.png)
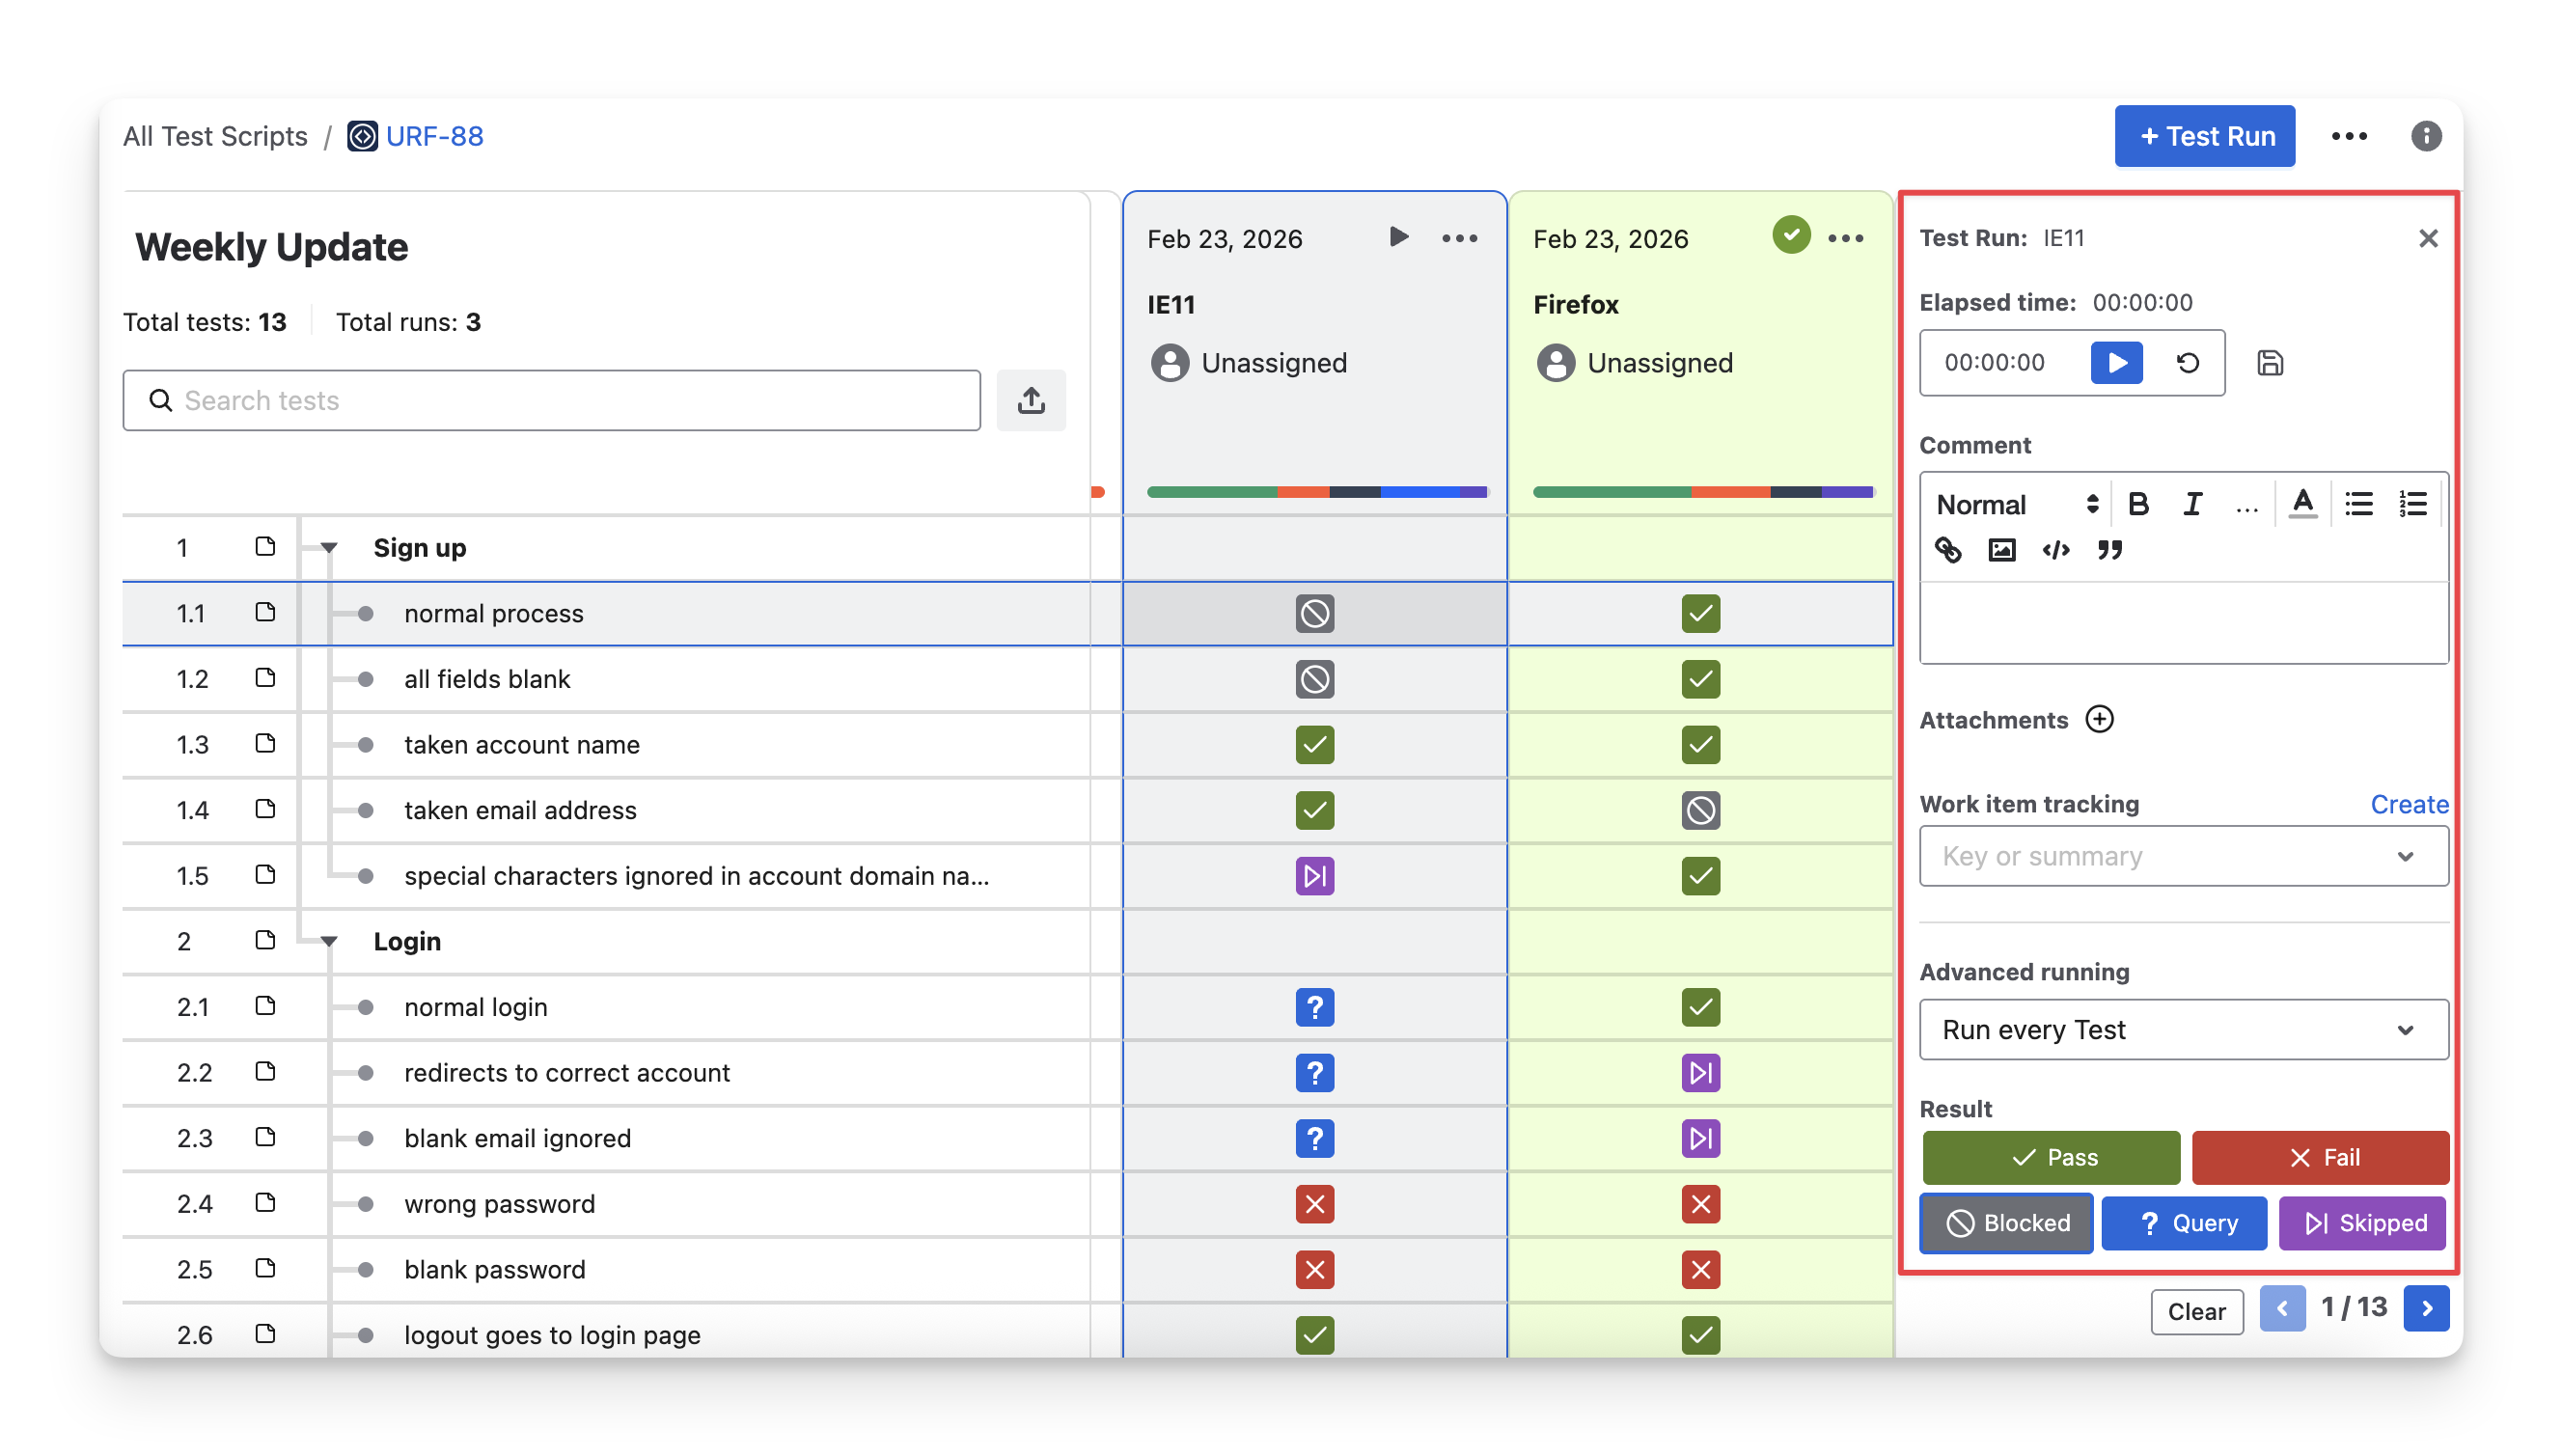
When you click on any Script Test key in the Script Test table, you'll be redirected to the Script Test Detail Screen.
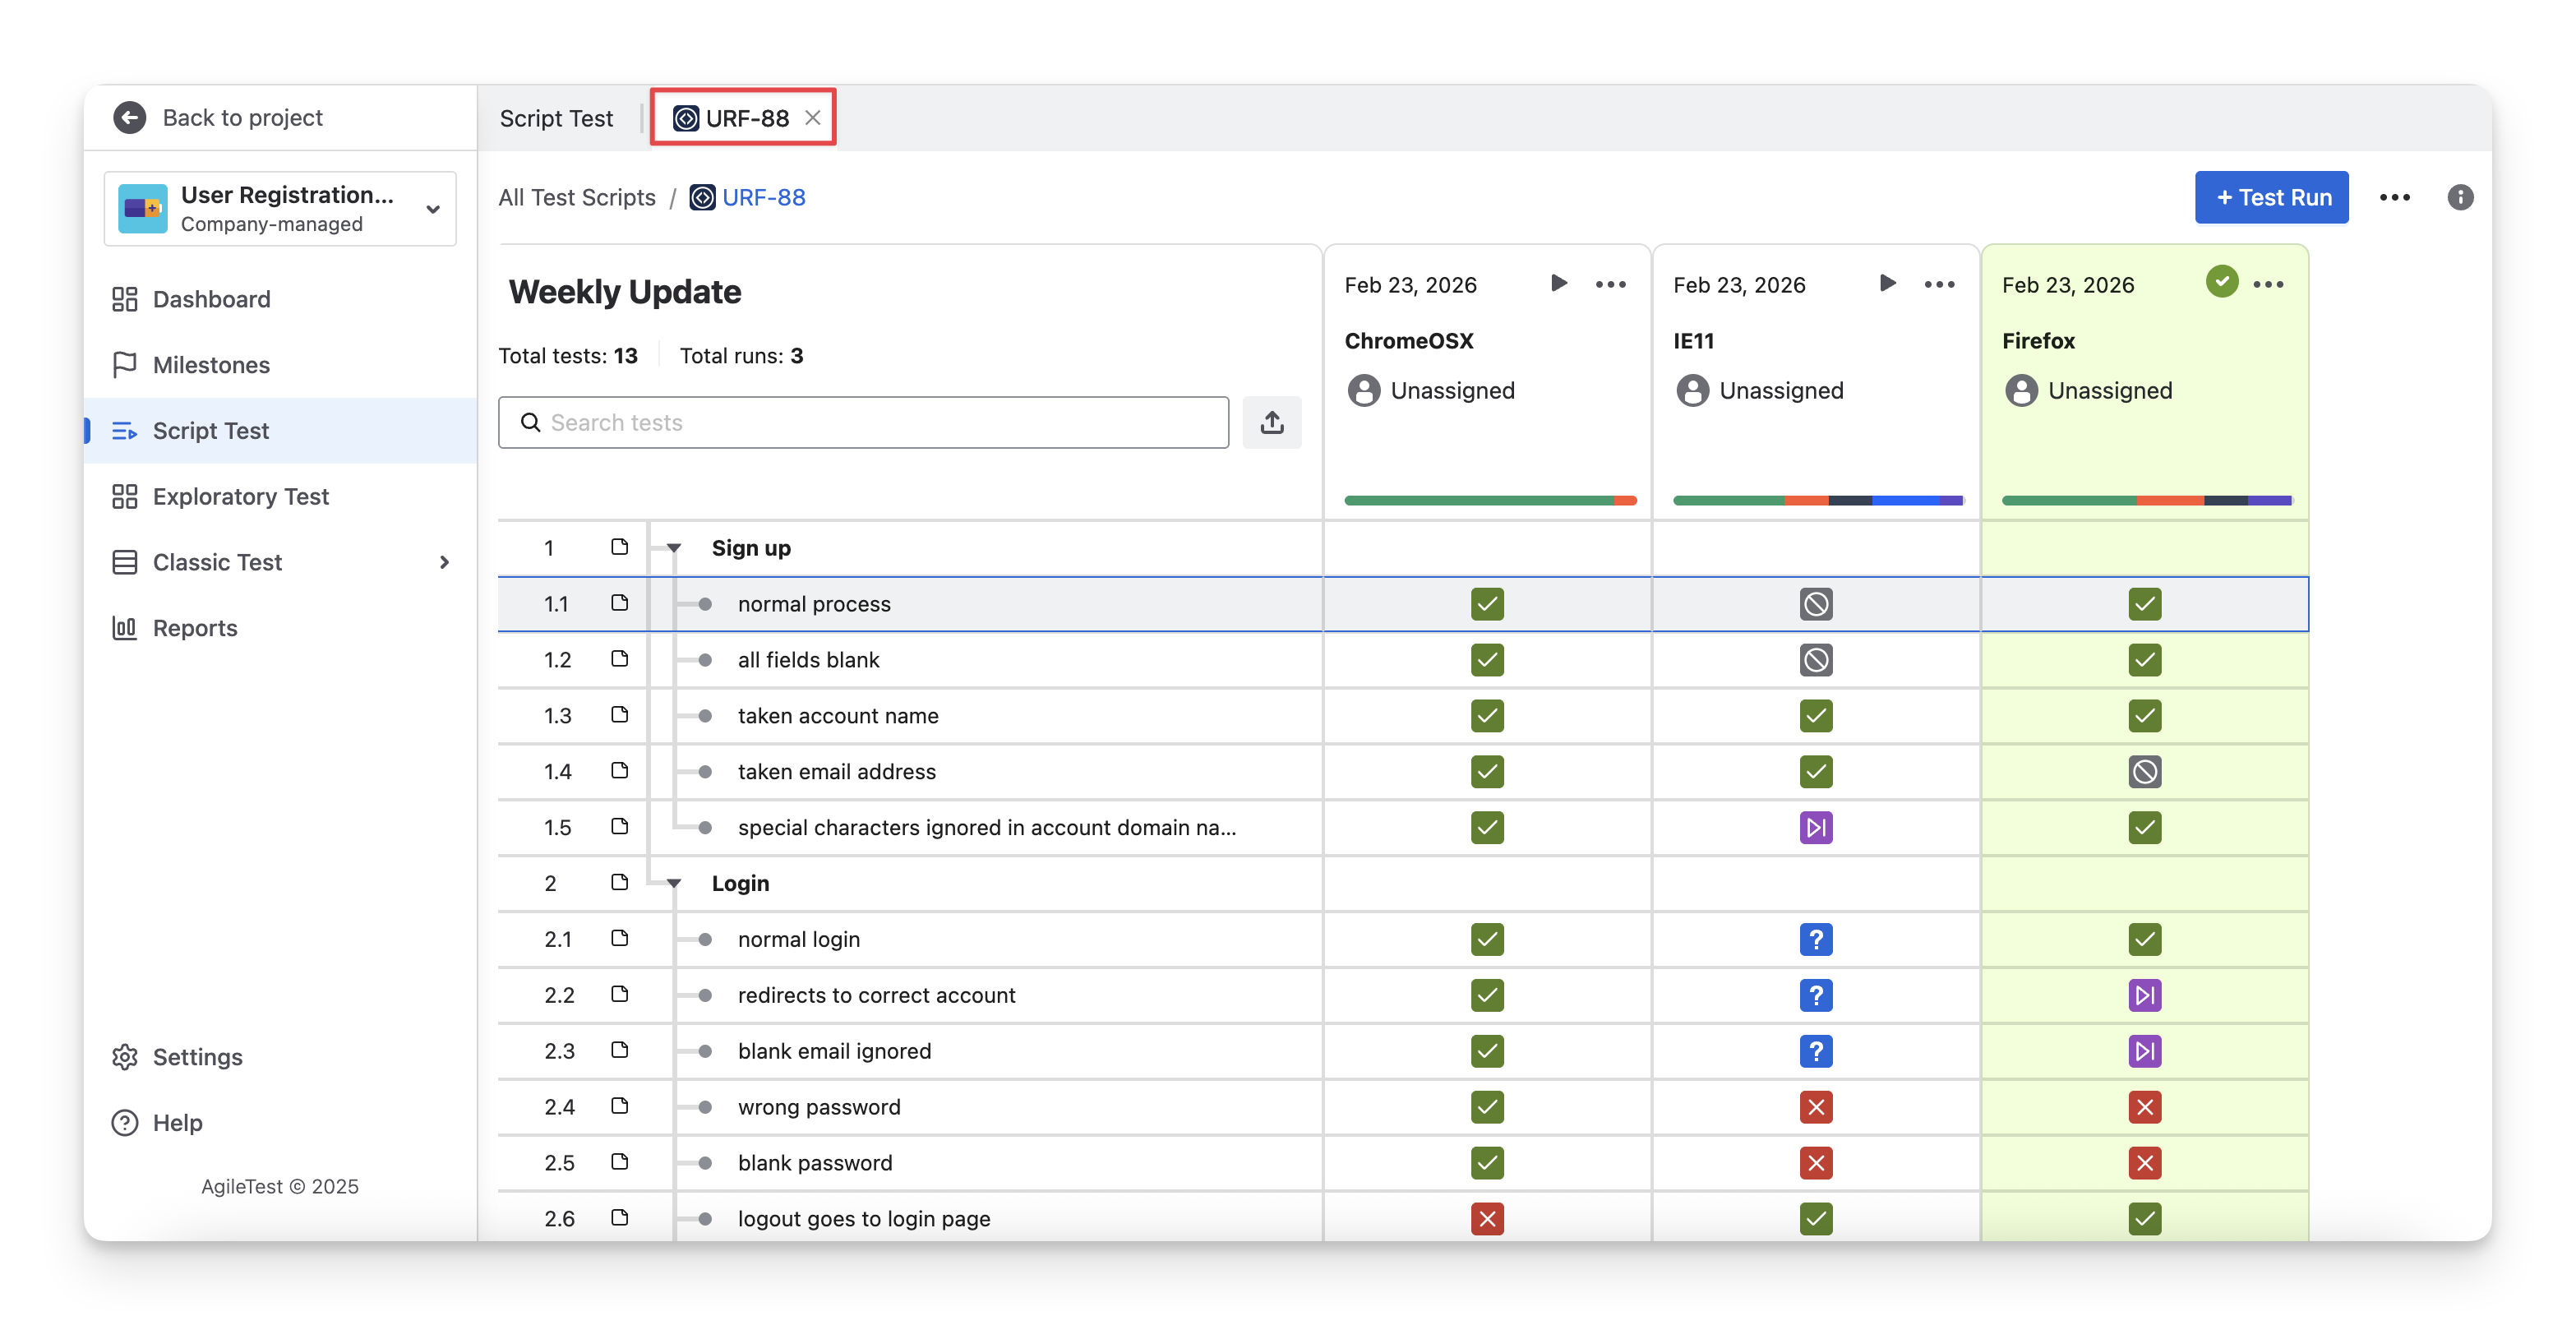
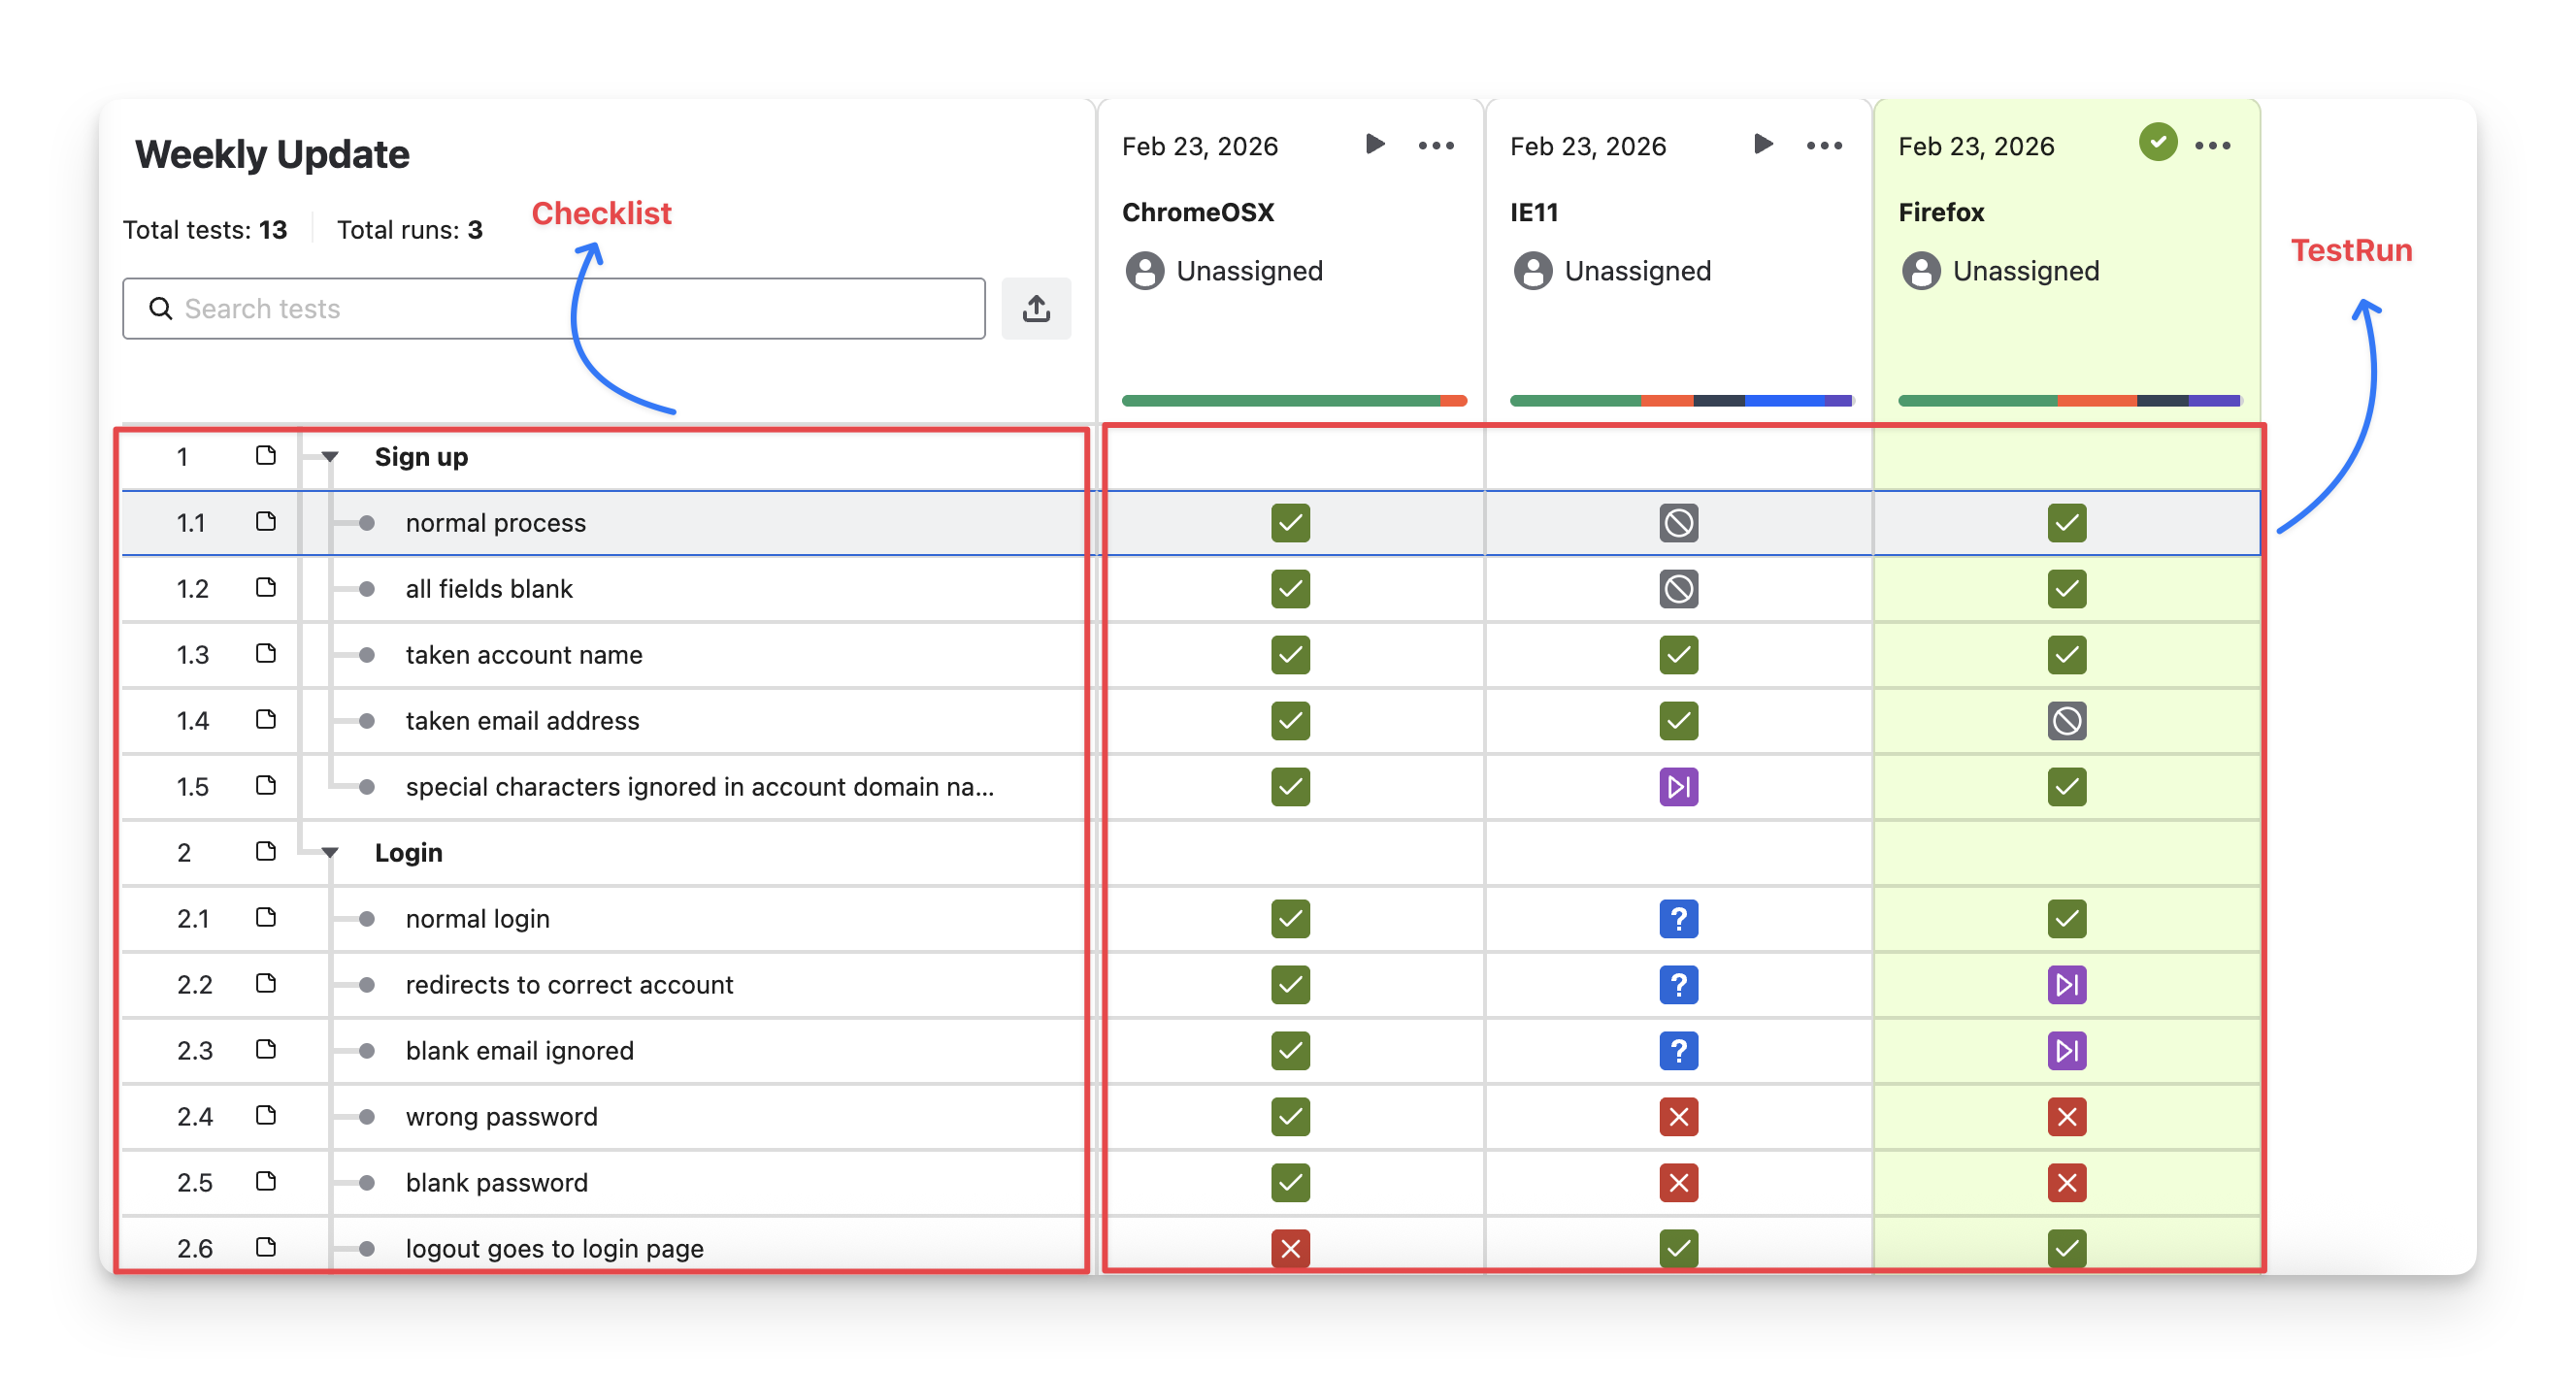
In a Script Test, the left-hand side displays a list of points that need to be verified. These points together form a checklist, a structured list of verification items for this script test.
From this checklist, you can perform multiple verification attempts. Each attempt creates a Test Run, representing one execution instance of that Script Test. During each Test Run, you assign a status ( Fail , pass , Blocked , query , Skipped ) to every item, which can be shortly called Test Run Item Status.
Below are those actions you can perform with the Checklists and Test Runs.
1. Add Checklist Items
There are 3 main approaches to add checklist items to a Script Test
1.1 Add Checklist Items Manually
This approach is best for small updates or when building a checklist from scratch directly inside AgileTest.
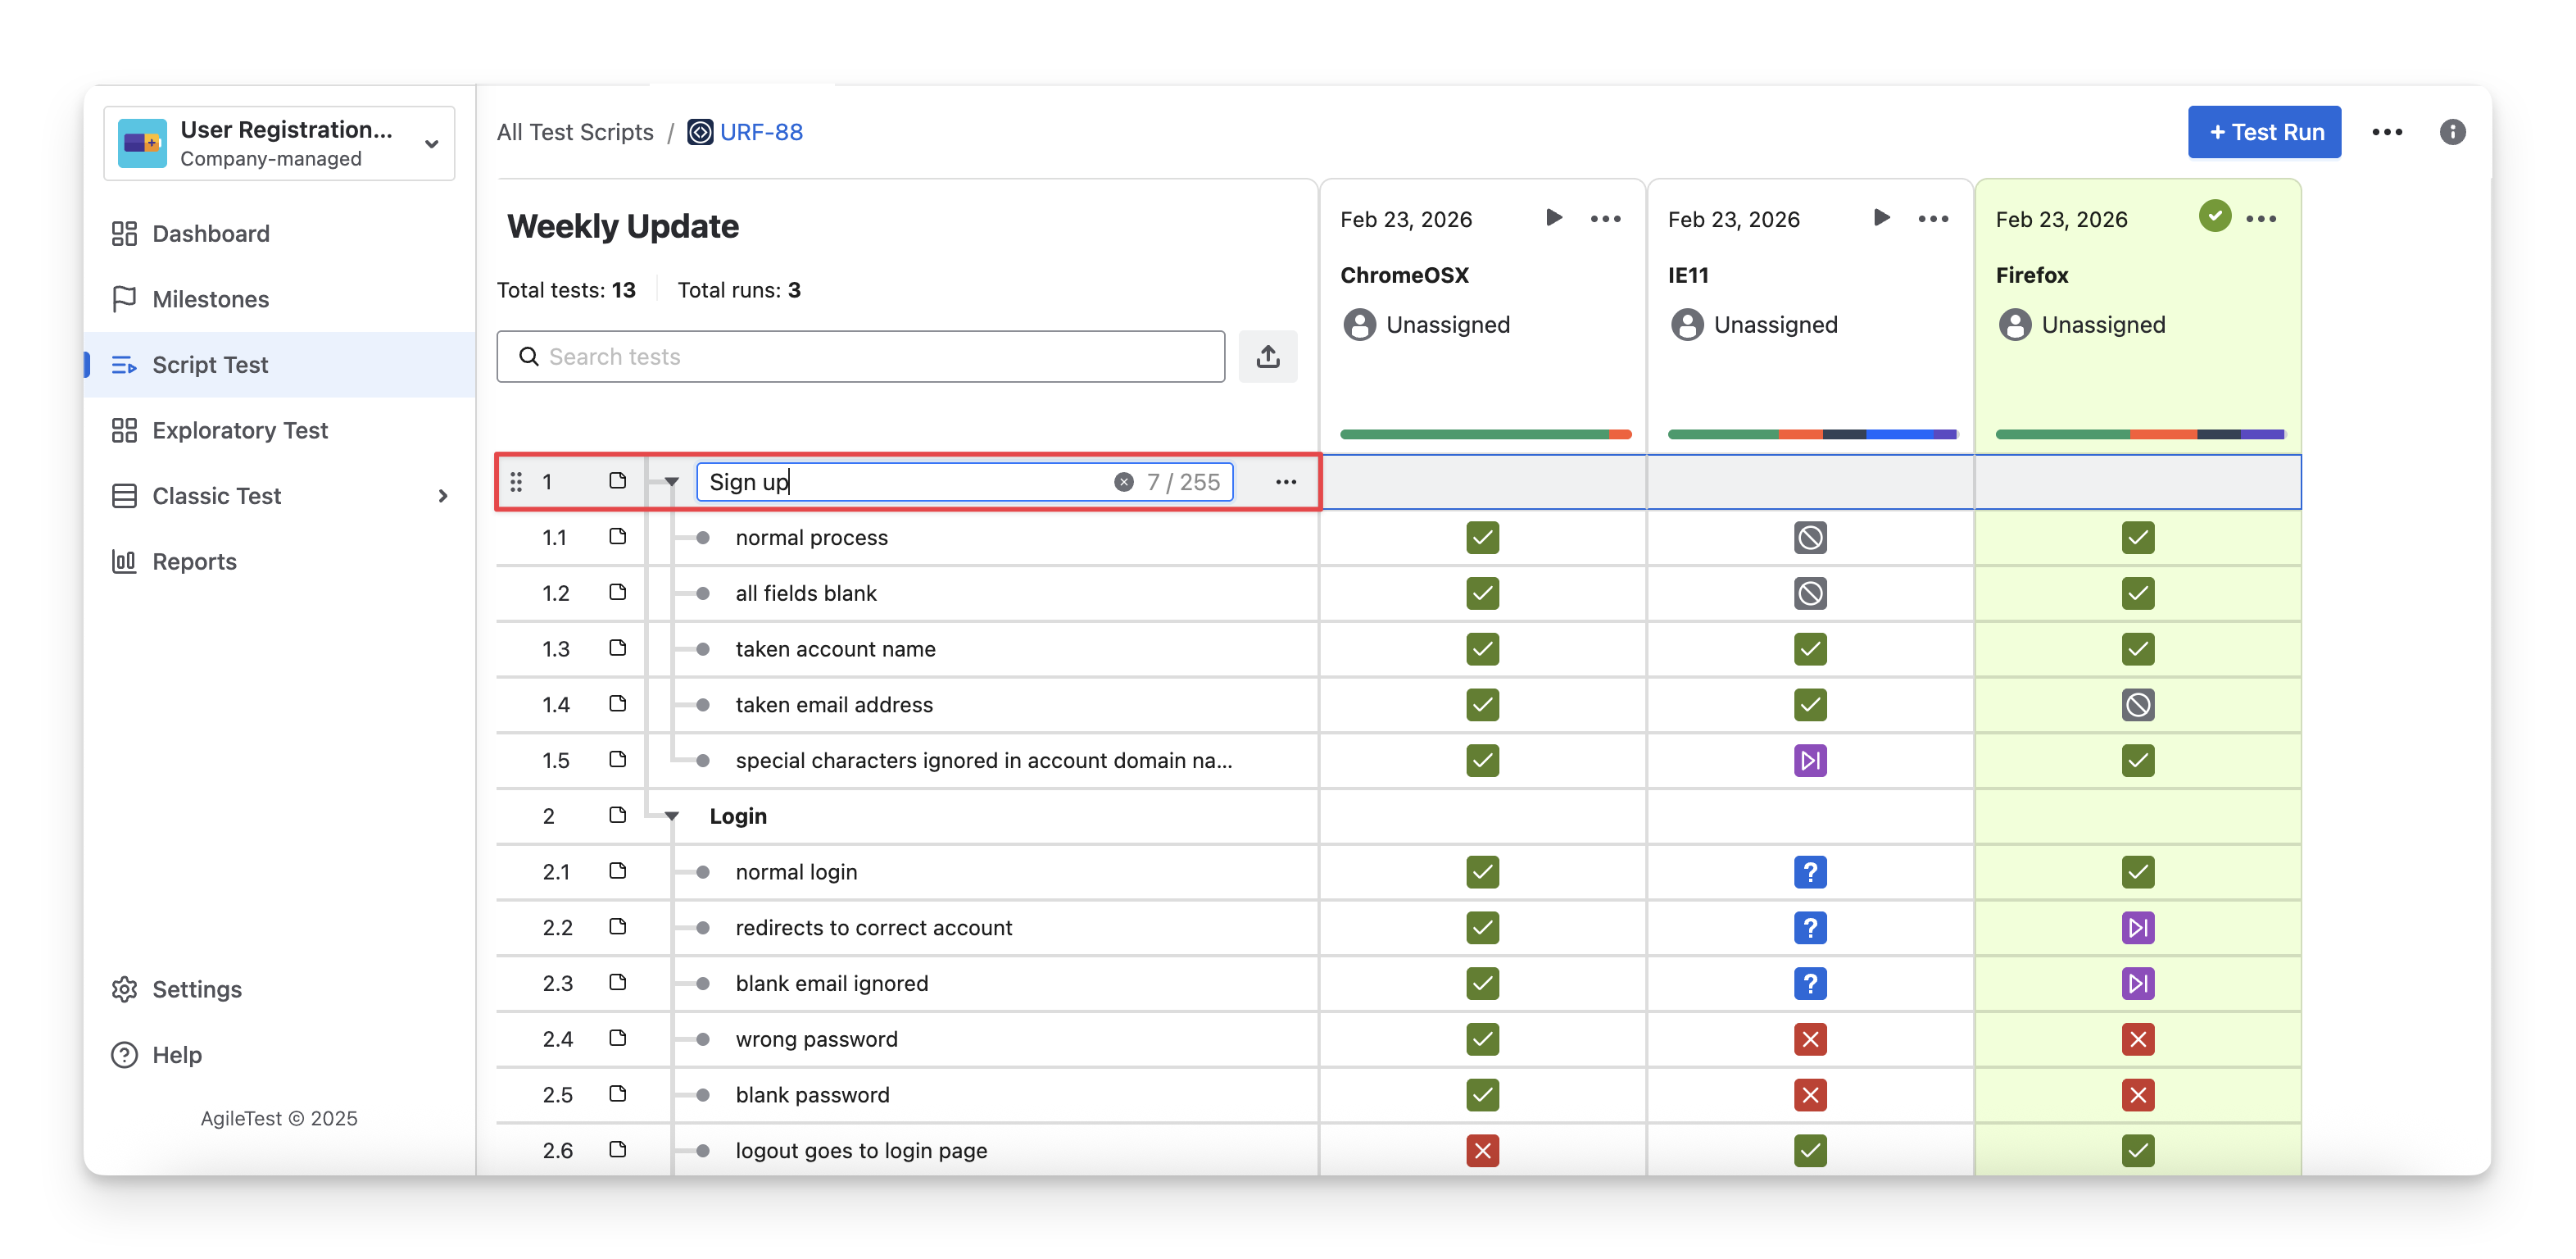
To add items manually to the checklist in a script test, click any list line and enter your details. Select or
to save or discard changes.
Some hotkeys to work on the editor:
-
Enter to finish row and start a new one
-
Tab to indent and make the row a child node
-
Shift + Tab to remove indent and move the row to higher structure level
-
Delete to delete the chosen script
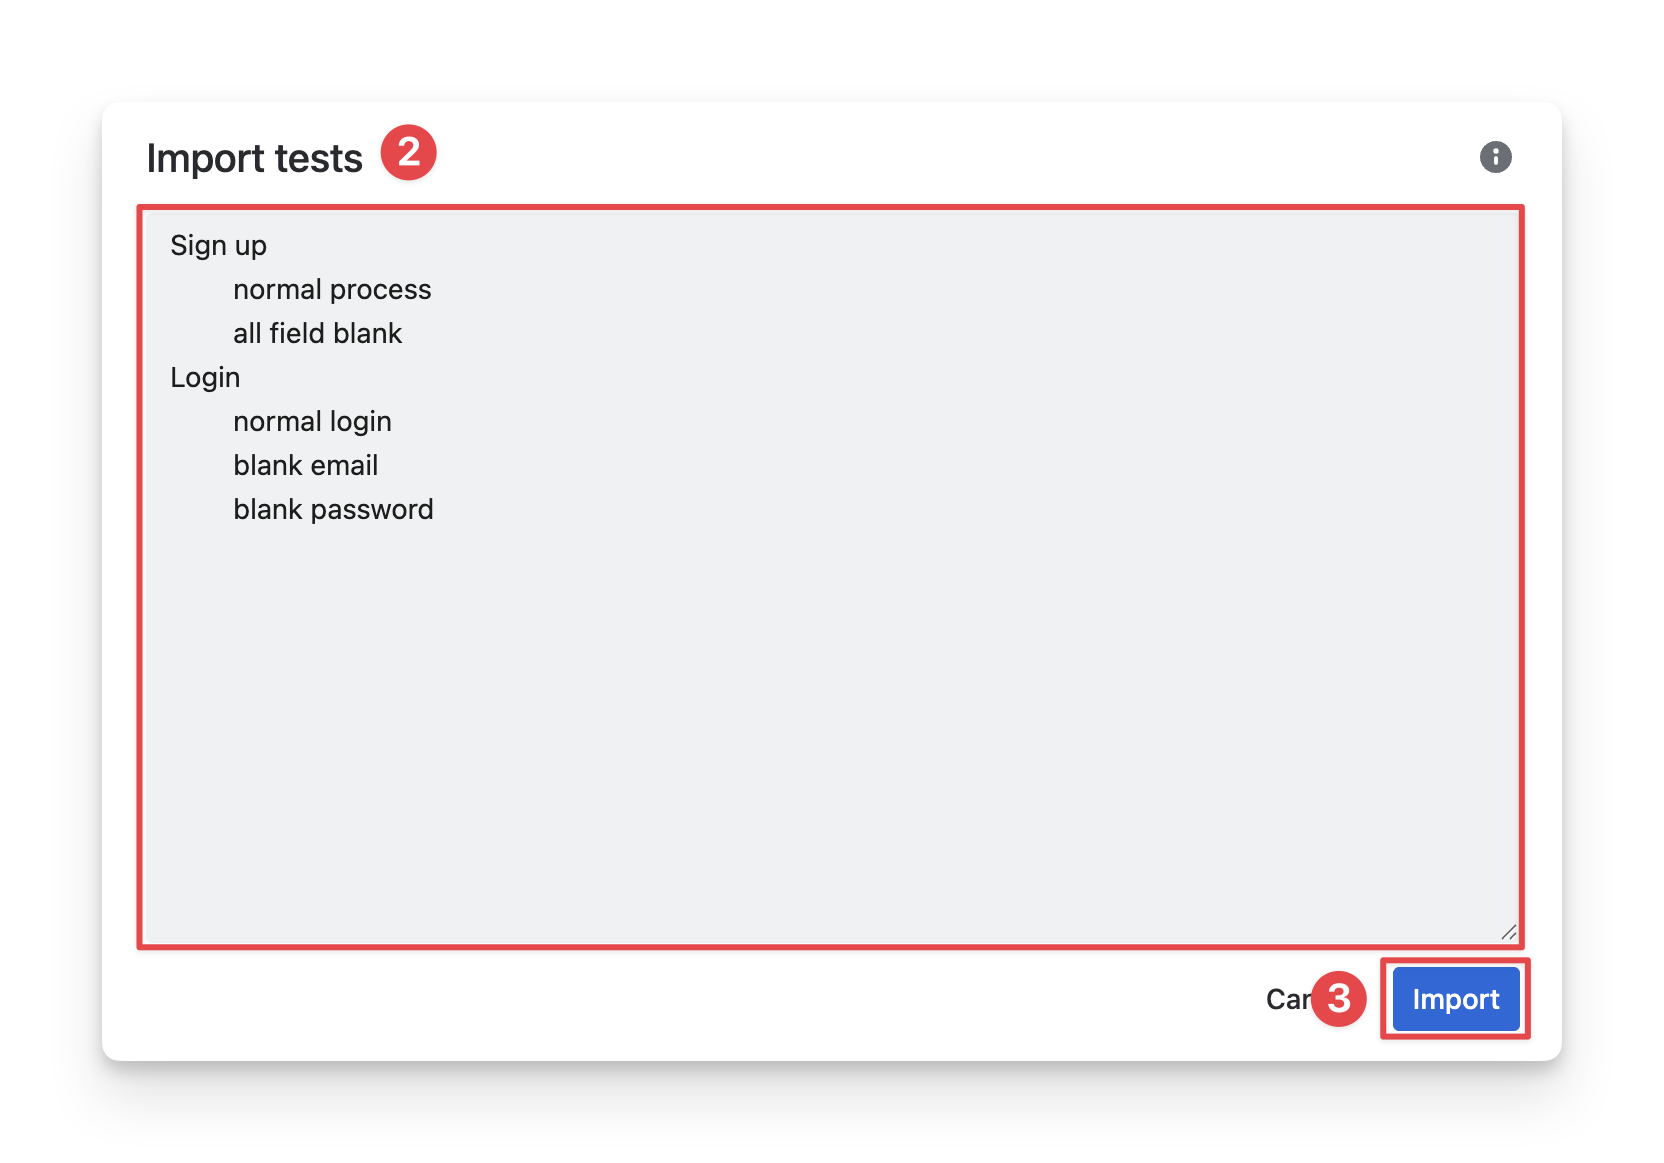
1.2 Import Checklist Items From Text
This approach is ideal for transforming your pre-written notes into a structured checklist without manual re-entry.
To import checklist items from text inside a script test, follow these steps:
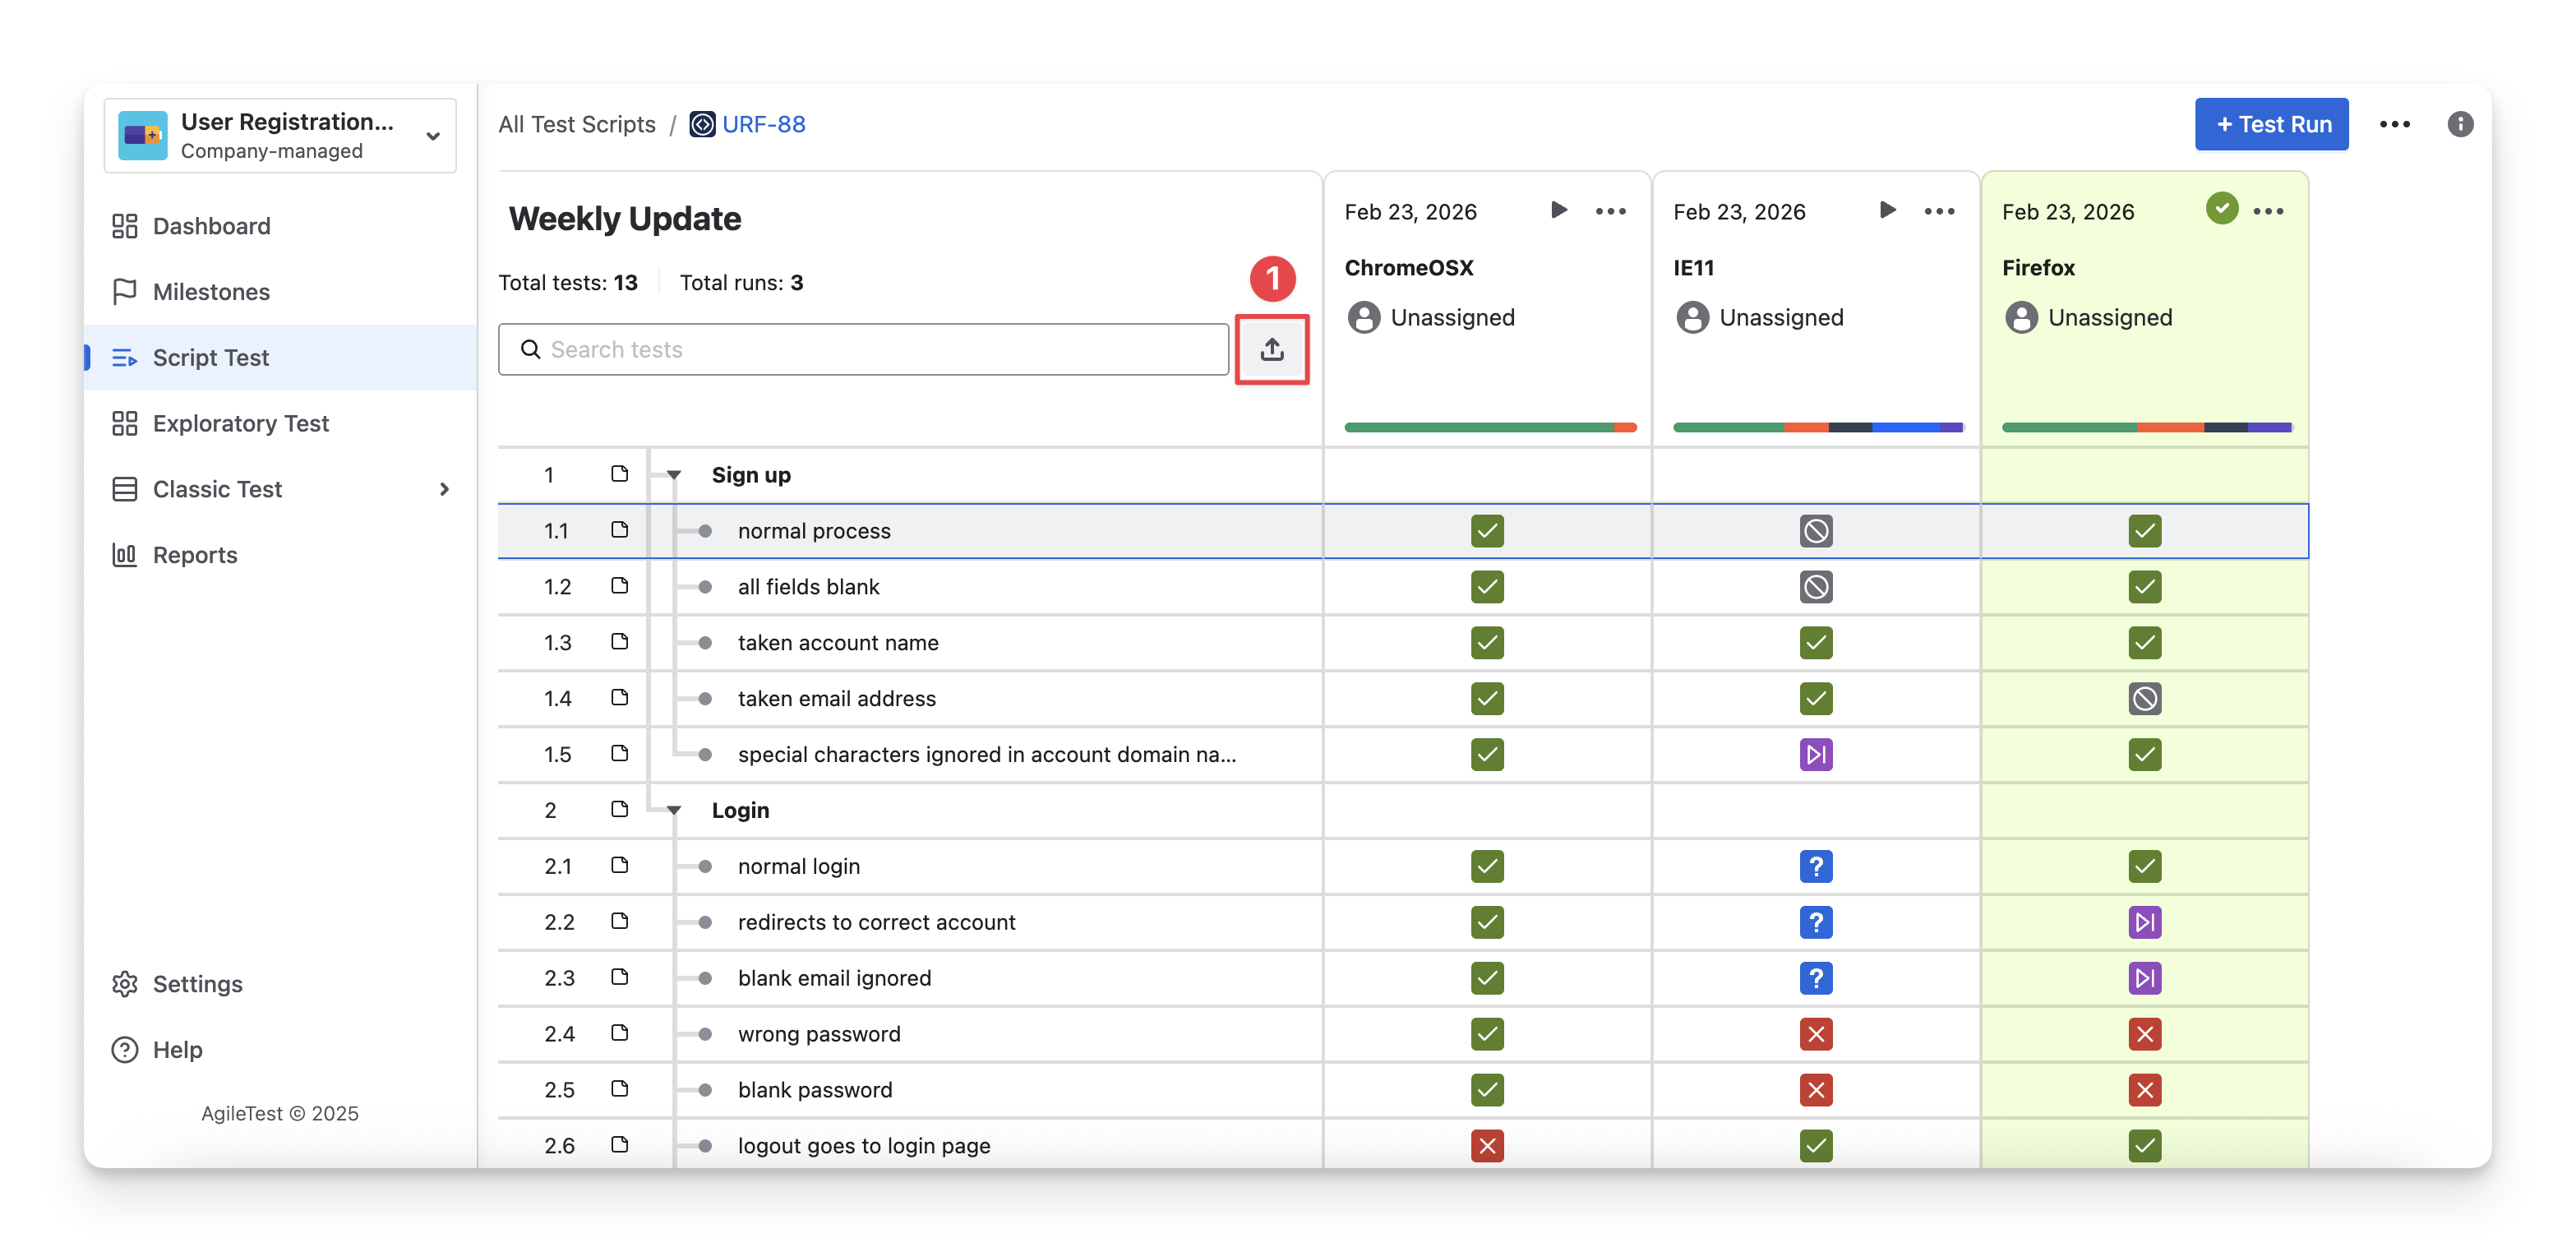
-
Choose the “Upload Tests” button in the Script Test Detail Screen.
-
Input your text that you need to convert into a testing checklist. Make sure that you have used the “Tab” format to differentiate the main and child nodes.
-
Click on the “Import” button to finish.
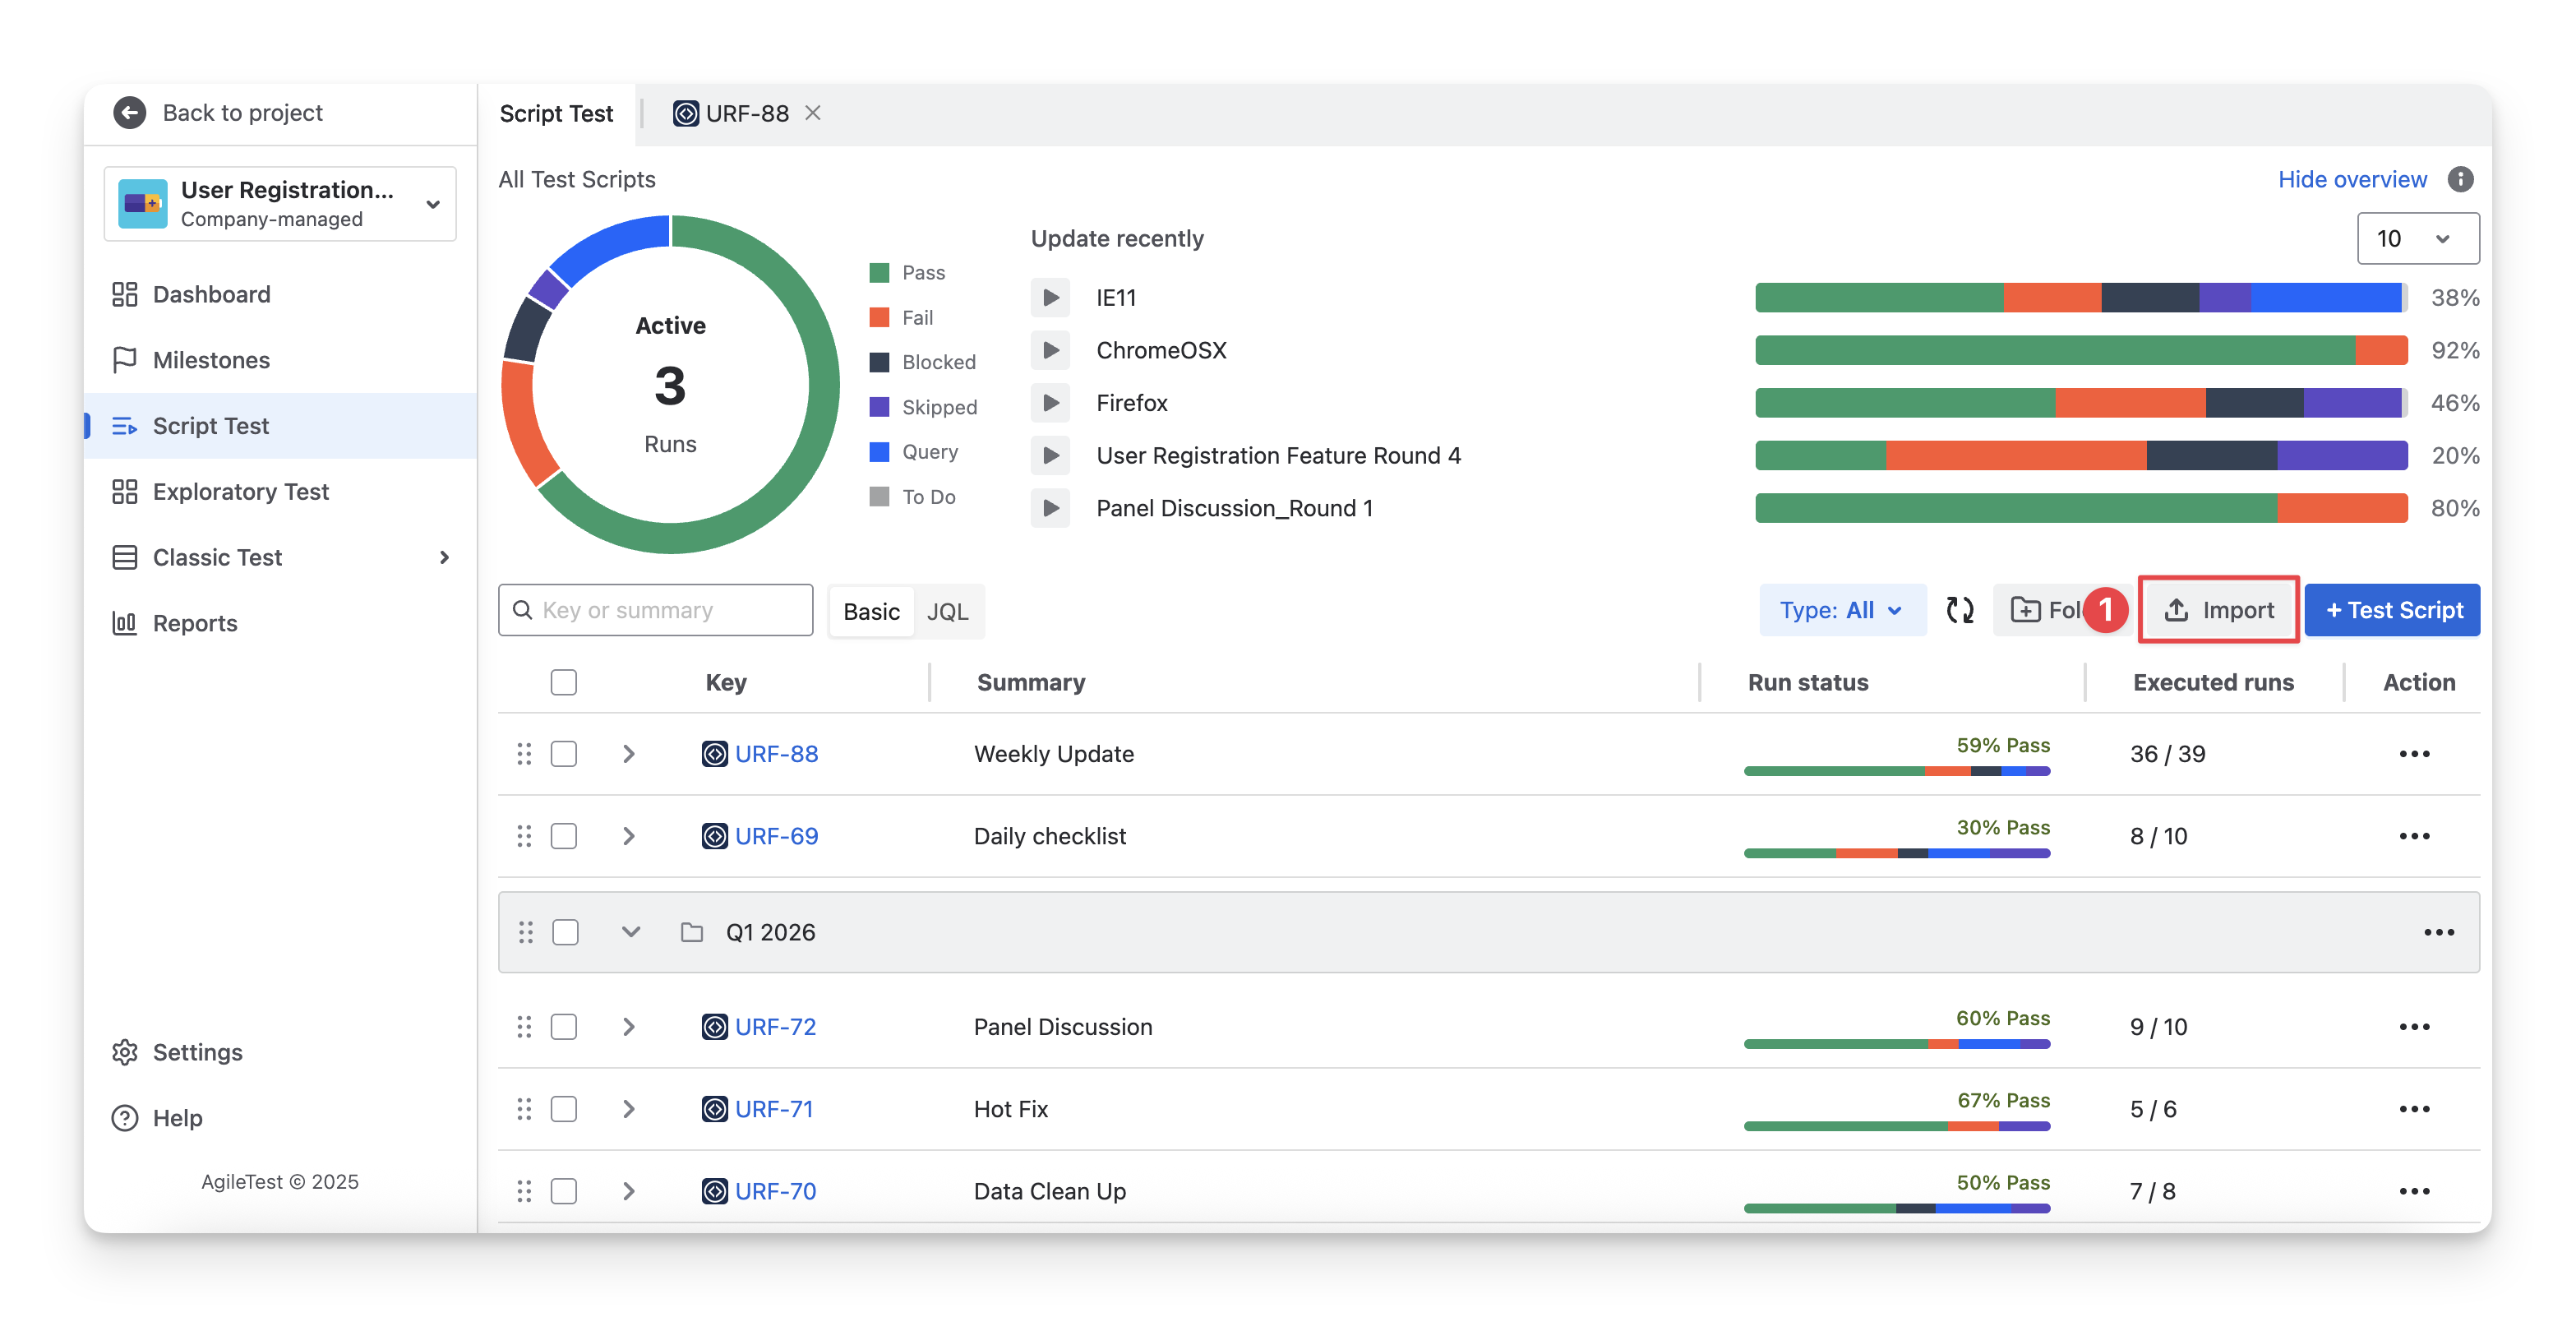
1.3 Import Checklist Items From CSV Files
This approach works best when you are performing large-scale setups or migrating data from another system.
Unlike the other methods, which only allow you to import checklist items, the CSV import also supports importing results and your findings. However, the CSV file must follow the required format before importing.
You can only use this approach in the Script Test Screen, and you need to create a new Script Test with each upload. To perform these uploads, follow these steps:
-
In the Script Test Screen, select the “Import” button.
-
Click on the “Create Test Script” area.
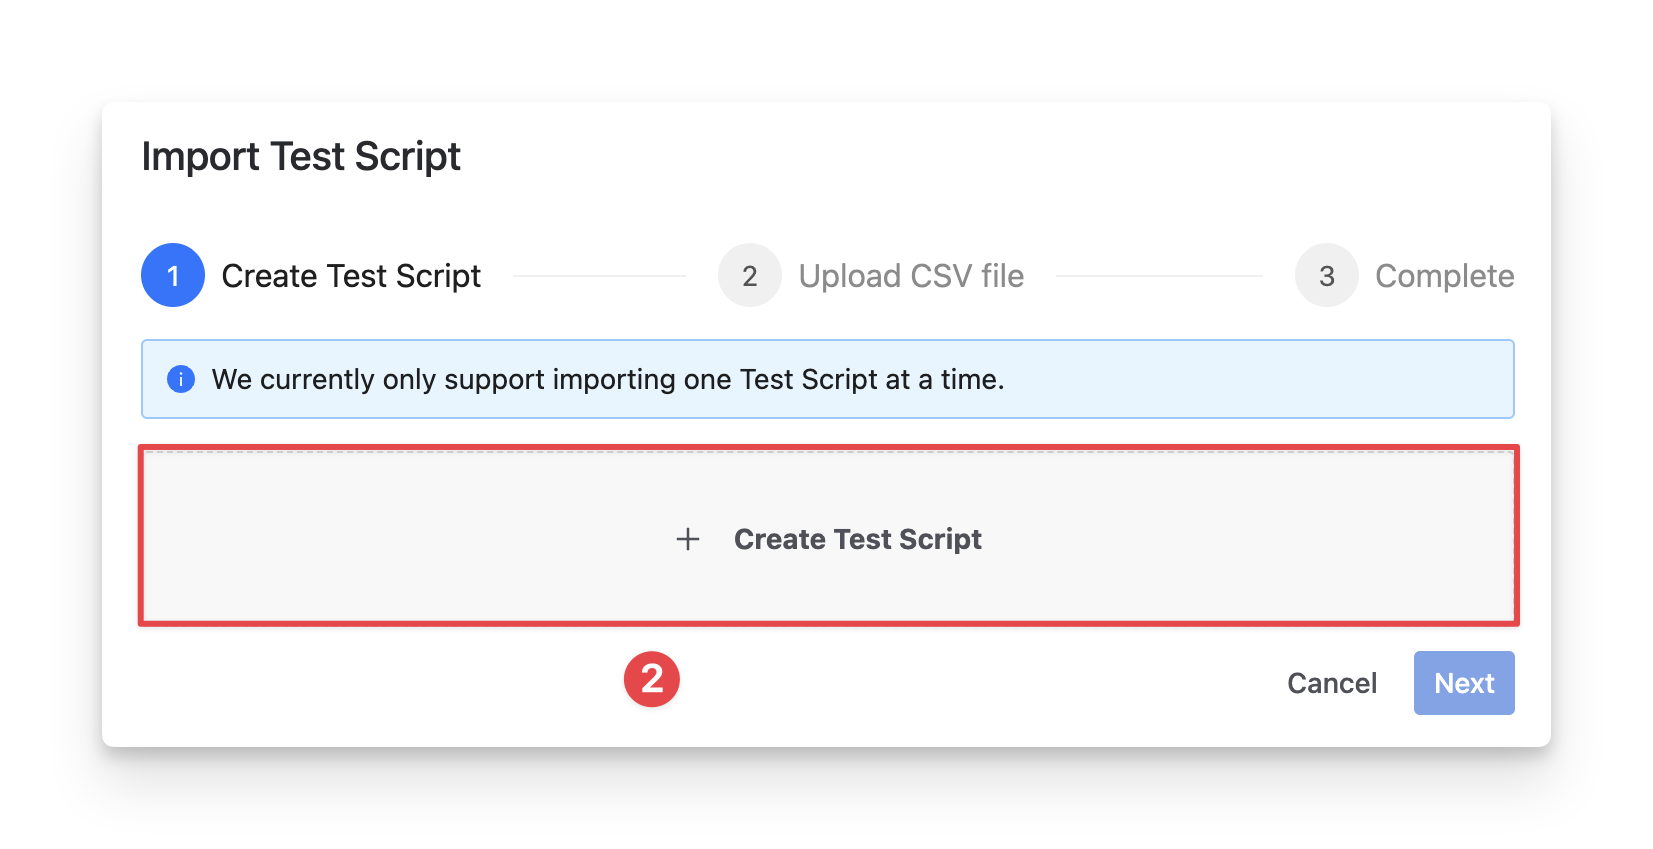
-
Fill in the script test details.
-
Summary: A clear and concise title that reflects what the checklist test is verifying.
-
Description (Optional): Additional context if needed, such as the scope of validation, environment details, or any important notes to help testers understand the purpose of this Script Test.
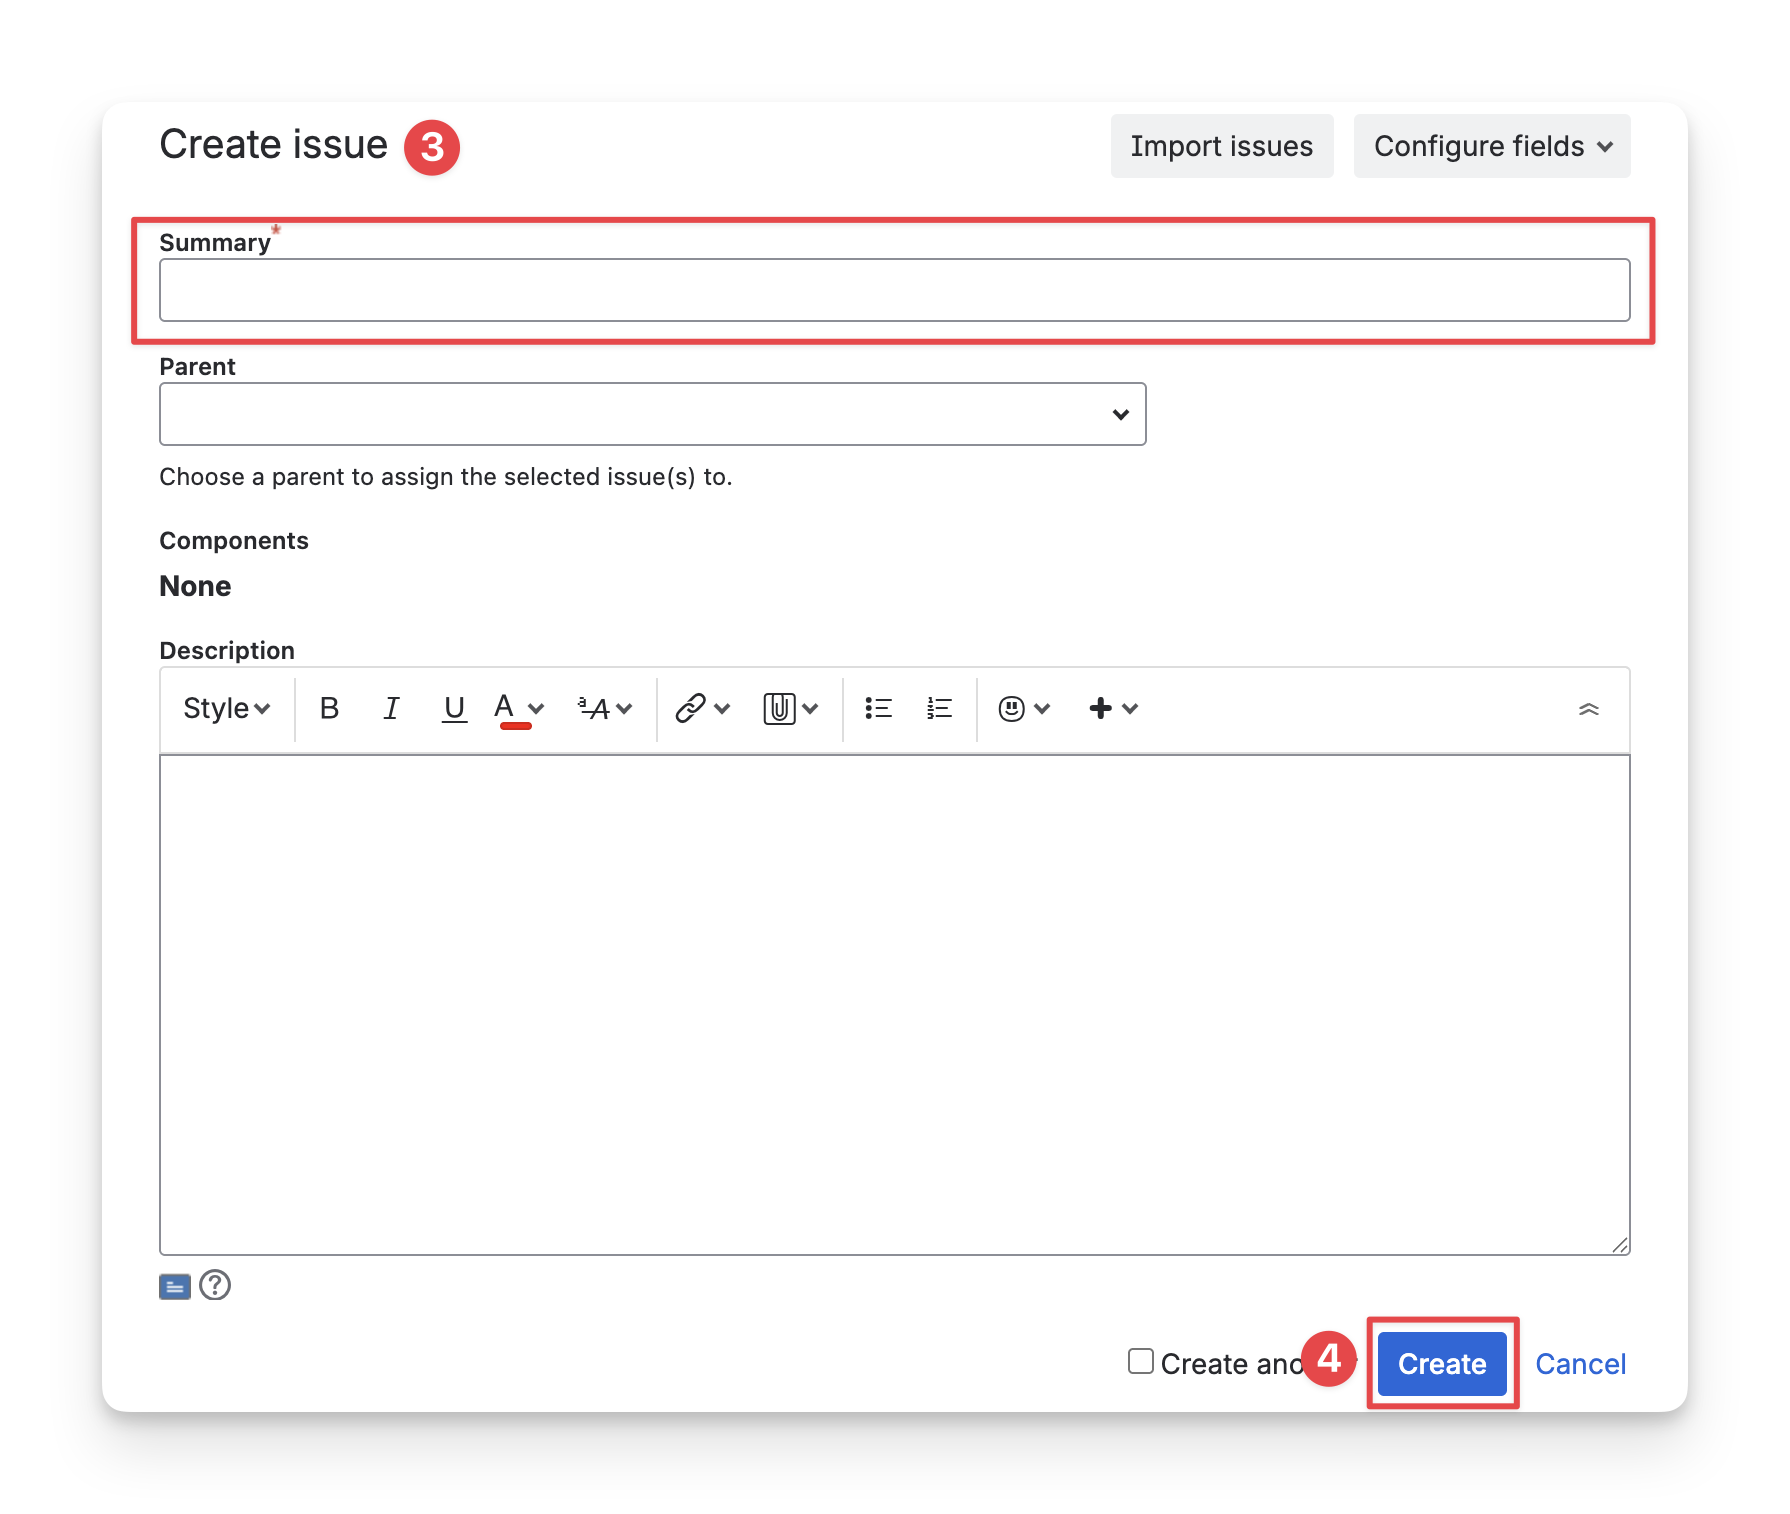
-
Click on the “Create” button to finish.
-
Upload your CSV files.
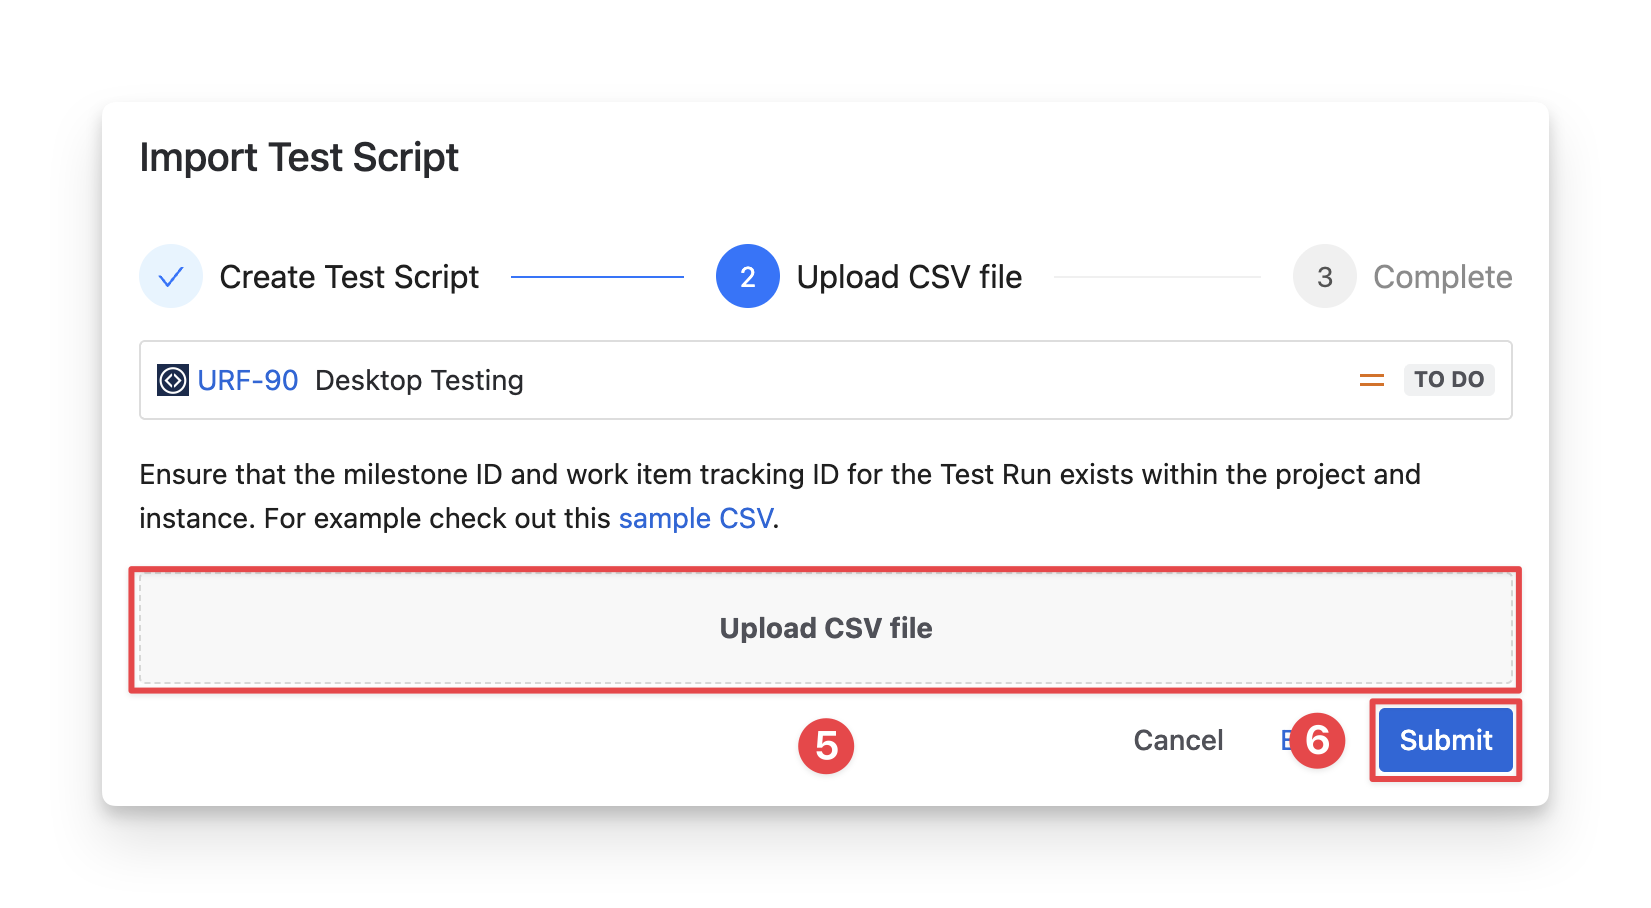
You can download the sample CSV or format your existing files to make sure all fields follow the correct format.

-
Select “Submit” to complete.
The table below outlines some sample supported fields, their required status, and the accepted value formats for CSV imports.
Data validation table
|
No |
Field |
Value |
Require |
|---|---|---|---|
|
1 |
TestID |
Number |
Yes |
|
2 |
Group |
Number |
Yes |
|
3 |
Test Summary |
Any Text, Maximum: 255 characters |
Yes |
|
4 |
Test Comment |
Any Text |
No |
|
5 |
Run result |
Allowed values: PASS, FAIL, BLOCKED, SKIPPED, QUERY, TODO
|
Yes |
|
6 |
Milestone |
Valid ID, configured in AgileTest |
No |
|
7 |
Test Run Status |
Allowed values: completed/inprogress Case-insensitive (e.g., completed or COMPLETED are accepted) |
Yes |
2. Manage Test Runs
2.1 Add Test Runs
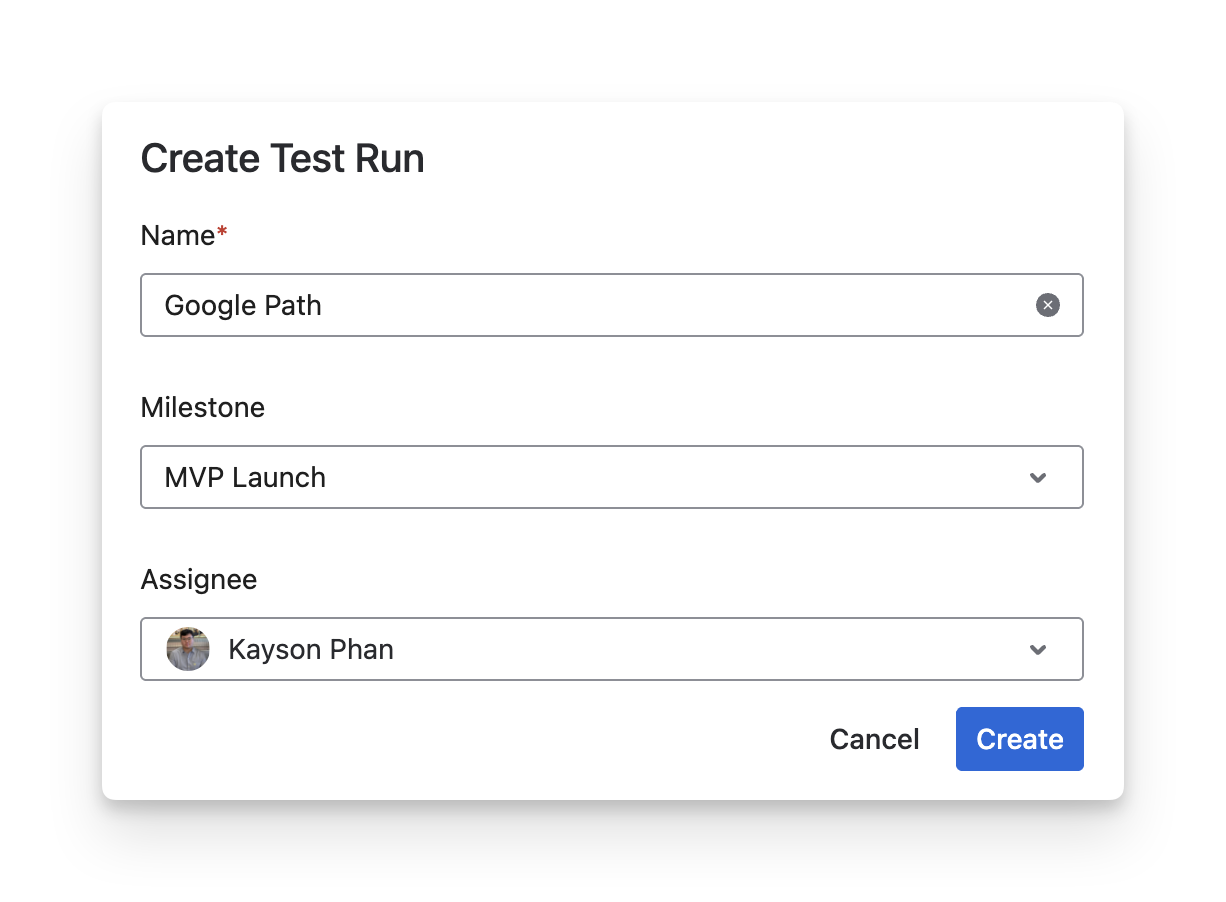
After you have created your checklists for testing, you can click on the “Test Run” button to create a new run to verify each item in your checklist.
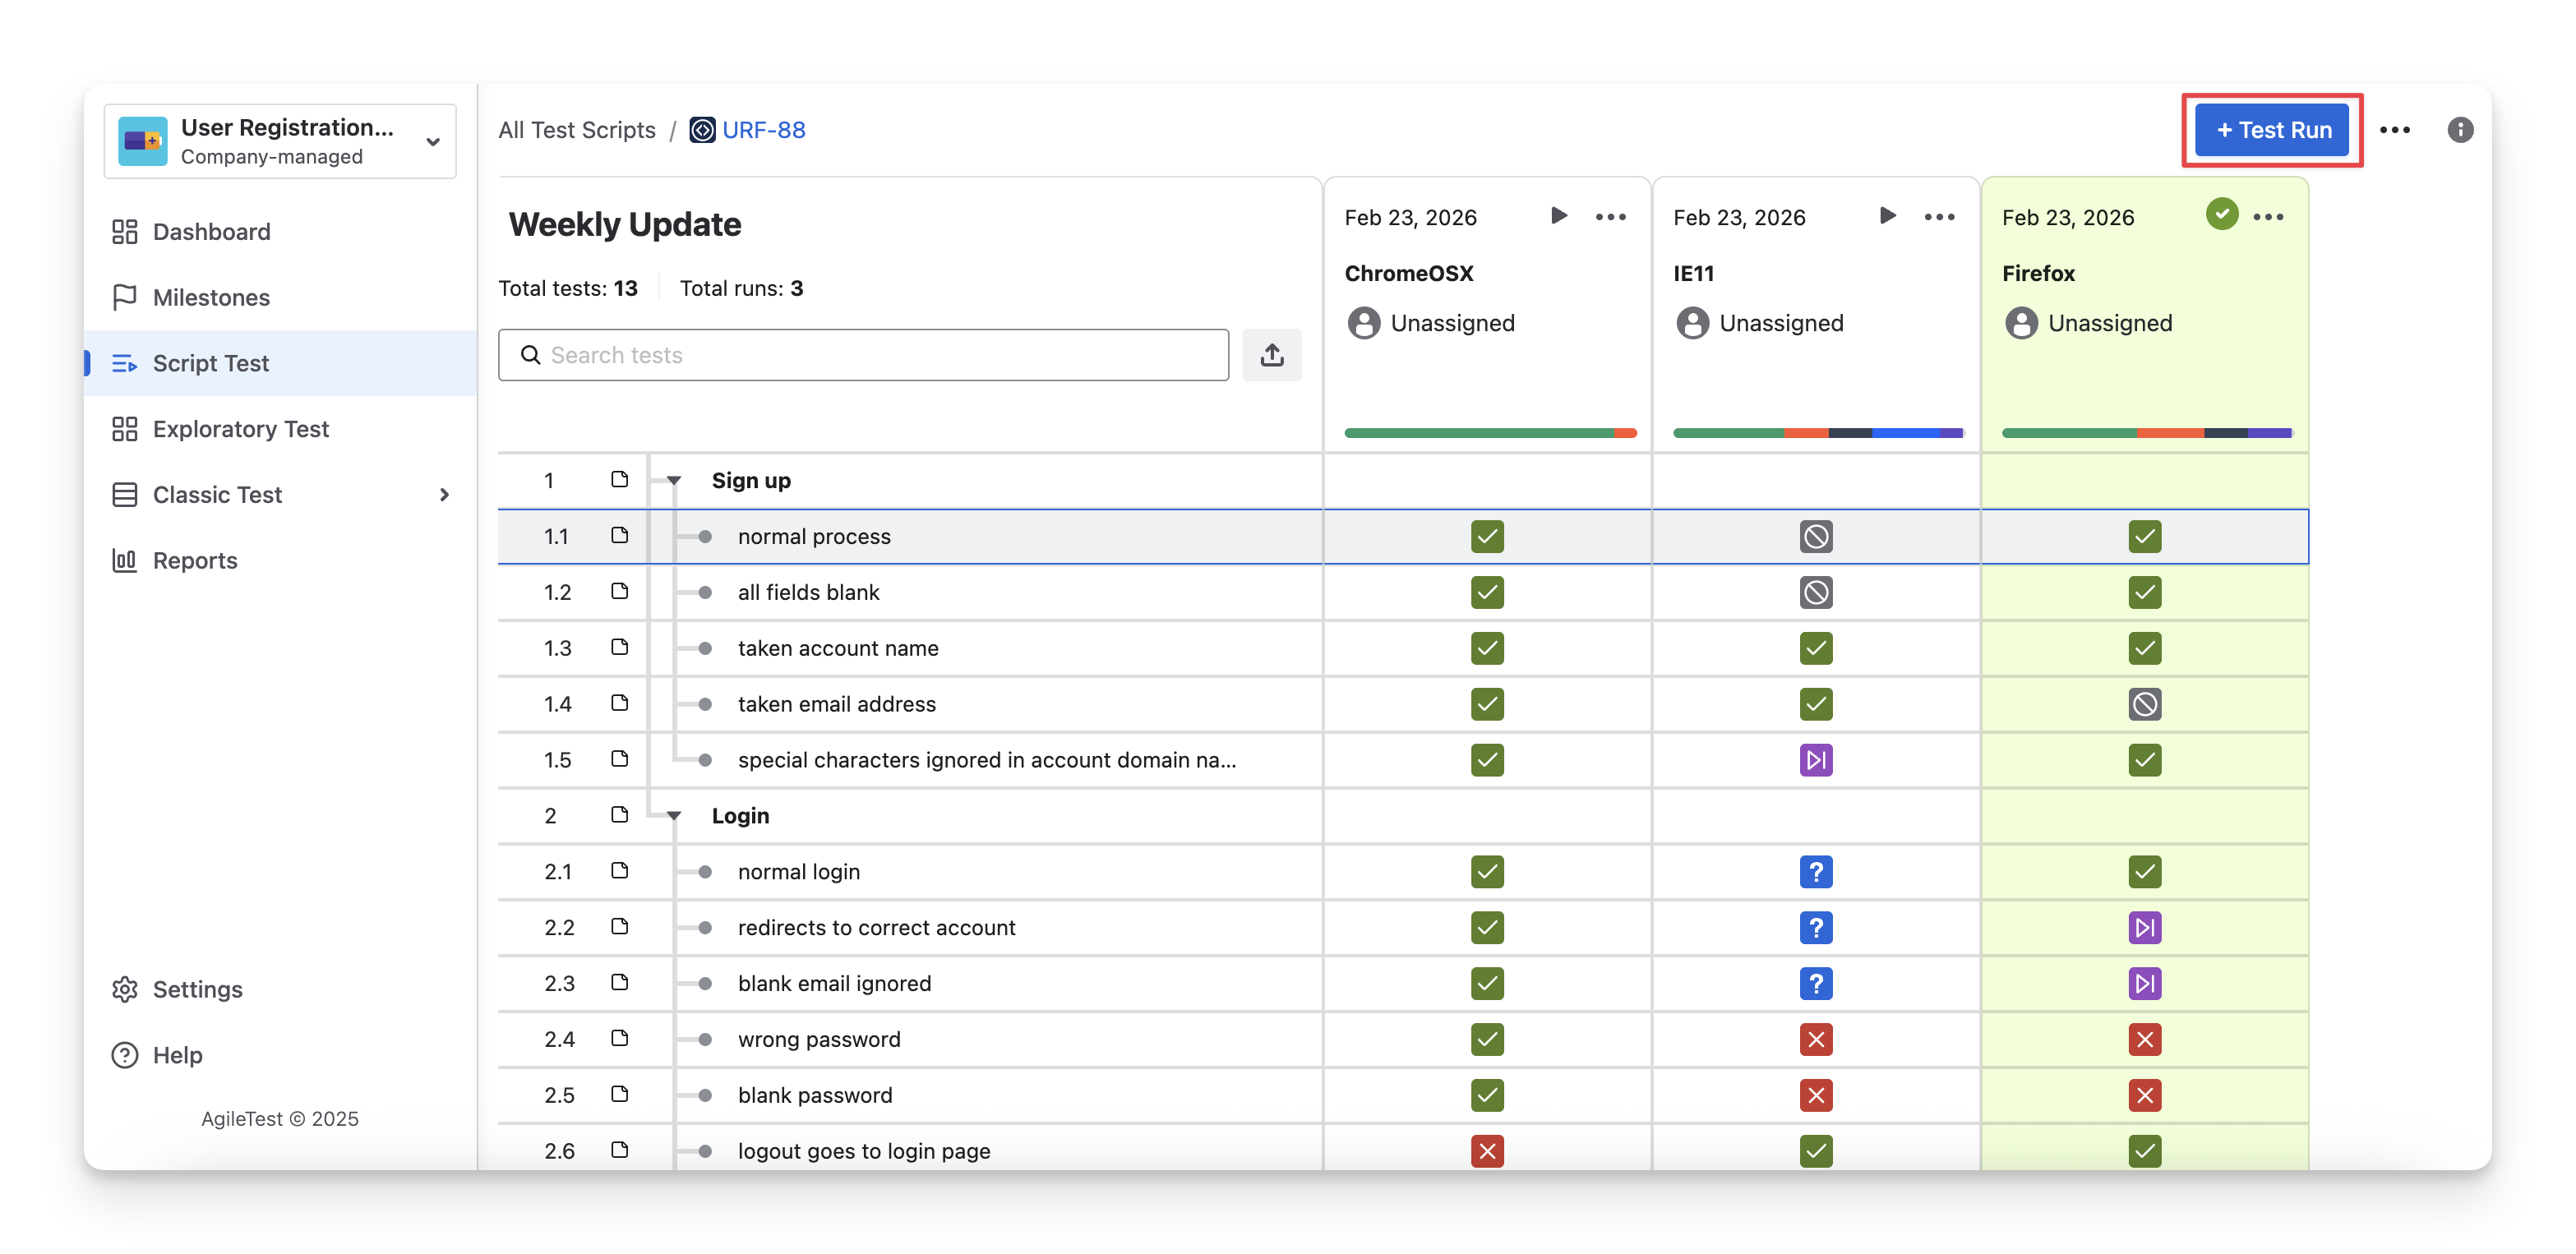
A dialog appears, and you can fill in the Test Run Details.
-
Name: Enter a clear and descriptive name for the Test Run.
-
Milestone: Select the related milestone to associate this Test Run with a specific release, sprint, or delivery phase.
-
Assignee: Choose the member responsible for executing or managing this Test Run. Assigned users will receive email notifications, helping ensure that test runs are picked up promptly and reducing delays in the testing process.
2.2 Execute Test Runs
To execute test run, click on the ▶️ button.
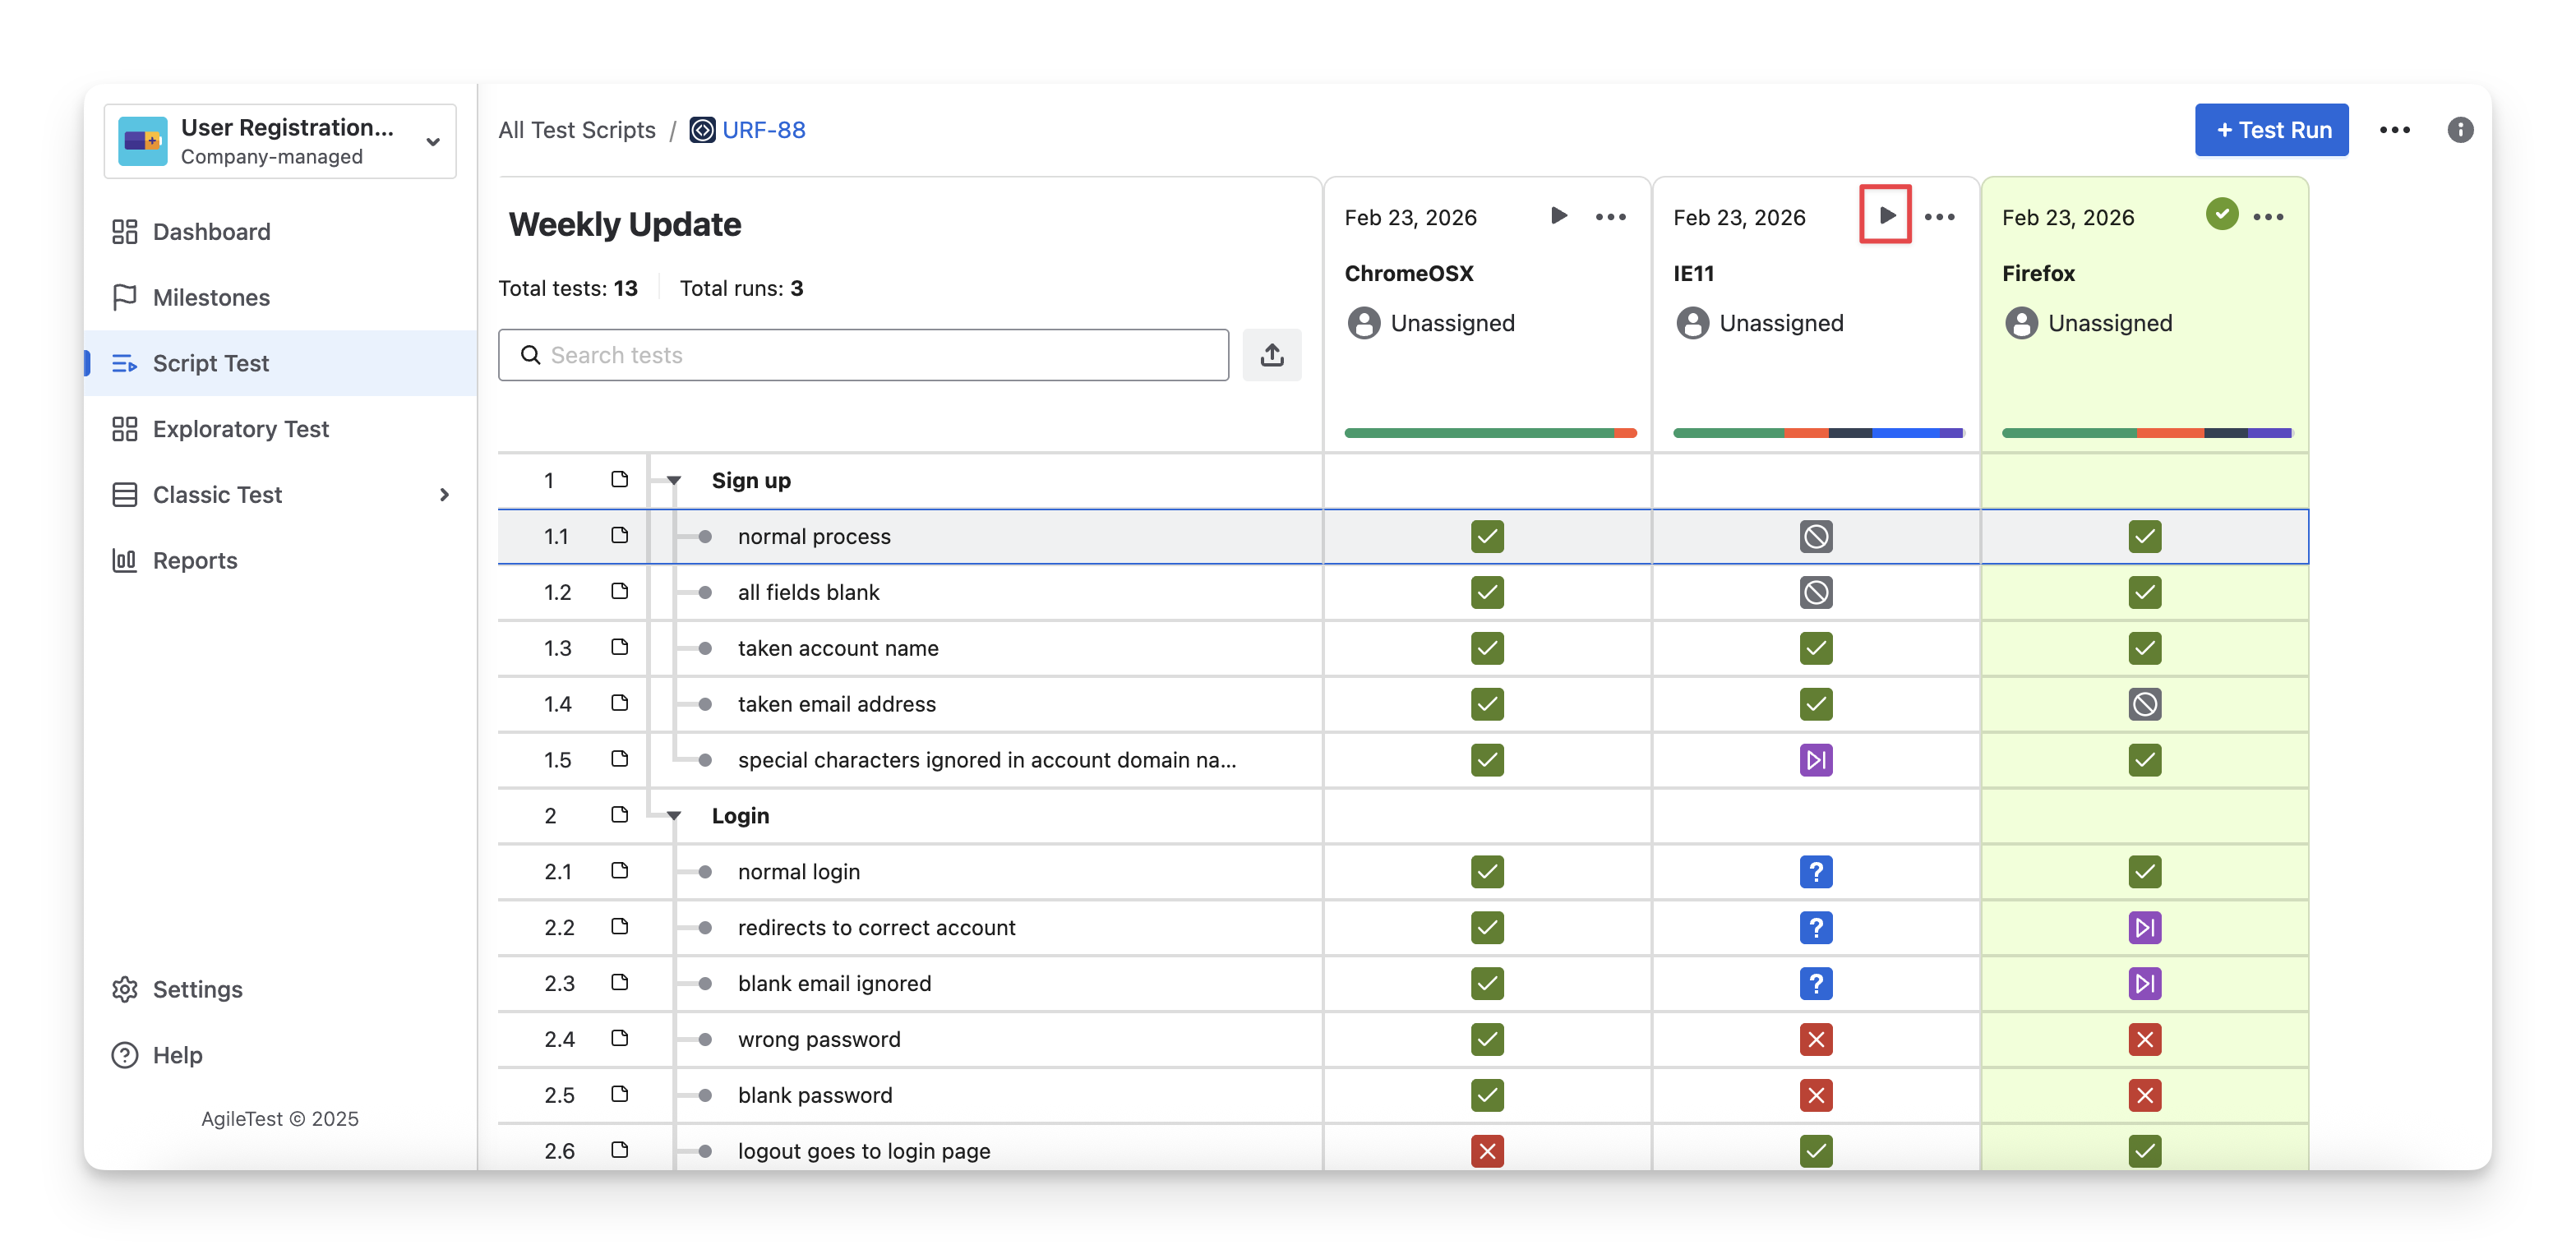
A panel on the right-side side will appear. Now, you can execute and record your findings for each line in the checklist. As you complete each checklist item, the panel will automatically move to the next item in the list.
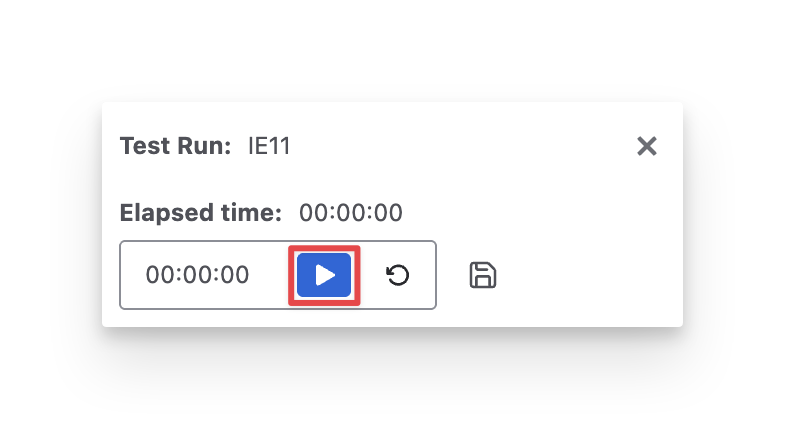
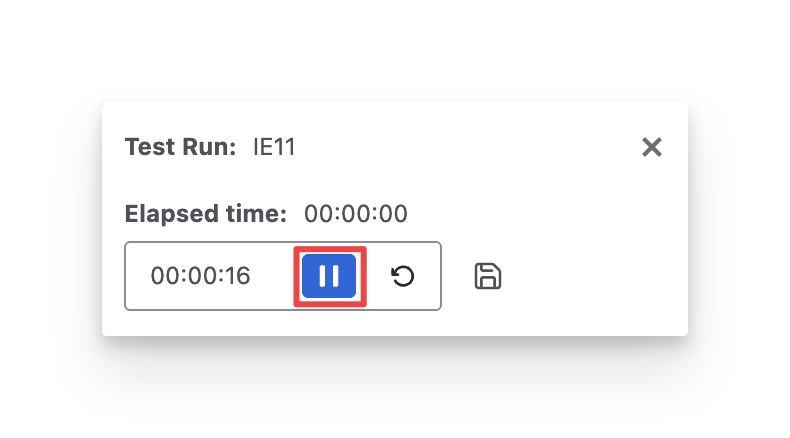
2.2.1 Record Executing Time
To track the execution time for each test run item, click the “Start” button in the Elapsed Time section when you begin testing, and click “Stop” once you have completed the verification to end the timer.
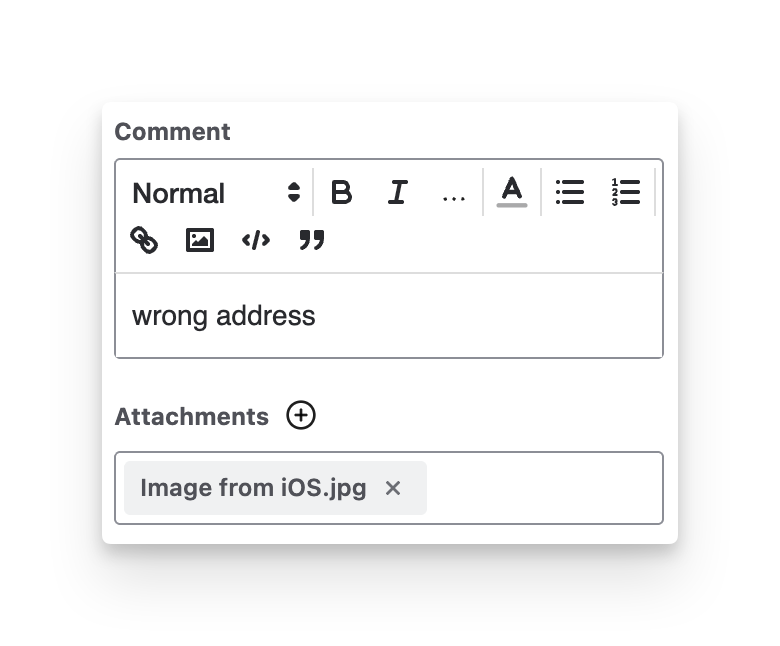
2.2.2 Add Comments and Attachments
During execution, you can
-
Enter comments as internal notes in the Comment sections.
-
Attach findings as evidence in the Attachments section.
2.2.3 Track Work Items
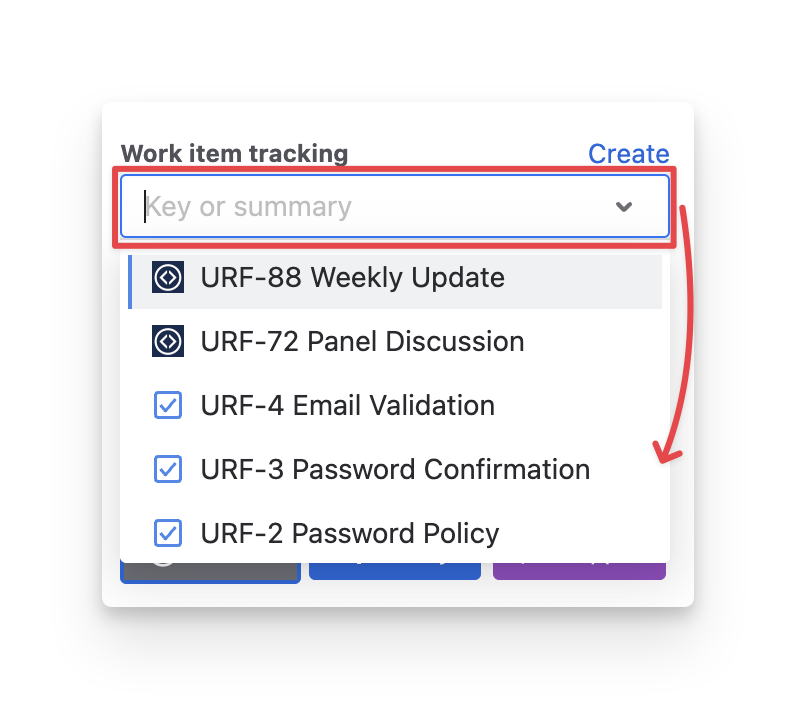
To link the current test run item to a specific issue (requirement, script test, etc), click the work item tracking dropdown to add it.
2.2.4 Select Execute Order of Test Run Item
By default, all checklist items are executed sequentially from beginning to end. However, you can navigate to Advanced Running and select an option from the dropdown menu.
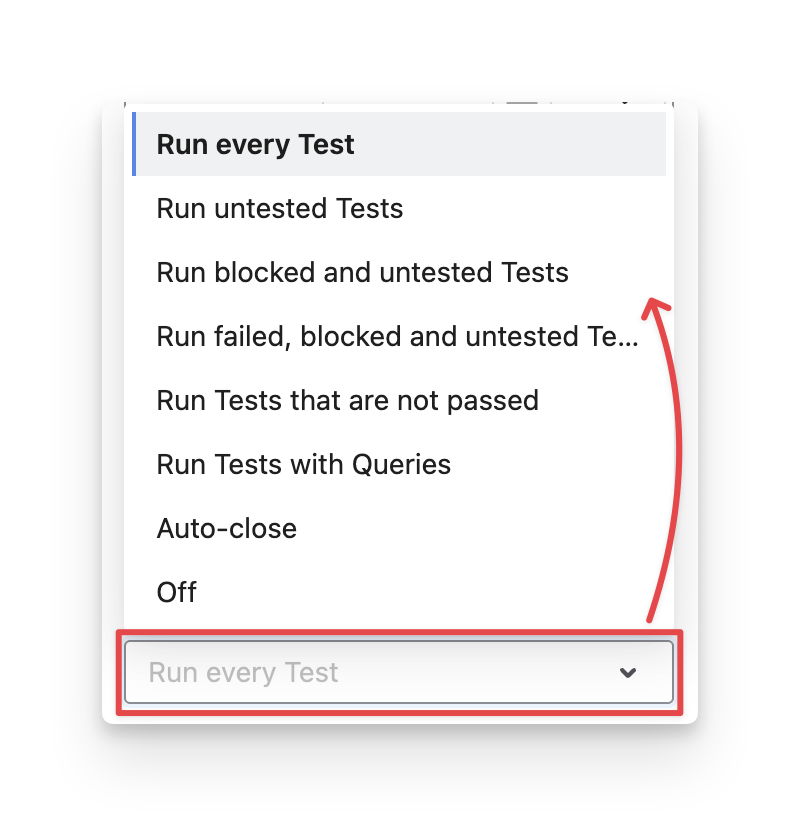
This allows you to configure the Test Run mode, which determines which checklist items will be skipped and which will be executed in the Test Run.
Here’s what each option means:
-
Run every Test: Execute all checklist items, regardless of their previous results.
-
Run untested Tests: Execute only todo items.
-
Run blocked and untested Tests: Execute items that are currently blocked or todo .
-
Run failed, blocked and untested Tests : Execute items that previously Fail blocked or todo .
-
Run Tests that are not passed : Execute all items that are Fail query blocked Skipped or todo .
-
Run Tests with Queries: Execute only items marked with query status.
-
Auto-close: Automatically close the Test Run once all eligible items are completed.
-
Off: No automatic filtering.
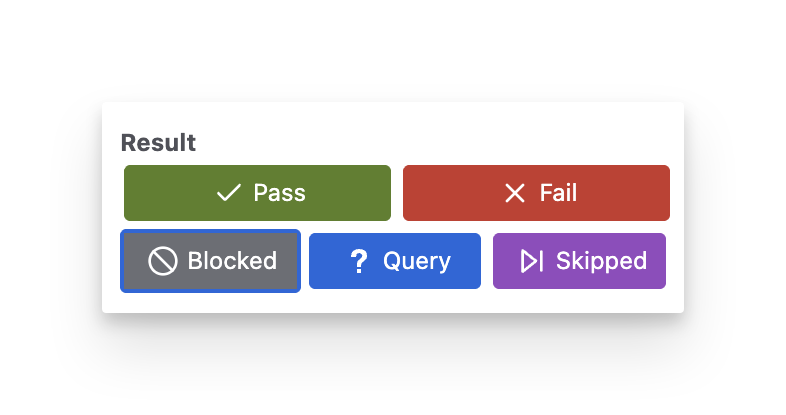
2.2.5 Assign Status To A Test Run Item
By default, each test run item is in todo status. You can mark it with one of five statuses: Fail query blocked Skipped Pass to complete the testing round.
2.3 Format Test Runs
Click the “
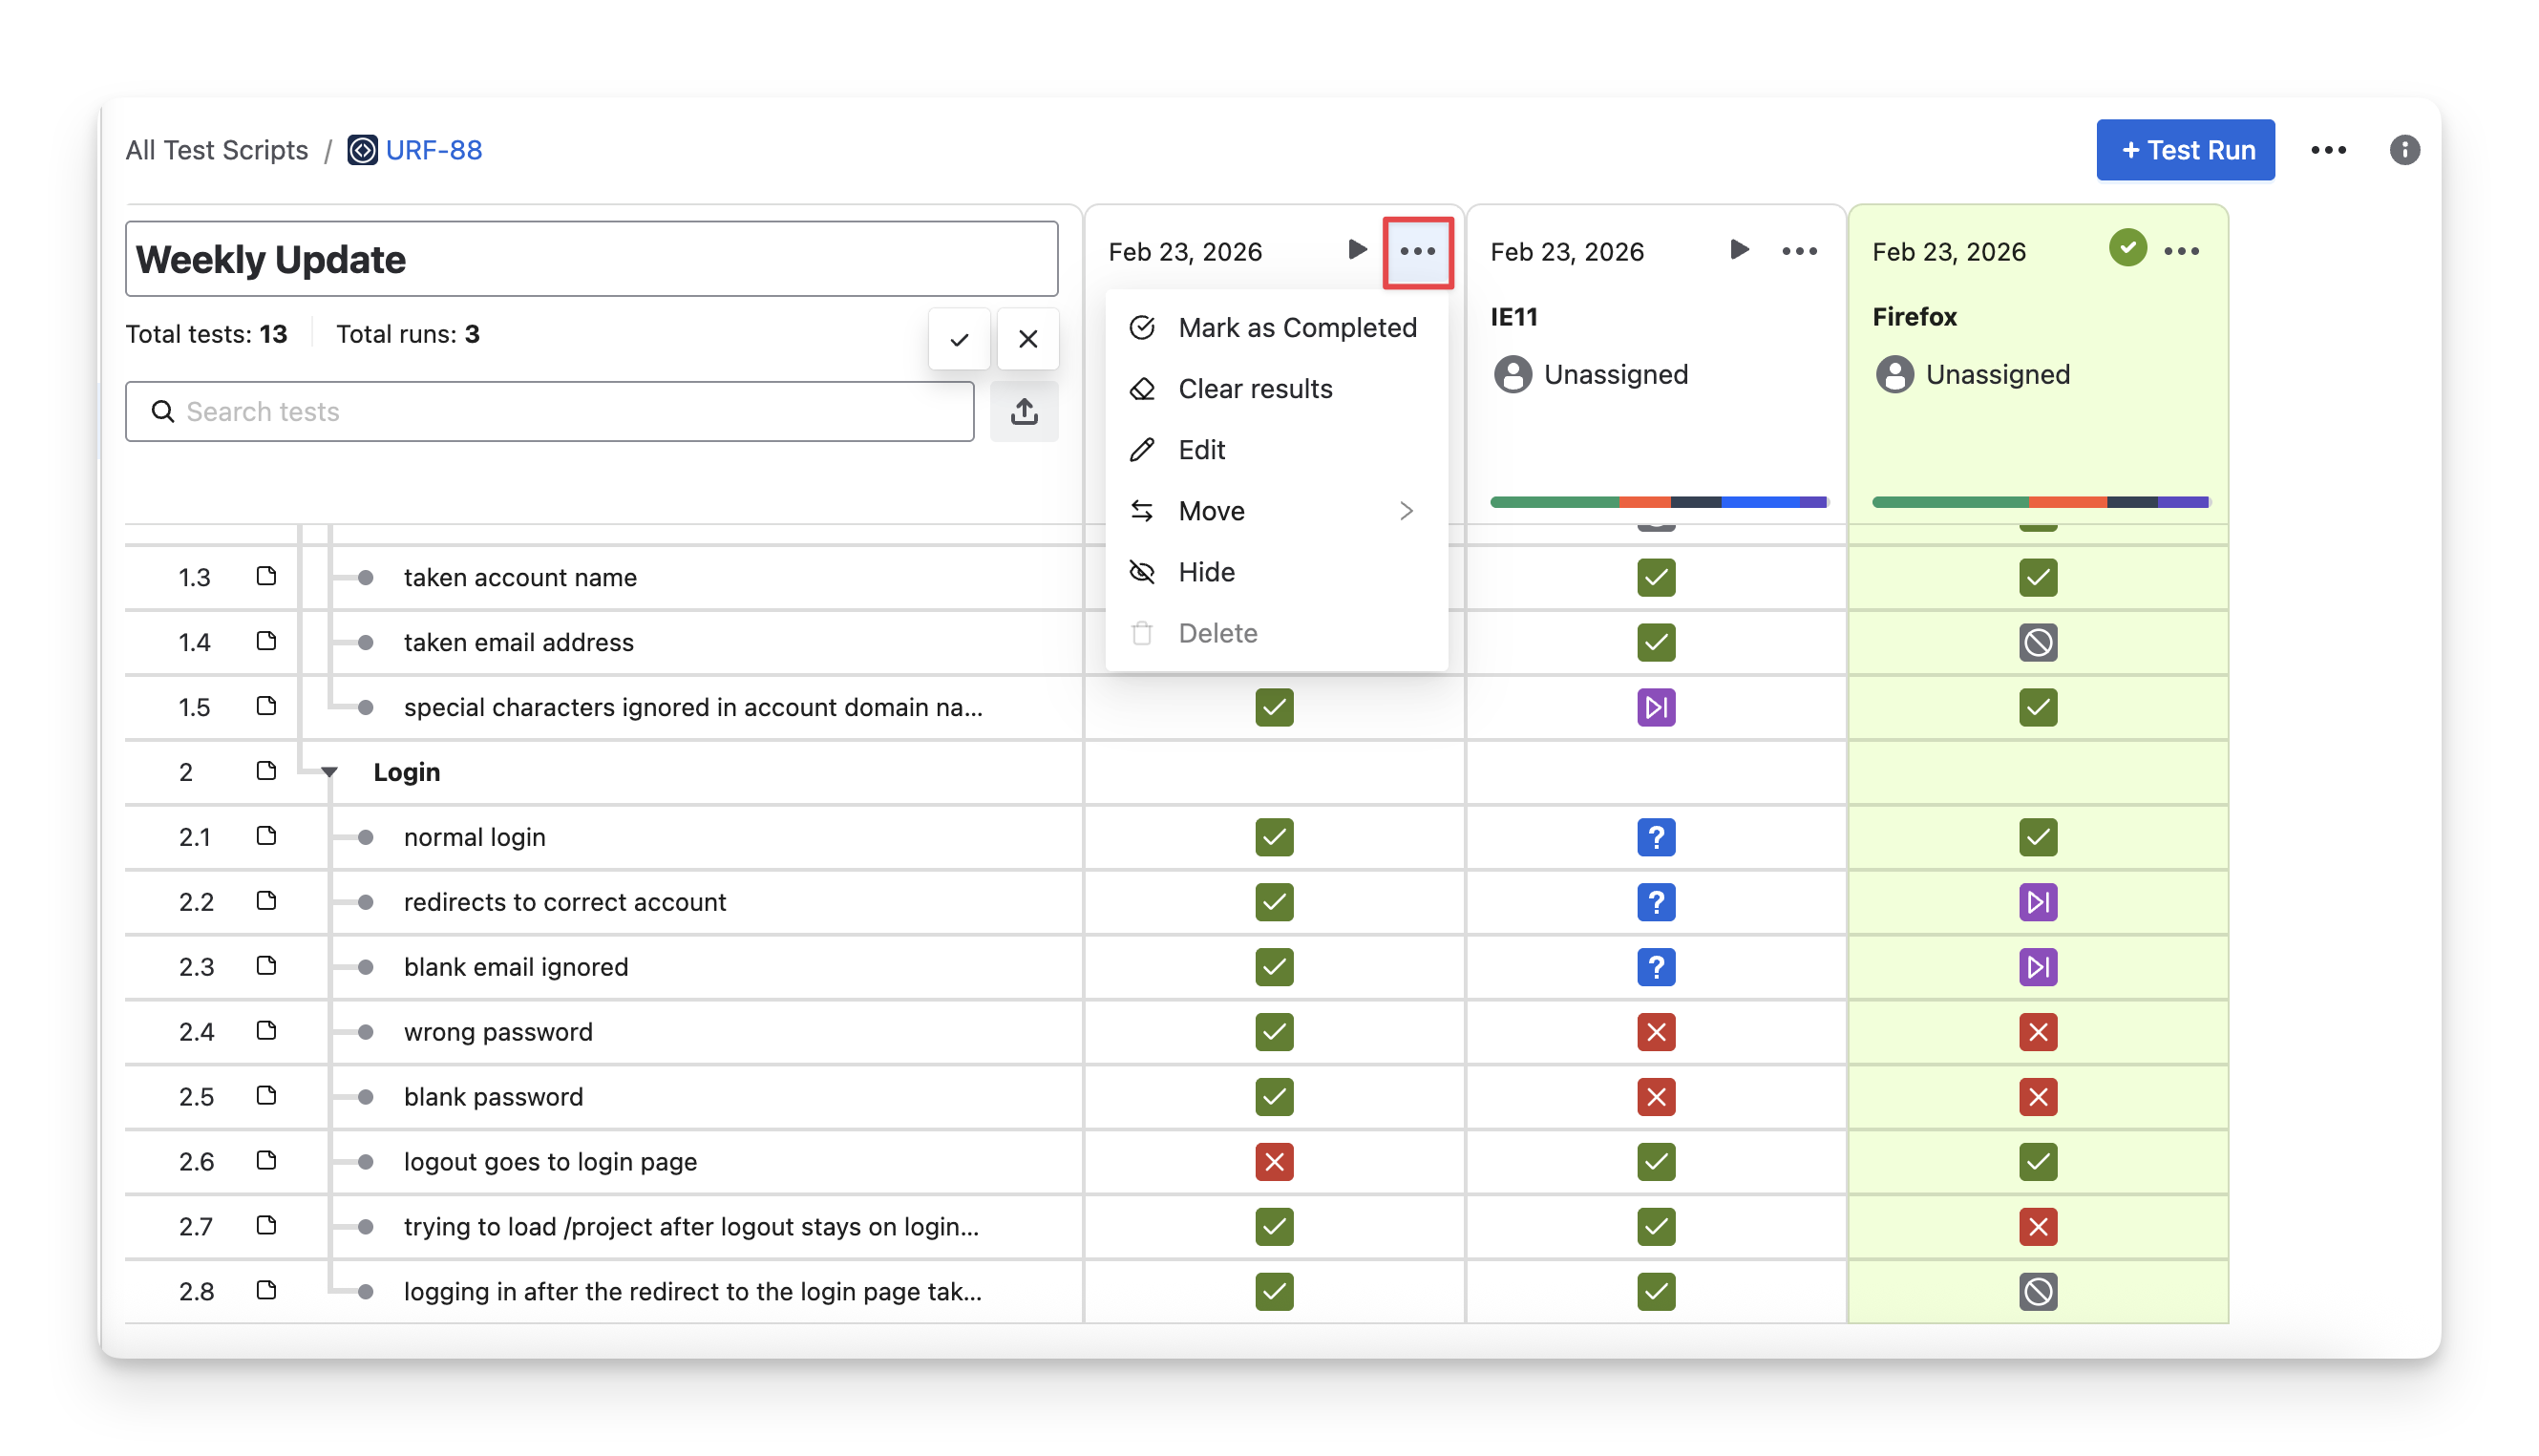
-
Mark as Completed/In-progress: Change the Test Run status between Active (In-progress) and Completed.
-
Clear Results: Clear all statuses that you have assigned to the test run items.
-
Edit: Modify name, milestone and assignee information.
-
Move: Shift the test run to the left or right.
-
Delete: Permanently remove the Test Run and all its associated results.
-
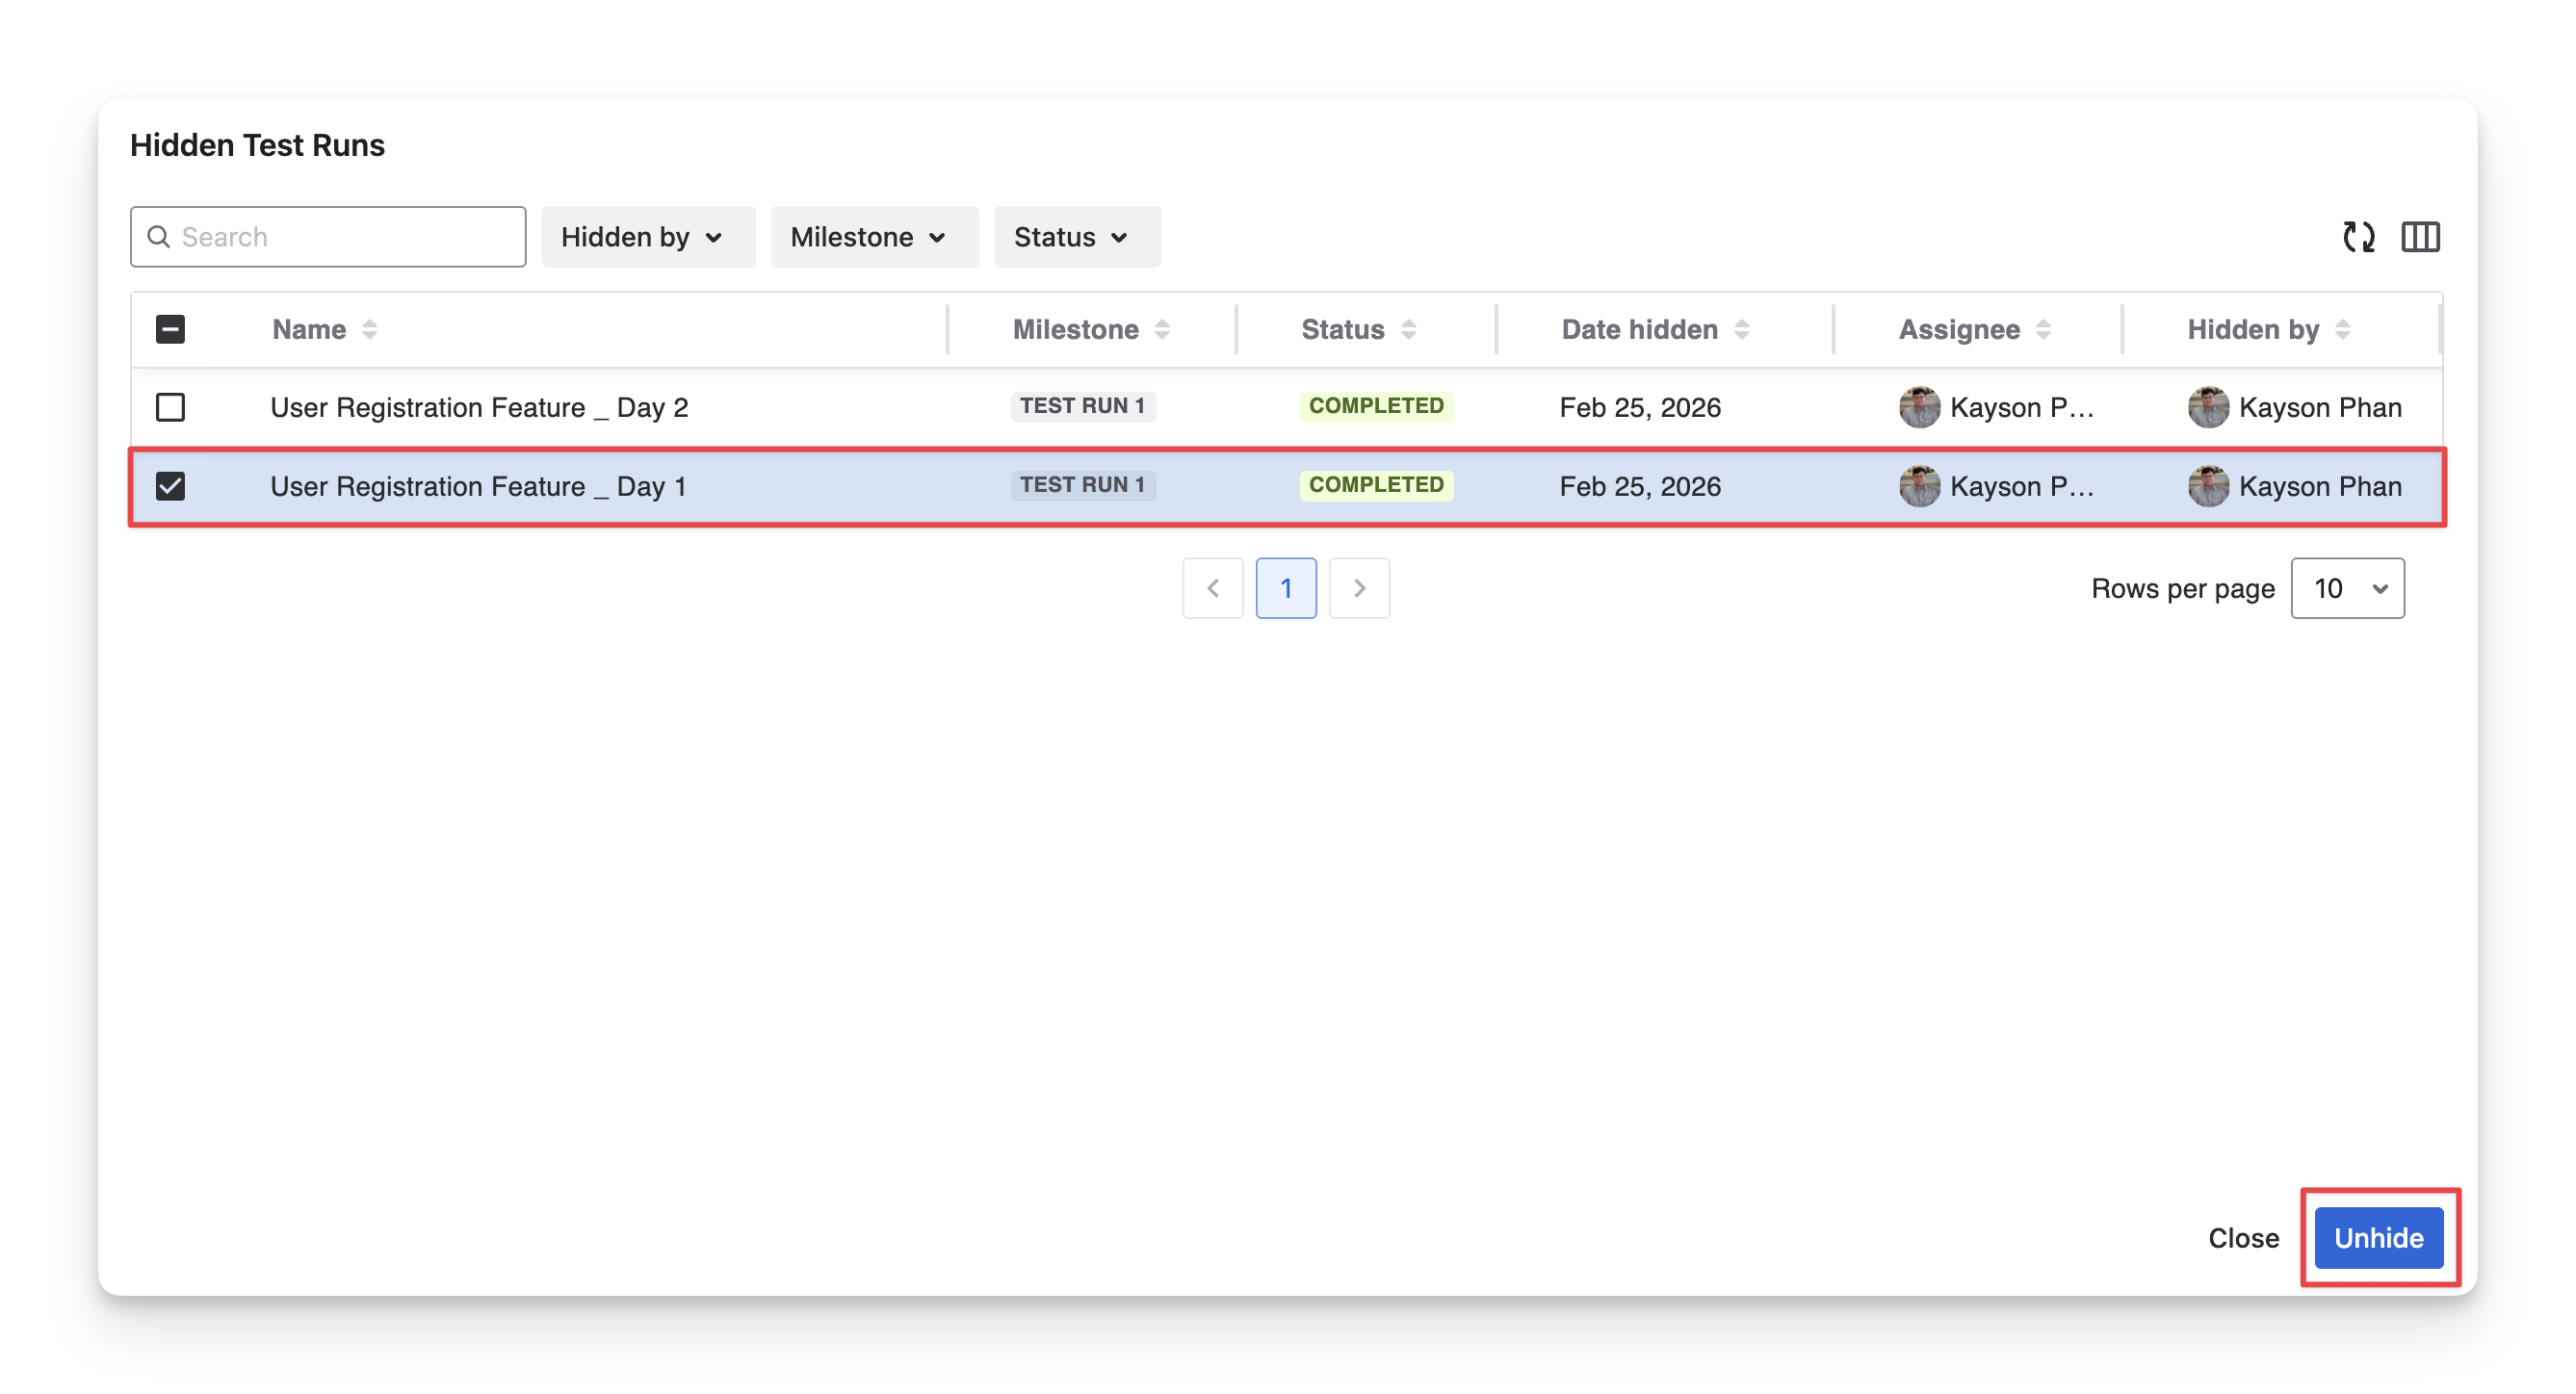
Hide: Temporarily hide the Test Run from the view without deleting it.
-
To view Hidden Test Runs, you can click on the “
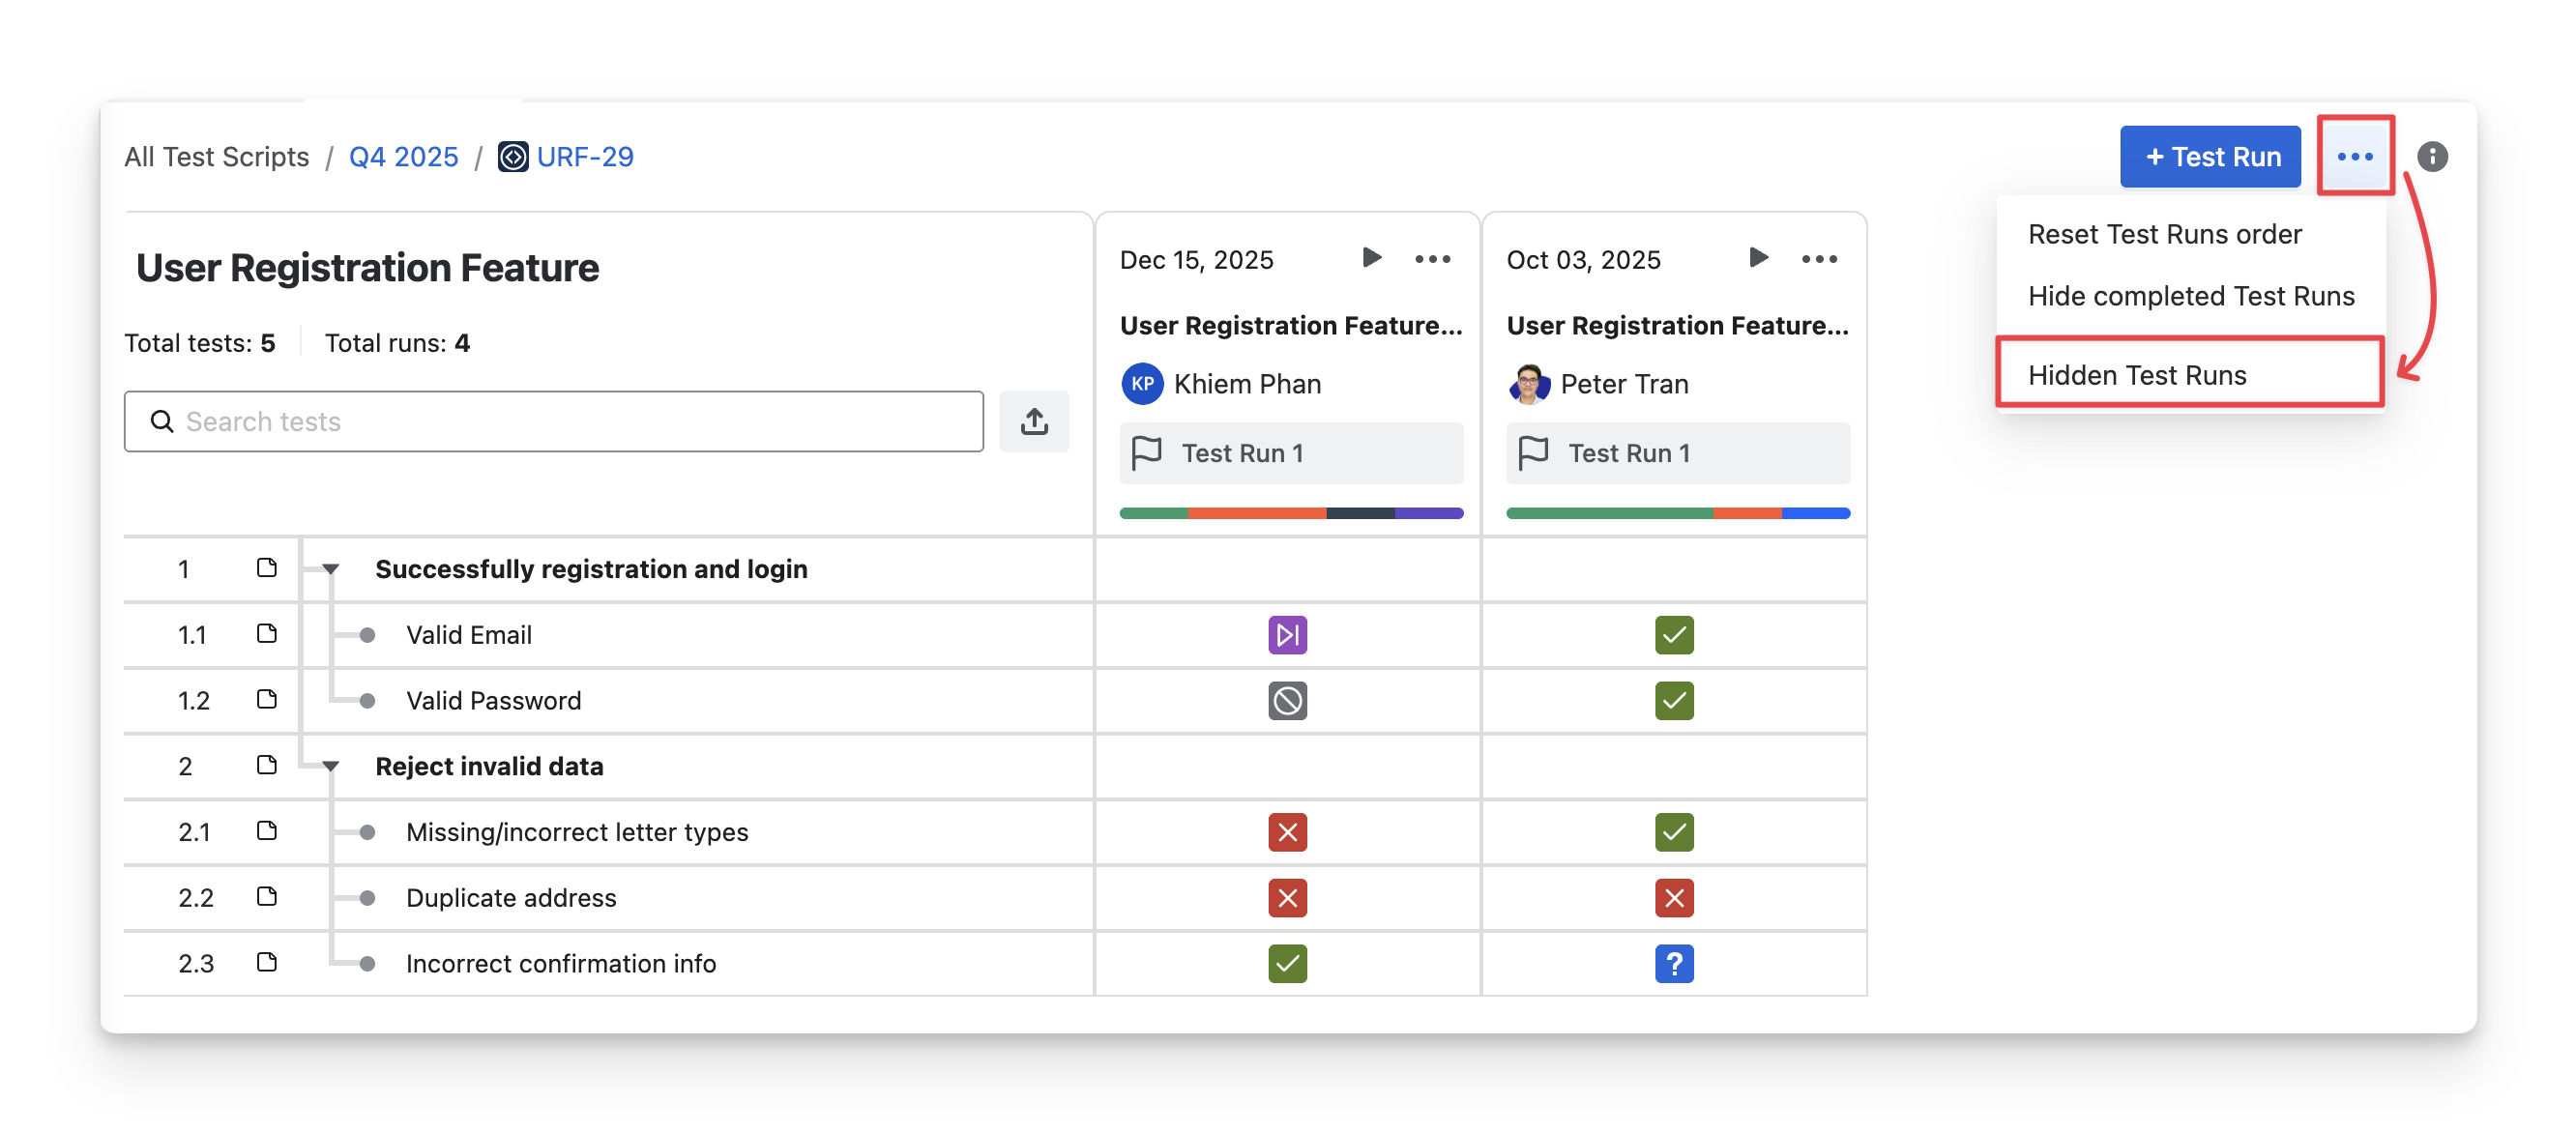
-
You can view your hidden test runs. Select any and choose “Unhide” to restore it to your screen
-
Should you need any assistance or further AgileTest inquiries, contact our 24/7 Support Desk!