.png)
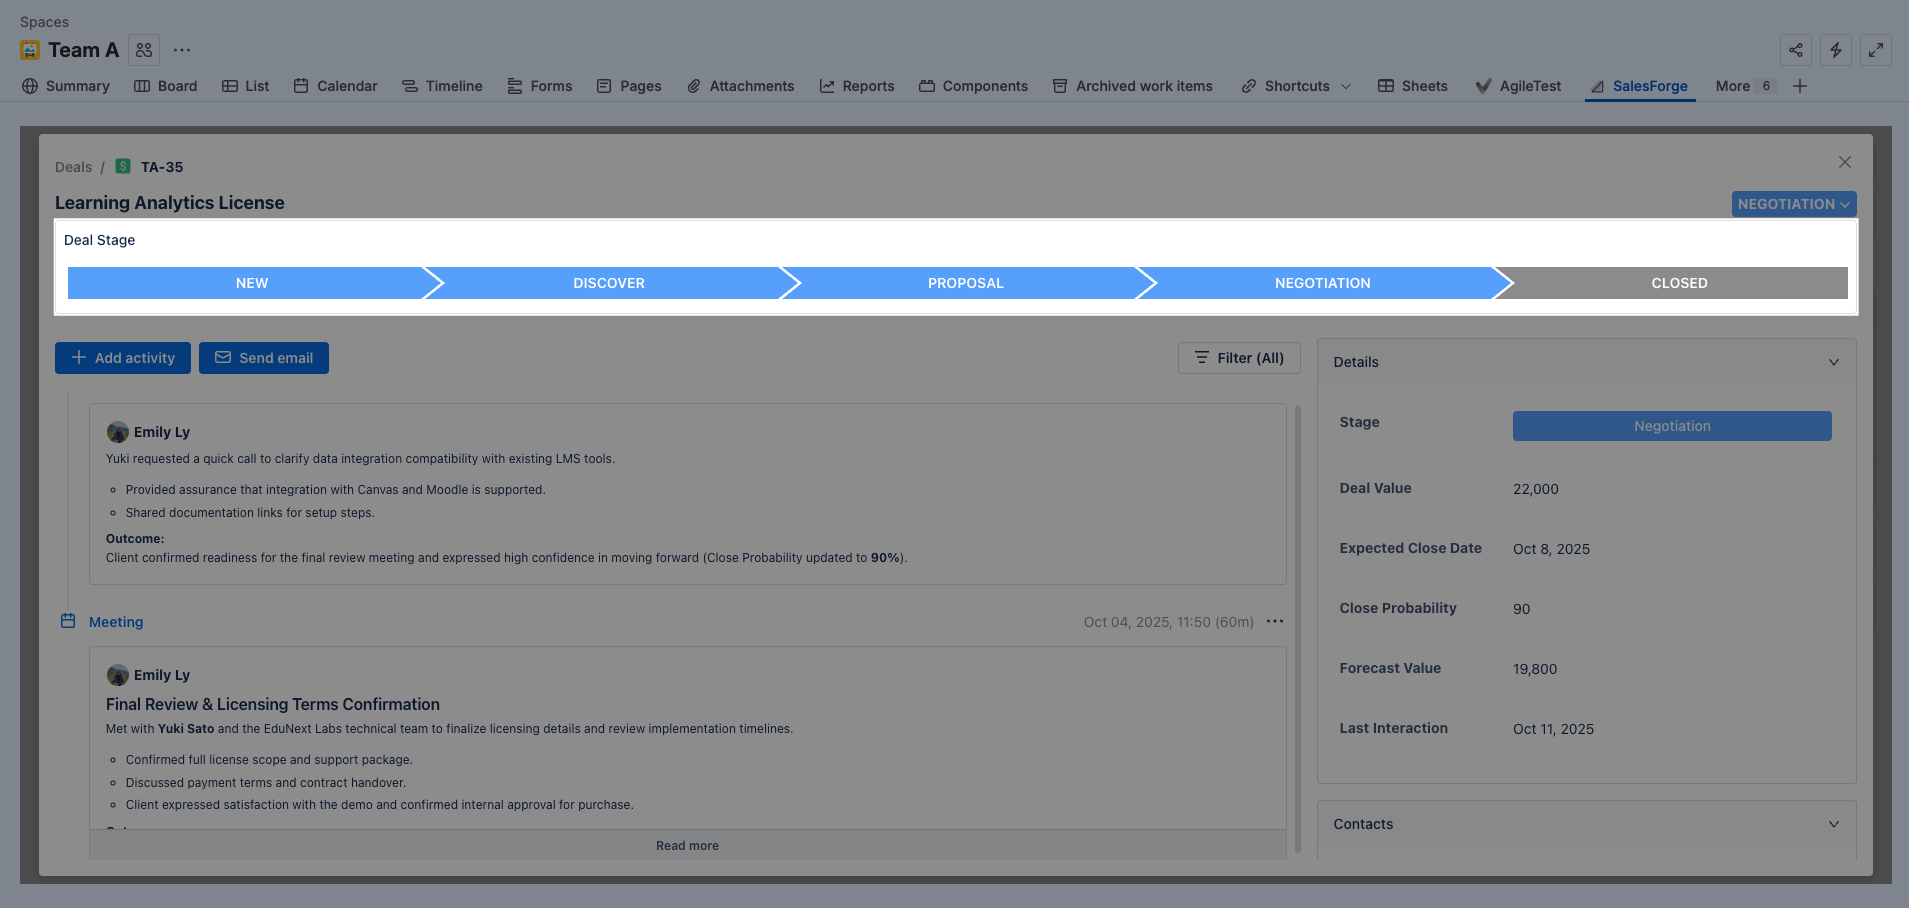
When you open a Deal, you are working with it as a :SalesForge_Deal: Sales & CRM Deal work item in Jira. This view allows you to track all relevant details, communications, and activities related to a specific Deal.
To open a Deal, double-click on the Deal name or the work item key on the Deals board.
Inside a Deal, you can:
1. View and Update Deal Stage
-
At the top of the Deal page, you’ll find the Deal Stage panel. The Deal Stage visualizes where your opportunity currently stands in the sales pipeline.
-
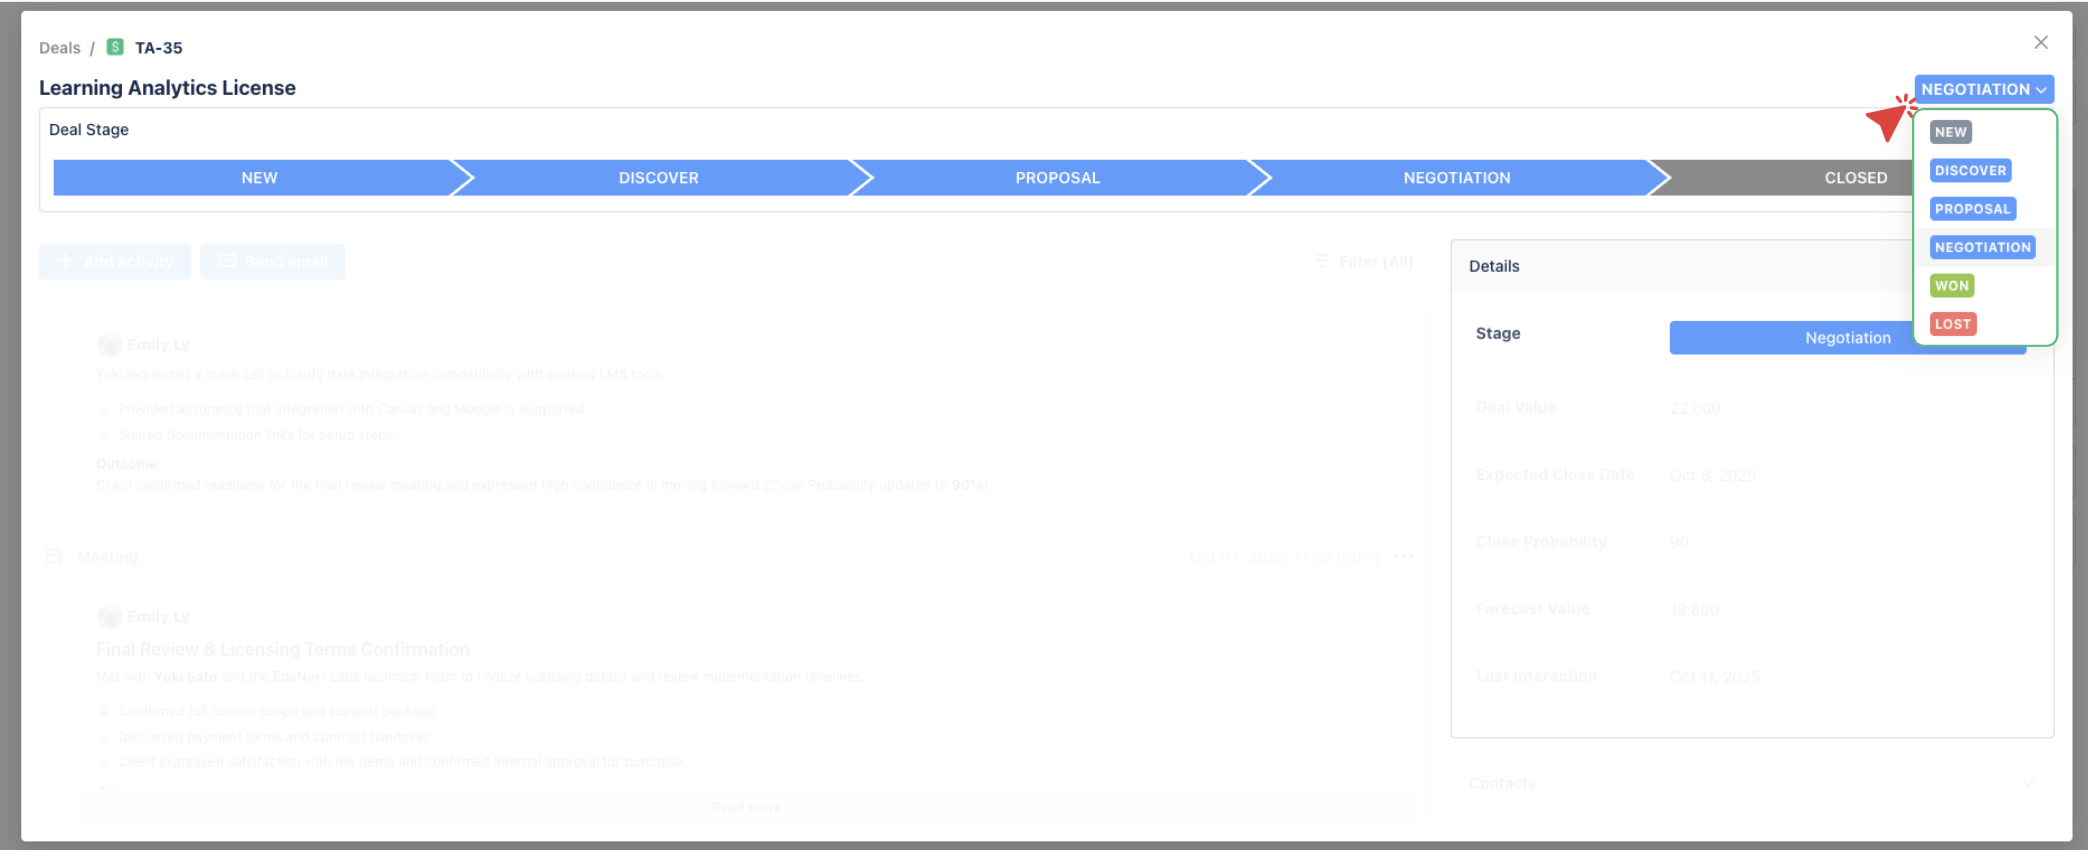
By default, Sales & CRM for Jira provides five stages:
-
New – A new opportunity has been created.
-
Discovery – Gathering client needs and exploring requirements.
-
Proposal – A formal proposal or quote has been shared.
-
Negotiation – Terms and pricing are being discussed.
-
Closed – The deal has been finalized (can be marked as Won or Lost ).
-
-
Each stage corresponds to the Status of the Deal. Updating the status will automatically move the Deal to the appropriate stage in the progress bar.
Pro Tip:
Sales & CRM offers default Deal stages that track the progression of your deals through the sales pipeline. However, you can customize these stages to better fit your specific sales workflow.
To customize the Deal stage, please refer to this document: How to Customize Lead and Deal Workflows →
2. Manage Activity Feed
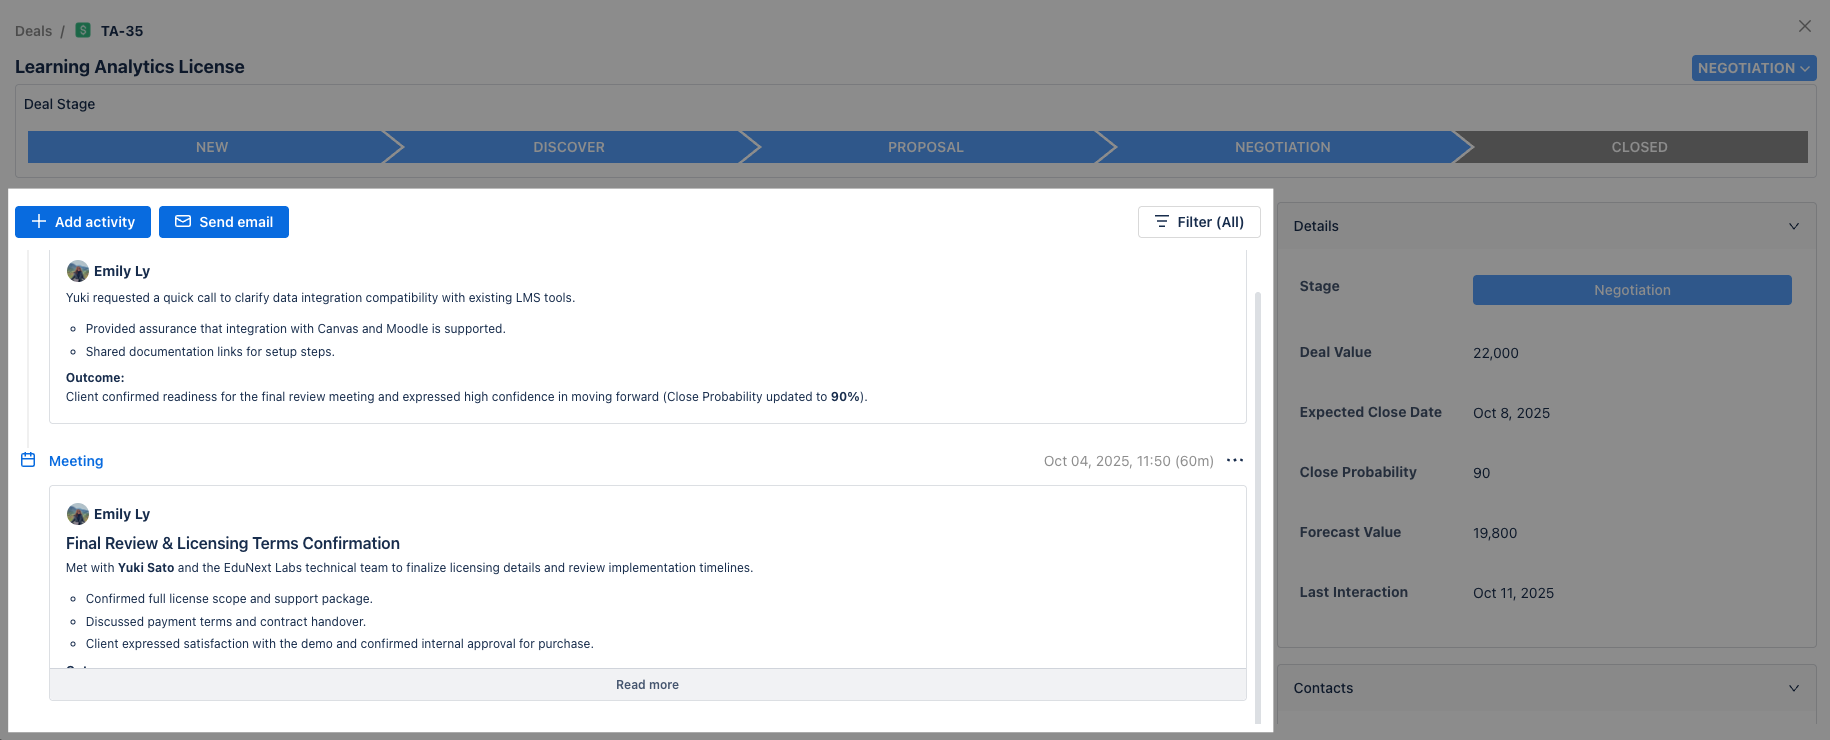
The Activity Feed on the left displays all recorded interactions and updates related to the Deal.
You can log new interactions by clicking ![]()
![]()
Activity types include:
-

-

-

-

All activities are displayed chronologically, creating a clear timeline of client engagement.
2.1. Add and Manage Activities
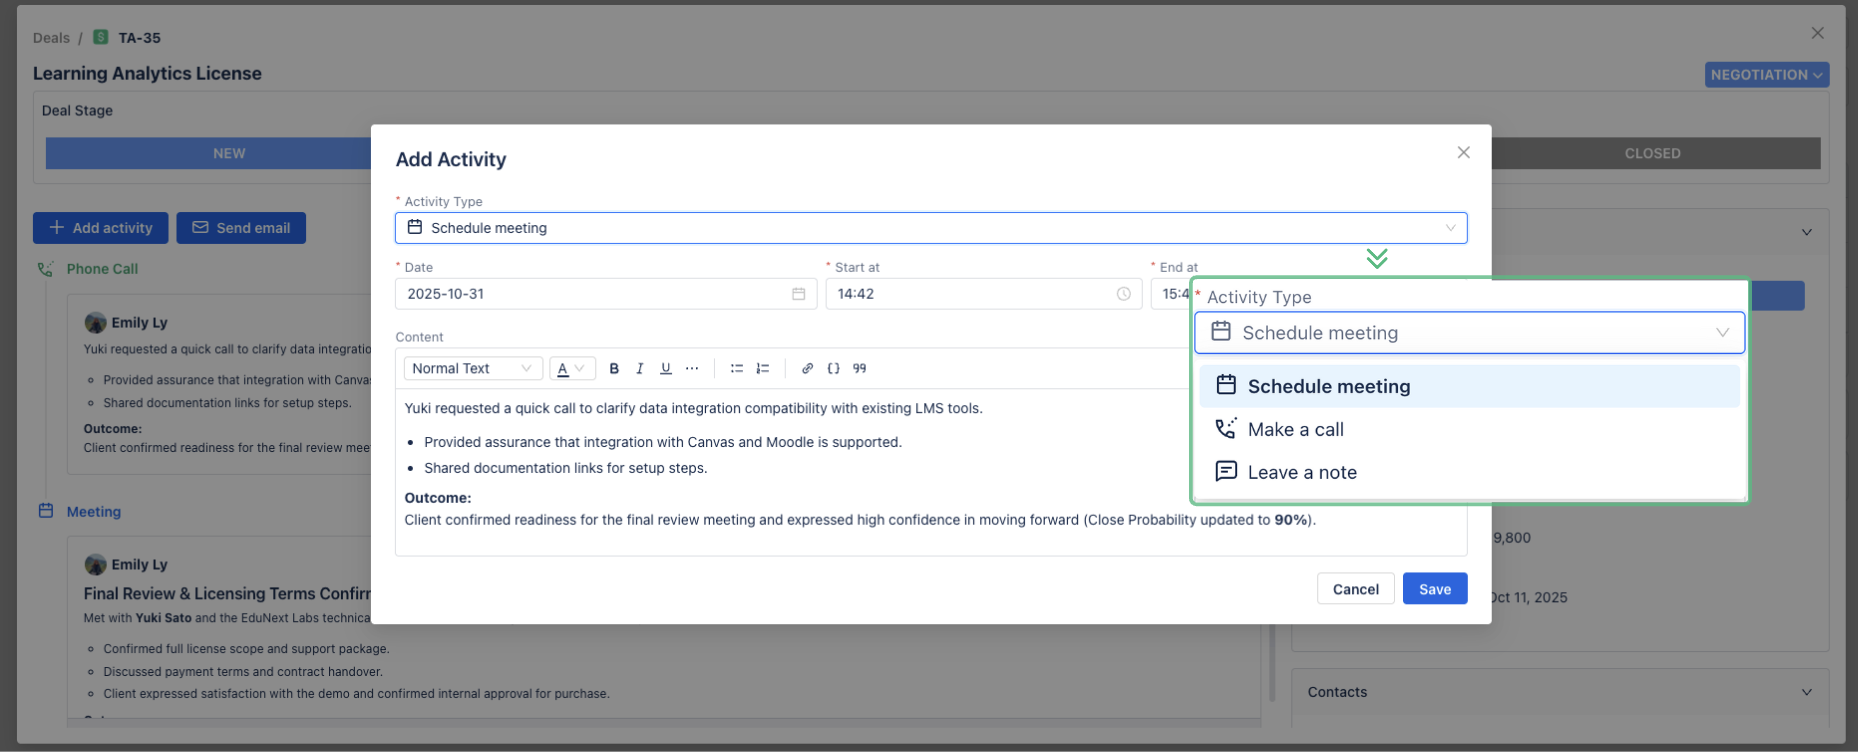
a. Add a new activity
-
Click

-
Choose the activity type (e.g., Note, Meeting, or Phone Call).
-
Enter the relevant details, including date & time, meeting notes, or call summaries.
-
Click Save to finish.
Did you know?
Notes in Sales & CRM will be automatically synced to the Comments section of the corresponding Jira work item.
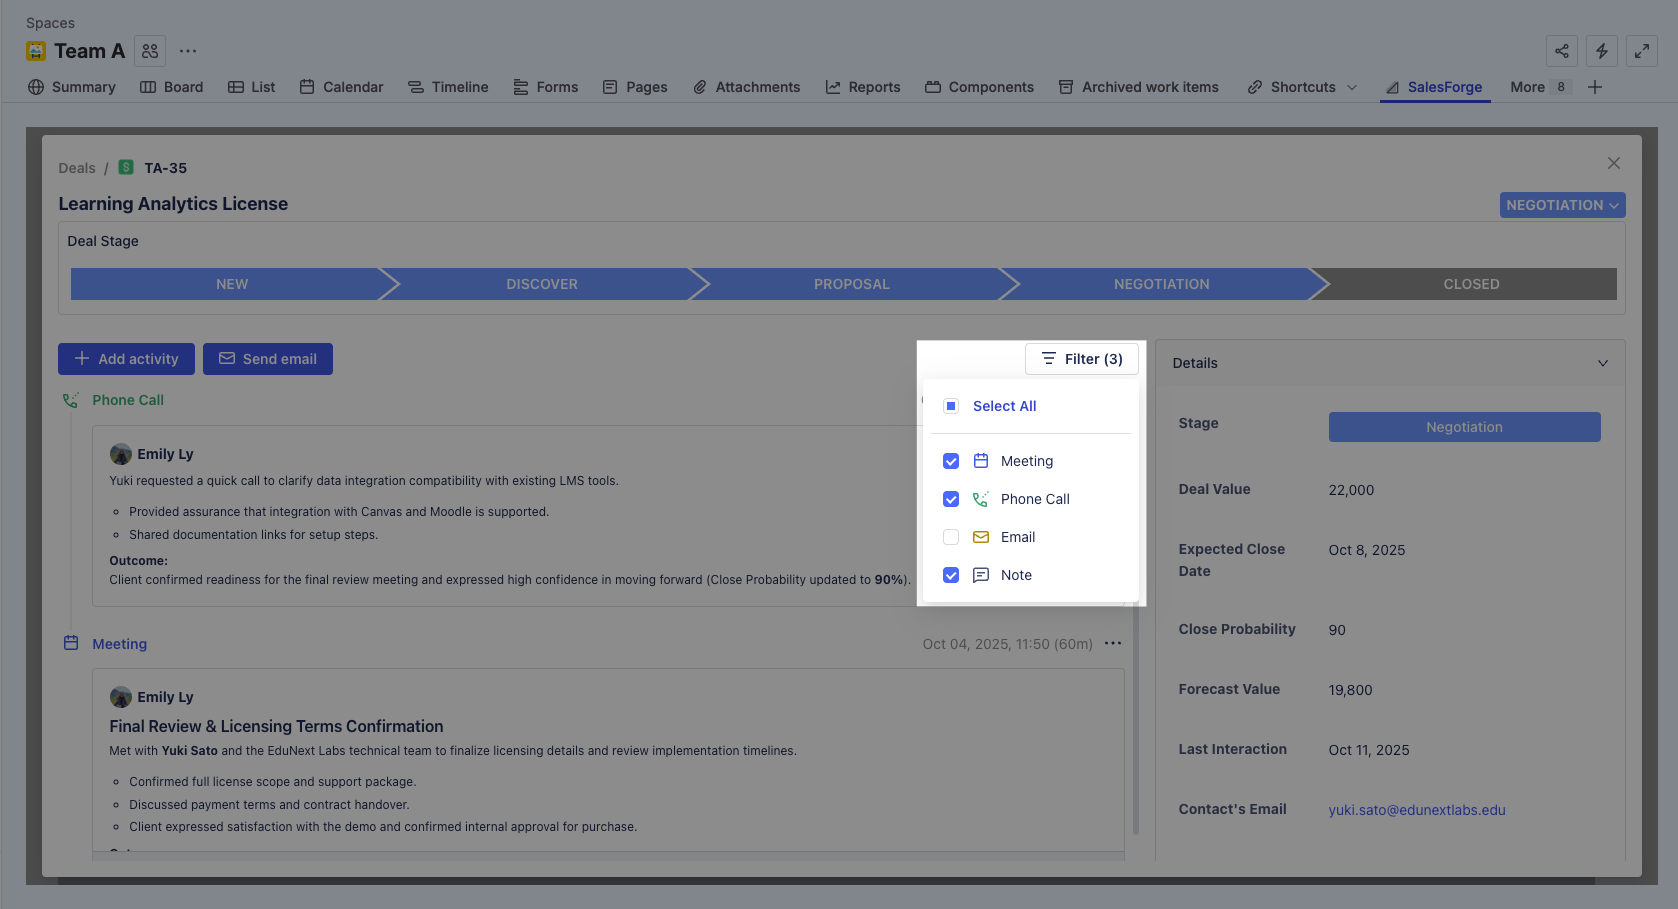
b. Filter Activities on the Feed
The Activity Feed allows you to quickly focus on specific types of interactions with the Filter capability. Here is how:
-
In the activity feed, click
-
Select one or more activity types you want to view (Meeting, Phone Call, Email, Note).
-
The feed will instantly update to show only the selected activity types.
-
To return to the full view, select All or clear the selected filters.
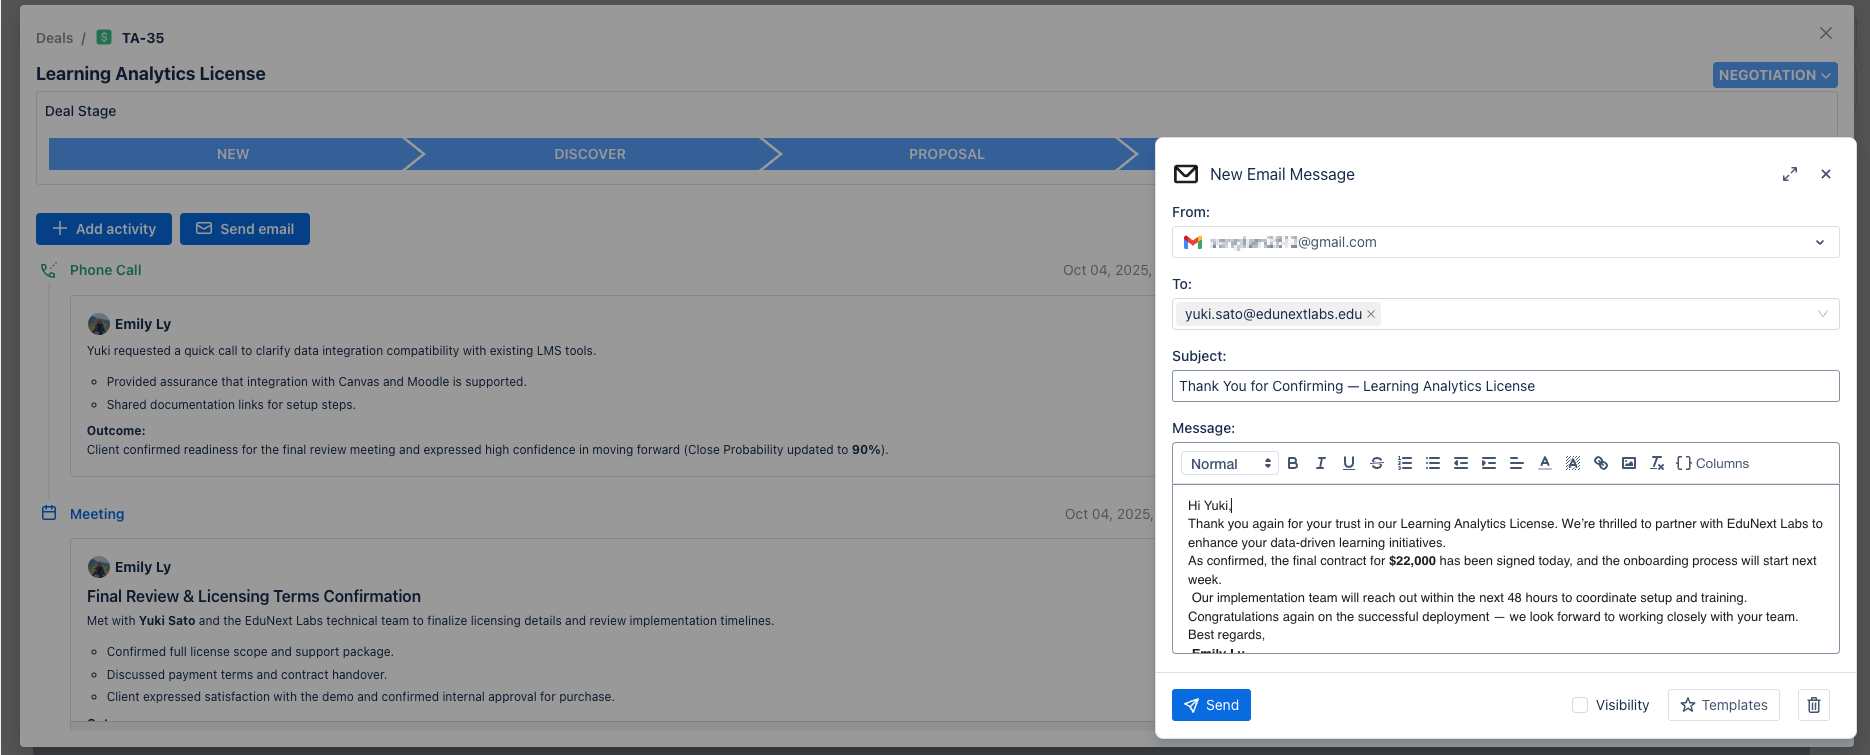
2.2. Send Emails
You can send an email from inside a Deal without leaving Sales & CRM.
You must enable Email Integration to send emails directly from Sales & CRM for Jira.
How to Enable Email Integration & Customize Email Template ->
Here is how:
-
Click on

-
Review and fill out the email details:
-
From: Choose your email address (if multiple email accounts are linked).
-
To: The recipient's email address (this will automatically populate from the Deal’s details, if any).
-
Subject: Enter the subject of the email.
-
Message: Compose your email in the message box using the available formatting options.
-
-
Visibility Option: Sales & CRM will automatically log your email as an activity in the activity feed if the Visibility option is enabled. This also means that all team members working with the Deal can see the email communication and related details in the activity feed.
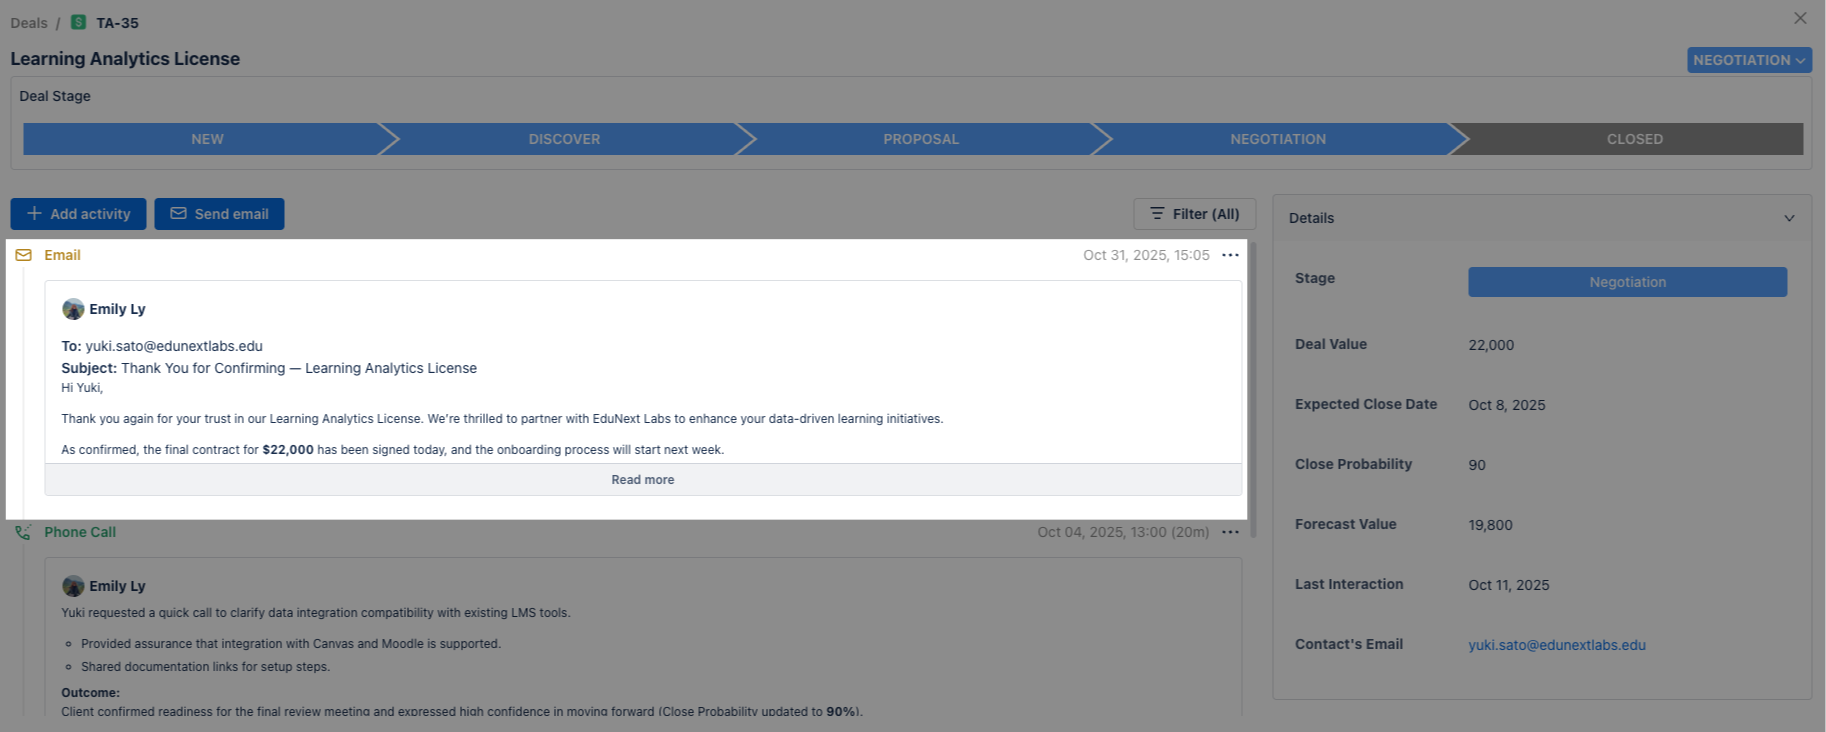
3. View Deal Details
The panel on the right-hand side displays all key information about the Deal. This information is pulled from the columns in the Deals board. If you hide or show columns in the board view, those changes will be reflected here in the Deal details.
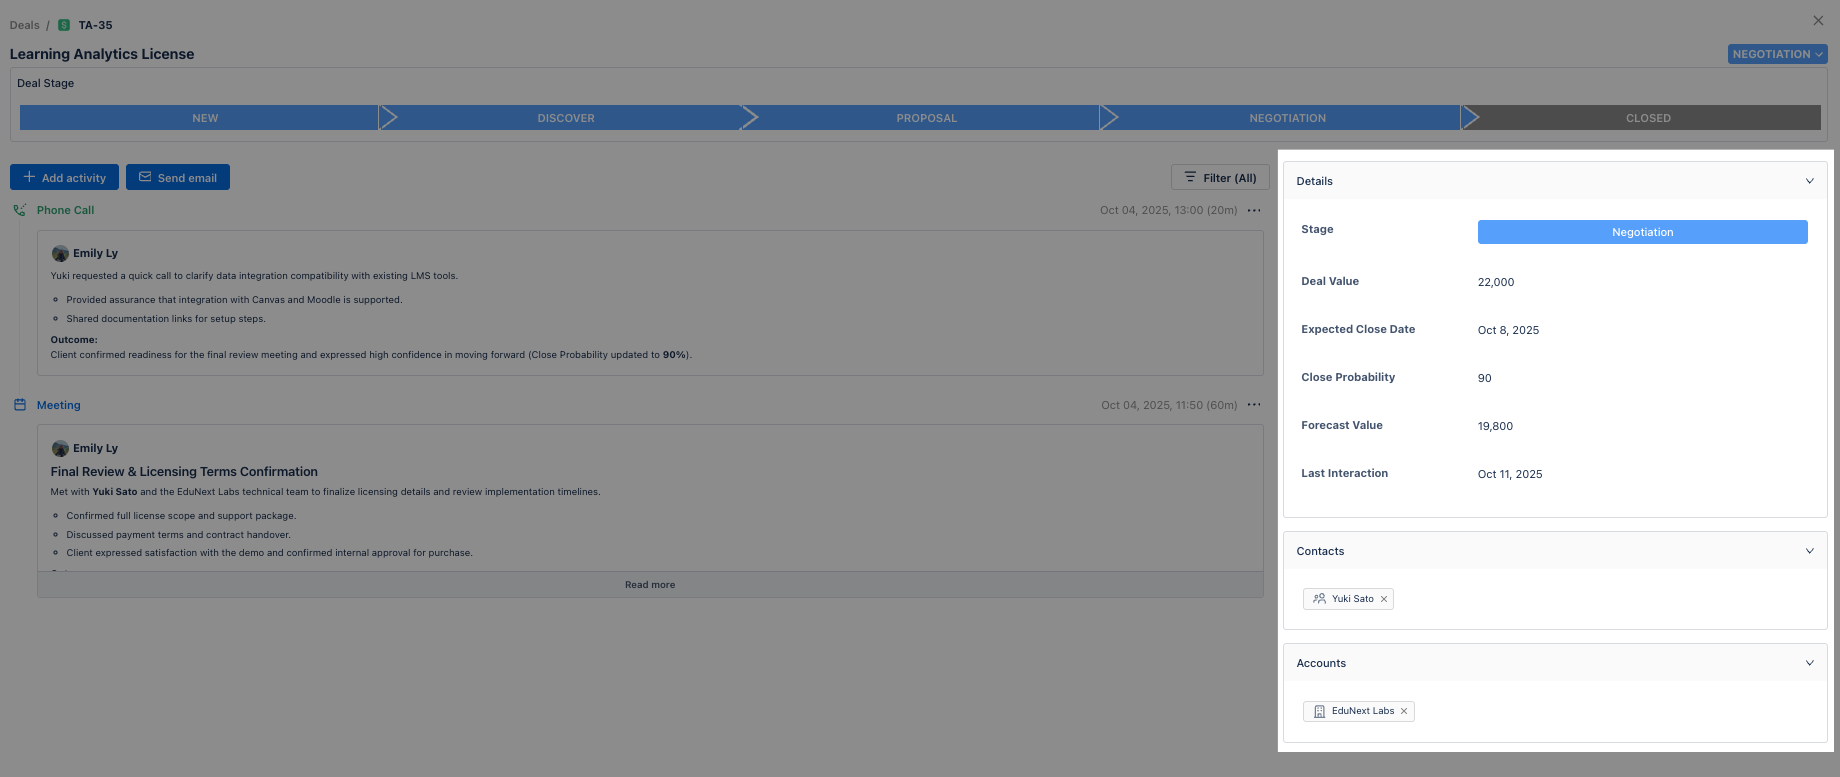
To update any information, simply click on the data you want to edit (e.g., click the Contacts field to change the associated Contact). After making the necessary edits, press Enter or Tab to save the changes.