Work item table
The Work item table is an Excel-like interface on the left side of the Gantt and Timeline views. It displays project tasks in a structured, spreadsheet-style format, making it easy to organize and track key details such as task names, dates, assignees, and status. Users can edit task information inline, customize columns, and apply sorting or filtering for quick navigation.
Timeline table: Displays tasks in the same hierarchy as Jira, reflecting the original issue structure.
Gantt table: Supports Work Breakdown Structure (WBS), allowing you to create and adjust custom task hierarchies independent of Jira’s structure.
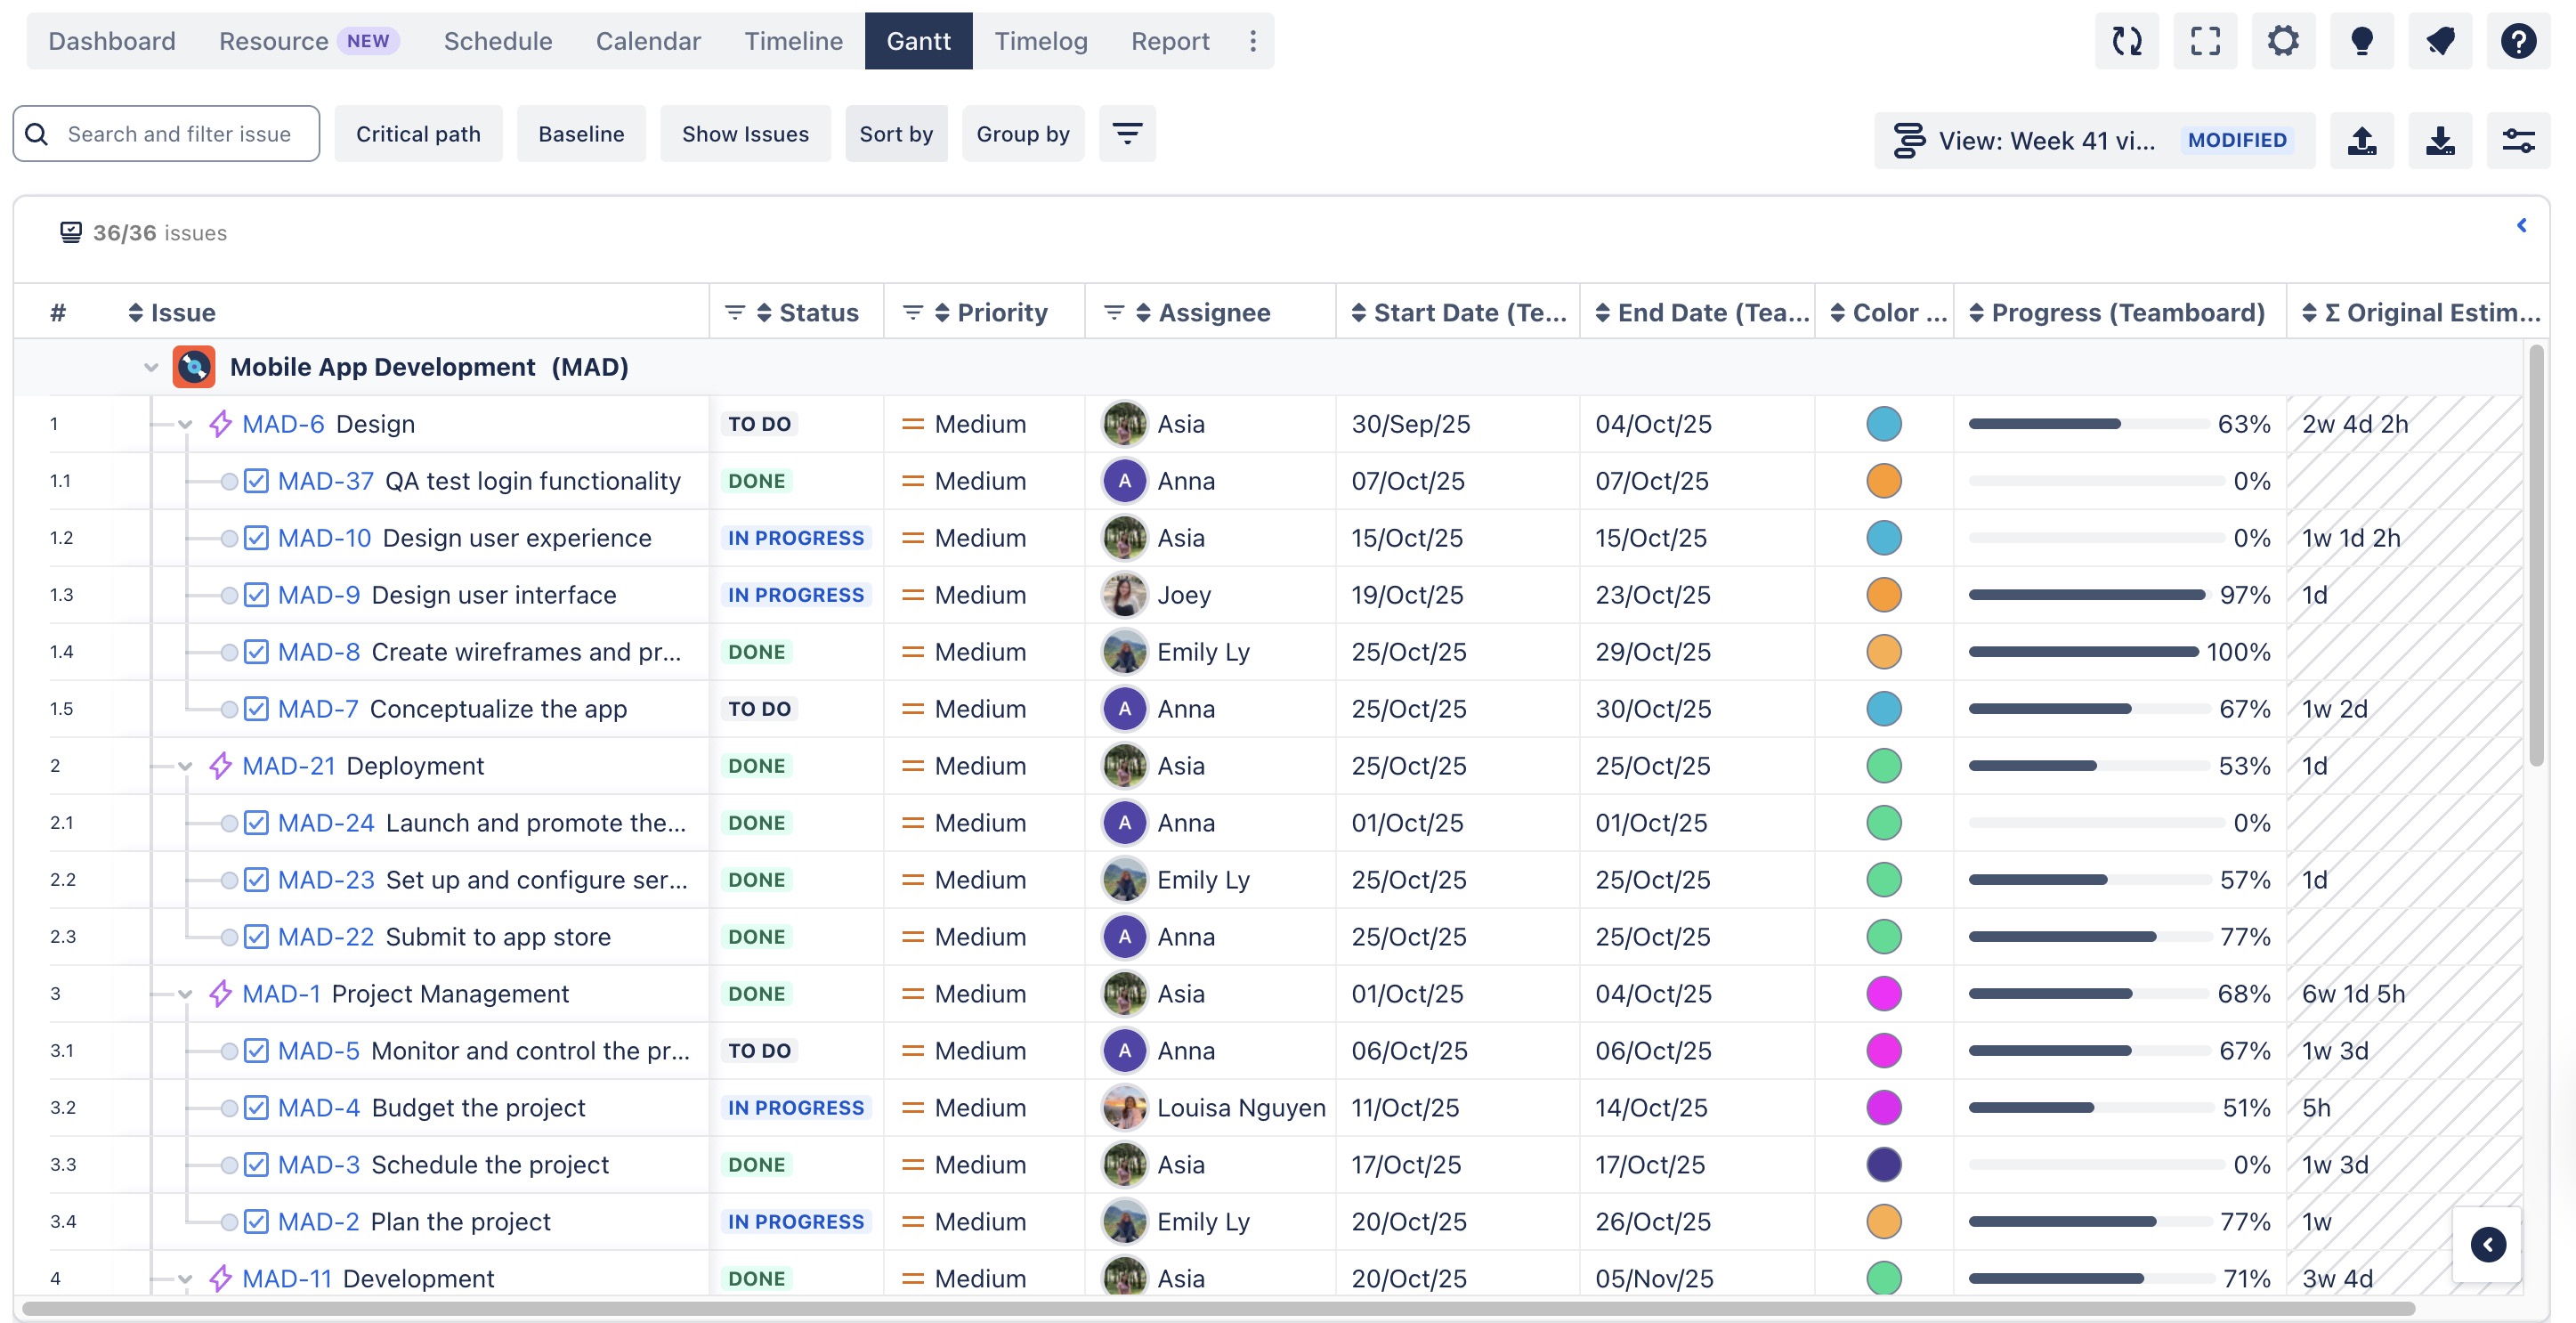
Customizing task hierarchy
Hierarchy adjustments in the Gantt table are for visualization and planning purposes within ProScheduler. These changes do not modify Jira’s native issue hierarchy (Epic → Task/Story → Subtask).
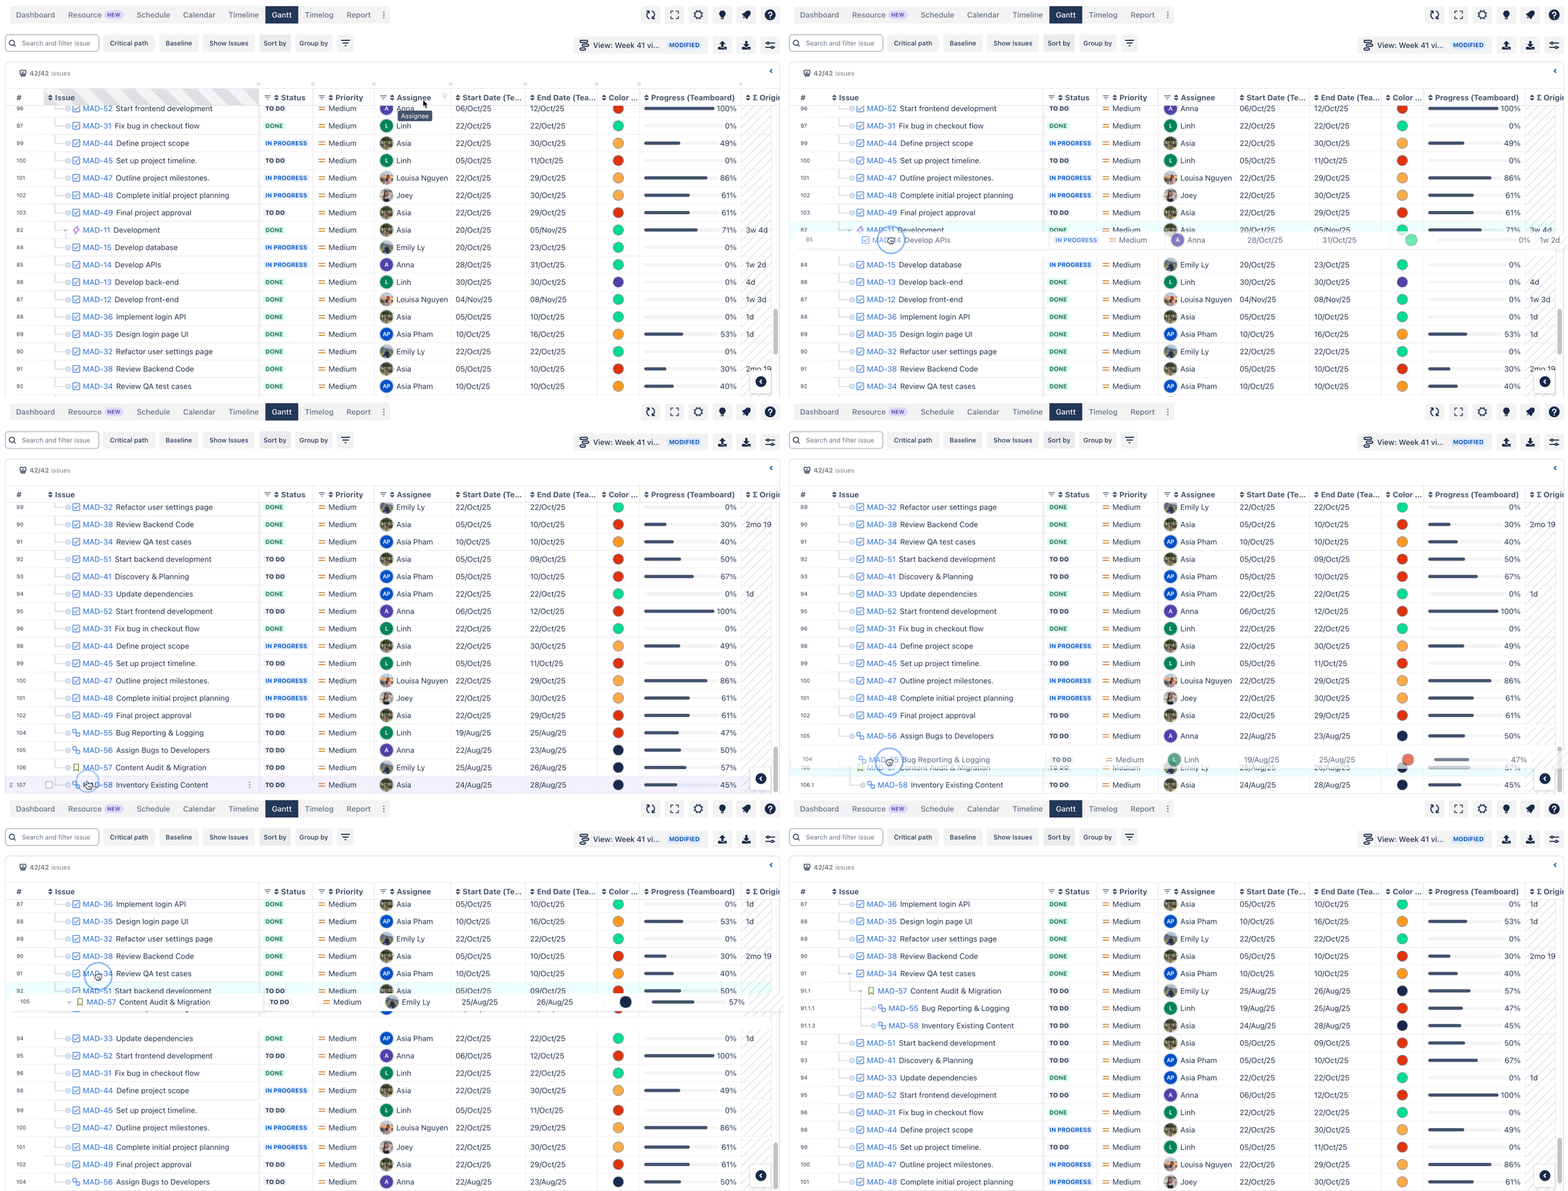
The Gantt table in TeamBoard ProScheduler gives you full control over your project structure by allowing you to customize the task hierarchy.
You can easily arrange tasks to reflect your project’s structure using a simple drag-and-drop feature.
Editing fields inline
You can directly update task details within the table without opening separate dialogs.
Inline editing is available for many commonly used fields, but some fields may have limitations or require specific Jira configurations. 👉 Learn more about supported fields.
To edit task details inline:
Move your cursor over the field you want to edit.
Click on the field value.
An editable text box, dropdown, or date picker will appear depending on the field type.
Enter the new value or select from the available options.
.jpg?inst-v=96d3dae6-81b8-4d1c-9378-55a97feea5e9)
Add or remove columns
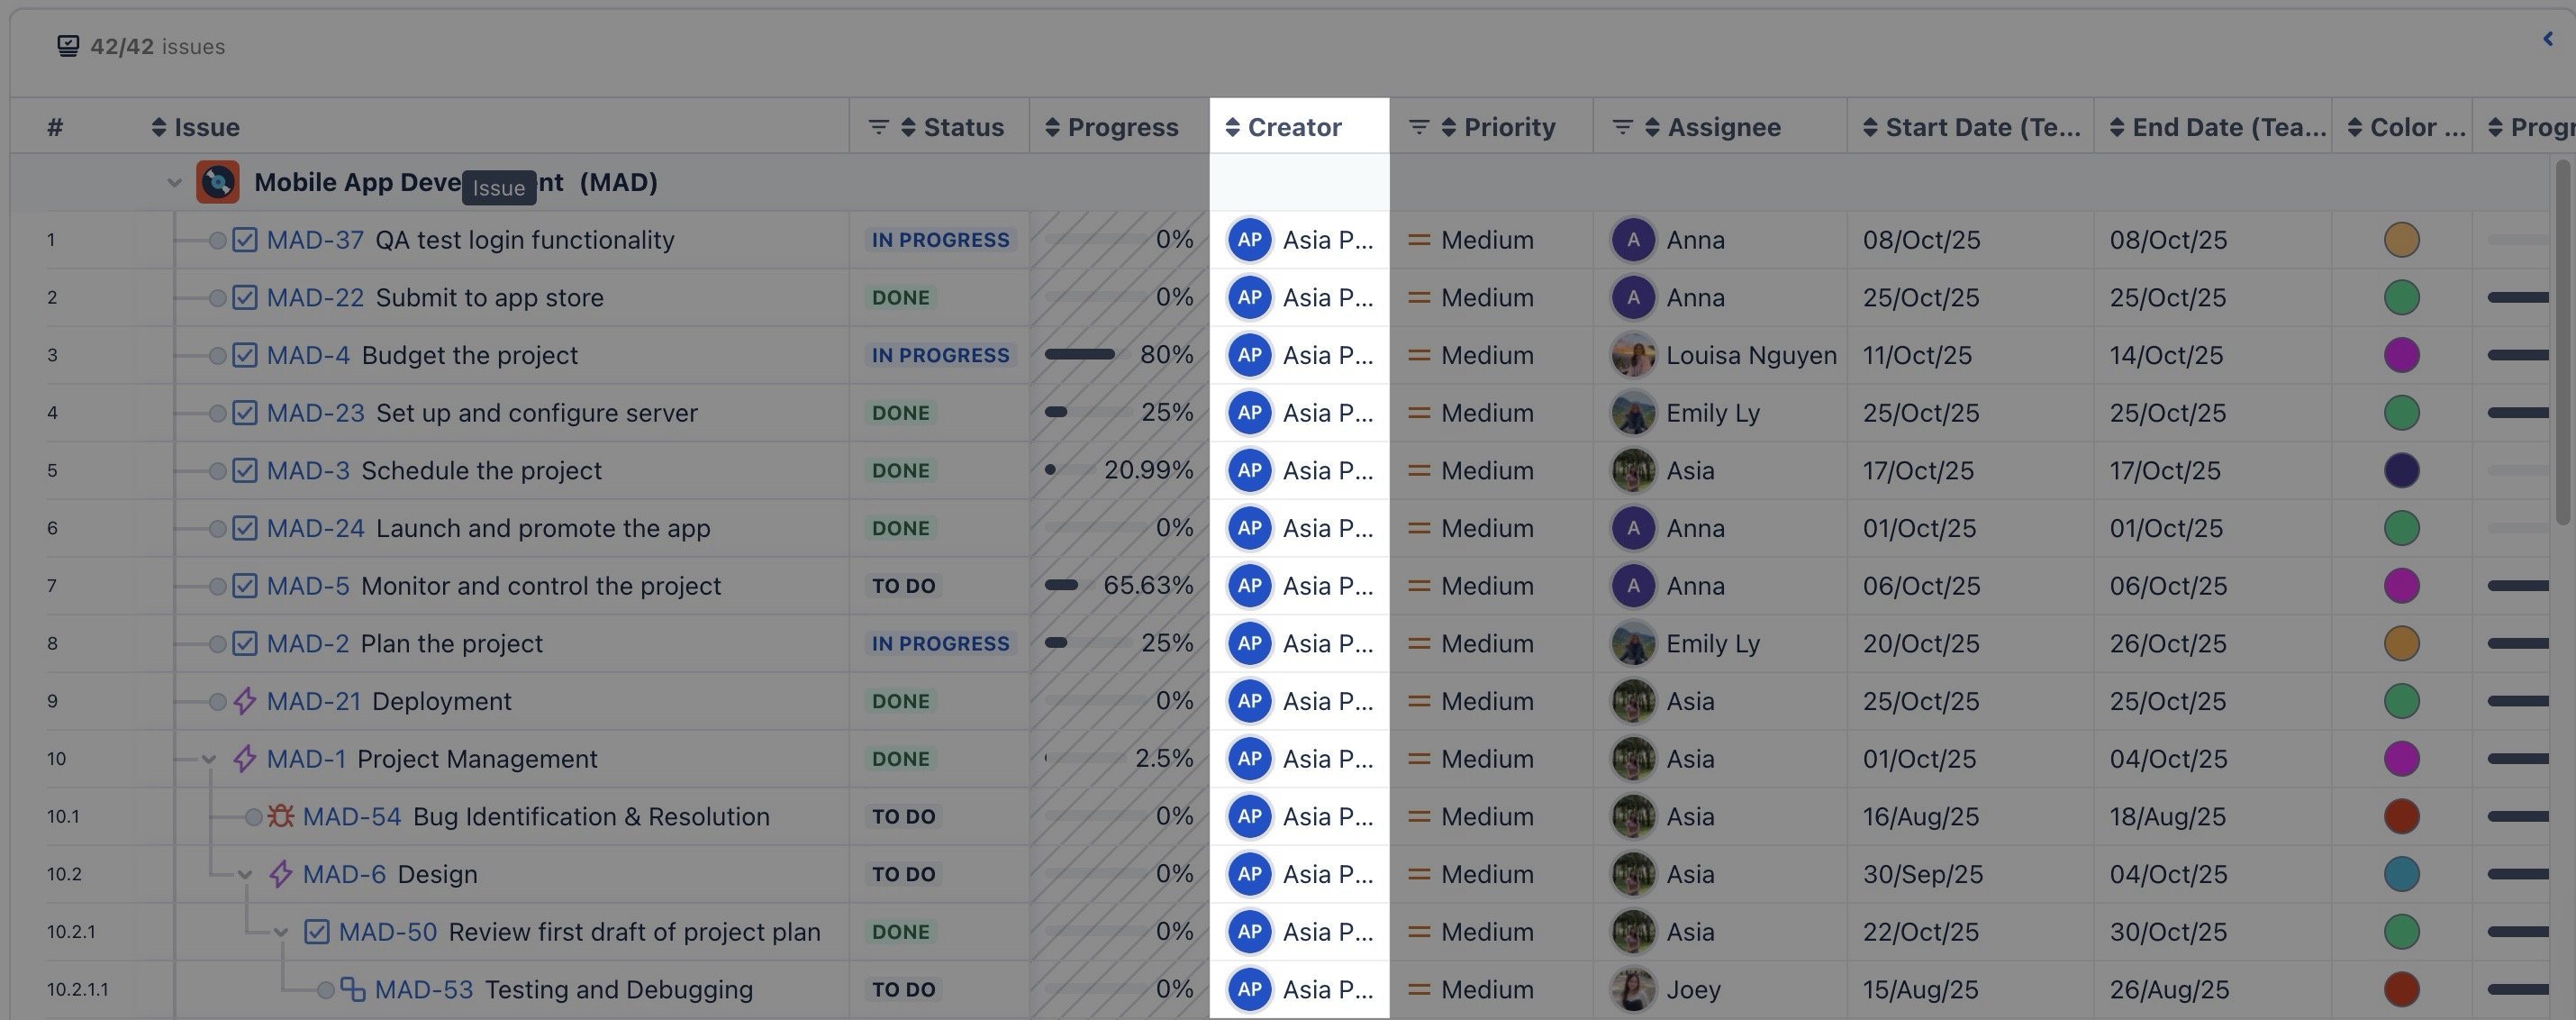
By default, ProScheduler displays primary columns using Jira fields in the table. You can easily customize the view by adding or removing columns based on your preferences.
To add a column:
Hover over the column header where you want to insert a new column.
Click the ➕ button that appears on the right side of that column header.
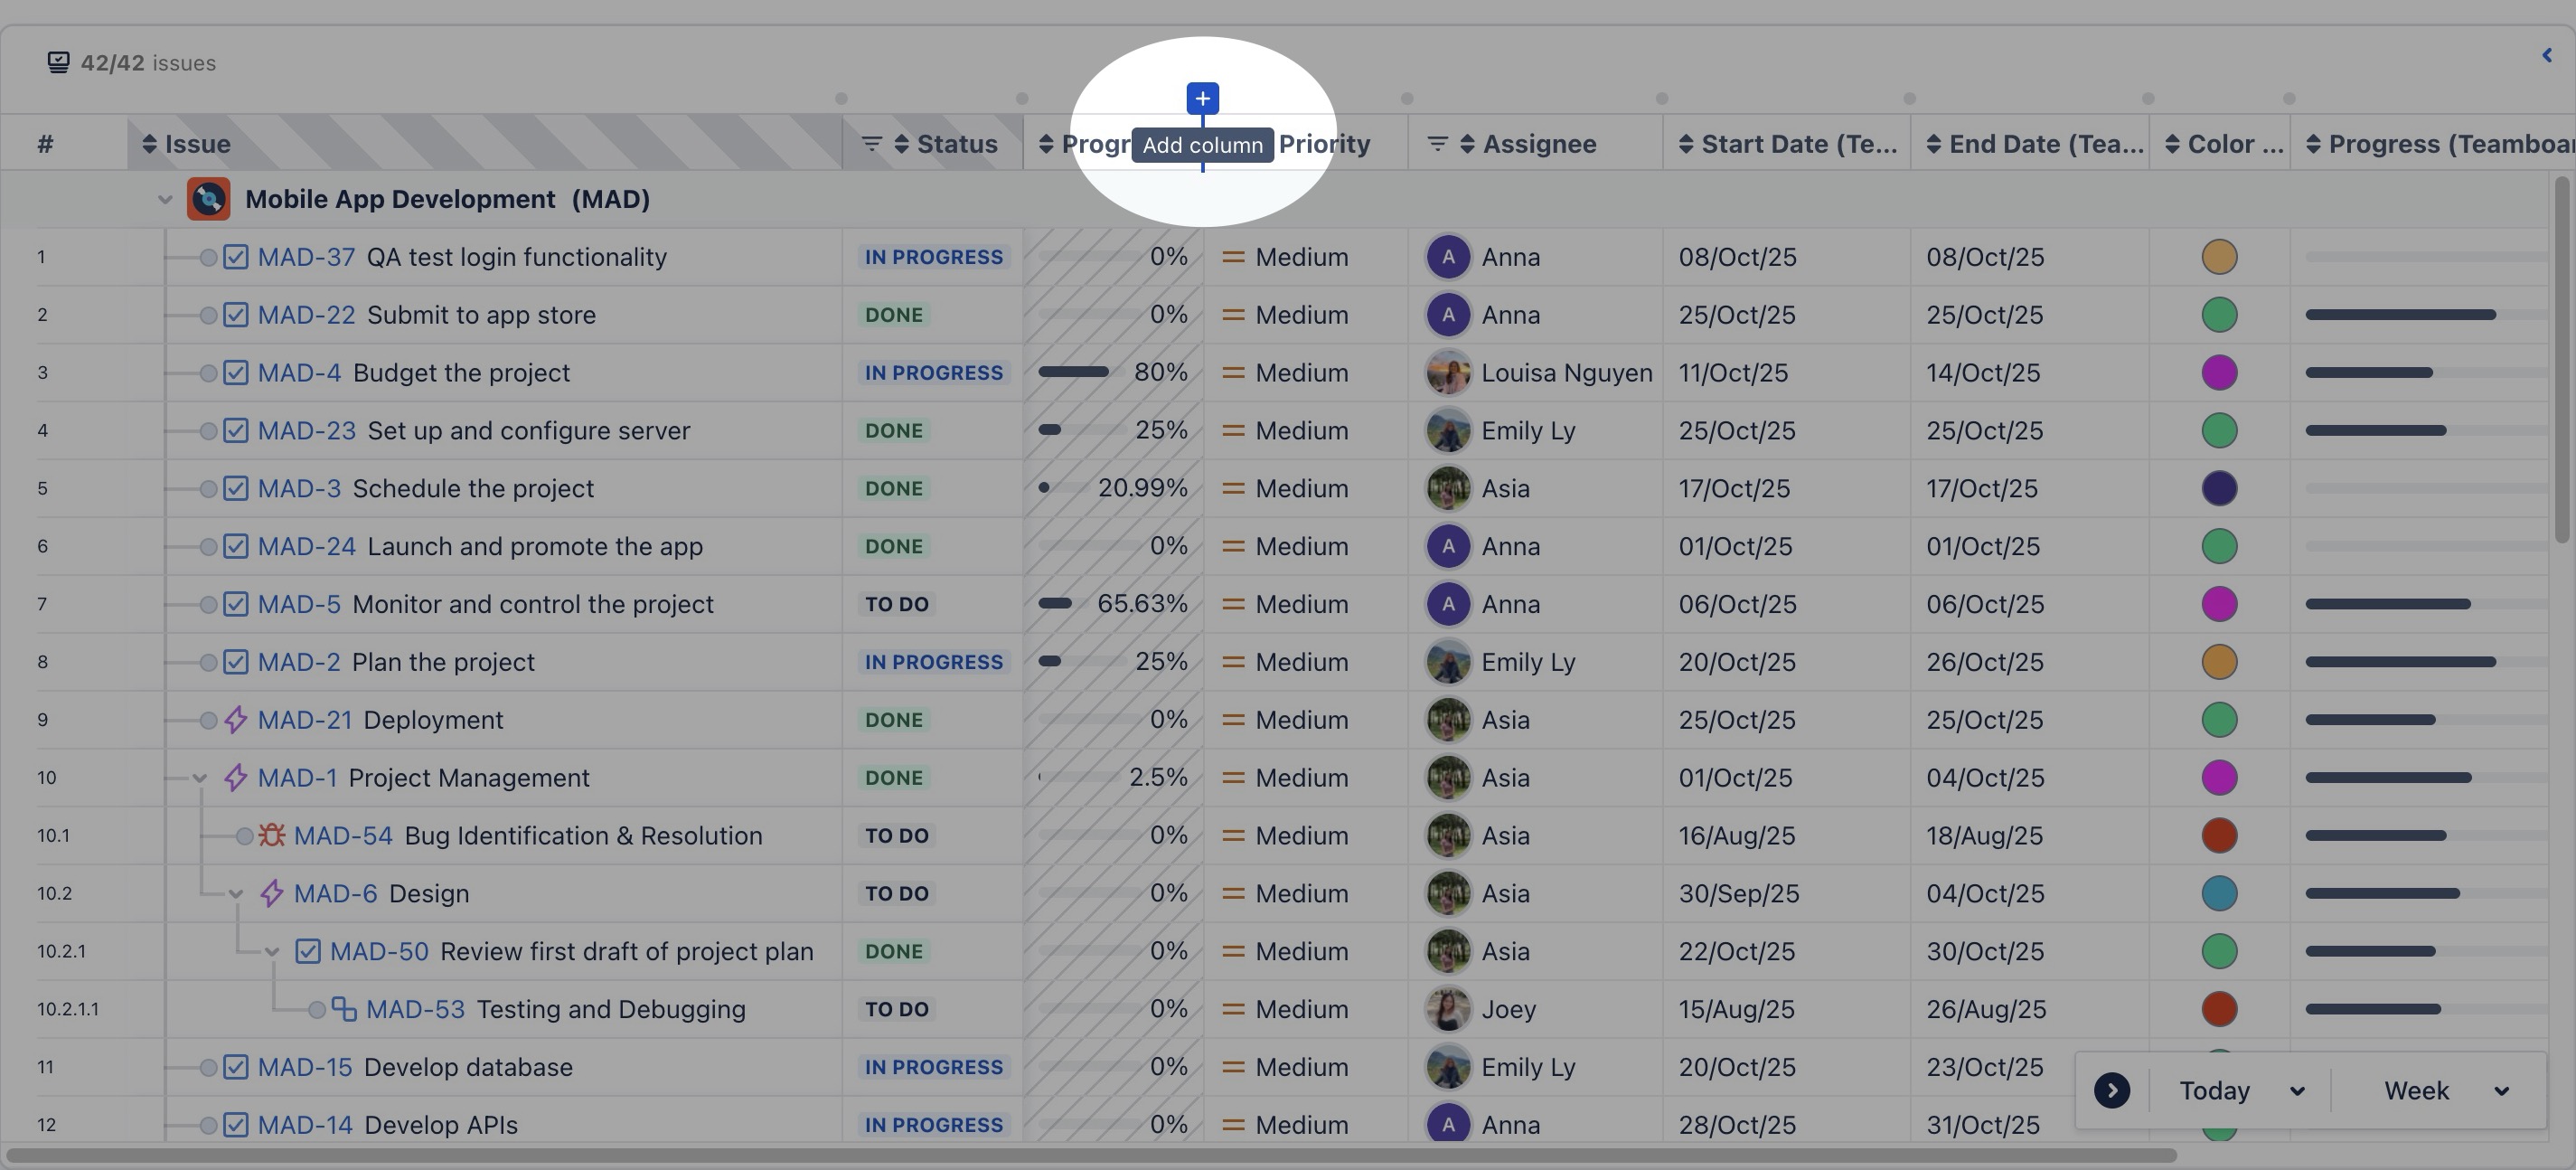
Use the search bar or scroll down the list to find the field you want to add.
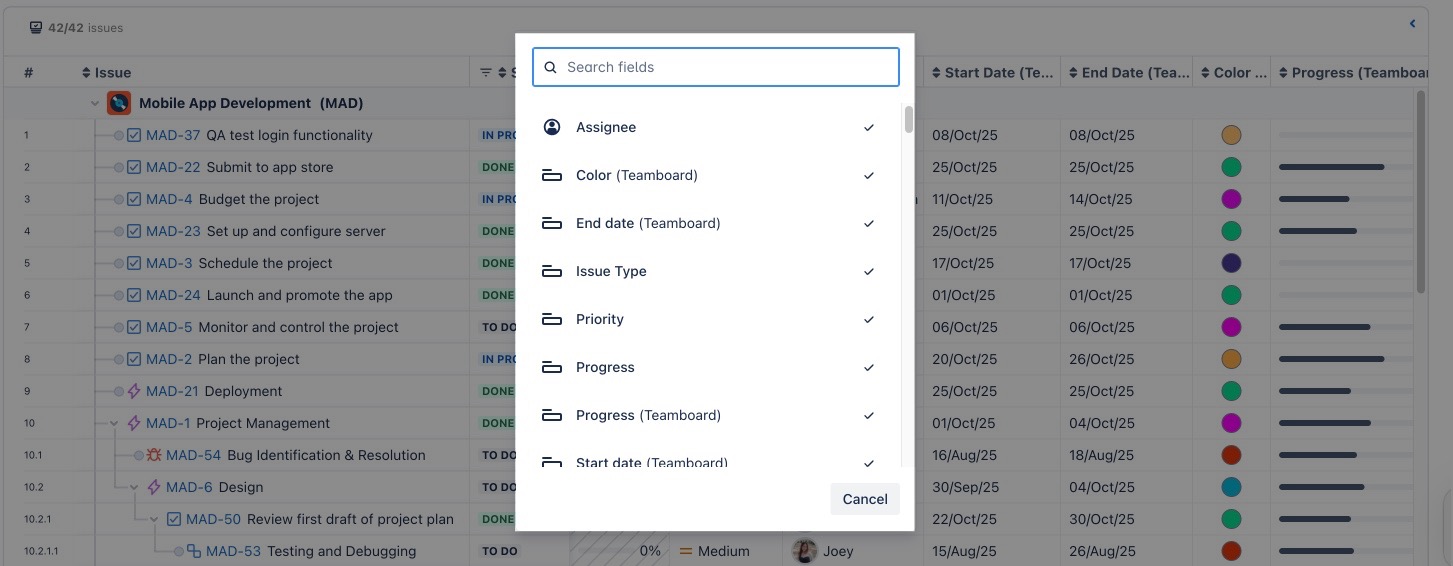
Select the field, and it will appear as a new column next to the selected column.
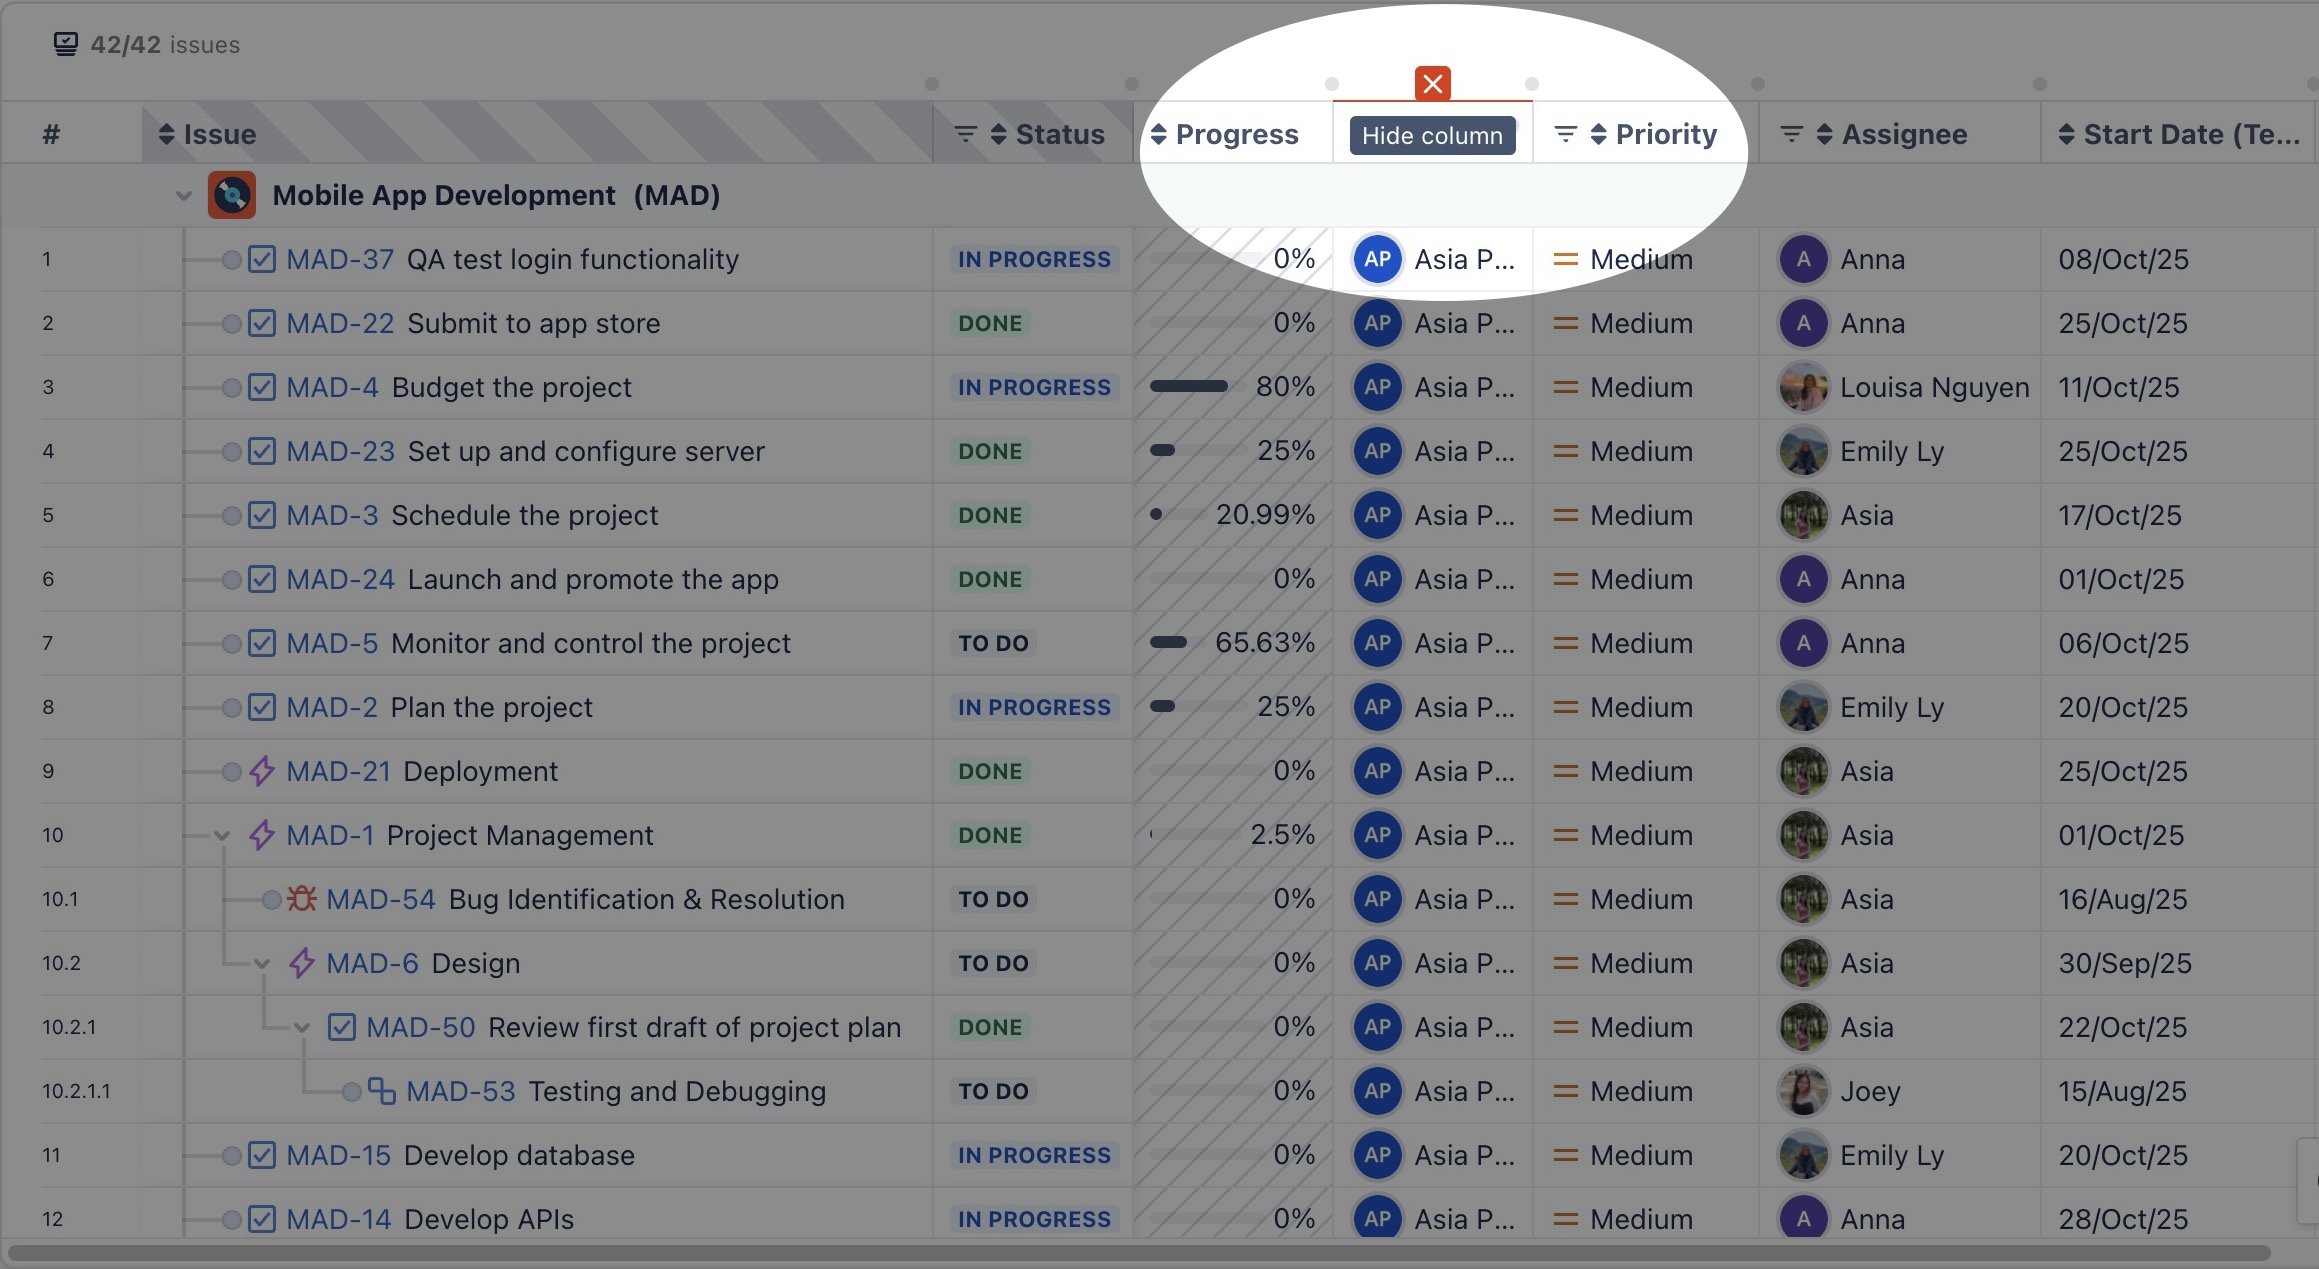
To remove a column:
Hover over the middle of the column header
Click the
 icon to remove the column.
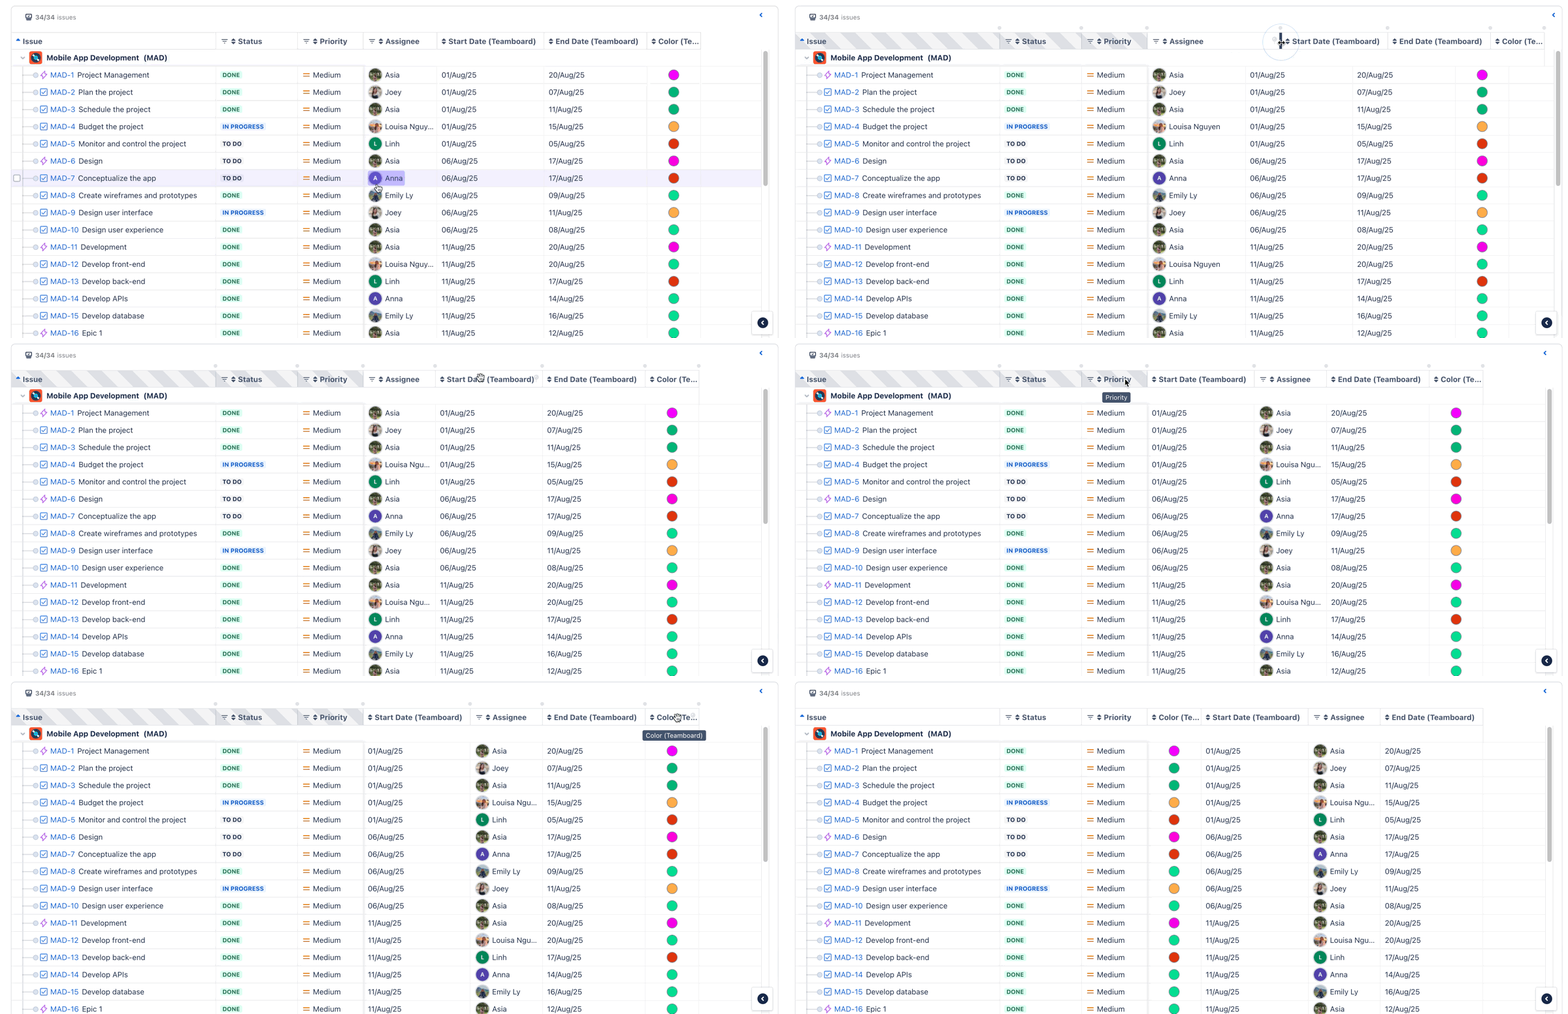
Resize and arrange the columns
To resize columns, click and drag the left or right border of a column.
To rearrange columns, hover over the column, then click and drag it to a new position.
Pin or unpin columns
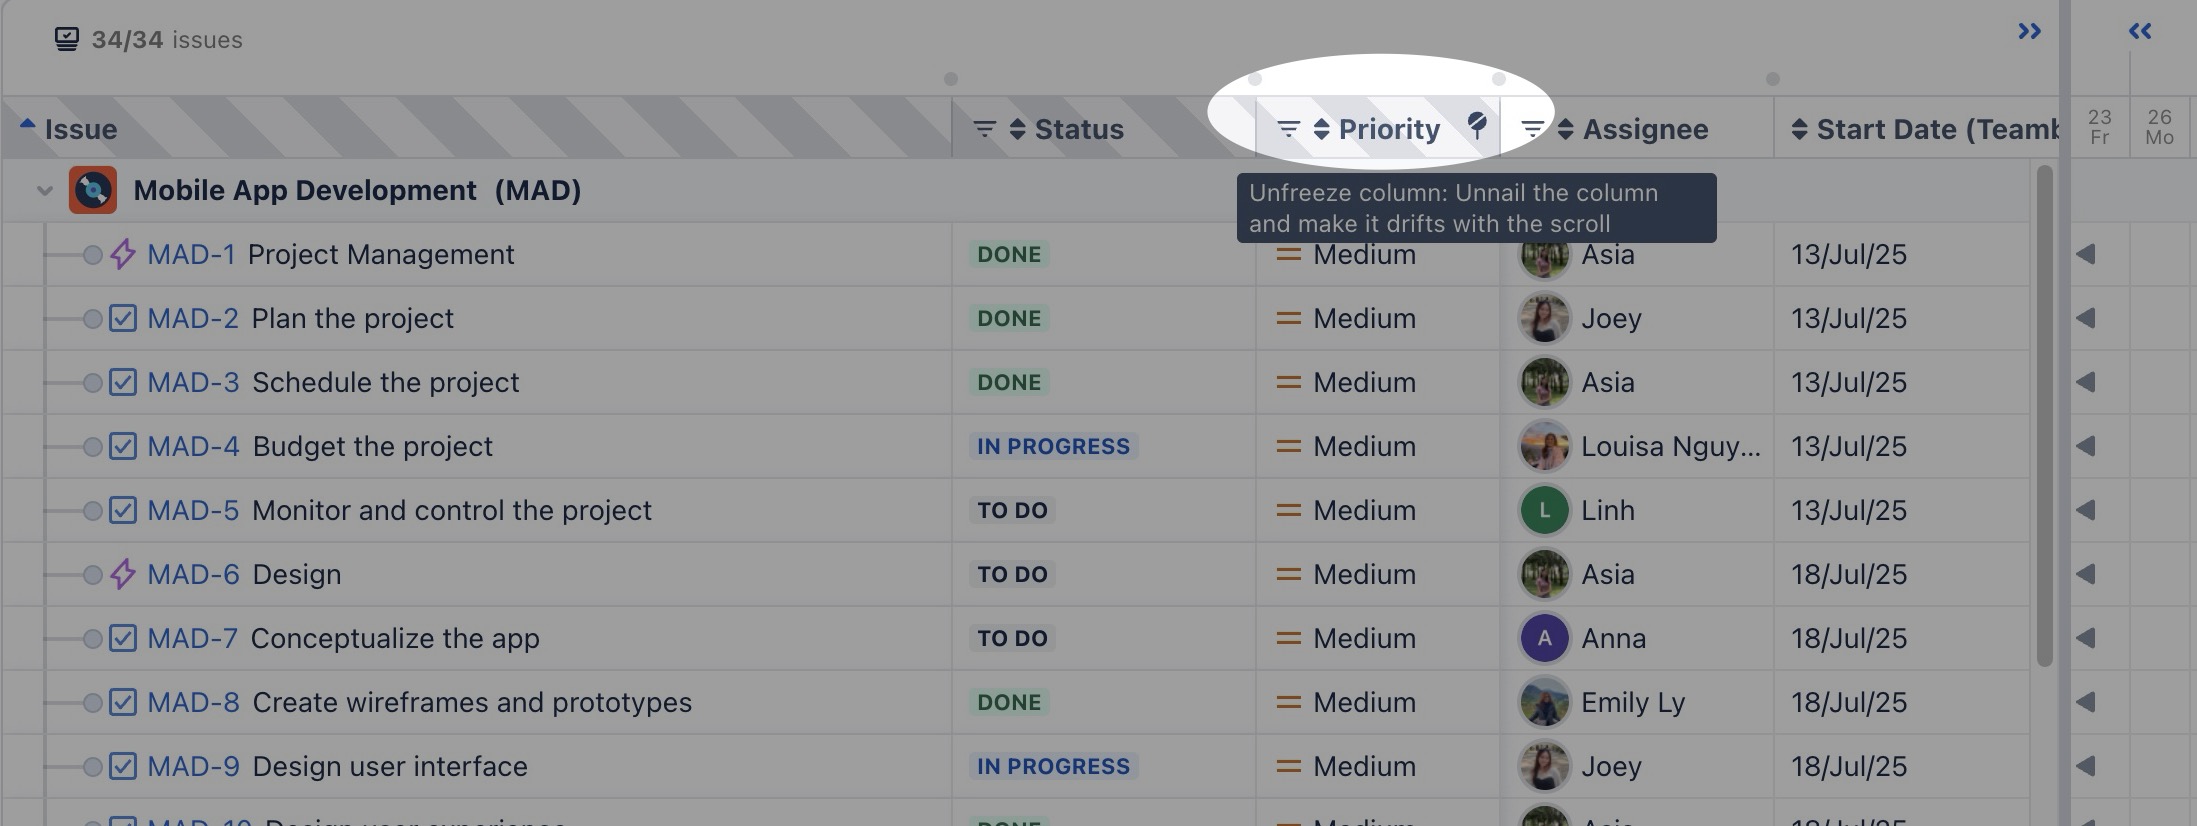
By default, Issue and Status columns are pinned to the left. You can pin other columns as well using the pin function.
To Pin a Column
Hover over the column header you want to pin.
Click the 📍 (Pin) icon to keep the column fixed on the left while scrolling.
To Unpin a Column
Hover over the pinned column header.
Click the 📍 (Unpin) icon to return the column to its normal position.
Expand to full table view
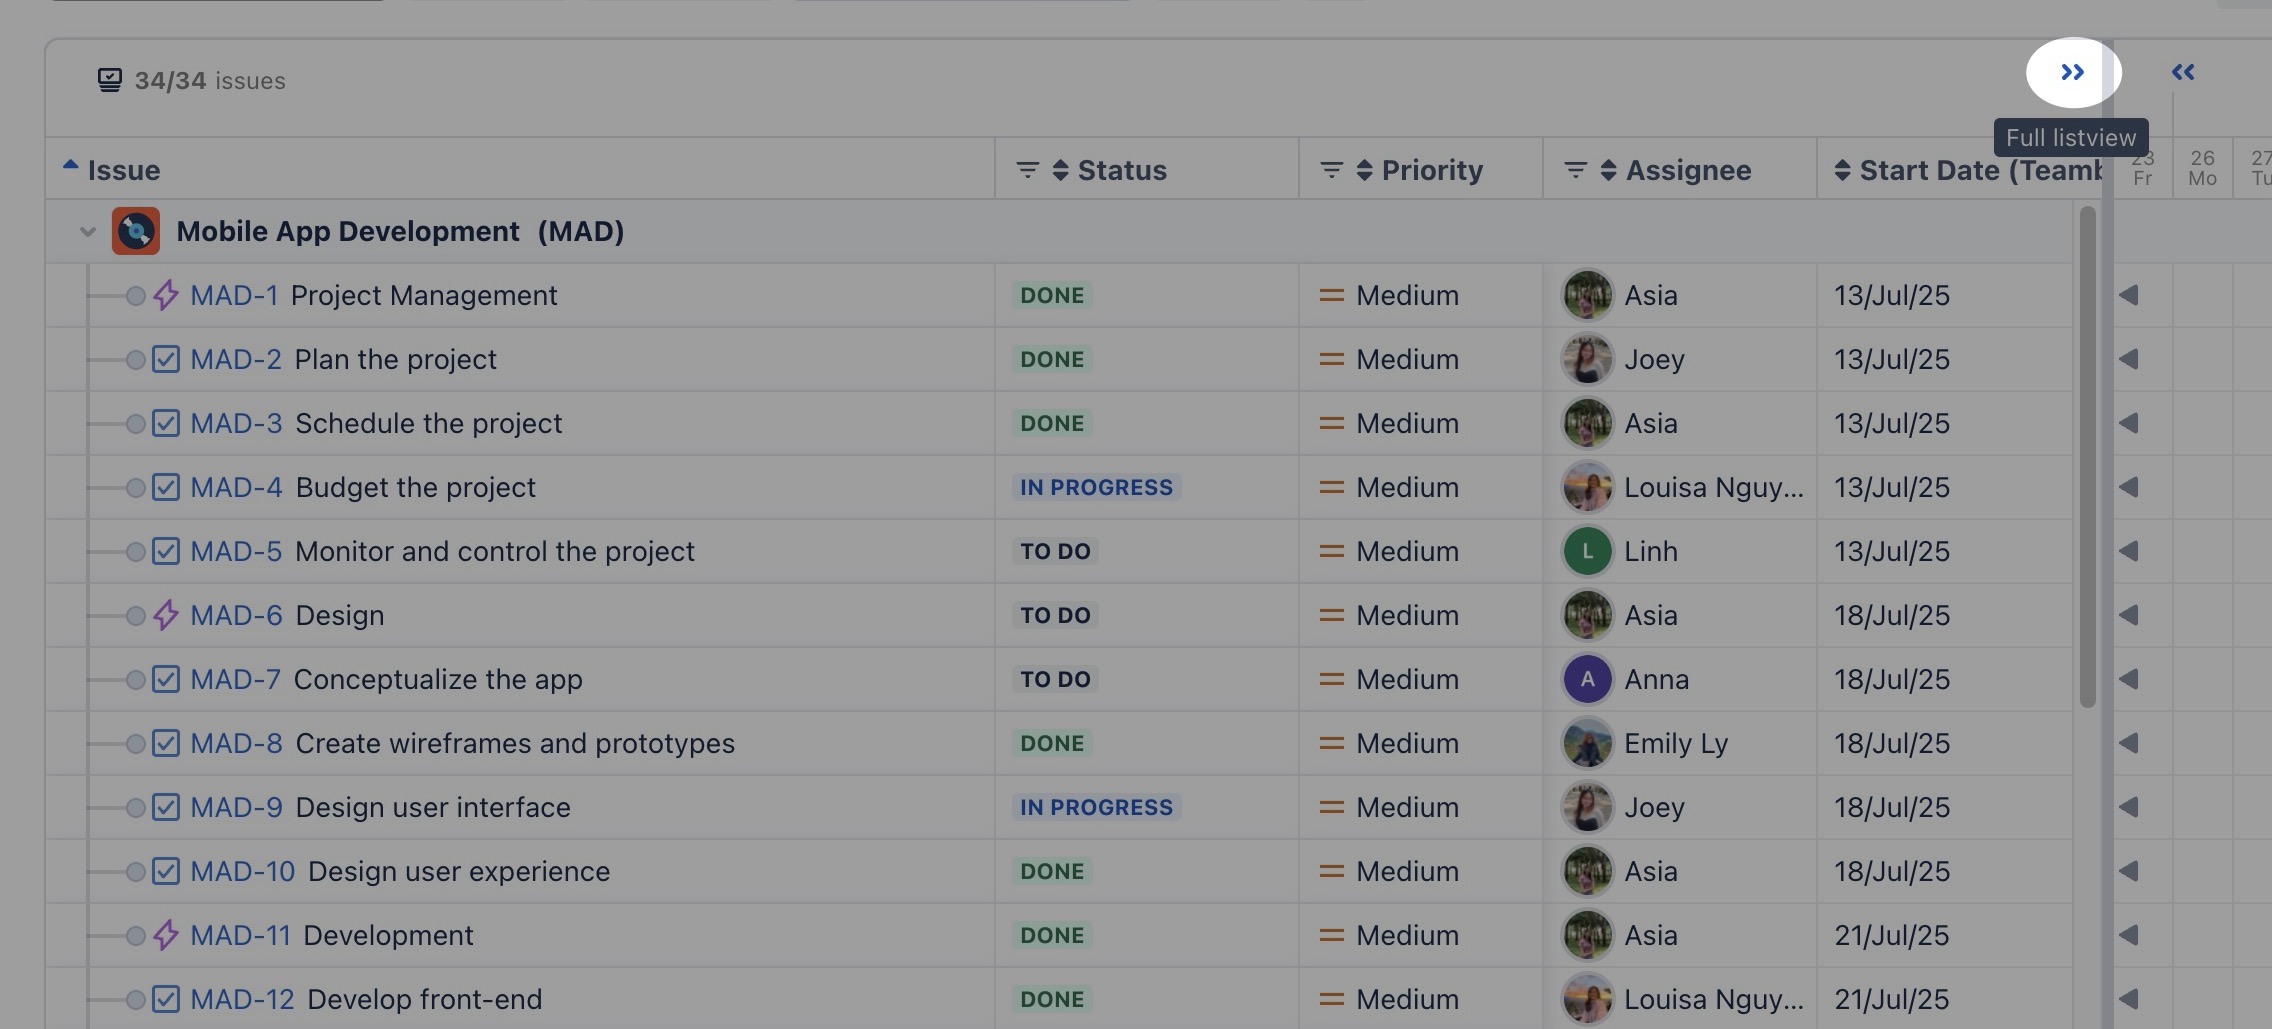
Click on the expand icon (>>) to open the full work items table, providing a detailed, Excel-like view of your project’s tasks.
Sorting
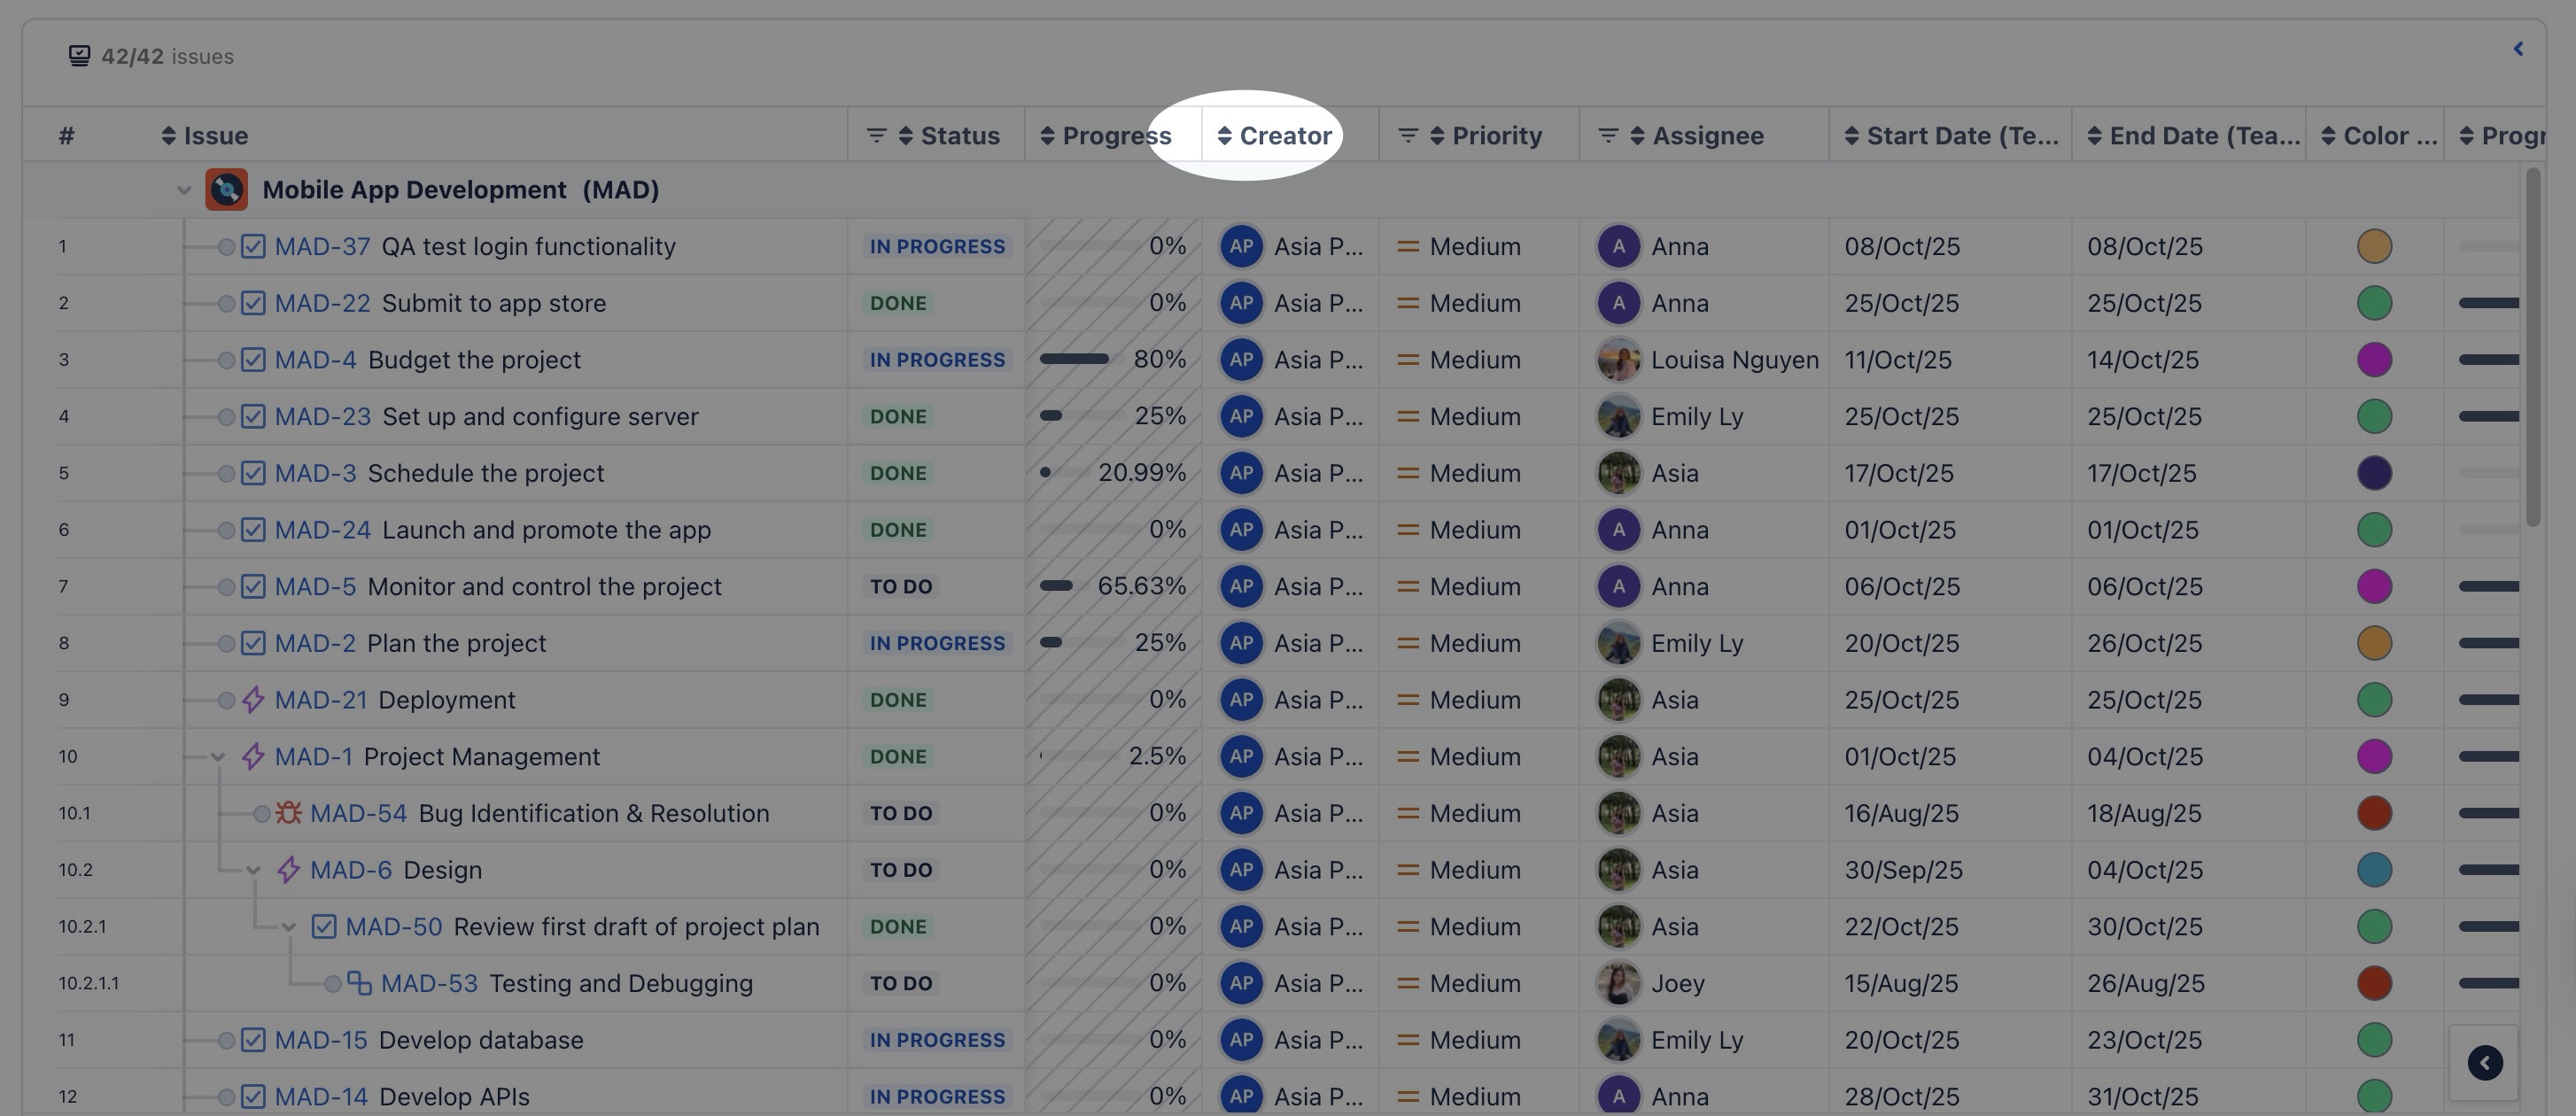
Sorting helps you organize data quickly in the table. When you apply sorting, the view is temporarily modified and the changes are visible only to you (it does not affect other users).
To sort data in the table:
Hover over the column header you want to sort.
Click the sort icon (▲ or ▼) that appears next to the column name.
Click again to toggle between:
▲ Ascending (A–Z)
▼ Descending (Z–A)
.png)