.png)
-
App Admin / Team Admin: Can create new teams and manage team members.
-
Team Members: Can only view the team.
To manage teams at the Team Level, navigate to the ![]()

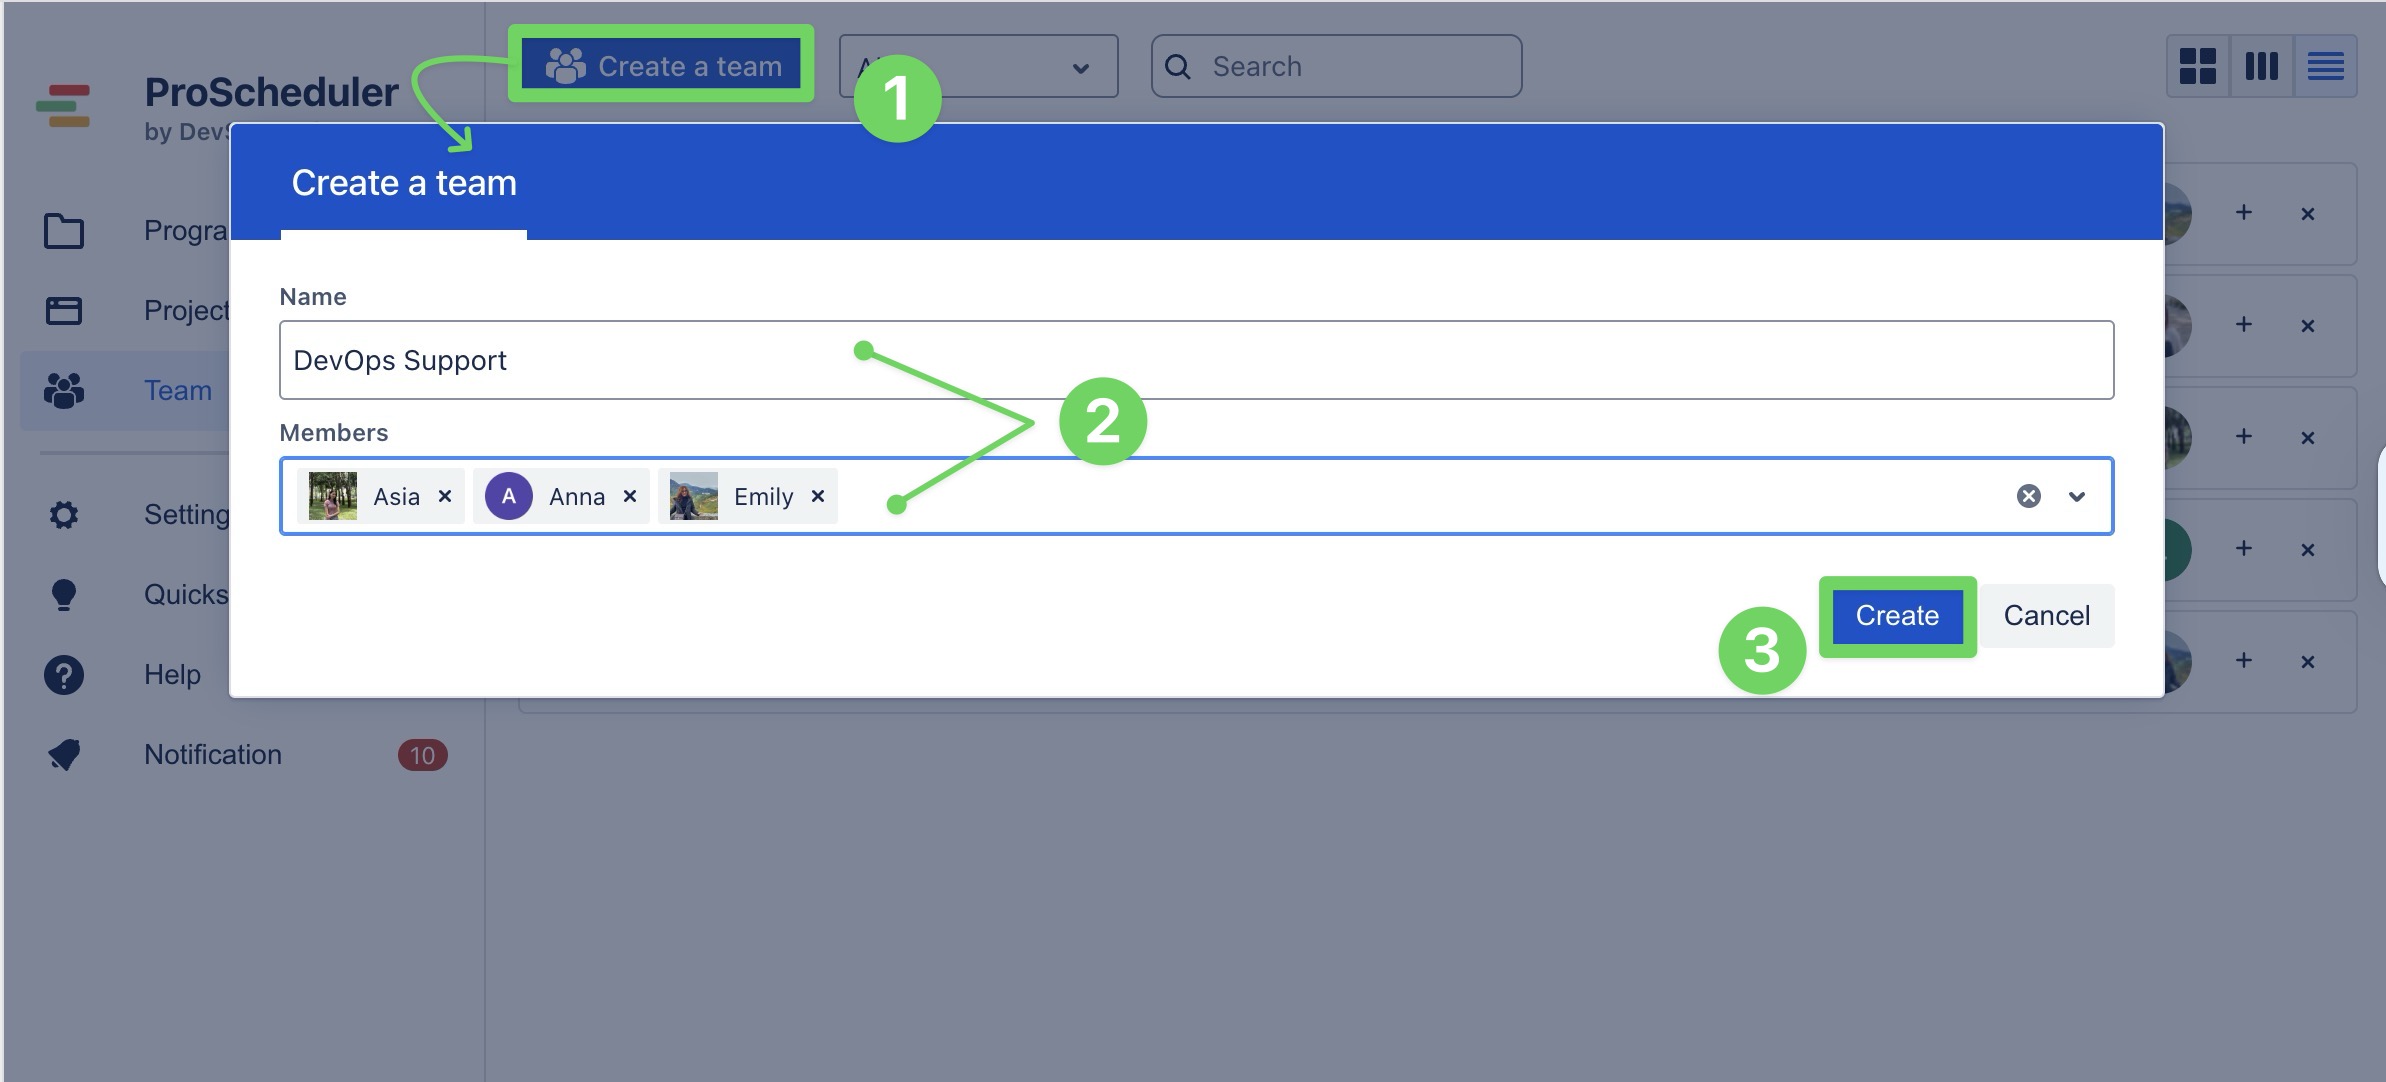
Creating a new team
-
Click

-
A pop-up panel will appear:
-
In the Name field, enter your team's name.
-
In the Members field, search for and add members from your Jira user list.
-
Click

After creating a team, you can assign it to any Project or Program using the Resource Board, making team planning faster and more consistent across your organization.
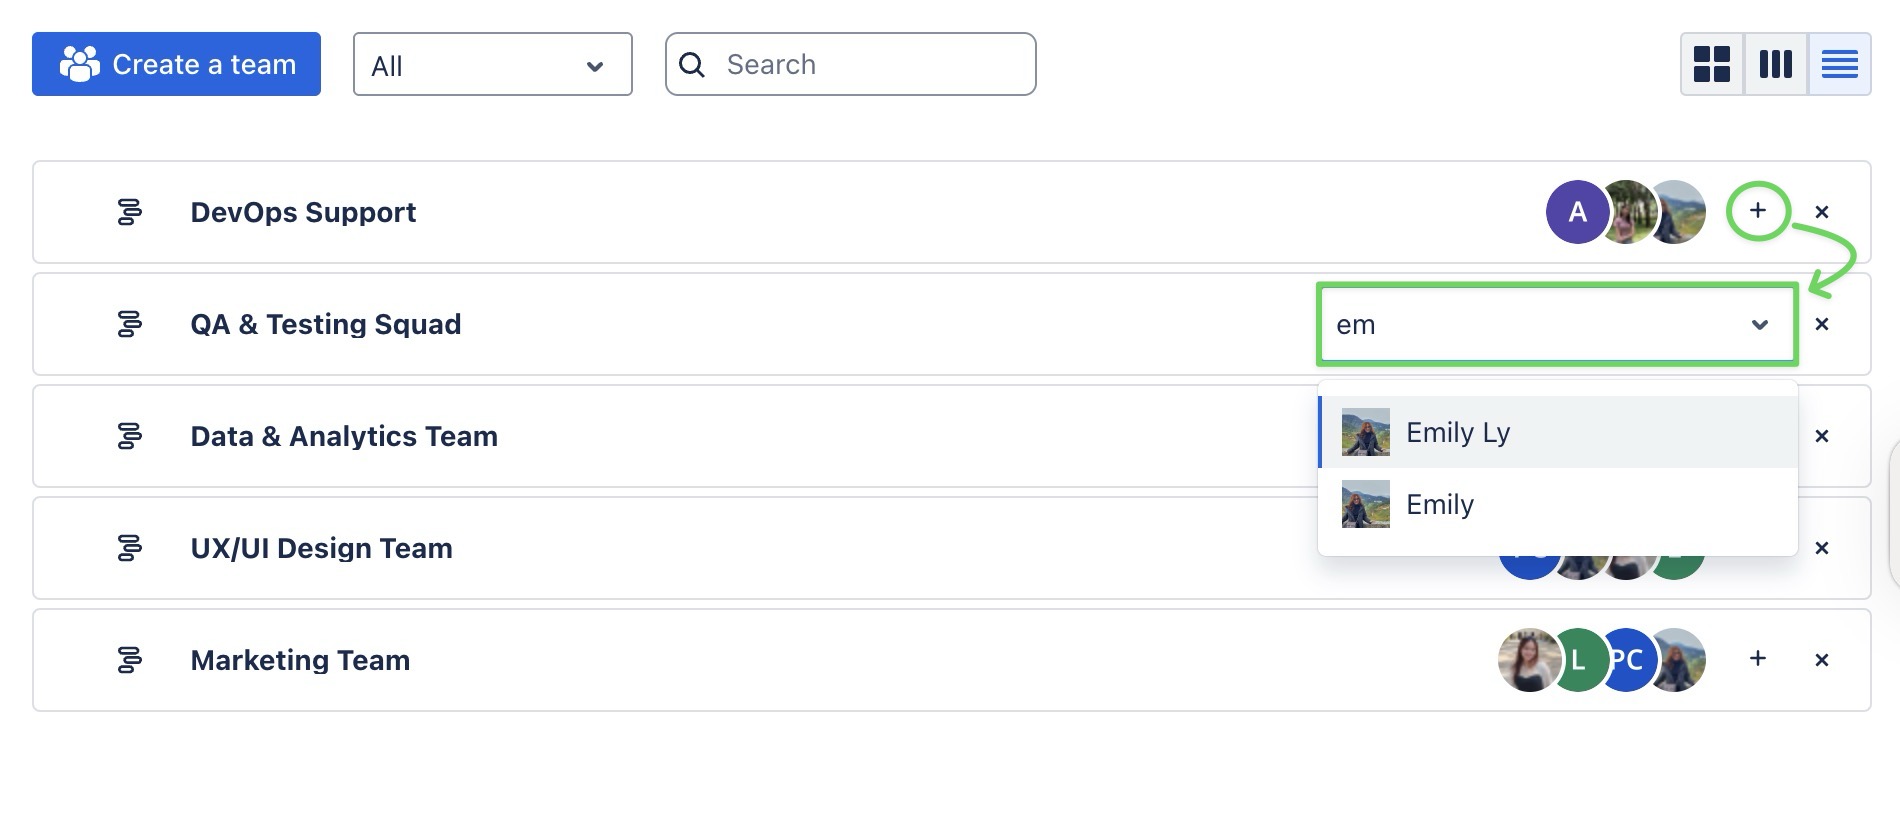
Adding a member to the team
Once a team is created, you can easily add more members:
-
Click the ➕ icon on the team card.
-
In the search field that appears, type the user’s name.
-
Select the user from the dropdown list to add them to the team.
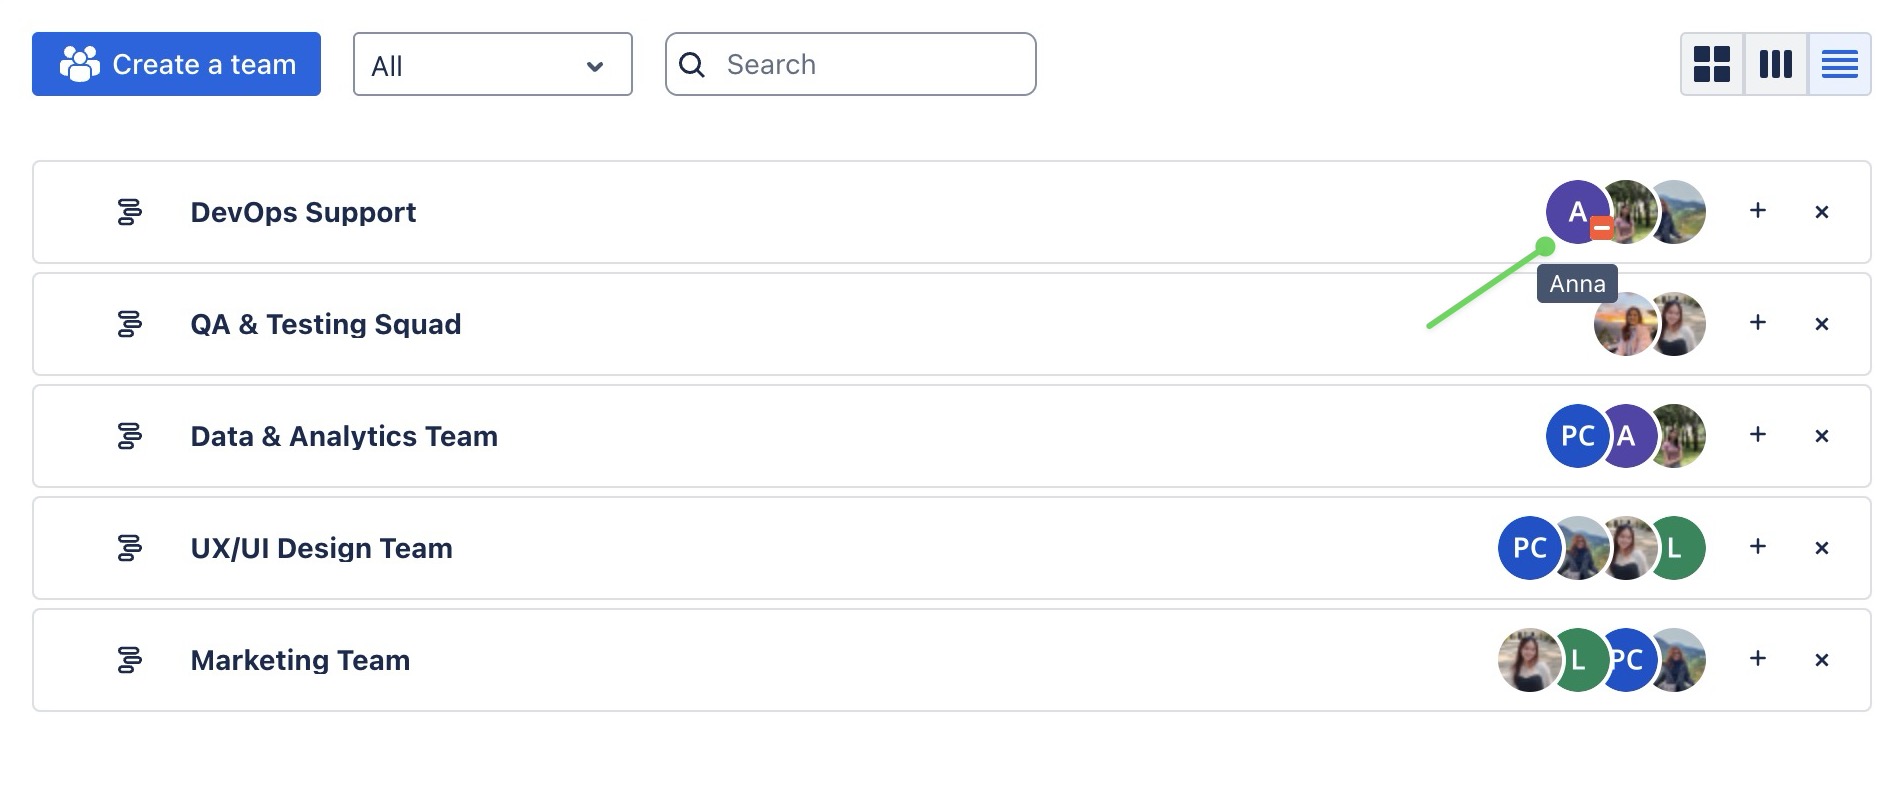
Removing members
To remove a member from a team, hover over the member’s name and click the 
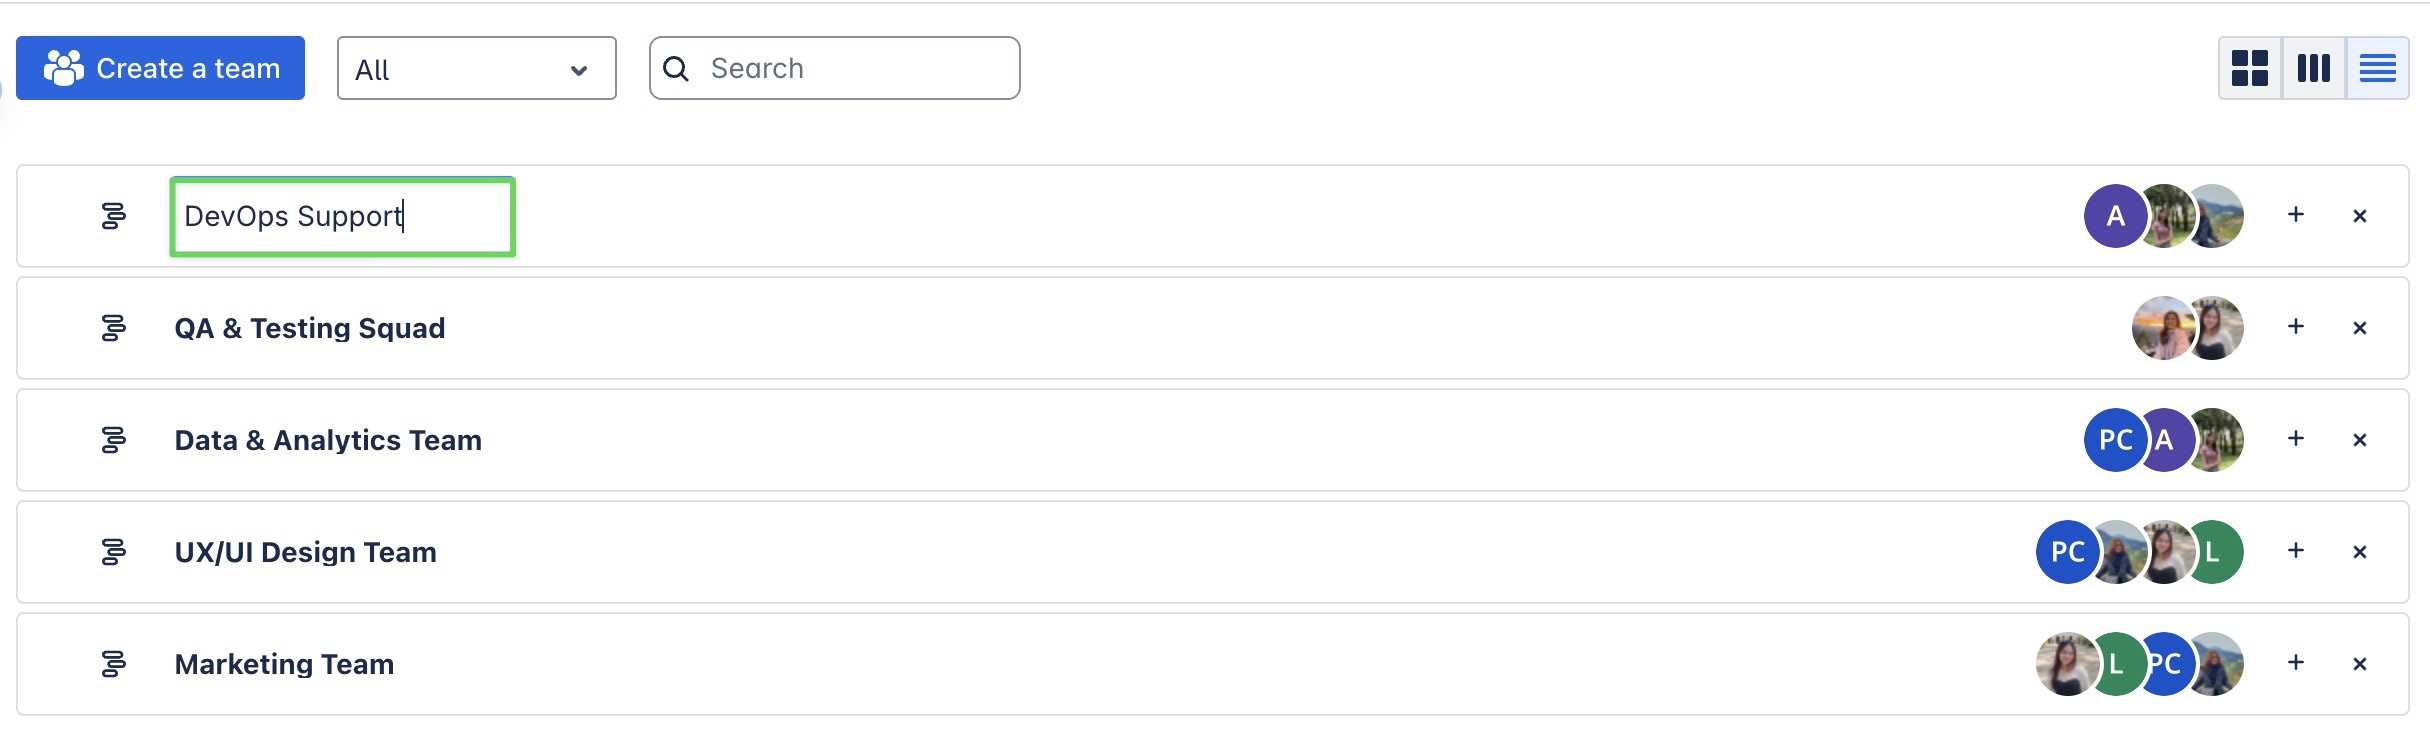
Renaming a team
To rename a team, click on the team’s name to make it editable. Type the new name to save the change.
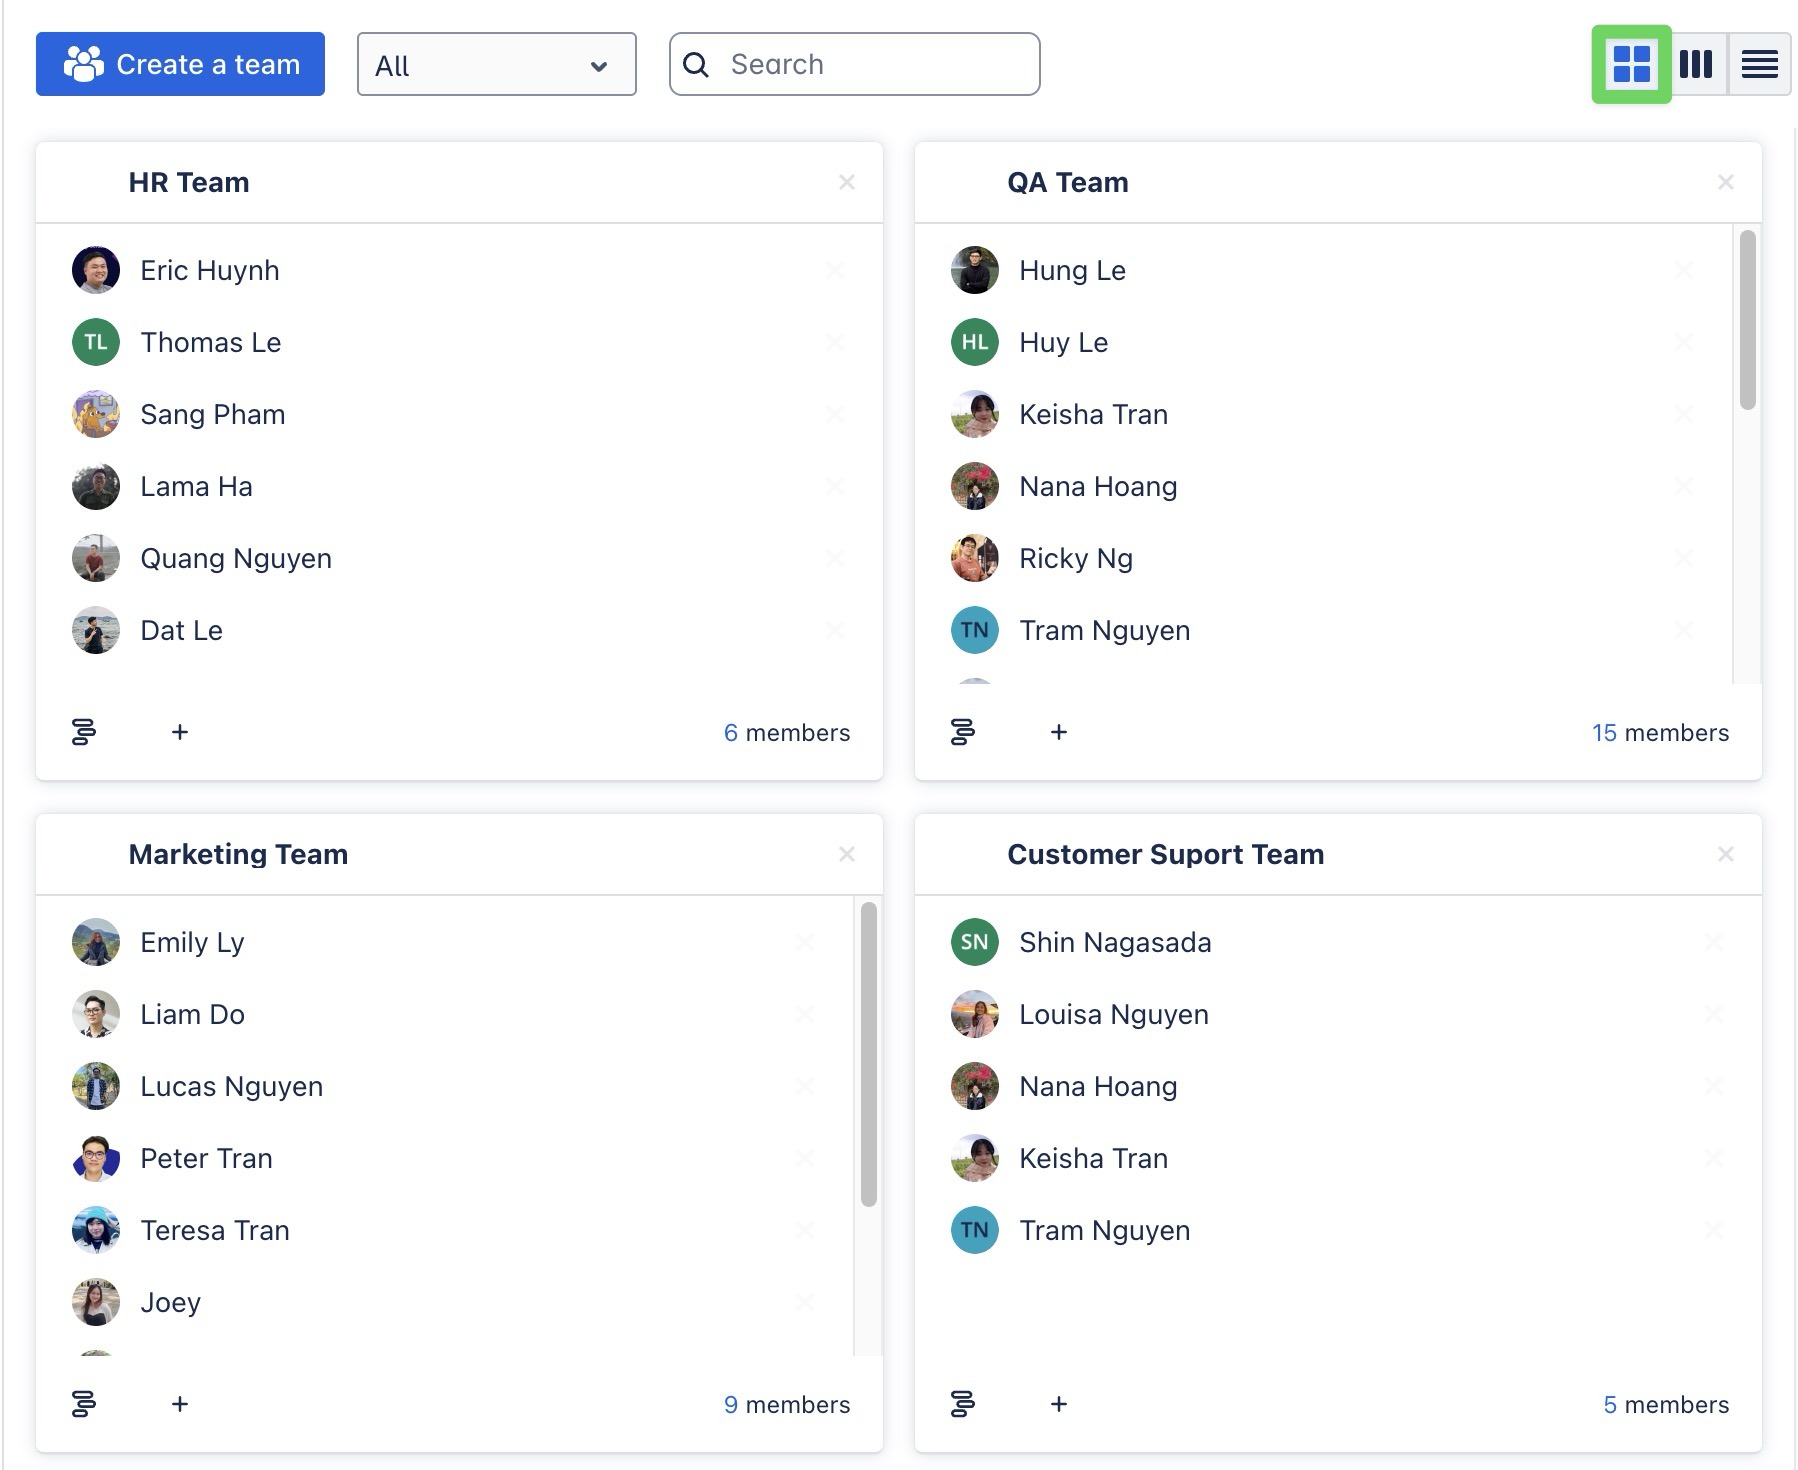
Viewing teams
You can view your teams in three different modes:
-
Grid view: Displays each team in a card layout with members shown inside for a quick visual overview.
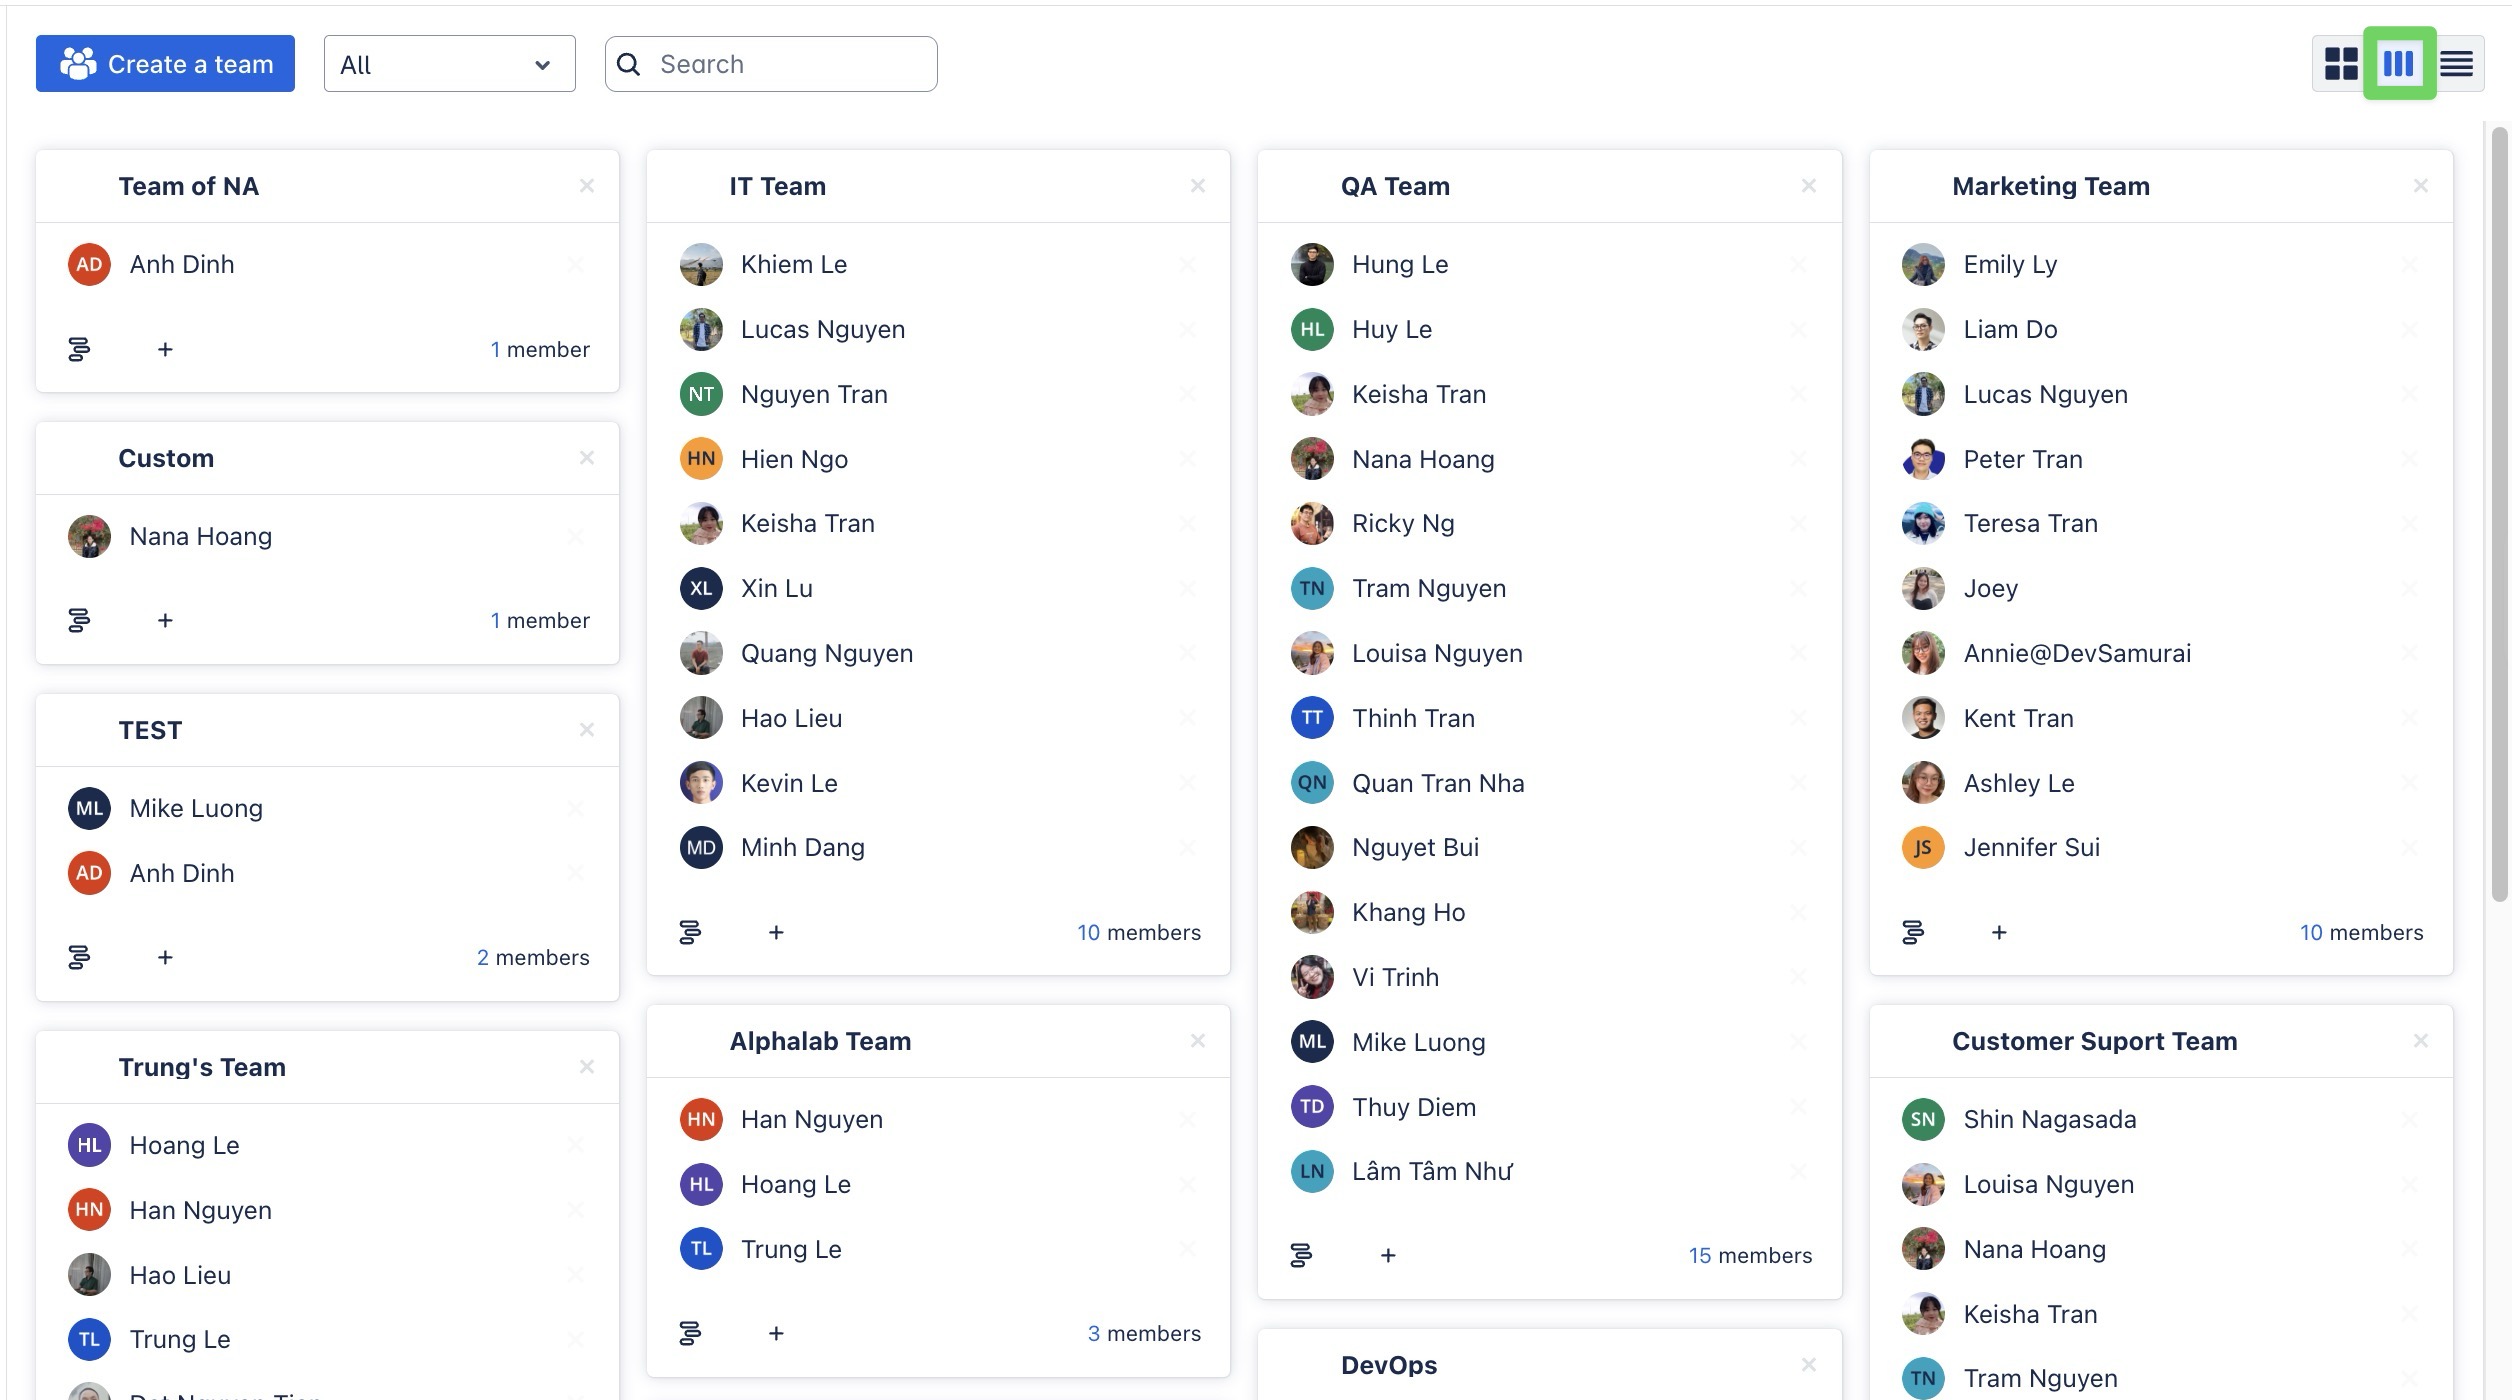
-
Waterfall view: Displays all your teams in vertical columns with full member lists, making it ideal for visually comparing team sizes and managing many teams at once.
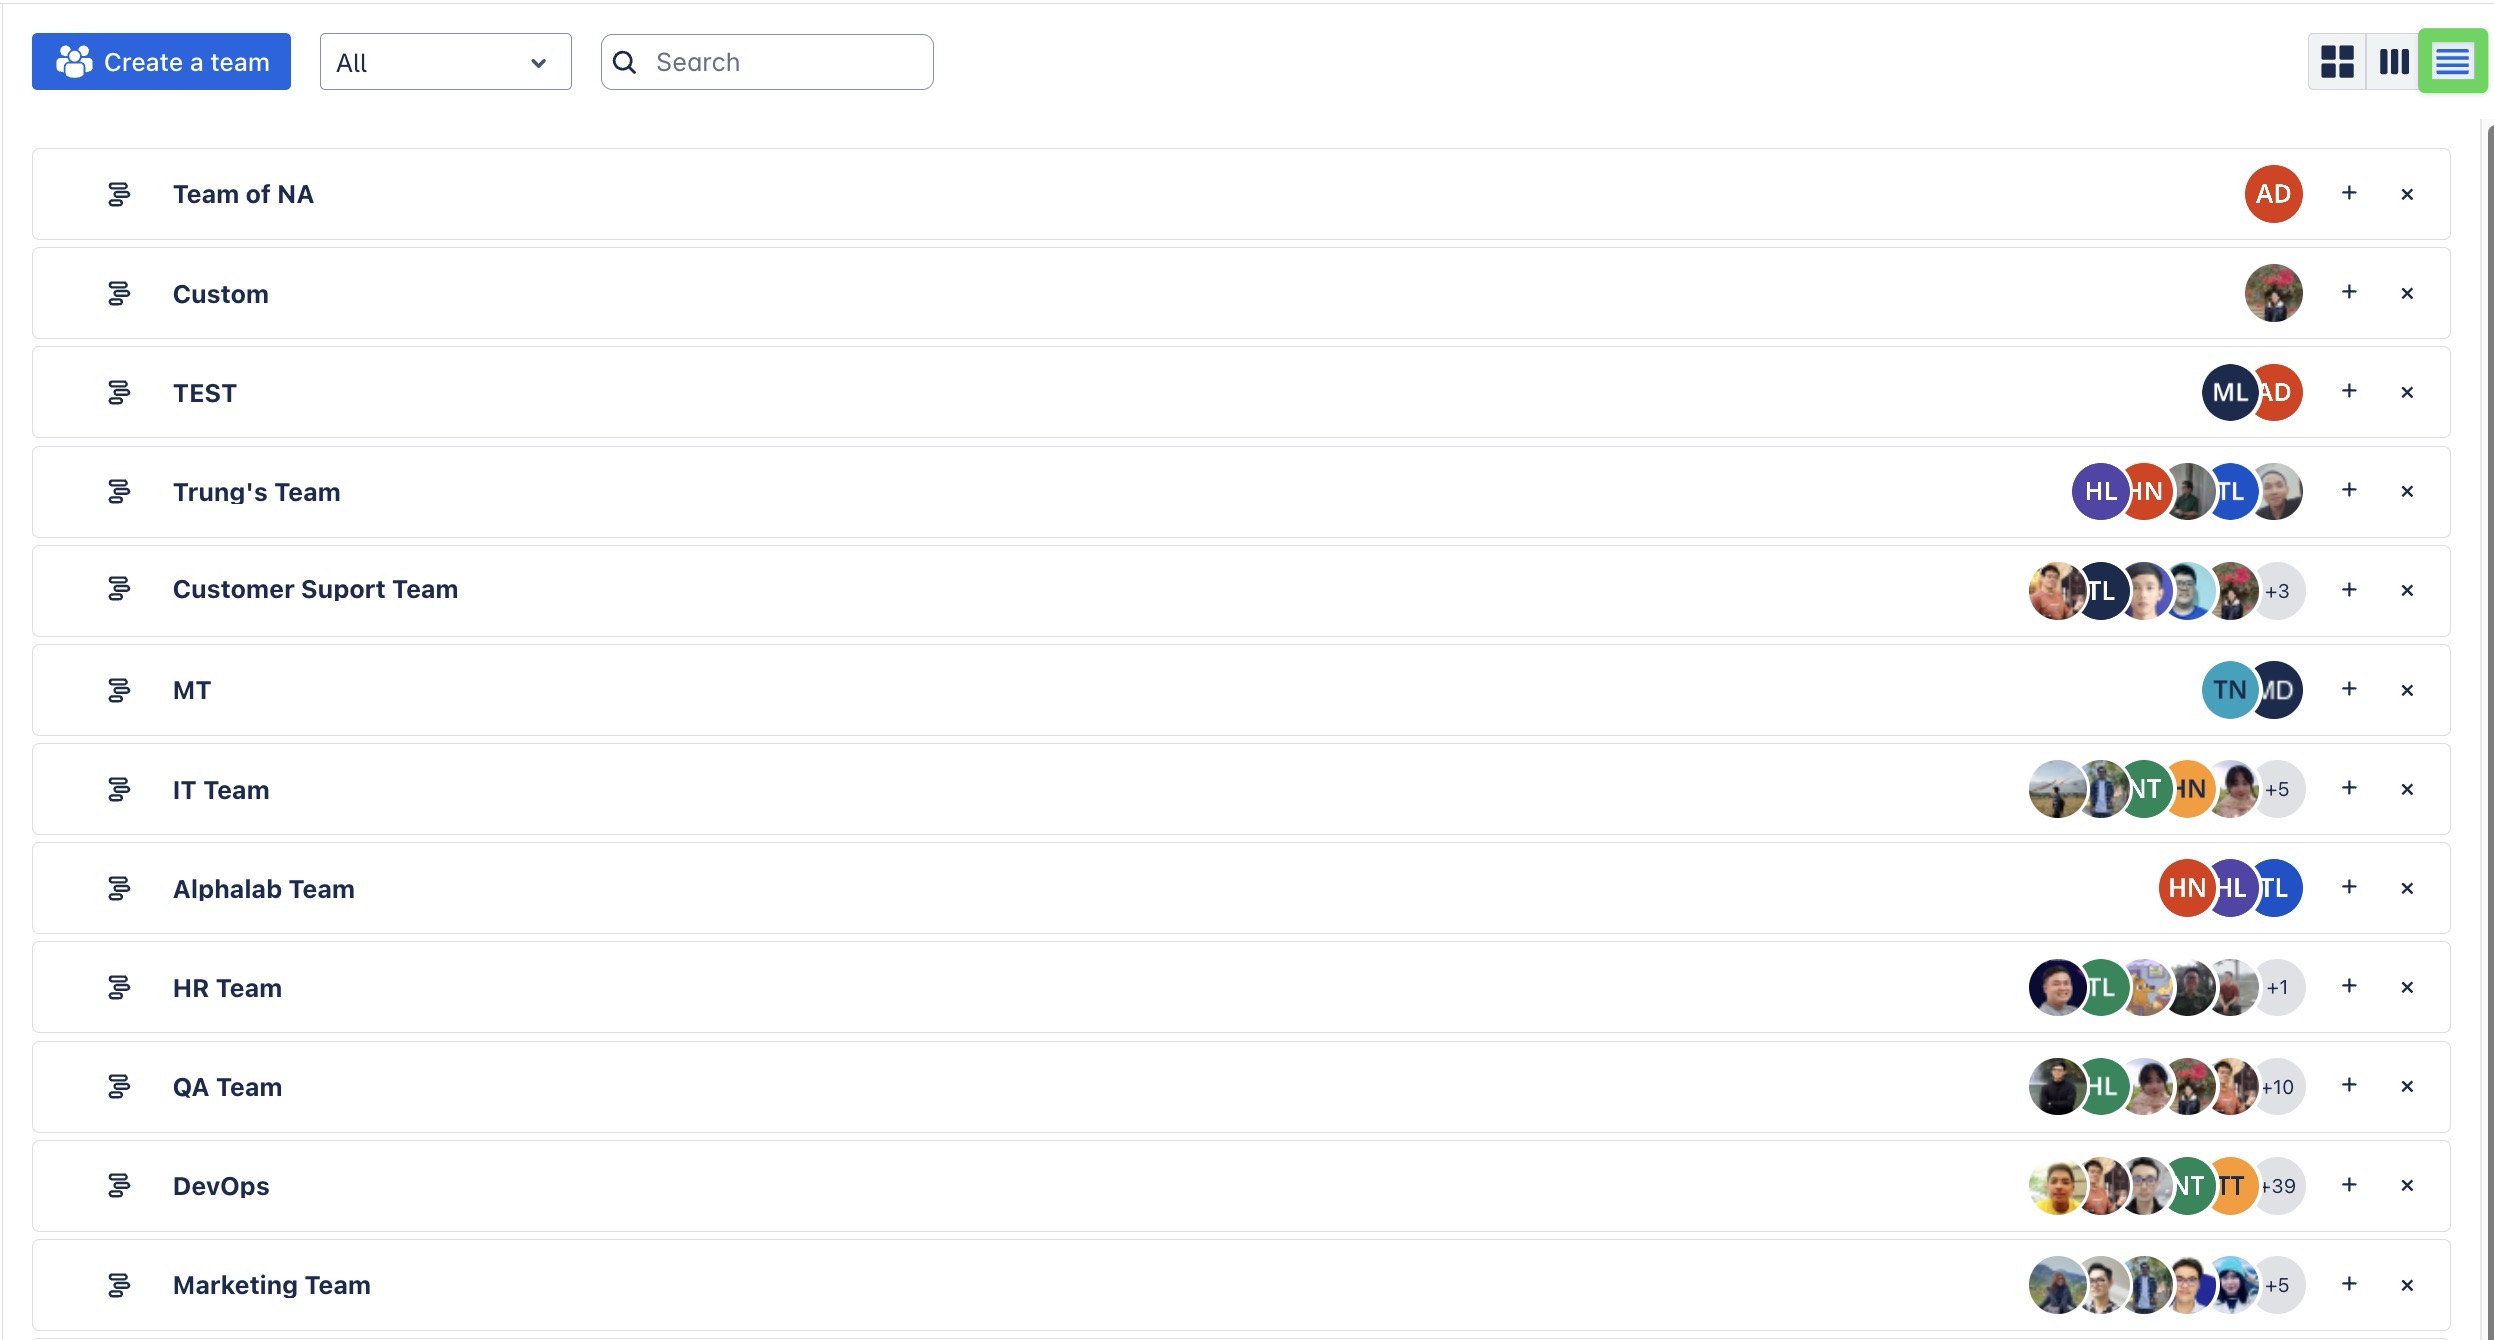
-
List view: Shows all teams in a compact list format for easy scanning and quick access.
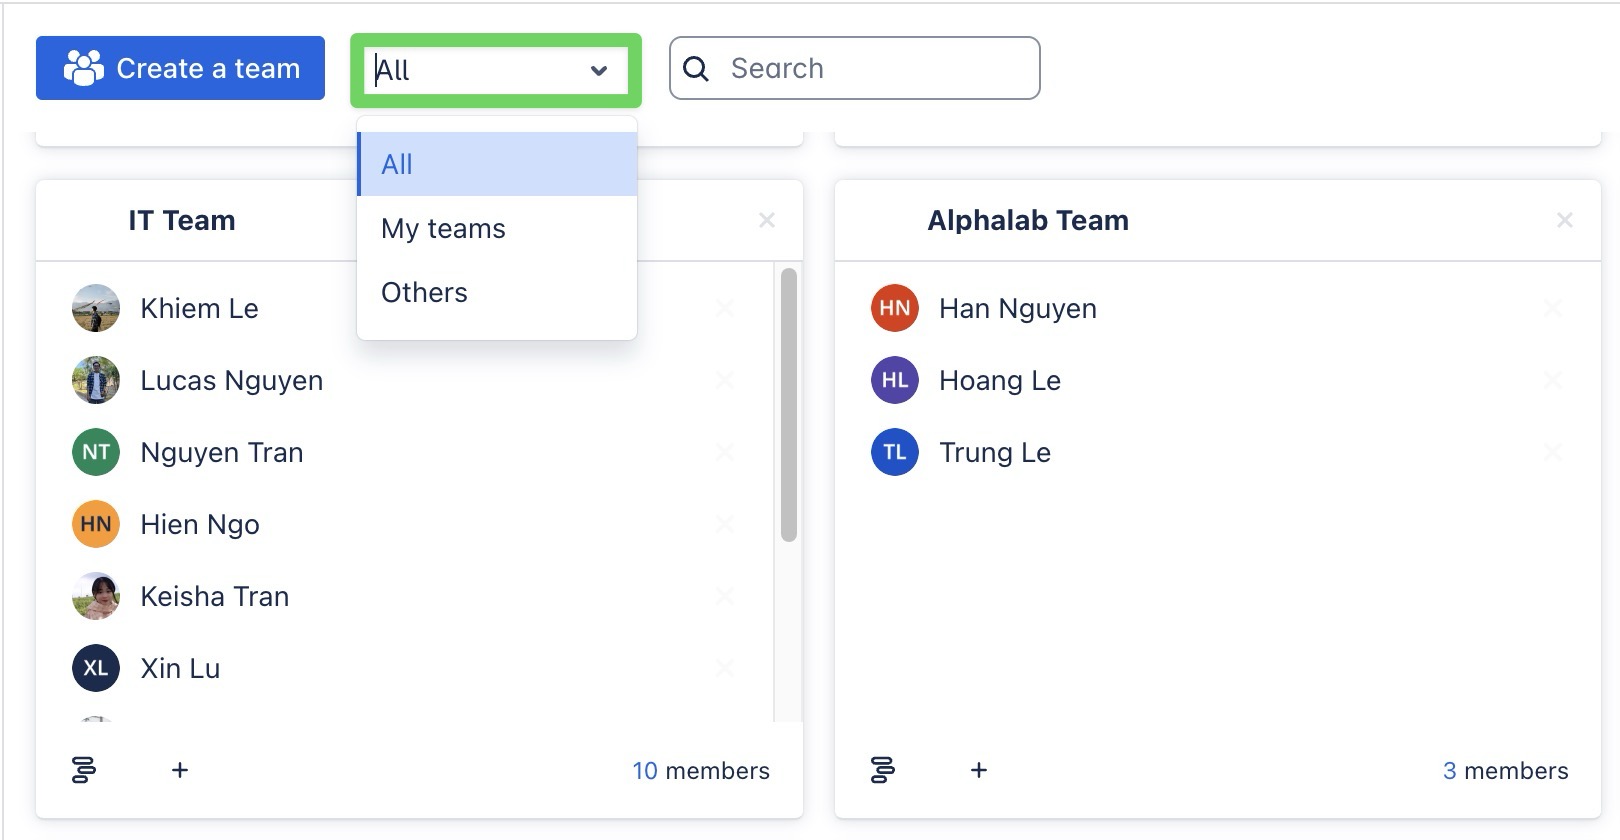
Filtering teams
You can easily filter teams to find what you need faster using these options:
-
All – Shows all available teams in the system.
-
My teams – Displays only the teams where you are a listed member.
-
Others – Lists teams that do not include you as a member.
Working on Team Level
To manage at the Team Level, go to the Team section. Hover over the team you want to manage and click 
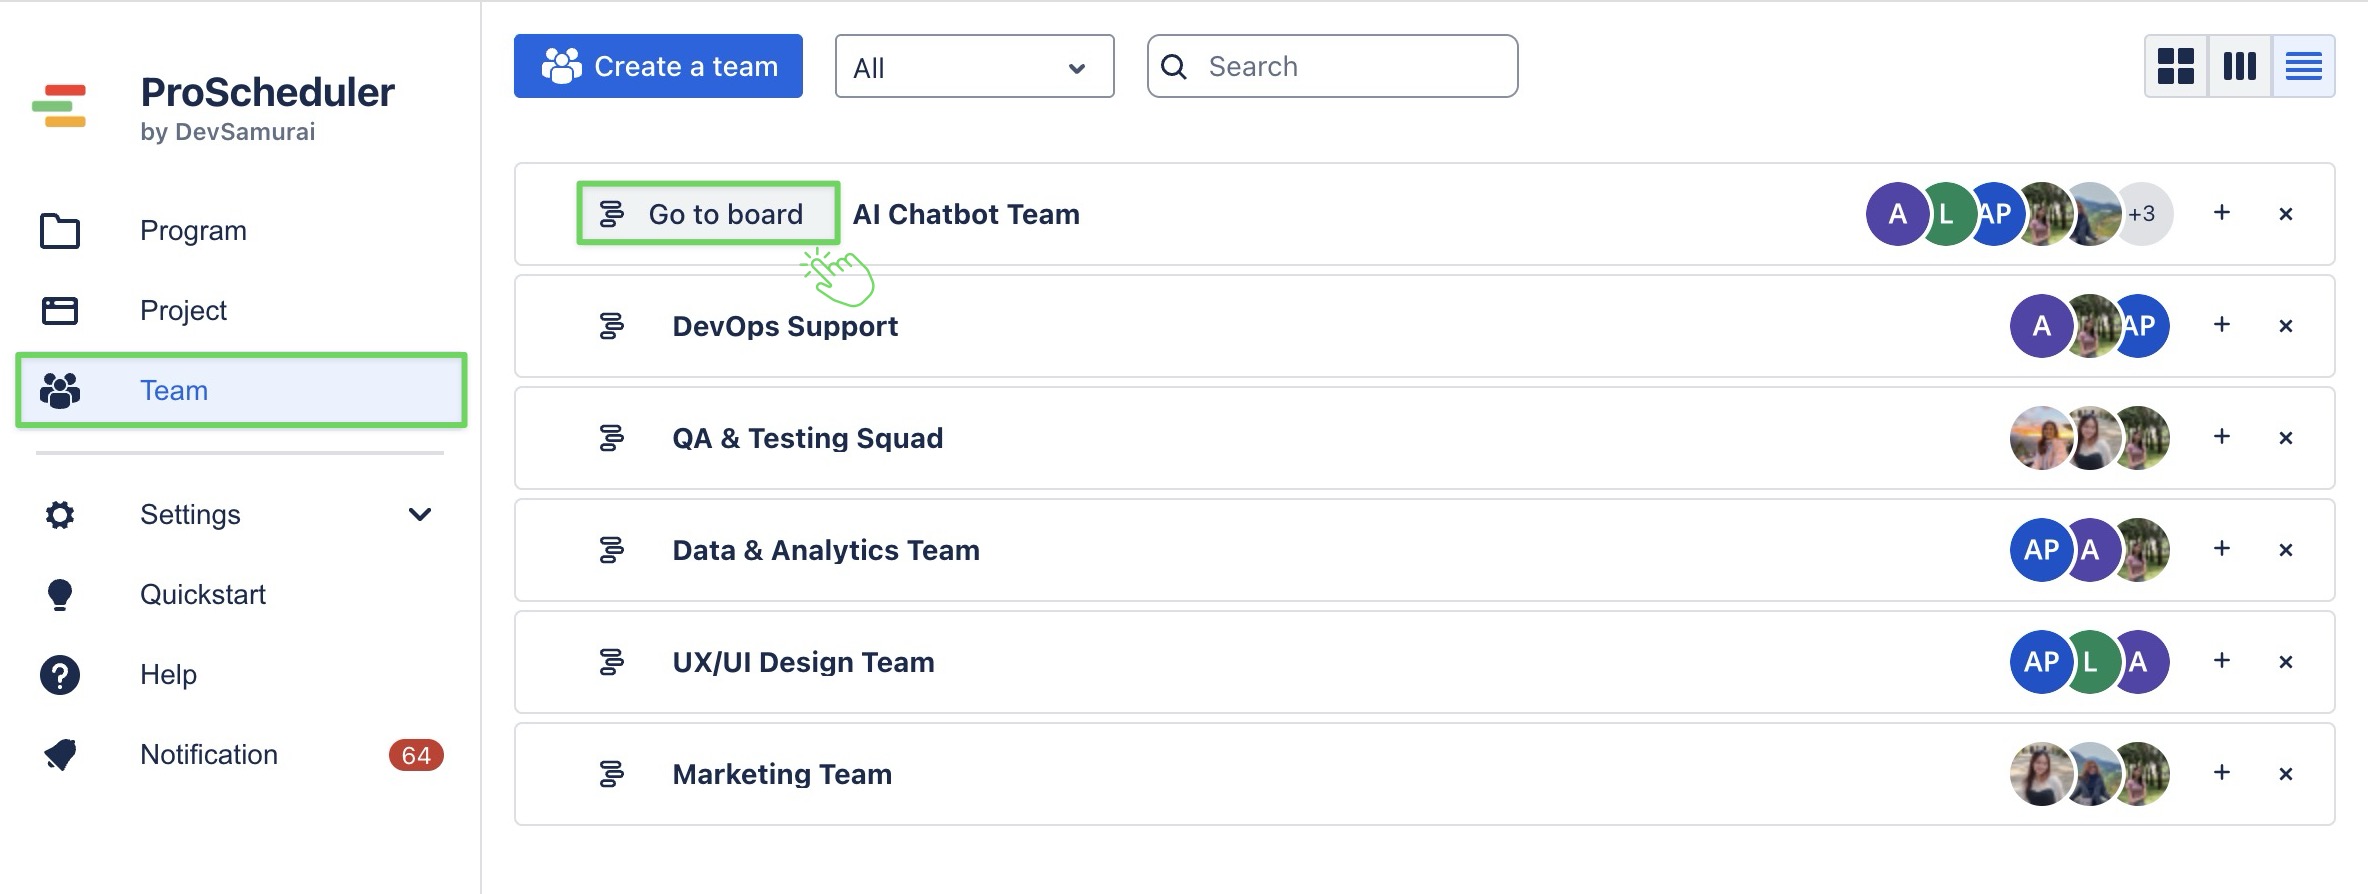
Within the Team section, you can access the following boards:
-
Schedule Board – Plan and manage resources efficiently.
-
Timelog Board – Track and log time spent on tasks.
-
Report – Analyze team performance with reports and metrics.
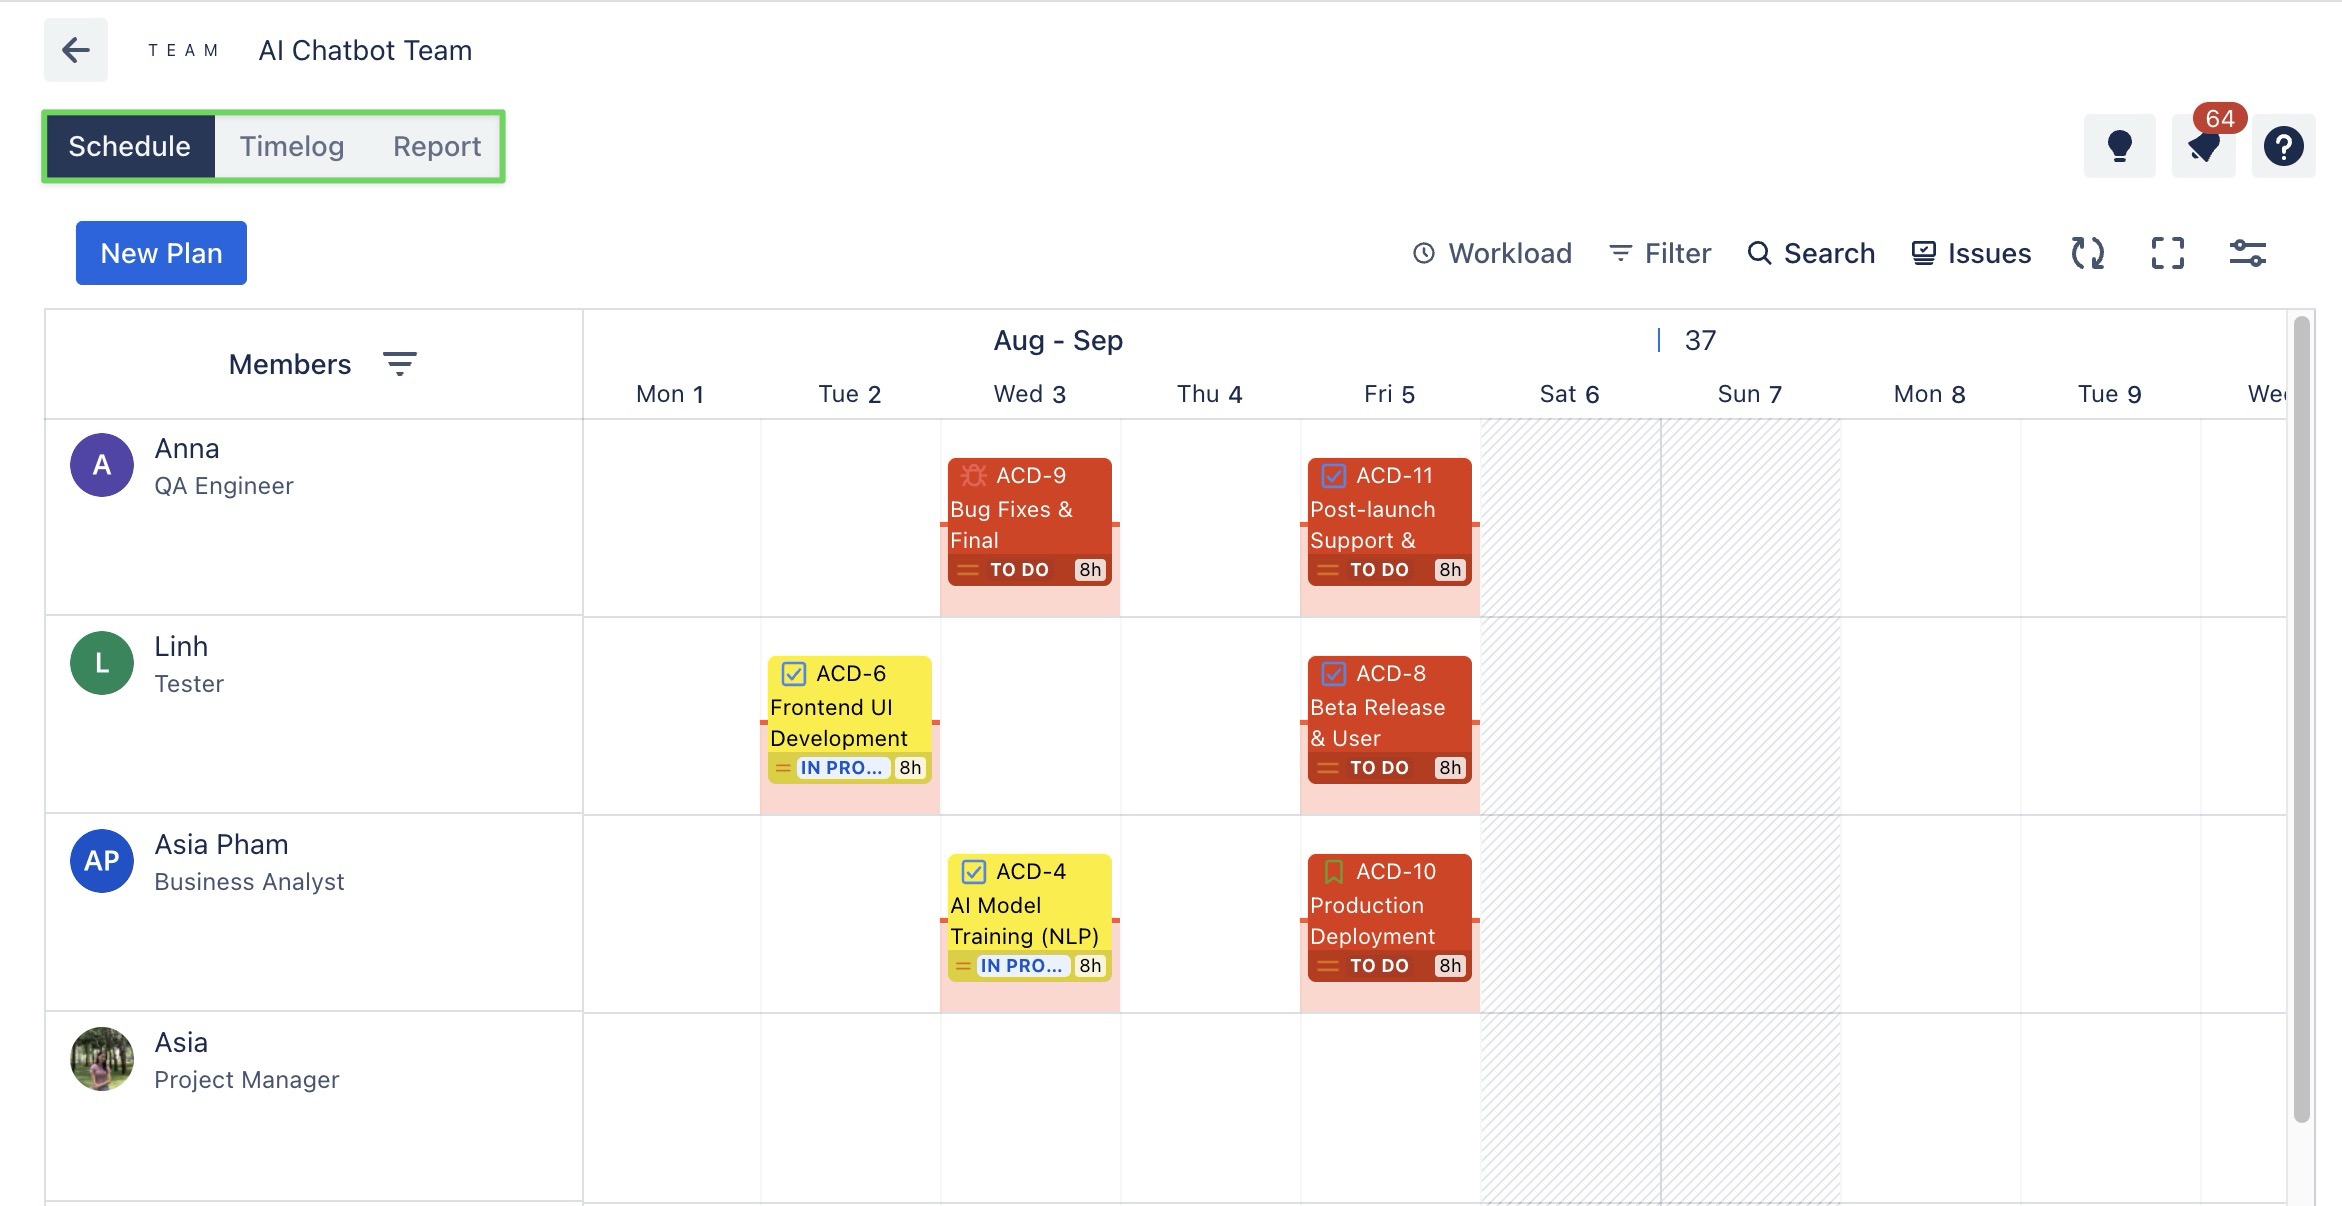
Working at the Team Level follows the same process as at the Project Level.
👉 For detailed instructions on how to use each board, see: