How to Manage Leave and Vacation Resources within TeamBoard TimePlanner?
Effectively managing leave and vacation requests is crucial for maintaining team productivity and ensuring smooth project workflows. TeamBoard TimePlanner provides a comprehensive solution for handling leave management within Jira. This guide will walk you through setting up and managing leave types, permissions, and approvals, as well as visualizing and reporting on resource availability. By leveraging these tools, you can streamline your leave management process, maintain accurate records, and optimize resource allocation across your projects.
https://youtu.be/Y2_R7MiSN8wStep 1: Configure Leave Types
Access Settings: As an app administrator, navigate to the settings section where you have the authority to configure various aspects of resource management.
Define Leave Types:
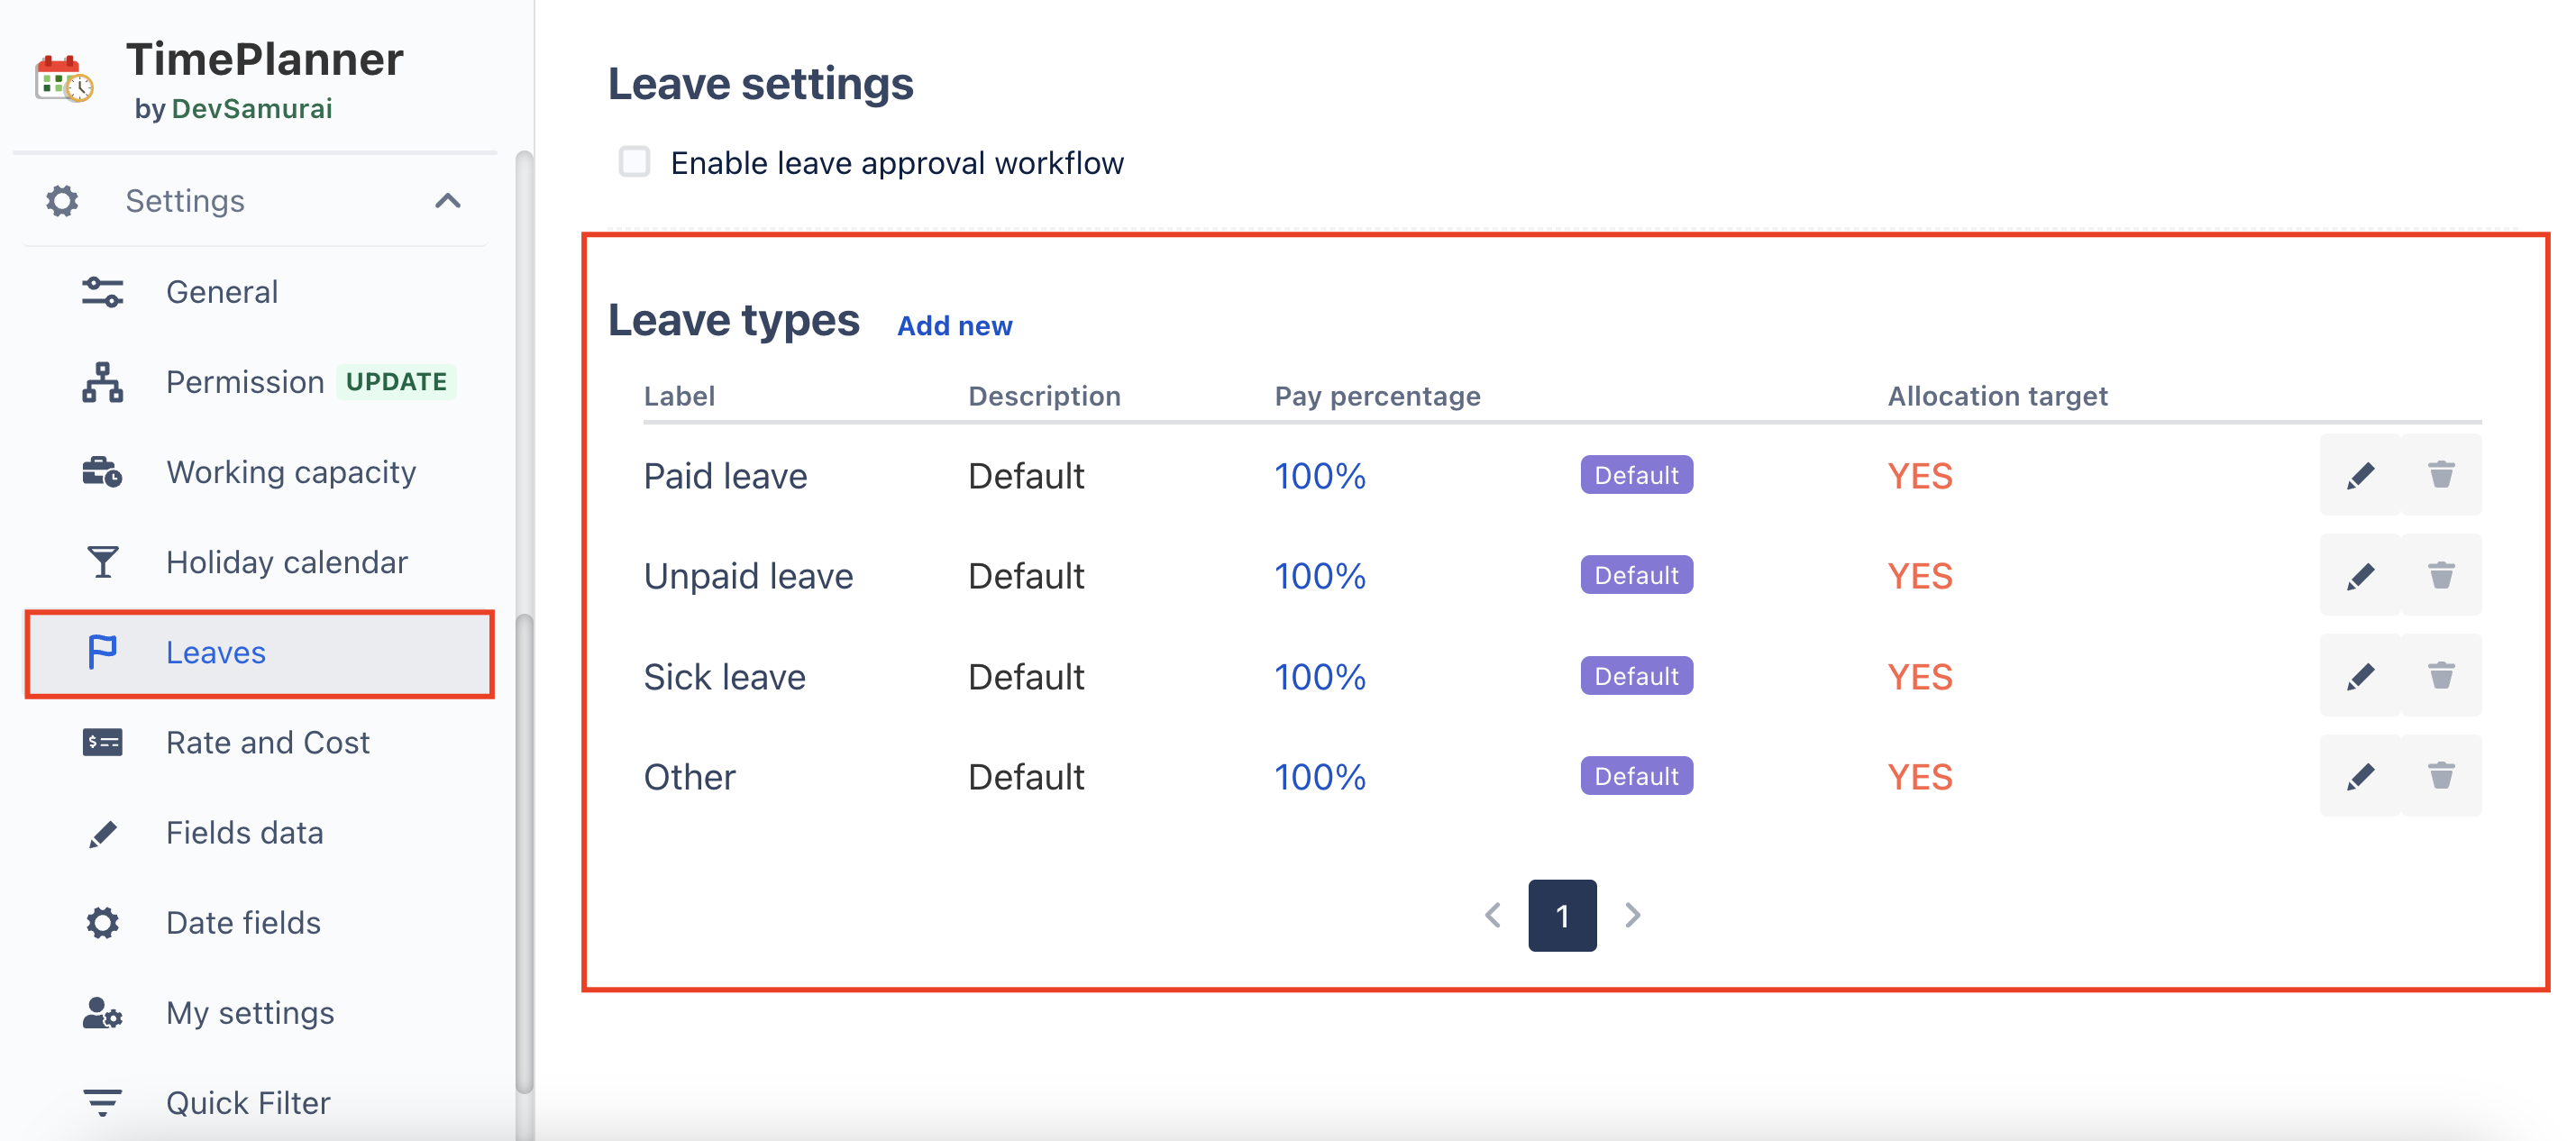
Create Leave Types: In the Leave Settings, define the different types of leave (e.g., vacation, sick leave, paid leave, unpaid leave).
Customization Options: For each leave type, you can set a specific label, add a detailed description, and determine the pay percentage associated with it.
Enable Approval Workflow:
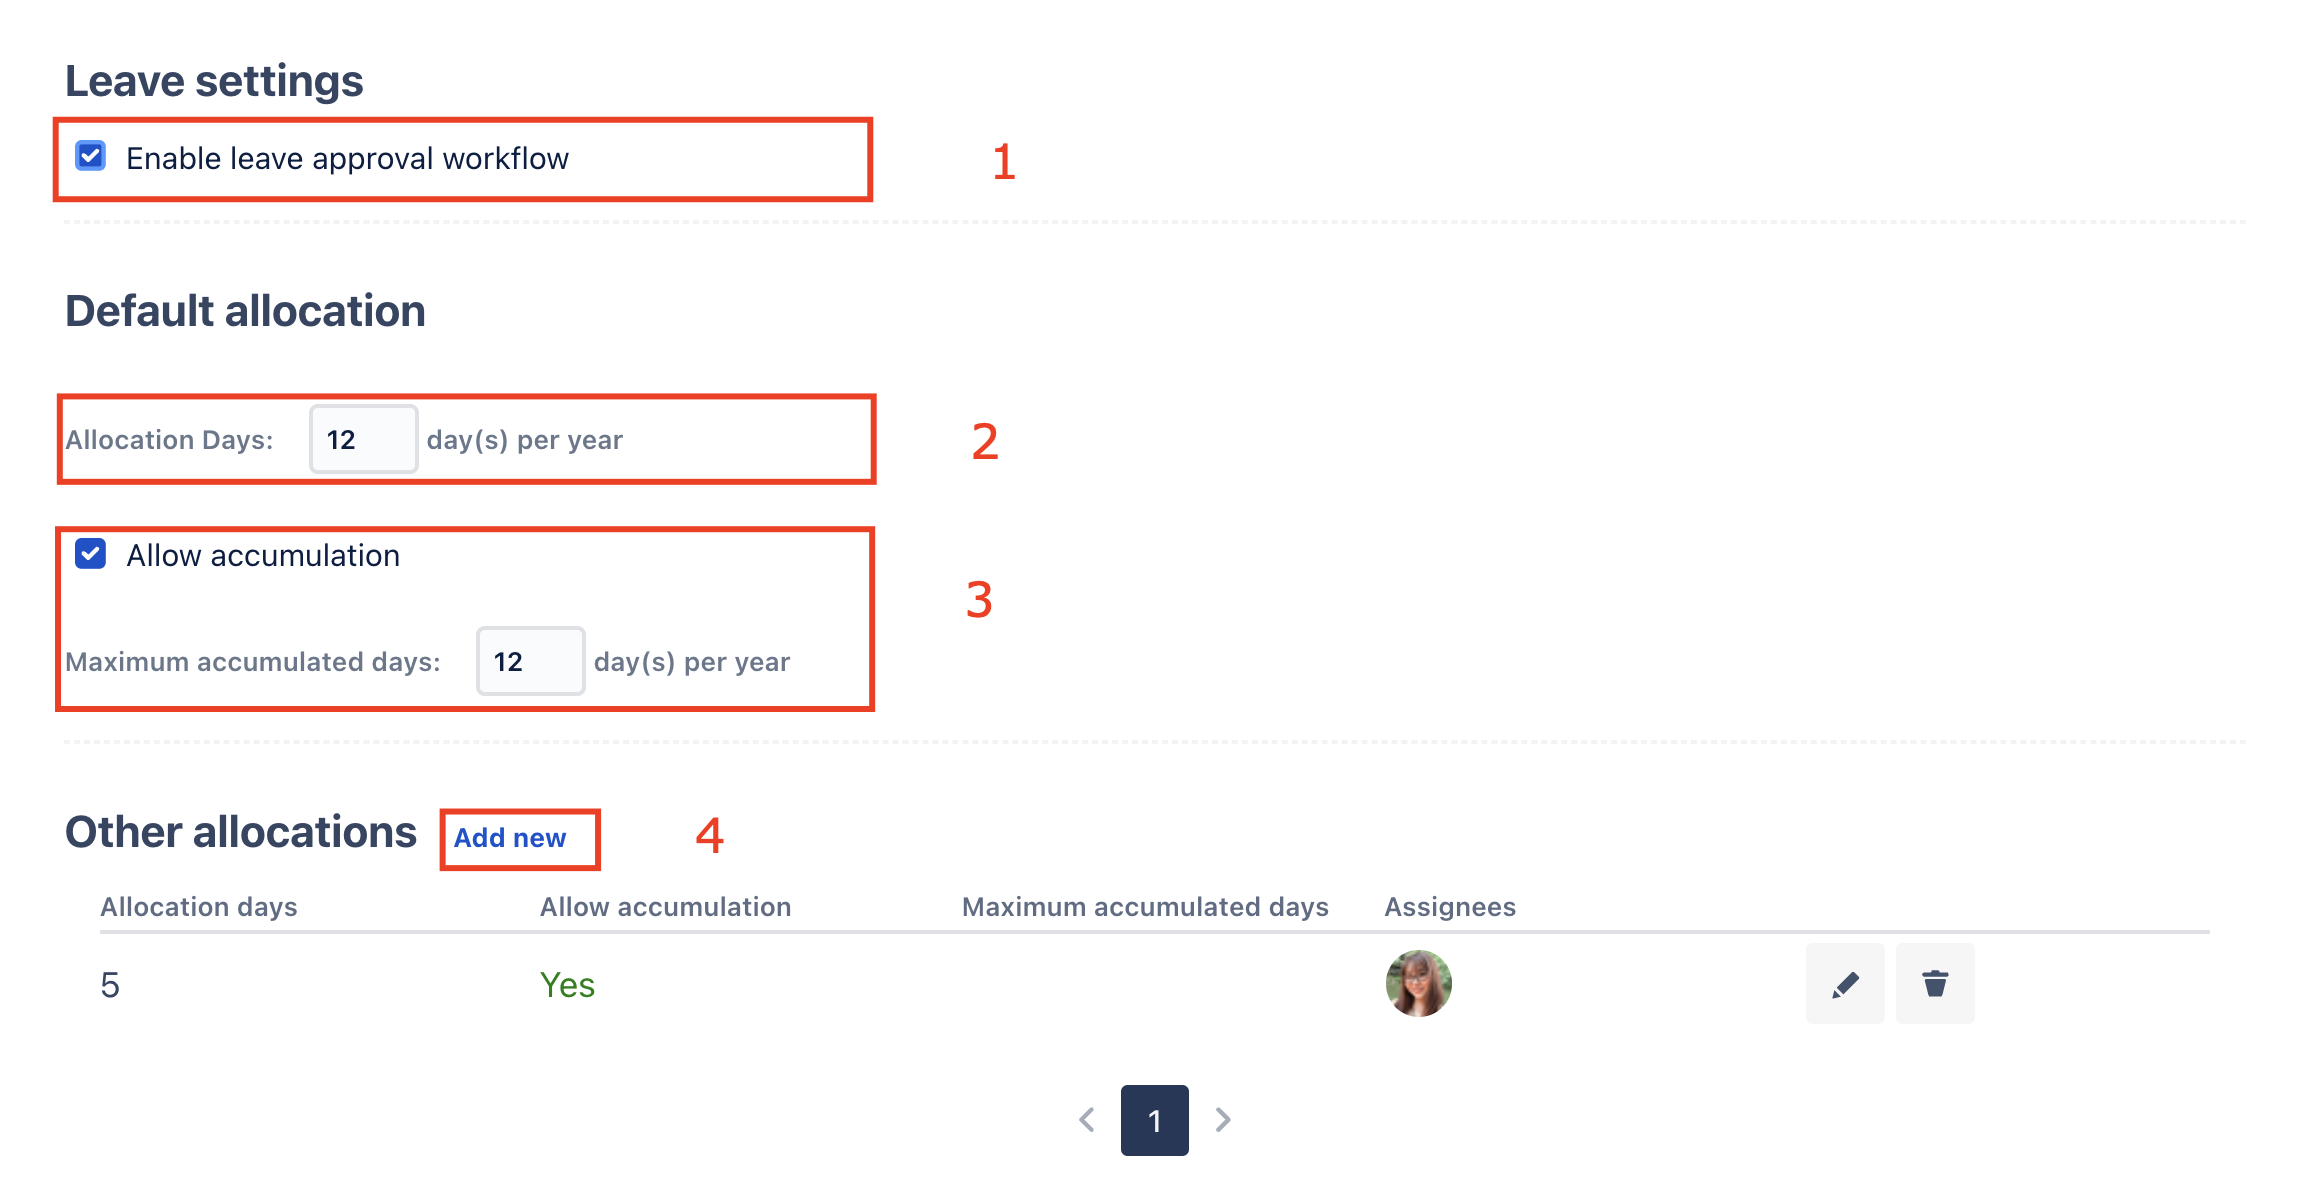
Enable Leave Approval Workflow: Decide if leave requests must go through an approval process. Enabling this means every leave request needs to be reviewed and approved by designated approvers.
Default allocation: Set the number of days allocated per year for all resources.
Allow accumulation: Checked this will allow the system to accumulate the number of remaining days. from the previous year to the current year. Set the maximum number of days that can be accumulated to next year.
Other allocations: Create some special allocation and assign it to someone. These special allocations will ignore system settings to apply for assignees.
If the approval workflow is not enabled, employees can plan their time off directly in the Schedule Board without requiring prior approval.
This setup ensures clarity in leave policies and streamlines the process for both requesting and managing time off.
For detailed information on configuring settings, please refer to the Leave Settings guide
Step 2: Set Permissions
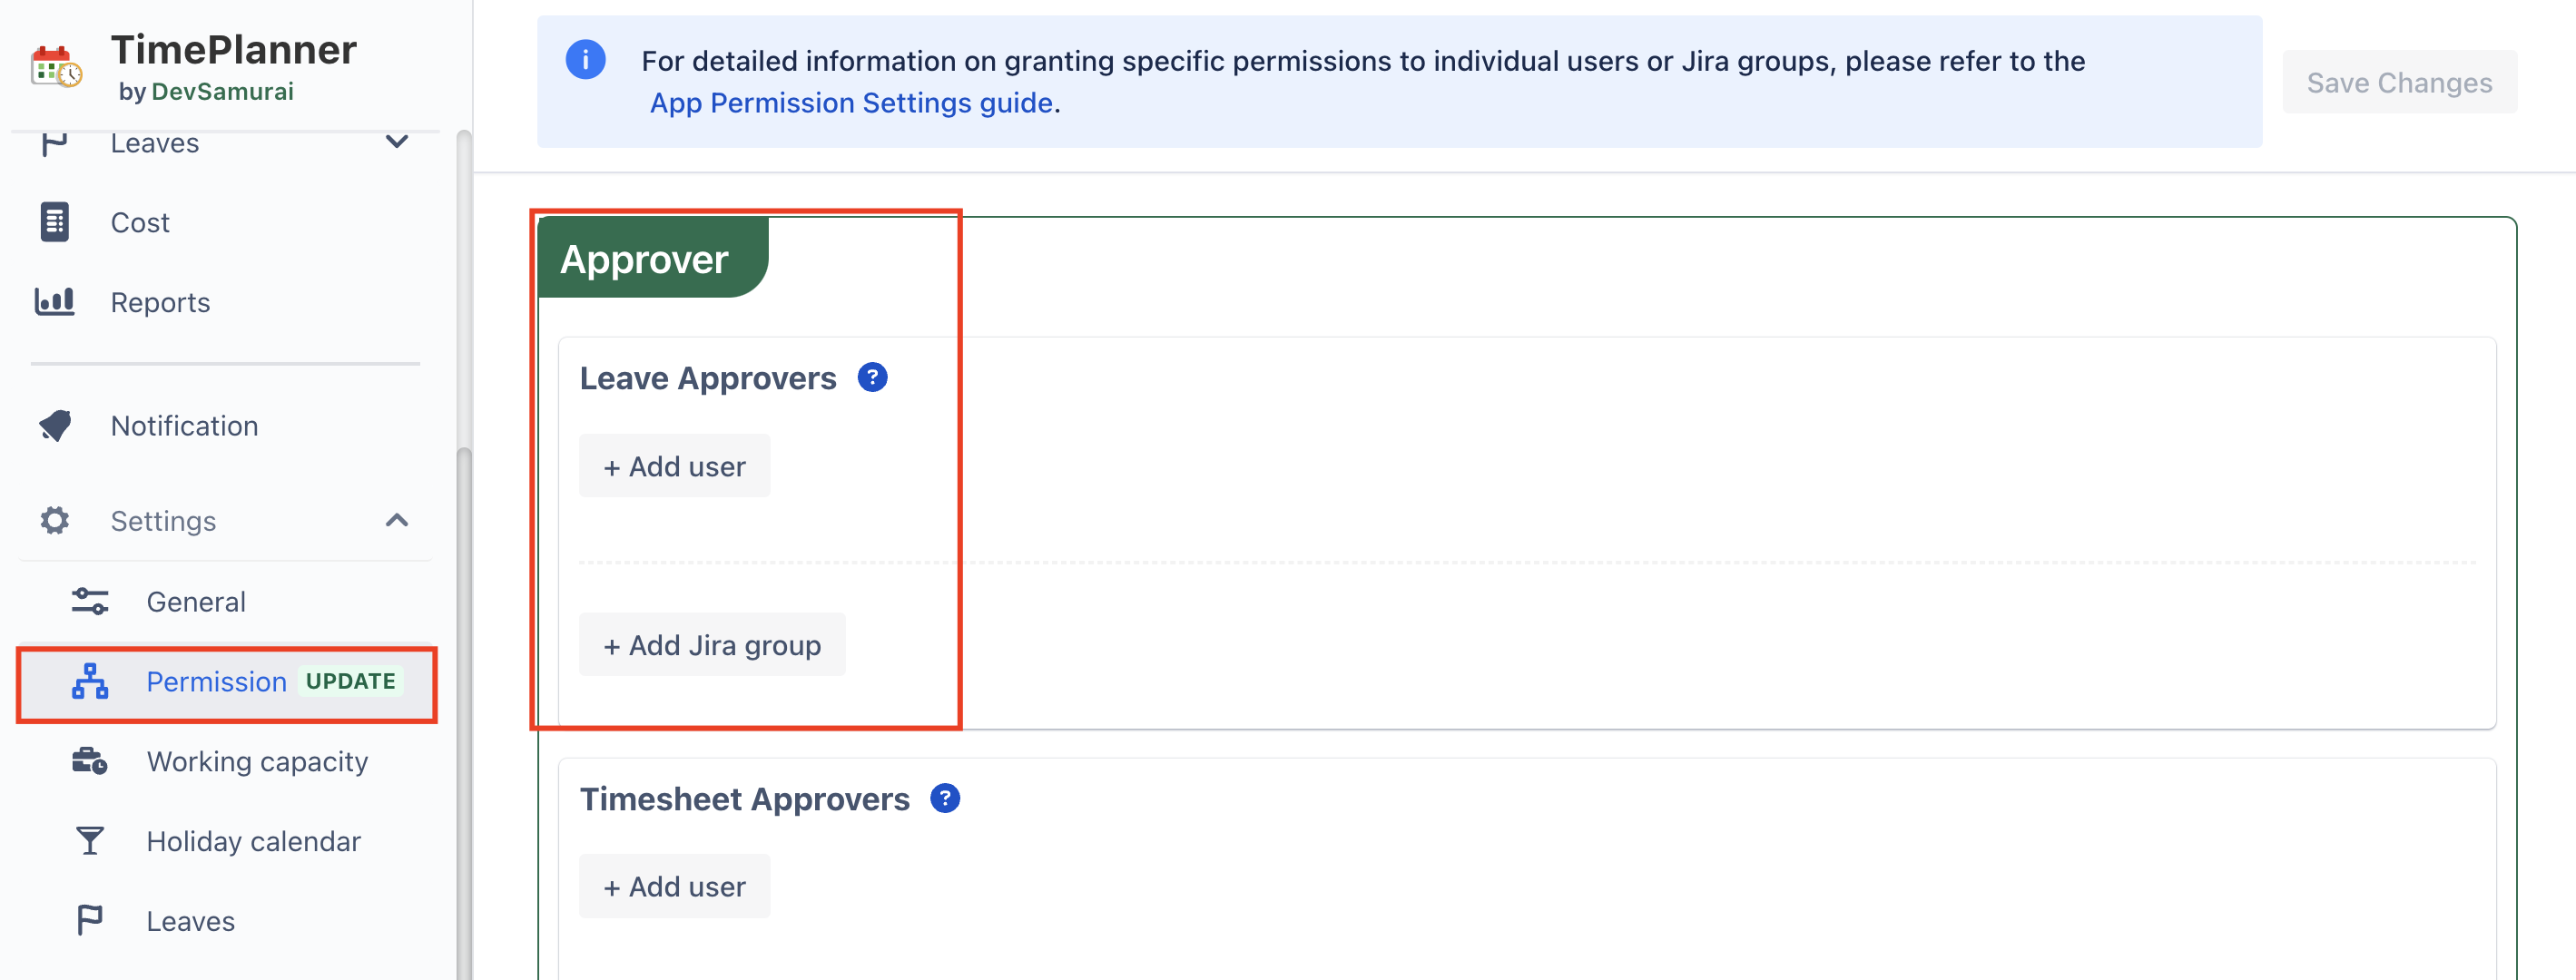
Access Permissions Settings: As an administrator, navigate to the settings area where permissions are configured.
Assign Leave Approvers: Find the "Approver" role and add the appropriate users to the Leave Approvers group. These users will have the authority to review and approve leave requests submitted by team members.
For detailed information on granting specific permissions to individual users or Jira groups, please refer to the App Permission Settings guide.
Step 3: Review and Manage Resource Leaves
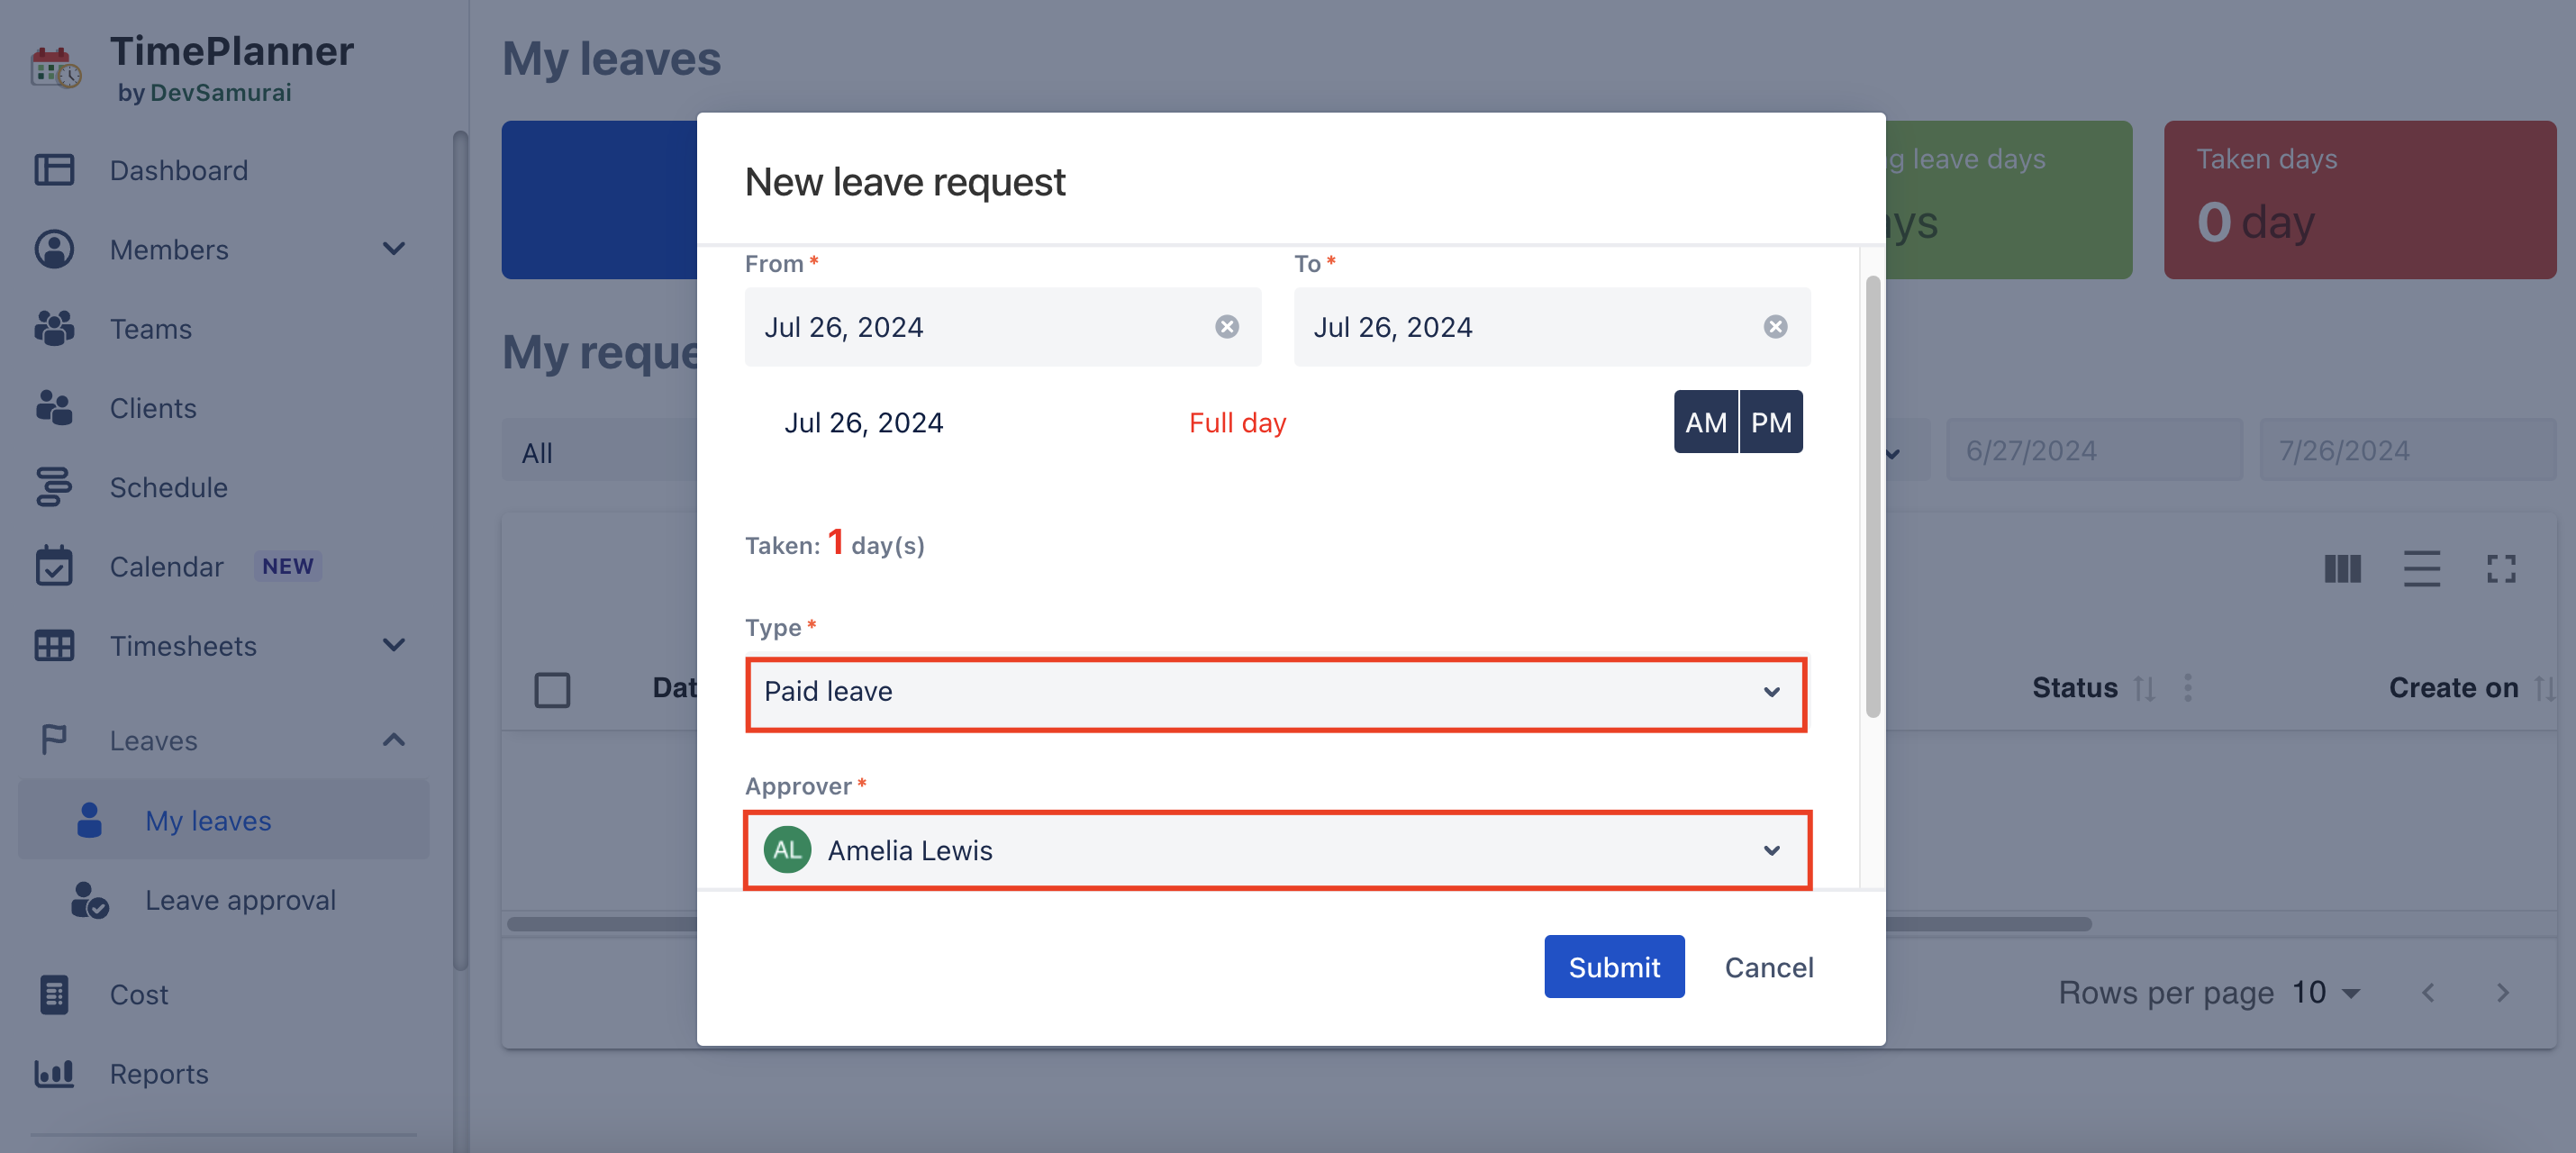
Access the Leave Section: Once the settings are configured, employees can submit leave requests by selecting the appropriate leave type and choosing an approver from the list you’ve configured.
Leave Approval Process:
Review Leave Requests: Approvers, assigned in the previous step, can view all leave requests. They have the ability to approve, reject, or mark requests as pending.
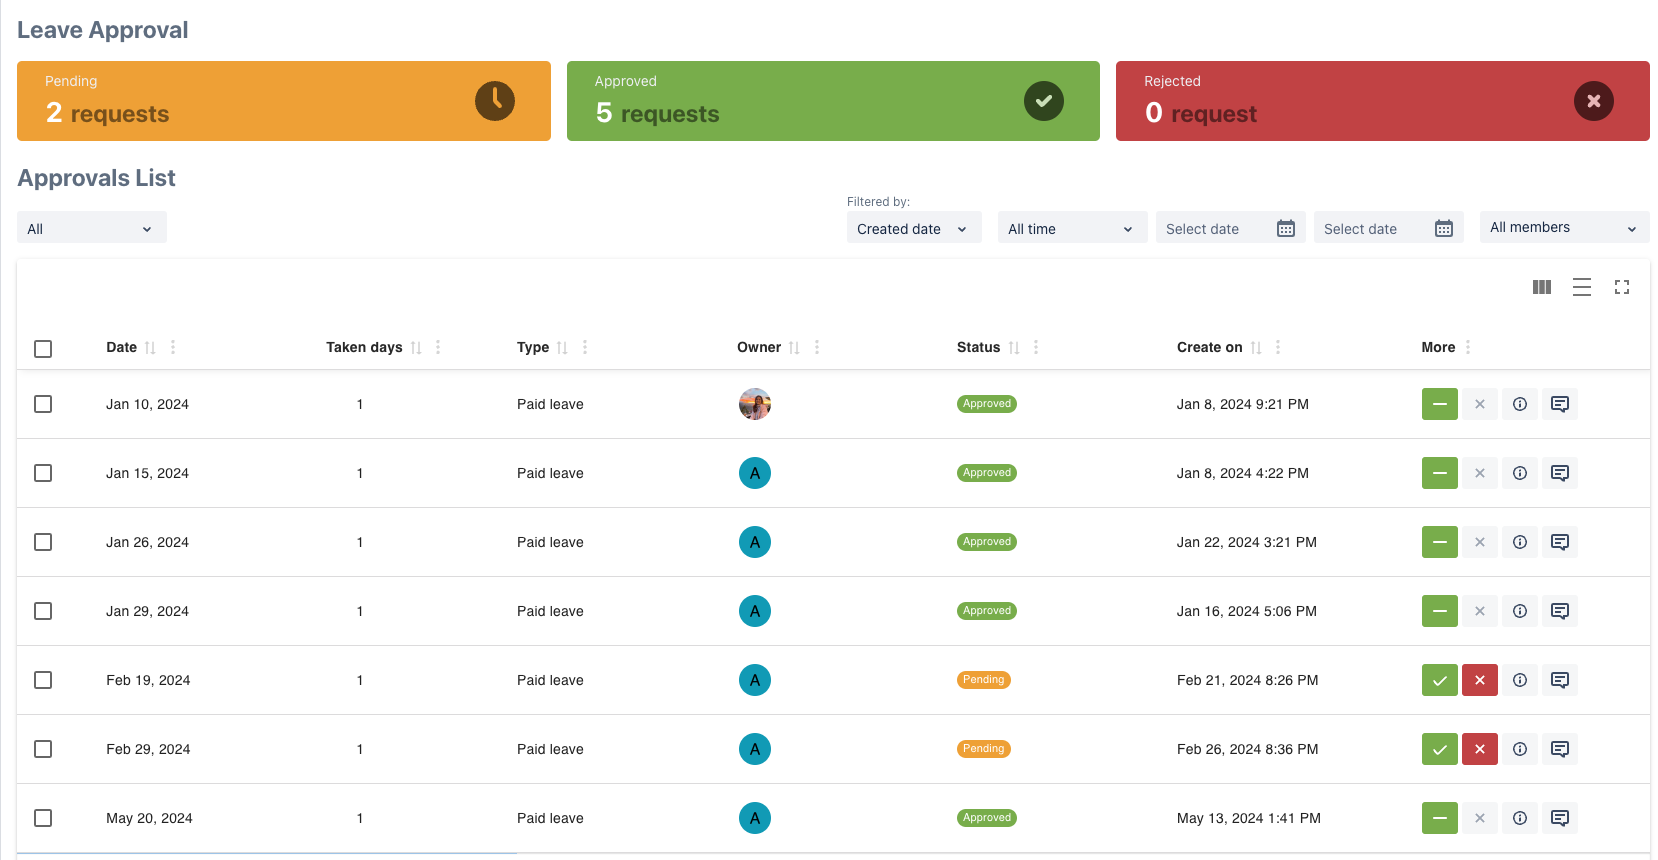
Managing Approved Leaves: If necessary, approved leaves can be canceled by the approver, or requests can be recalled by the employee.
This ensures that all leave requests are properly tracked and managed within the organization.
For detailed information on Leave Approval, please refer to the Leave guide
Step 4: Define Working Capacity
Navigate to the settings section and select the "Working Capacity" option. Establish the default number of working hours per day for your team members.

This setup helps track each team member's availability along with their day off. When holidays or approved leaves are scheduled, the system will automatically adjust the available working hours, deducting the time off from the standard capacity.
Step 5: Visualize Resource Availability
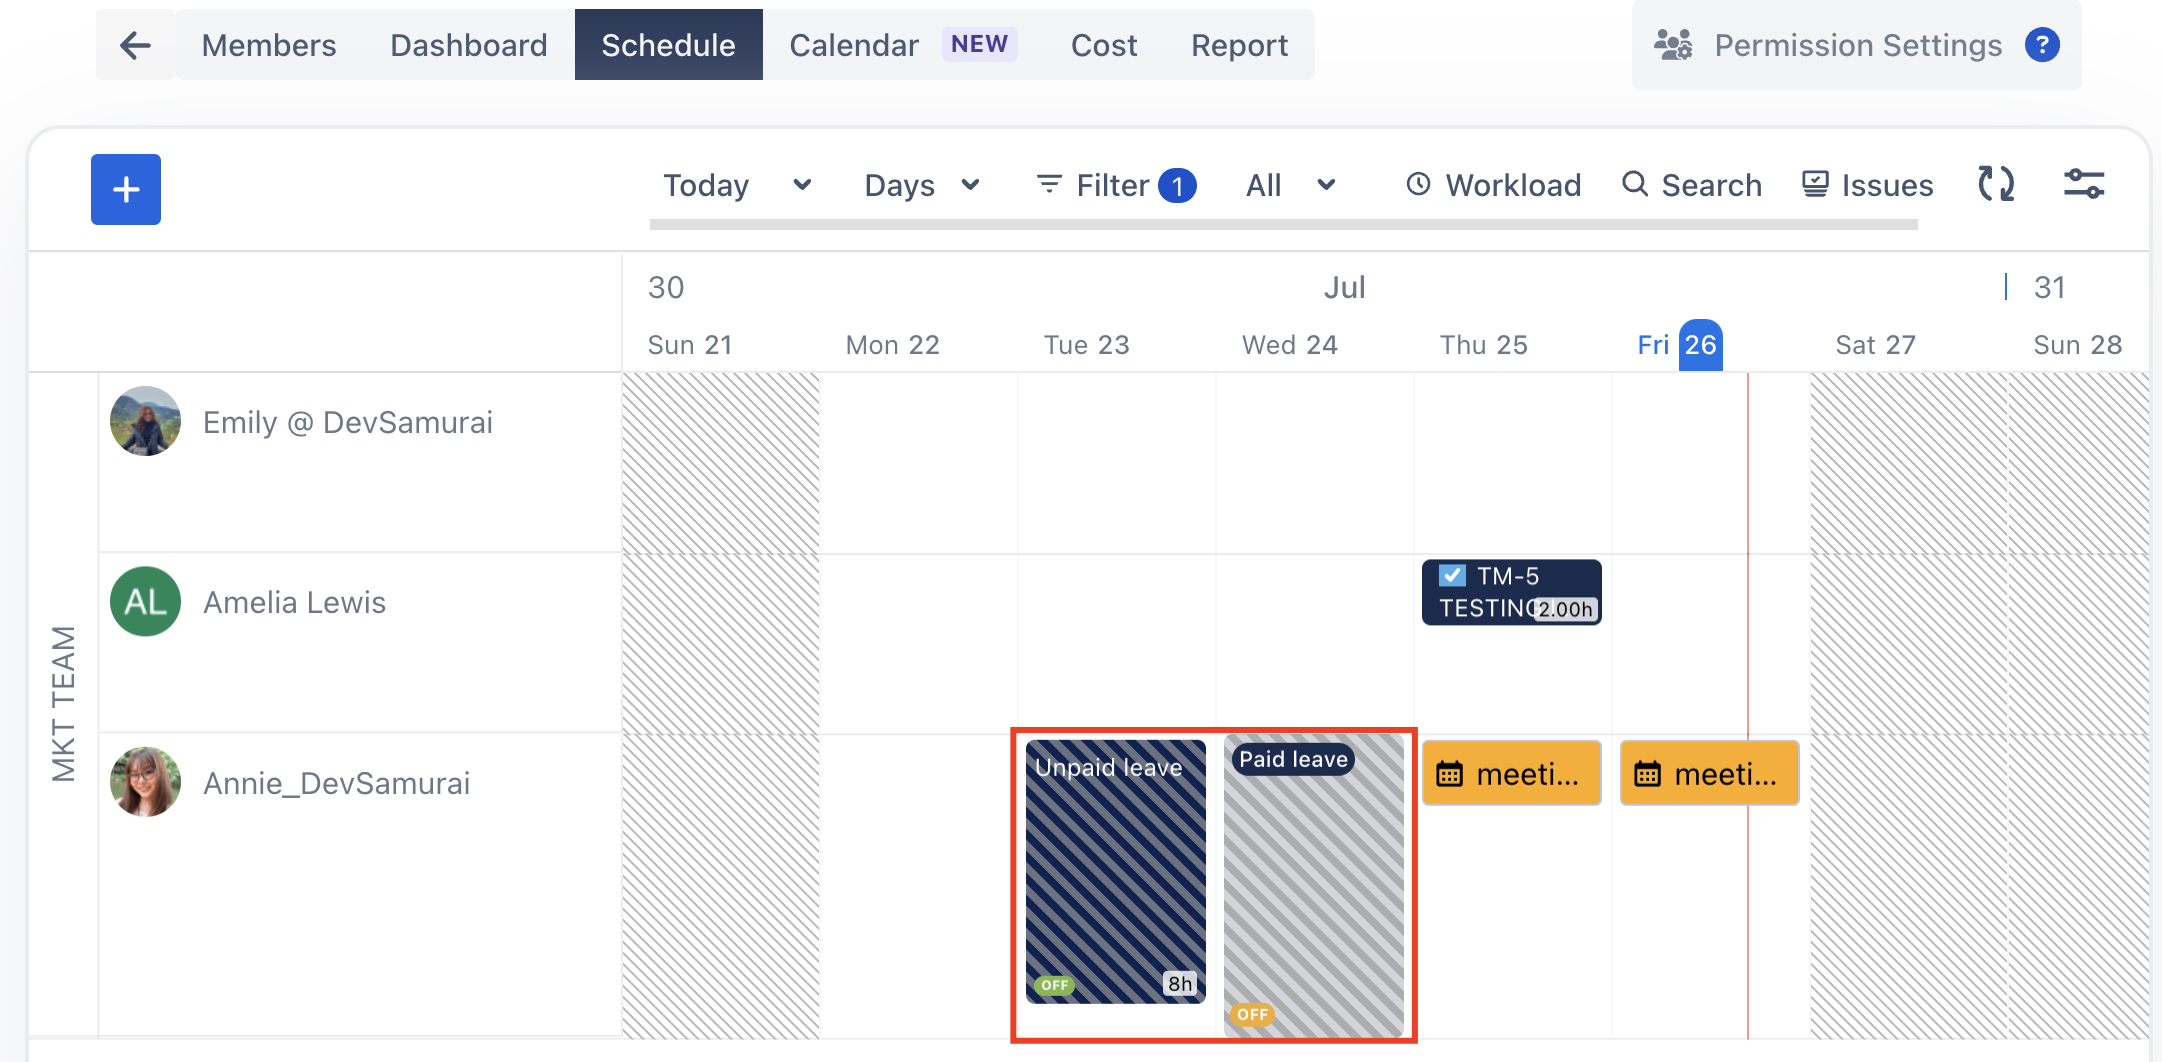
Schedule Board: The Schedule Board displays all approved leave requests, allowing you to see the impact on team availability. It shows each member's working capacity alongside their leave, enabling effective task planning and workload distribution.
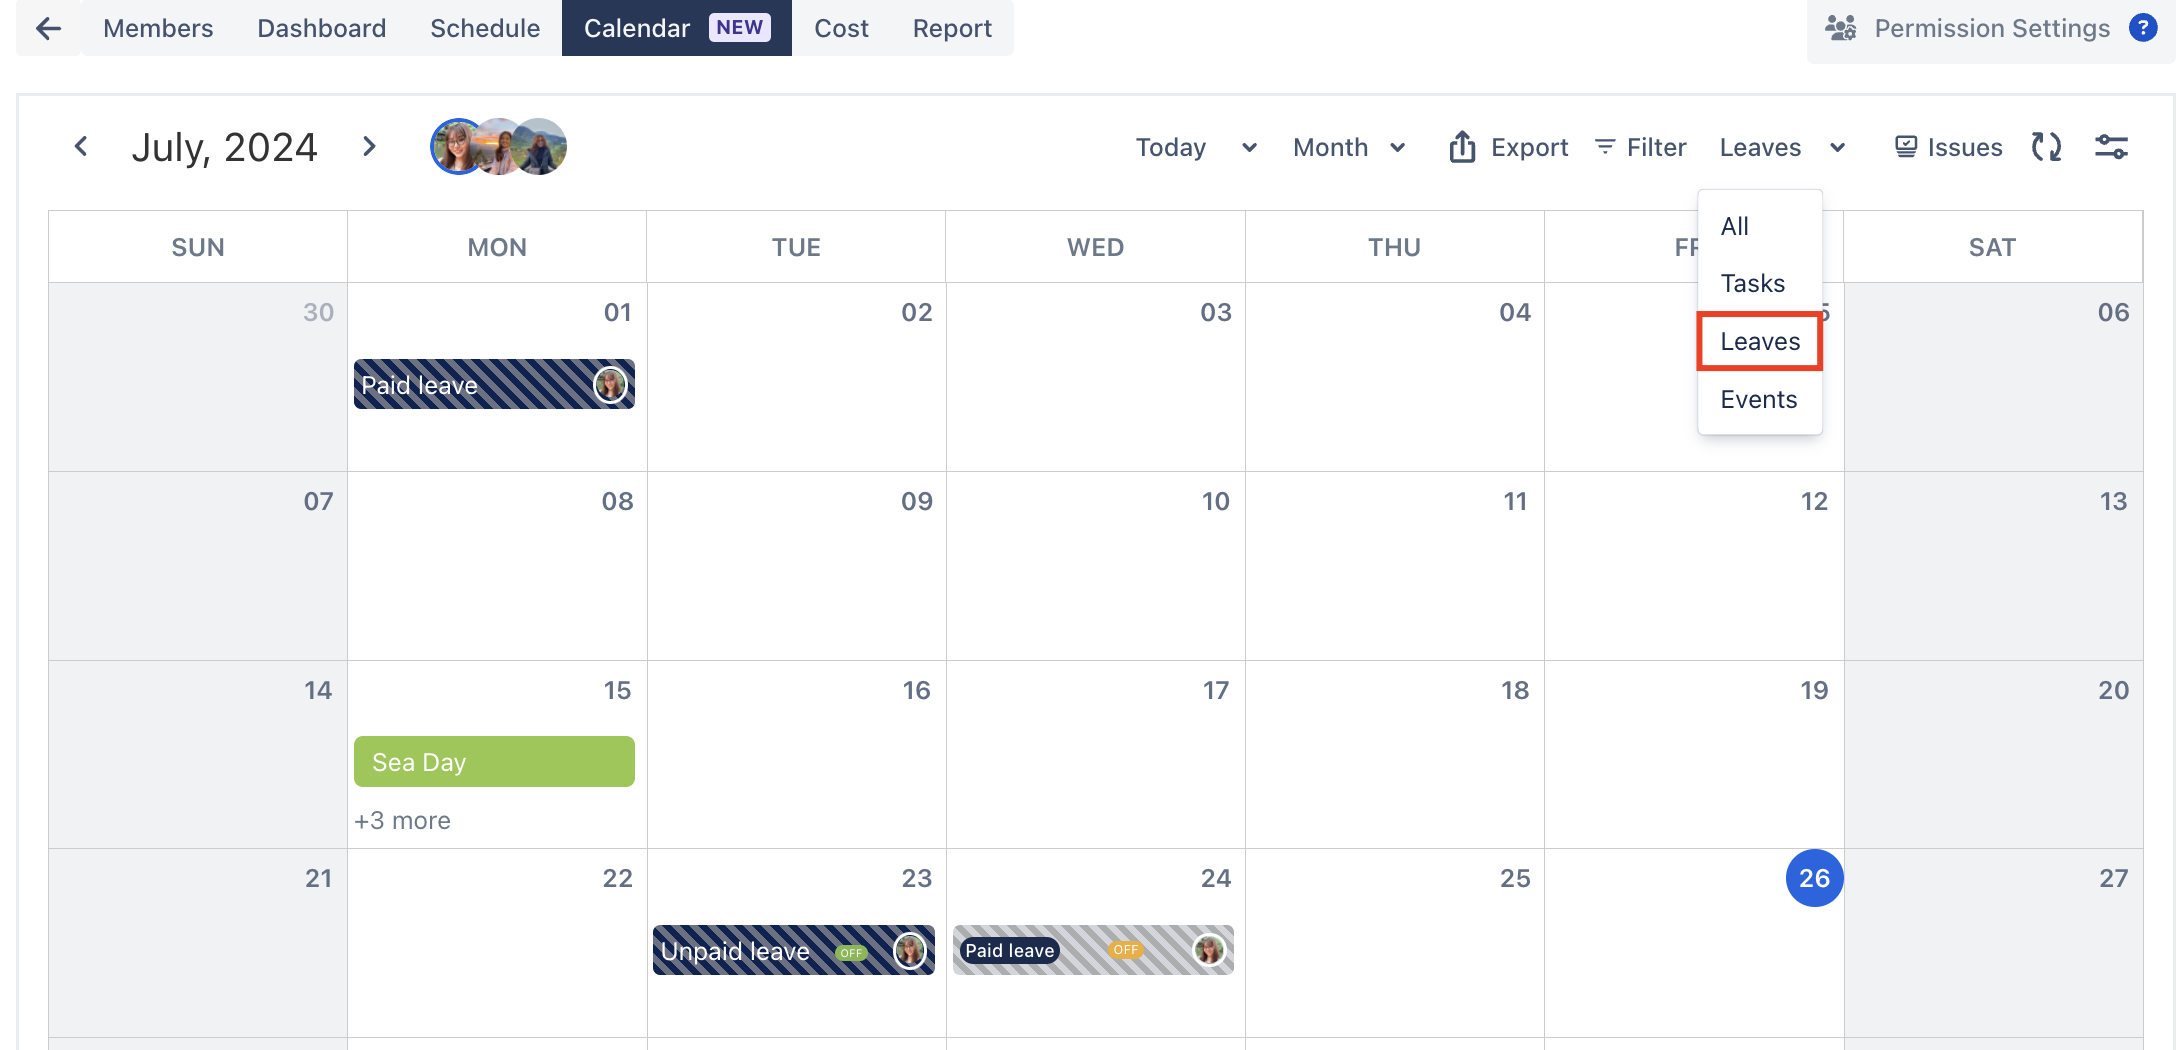
Calendar View: The calendar provides a visual representation of team members' leaves over a week or month, making it easy to track who is available and when.
Step 6: Tracking and reporting
Report: Access comprehensive reports that display all team members' time off, including specific leave types, dates of absence, and total hours taken off.

In conclusion, TeamBoard TimePlanner provides a comprehensive and efficient way to manage leave and vacation resources. By utilizing its features, you can establish clear leave policies, streamline the approval process, and maintain a detailed record of all time-off requests. This system enhances transparency and accountability, ensuring that team availability is accurately tracked and managed.
If you have any questions, please feel free to reach out to our support team or schedule a demo call to get personalized assistance.
🆕 Try it now on Sandbox
🙋 Contact Support
🌐 Visit teamboard.cloud
.png)