.png)
TeamBoard TimePlanner allows users to log time not only for Jira tasks but also for specific events and custom tasks, such as meetings, workshops, or other non-standard activities. These activities are separate from Jira issues and can only be created or managed within the TimePlanner app.
You can log time for events or custom tasks using Calendar View, List View, or the Start Timer feature.
From Calendar View
Log Time for Scheduled Events
-
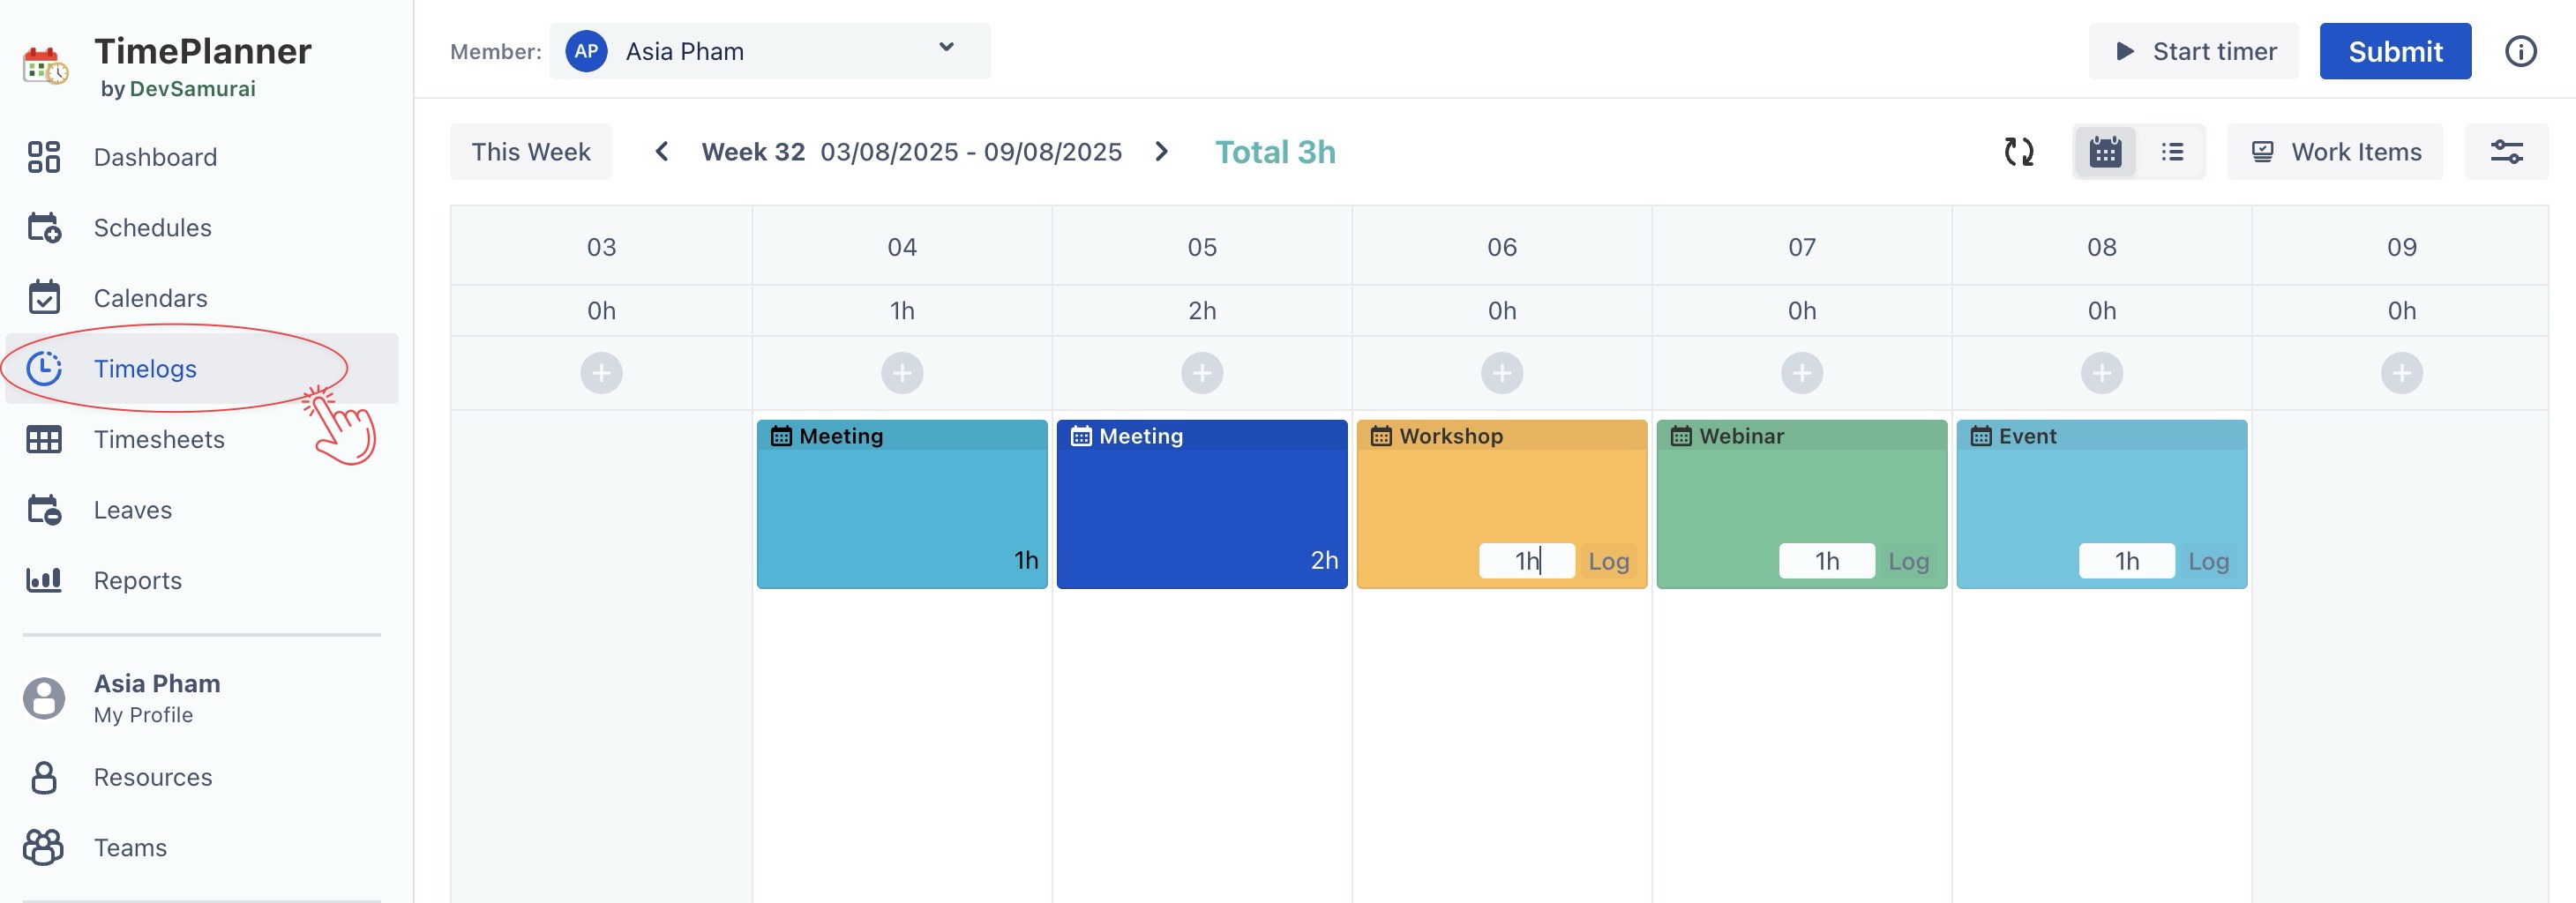
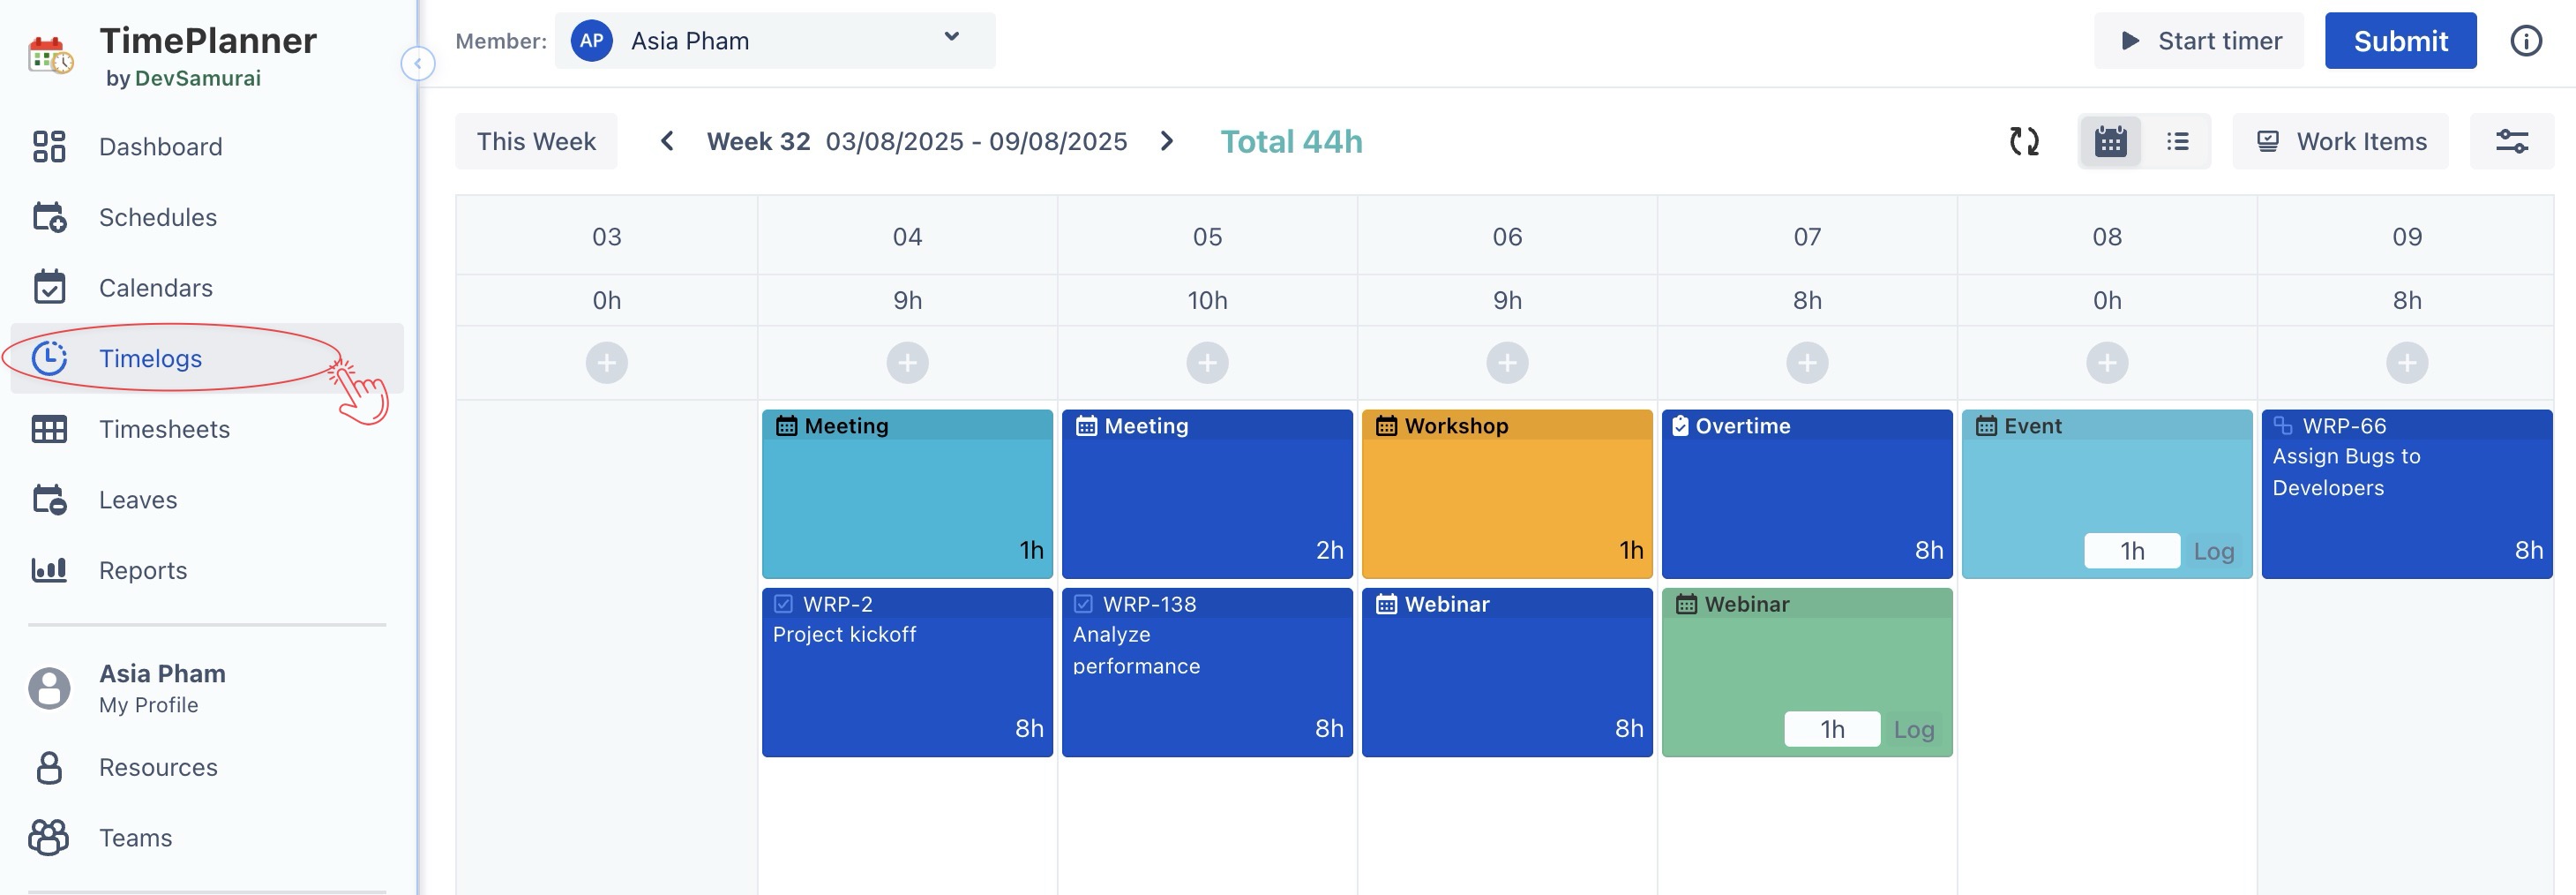
Navigate to

-
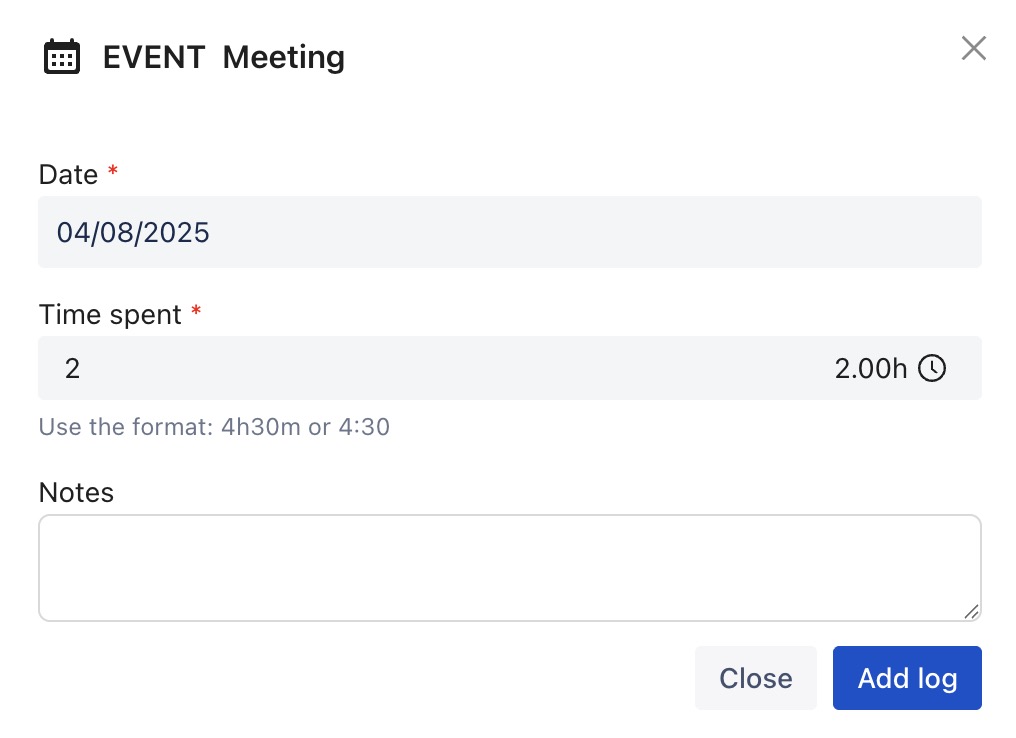
Locate the scheduled event that you want to log time for.
-
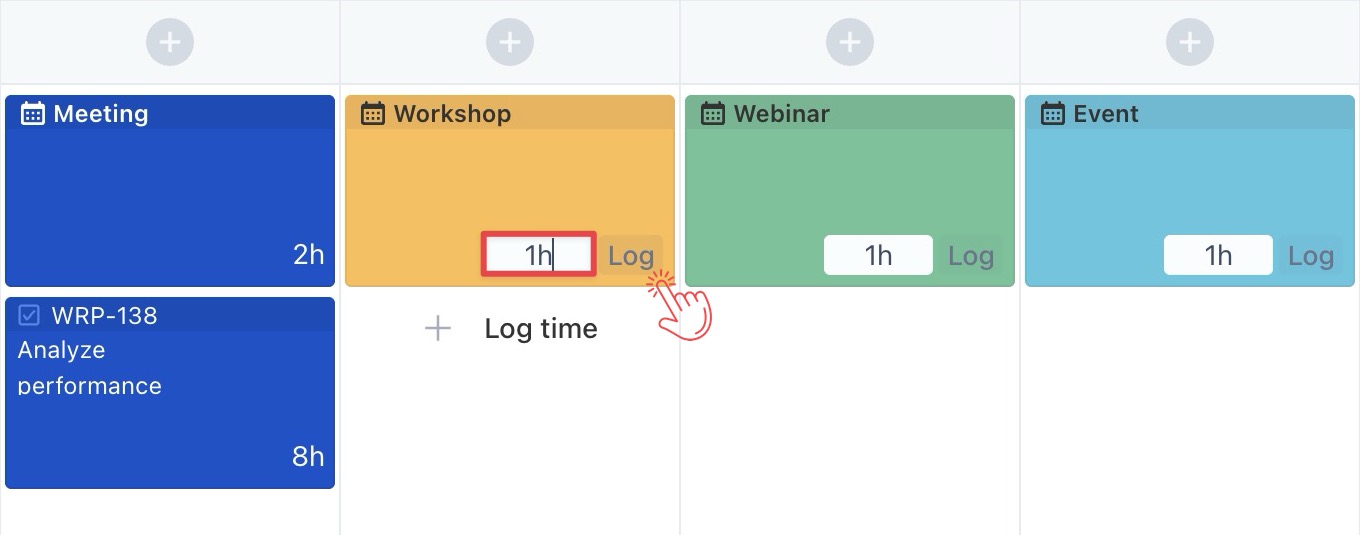
Enter the actual time spent in the Timelog entry field.
-
Click the Log button to save your time entry.
Log Time for New Events or Custom Tasks
-
Click the (+) icon, or hover over any date cell and click

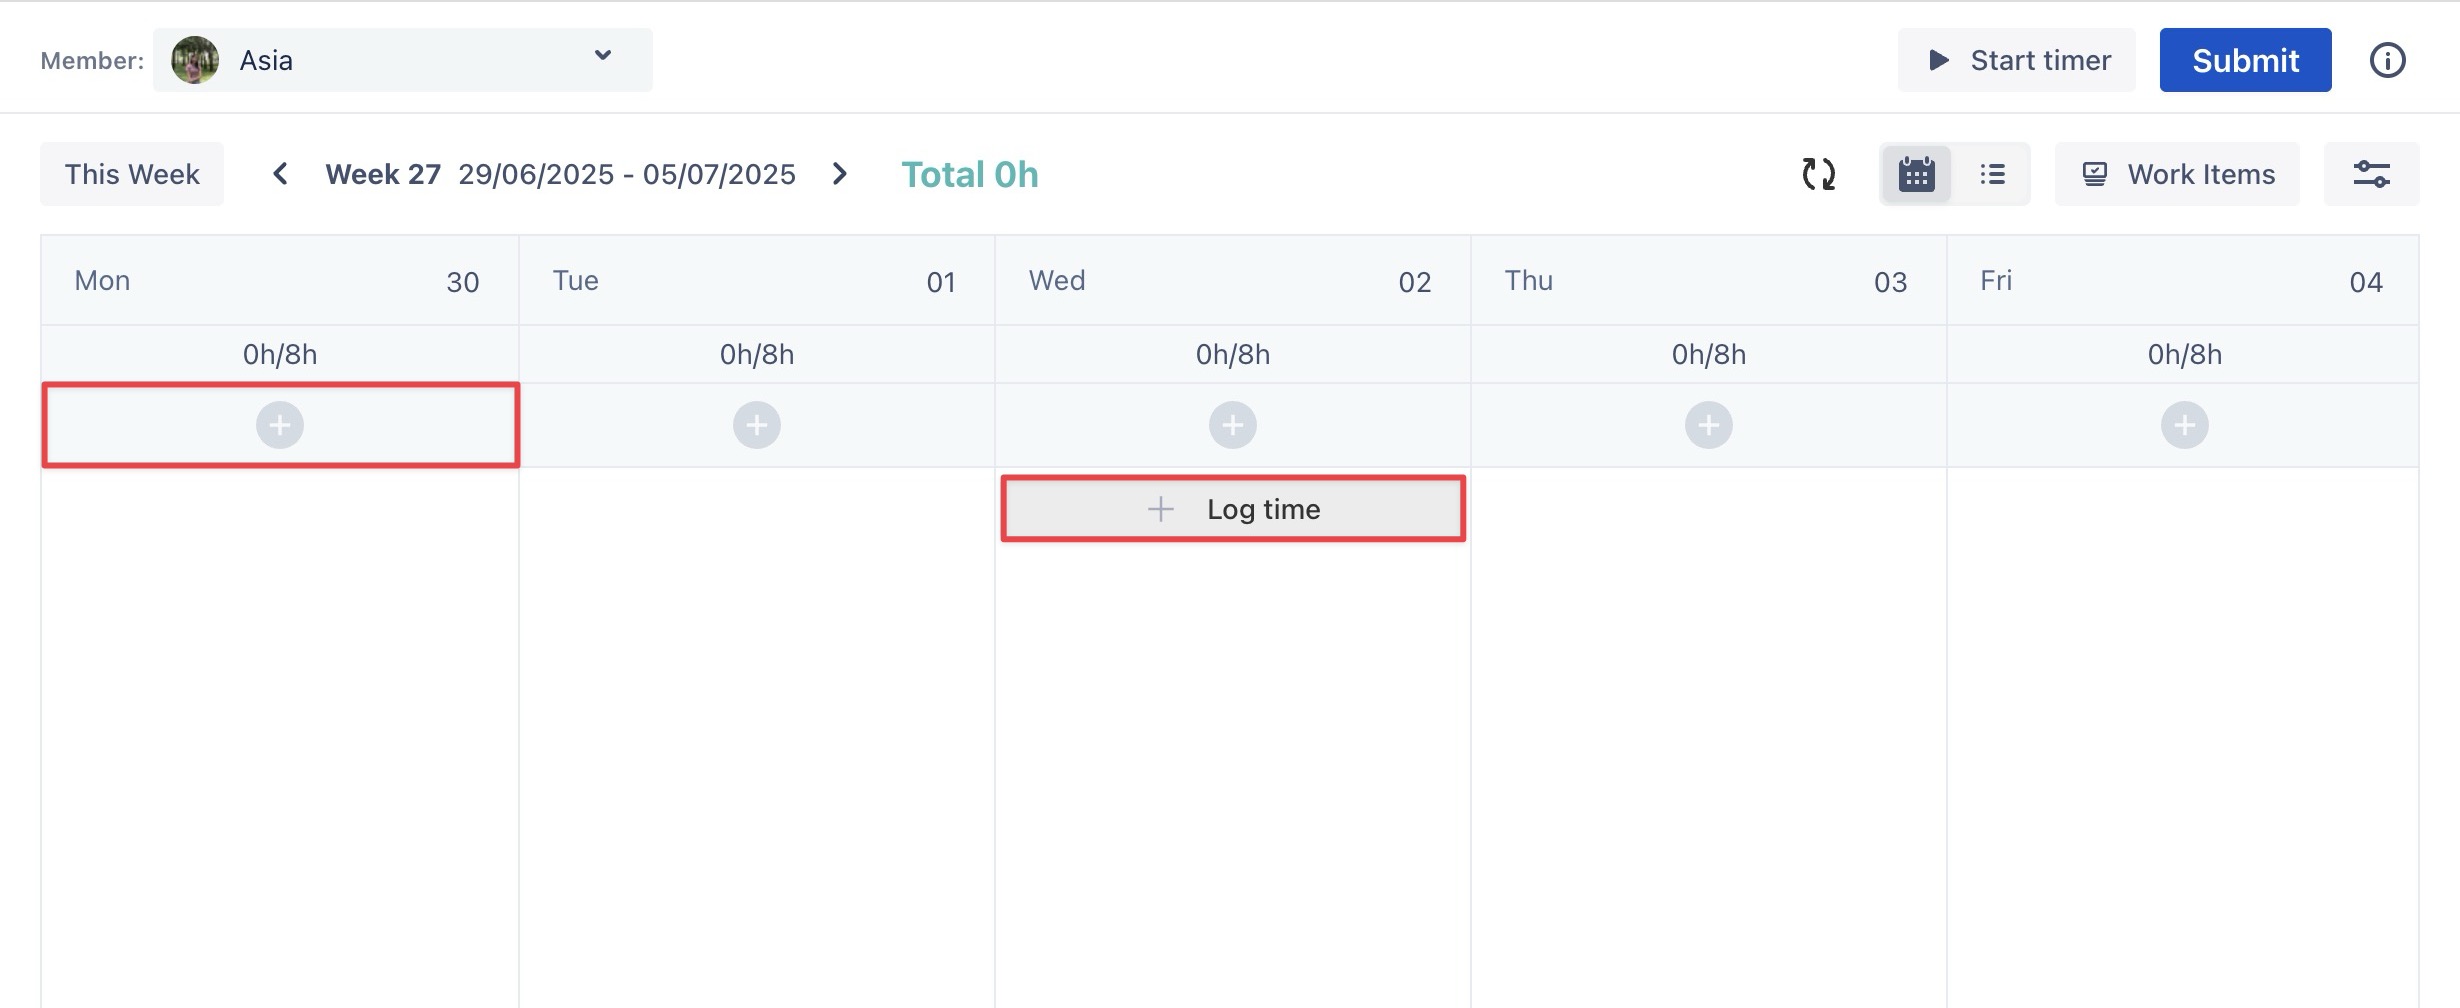
-
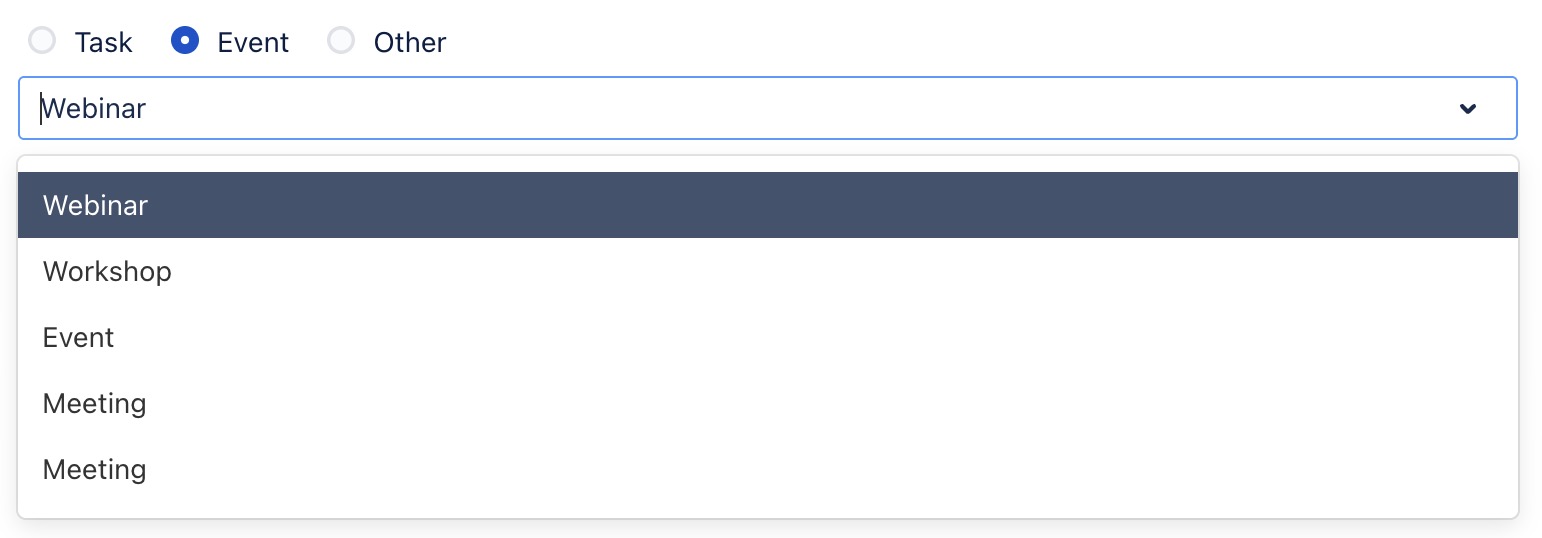
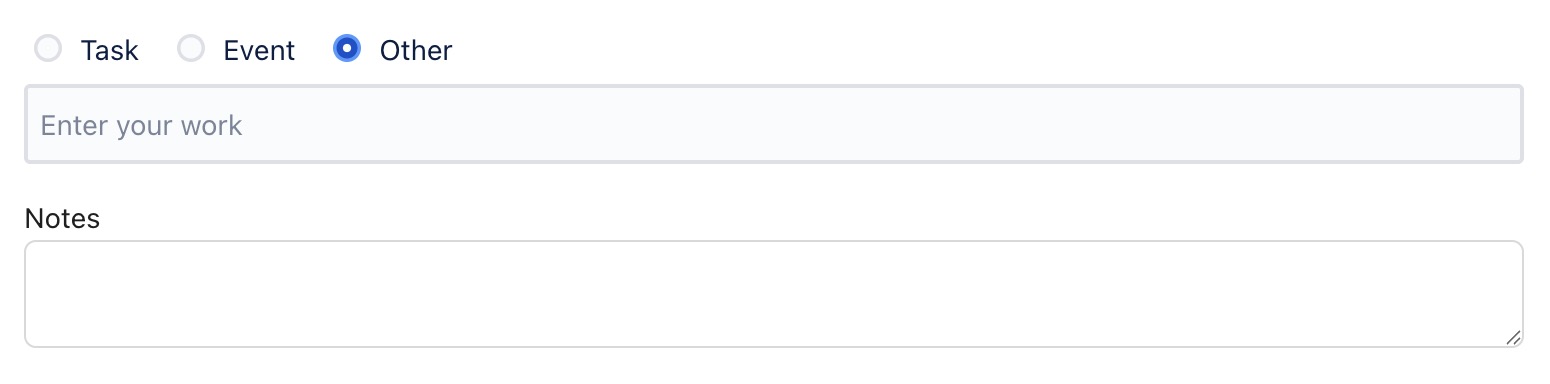
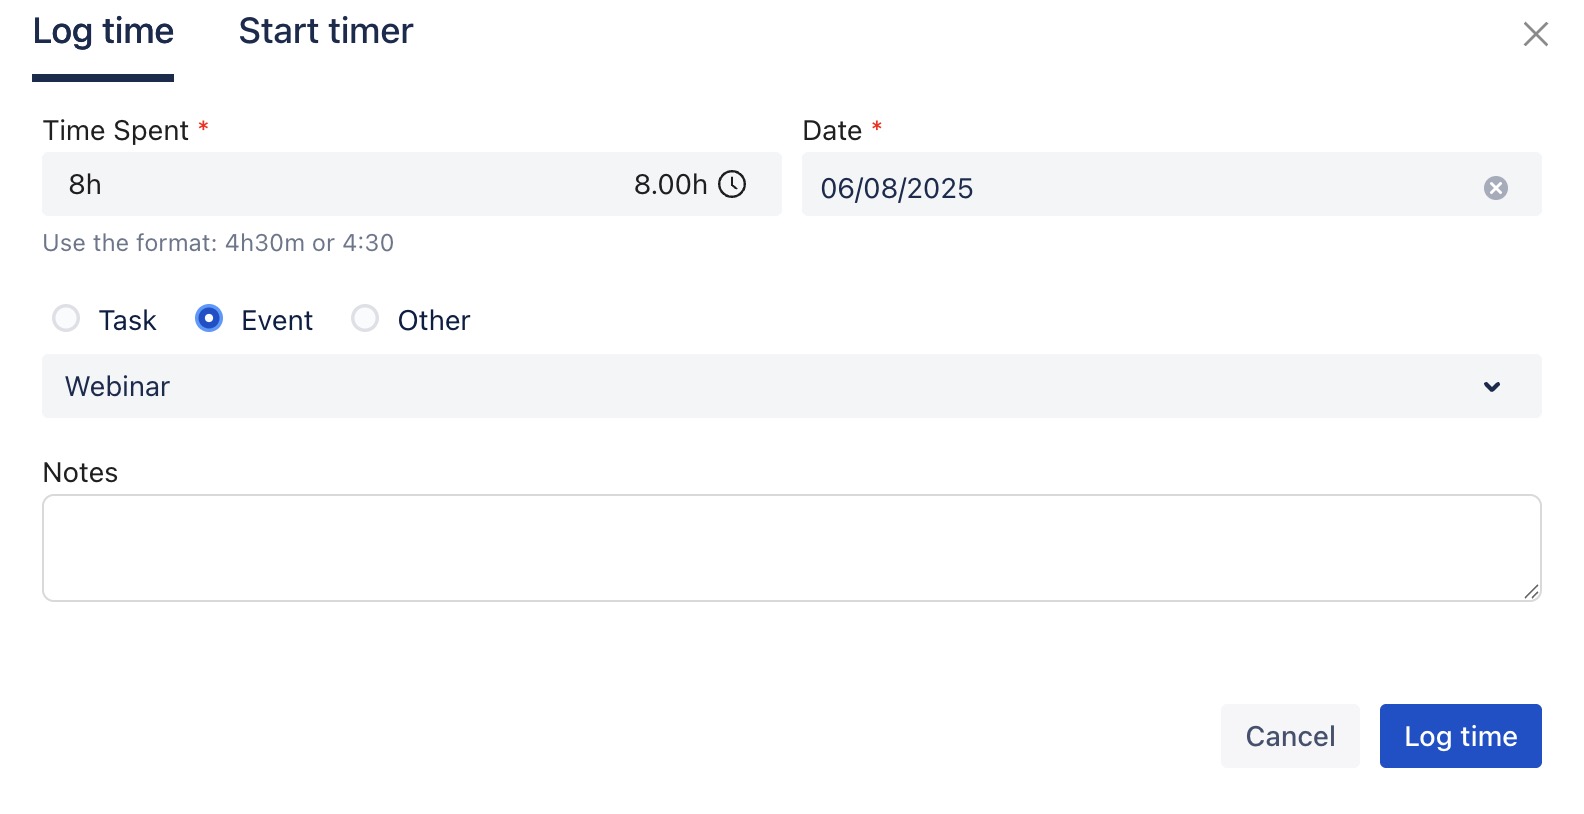
In the Planning Dialog, choose the task type:
-
Event: Search for an existing event from the dropdown menu.
-
Other: Enter a name for the custom task.
-
Fill in the details, including time spent, date, and notes.
-
Click

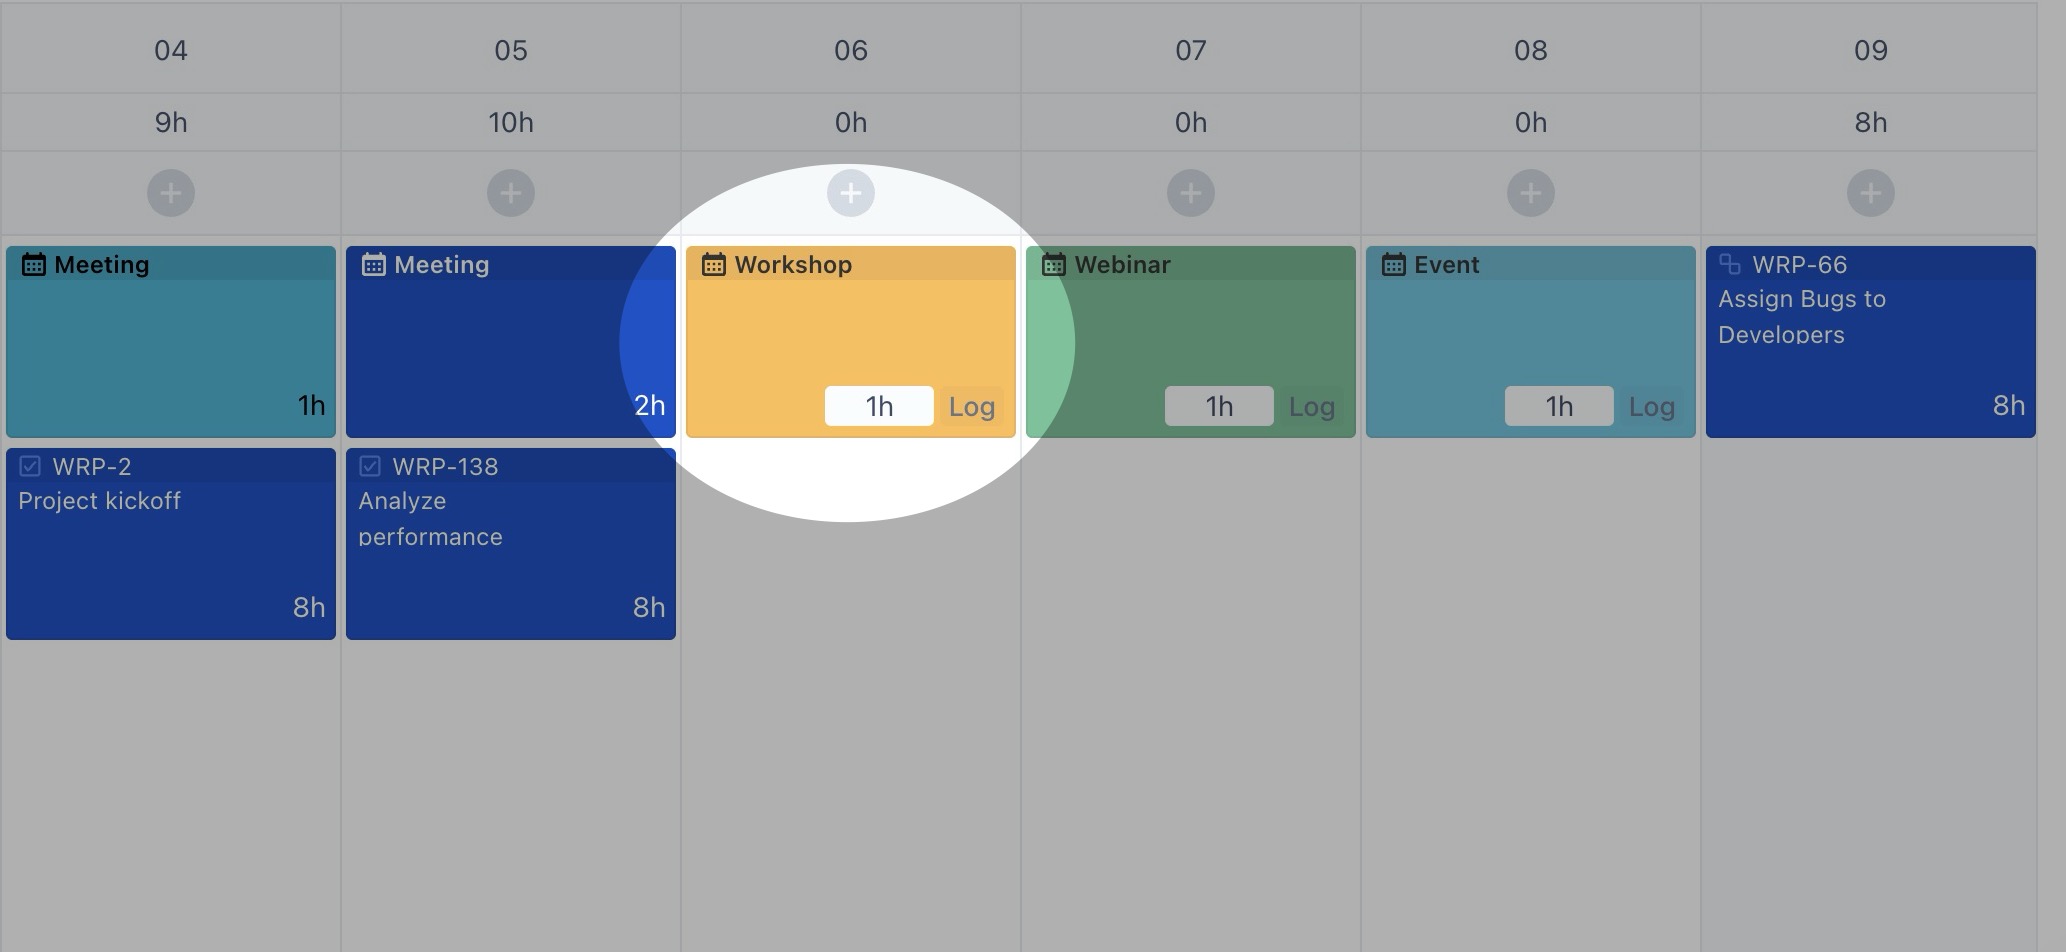
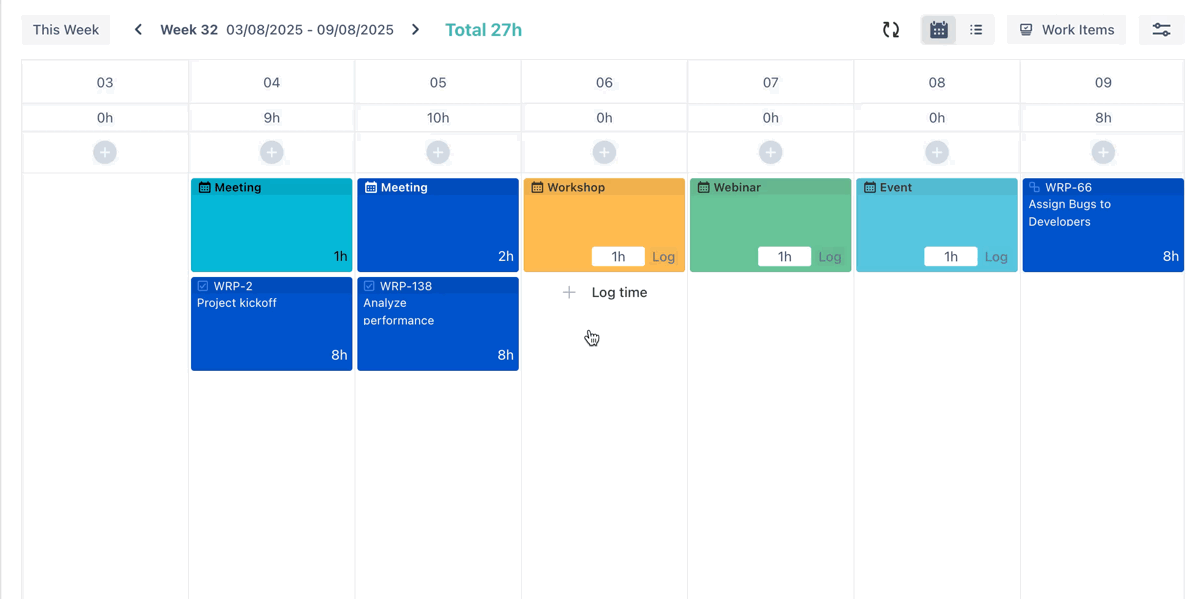
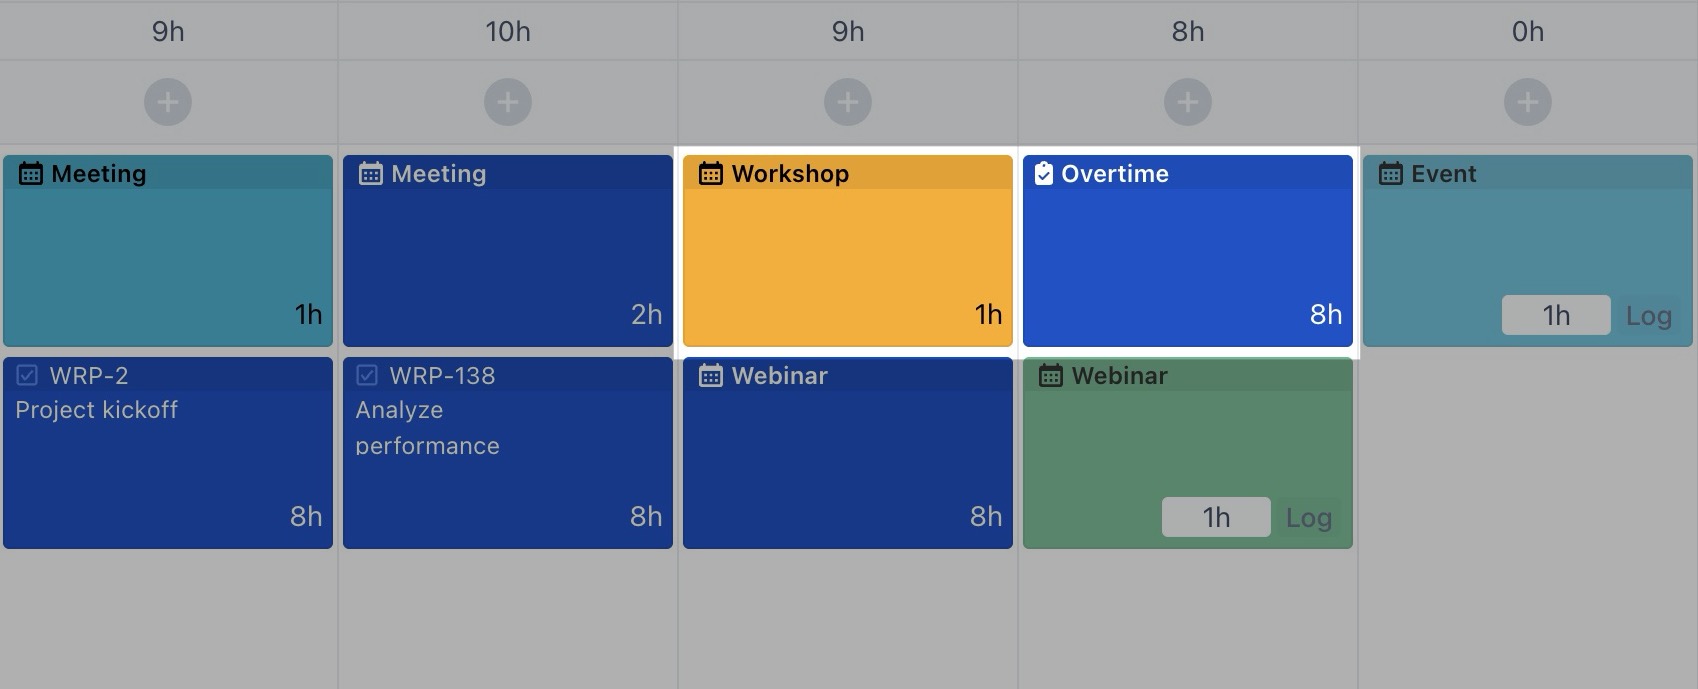
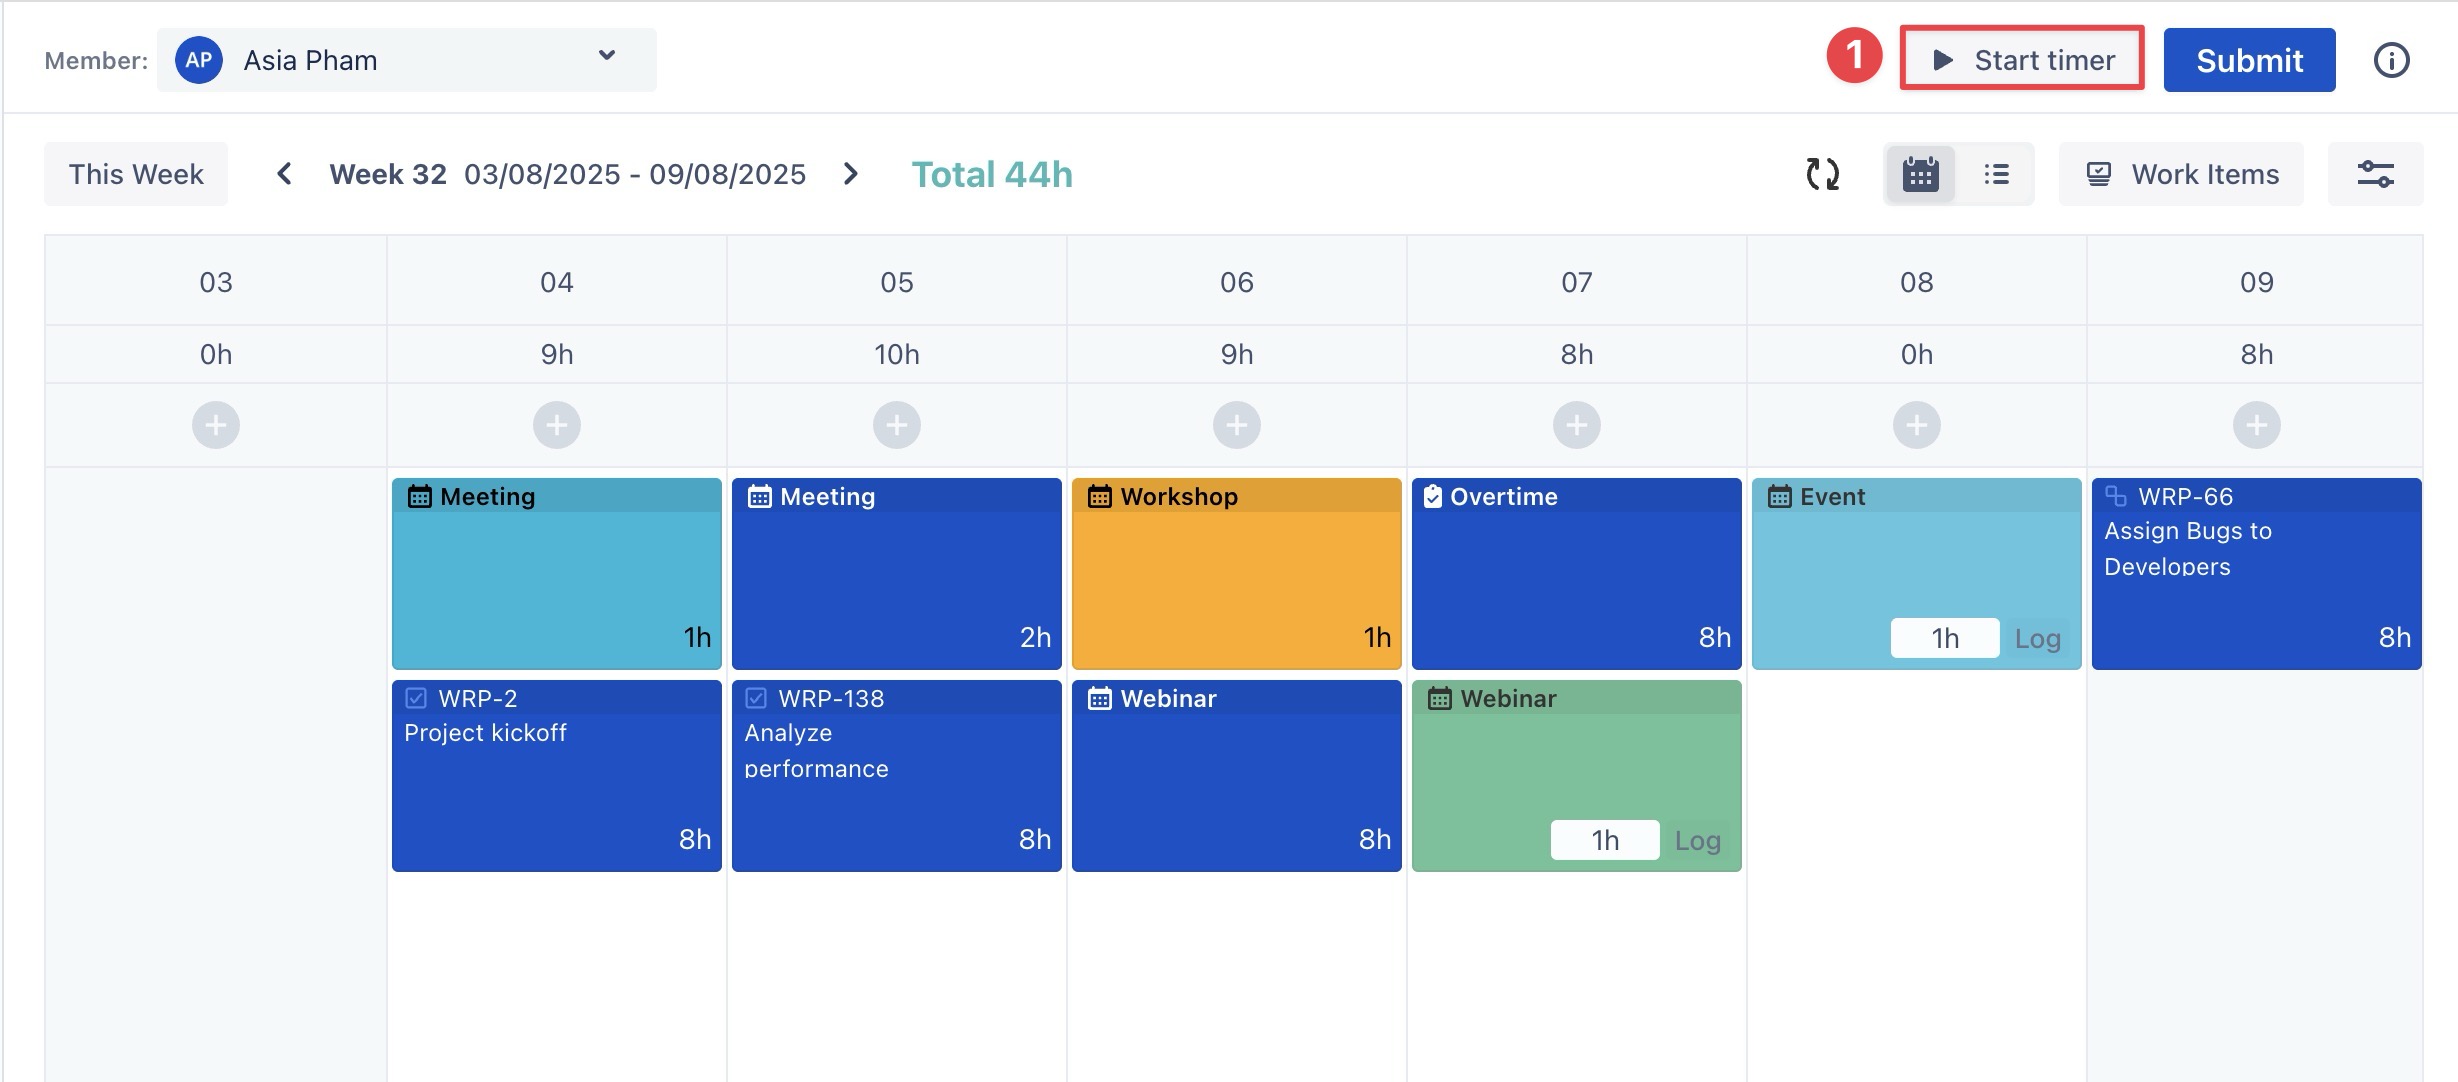
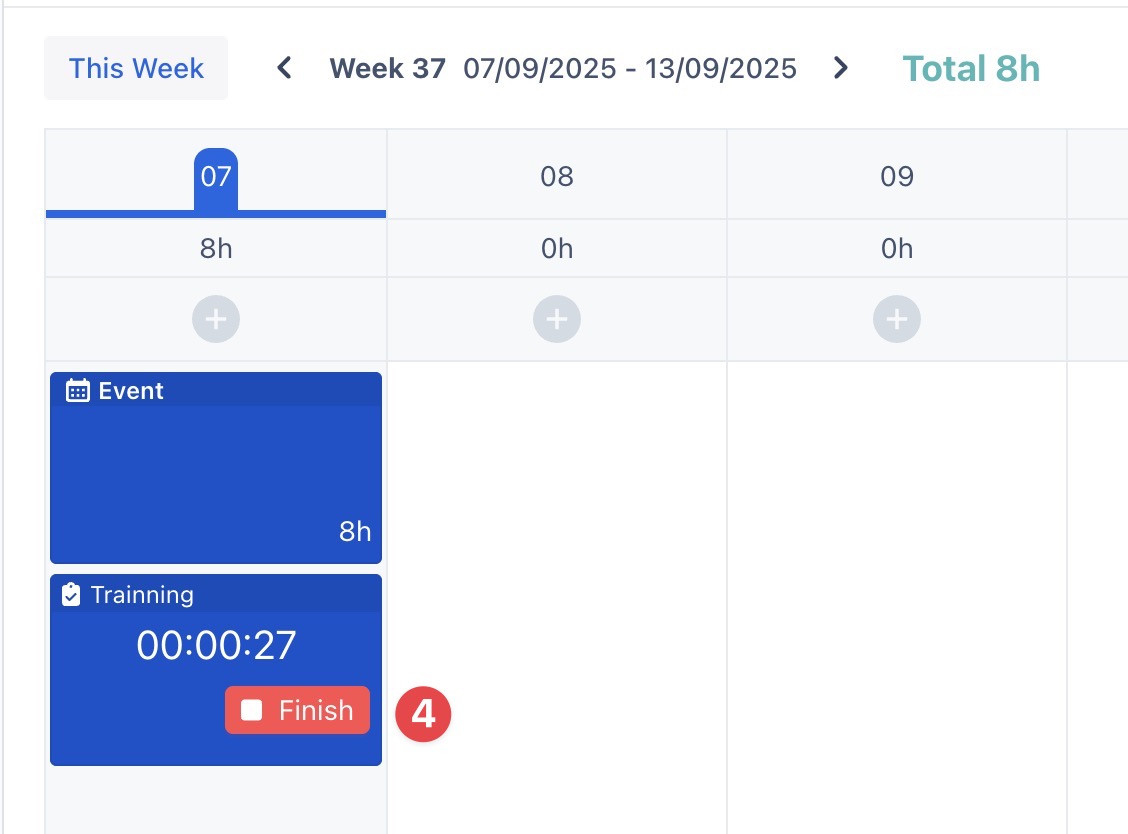
Once logged, Events and Custom Tasks are displayed on the board, as shown below:
From List View
Log Time for Scheduled Events
To log time for events that are already created, follow these steps:
-
Navigate to
-
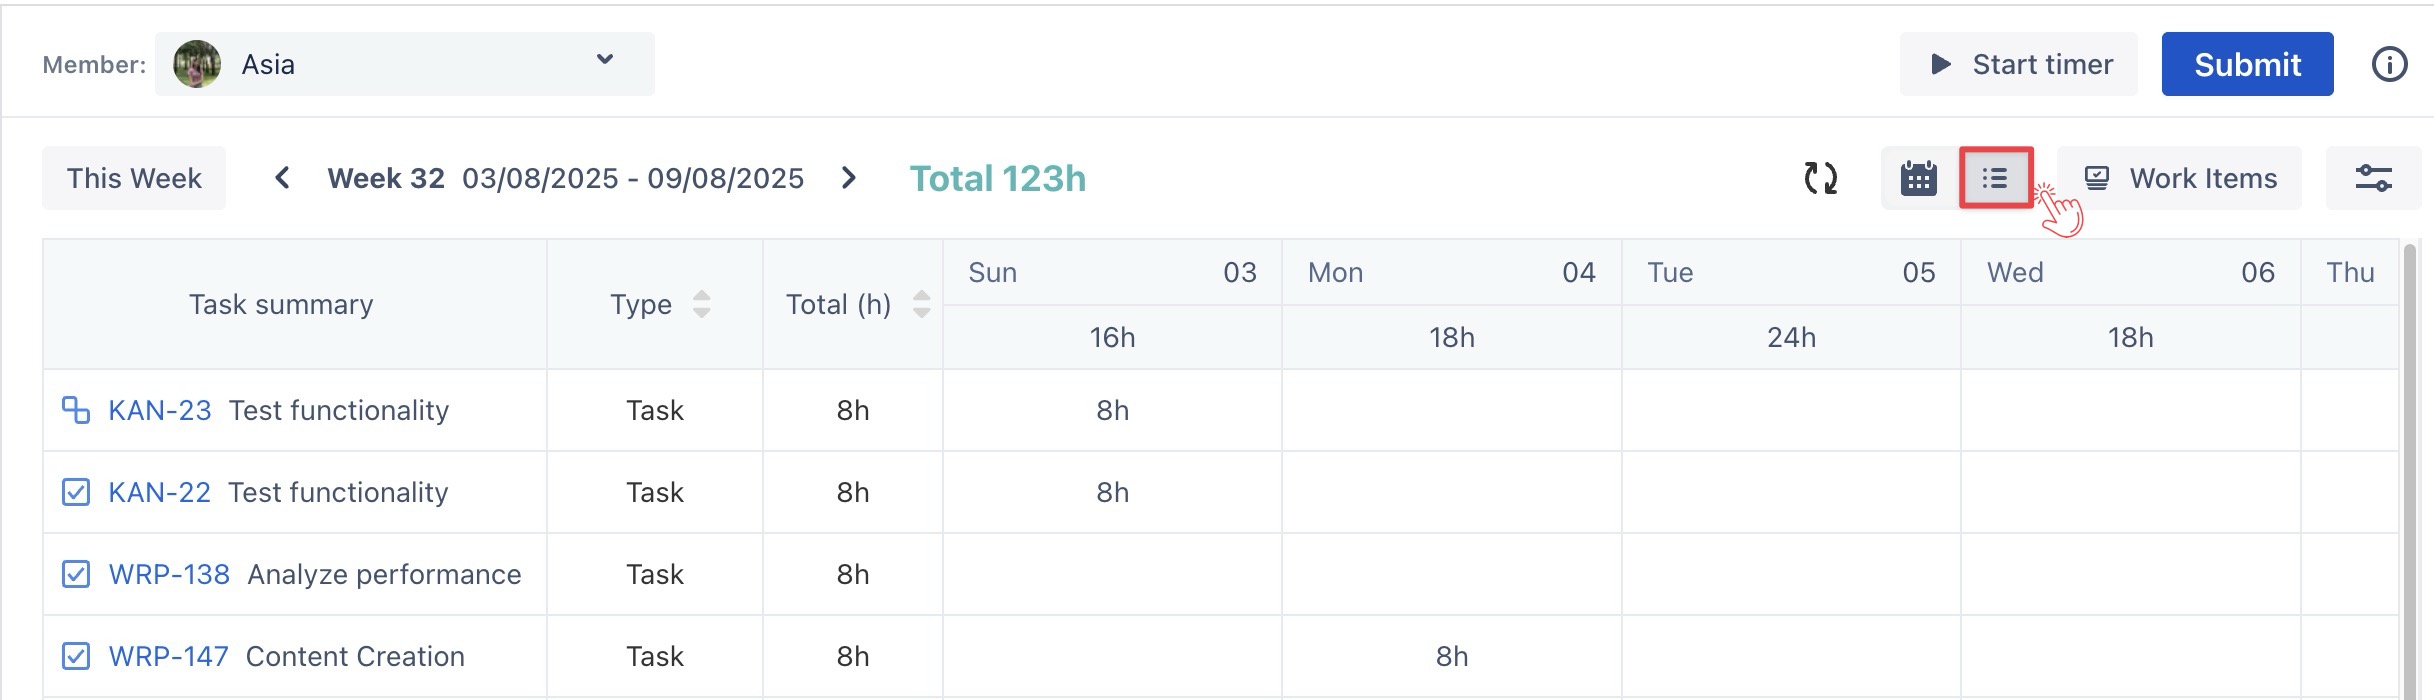
Switch to the List View by selecting

-
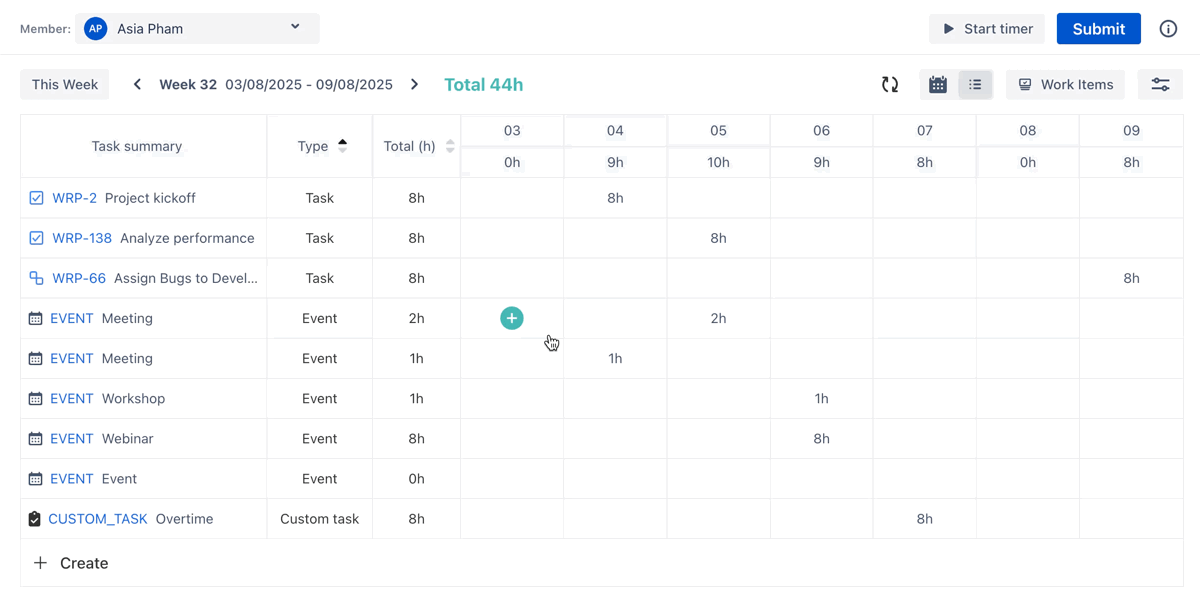
Hover over the empty cell for the event, then click the (+) button to open the Log Time form.
-
Fill in the event details, including time spent, date, and any relevant notes.
-
Click

Log Time for New Events or Custom Tasks
-
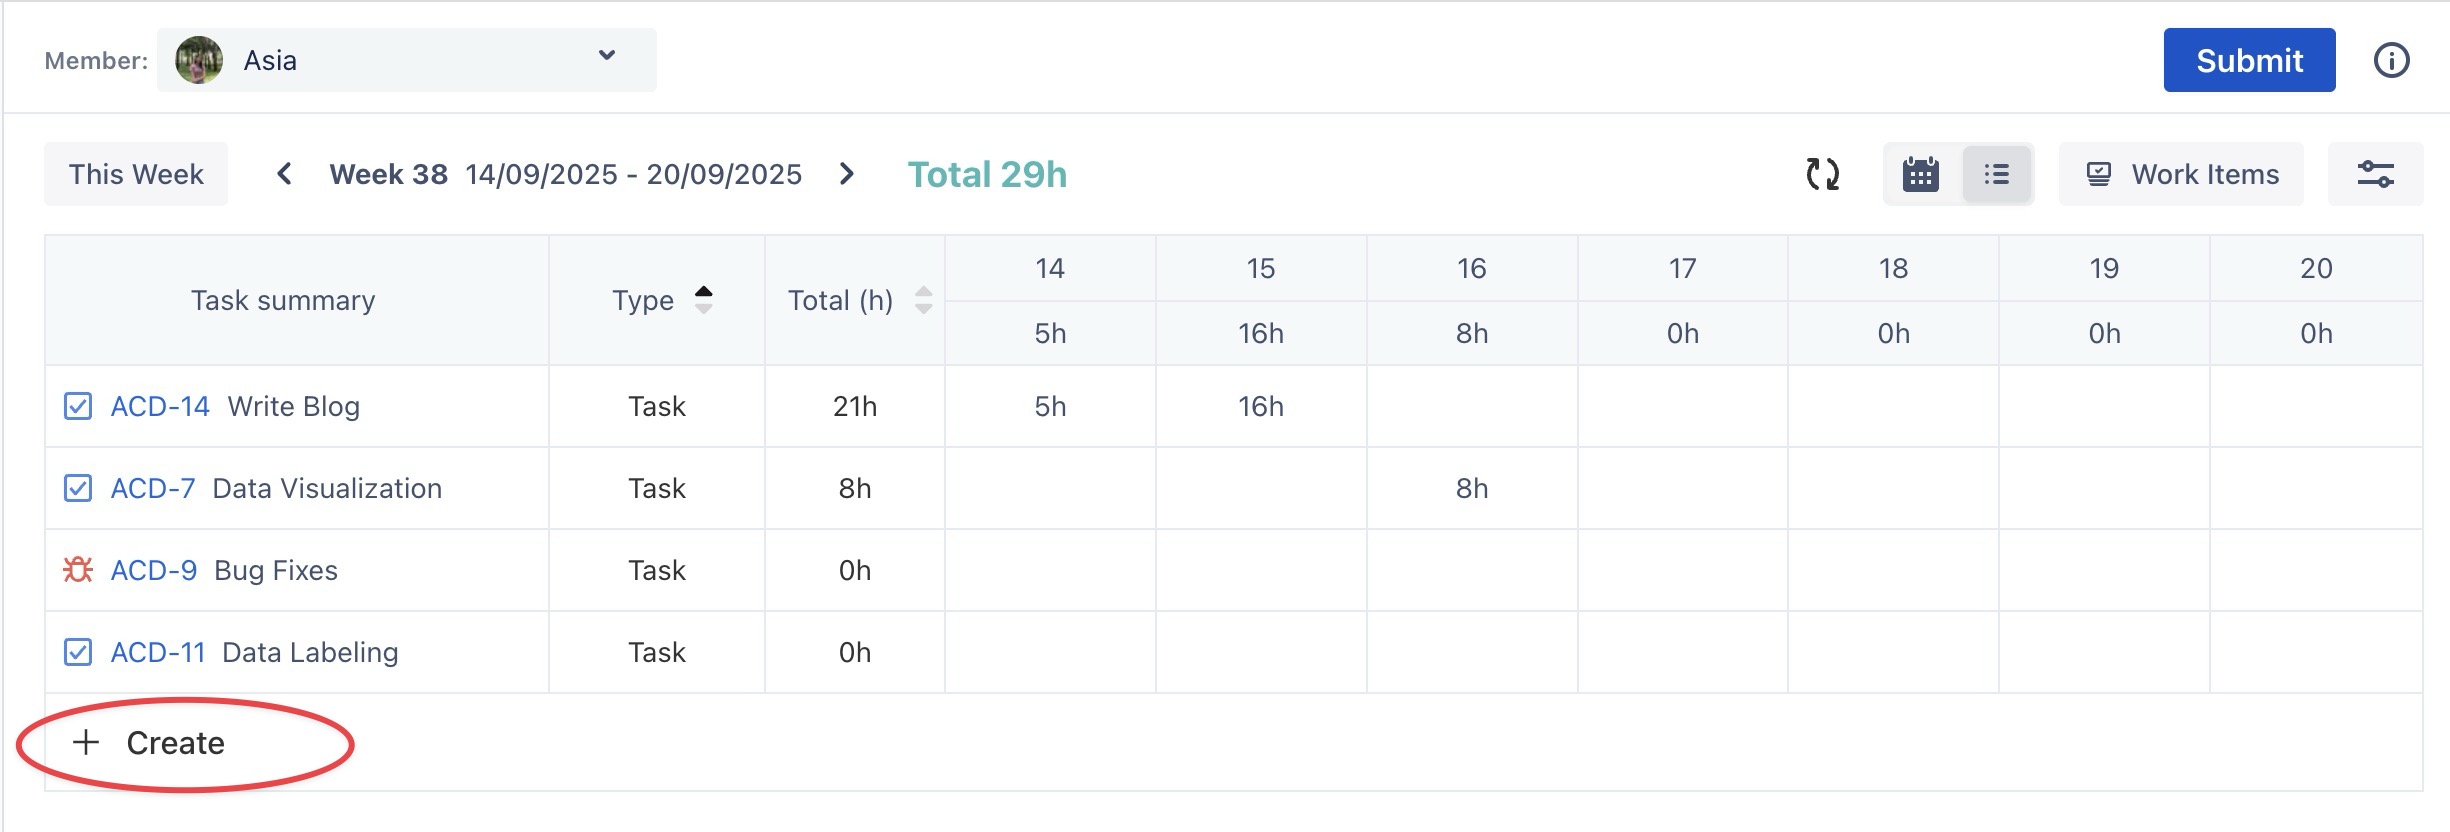
Click the + Create button located below the table to open the Planning Dialog.
-
In the Planning Dialog, choose the task type:
-
Event: Search for an existing event from the dropdown menu.
-
Other: Enter a name for the custom task.
-
Fill in the event details, including time spent, date, and any relevant notes.
-
Click
Log Time using the Start Timer
-
From the Calendar or List View, click

-
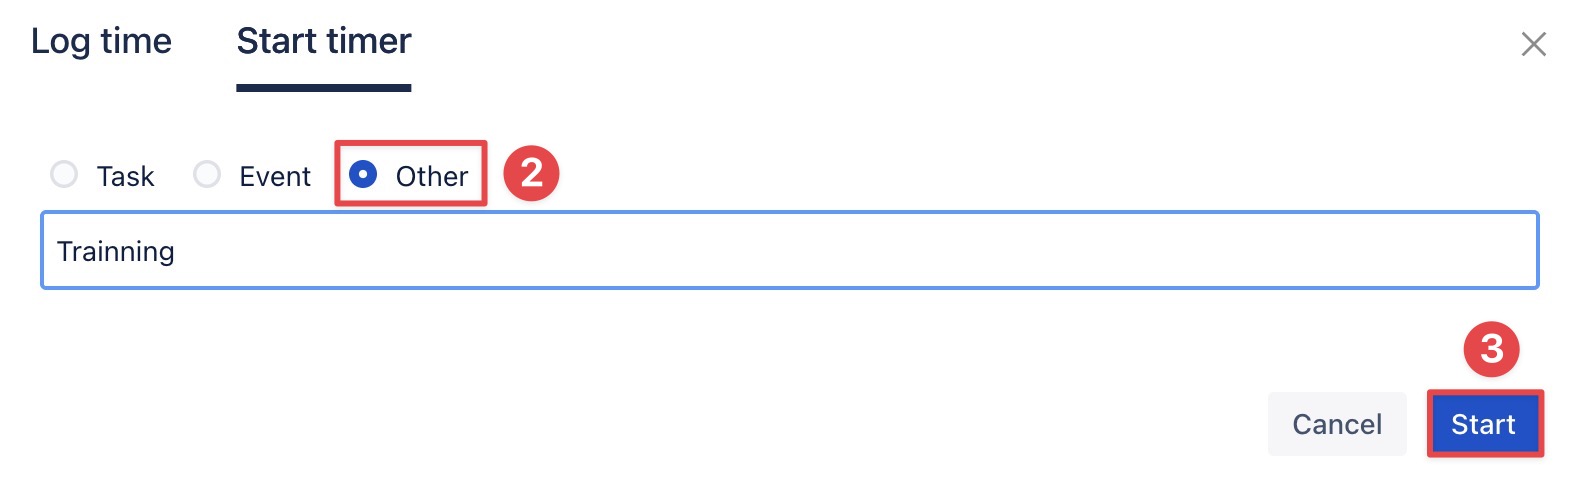
In the Planning Dialog, select Other as the task type and enter a task name.
-
Click

-
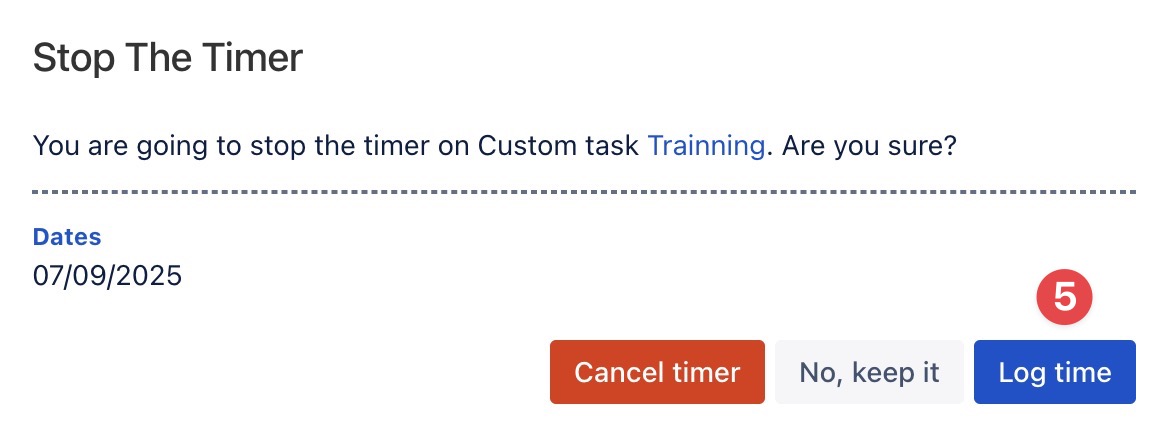
When you finish the task, click Finish.
-
A confirmation pop-up will appear: select

To edit or delete a Timelog entry for Events or Custom Tasks, follow the same steps as for Jira tasks. [Learn more here.]