.png)
What is a Swimlane?
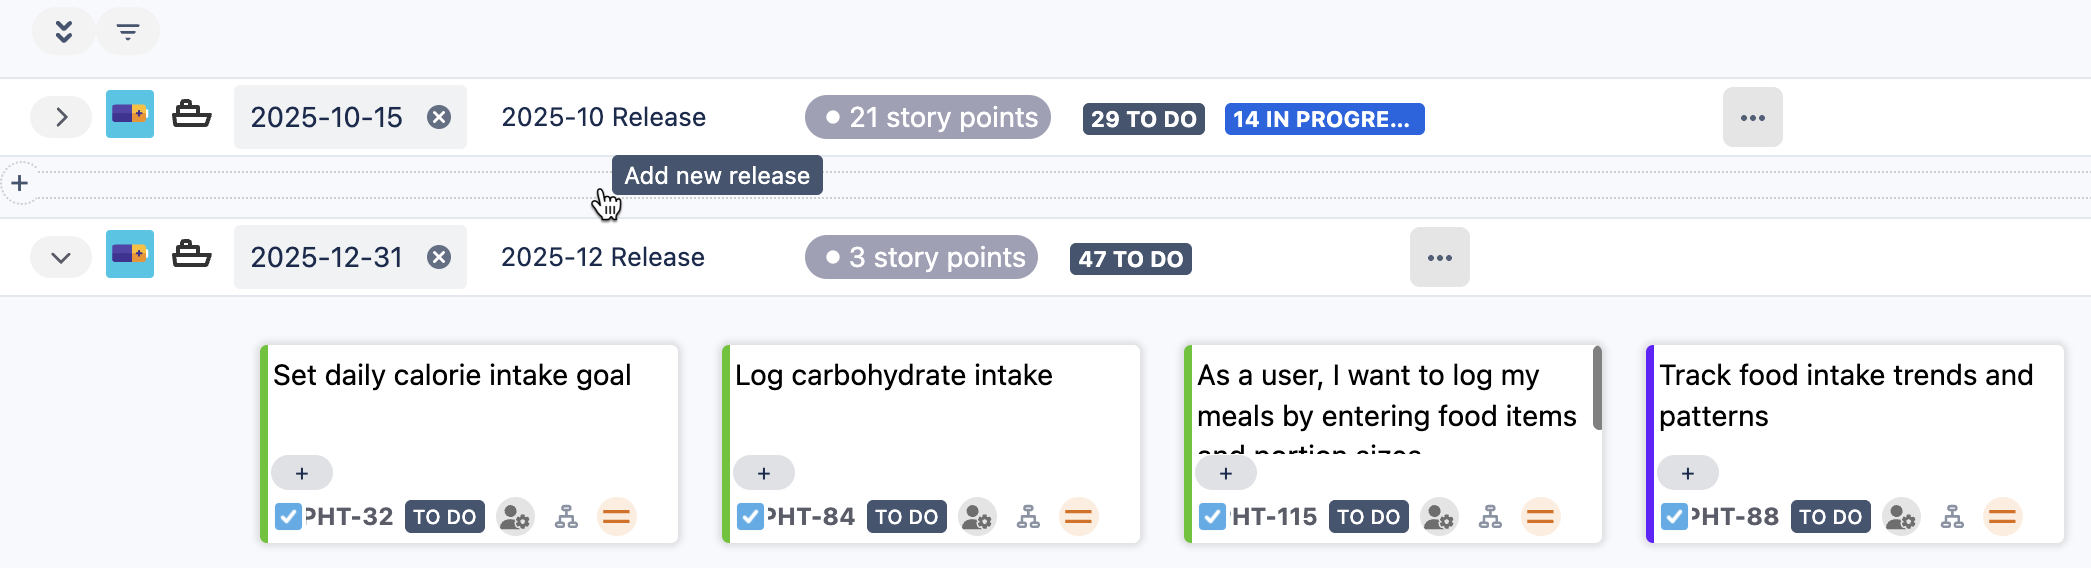
Swimlanes organize your Stories horizontally, grouping them by release or sprint. This makes it easy to see what’s included in each iteration and track progress over time.

In ProductGo, you can use three swimlane modes:
-
Release
-
Sprint
-
No swimlane
Enabling and Switching Swimlane Modes
By default, Sprint and No swimlane modes are disabled. To enable them, go to Admin Settings and turn on the options for Sprint or No swimlane mode:
You can switch between swimlane modes anytime in User Settings.
Creating a Swimlane
To add a new swimlane, go to the area below the Steps on your story map. Hover over the swimlanes and click the + button that appears.
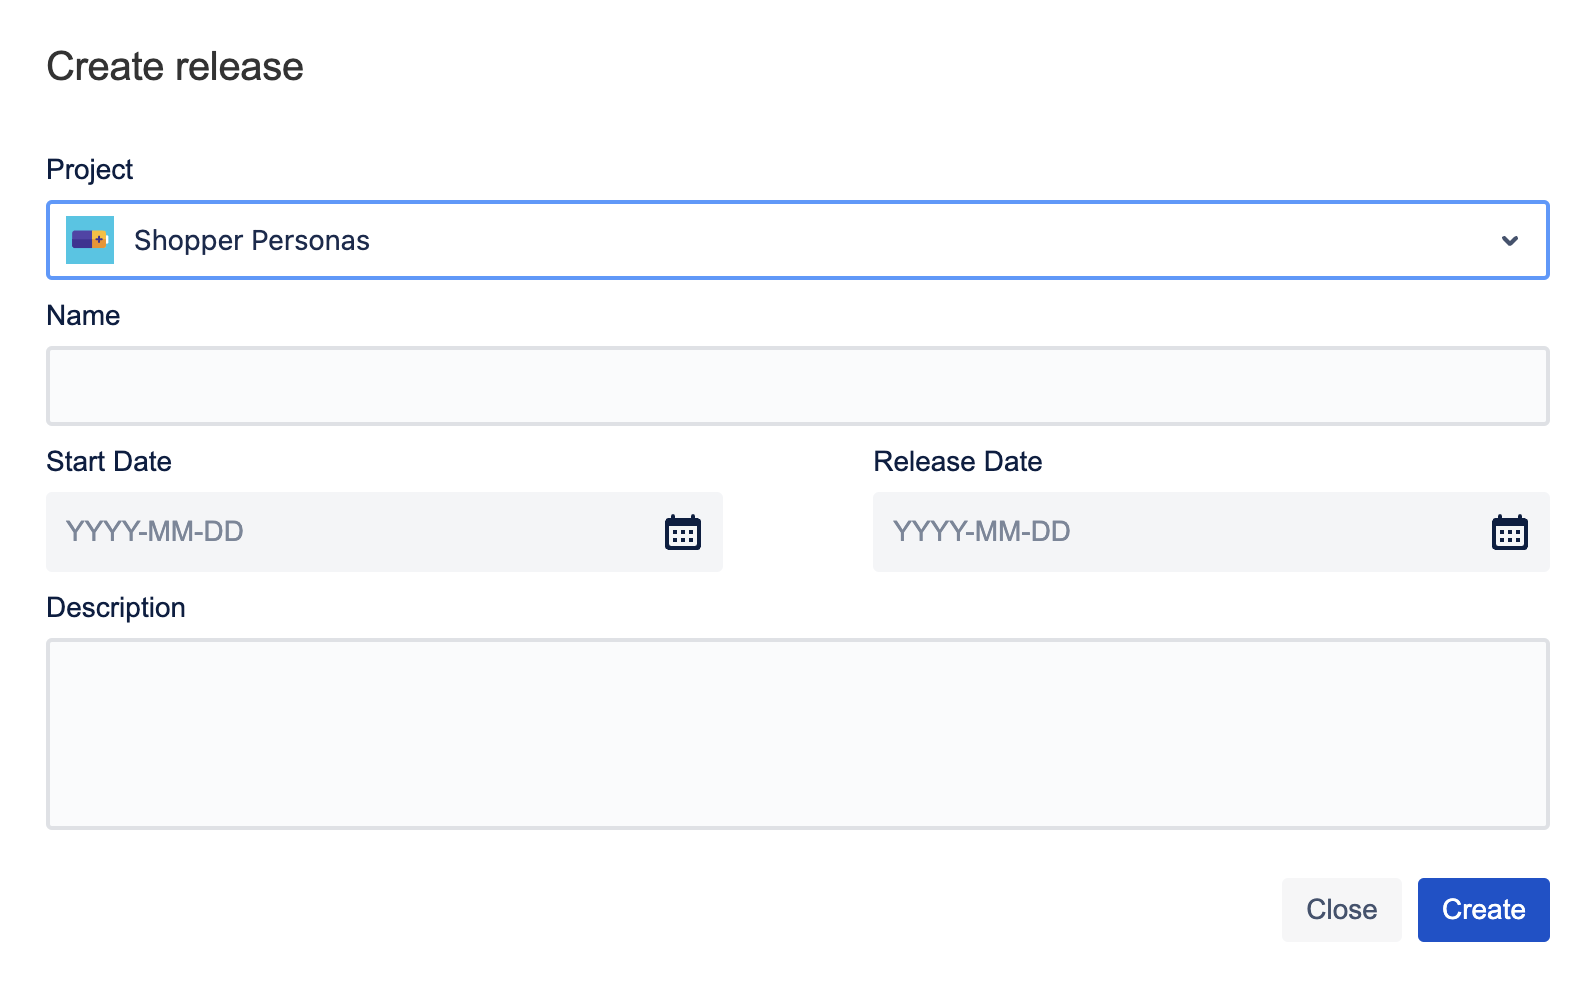
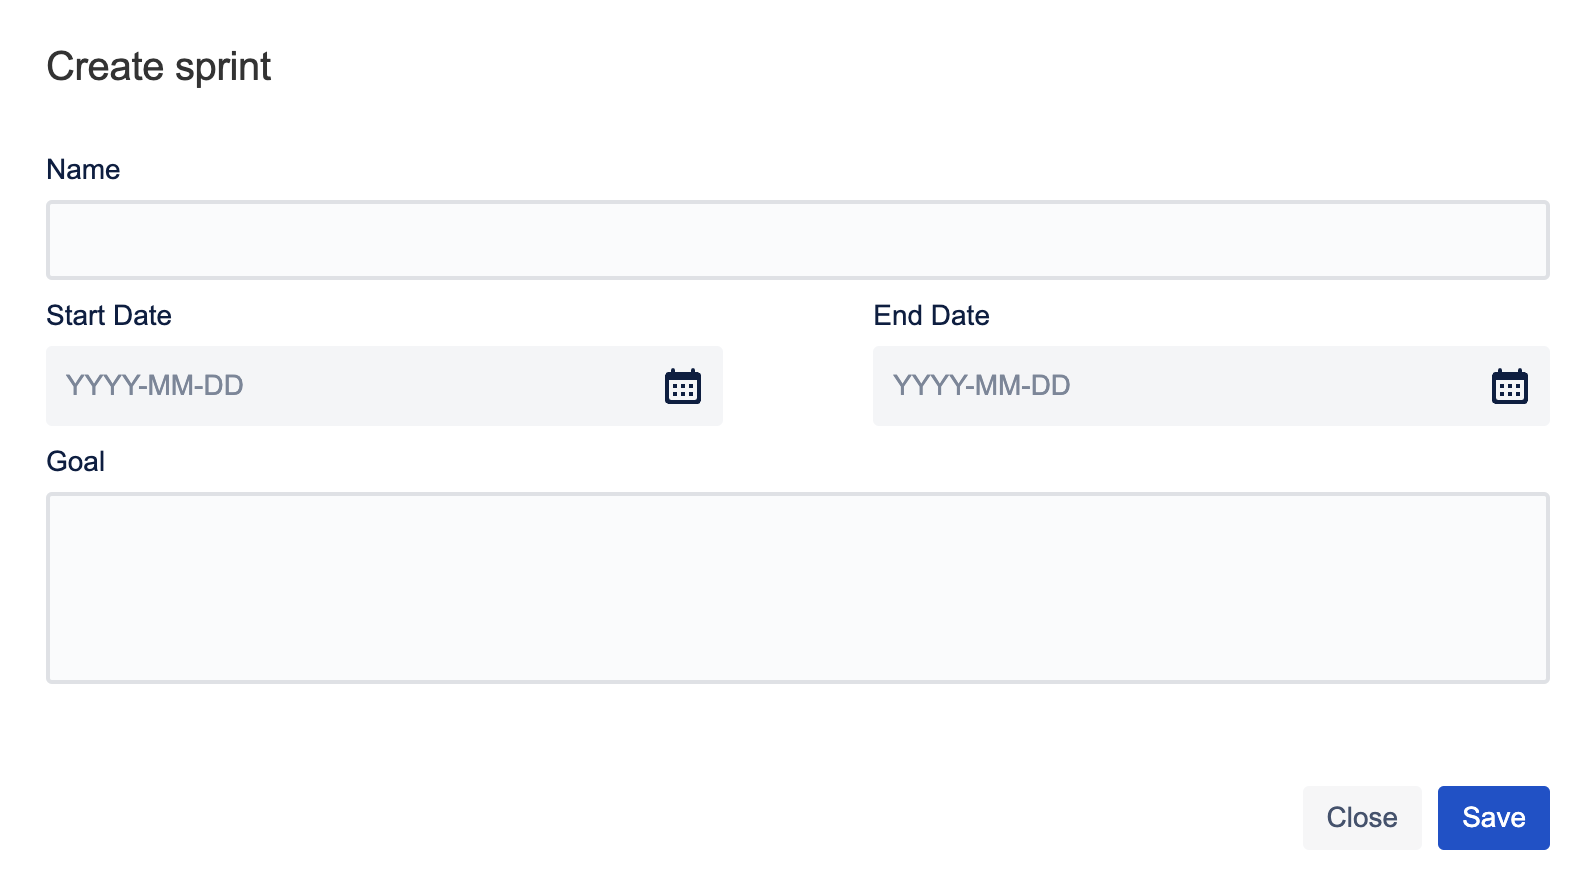
Then, enter the details for your Release or Sprint:
-
Name
-
Start Date/End Date
-
Description/Goal
Adding Stories to Swimlanes
You can add stories to a swimlane by:
-
Creating new stories directly within the swimlane
-
Dragging stories from the Unscheduled swimlane at the bottom
-
Dragging stories from the Issues without epics option in the board menu

Managing Sprints and Releases
You can start or complete a Sprint, or release a Release, directly from the story map:
For Sprint
For Sprints, use the More options button on the sprint swimlane to Start or Complete the sprint.

Once started, the swimlane displays an Active sprint badge.

When completing a sprint, you’ll see a summary screen and can choose where to move any incomplete issues.

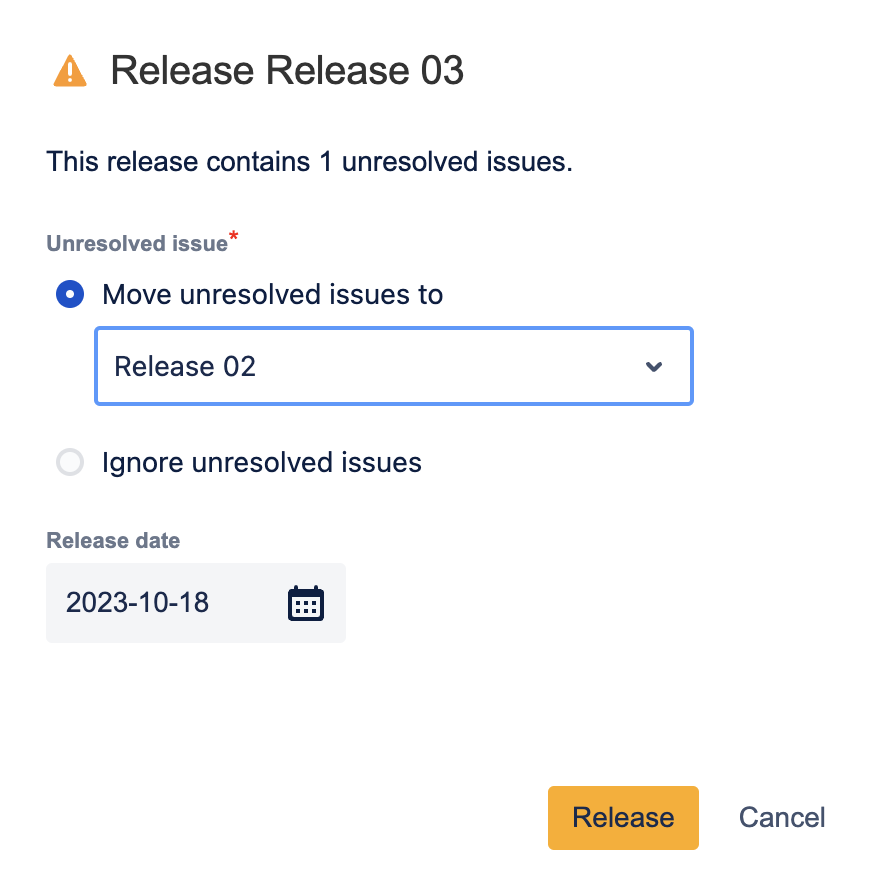
For Releases
For Releases, use the More options button on the release swimlane to release it.

The summary screen lets you decide what to do with any incomplete issues—move them or ignore as needed.
This flexible swimlane setup helps you manage your workflow and keep your team focused on each release or sprint