AI Generator
With the introduction of AI technology in the testing field, AgileTest introduces our latest feature: AI Generator. So what is AgileTest AI Generator and how can it help our testers?
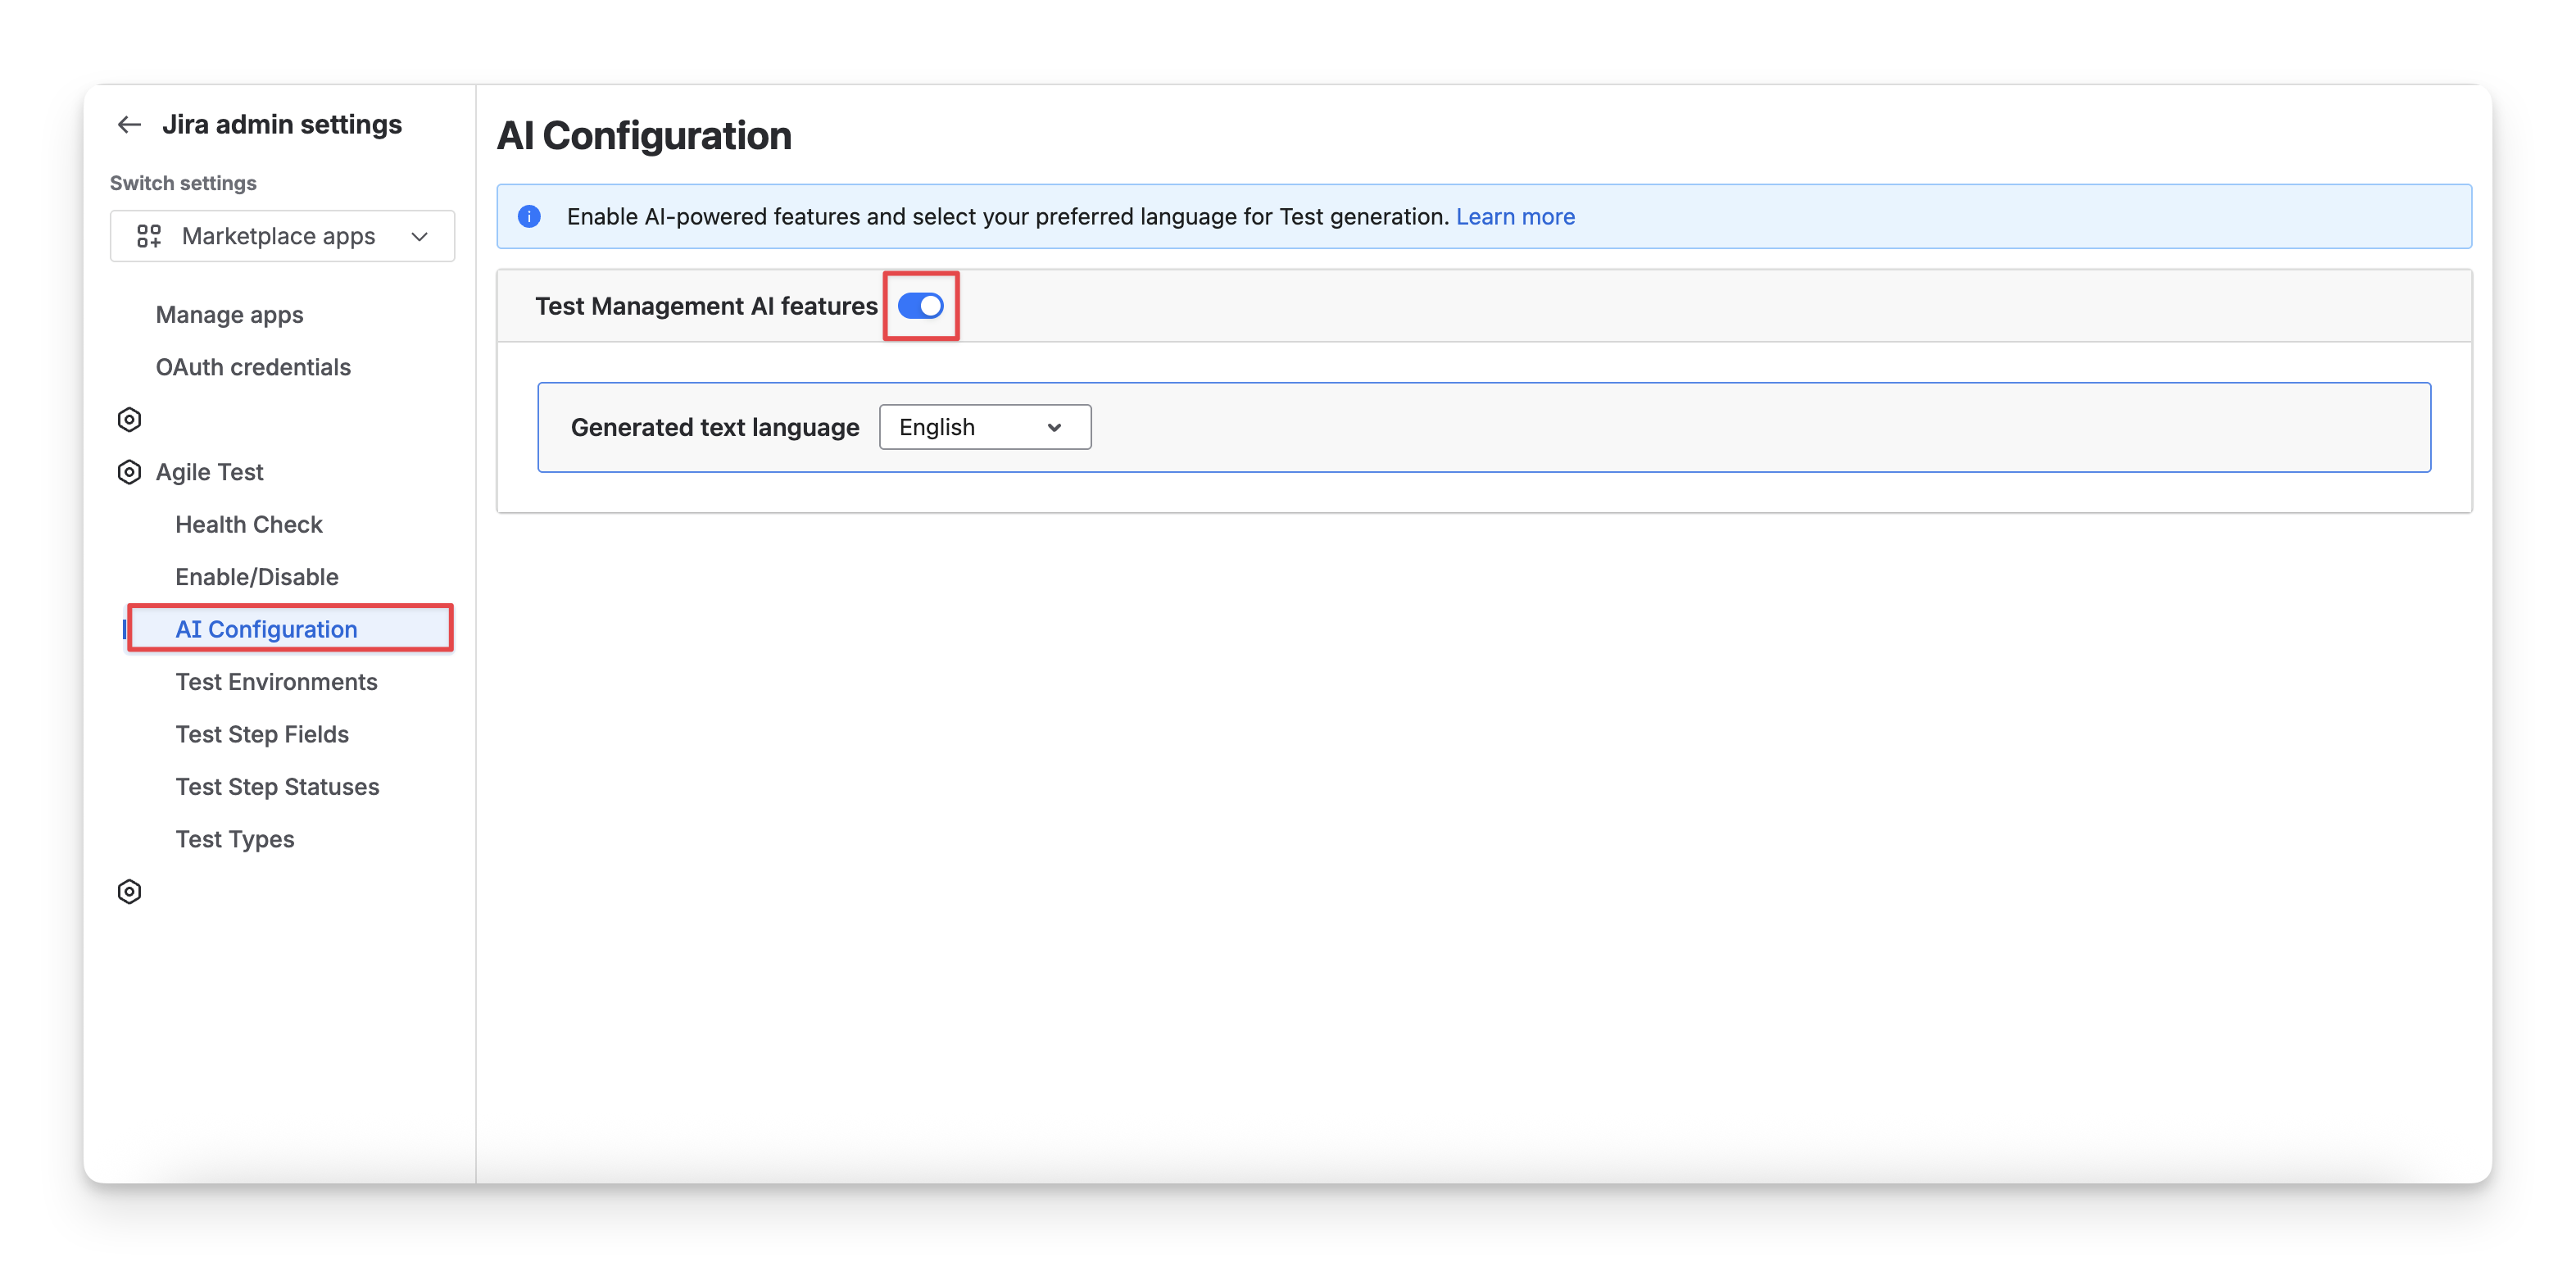
AgileTest AI Generator helps by generating test cases and steps based on test cases’ requirements. Besides that, our users can also customize the languages of the generated outcomes.
1. Generate Test Case
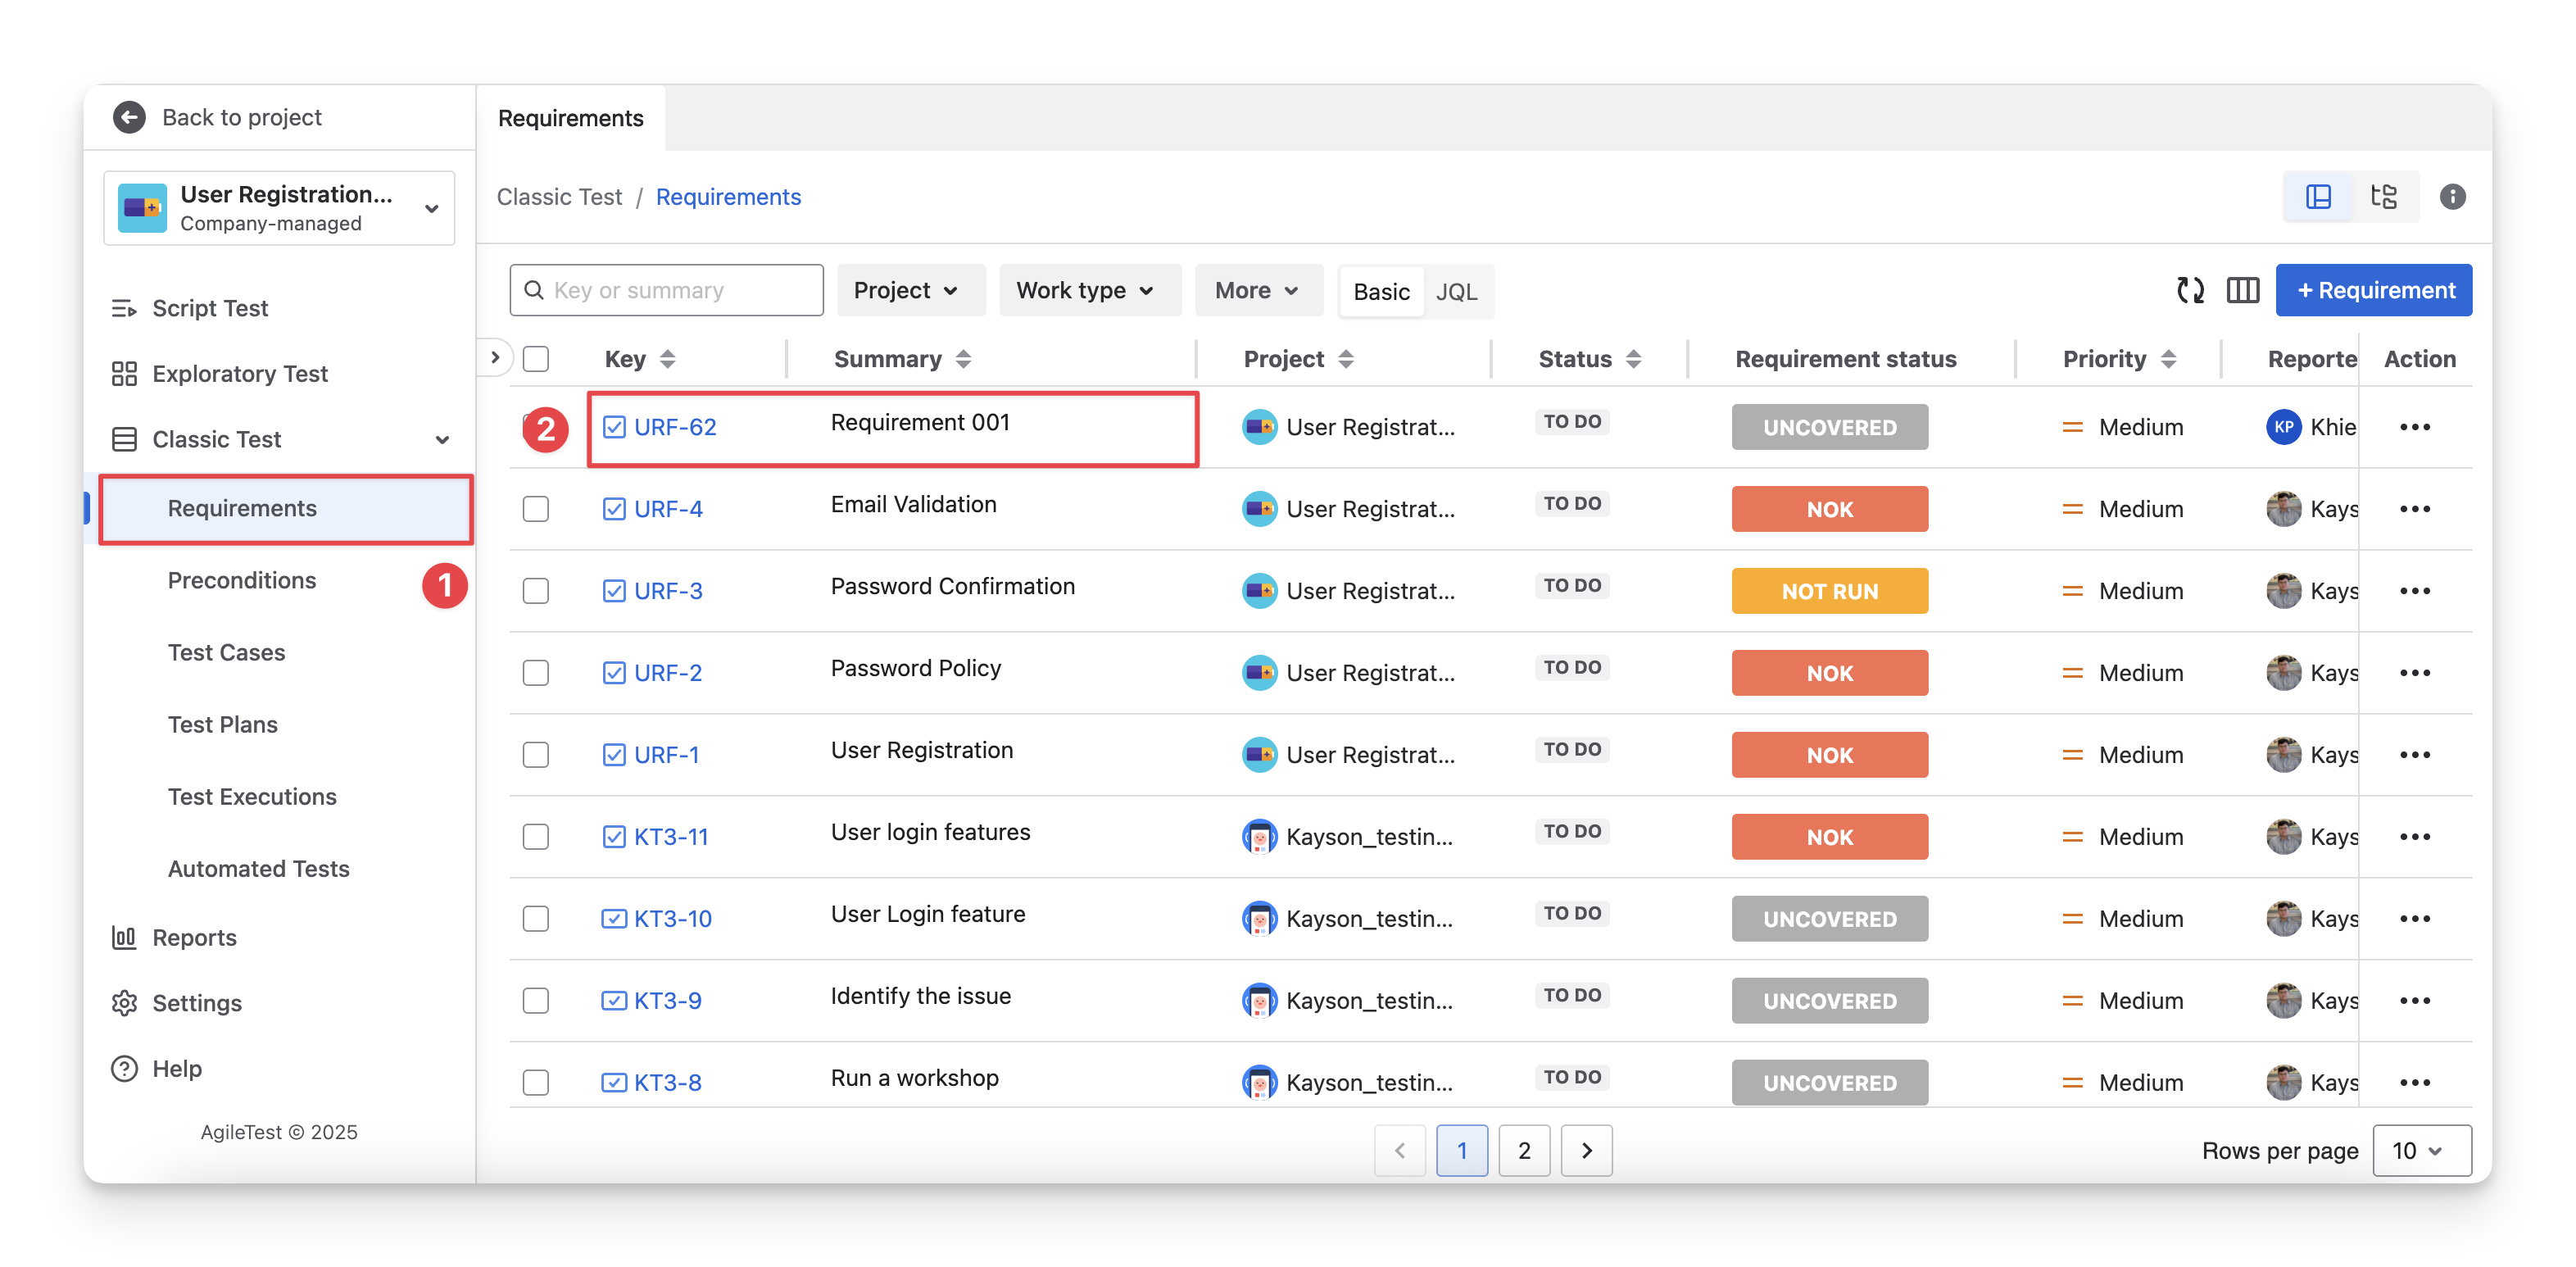
Step 1: Access Requirements
After accessing AgileTest, select "Requirements" from the left-side panel.
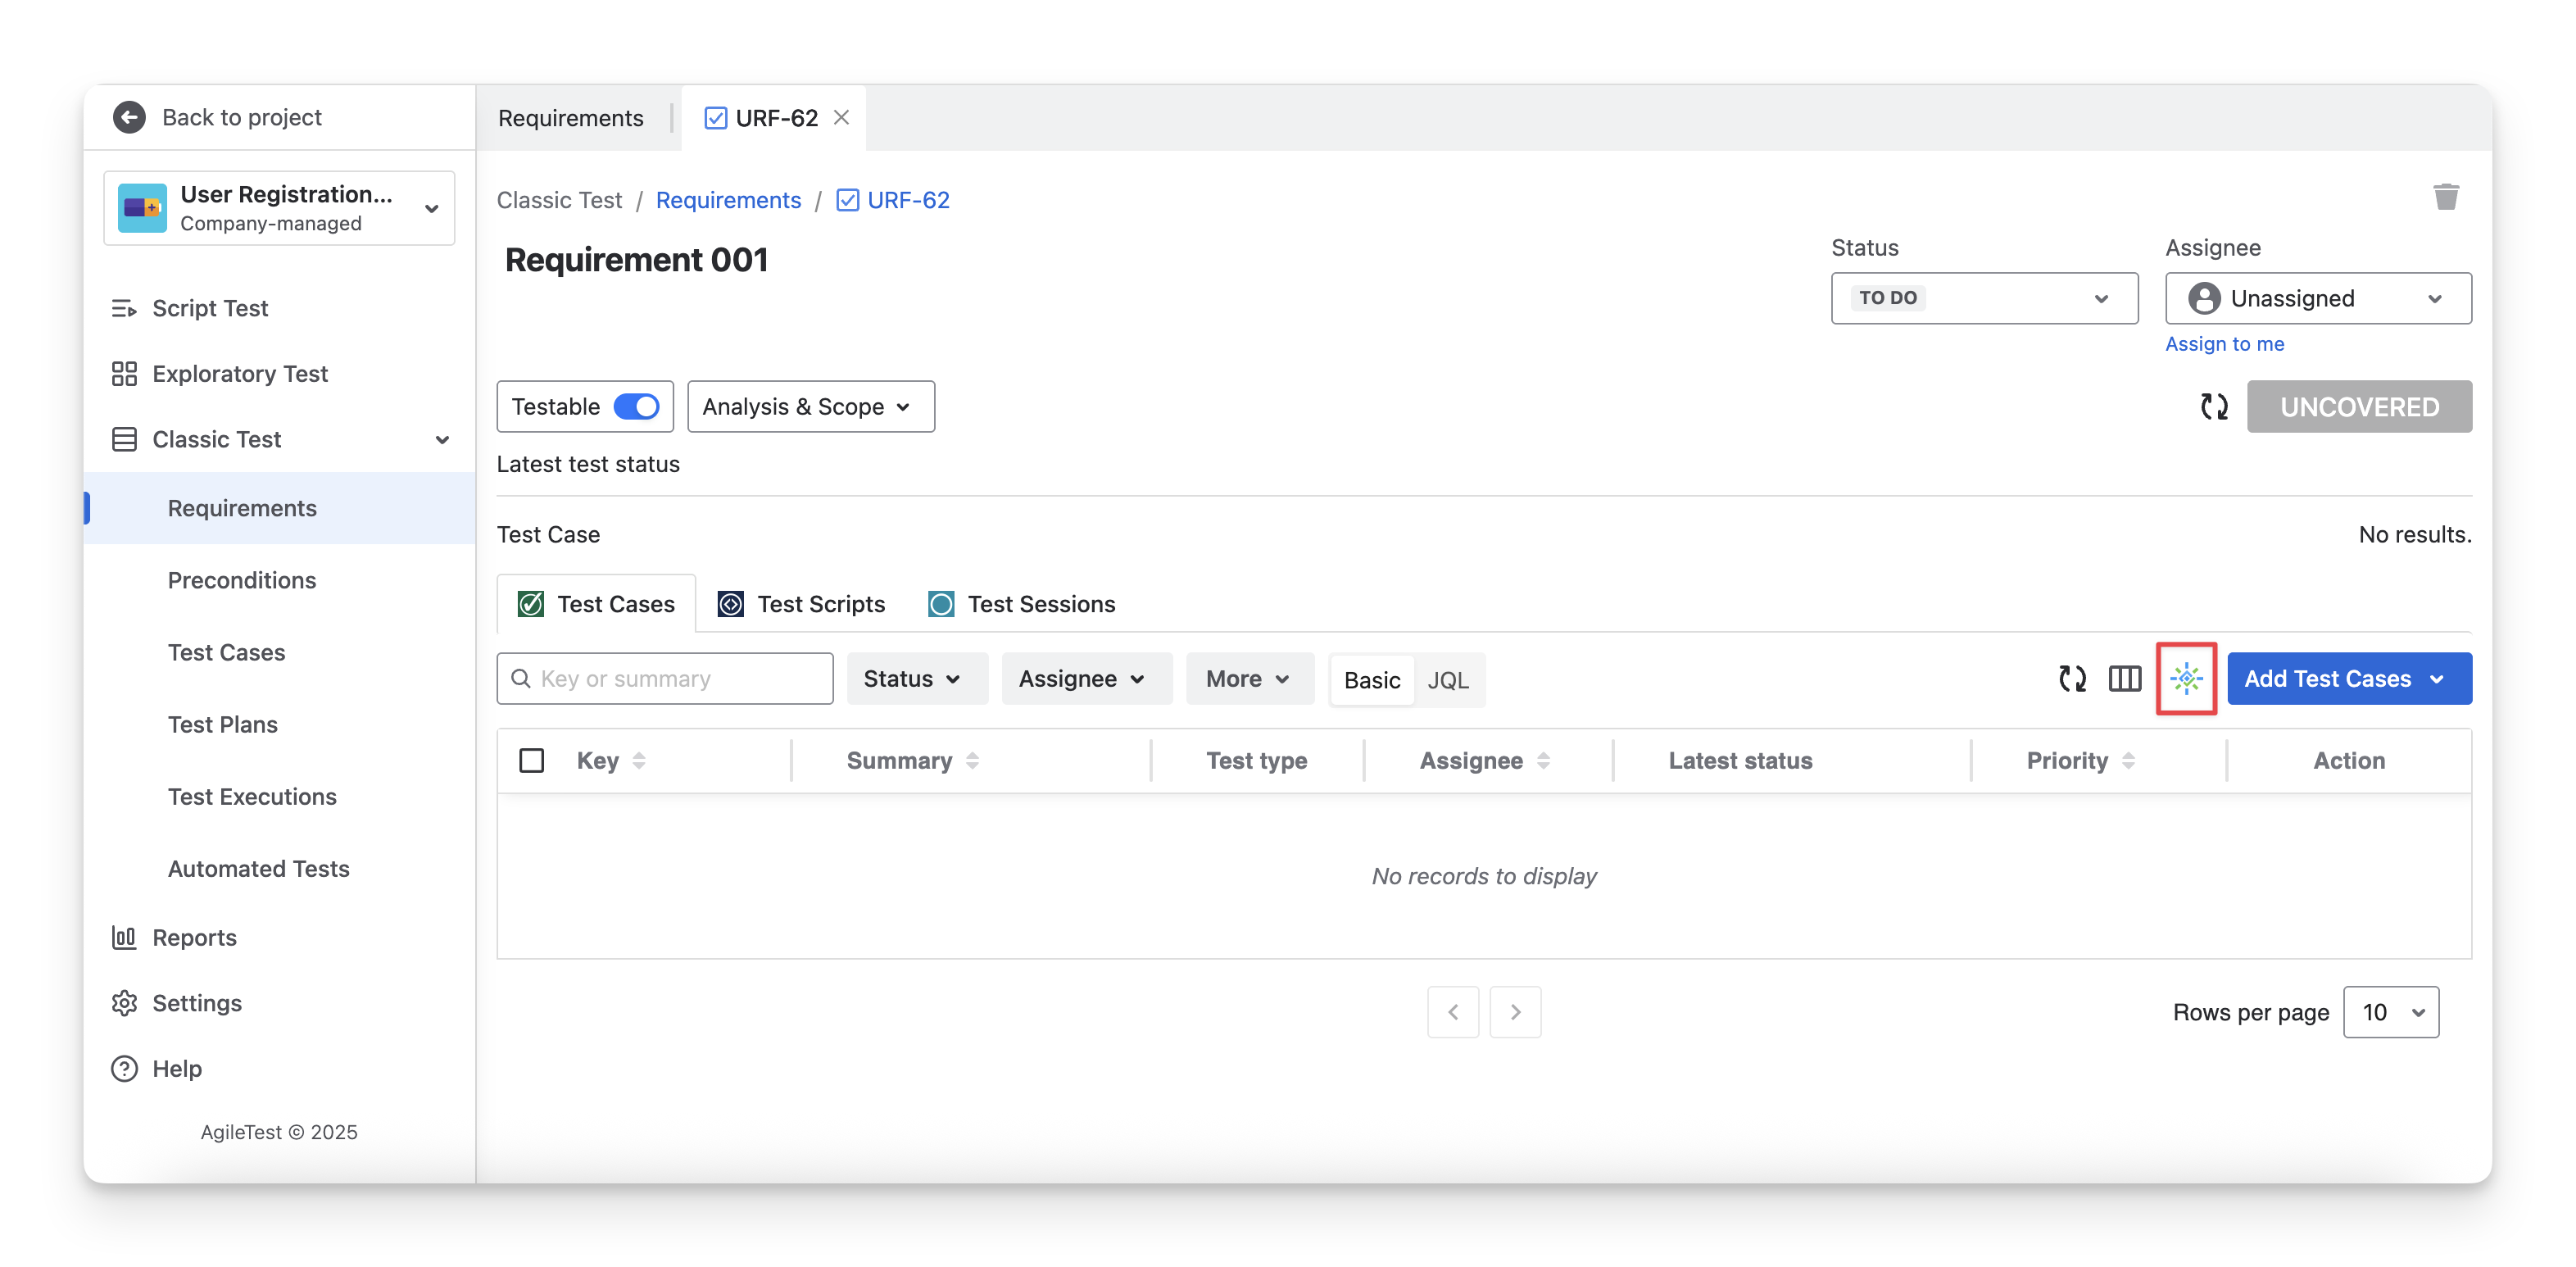
Step 2: Choose AI Generator
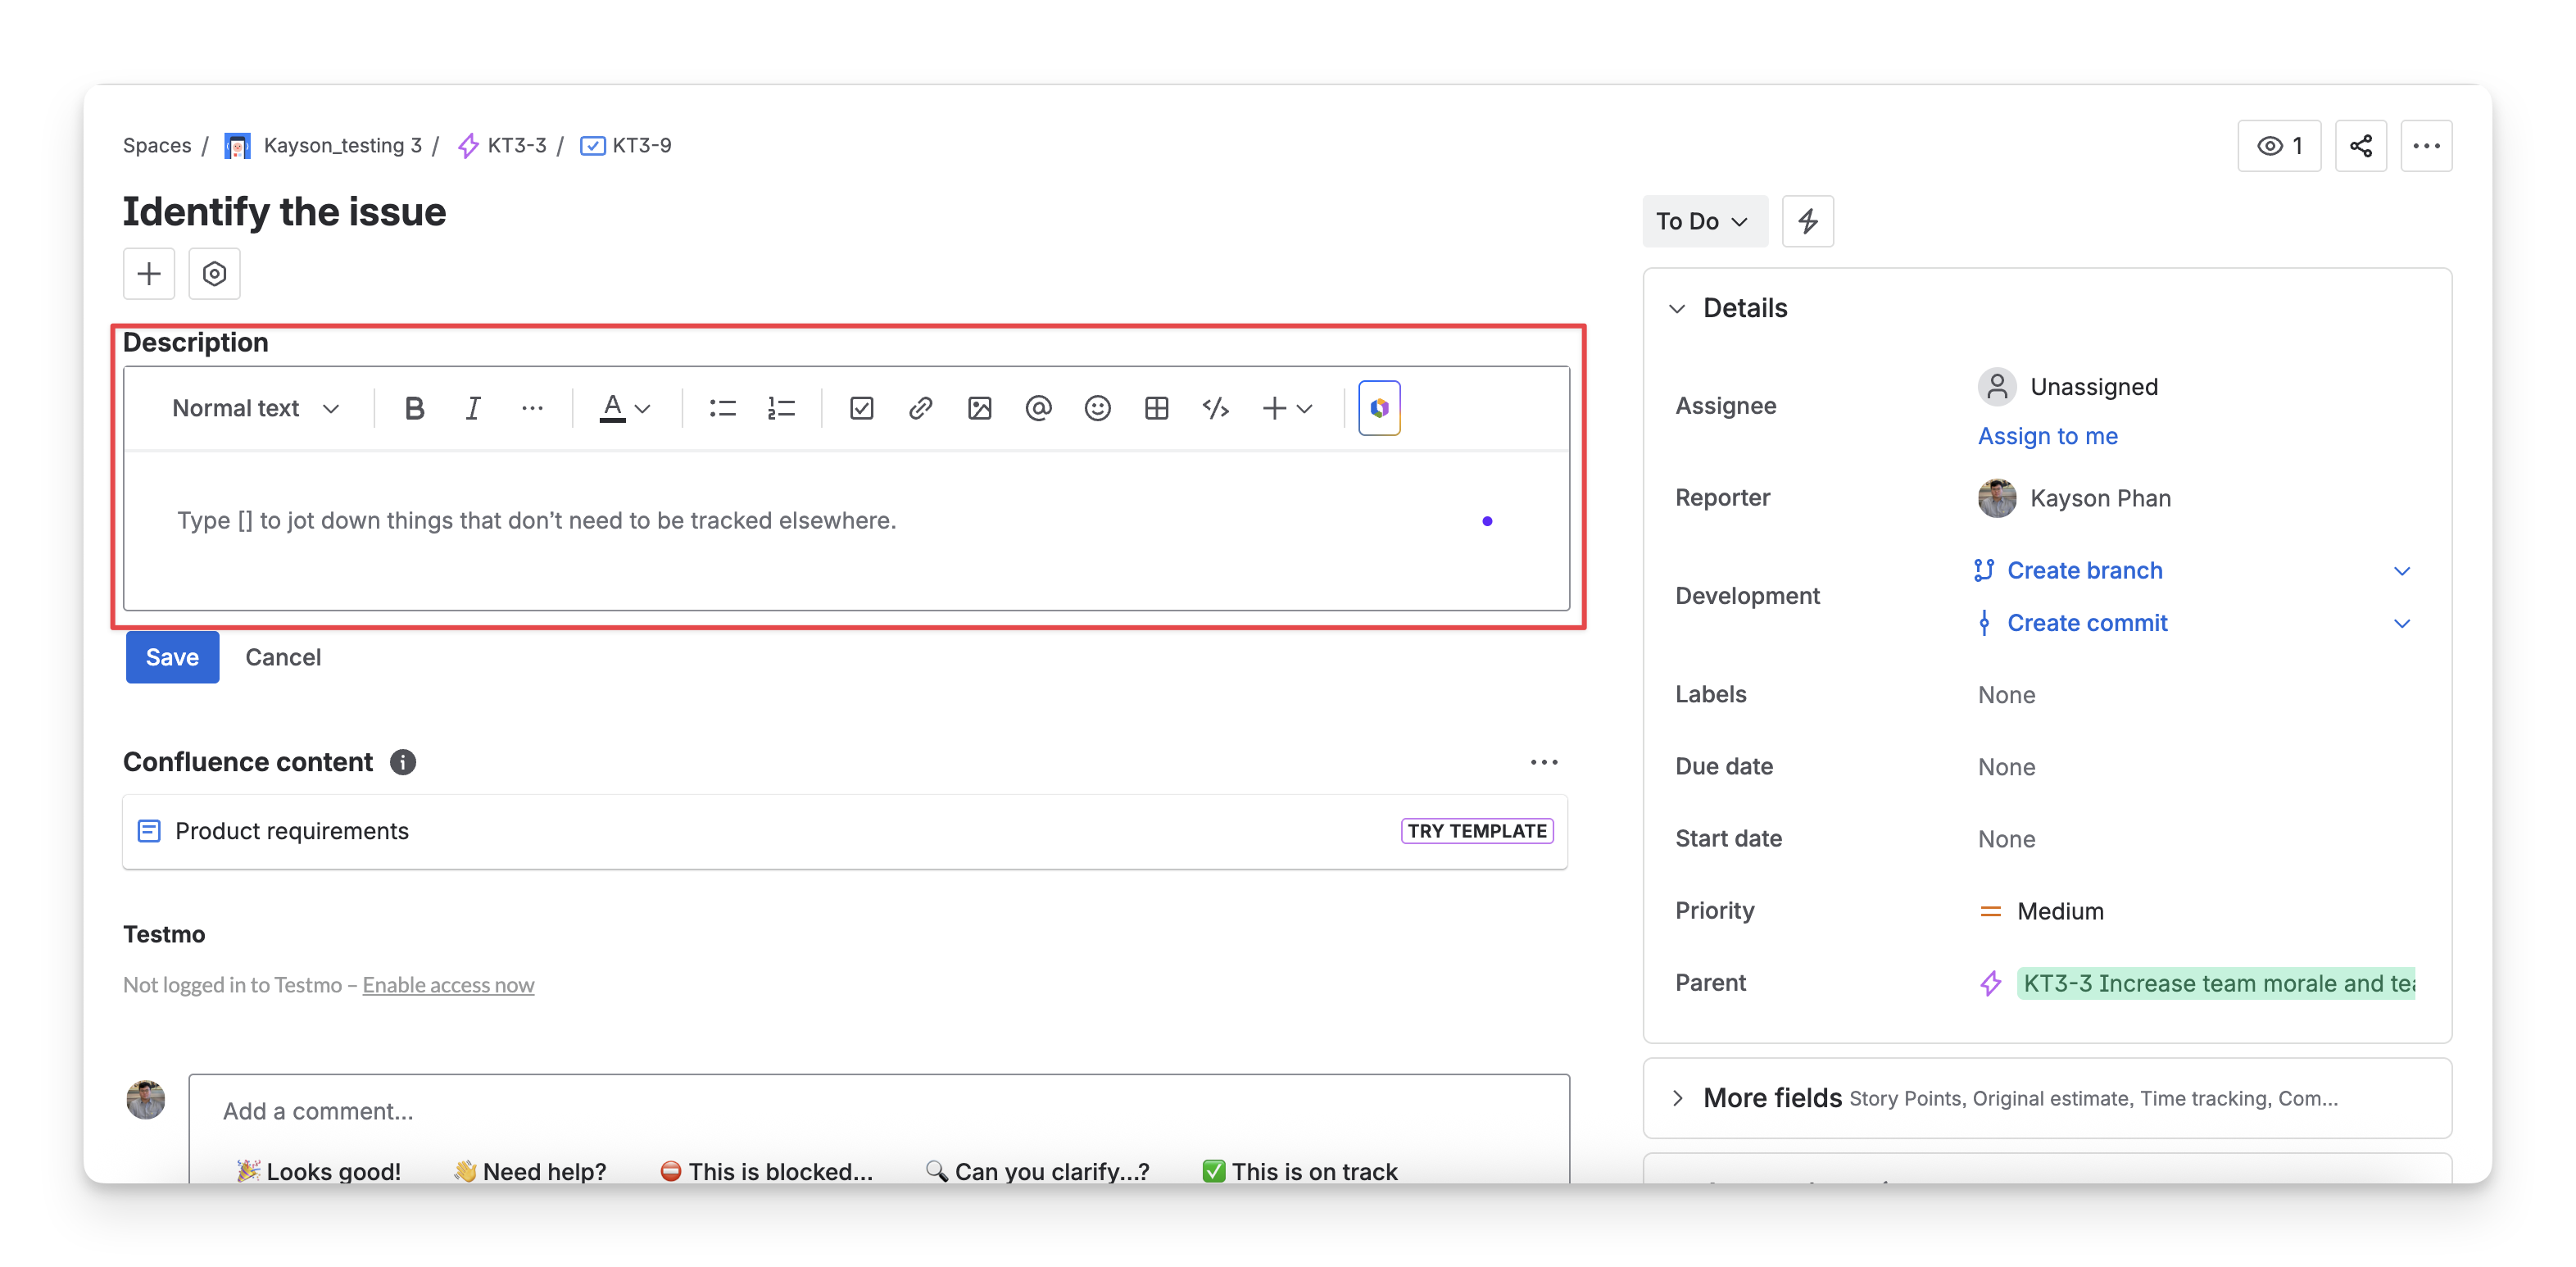
Then choose the Requirement issue to access the issue board. Here users can view the Jira board → Choose AI Generate New Test Cases button, located like in the reference picture below.
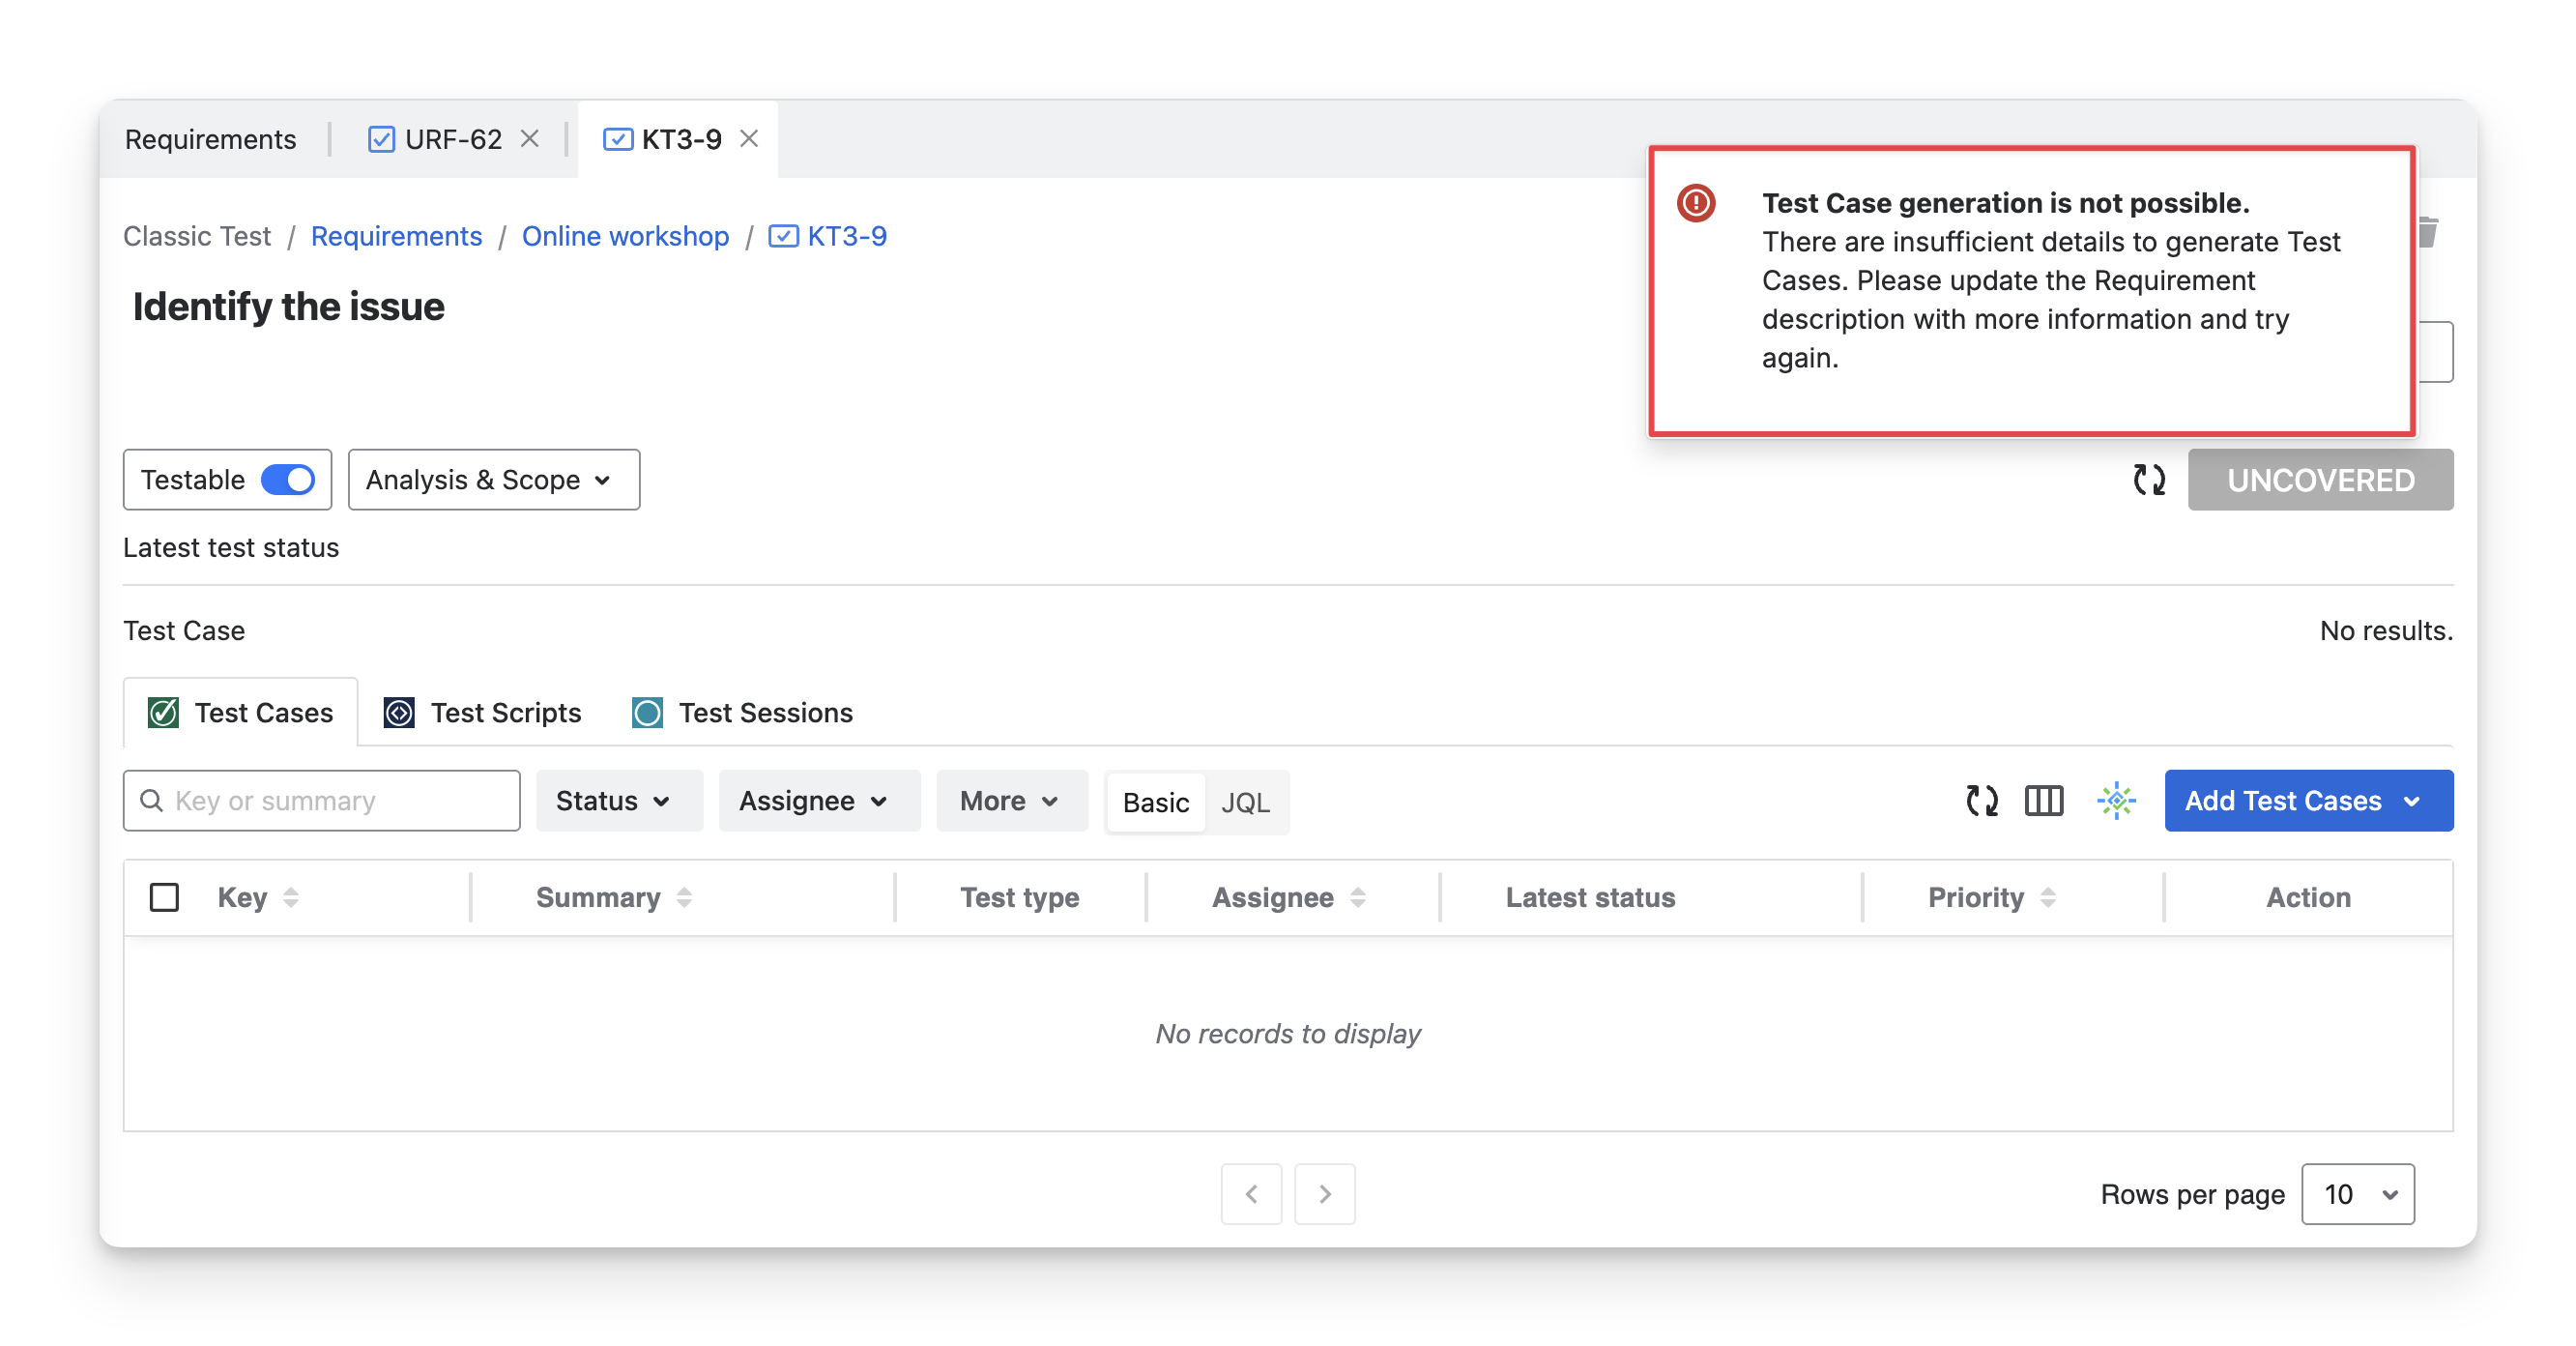
Note: If the Requirements description is inefficient or left blank, then the system will announce that there are insufficient details for the requirements. Then users have to click on the issue to view the Jira board and add the requirement description.
In this case, users should choose the Requirement issue key → fill in the description.
Step 3: Edit Generated Test Cases
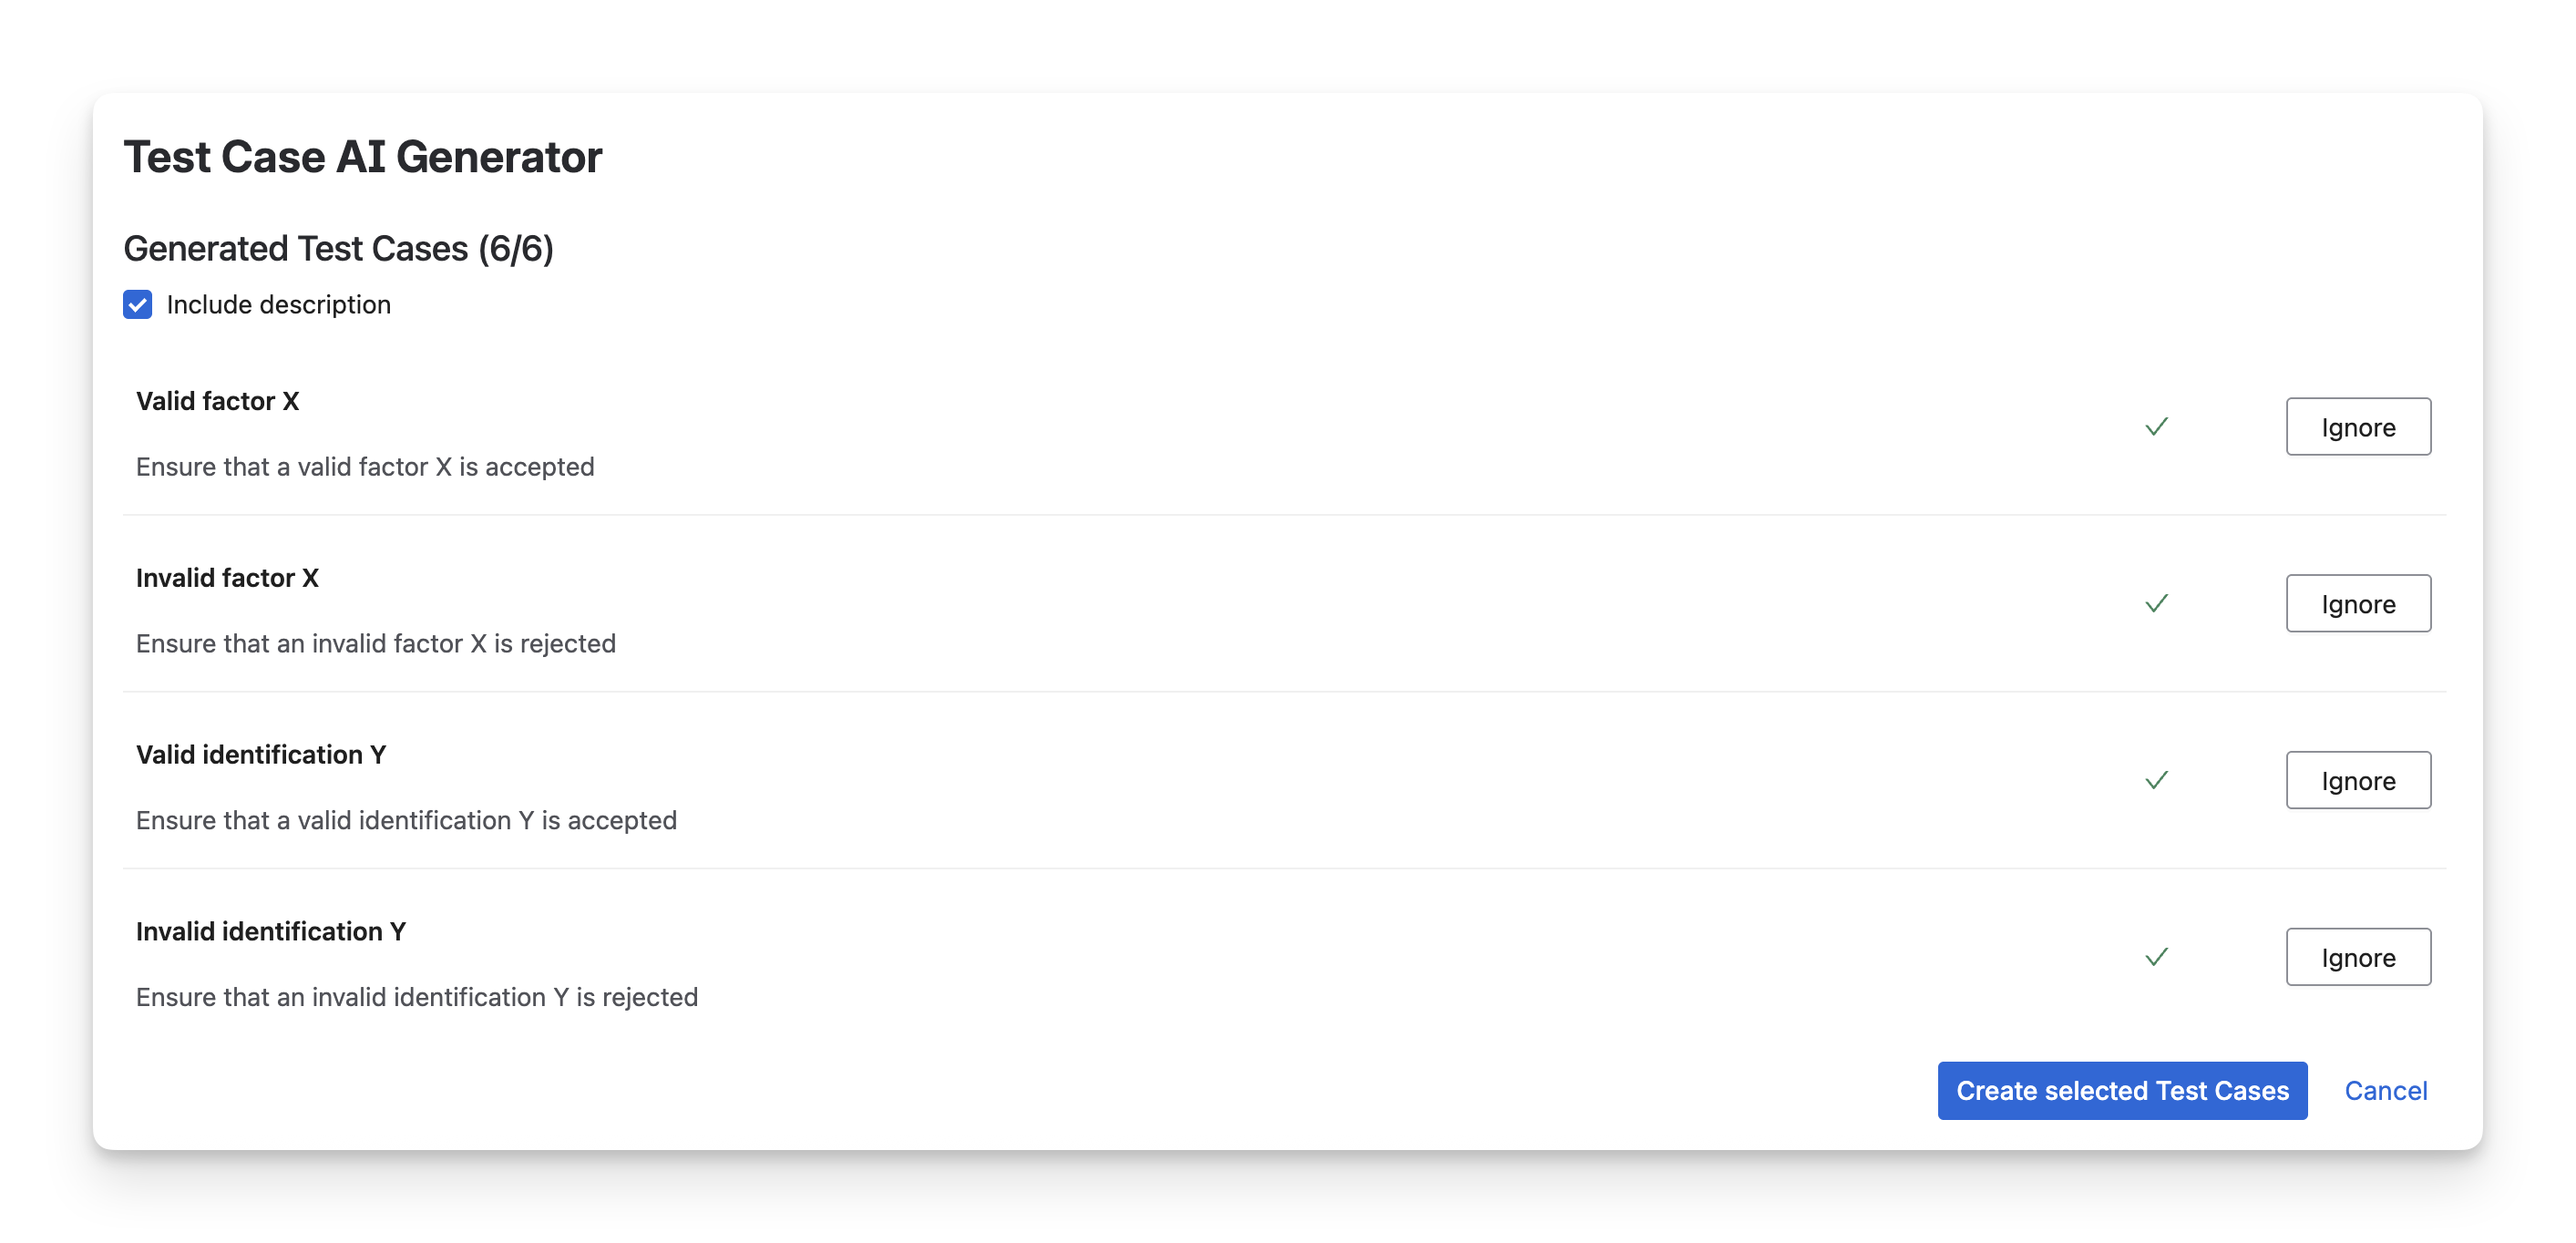
Once the button is clicked, our AI Generator will generate test cases and their descriptions based on the Requirements' description. Users can manage the generated test cases in this board:
Generated Test Cases List: Displays the test cases generated after activating the AI Generator button.
Include Description Option: Users can accept the description for each generated test case by toggling this option.
Test Case Summary: Summary of the generated test cases, each treated as a Jira issue. These generated tests can also be managed in the Tests feature from the left-side menu panel.
Test Case Description: Description of the generated test cases, linked with the generated test cases.
Edit Generated Test Summary: Users can modify the generated test summary after triggering the AI Generator button.
Edit Generated Test Description: Users can modify the generated test description after triggering the AI Generator button.
Accept Edits: Upon making changes or edits to the generated test summary/description, users should click the buttons to either save the edits or discard them.
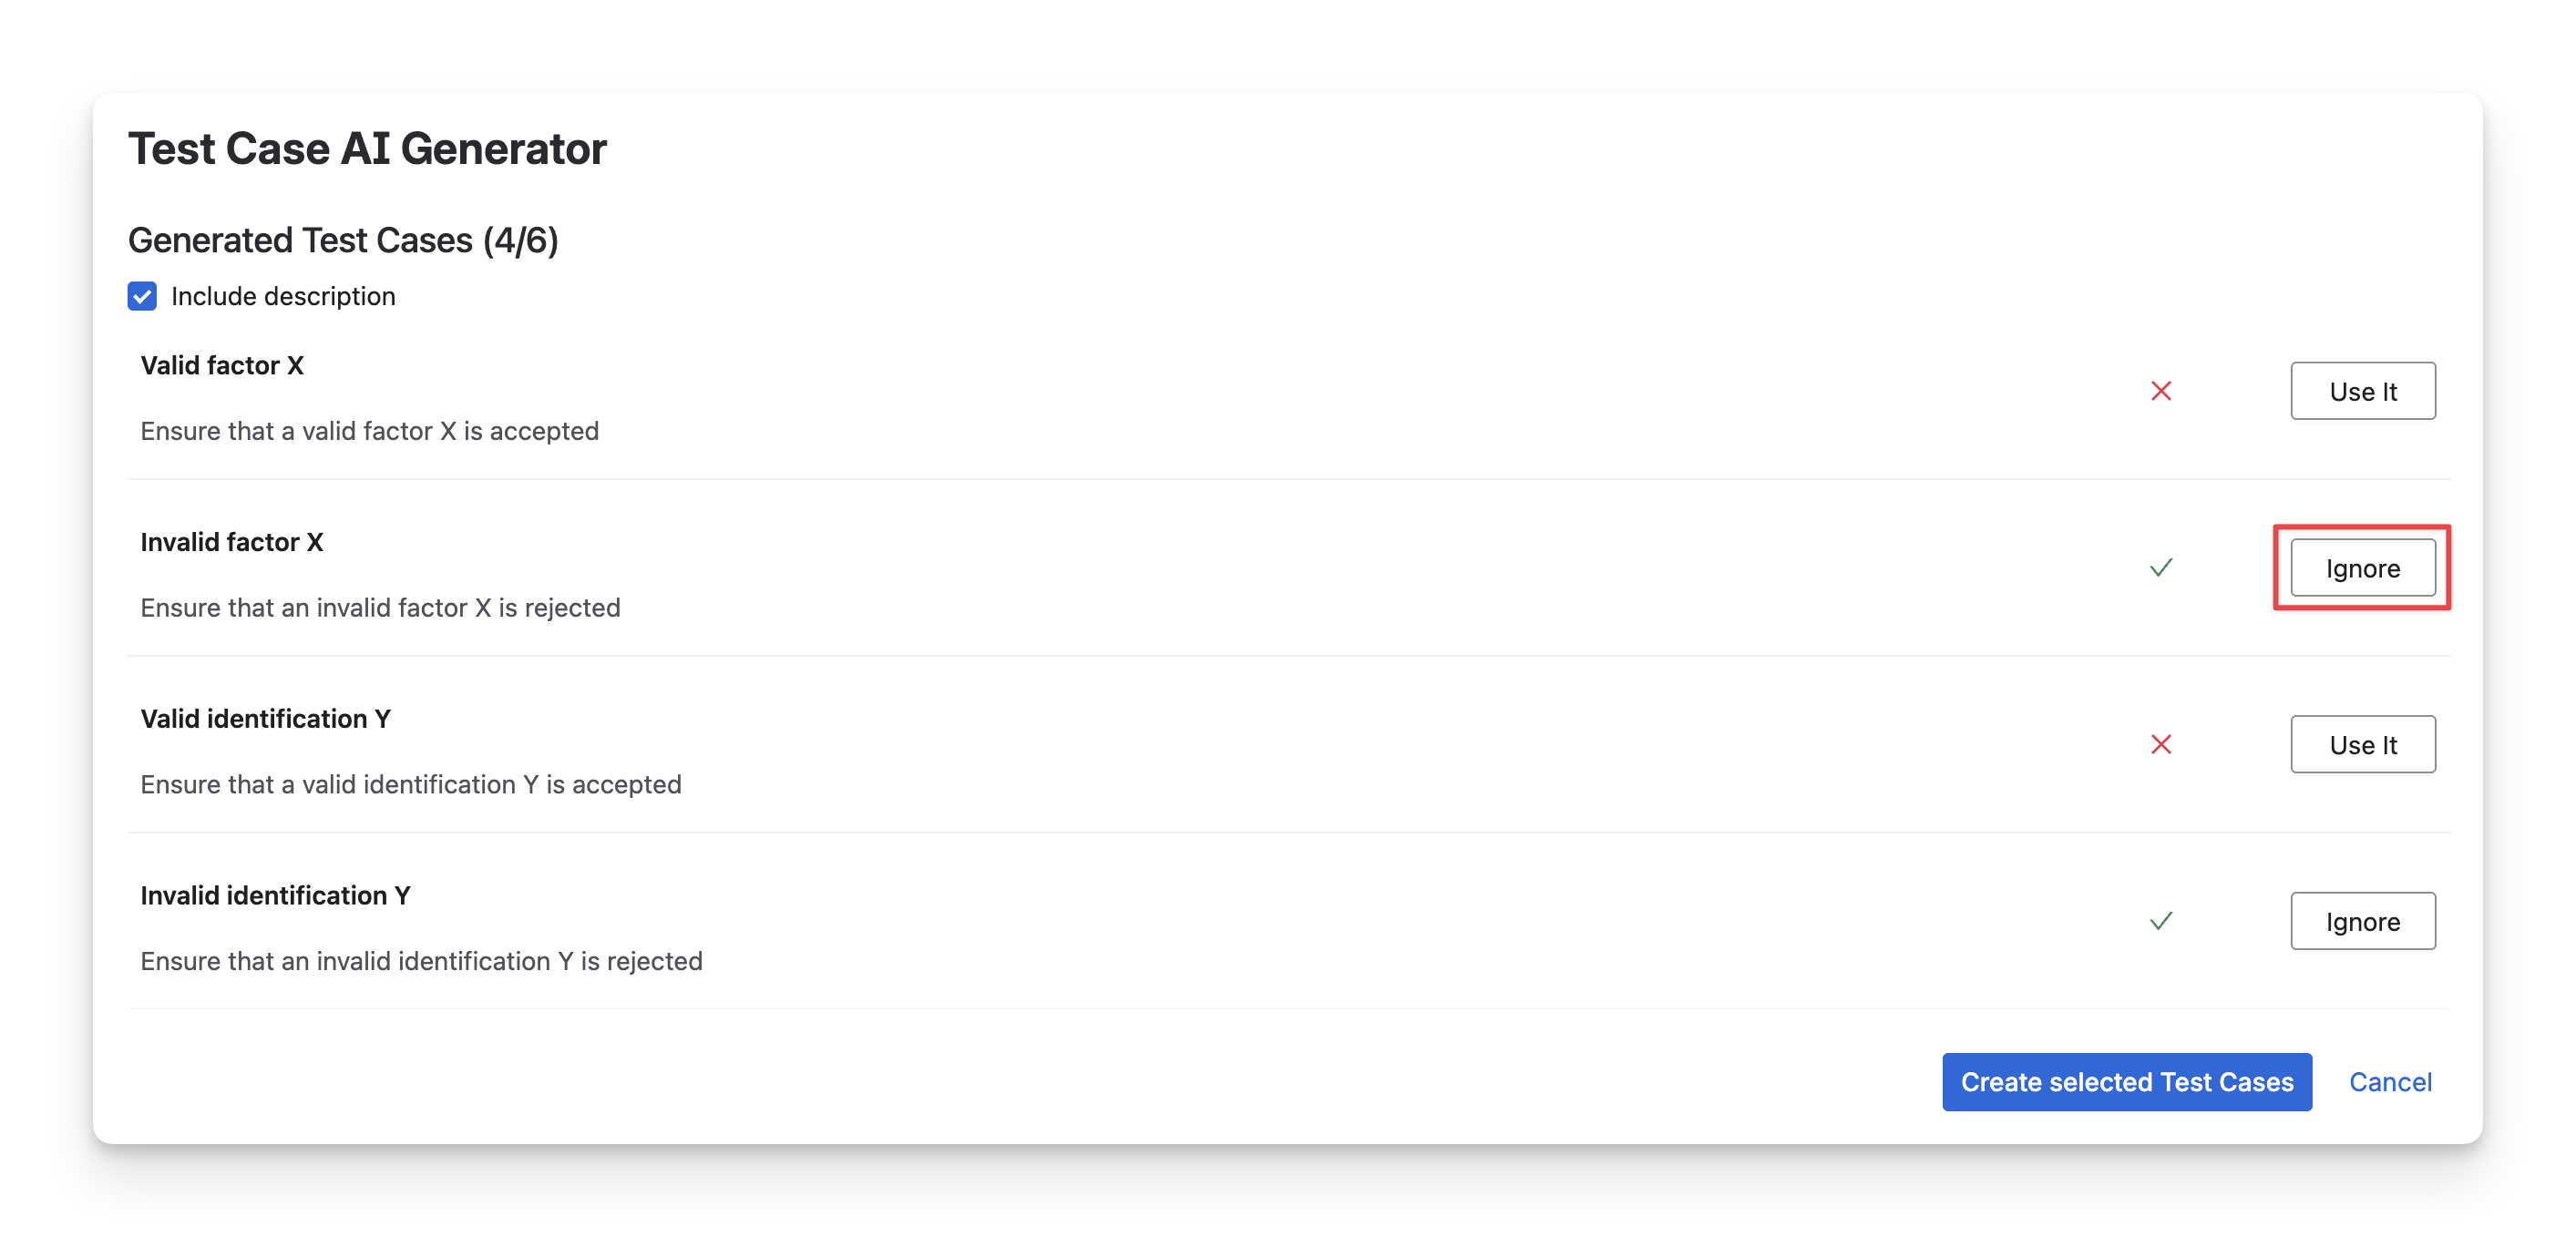
Ignore the Generated Tests: If users find the generated alike to their project's need, they can click the Ignore button to not select that specific test case.
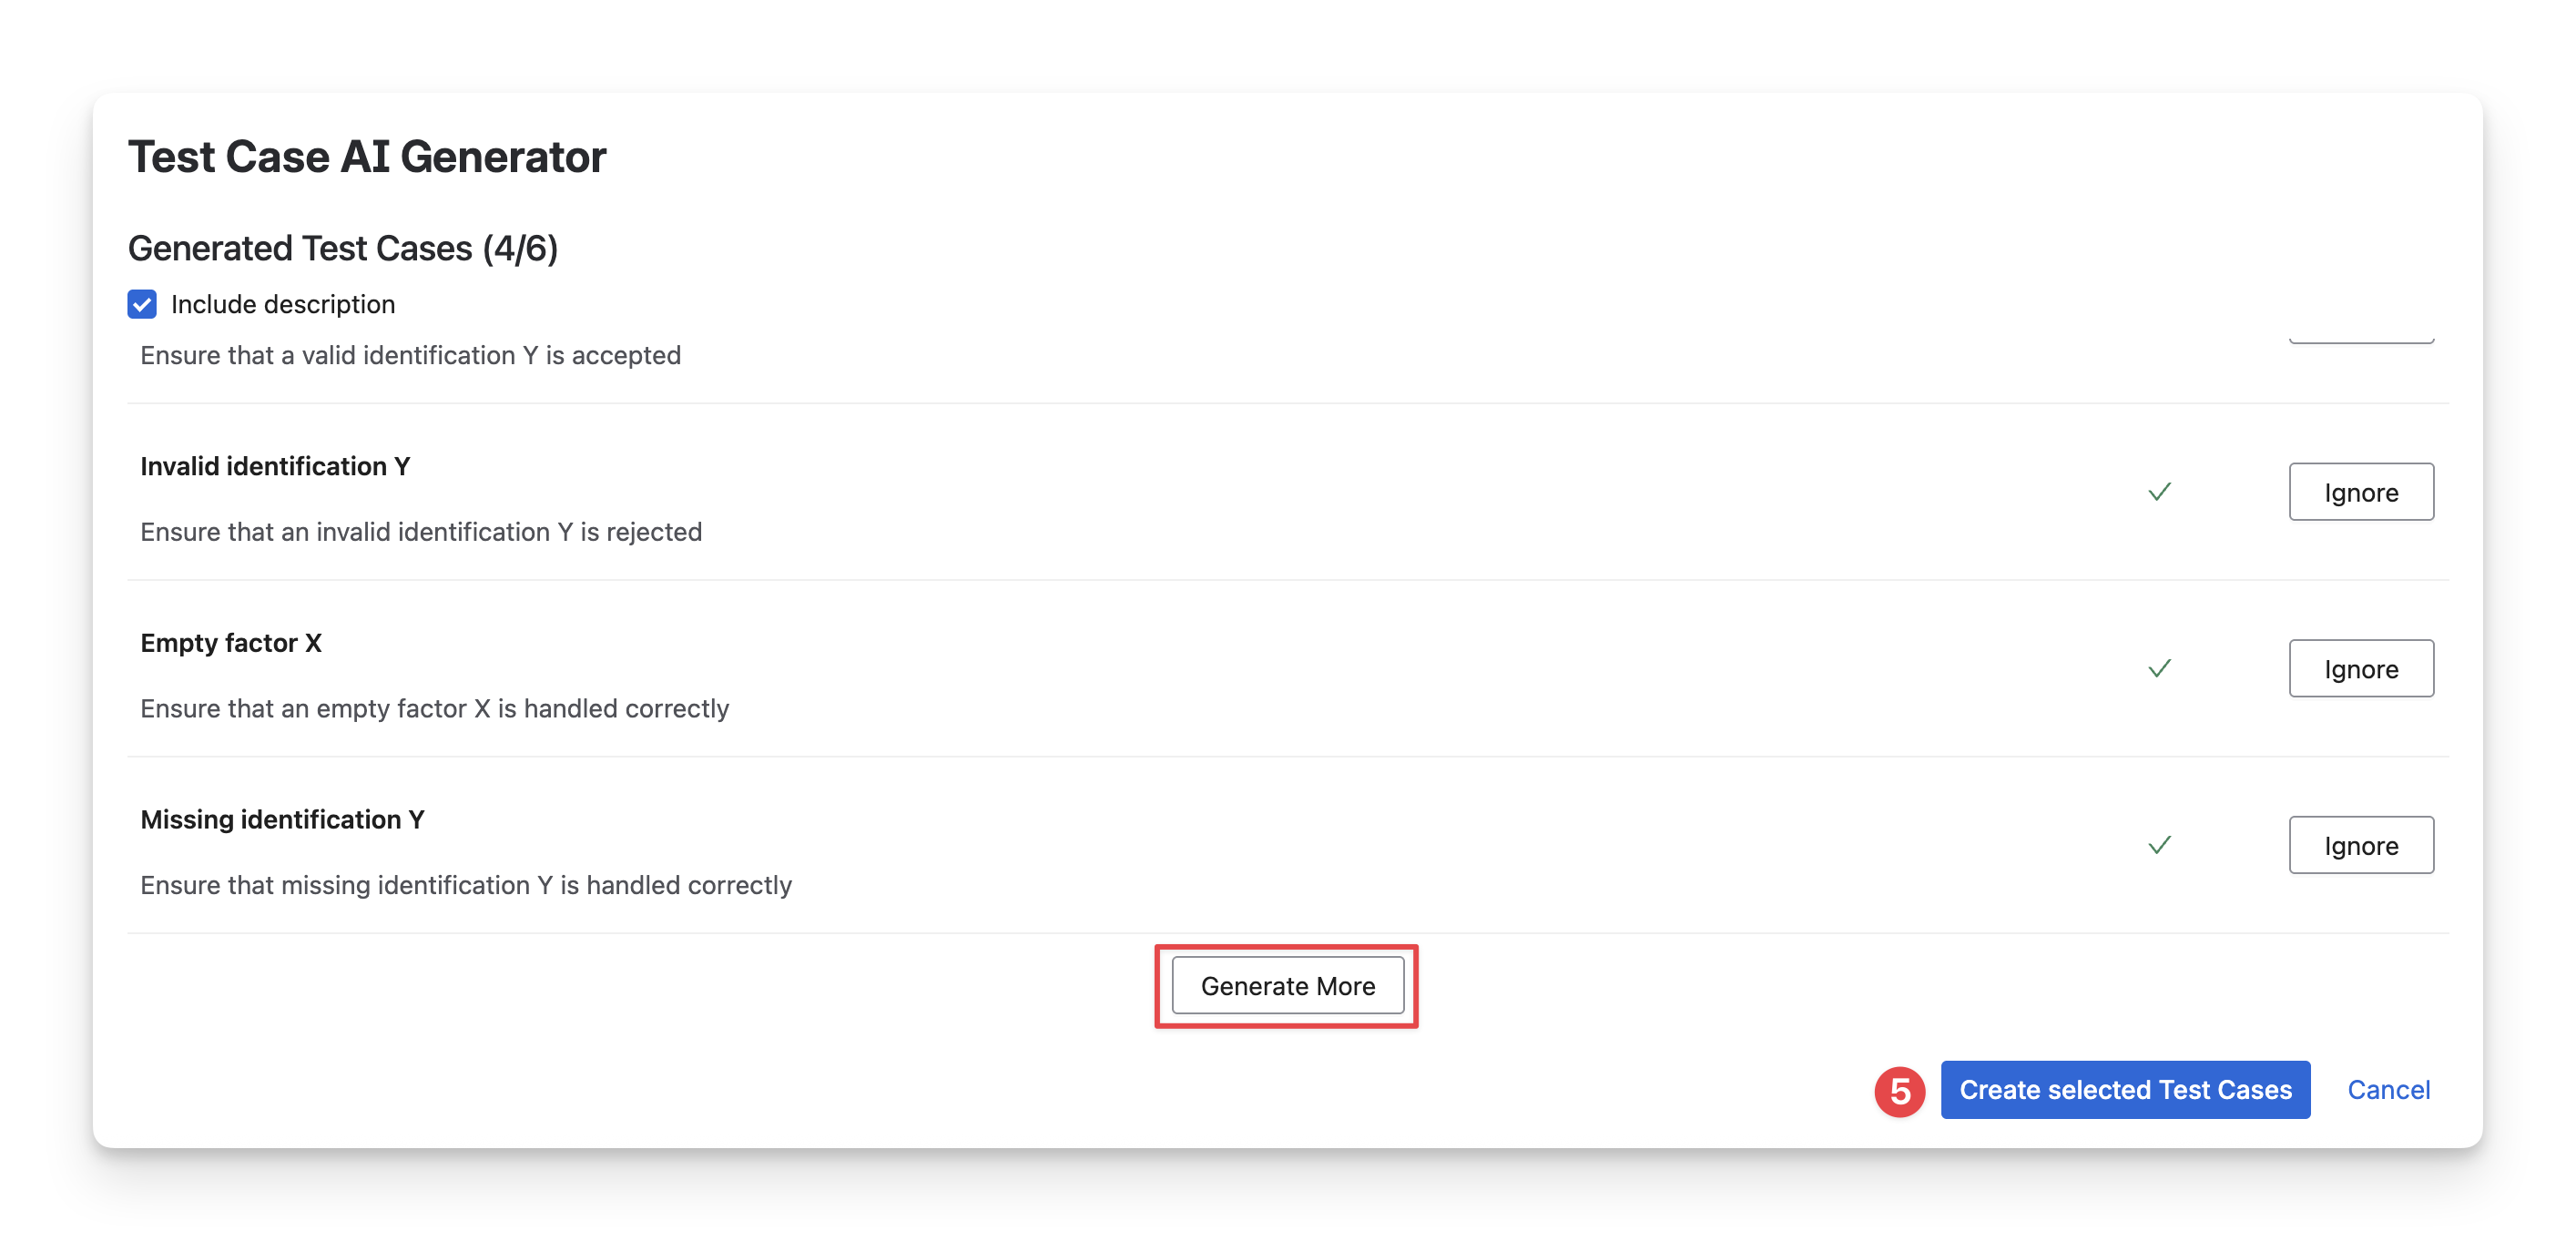
Create Selected Test Cases: To accept and create the generated test cases, review the generated test cases and select the ones you wish to proceed with. Once selected, click on Create Selected Test Cases button. These test cases will be associated with the corresponding requirements they were derived from and can be managed through the Tests feature within Test Management.
2. Generate Test Steps
To generate test steps of a test case, users must follow the below:
The test case must be linked with a requirement
The requirement and test descriptions must be descriptive and fulfilled
Step 1: Access Tests
After accessing AgileTest, select "Tests” from the left-side panel.
Step 2: Choose AI Generator
Then choose the Test issue to access the issue board. Here users can view the Jira board → Choose AI Generator, located like in the reference picture below.
Note: If the test case is not linked with a requirement and the requirement description is left blank, then the system will announce that there are insufficient details for the steps generation. Then users have to click on the issue to view the Jira board and add the requirement description.
In this case, users should link that test case with a requirement; and fulfill their descriptions to maximize the use of the AI Test Steps Generator.
Step 3: Edit Generated Test Cases
Once the button is clicked, our AI Generator will generate test steps and their descriptions based on the Requirements' description. Users can manage the generated test cases on this board:
Ordinal Number of Test Steps: Indicates the order of the generated test steps.
Drag: Allows users to rearrange the order of the generated test steps.
Positioning Arrows: Use the arrows ⬇️ ⬆️ to move the step's order by 1 unit.
Test Step Field: Specifies the action and instruction of a test step in a test case. Jira Admins can customize the fields to suit their project's requirements.
→ Refer to this guide to configure the Test step fields document.Clone: Users can duplicate the test step directly within the AI Generator board. The cloned test step will inherit all data, including field information, attachments, and related content.
Move To: When the number of steps exceeds, users can use the Move To button to relocate the steps to a preferred position in the list.
Delete: Eliminates a specific test step from the generated list. The deleted test step will not be saved or used further.
Save: After editing the generated steps, select this button to save any changes.
Cancel (A Single Test Step): Discards changes made to a specific generated test step.
+ New Step: Manually create and add a new individual test step to the list of generated steps.
Re-generate: If the generated steps do not align with the project requirements, the Re-generate option can be used to refresh the AI Generator for new test steps.
Cancel (AI Generator): Discards all generated test steps.
Create Steps: After completing edits, select this button to accept the generated test steps and proceed.
Should you need any assistance or further AgileTest inquiries, contact our 24/7 Support Desk!