.png)
Fields mapping
This is where you will map the value of your Jira issues. In case you have yet to enable this feature, you can simply go to the settings.
If you don’t know how to do it, here is the guide on how to add fields to the Issue Screen for Company-managed projects & Team-managed projects.
-20240207-100122.jpg?cb=1cb29eb35ef7bb272674f0977f58cdfd)
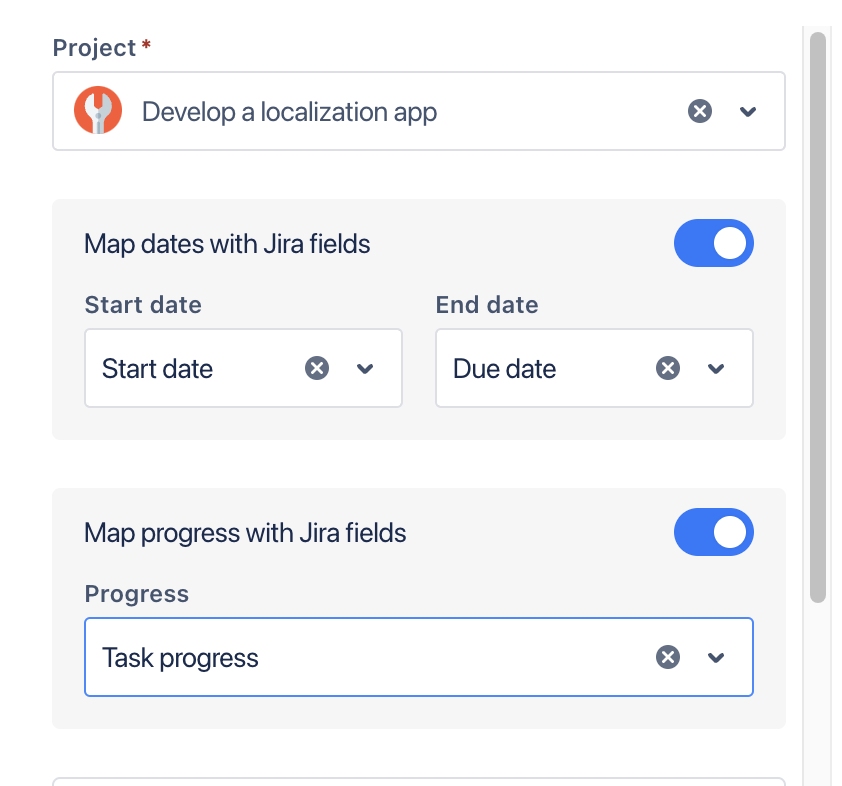
In this Project field mapping settings, the Start date and End date can be mapped to Jira date fields.
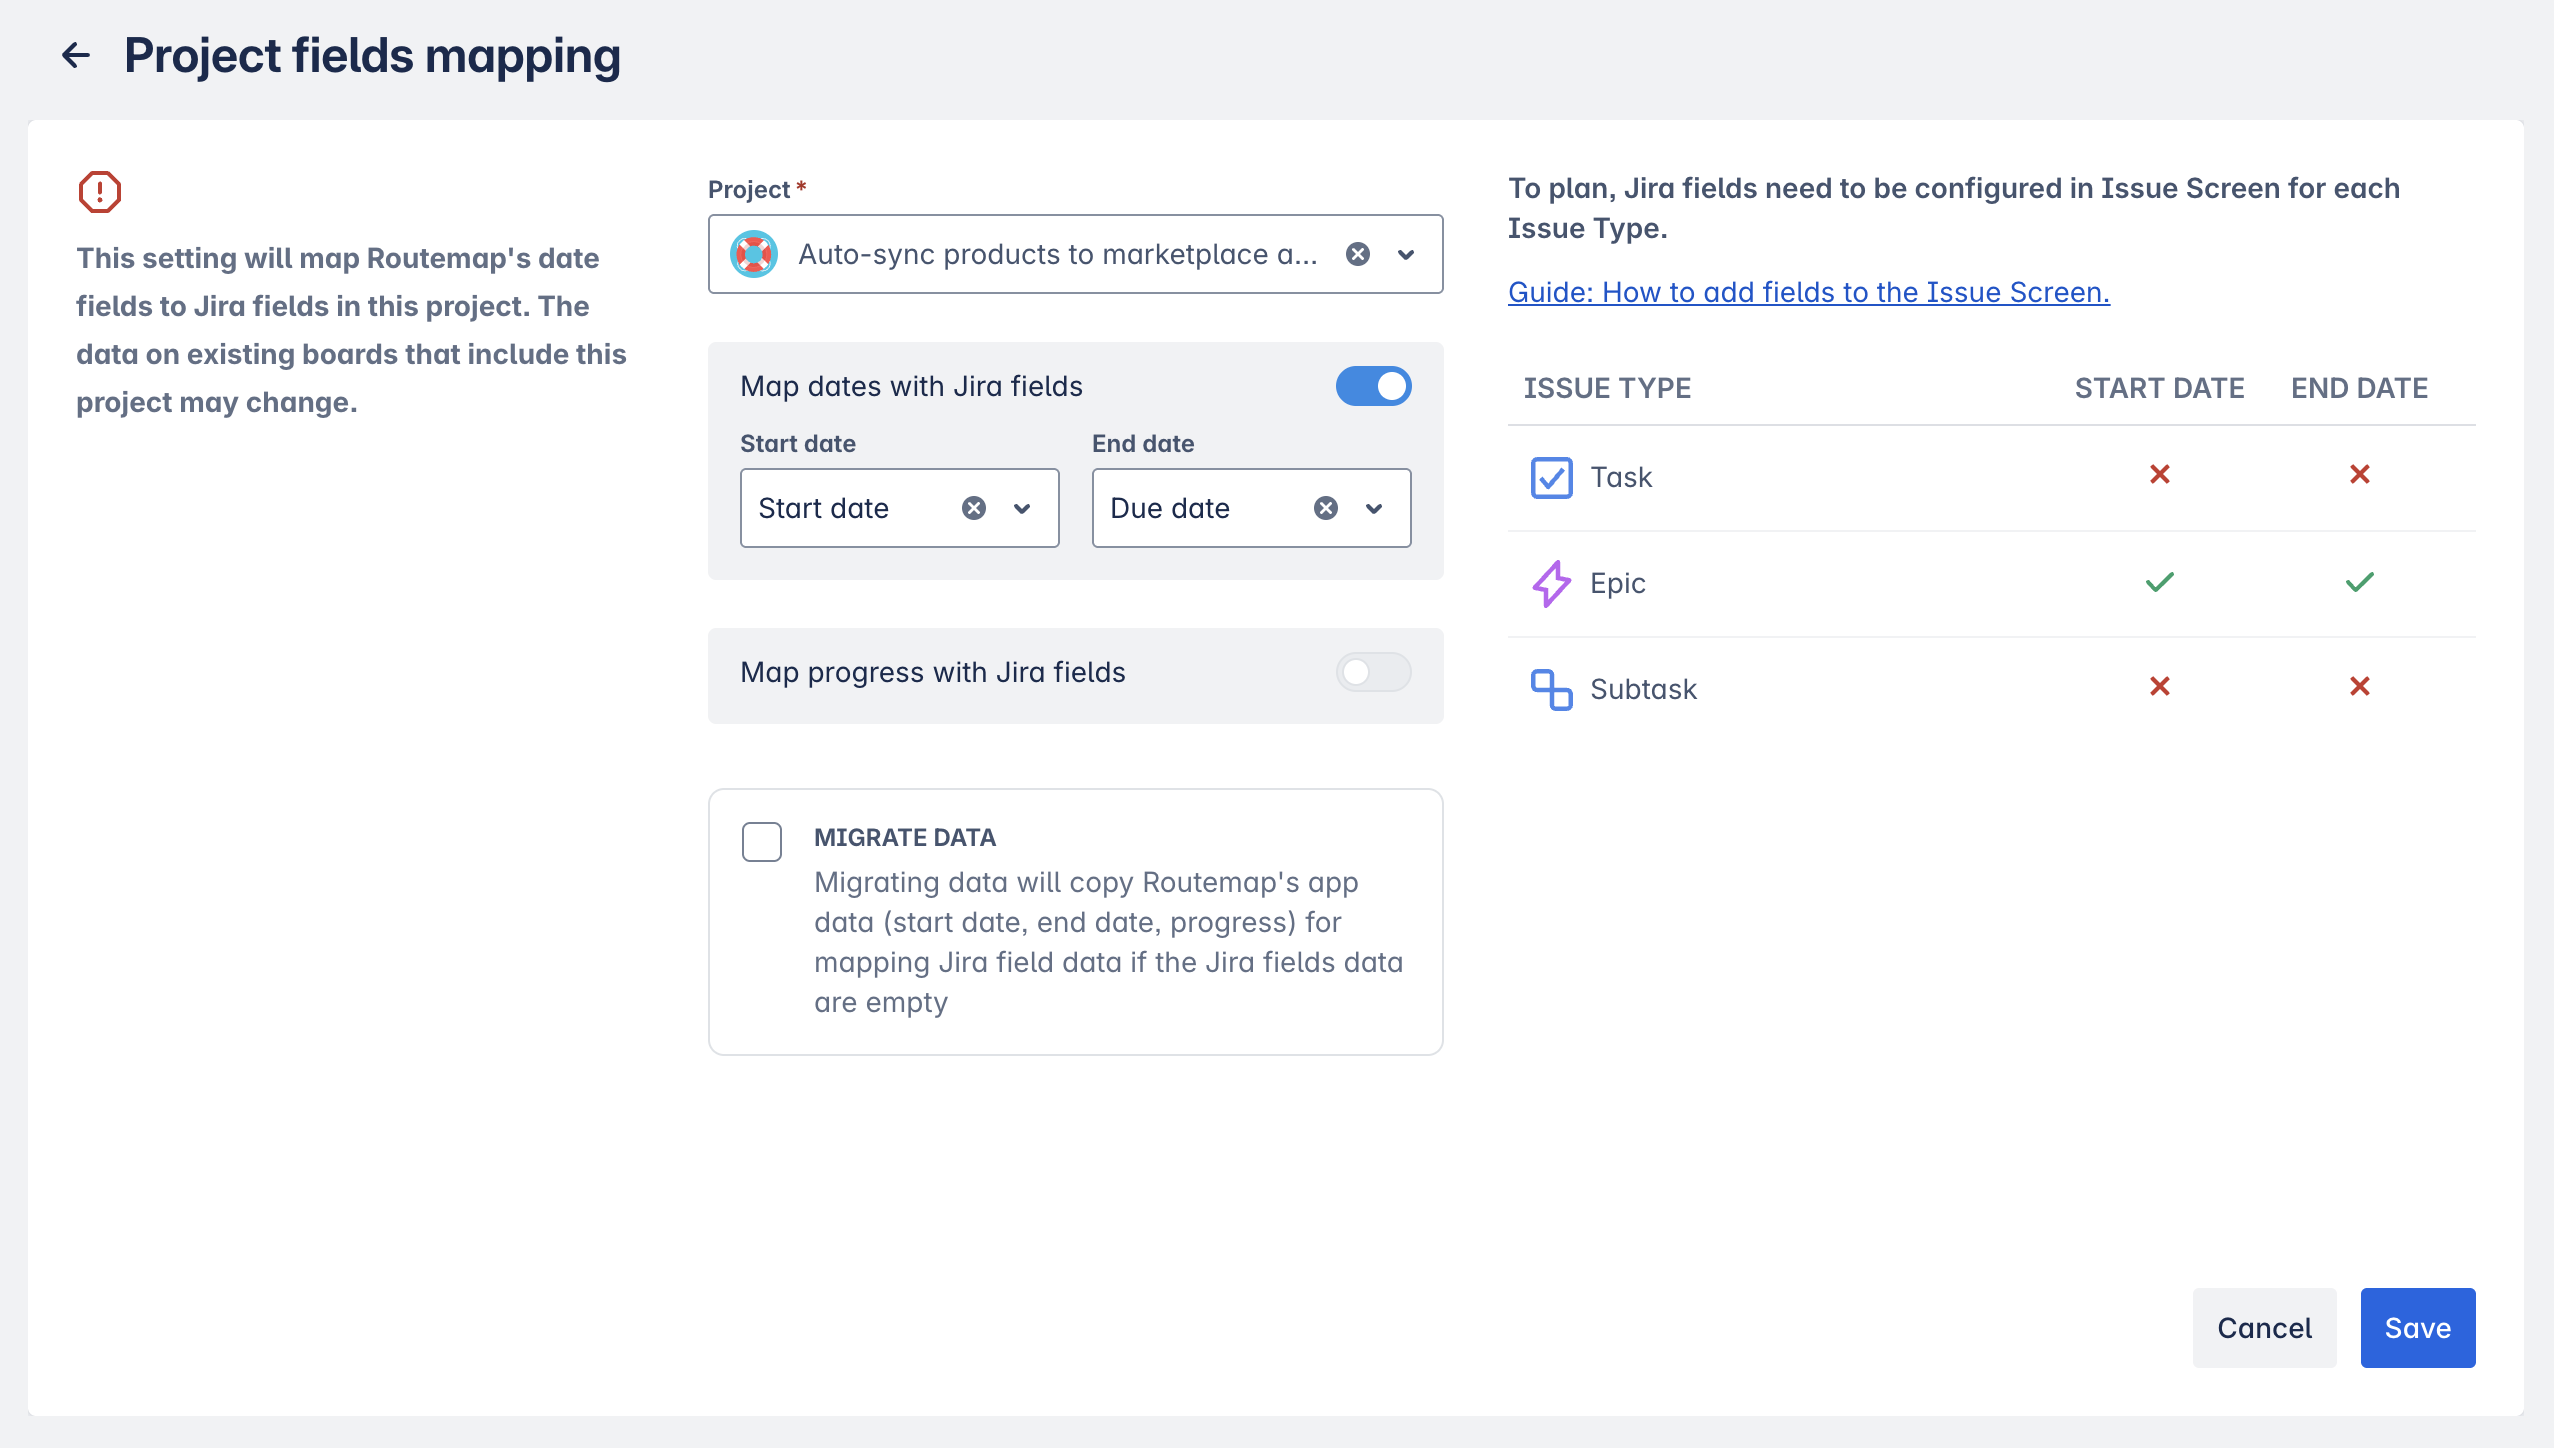
Progress: you can also map progression to visualize your task progression. See how to map the Progress field.
Migrating data: if you decide to use this option, it will copy all the existing date values from Routemap to Jira fields accordingly.
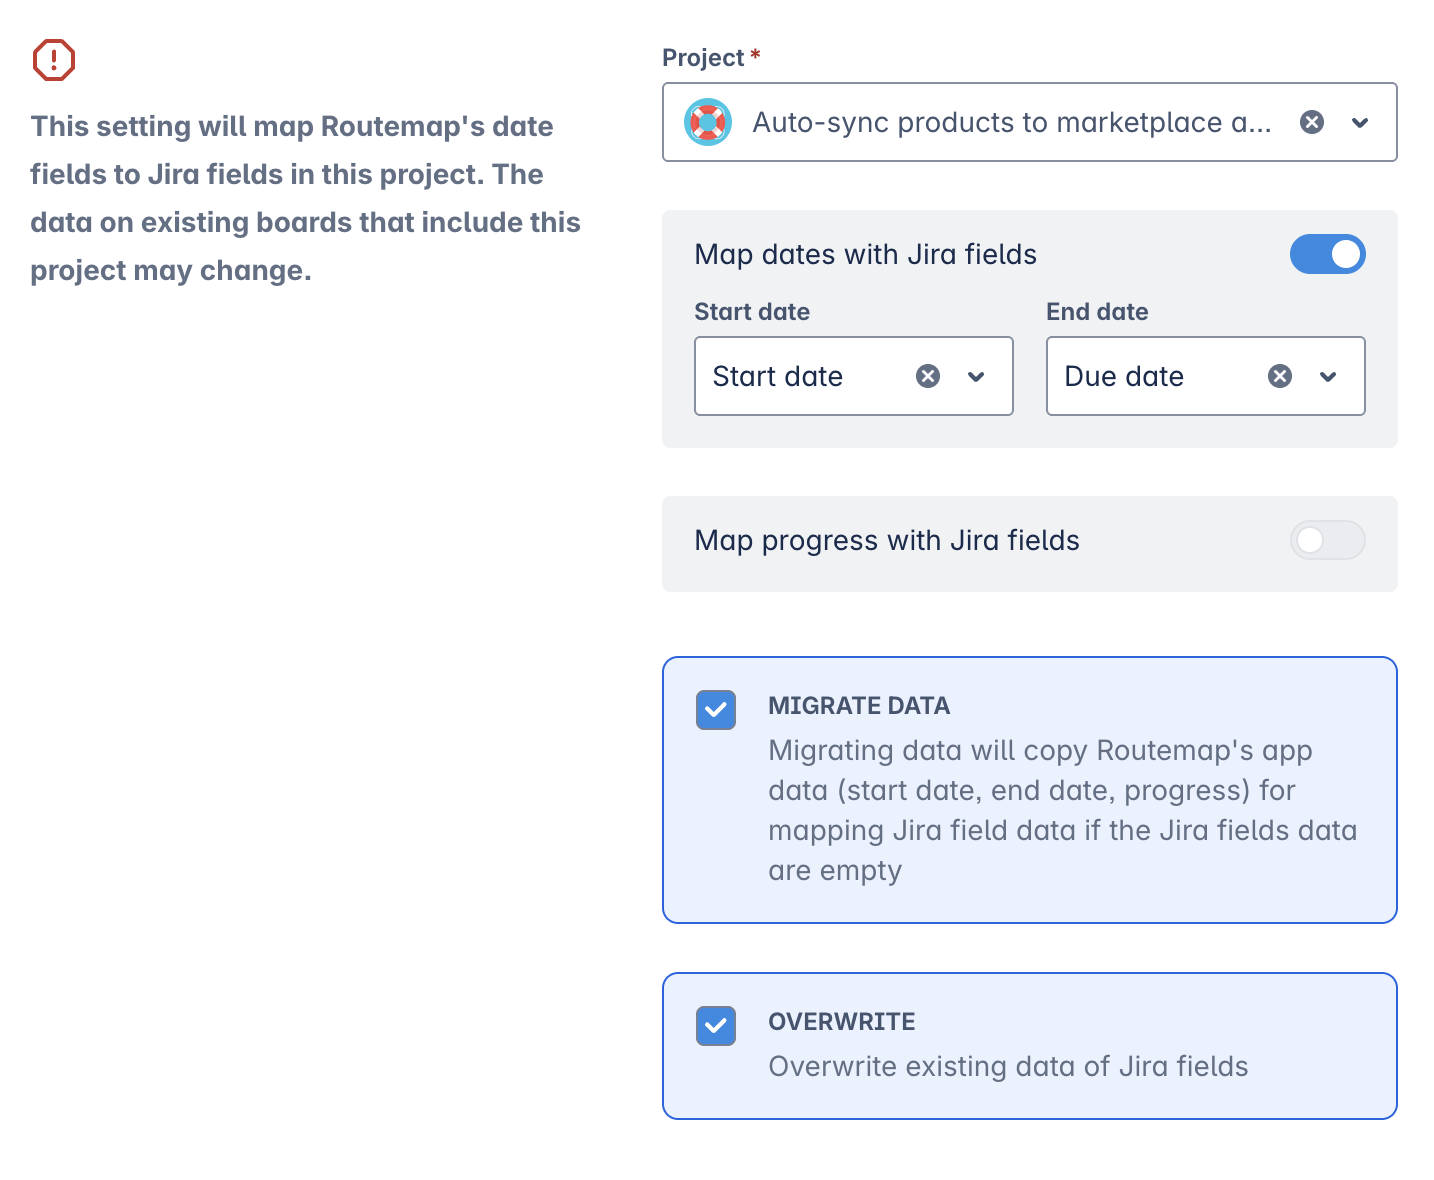
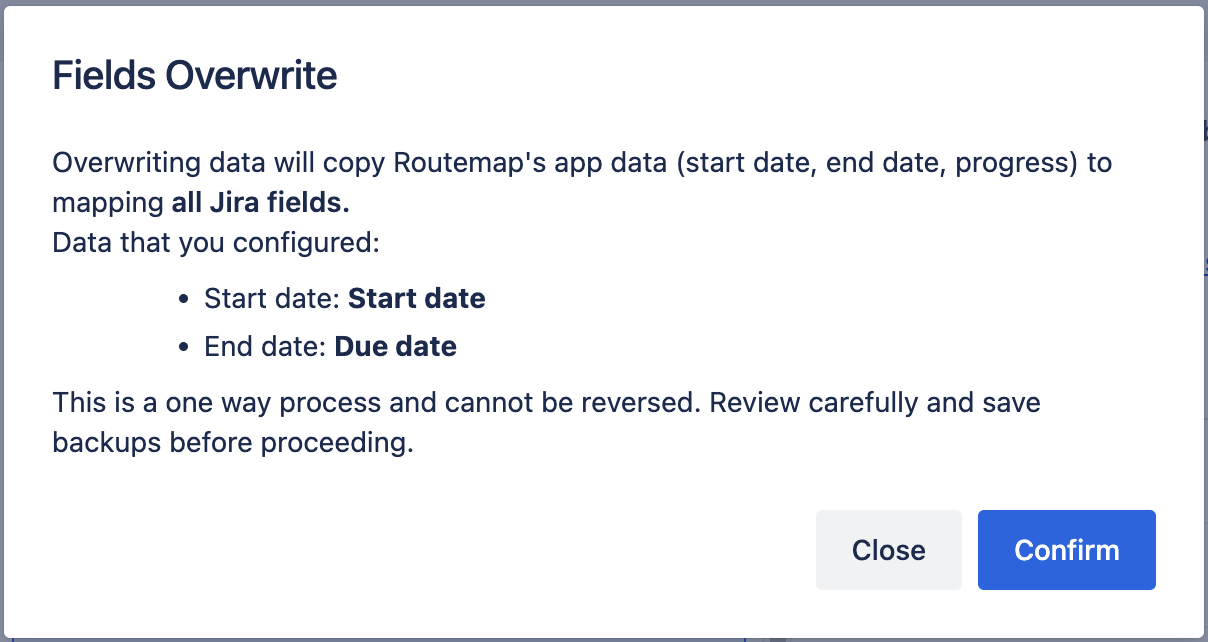
You can also choose to overwrite the existing data of Jira fields by using the data from roadmaps.
Adding the Progress field to Routemap
At the moment, Jira does not support fields for presenting task progress. However, you can create a custom field and add it to your Jira issues.
1. For Team-managed projects
From your project board, locate Project settings on the left column -> go to Issue types.
In the Field column on the right, you should find the Number field, and you can use it to create your custom "progress" field.
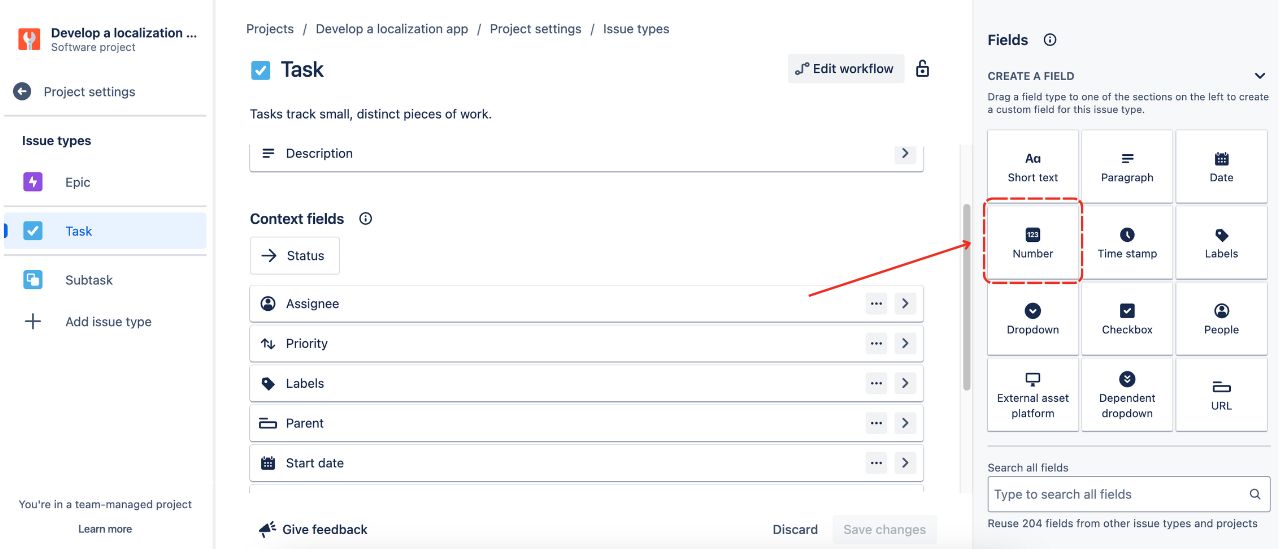
Set this number field name as Progress/Task progress for easy access.
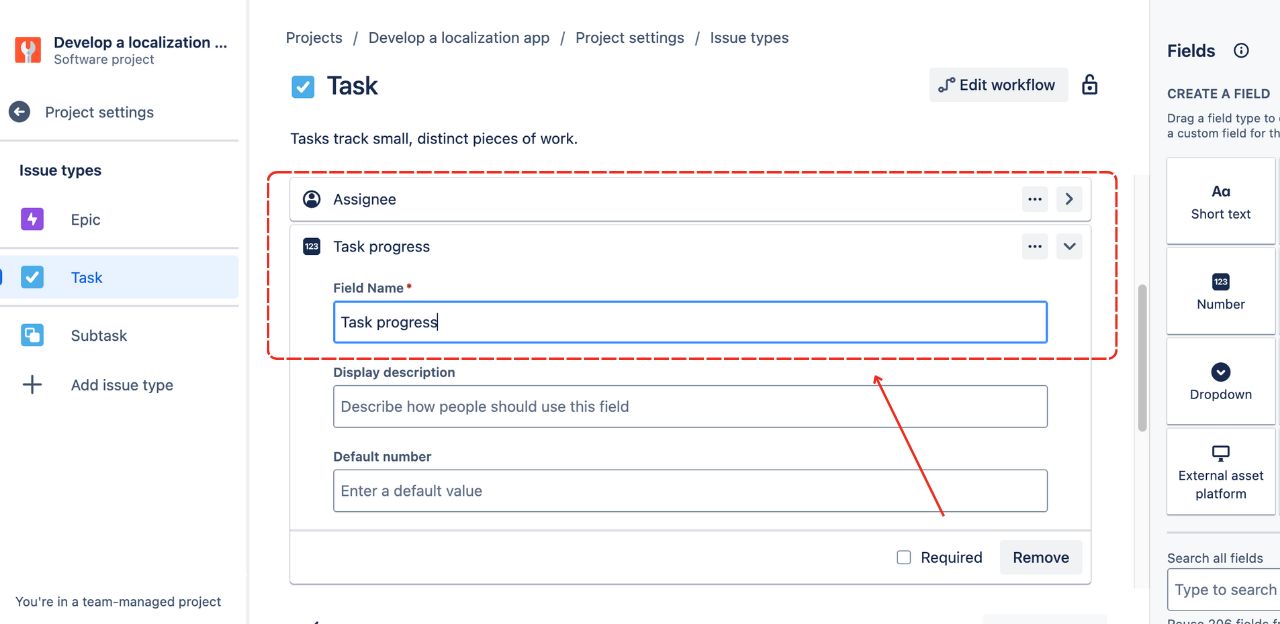
Click Save changes.
Go to the Board settings in Routemap, and choose the project you want to map the progress field.
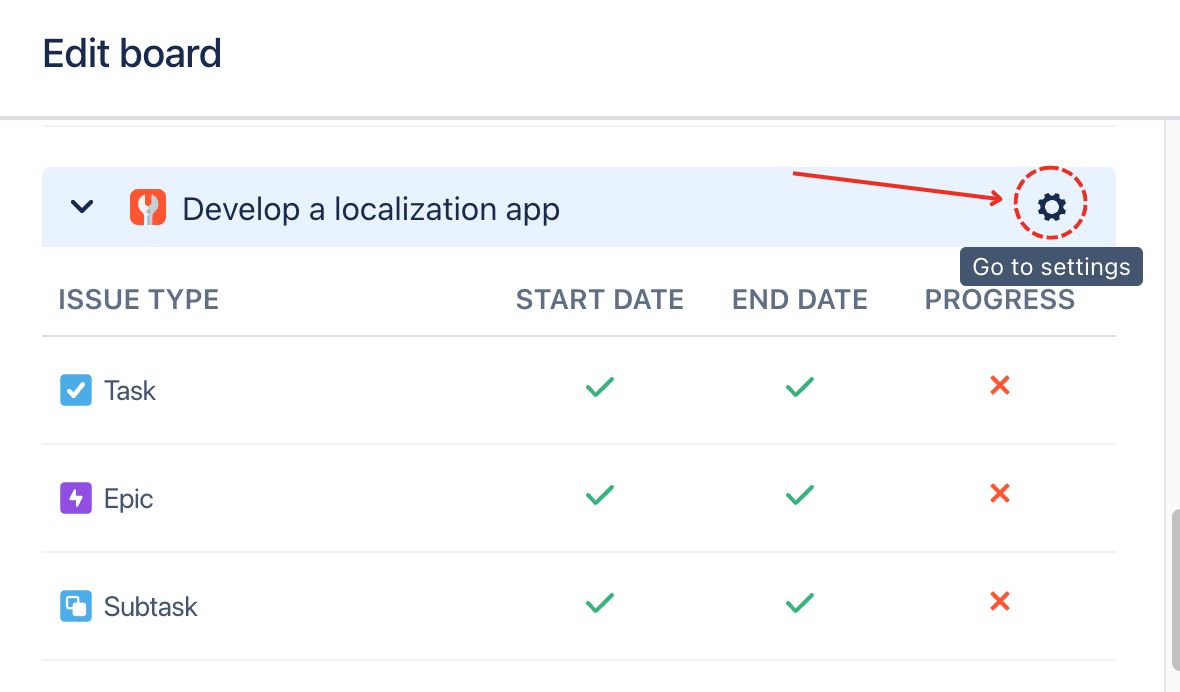
Now, you should find the field name you just created for mapping progress.
And this field will automatically synchronize with Routemap's progress feature.
2. For Company-managed projects
It is quite similar to Team-managed projects. Stills, there is a difference when you have to screen issues to create a custom field for Progress.
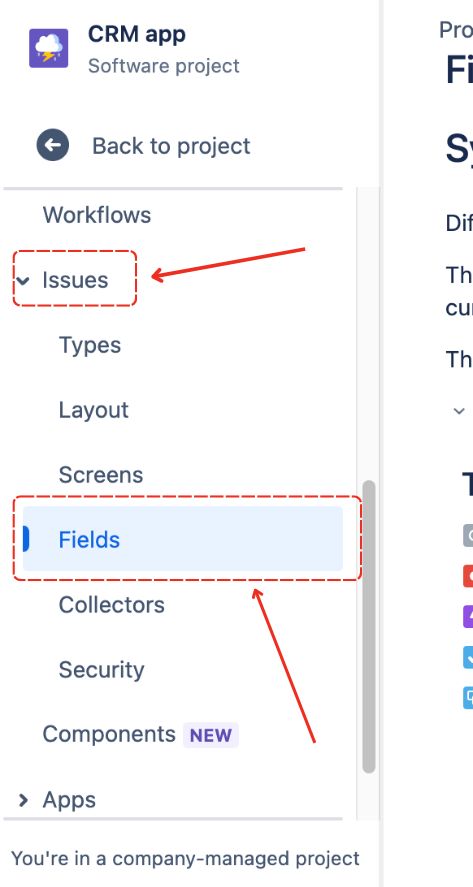
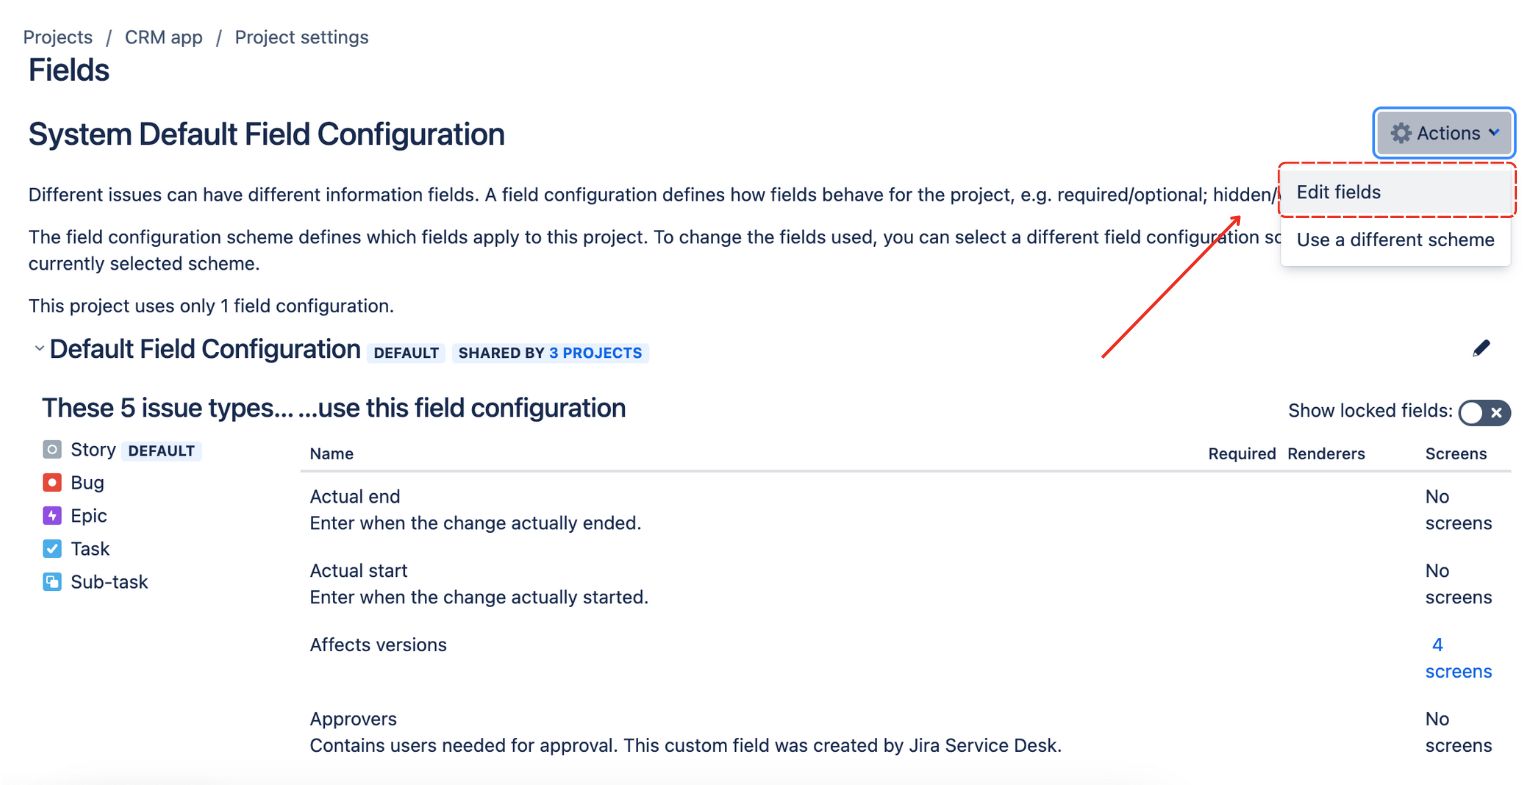
From your Company-managed project board, go to the Project settings.
.jpg?cb=de09d24ffd24a4d1869b1ae8af67ad6f)
Locate the Issues tab and choose Fields from the dropdown menu.
Then, you can locate the Action button on the top right and select Edit fields.
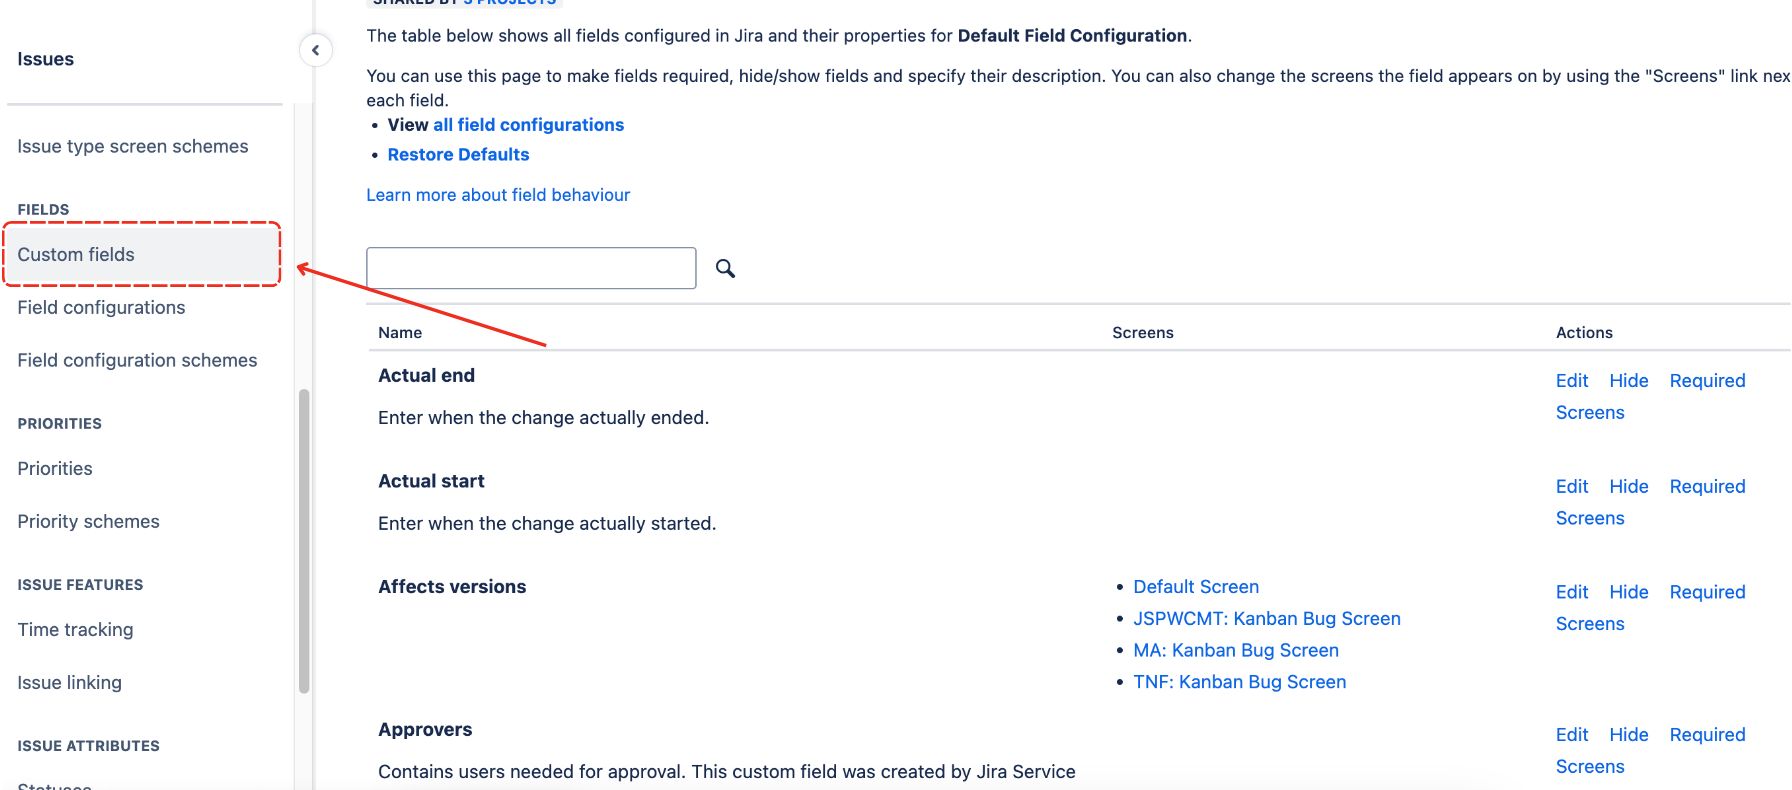
After that, you can scroll down on the left column and choose Custom fields.
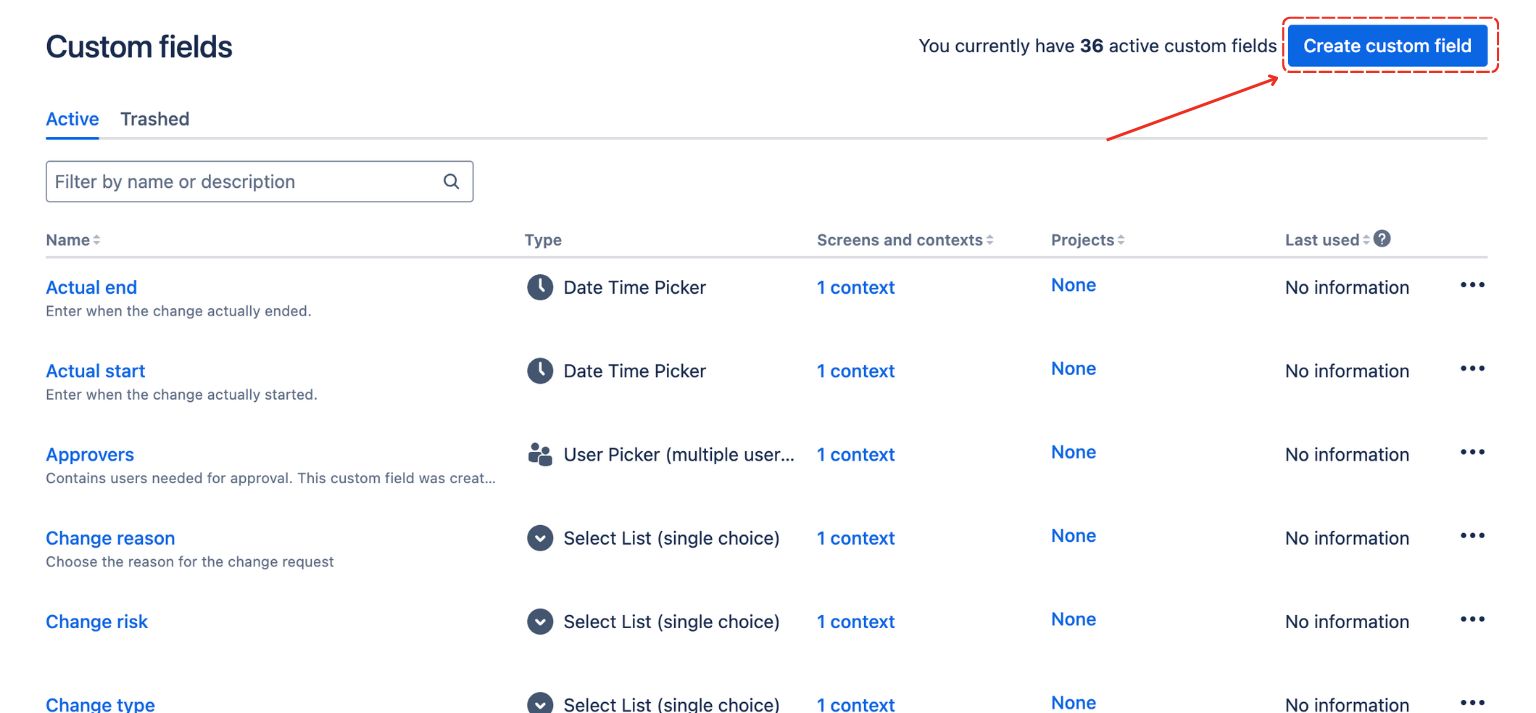
Now, choose Create custom field.
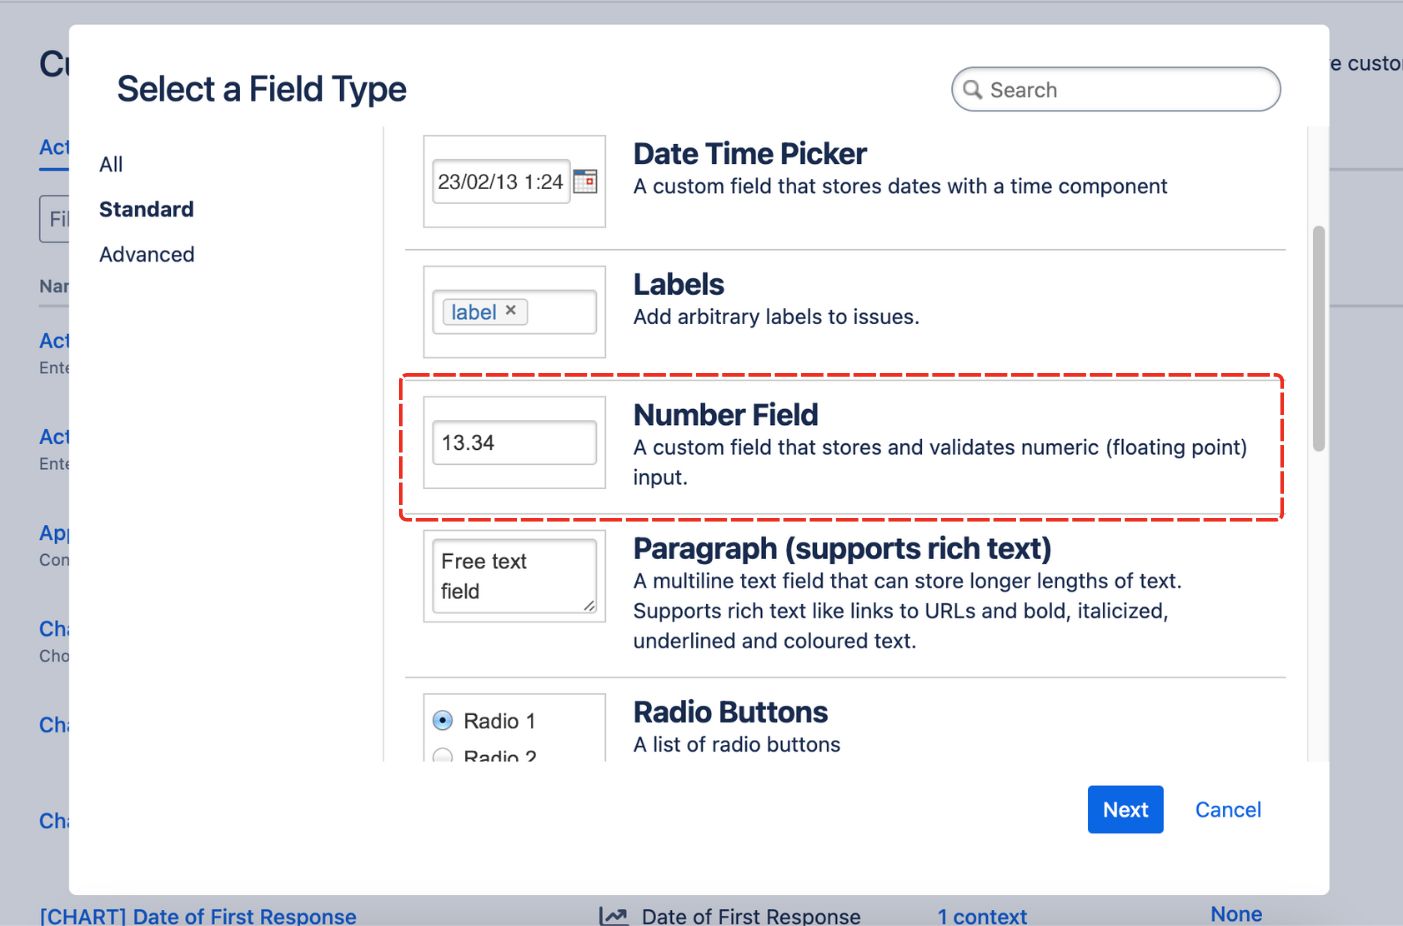
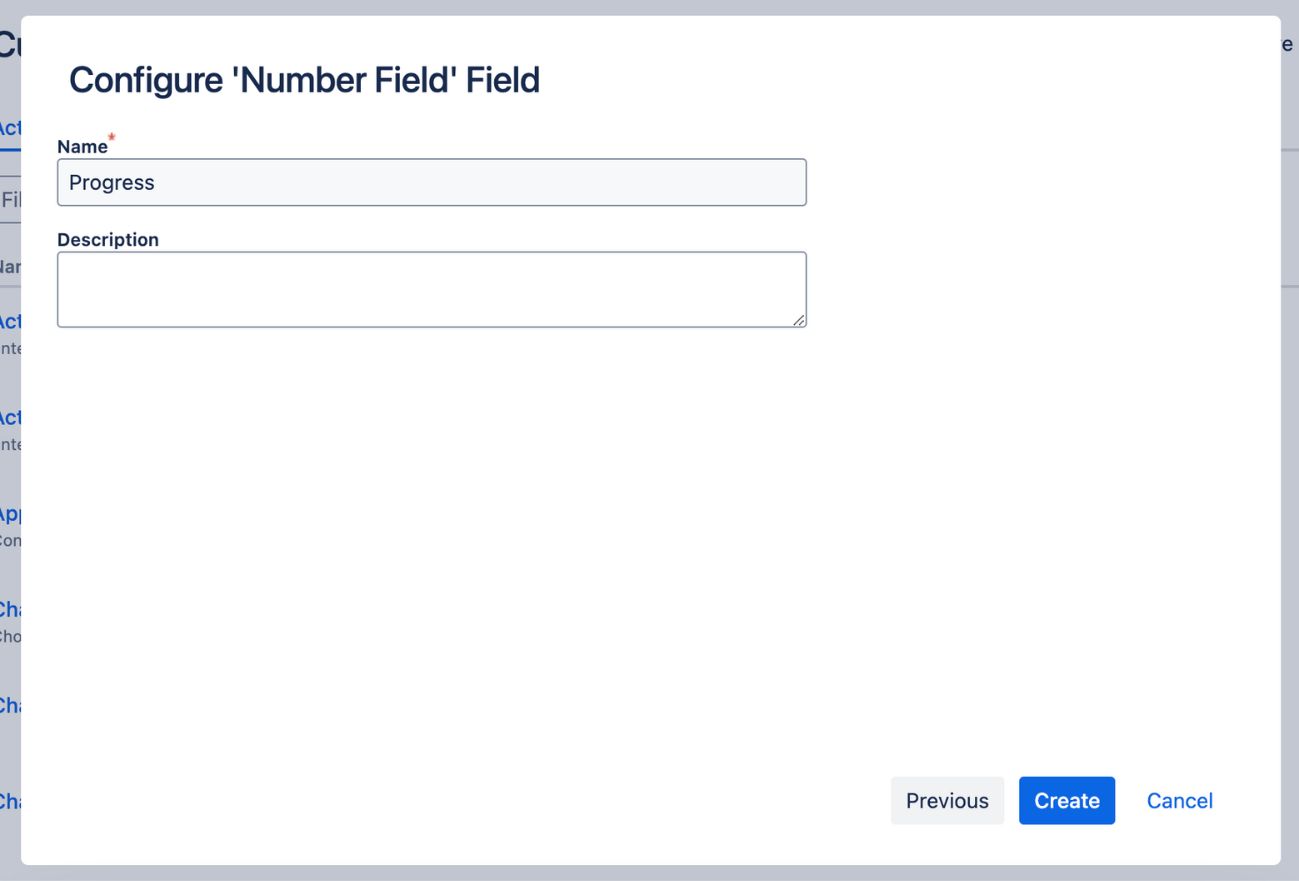
There will be a popup to let you choose a Field type you want to create. You can find the Number field and select it.
Now, you can configure this Number field as Progress to suit your needs and click Create.
After that, you will have to associate this custom field with the screens that you want to use it on. Normally, you can just check the box for Default Screen and that’s it. However, if you plan on using different Screens, you can decide which ones will use this custom Progress field.
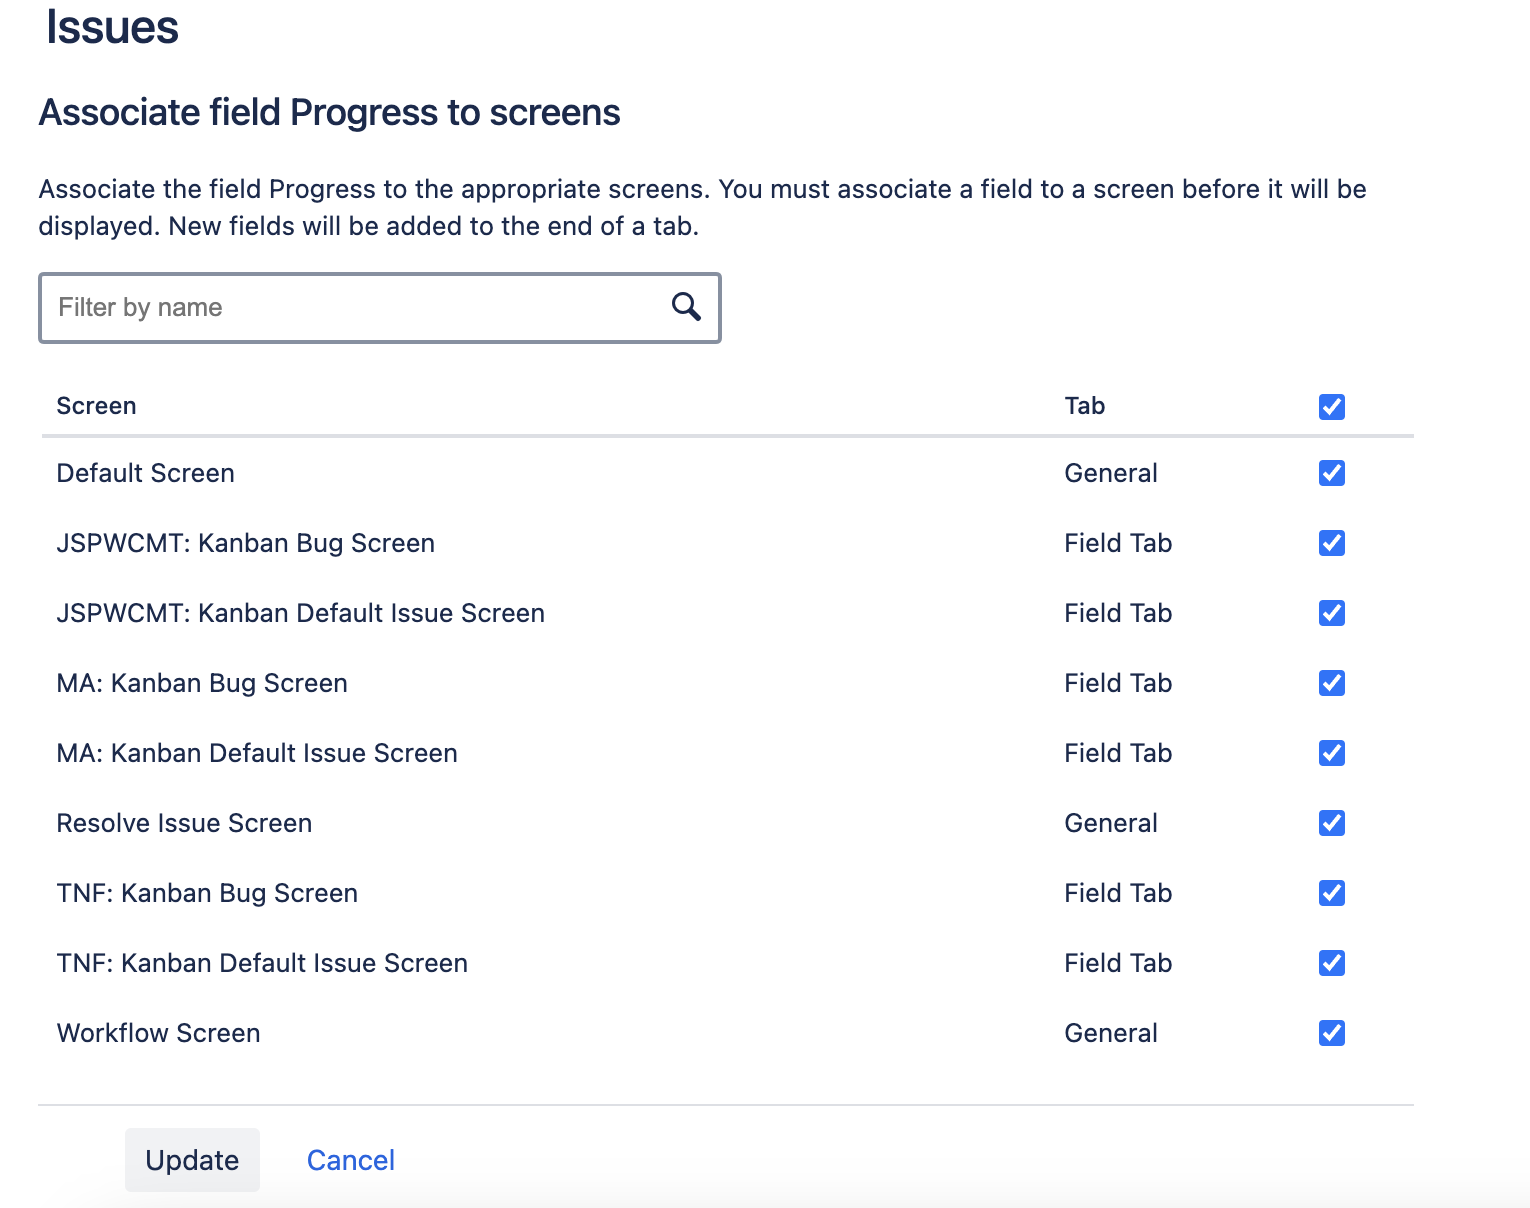
Once done, you can click Update.
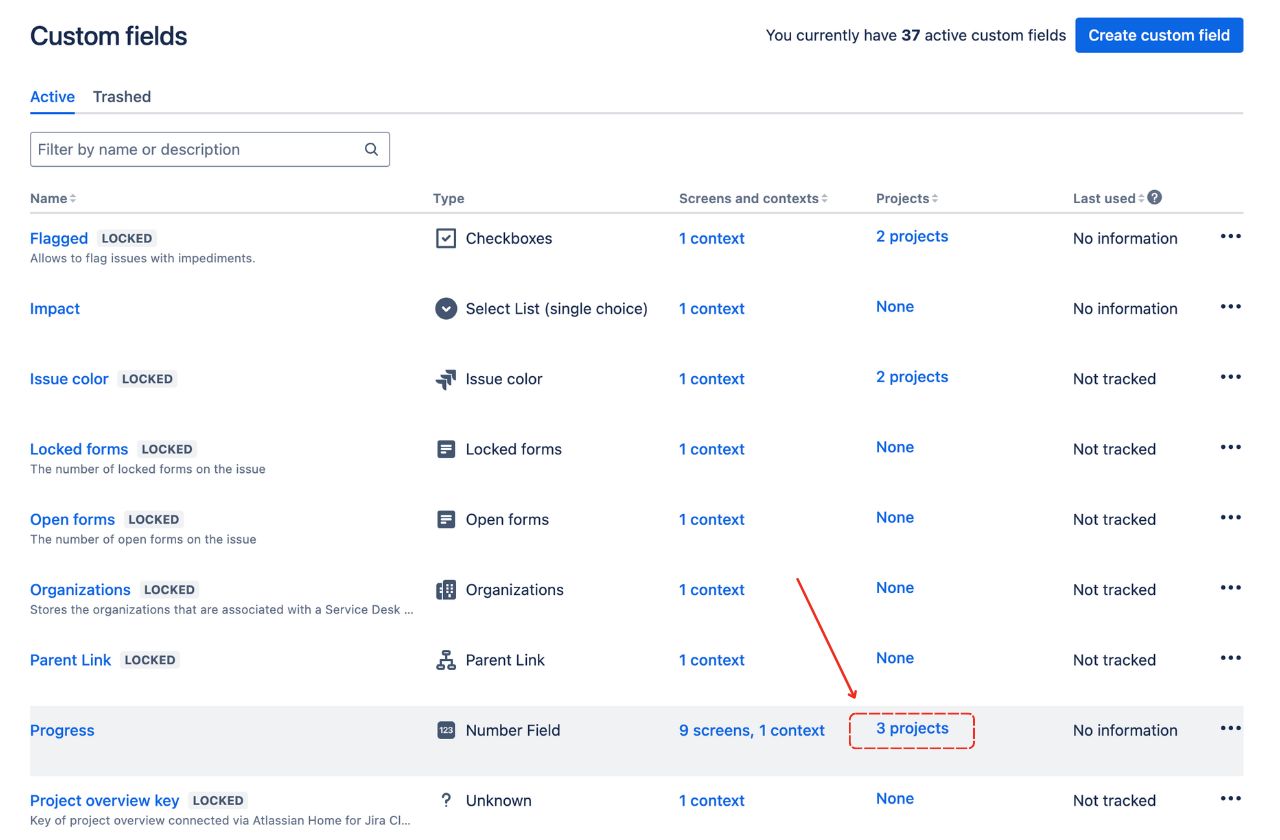
You will now be taken back to the Custom fields page. You can find the new custom field you created on this list and click project on the same line to see which Jira company-managed project is applying the Progress field.
Now you can go back to your project board, and you will find this Progress field in your Jira ticket. This progress will also synchronize with the progress feature in Routemap.
You've caught up! Next step: See the step-by-step guide to create a new board in Routemap.