Leave Approval Overview
The Leave Approval feature in TeamBoard for monday.com makes it simple for team members to request time off and for managers to approve or track these requests. It helps everyone stay on top of who’s available and manage workloads more smoothly.
Getting Started with Leave Approval
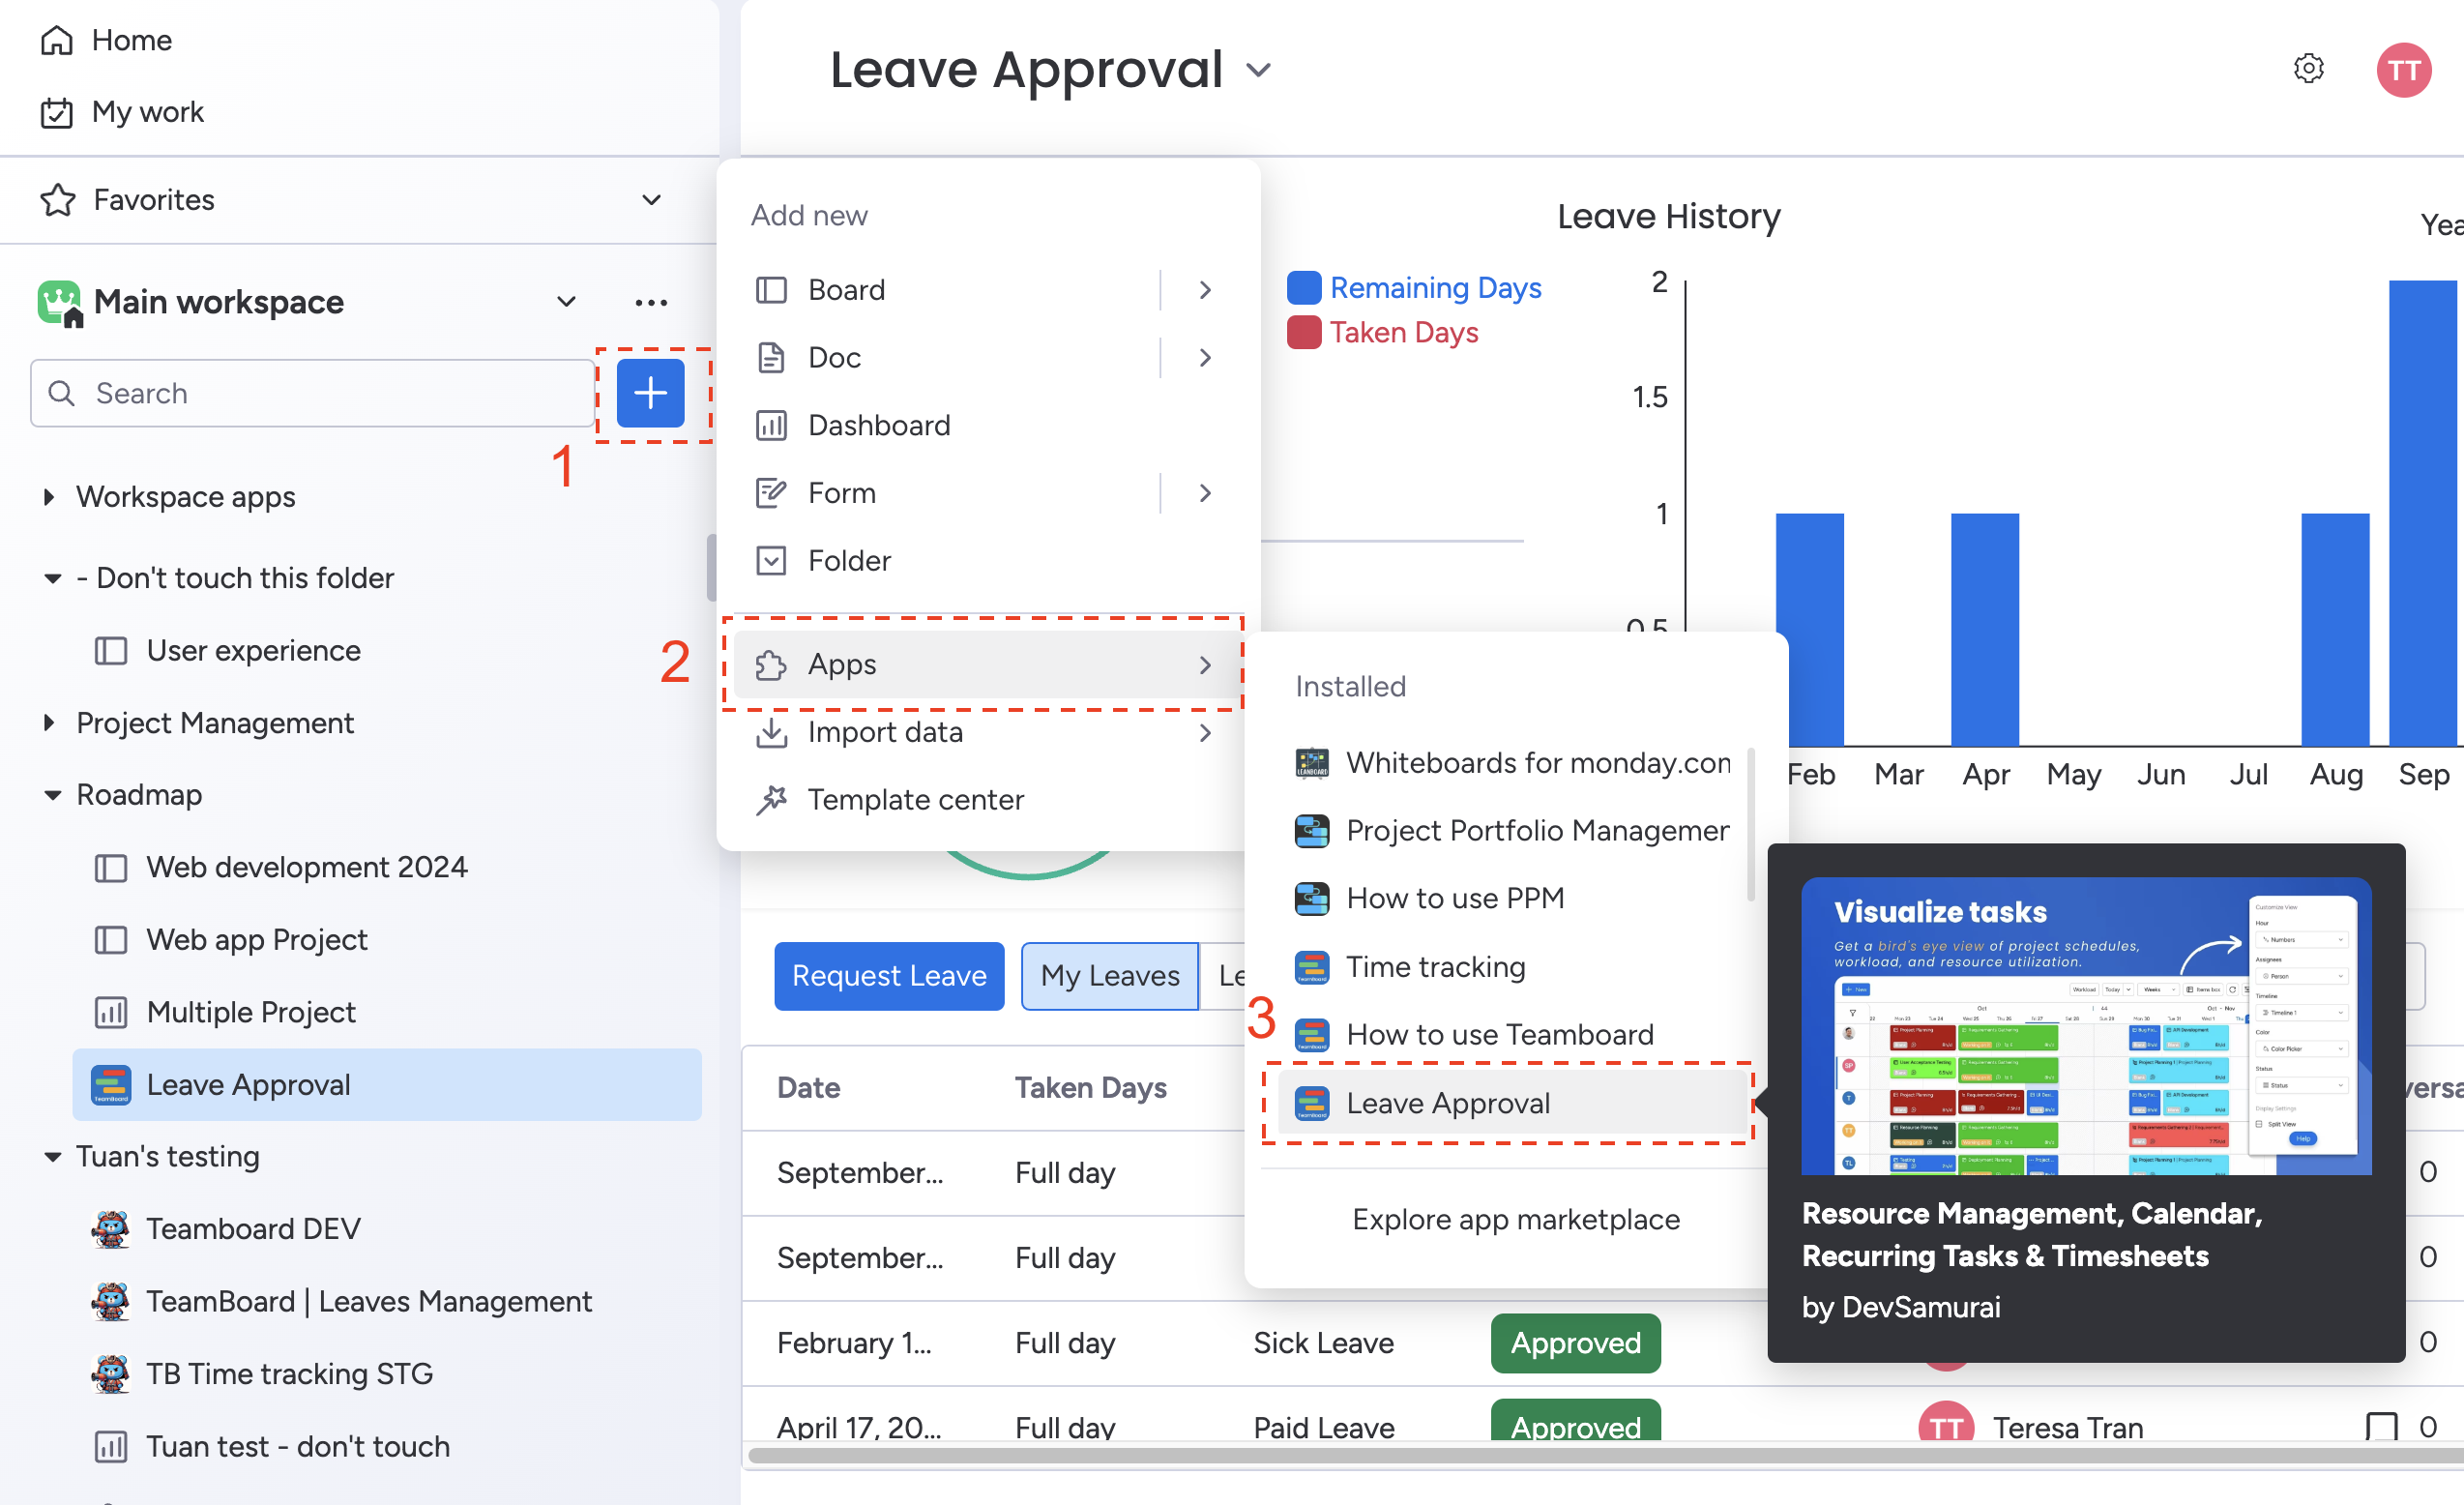
To start using Leave Approval, click the plus ![]() button in your workspace and choose ‘TeamBoard Leave Approval’. This will open the Leave Dashboard, where you can view and manage leave requests.
button in your workspace and choose ‘TeamBoard Leave Approval’. This will open the Leave Dashboard, where you can view and manage leave requests.
The Leave Dashboard
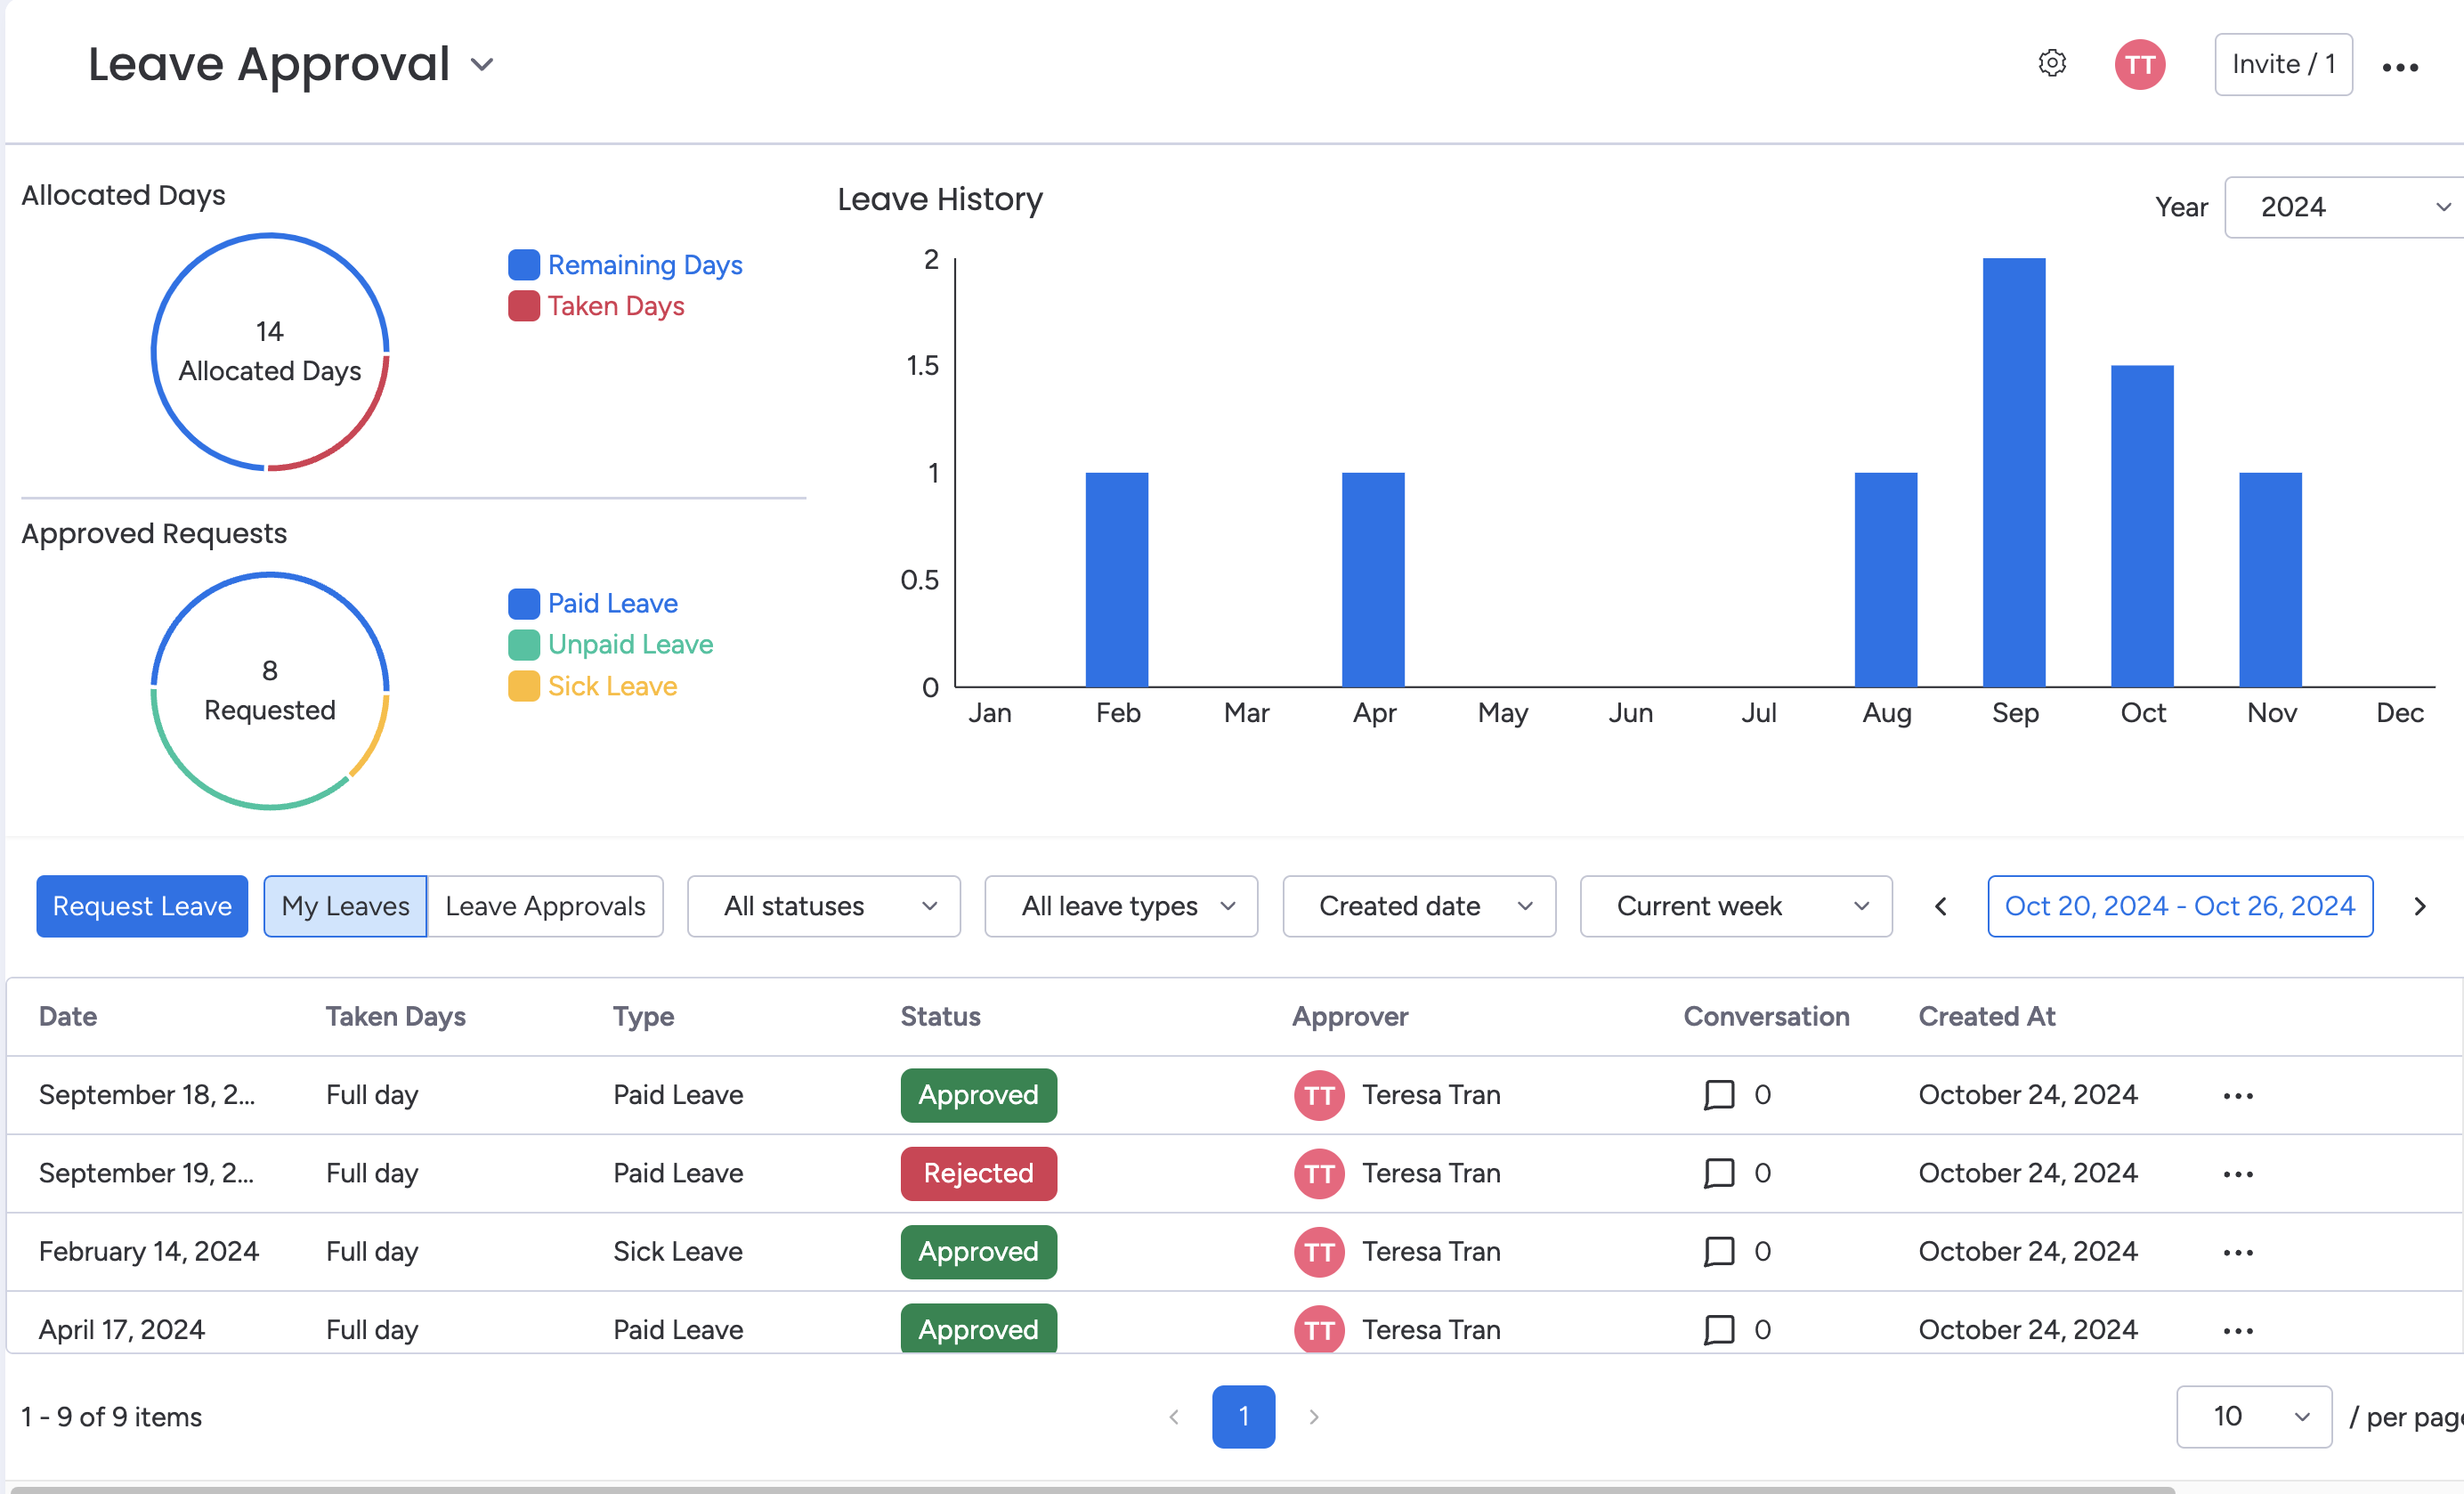
The Leave Dashboard has everything you need to stay updated on leave details for your team. Here’s an overview of the key sections:
1. Allocated Days
This section shows how many leave days each employee has been given for the year.
If an employee has 14 days total, this will show how many they have used and how many are left. It’s a simple way to stay on top of your leave balance.
Custom Allocations: If the admin has set up Custom Allocations, certain team members or roles may have different leave allowances based on their specific needs or contracts.
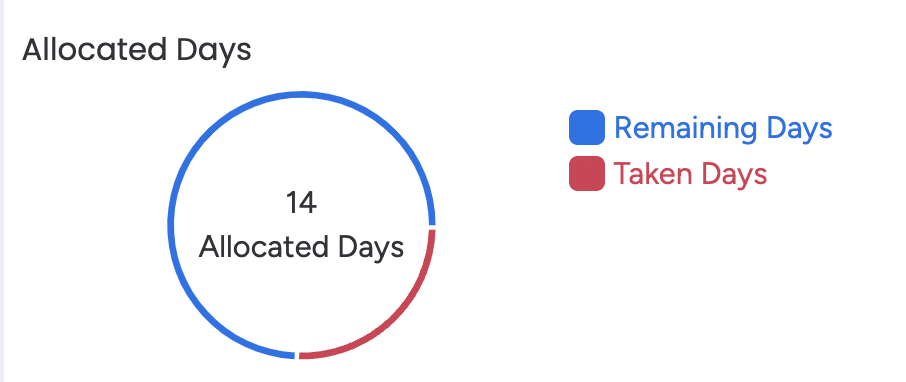
If the admin has not selected “Allocation Target” for a specific leave type, that type will not count against the allocated days. For example, some types of leave, like jury duty or bereavement leave, may not reduce the total allocated days.
2. Approved Requests
This section lists all leave requests that have already been approved, along with the type of leave taken (e.g., annual leave, sick leave, or personal day). This clear view of upcoming and past confirmed time off helps managers and team members plan around scheduled absences.
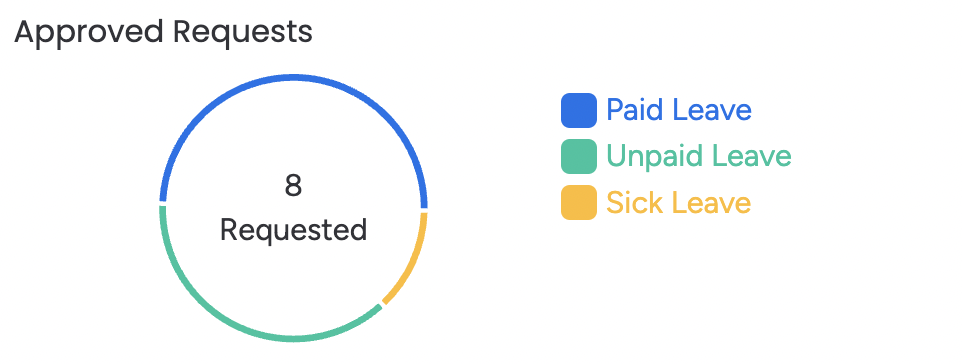
Tip: If your team needs additional types of leave (e.g., volunteer leave, parental leave), admins can create new leave types in the settings. Custom leave types make it easier to categorize and track different reasons for time off.
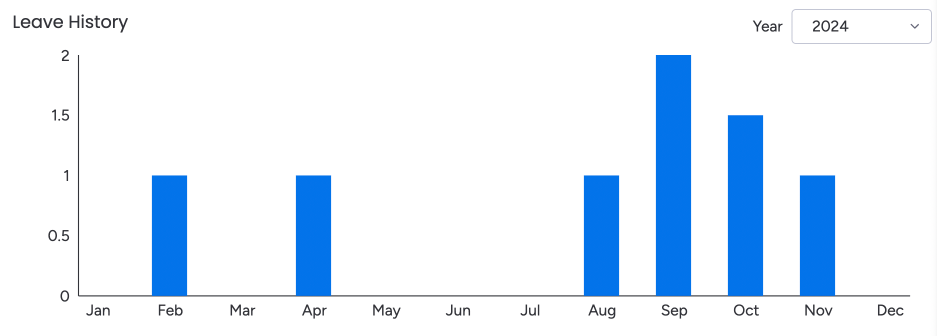
3. Leave History
This section records all past leave requests. This historical view is helpful for planning future requests and keeping personal records up-to-date.
4. List of Requests
Displays all current leave requests with their statuses, such as "Pending," "Approved," or "Rejected." This allows you and your manager to stay on top of requests awaiting approval or planning.

Request Leave: Click this button to create a new leave request.
My Leaves: This option shows a list of your own leave requests.
Leave Approvals: For managers and approvers, this section displays a list of leave requests that need approval.
All Status: Use this filter to choose specific statuses.
All Leave Types: Filter the list by specific leave types.
Created Date and Time Frame: Set a specific date or time range to view leave requests created within a certain period.
Export List: Click this option to export the list of requests as a CSV file.
Help: Access the Help section for guidance on using the Leave Approval feature.
Refresh: Refreshes the list to show the most recent updates or changes.
Settings: Go to Settings to adjust leave preferences, like default approvers or custom leave types.
📖 Support and Resources
Help Center: Visit our Help Center for detailed documentation.
Contact Support: Reach out to our support team here.
Book a demo: Schedule a demo for personalized guidance.
Tutorial Videos: Watch our tutorial videos for more help.
Customer Portal: See Roadmap and Request a Feature.
Happy planning and organizing! ♥️
.png)