.png)
Managing members involves adding, removing, and organizing resources within the Resource Board. This helps streamline resource allocation and workload management by ensuring the right people are assigned to the right tasks, improving efficiency and team organization.
As a third-party plugin for Jira, TeamBoard ProScheduler allows you to add active Jira users and display them on a single page, enabling you to assign tasks, track progress, and keep your projects organized.
TeamBoard Proscheduler offers three types of user management:
-
Jira Users: Integrates with your Jira instance to add active members from your Jira project.
-
Jira Groups: Imports entire Jira groups, simplifying the addition of multiple users with predefined roles.
-
TeamBoard Teams: Creates teams at the Team Level within ProScheduler, independent of Jira groups, for better project planning.
Adding members
To add new members to the board, you will have 3 options: Jira users/group, TeamBoard Teams & Generic Resources.
Option 1: Jira users/group
Add Jira Users/Groups when you want to integrate active team members directly from your Jira instance. This option allows you to add specific users or groups who are already active members of your Jira project into TeamBoard ProScheduler for task assignment and tracking.
-
Go to Resource from the top navigation bar.
-
In the Members panel, select Jira user/group from the dropdown menu.
-
In the search bar, search for a user’s name or a Jira group name.
-
Click the

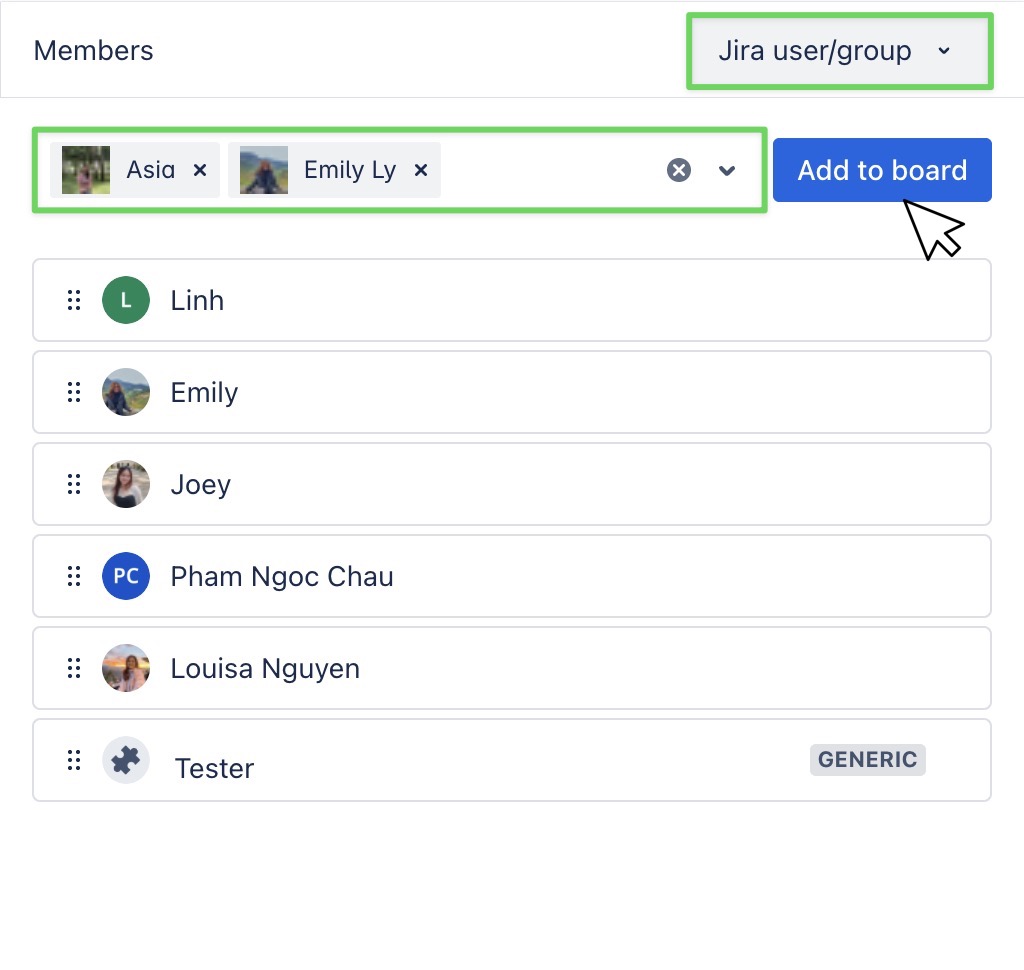
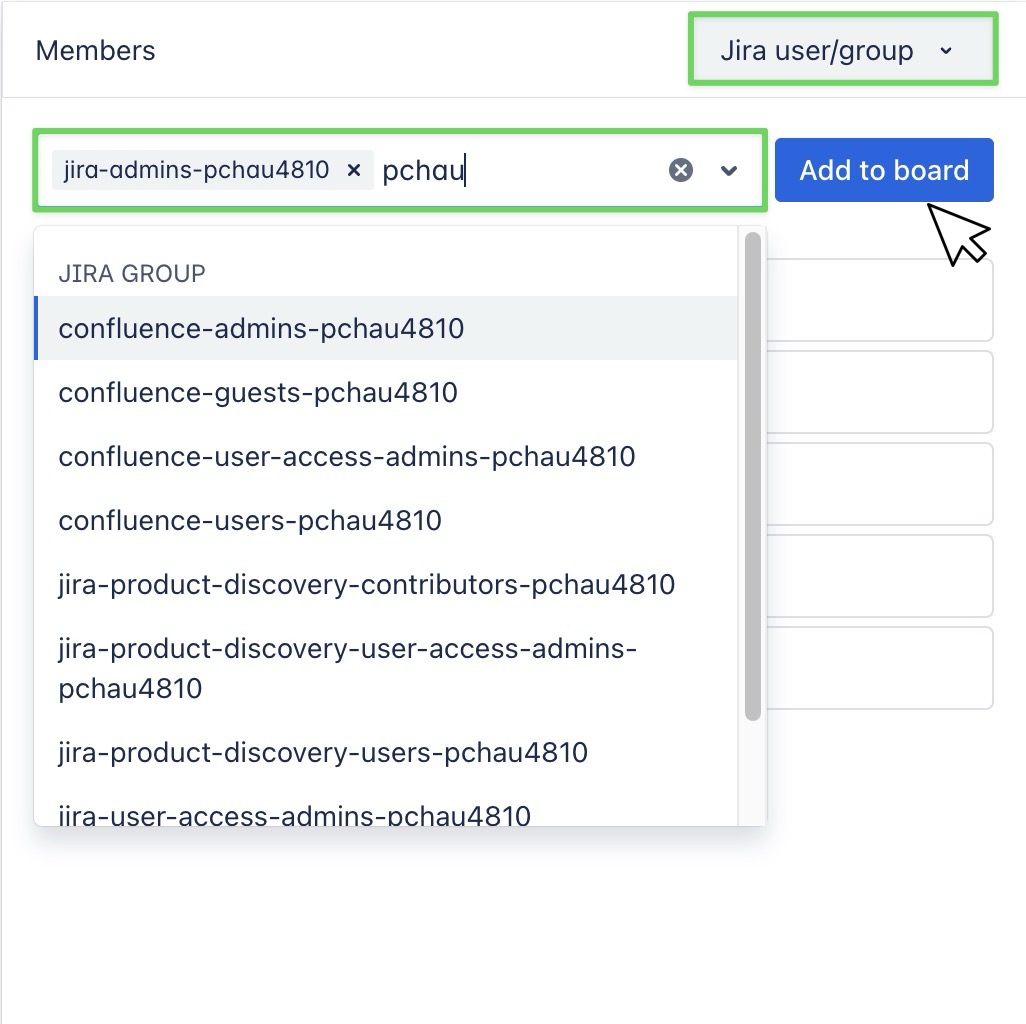
Tips: You can add multiple members or groups at once.
Option 2: TeamBoard Teams
If you’ve already set up predefined teams in TeamBoard ProScheduler, you can quickly add them to your Resource Board. This is ideal for organizations that group resources by project, role, or skill set.
-
Go to Resource from the top navigation bar.
-
In the Members panel, select TeamBoard Teams from the dropdown menu.
-
In the search bar, search for the team name.
-
Click the
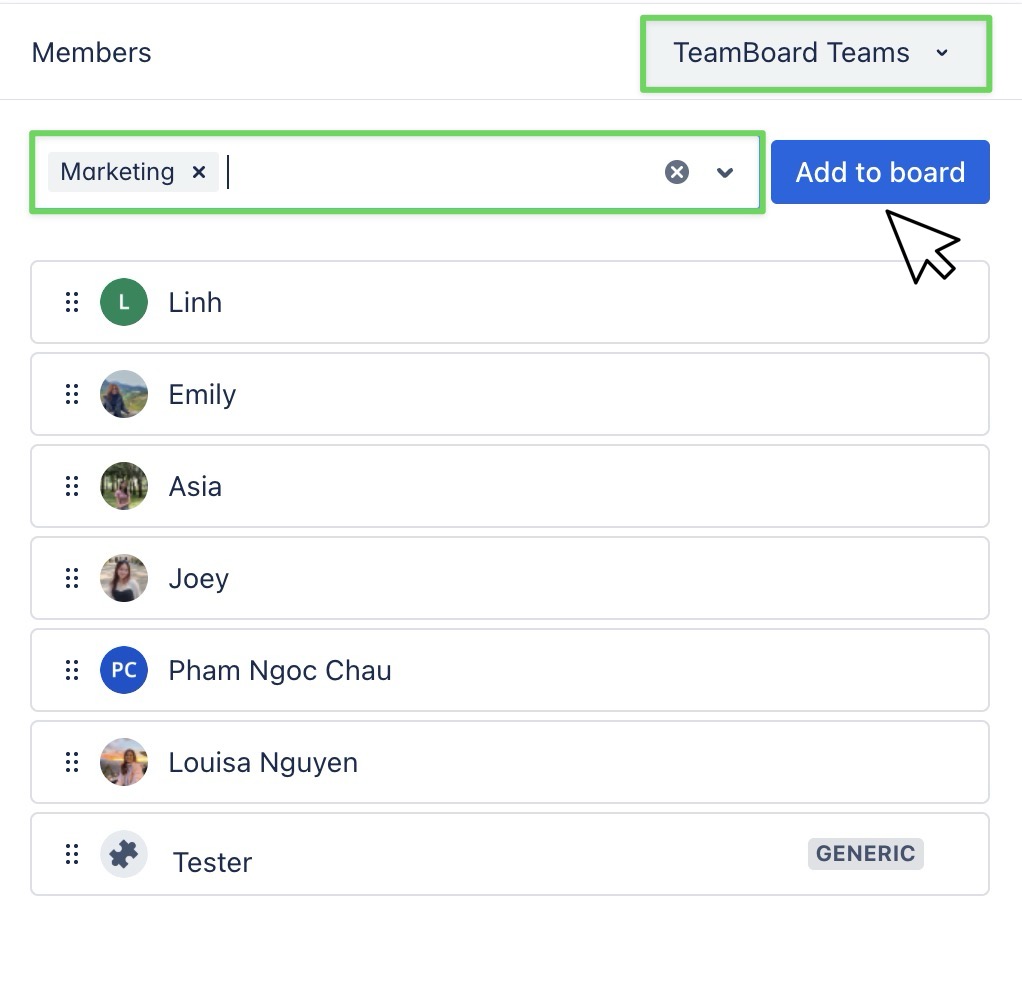
TeamBoard Teams are set up at the Team Level
Option 3: Generic Resources
Add Generic Resources when you’re in the early stages of project planning and need placeholders for tasks before the actual team members are assigned.
-
Go to Resource from the top navigation bar.
-
In the Members panel, select Generic Resources from the dropdown menu.
-
In the search bar, create a name for the generic resource.
-
Click the
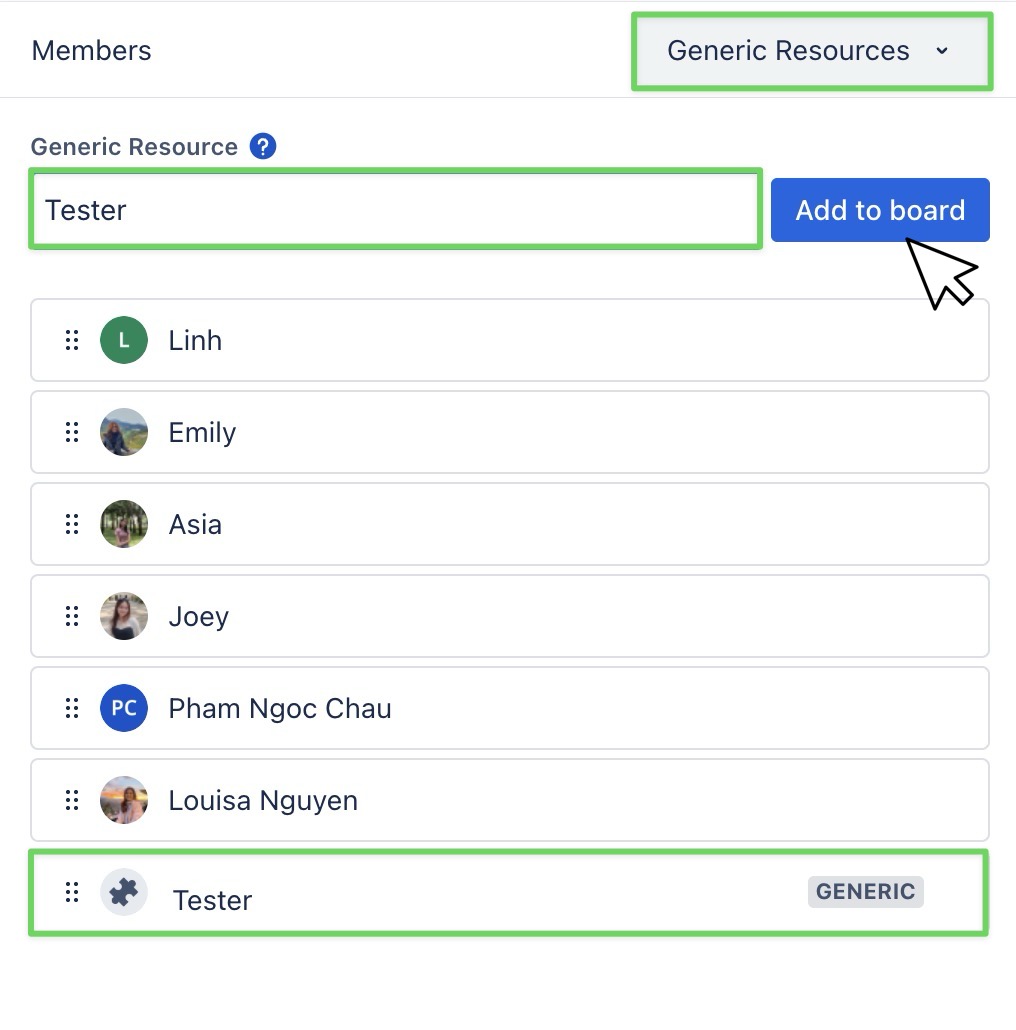
Learn more about how to manage Generic Resources in the next section.
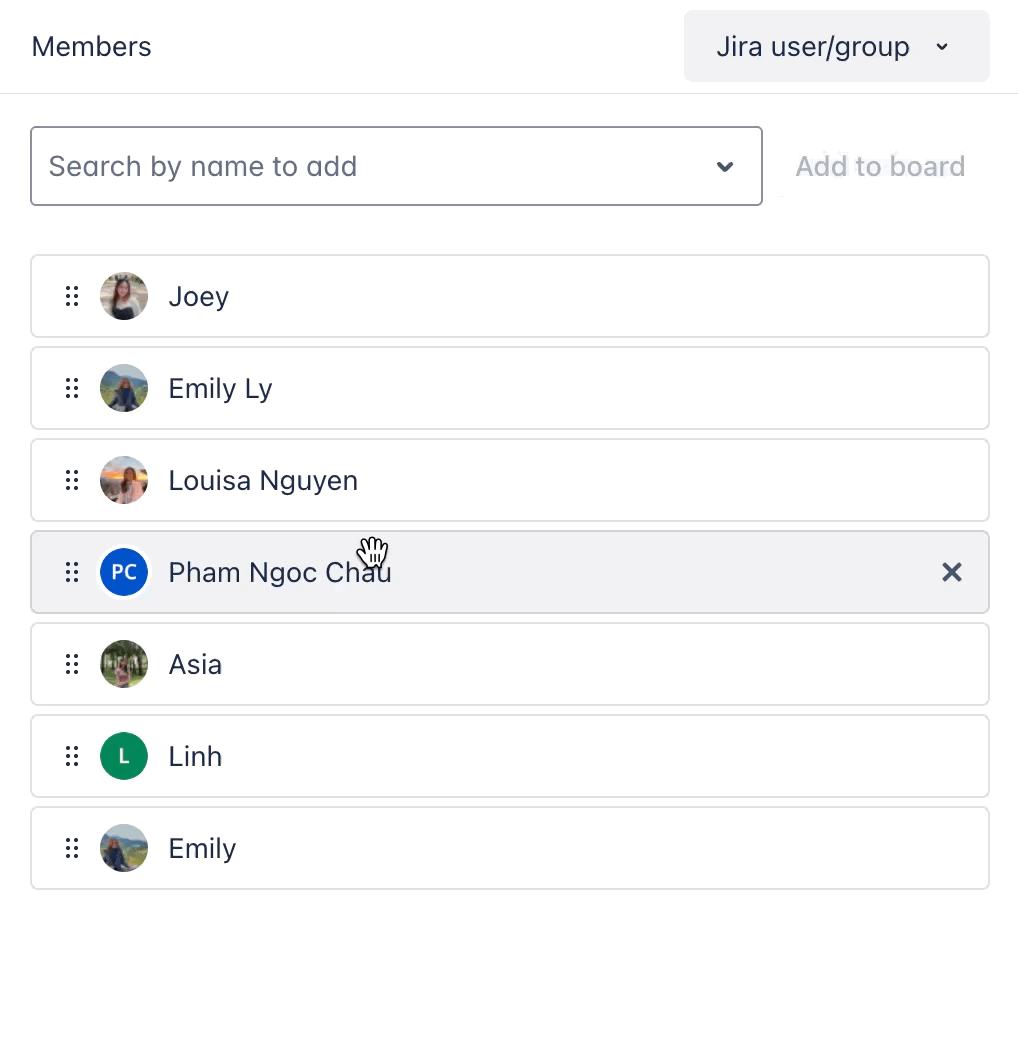
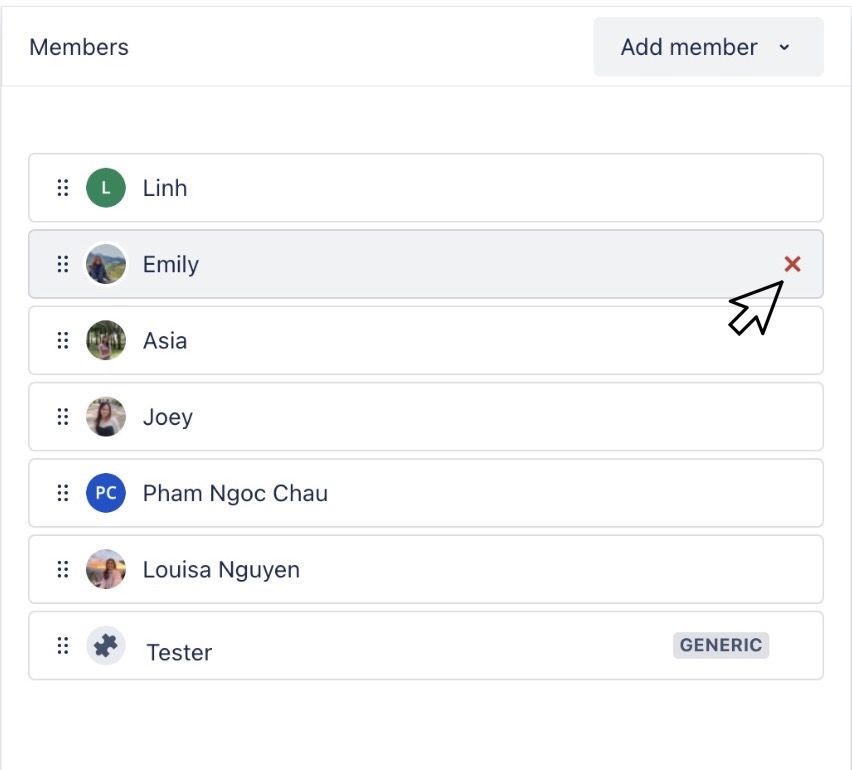
Removing members
To remove a member from the board, hover over the member’s name in the Members panel, and click the ❌ icon to delete the member from the list.
Reordering members
To reorder members, click the ( ![]()