.png)
The Team Planning feature in TimePlanner provides team leaders and administrators with a complete set of tools to manage, organize, and monitor team activities efficiently. It helps plan tasks, allocate resources, track workload, and gain insights into team performance.
Accessing the Team Workspace
-
Go to

-
Locate the team you want to update.
-
Click the Team to open the Team Workspace.
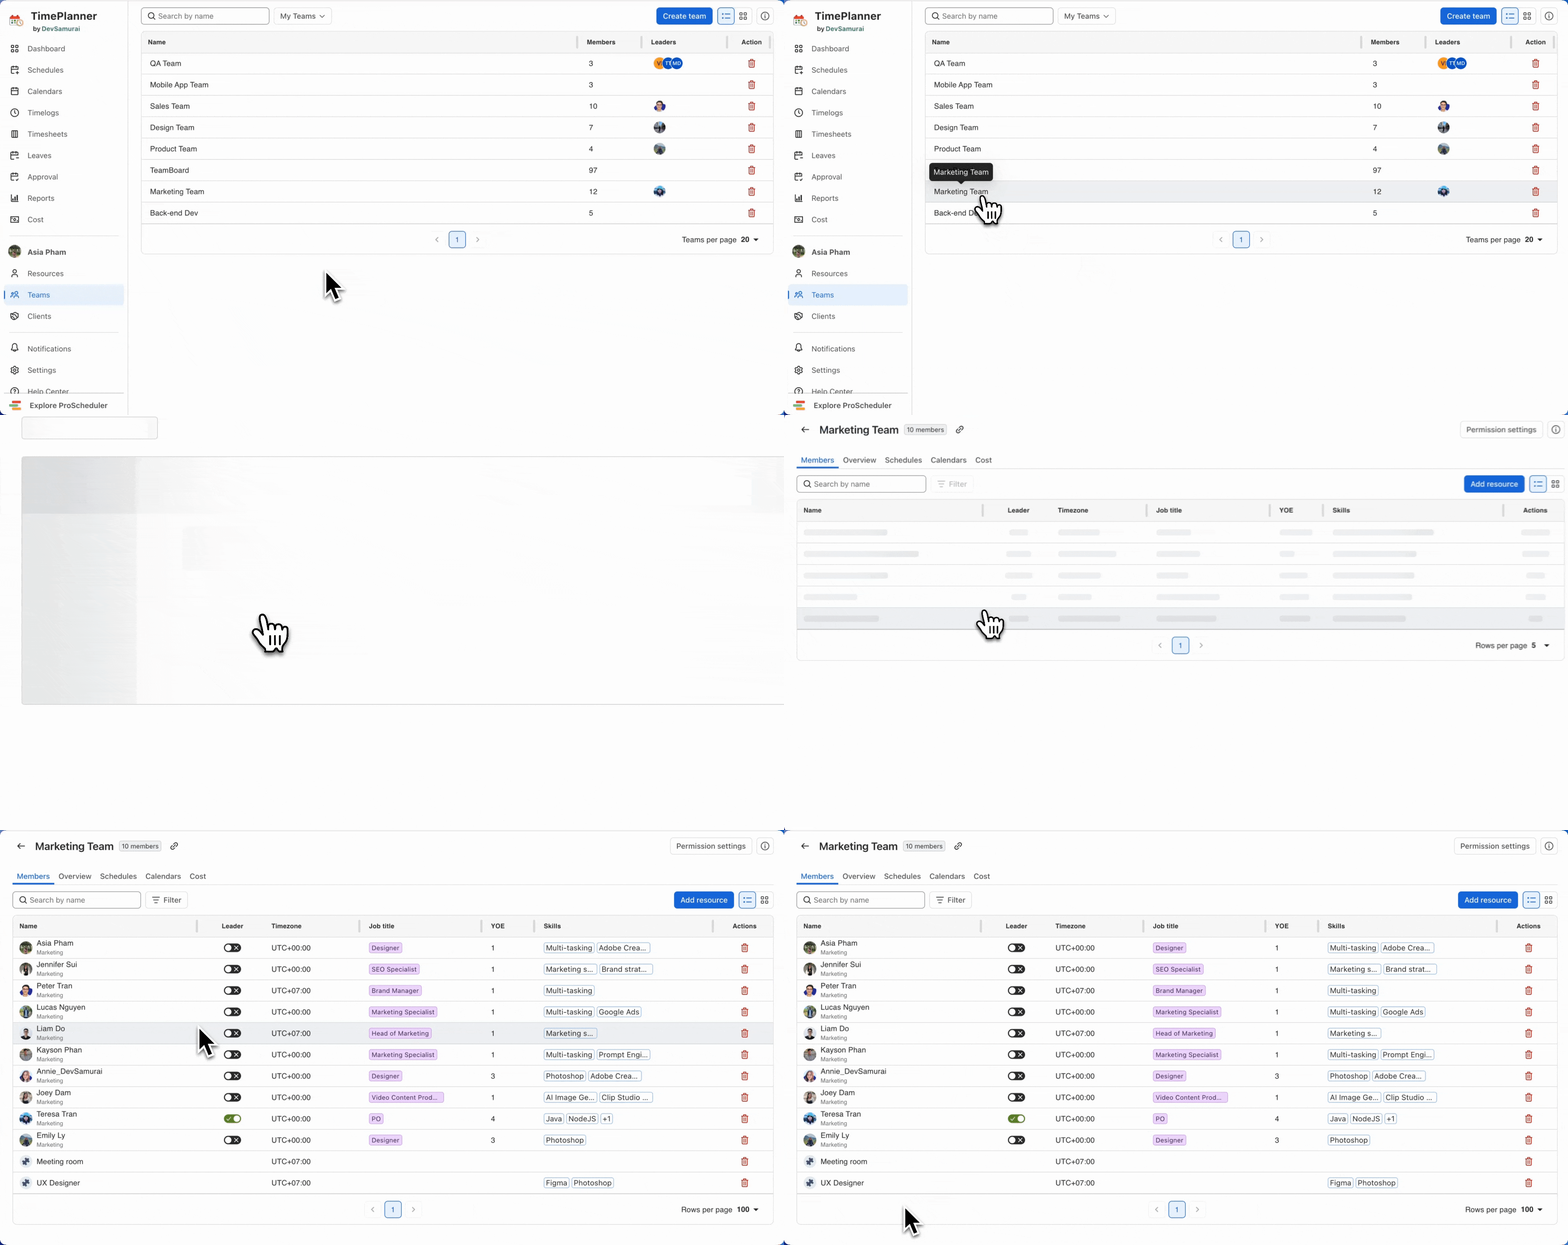
Working on the Team Workspace
Within the Team Workspace, you can access the following tabs:
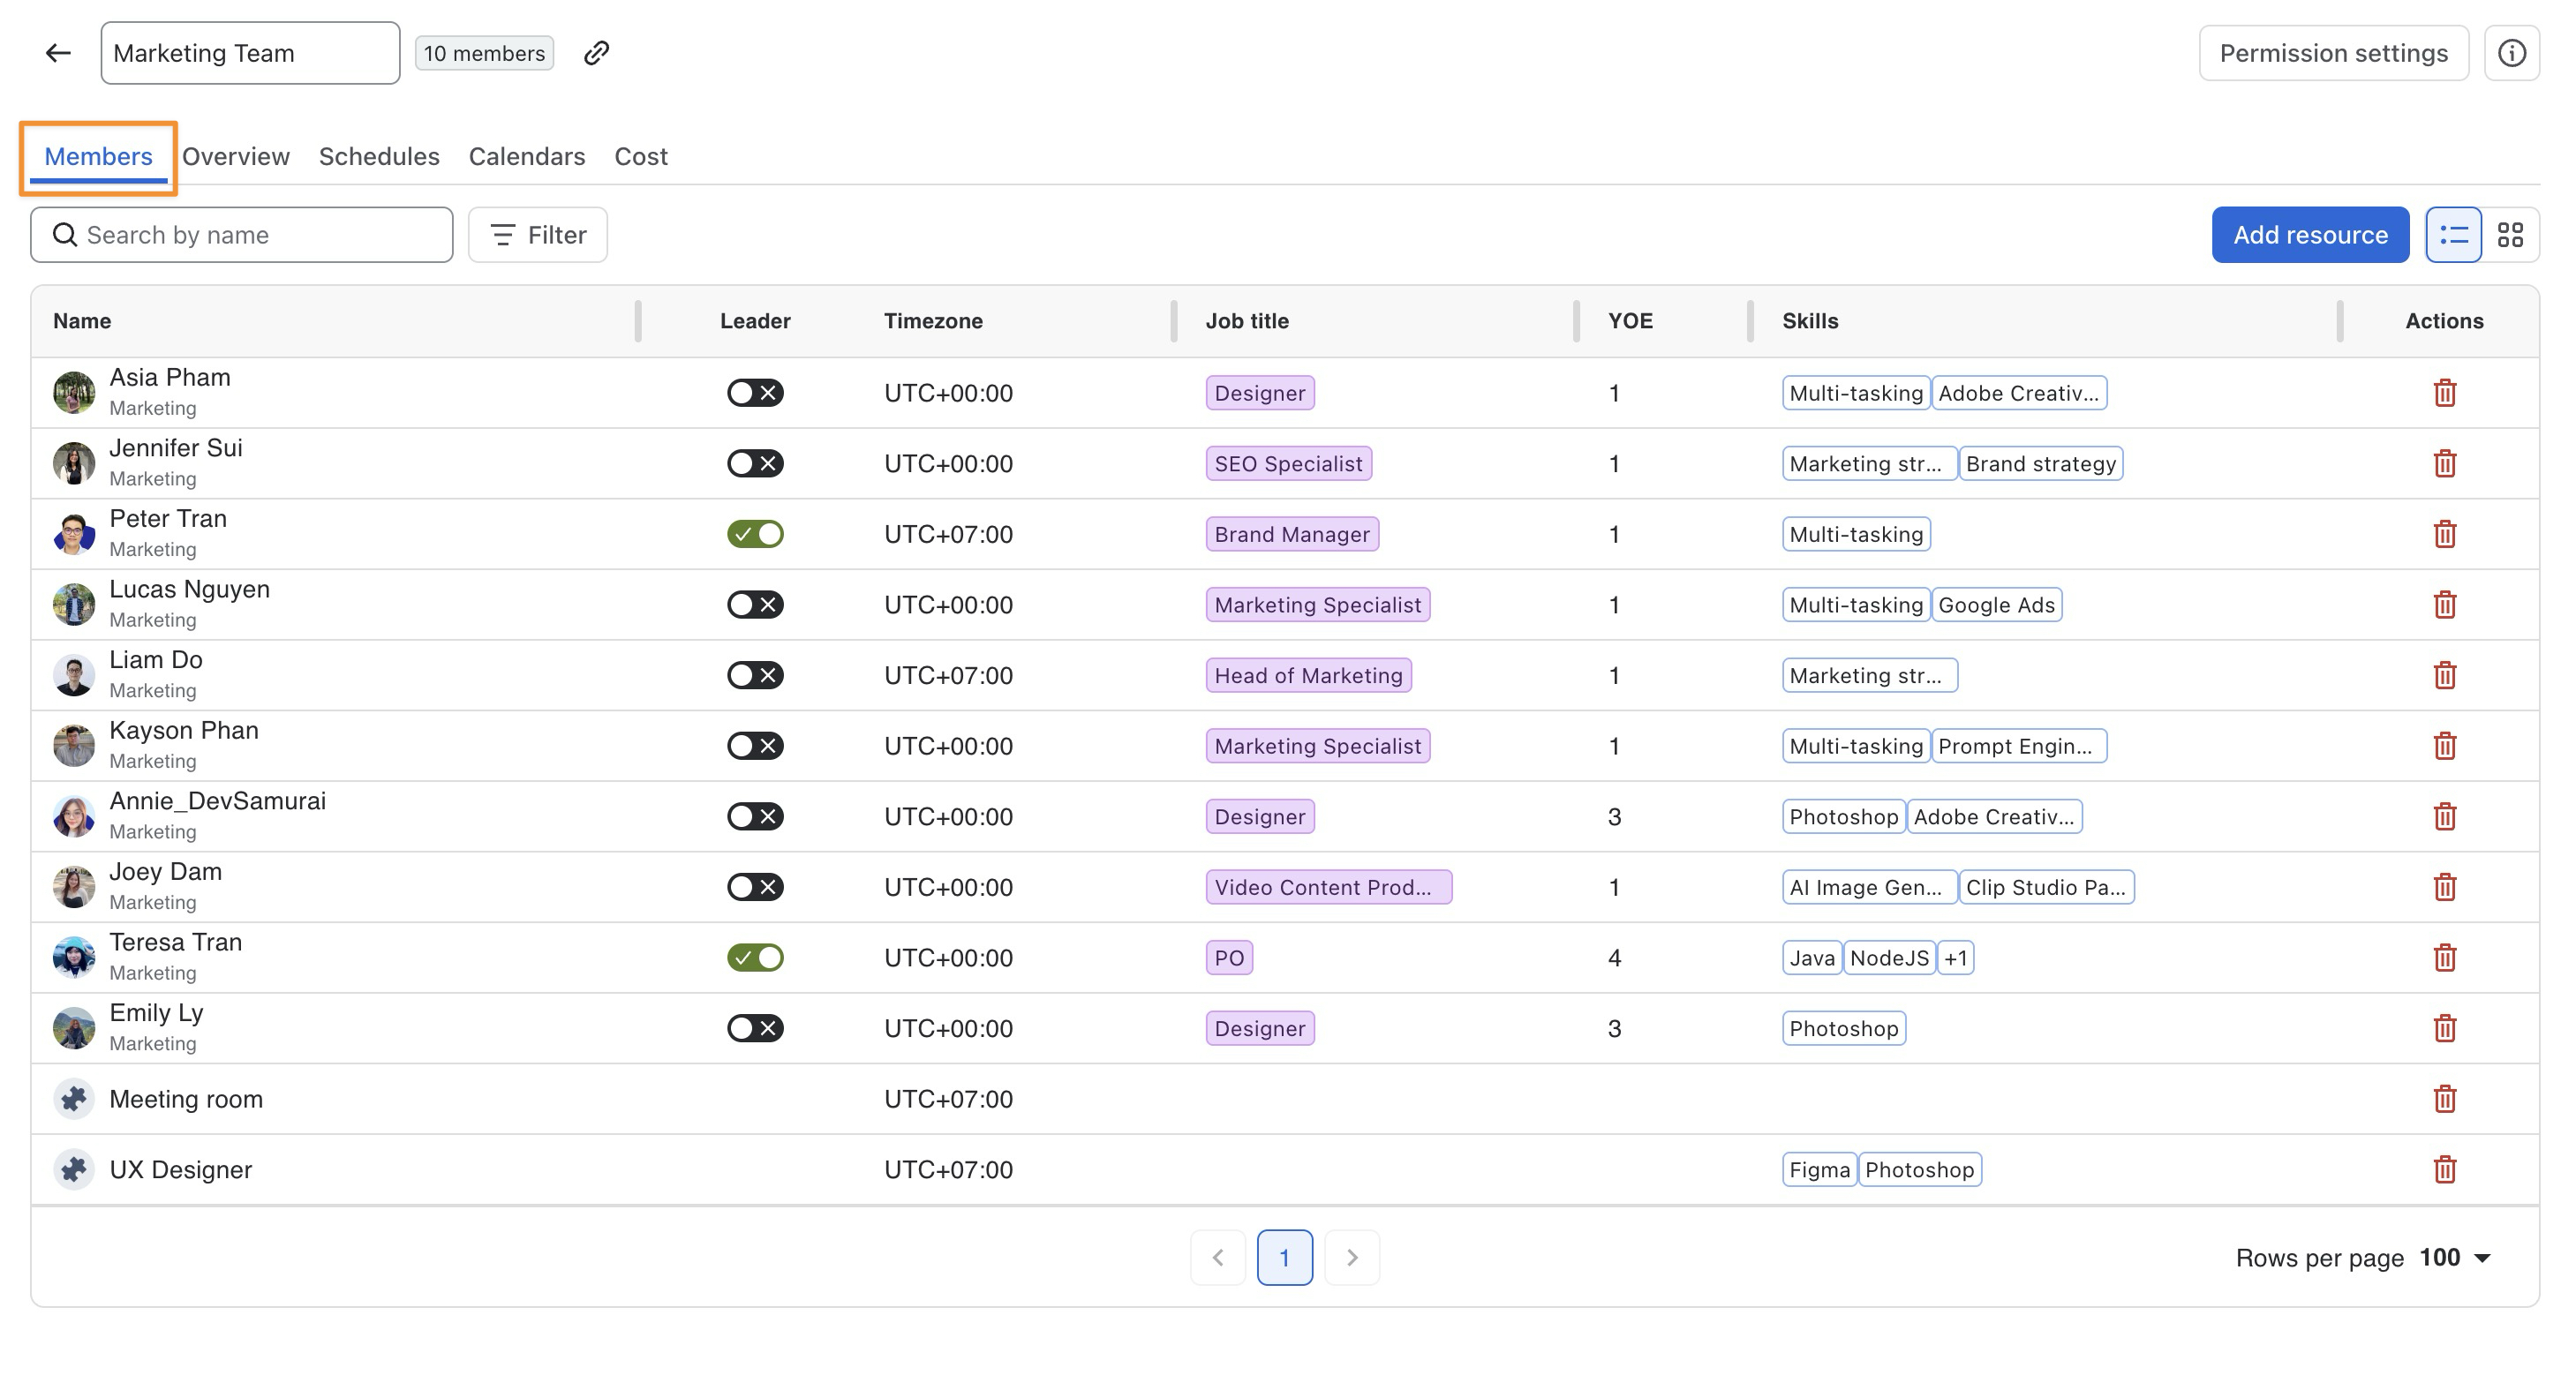
1. Members
The Members tab shows the members and Generic Resources assigned to the team.
From this tab, you can:
-
Search, filter, and sort resources.
-
Add or remove members and Generic Resources.
-
Assign or remove Team Leader roles.
-
View information such as timezone, job title, YOE, and skills.
Learn more: Manage team members and resources
2. Overview
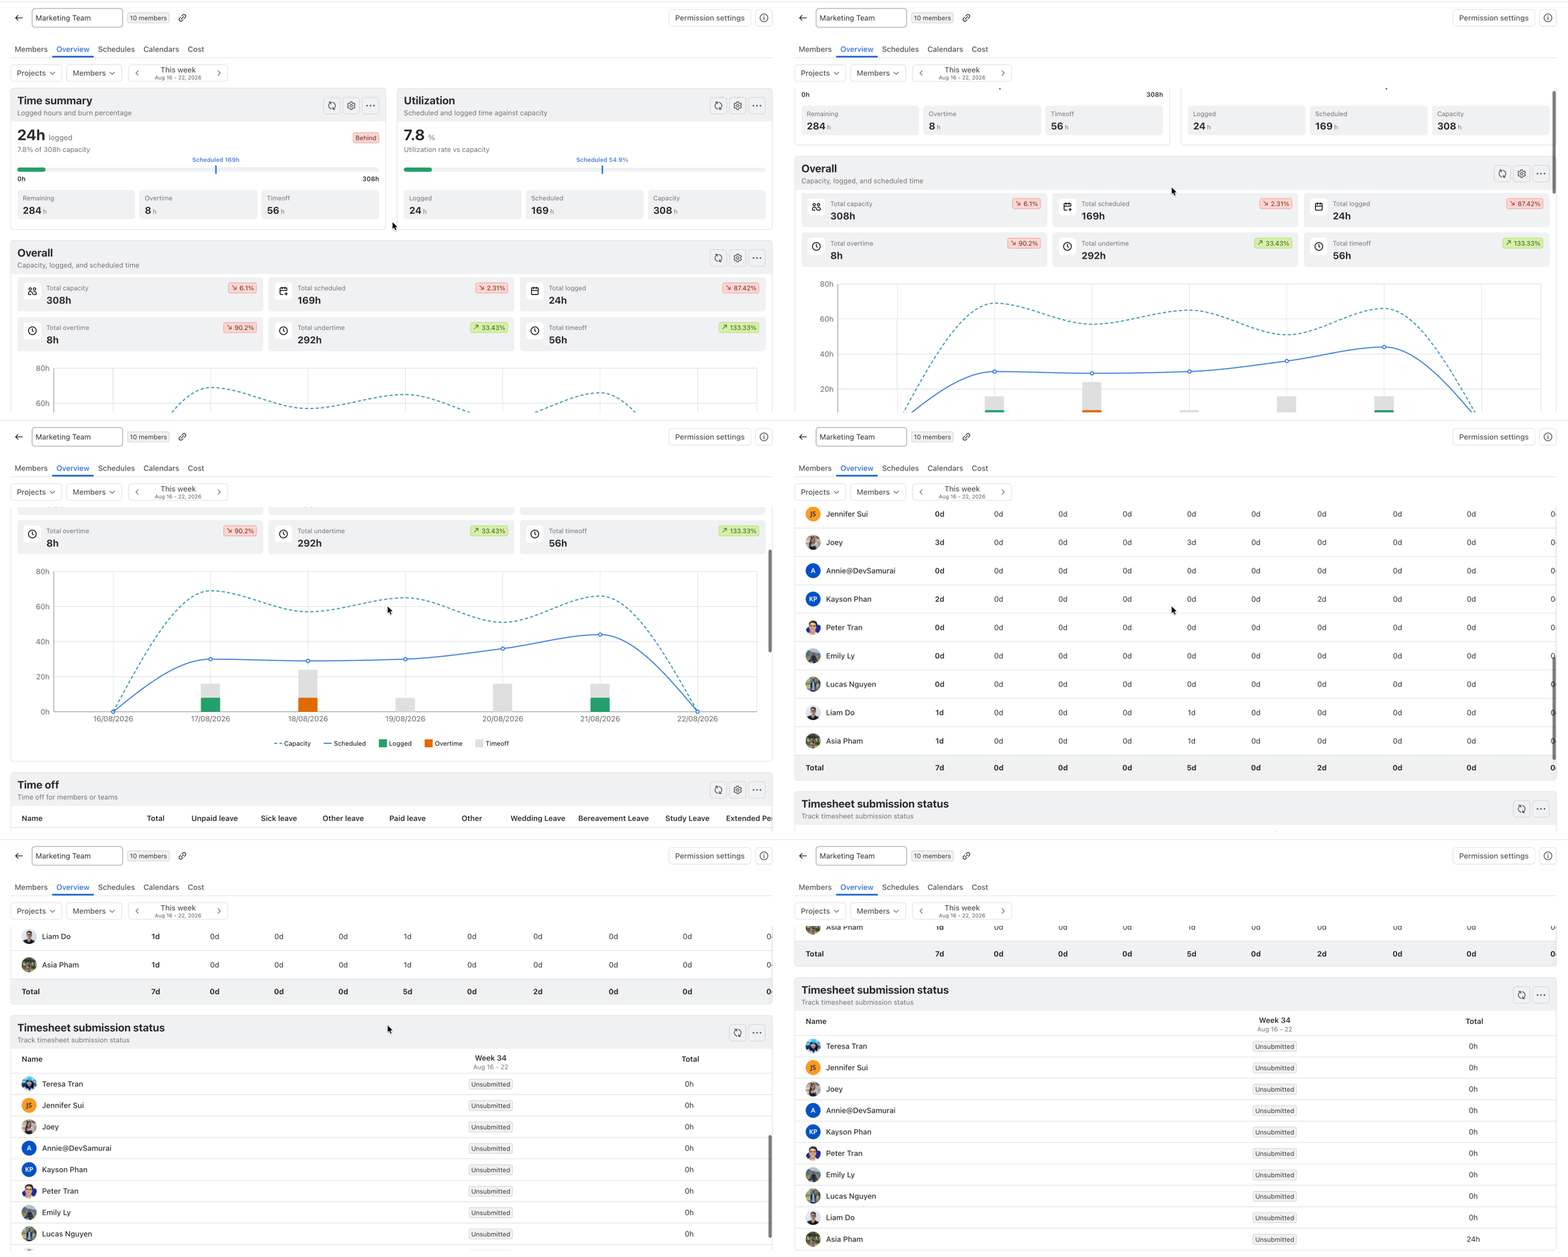
The Overview tab provides a team-level summary of capacity, scheduled work, logged time, utilization, time off, and timesheet submission status.
You can use the filters at the top to narrow the data by Project, Member, and Time Period.
Available widgets can include:
-
Time Summary
-
Utilization
-
Overall
-
Time Off
-
Timesheet Submission Status
This view helps you quickly understand how the team is using its available capacity and where workload or time-tracking attention may be needed.
3. Schedules
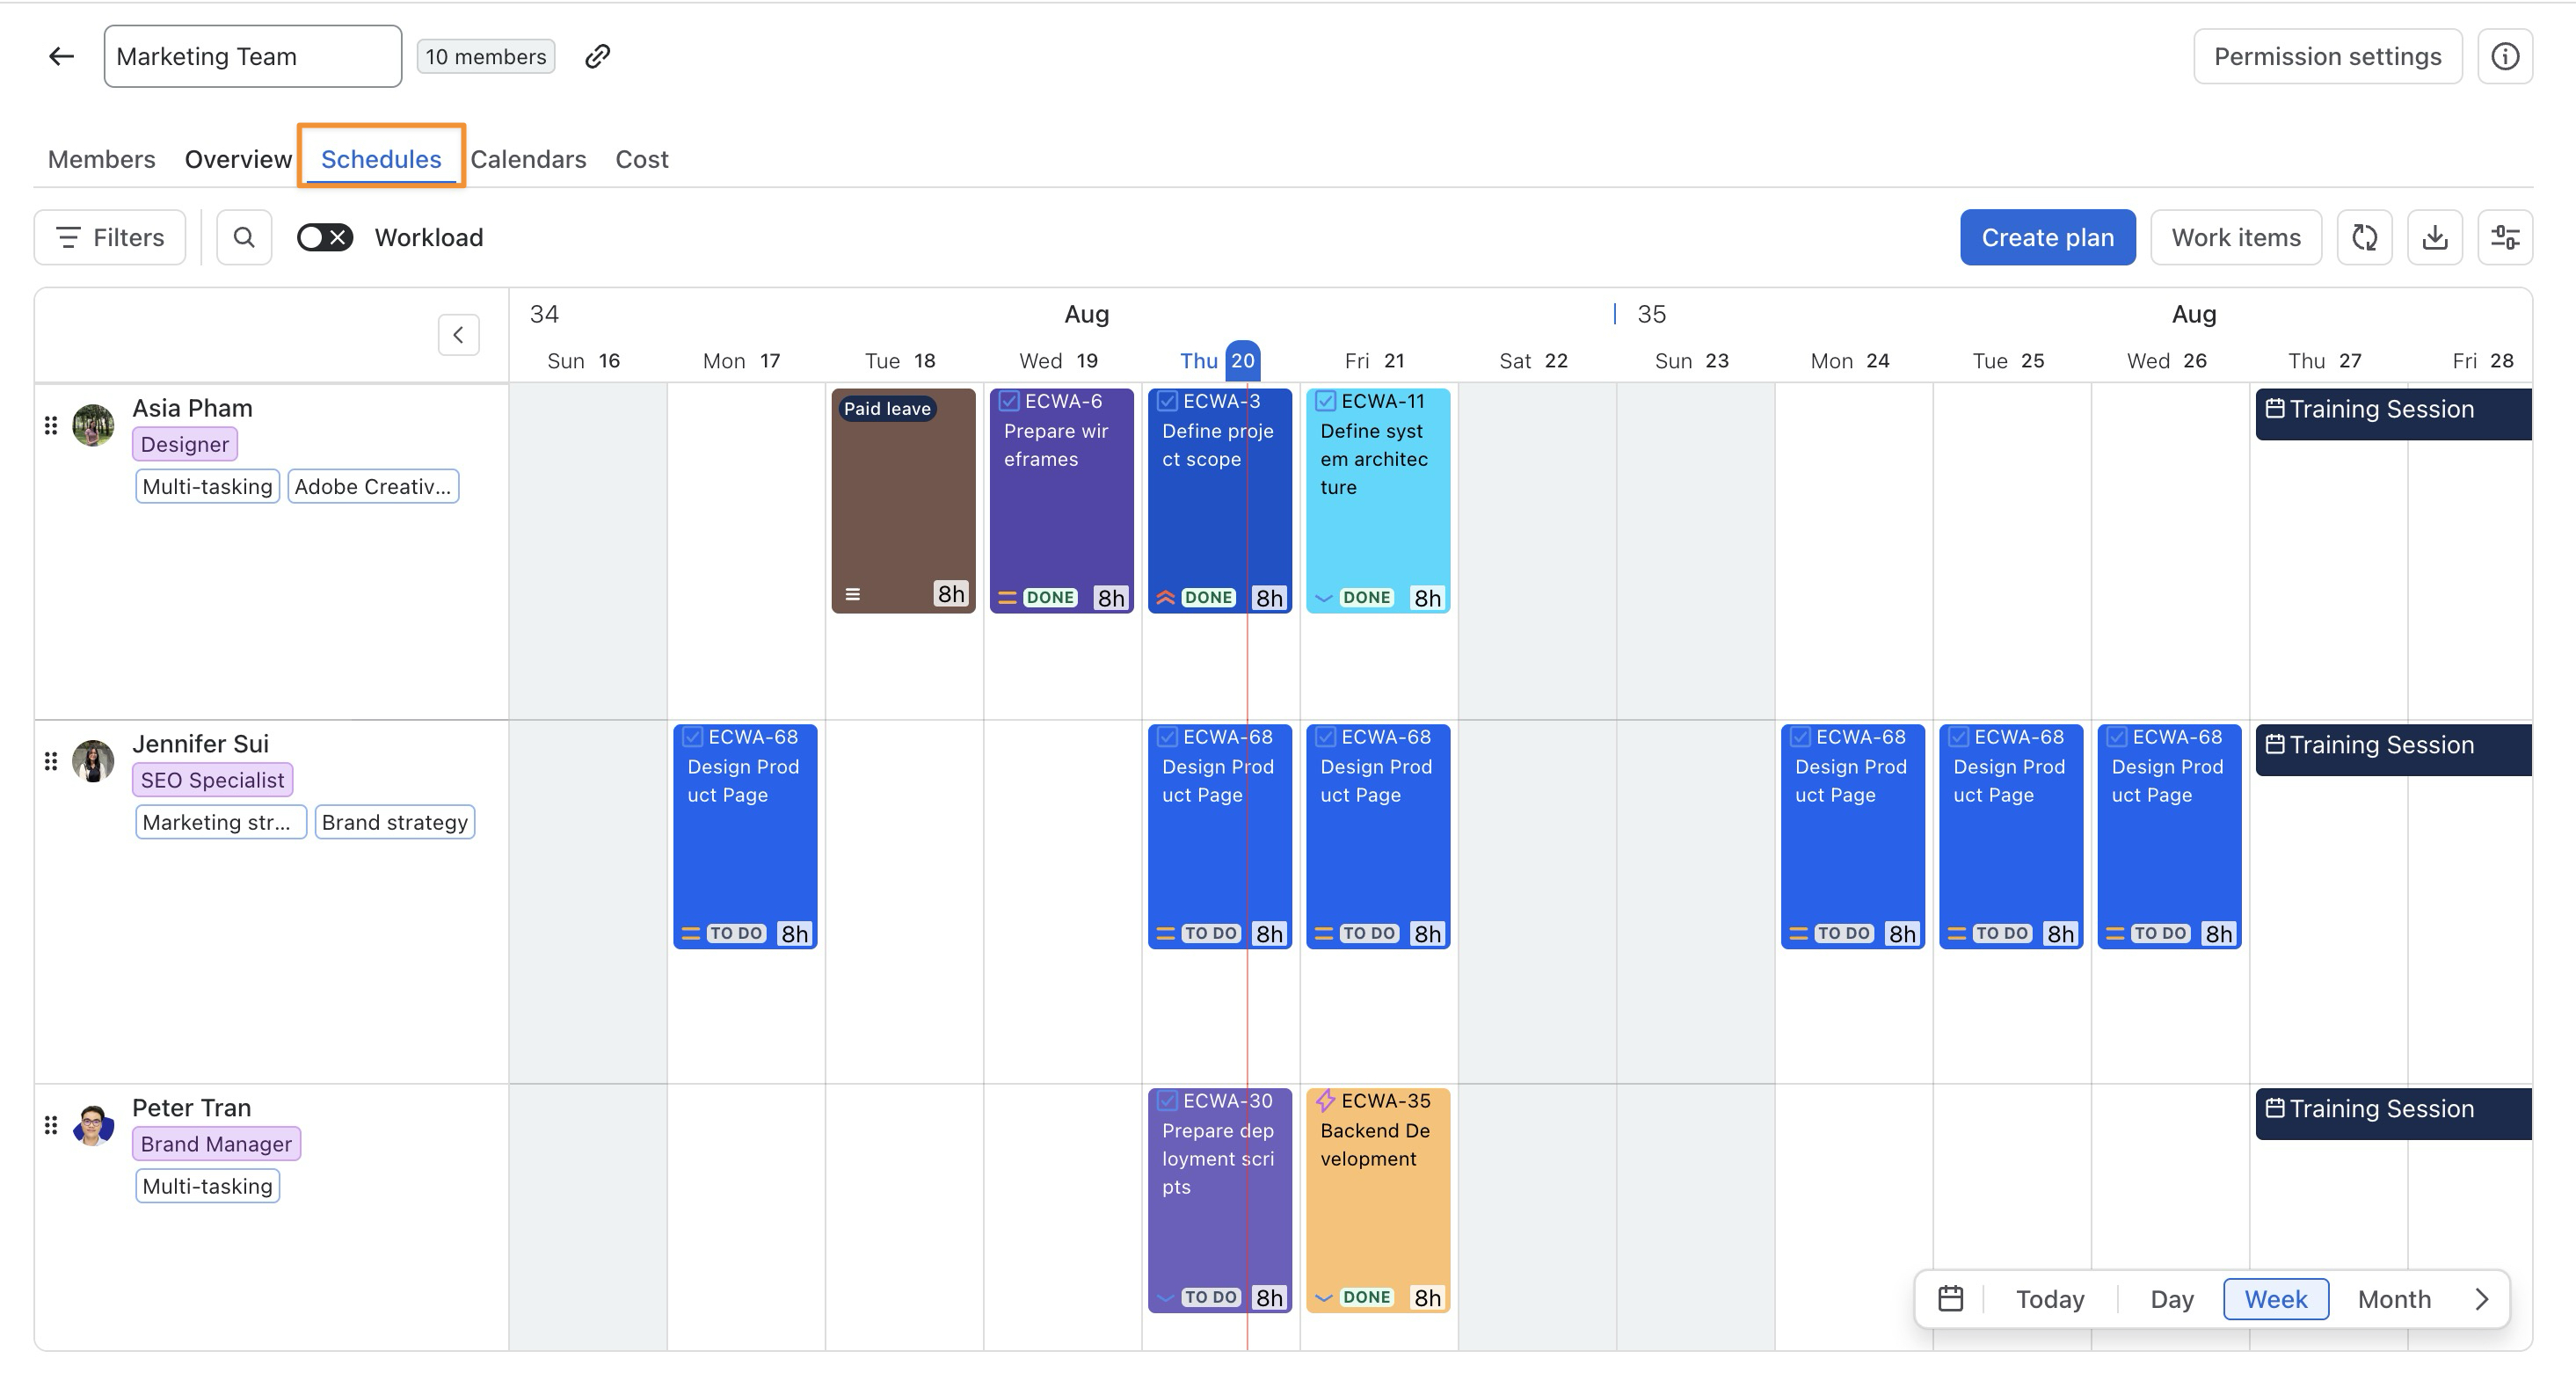
The Schedules tab opens the Schedule Board for the selected team.
Use it to:
-
Plan Jira work items.
-
Create events and leave or Time Off.
-
Review work by member and date.
-
Turn on Workload to compare planned work with member capacity.
-
Search and filter scheduled work.
-
Adjust plans directly on the timeline.
The Schedule Board only shows resources assigned to the selected team.
Learn more: Learn how to plan work in TimePlanner
4. Calendars
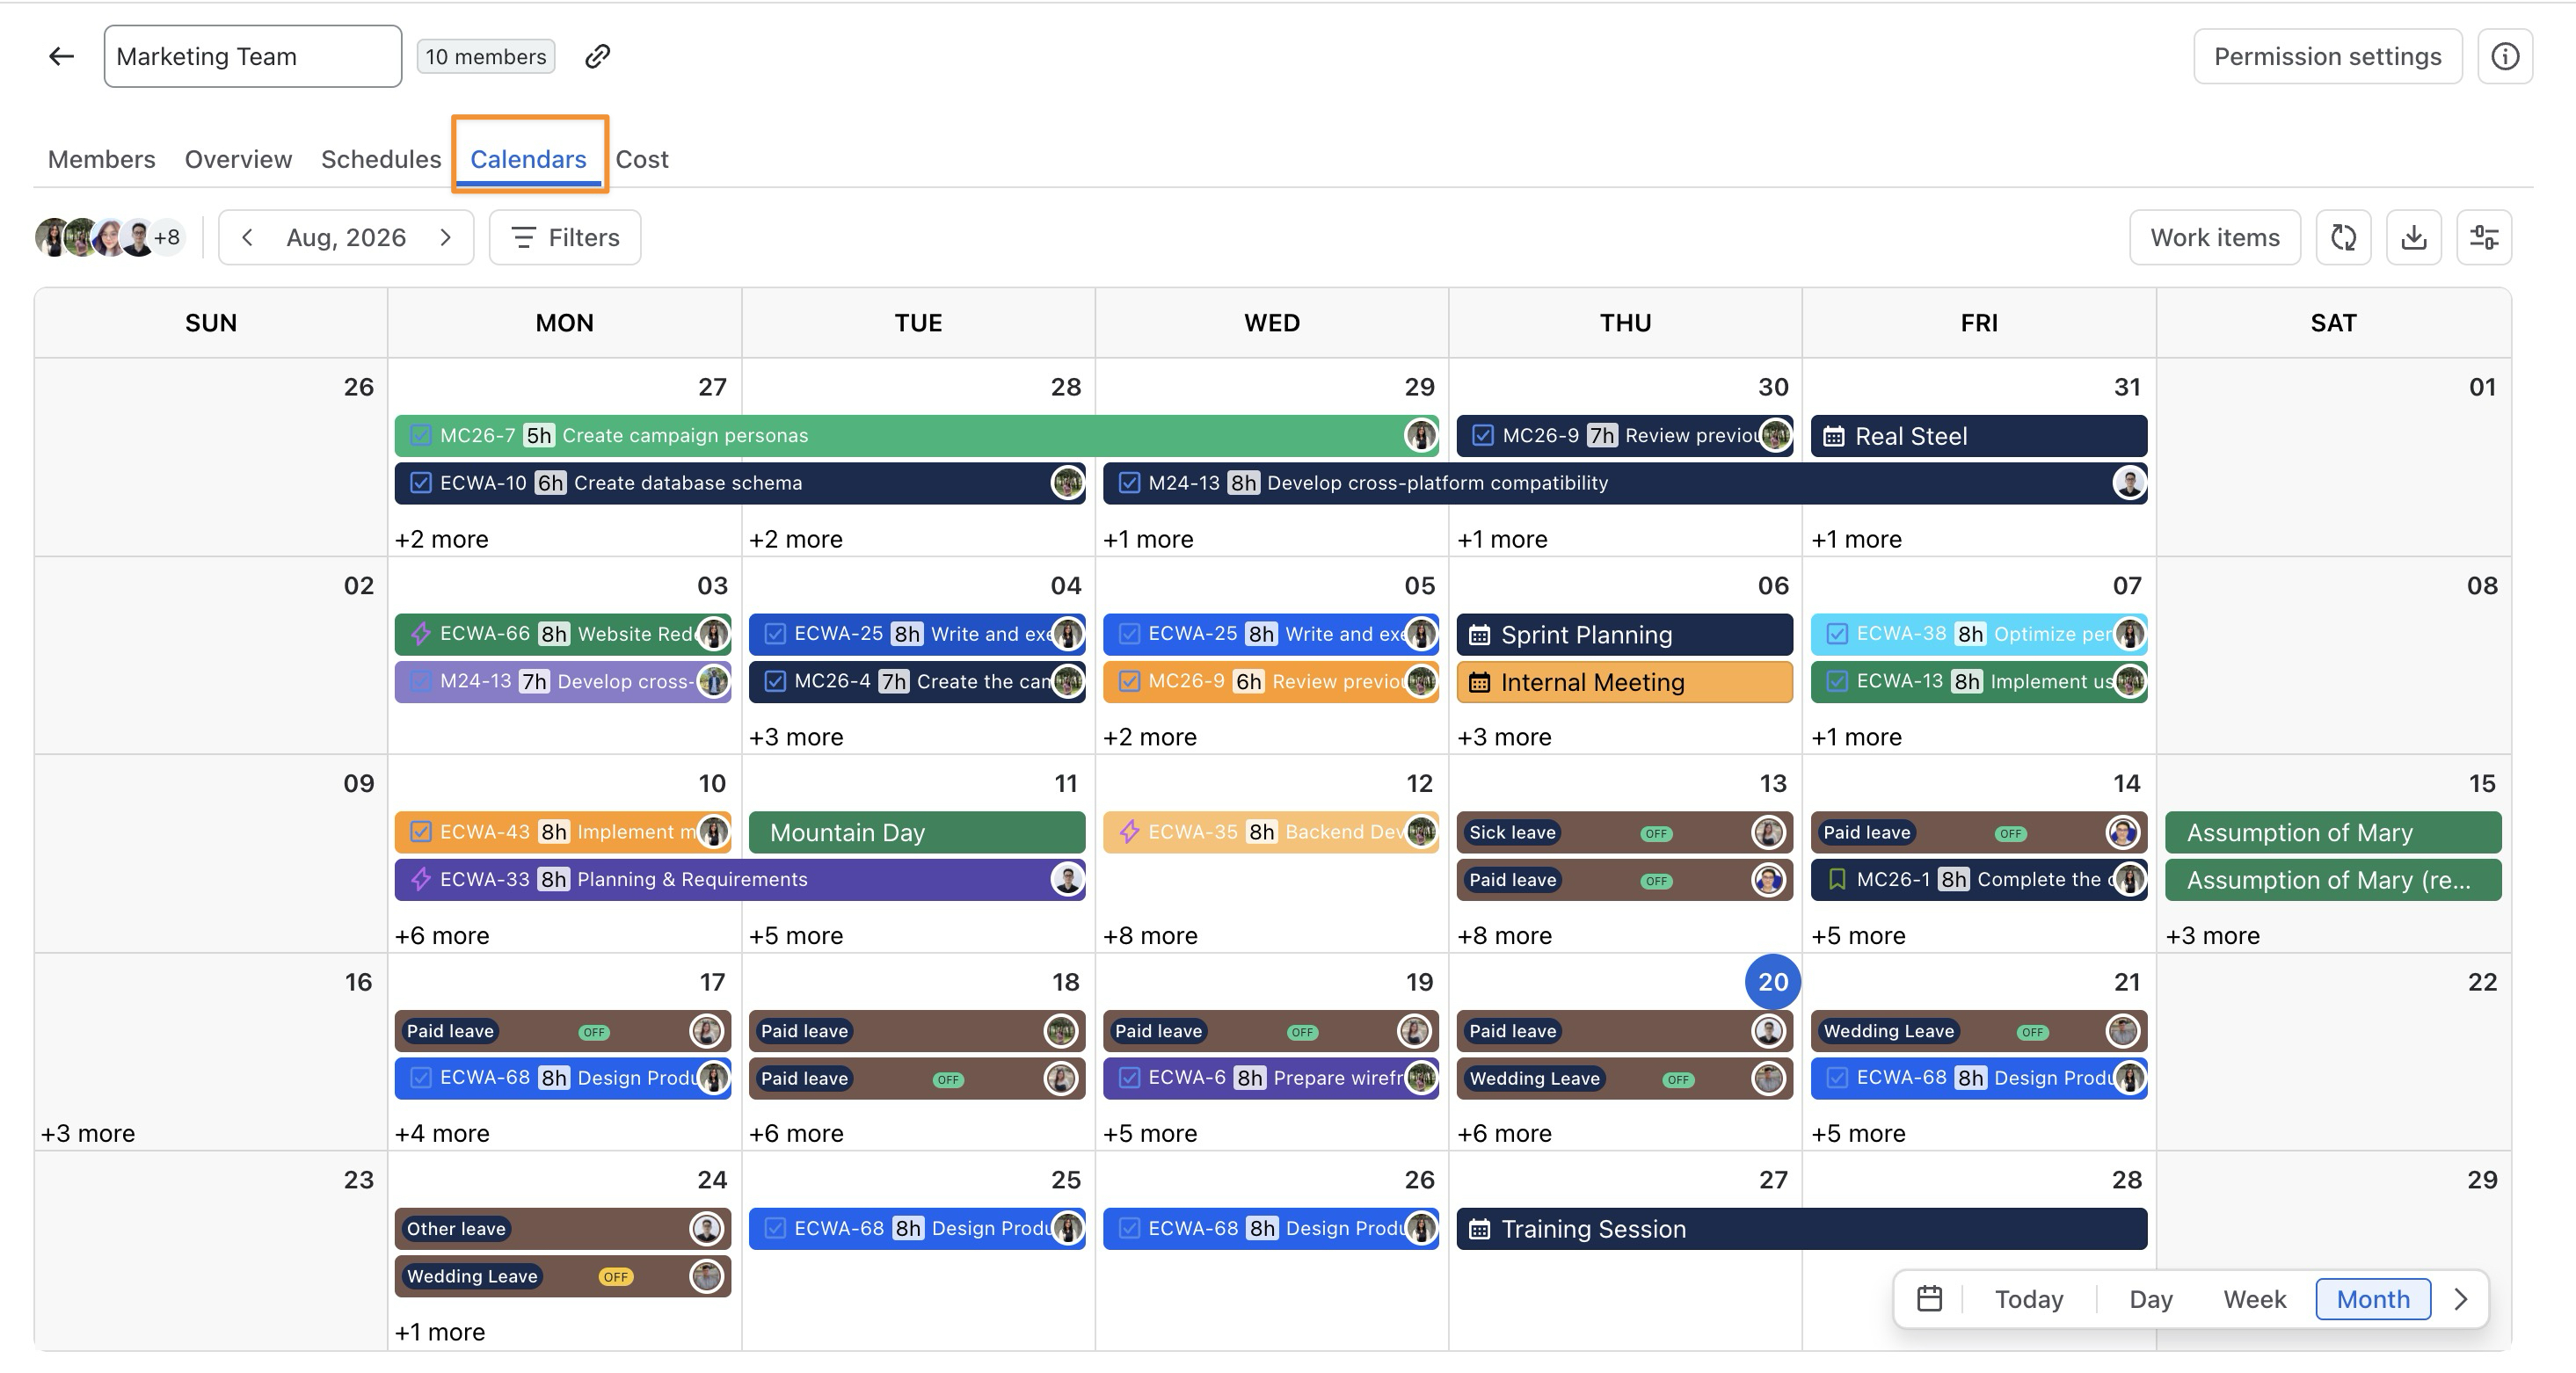
The Calendars tab provides a calendar-based view of the selected team's planned activities.
It can display items such as:
-
Jira work items
-
Events
-
Leave and Time Off
-
Holidays
Use the date controls and filters to focus on the period and activities you want to review. You can also switch between Day, Week, and Month views.
Learn more: Learn how to use the Calendar view
5. Cost
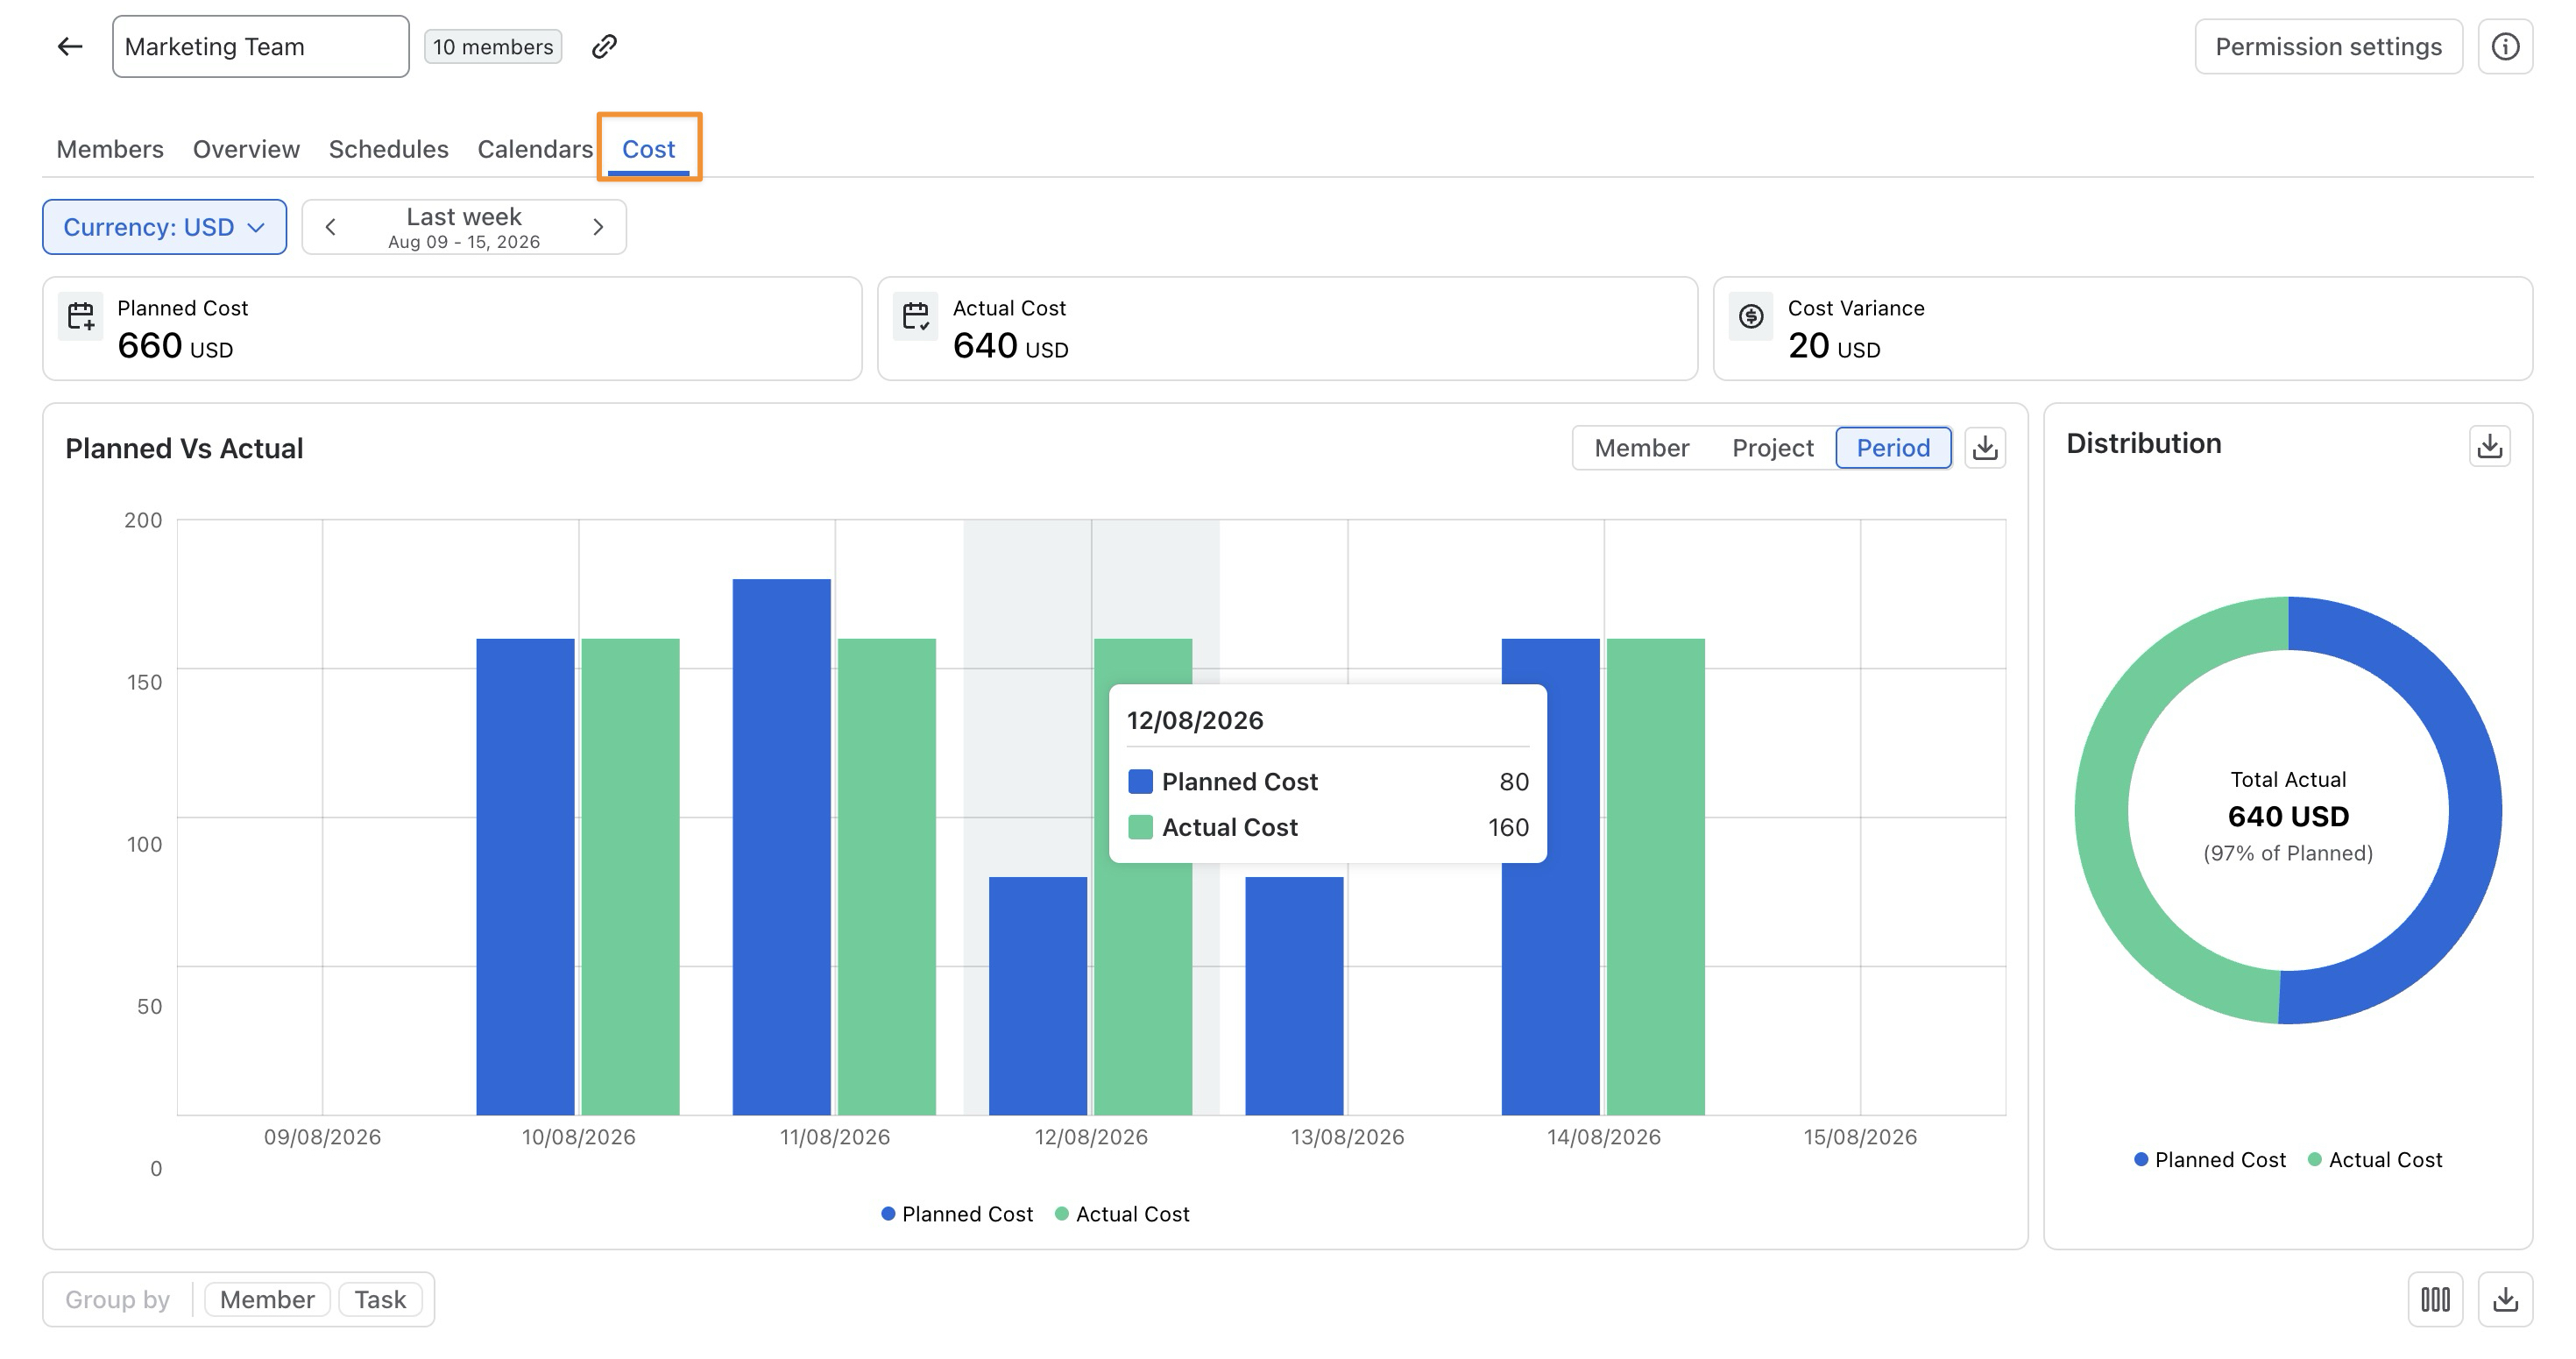
The Cost tab shows cost information for the selected team over a chosen period.
At the top, you can select the currency and time period. The page then displays:
-
Planned Cost
-
Actual Cost
-
Cost Variance
The Planned vs Actual chart lets you compare costs by Member, Project, or Period, while the Distribution chart shows the relationship between planned and actual cost.
Use this tab to understand whether the team's actual costs are tracking above or below what was planned.
Learn more: Learn how to manage costs in TimePlanner