.png)
There are 2 approaches to creating requirements:
1. Create New Requirements
To create a new requirement, follow these steps:
-
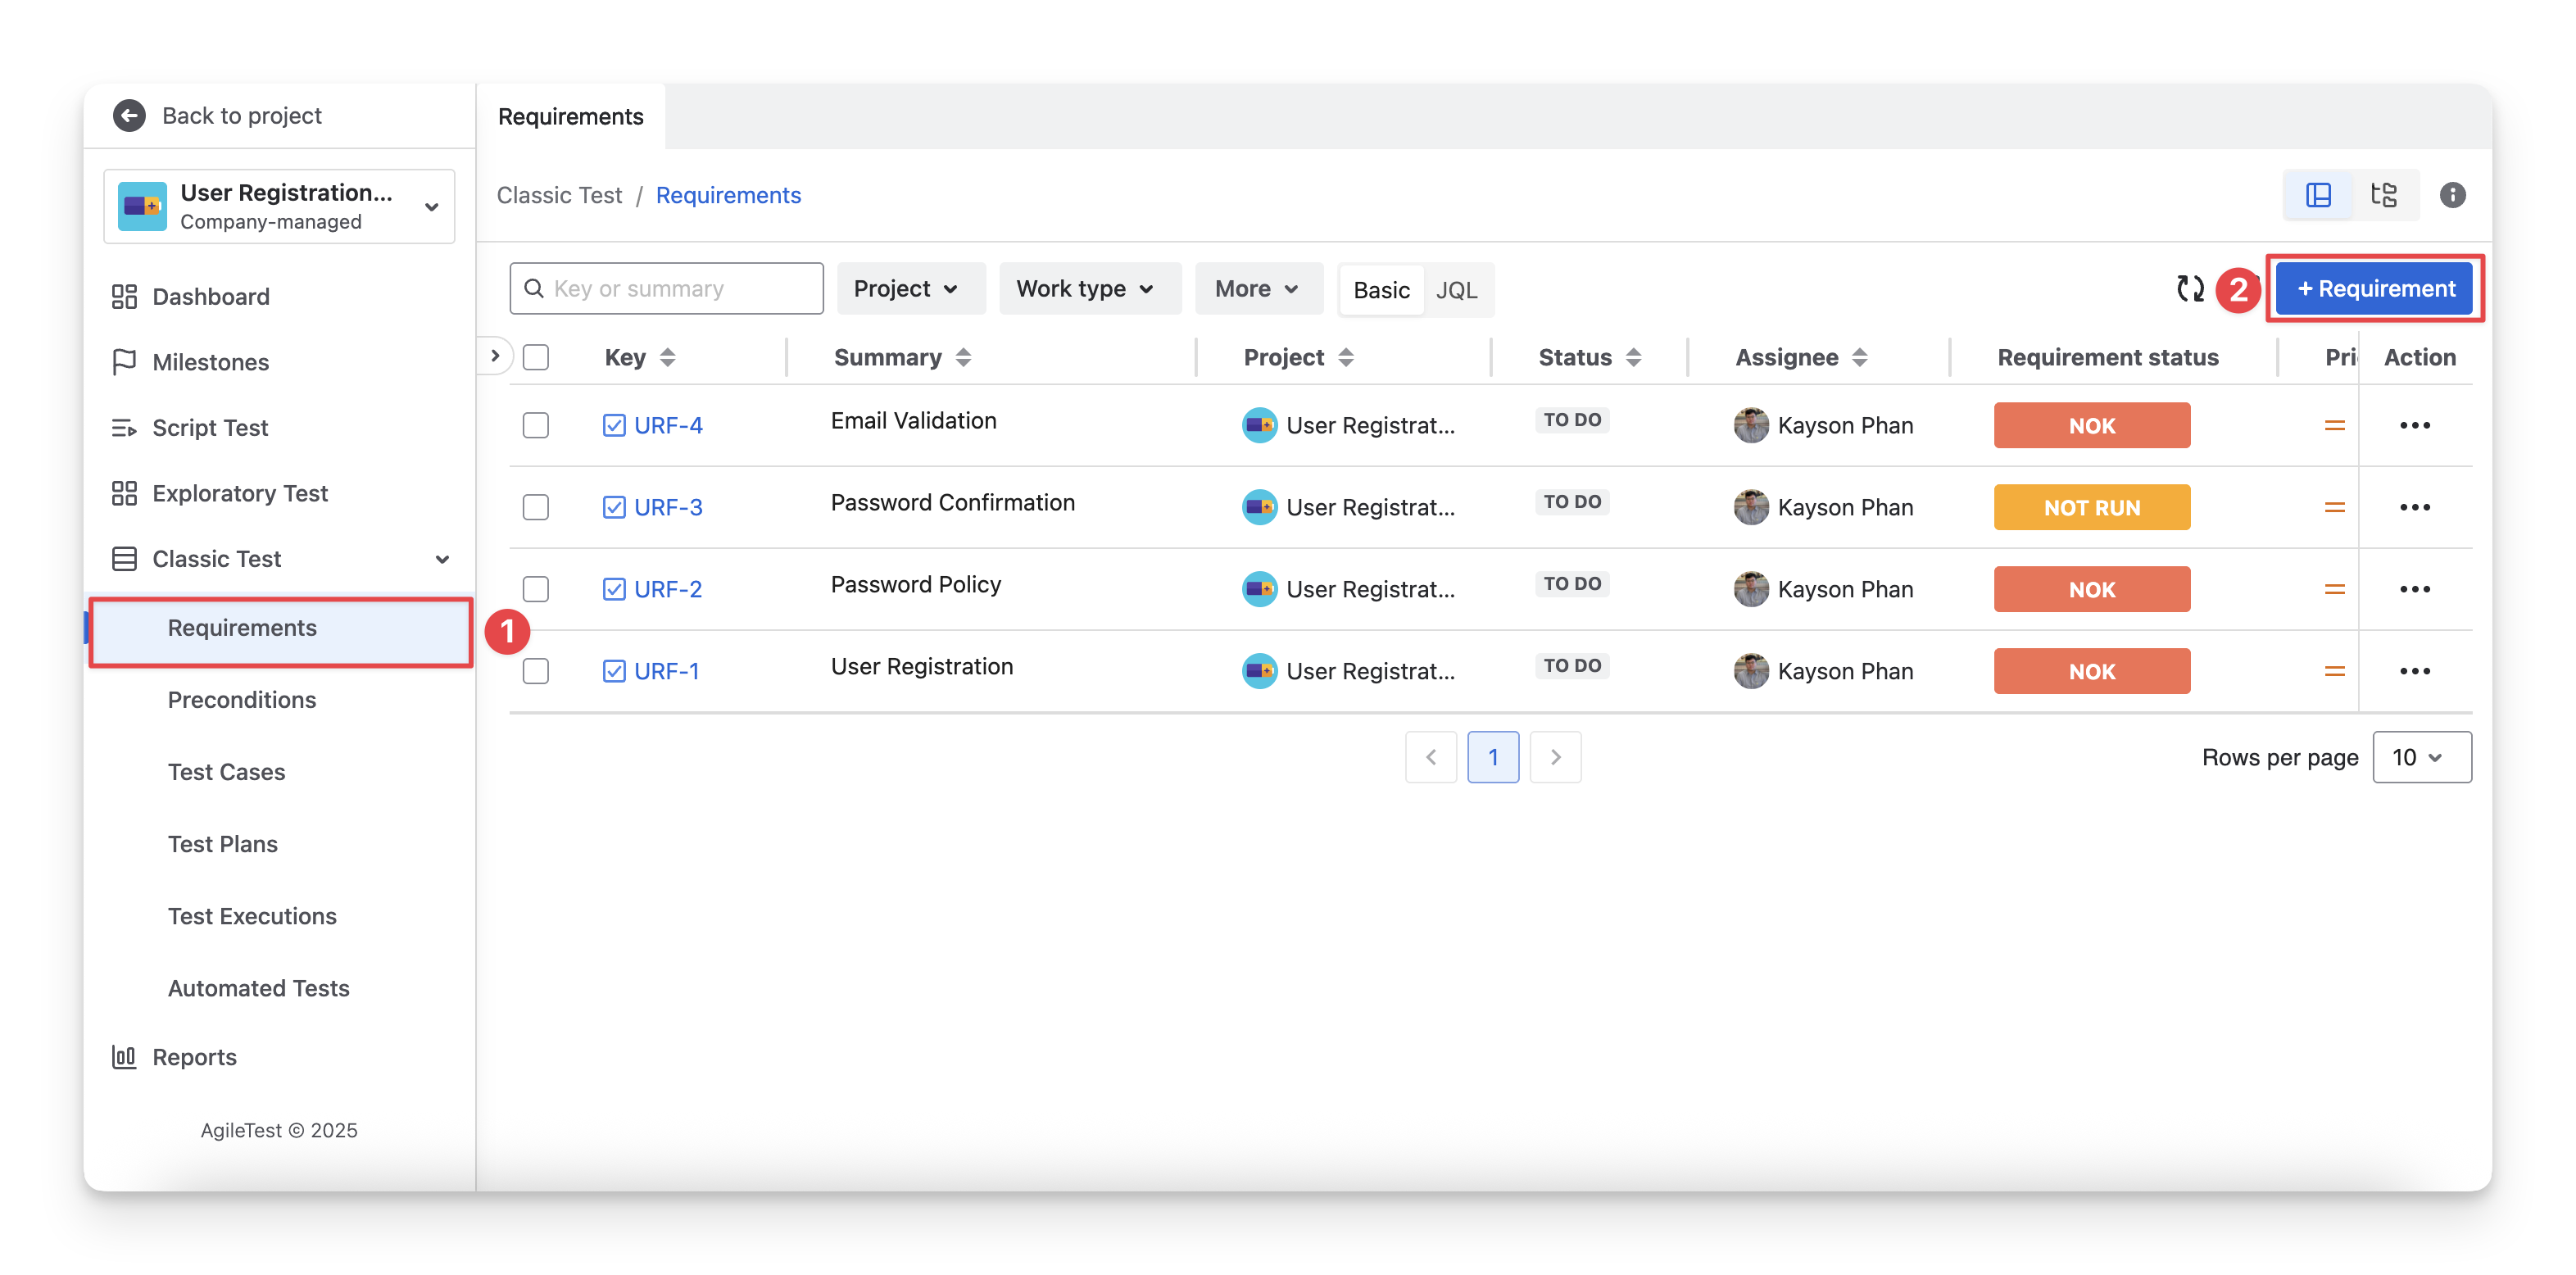
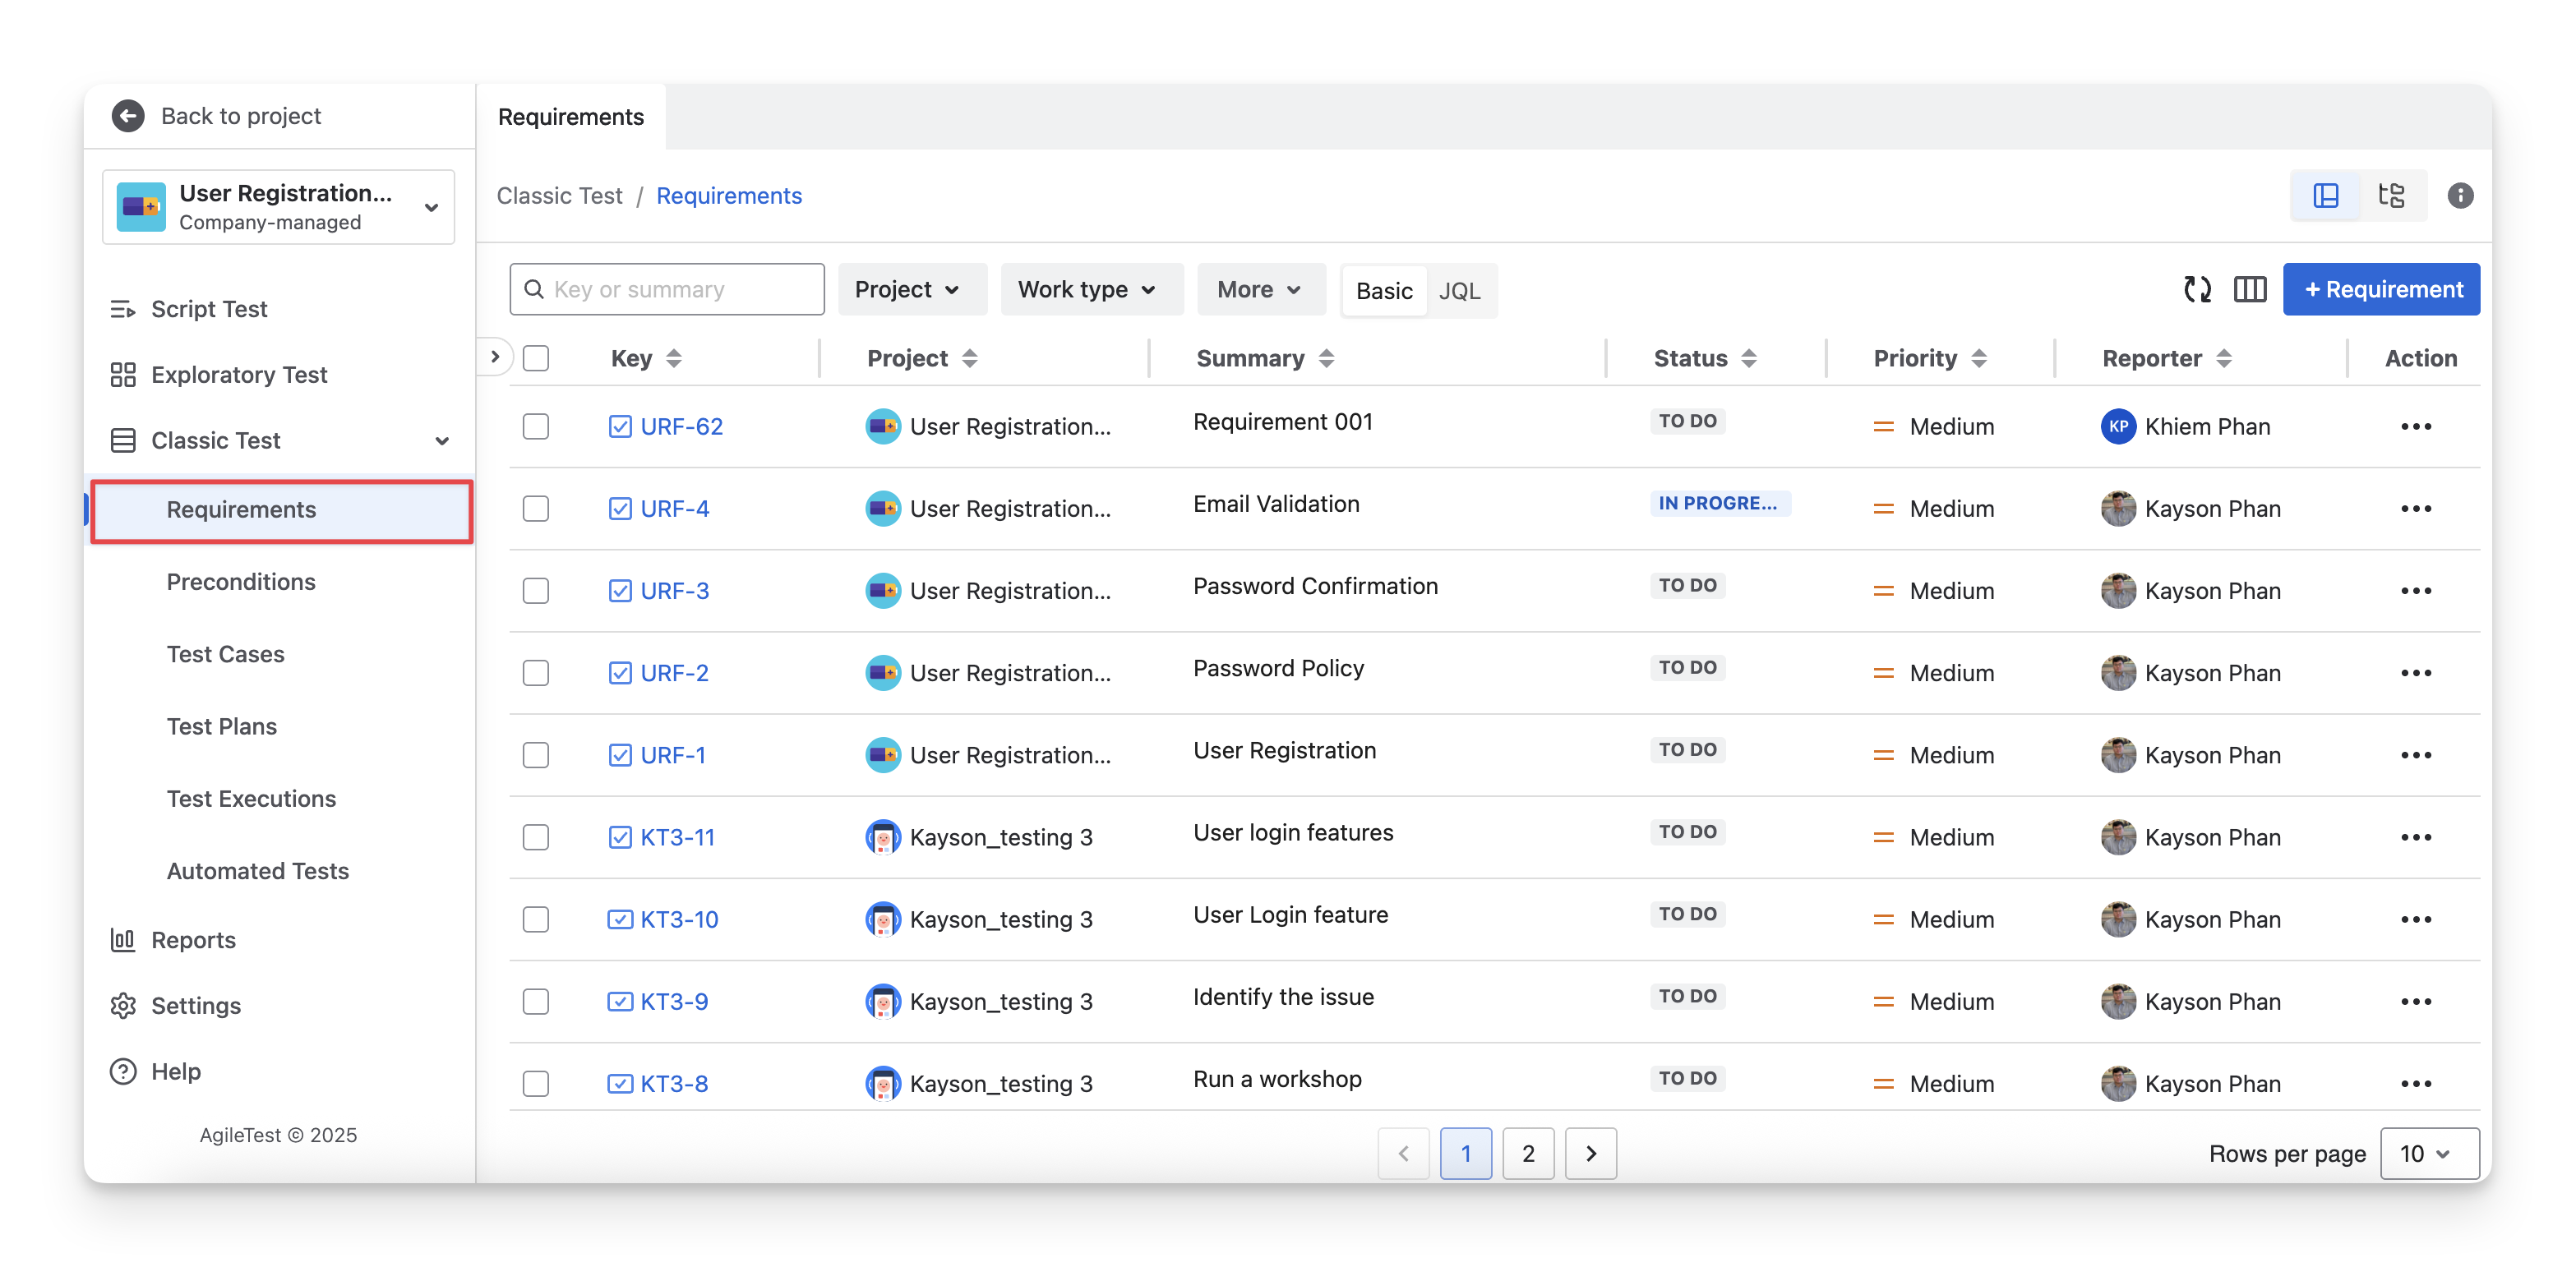
On the left menu sidebar, navigate to the Classic Test section → Choose Requirements.
-
Click the “+ Requirement” button. You can select the project and work type for this requirement.
-
Fill in the Requirement details.
-
Summary Field: Enter a brief and clear title that describes the requirement. This field is mandatory and should quickly convey the purpose or functionality of the requirement.
-
Description Field: Provide a detailed explanation of the requirement, including business context, expected behavior, and acceptance criteria if applicable.
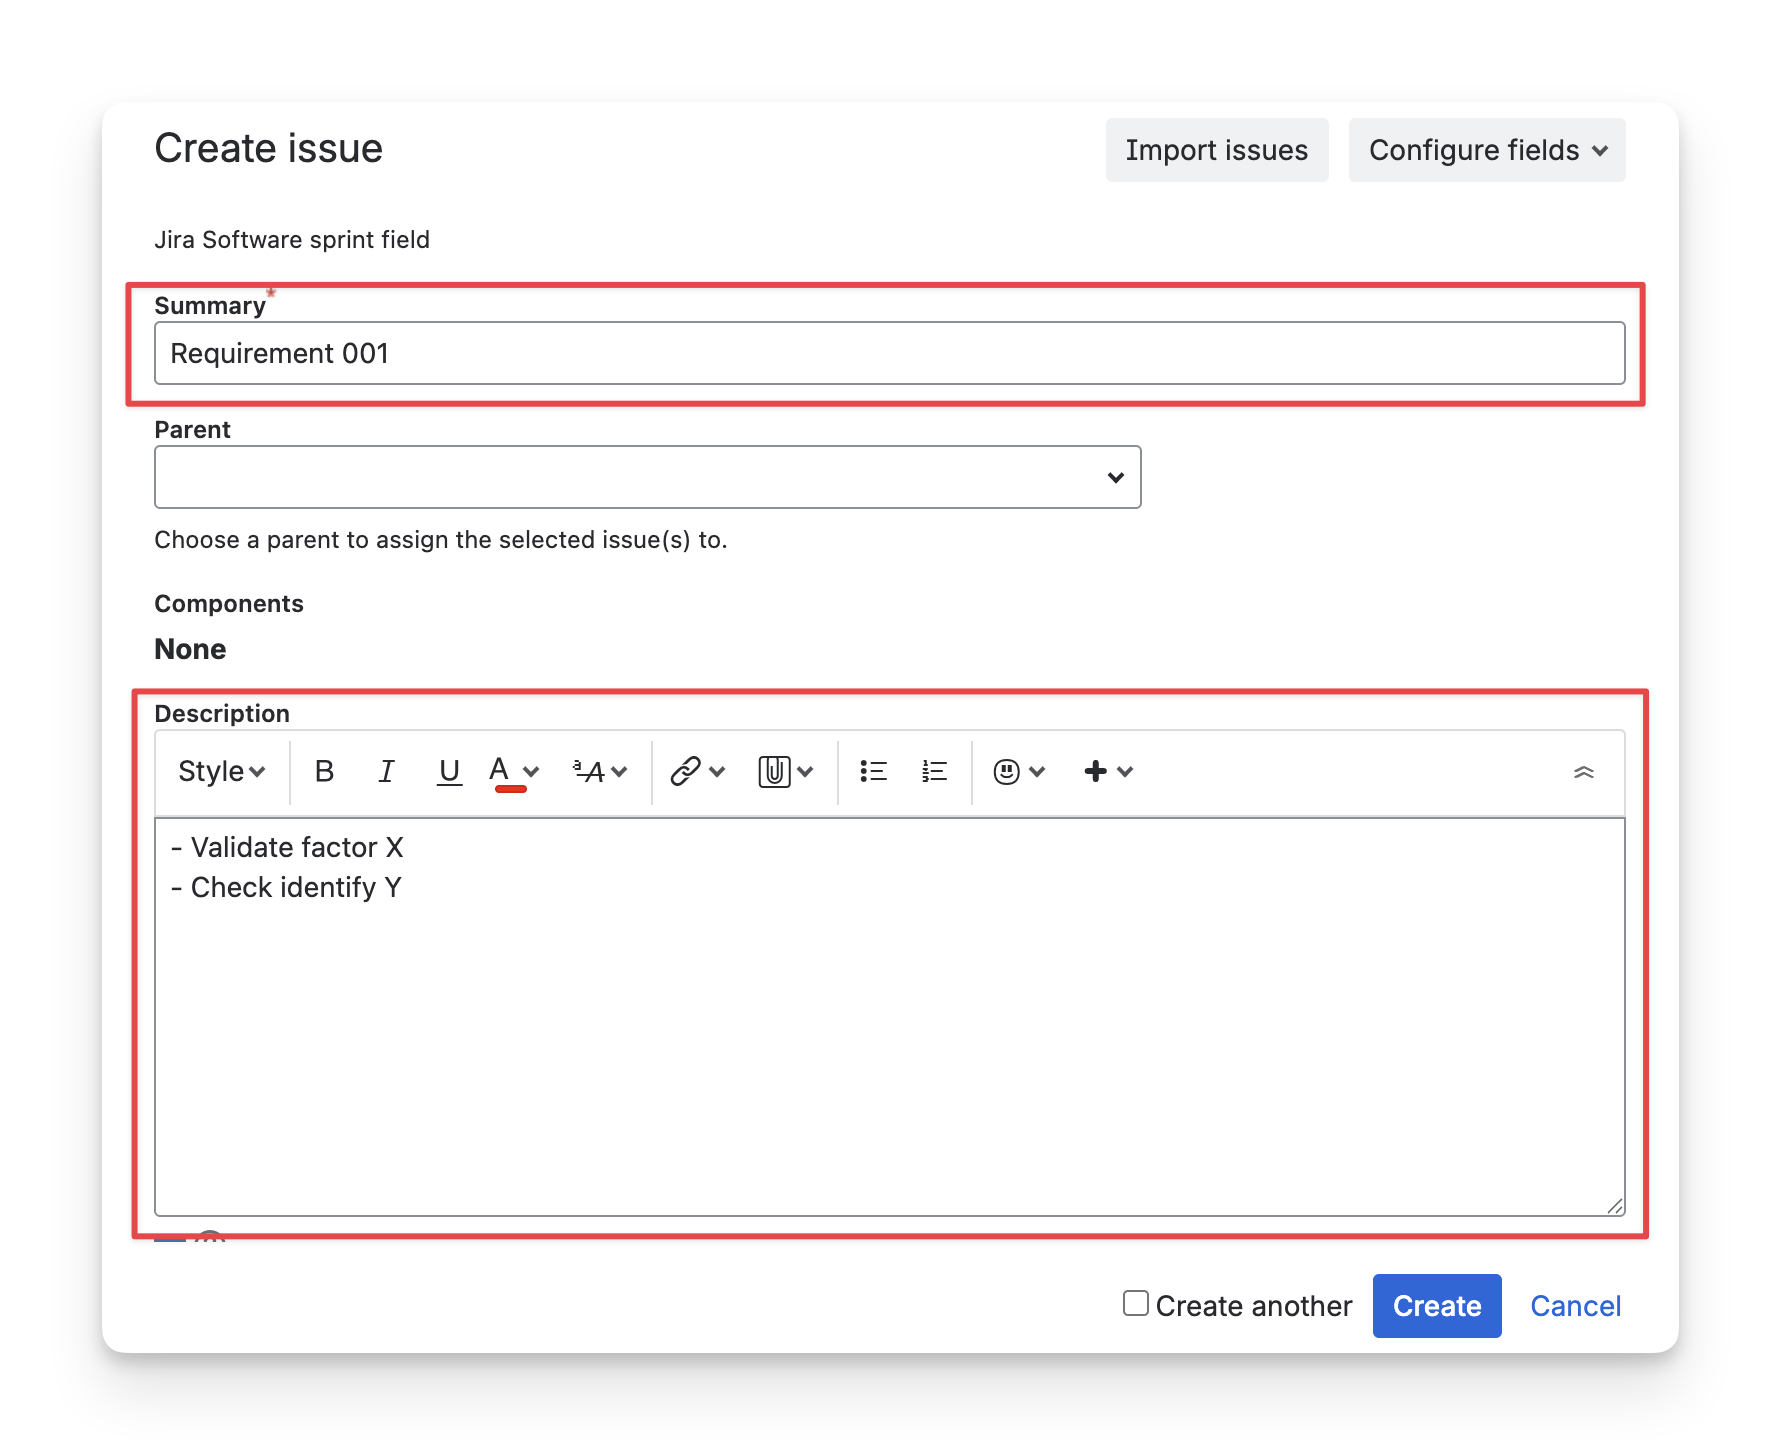
Pro Tip: The AI Generator scans the Description field of each requirement as input to generate test cases and detailed test steps. Therefore, you should also include a detailed description if you wish to generate test cases using the AI Generator.
What defines a “good” requirement description detail?
There are no strict rules for writing a description. The goal is to create a clear, testable, and measurable benchmark for your testing. You can use the SMART framework to define your requirement description.
-
Specific: The requirement clearly describes one specific behavior or functionality.
-
Measurable: The requirement includes observable and verifiable outcomes so testers can determine whether it passes or fails.
-
Achievable: The requirement is technically feasible and aligned with system capabilities, constraints, and project scope.
-
Relevant: The requirement delivers business or user value and supports a real user need or business goal.
-
Testable: The requirement can be validated through test cases, and its behavior can be clearly verified.
→ Read more: Apply AgileTest Generator to improve your requirement description.
2. Map Existing Requirements From Other Projects
If you already manage Jira tickets as requirements, you don't need to create new ones in AgileTest. Instead, with Administrator permissions, you can map the project and configure requirement work types to convert Jira tickets into AgileTest requirements.
To do this, you can follow these steps:
-
On the left-hand side menu bar, go to the Settings section.
-
Choose the Requirement Mapping tab.
-
Click on the “Map Project” button.
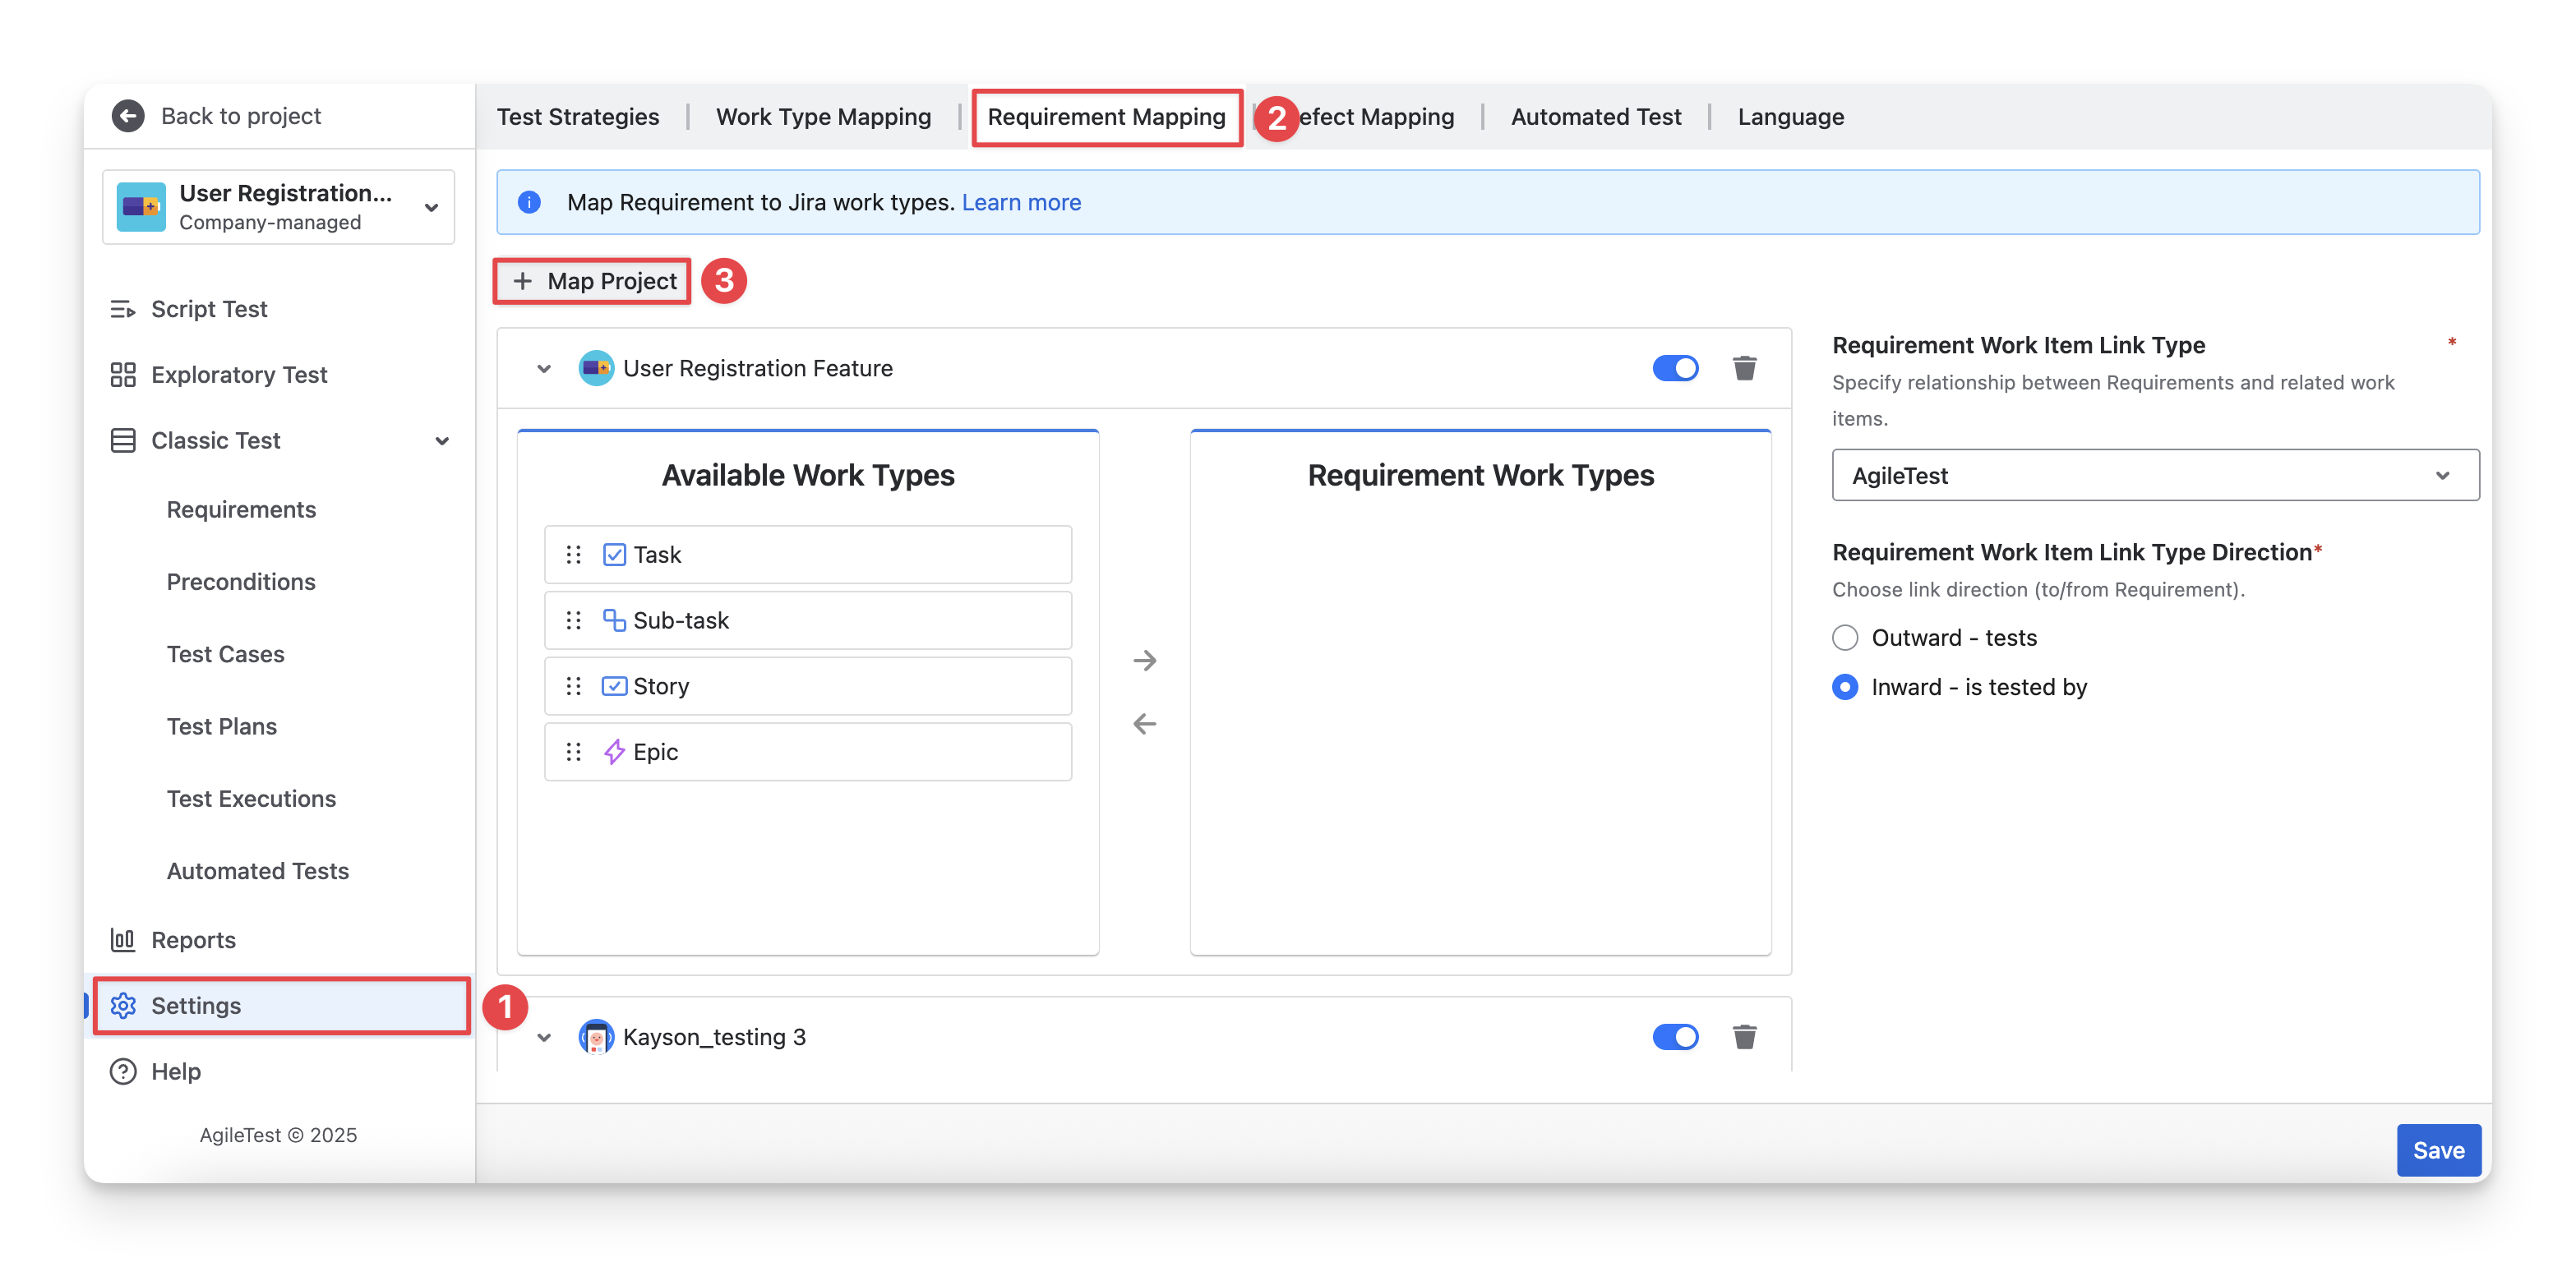
You can only map a maximum of 3 projects.
-
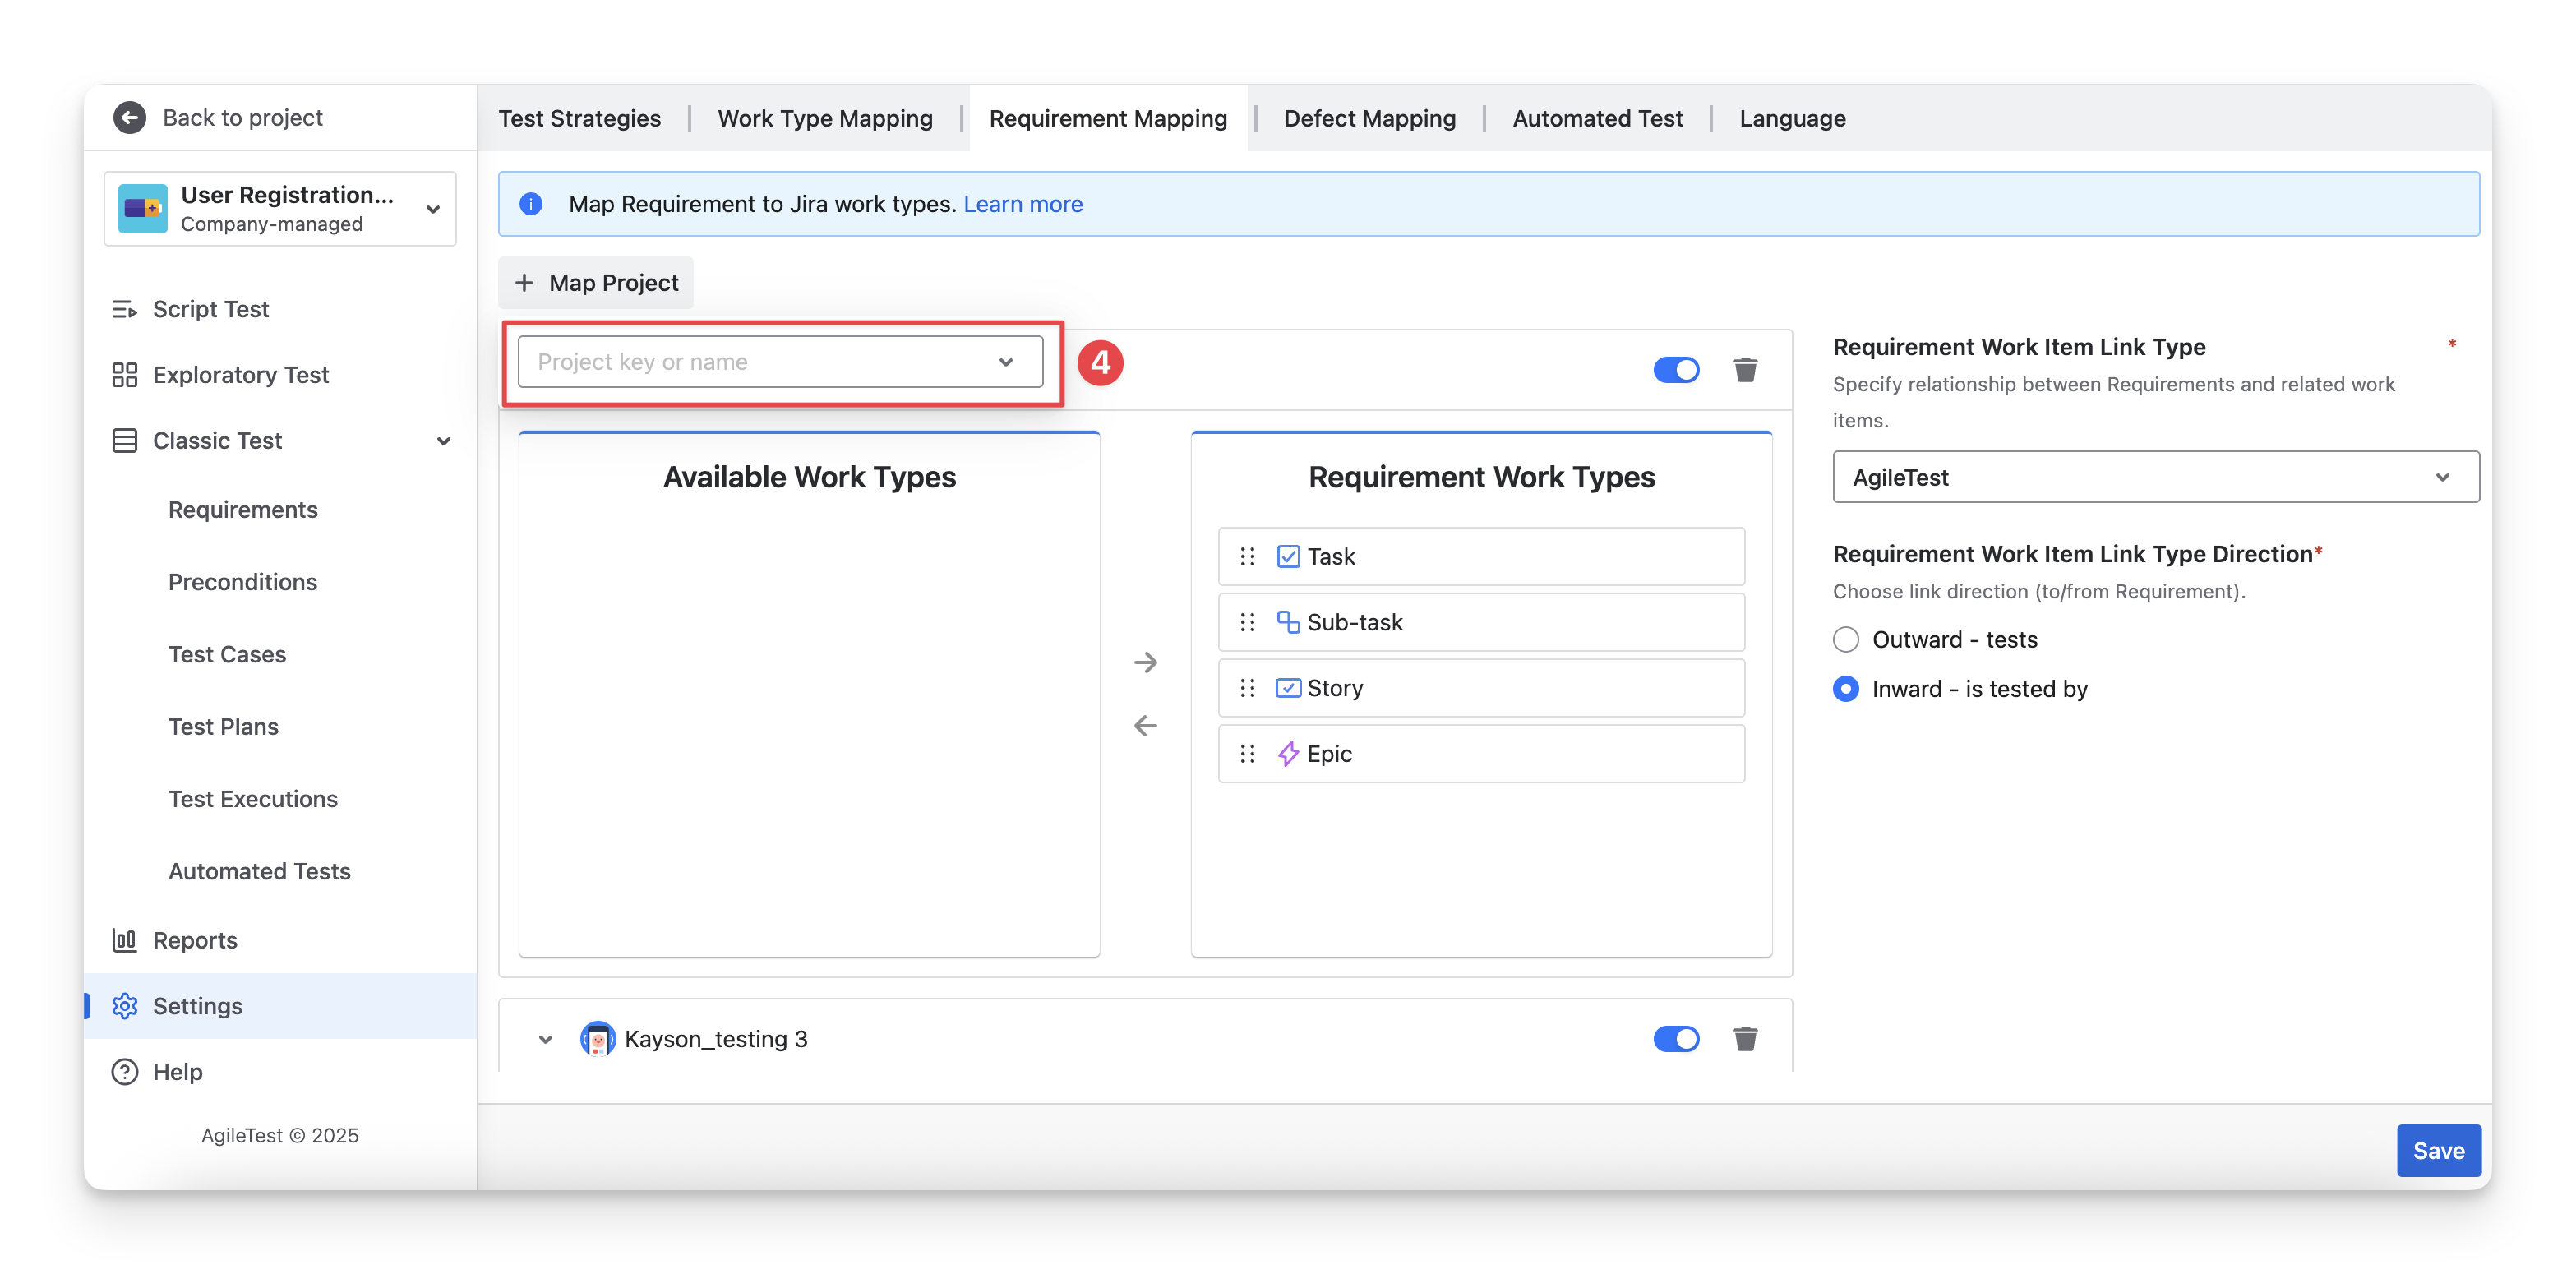
Enter the project key or name and select the project you want to map.
-
Choose the work types you used to create Jira tickets as requirements.
-
Drag them to the right columns or use the ➡️ to move them.
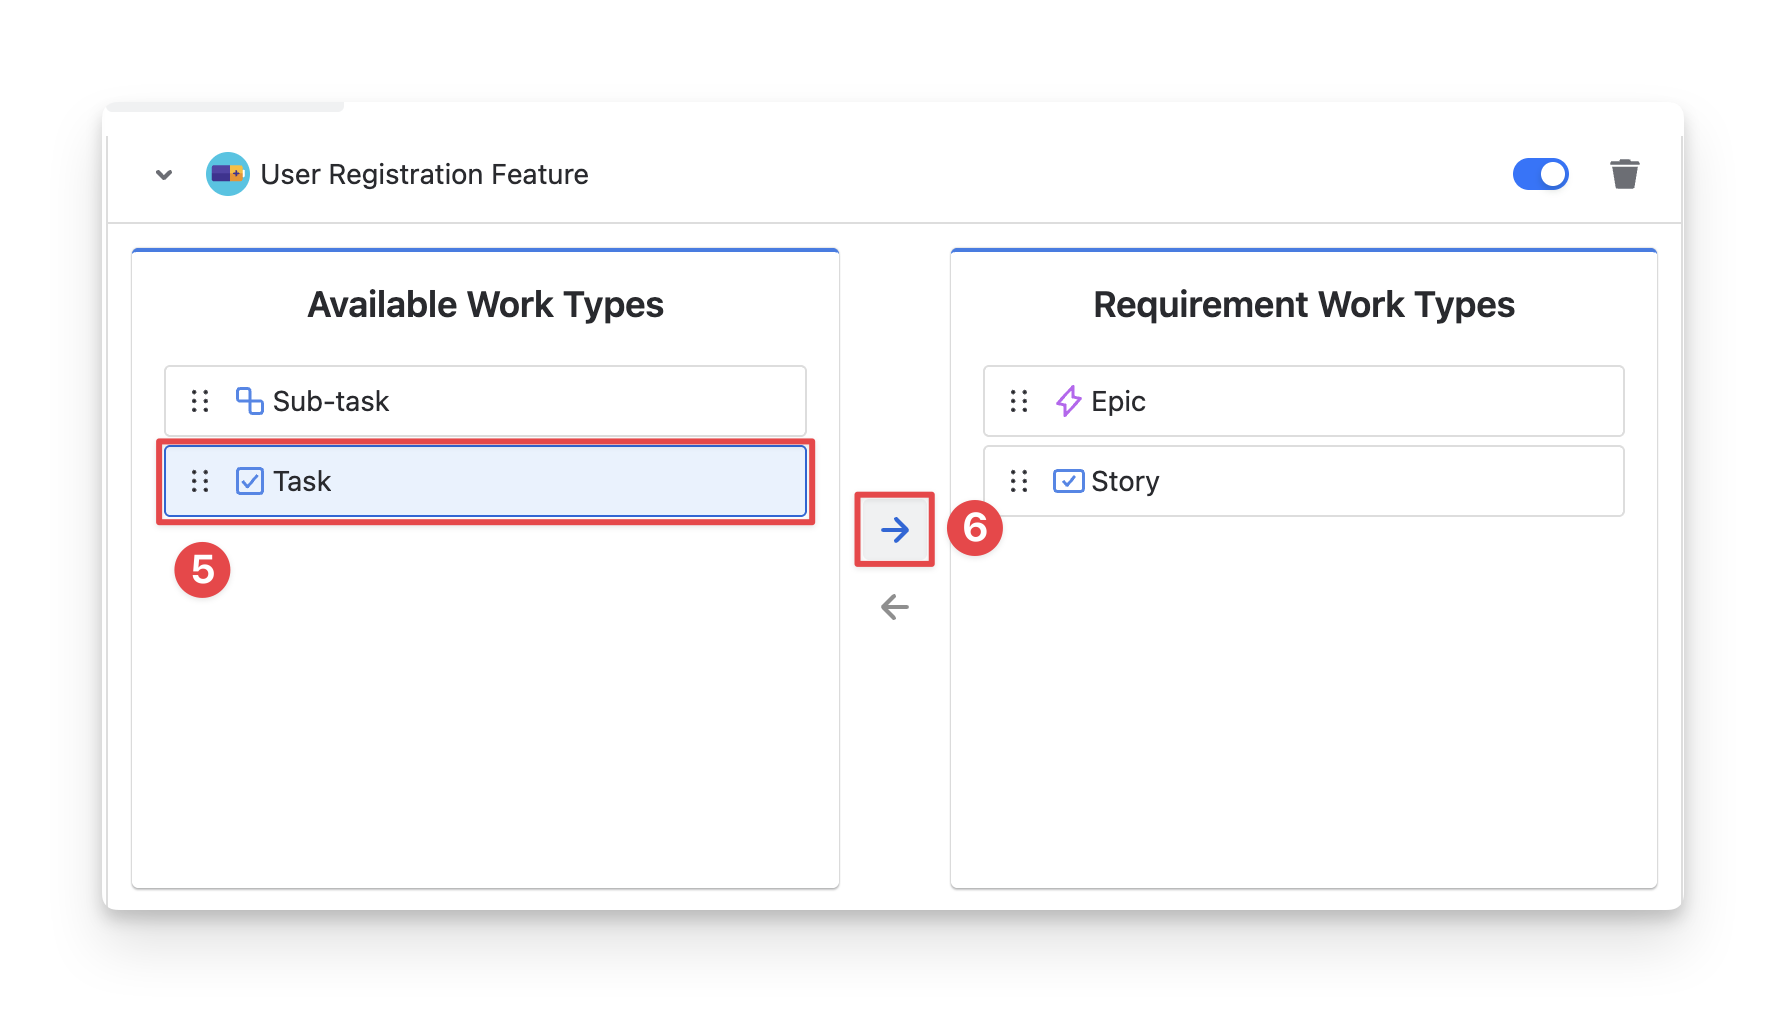
-
Click the “Save” button to complete the configuration.
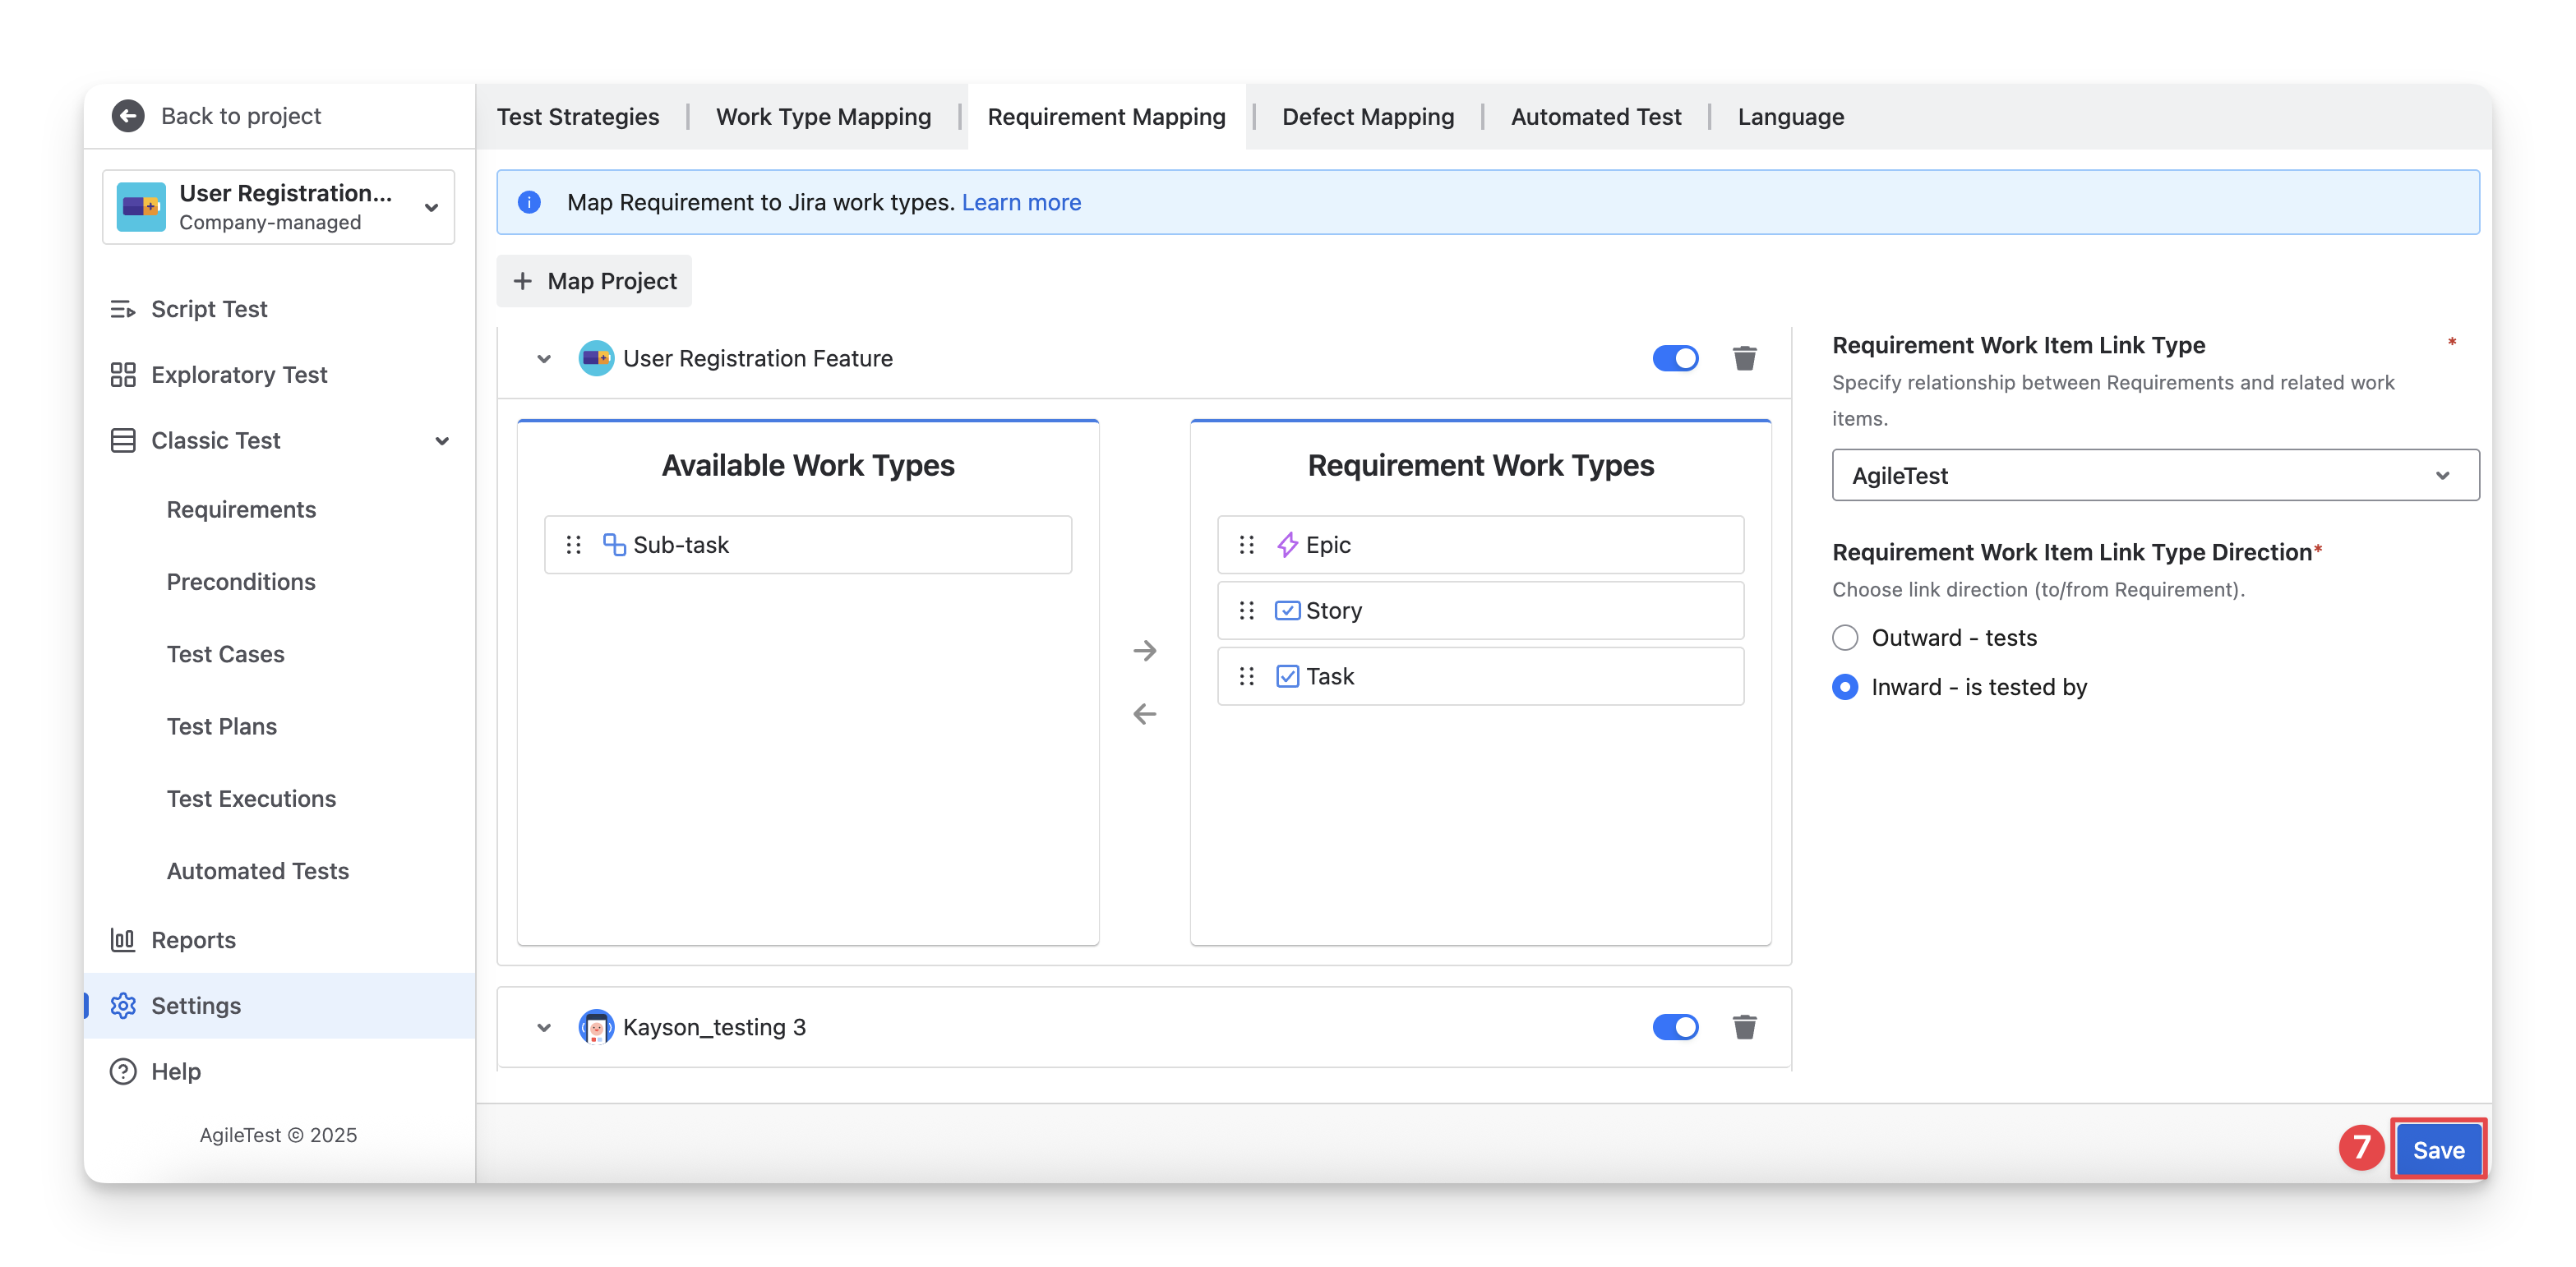
Once the mapping is completed, all Jira tickets of the selected work types in the mapped project will automatically appear in the Requirements section of AgileTest.
Should you need any assistance or further AgileTest inquiries, contact our 24/7 Support Desk!