.png)
At the top of the Execute Screen, you can locate the Test Execution Space section.
The Test Execution Space provides a structured workflow for QA teams to manage test execution:
-
Locate test cases: Navigate, find, and move between test cases in the test execution.
-
Check requirements & preconditions: Verify linked requirements and preconditions before testing to prevent errors.
-
Execute, mark status, and log findings: Execute the test steps, assign their status, and attach defects, evidence, or comments to document critical information.
-
Review documents: Access related documents to ensure all necessary resources are available during testing.
-
Download test case results: Download the test case results for reporting and further analysis.
1. Test Case List
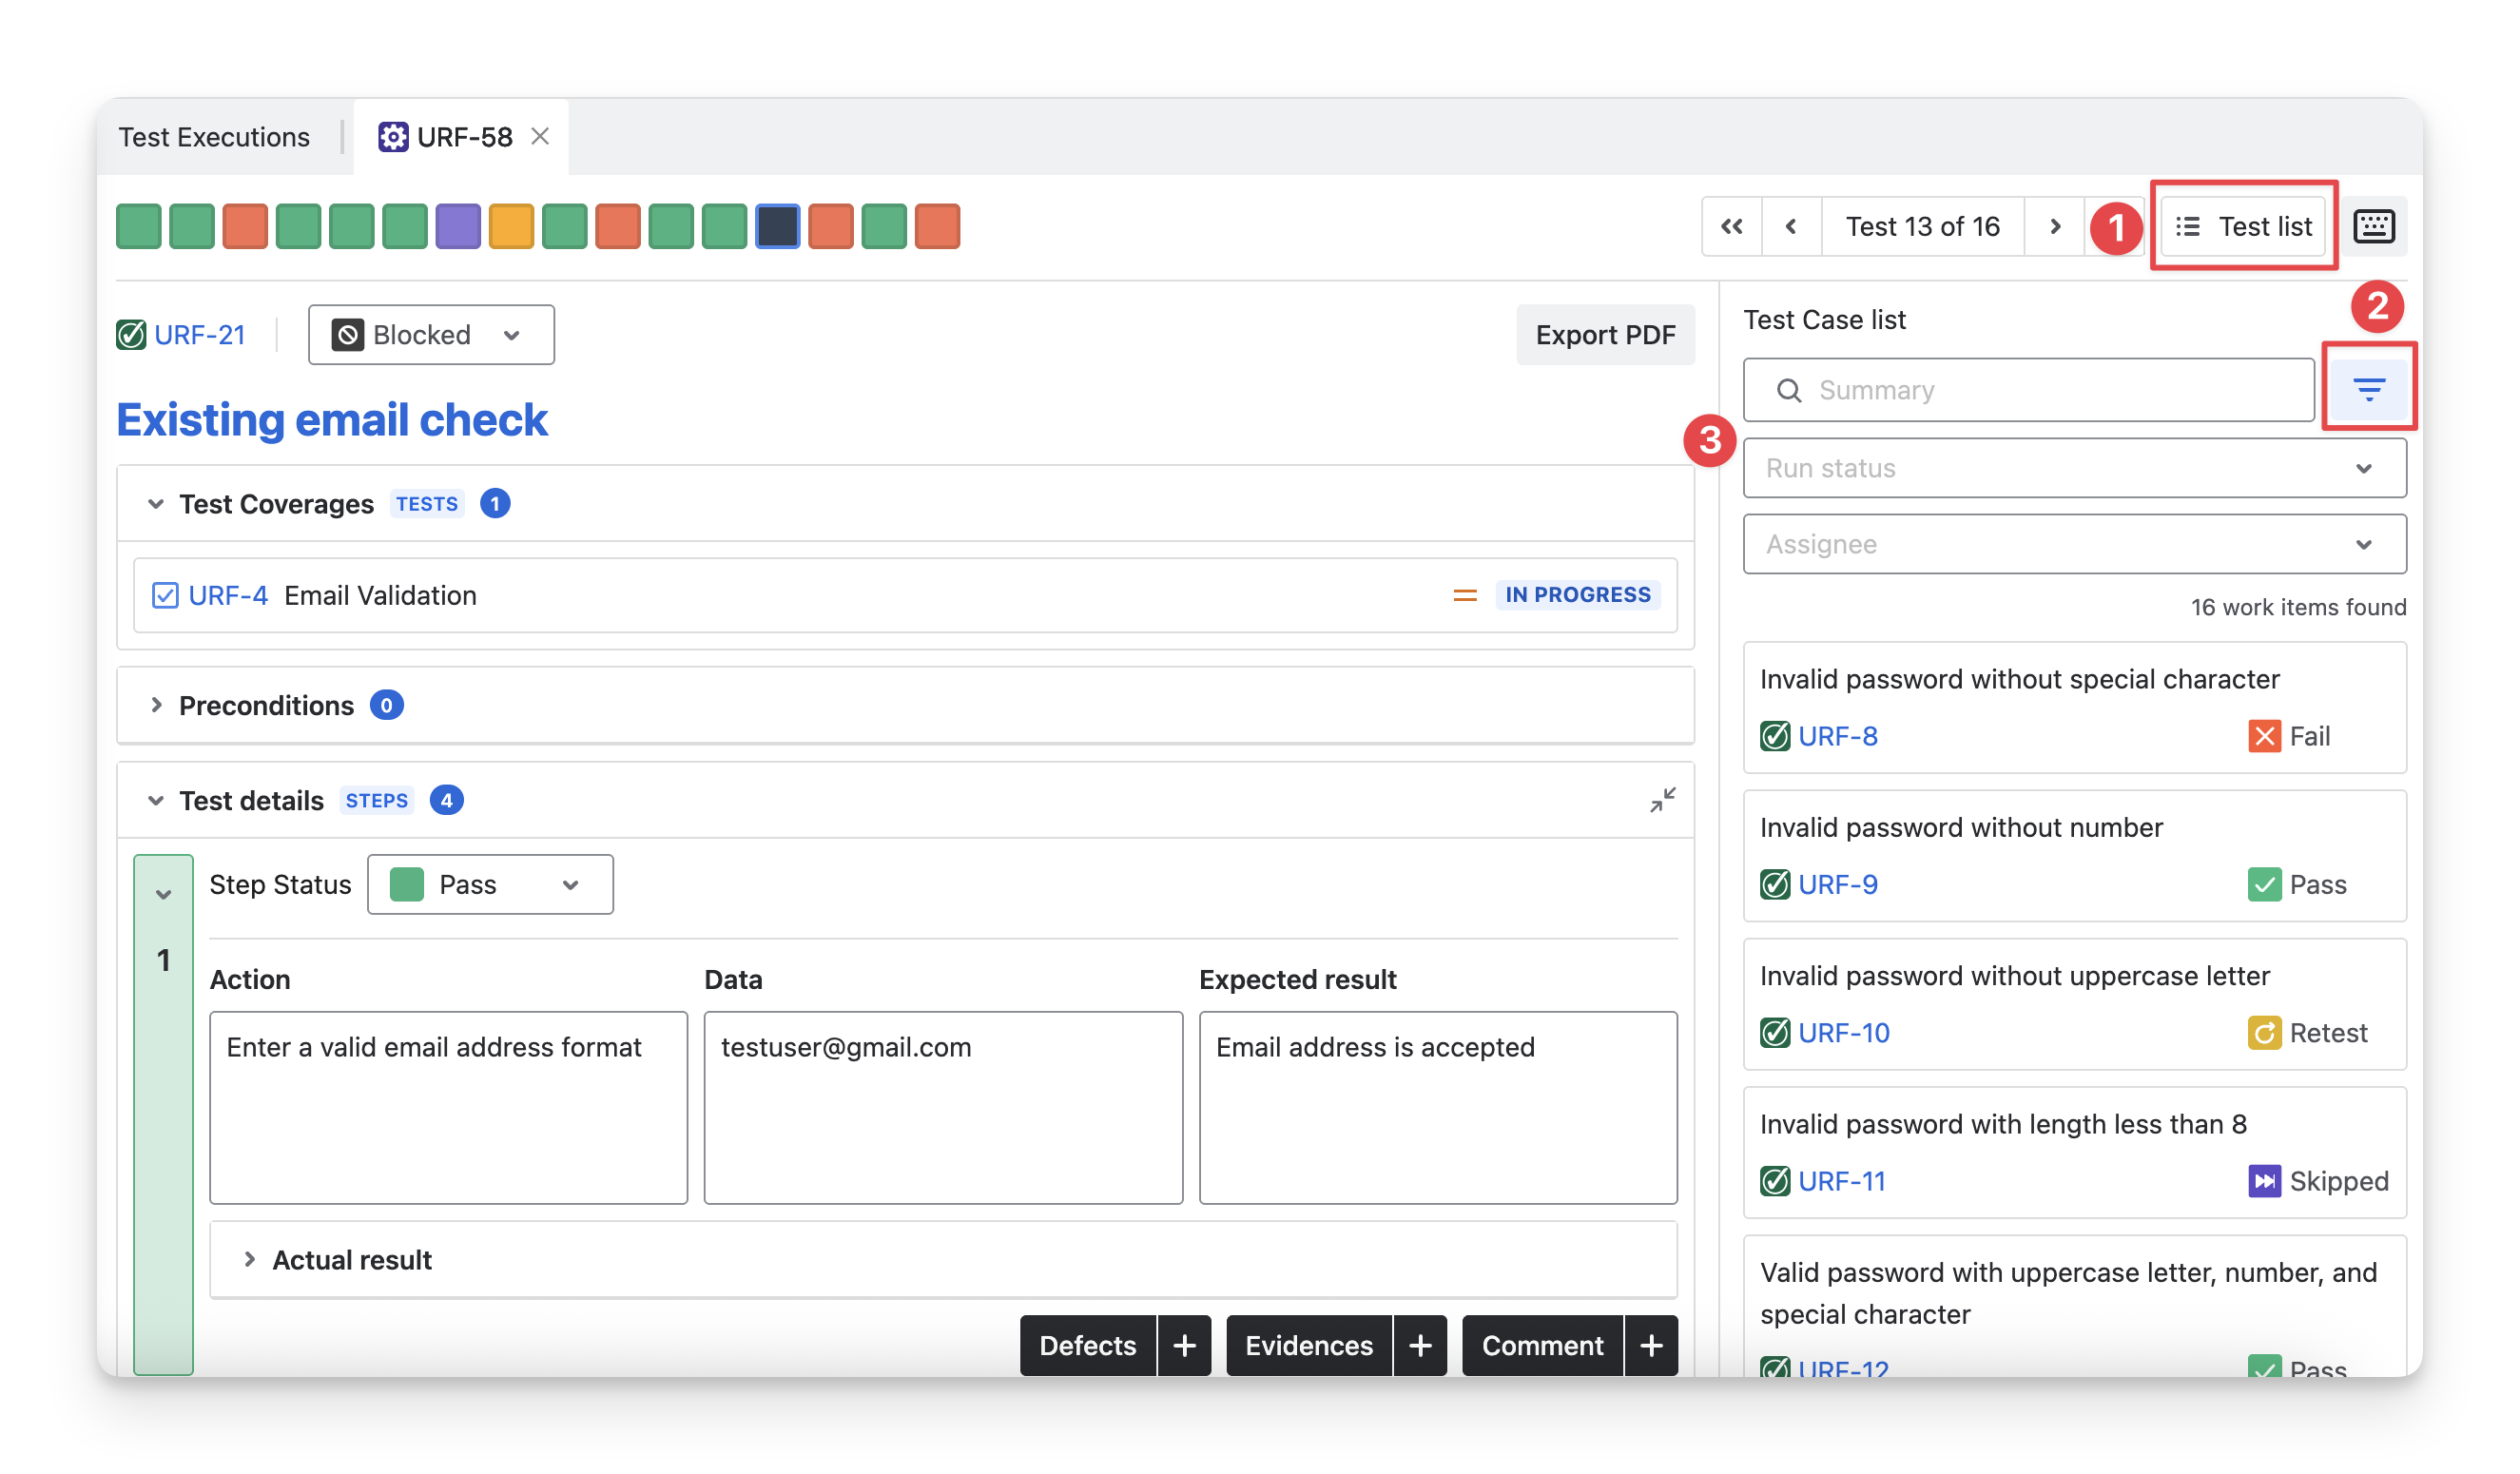
Under the dashboards of the Test Execution Results section, you can see a list of test cases to be executed. By default, these test cases have the todo status.
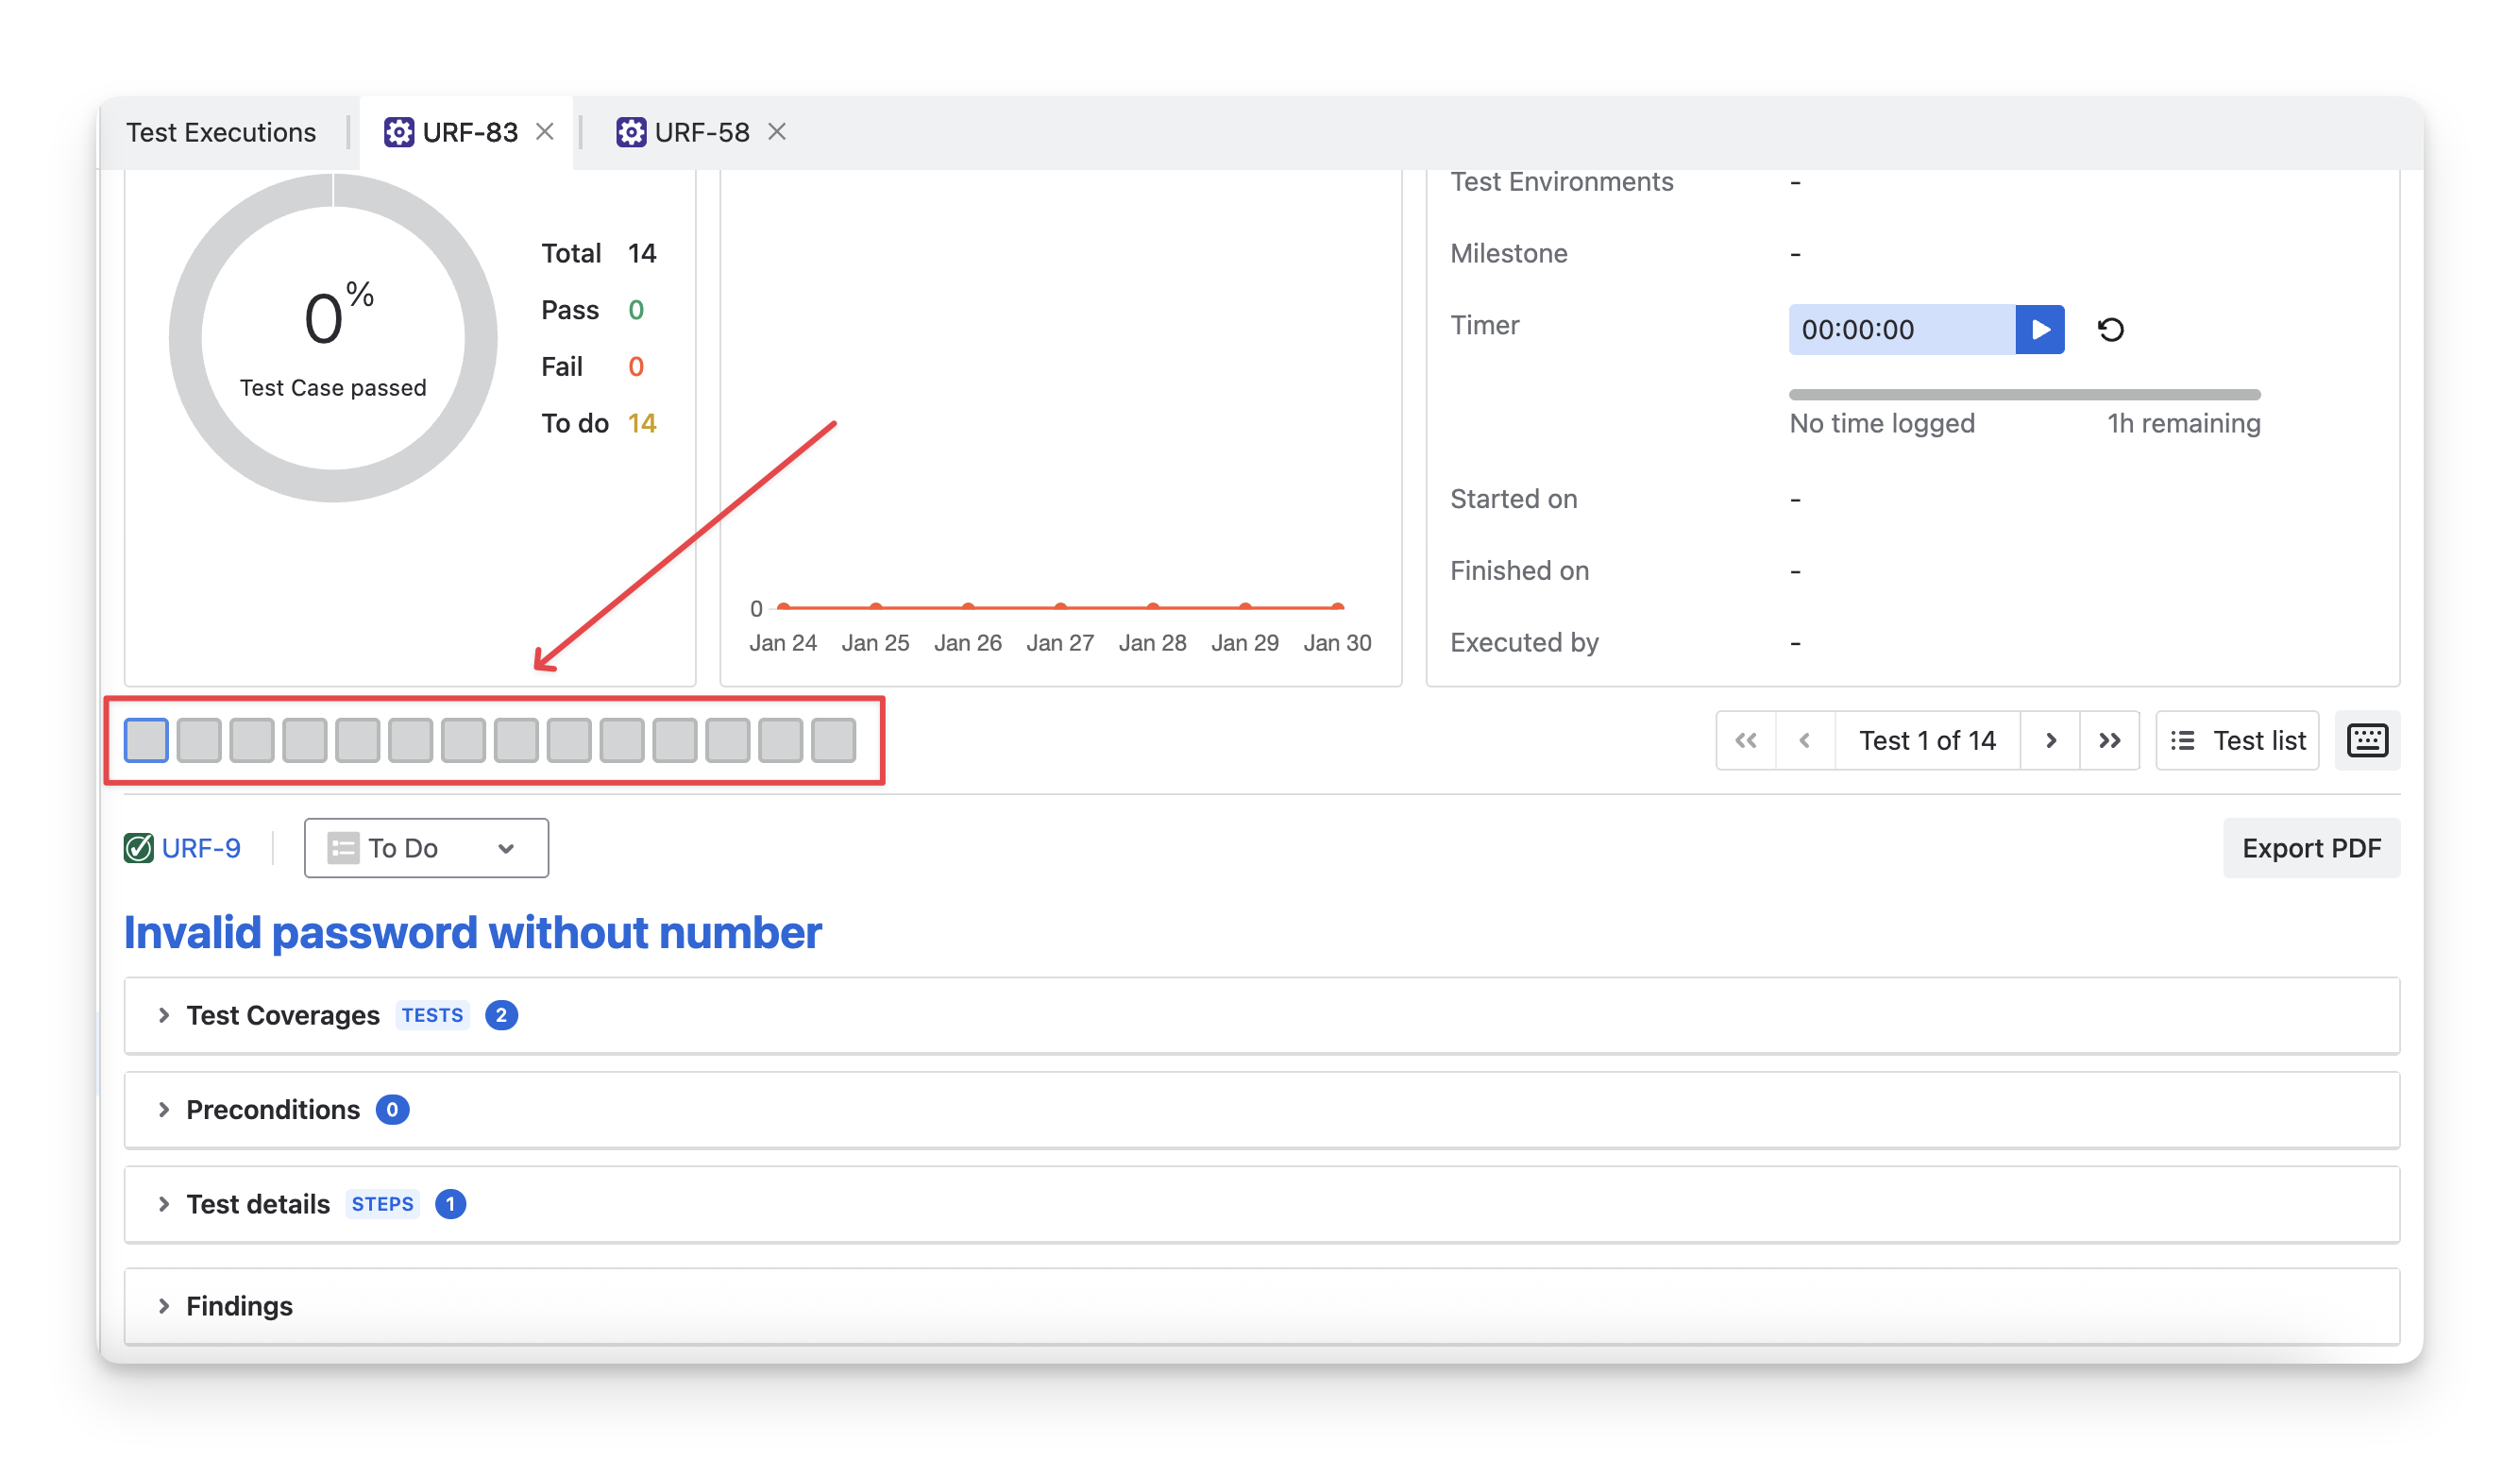
The order of the test cases in this summary list matches the order of them in the Test Execution Detail screen.
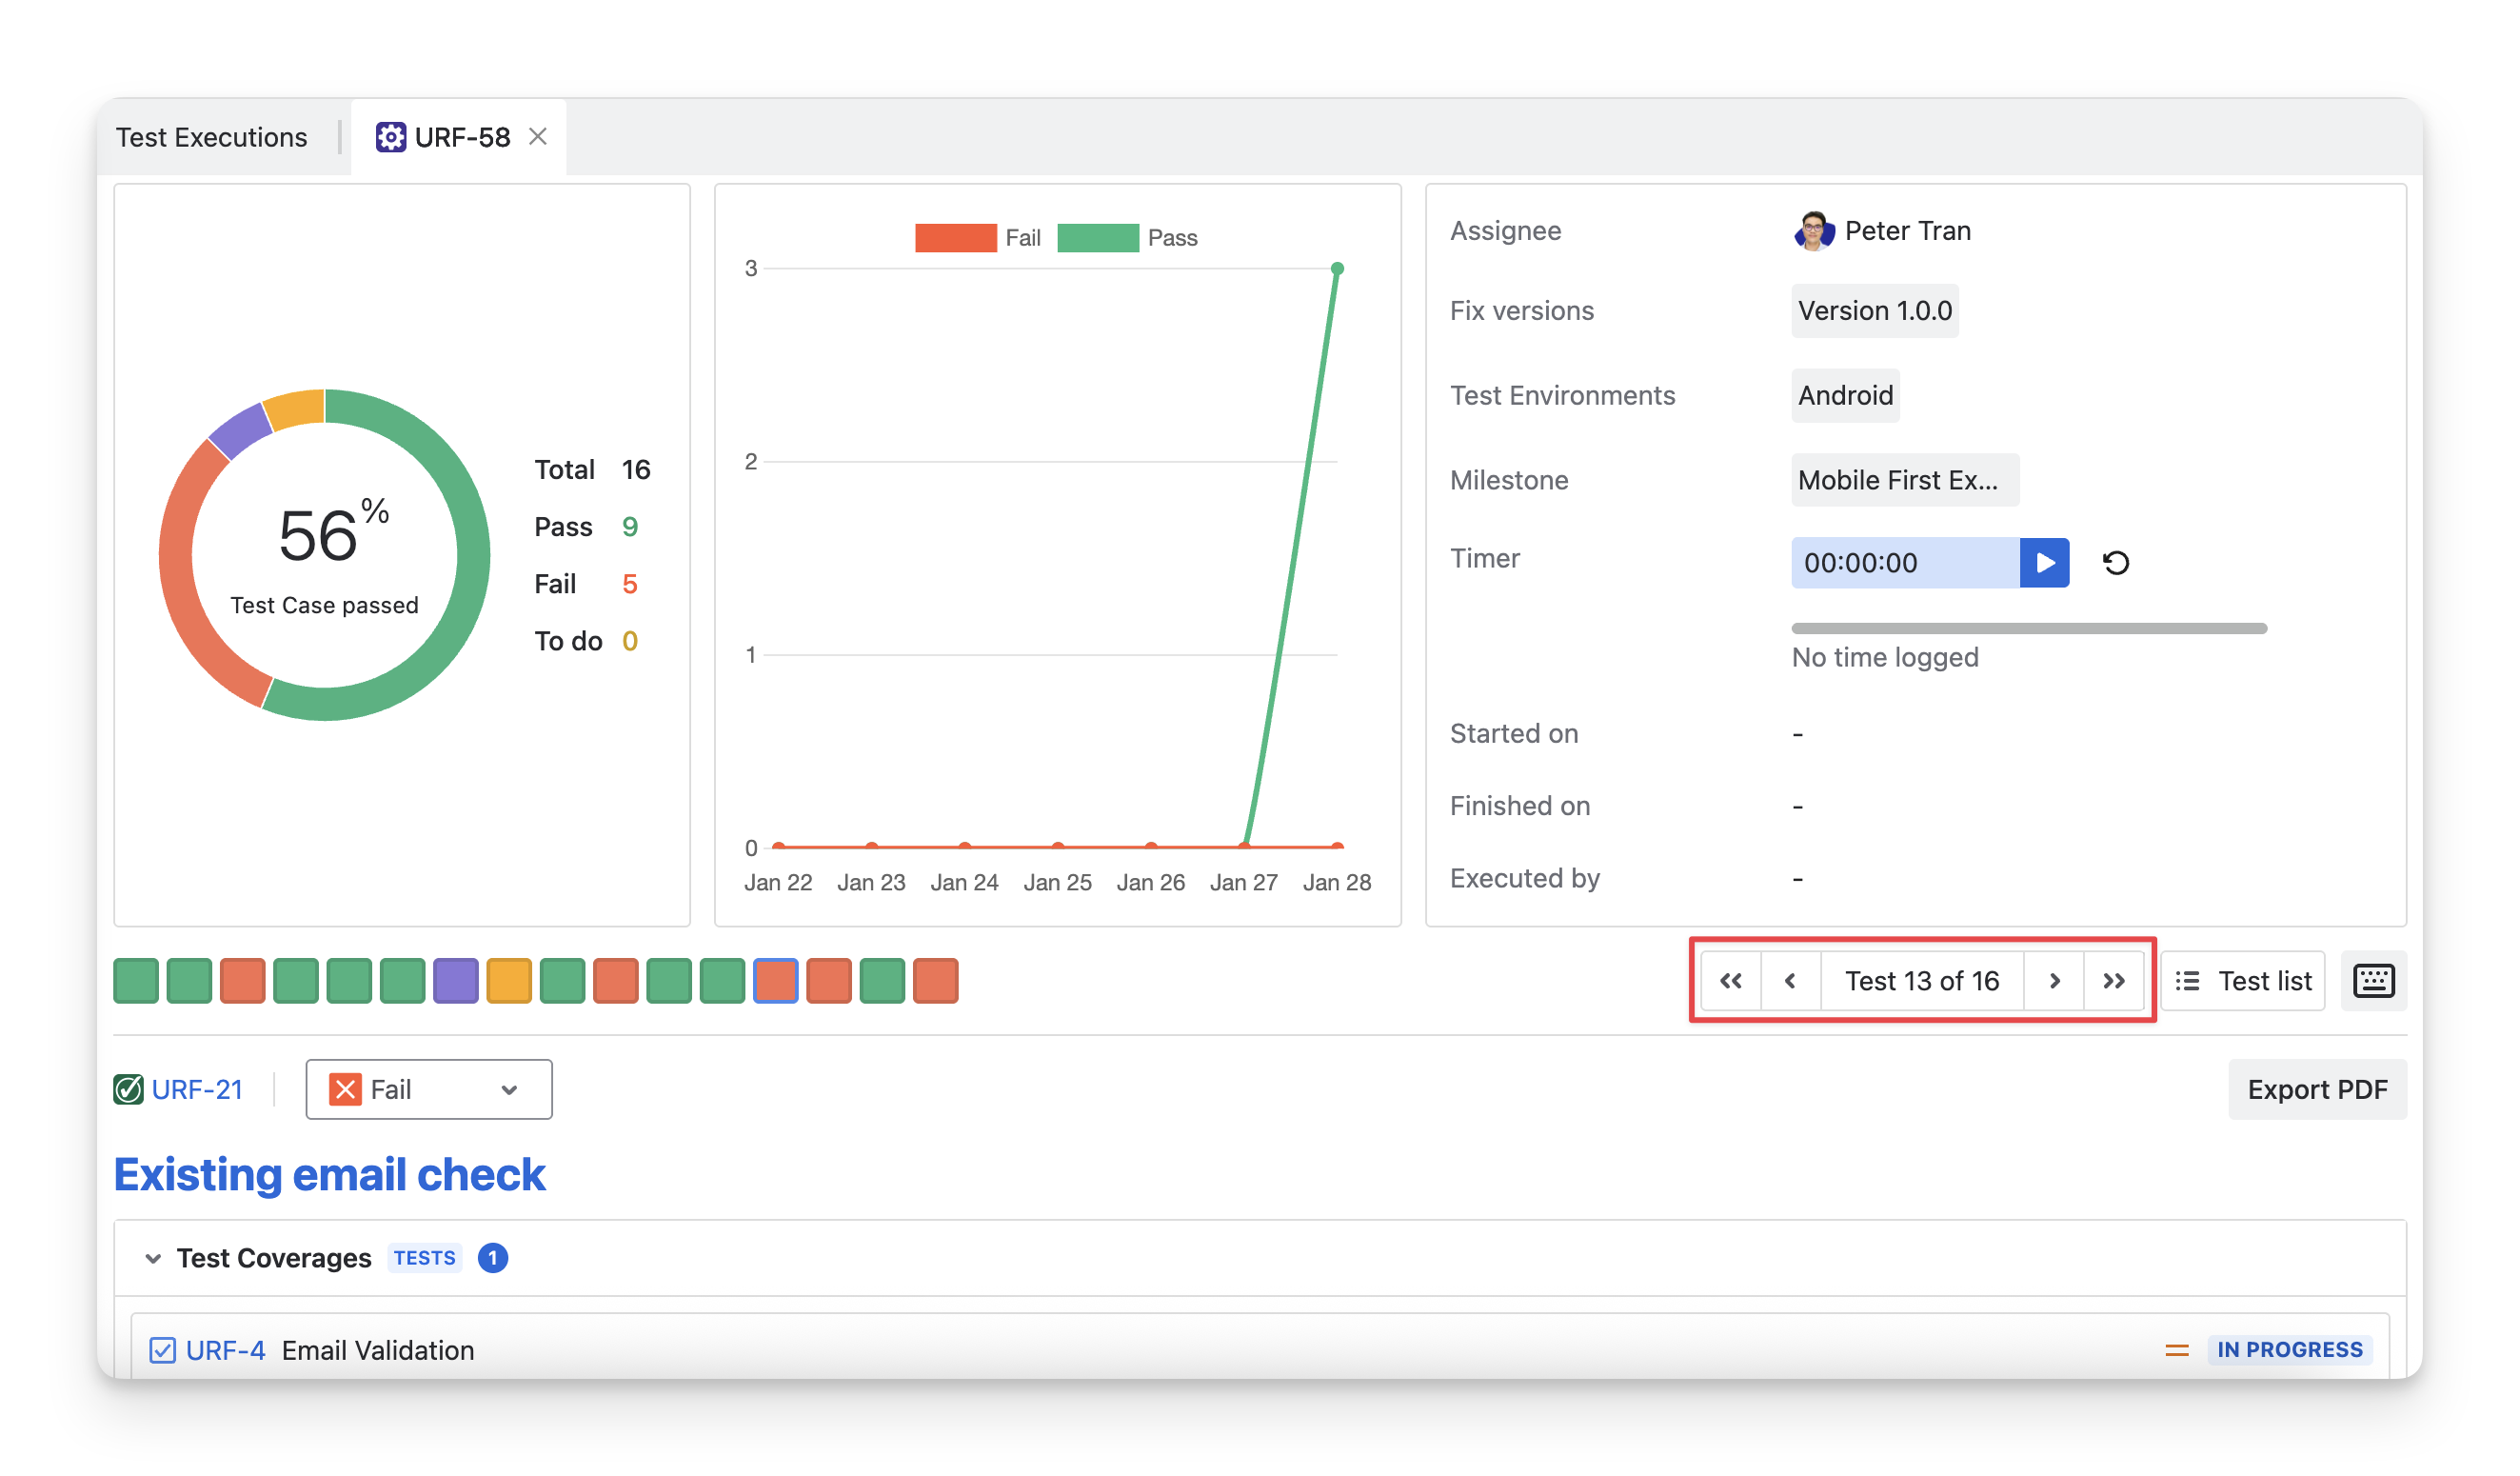
You can navigate to the preferred test case from this list to start execution. To move between test cases, you can use the navigation buttons provided.
-
⏪ : Move to the first test case
-
◀️ : Move to the previous test case
-
▶️ : Move to the following test case
-
⏩ : Move to the last test case
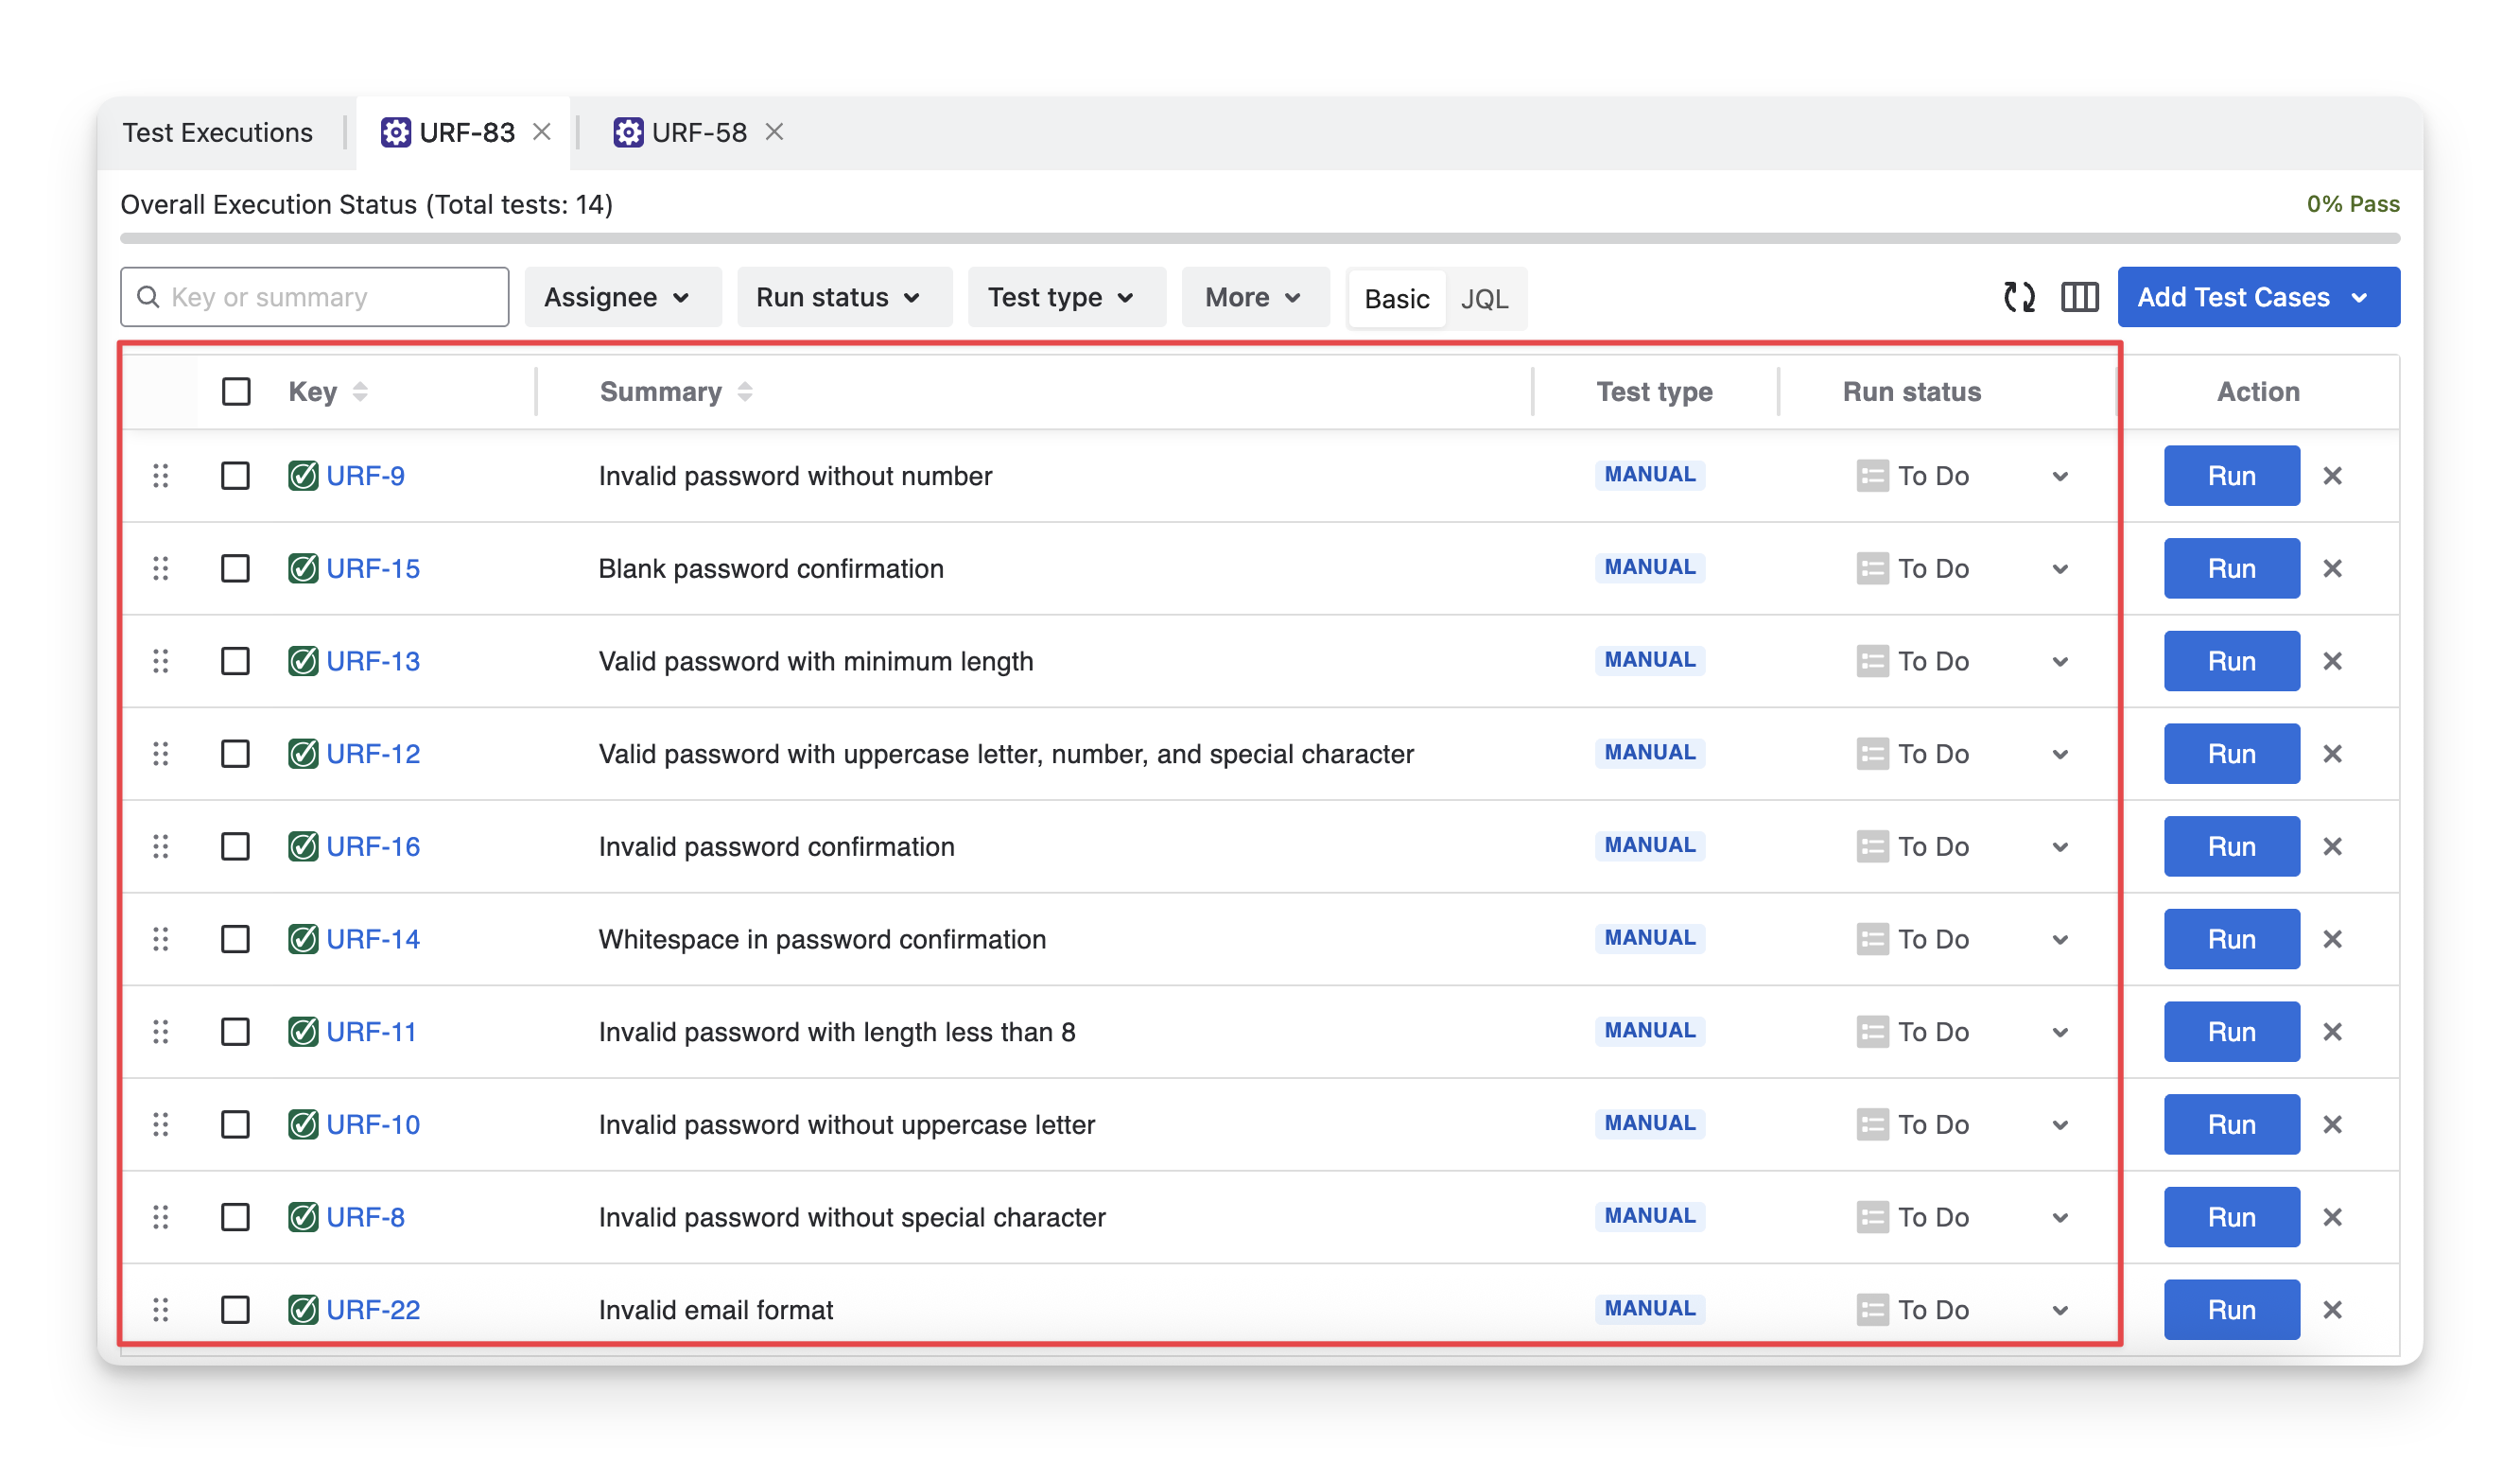
How to quickly identify a test case in the Executing Screen?
-
Click on the “Test list” button on the right-hand side.
-
Choose the Filter icon.
-
You can filter these test cases by:
-
Summary: Filter by the name of the test case.
-
Run status: Filter by the execution status of the test case.
-
Assignee: Filter by the team member assigned to the test case.
When you assign a test status to a test case, the corresponding status color is displayed in both the test case list and the test case status section.

Learn more about Test Case Calculation.
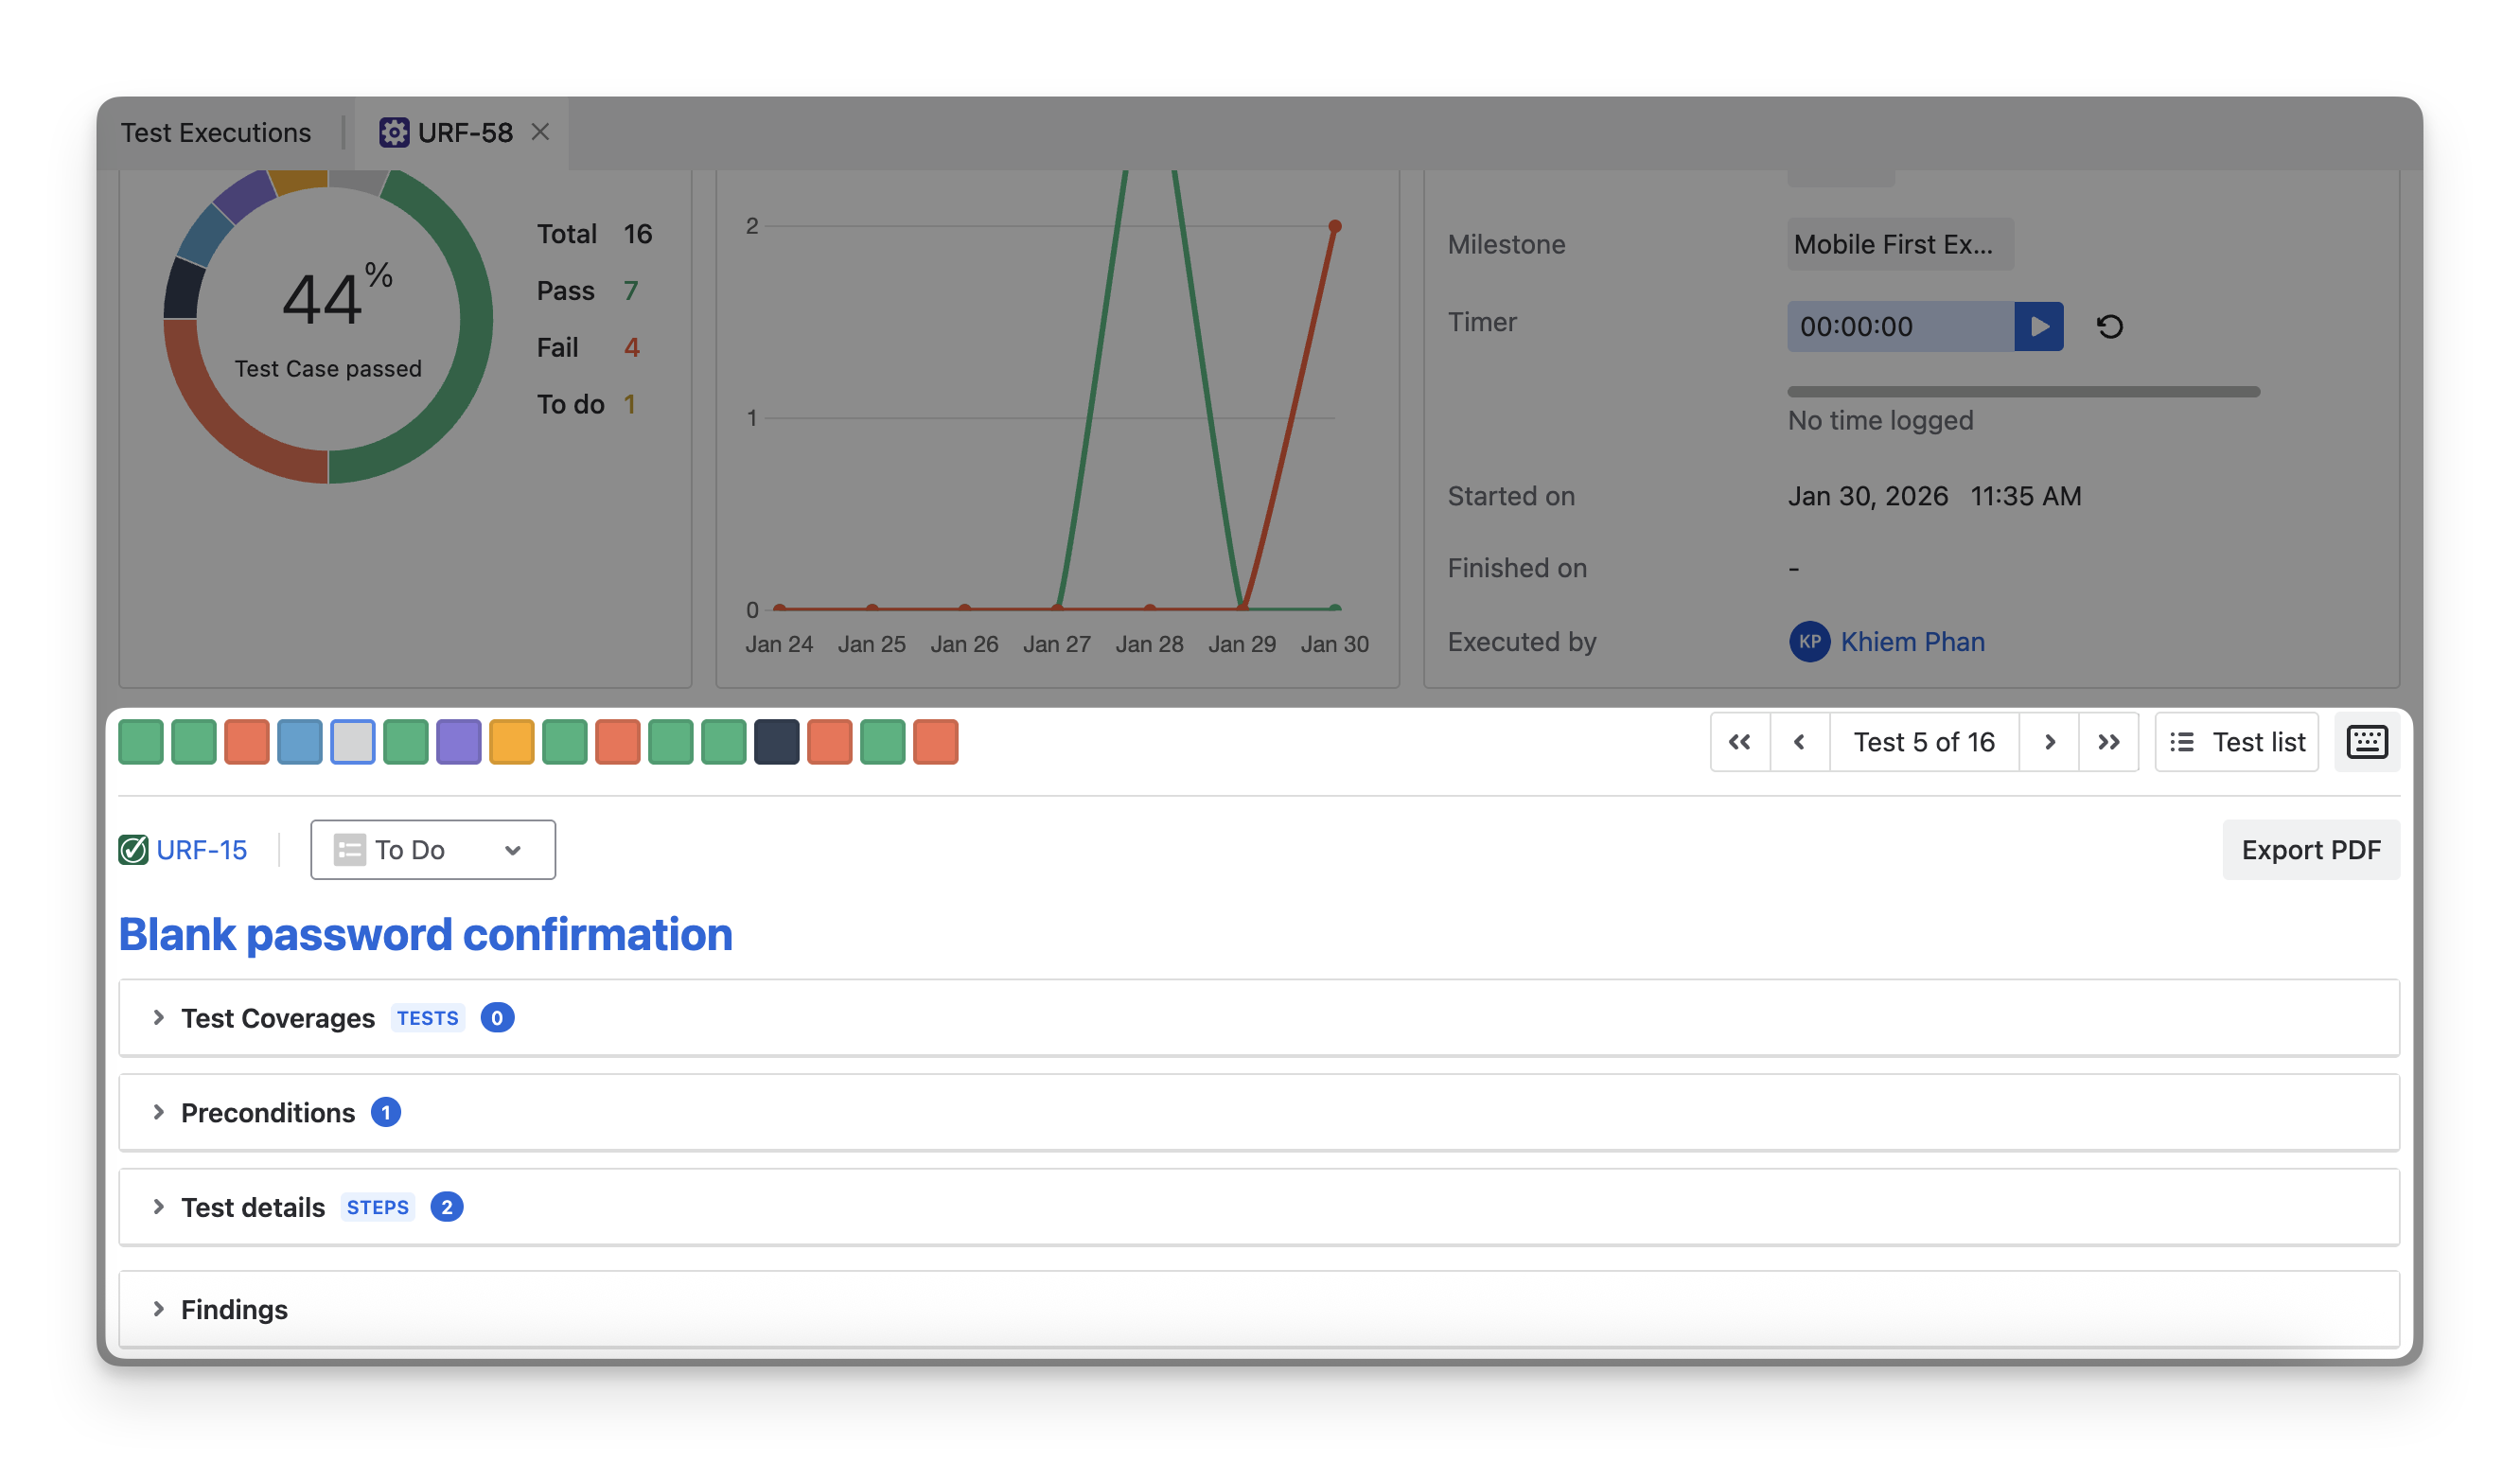
2. Test Coverages and Preconditions
To see information in these tabs, the test case must be linked to requirements and preconditions beforehand during test case preparation.
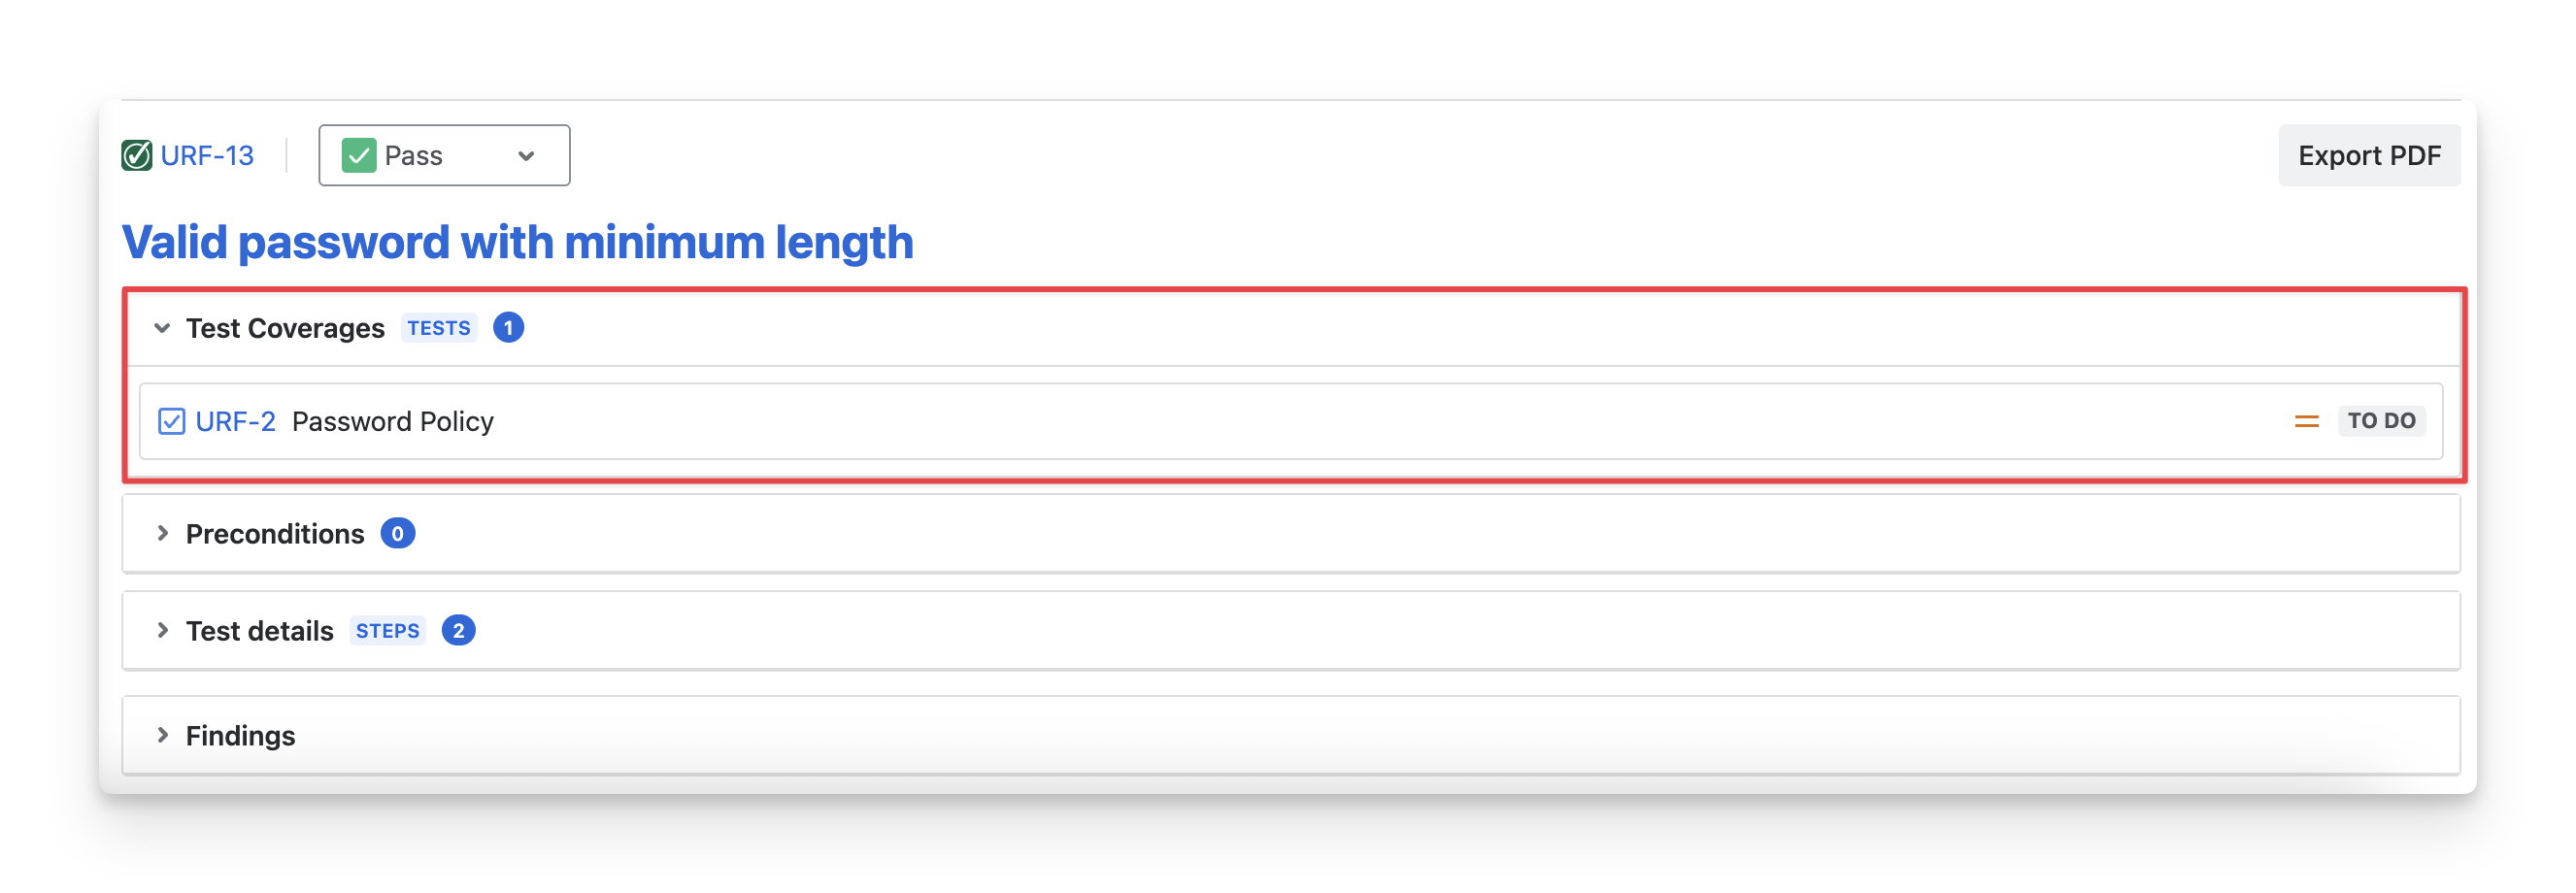
2.1 Test Coverages
The Test Coverages dropdown shows which requirements are linked to this test case. This helps you verify that your test case is linked to at least one requirement, so that it can be reflected in the test traceability and test coverage reports.
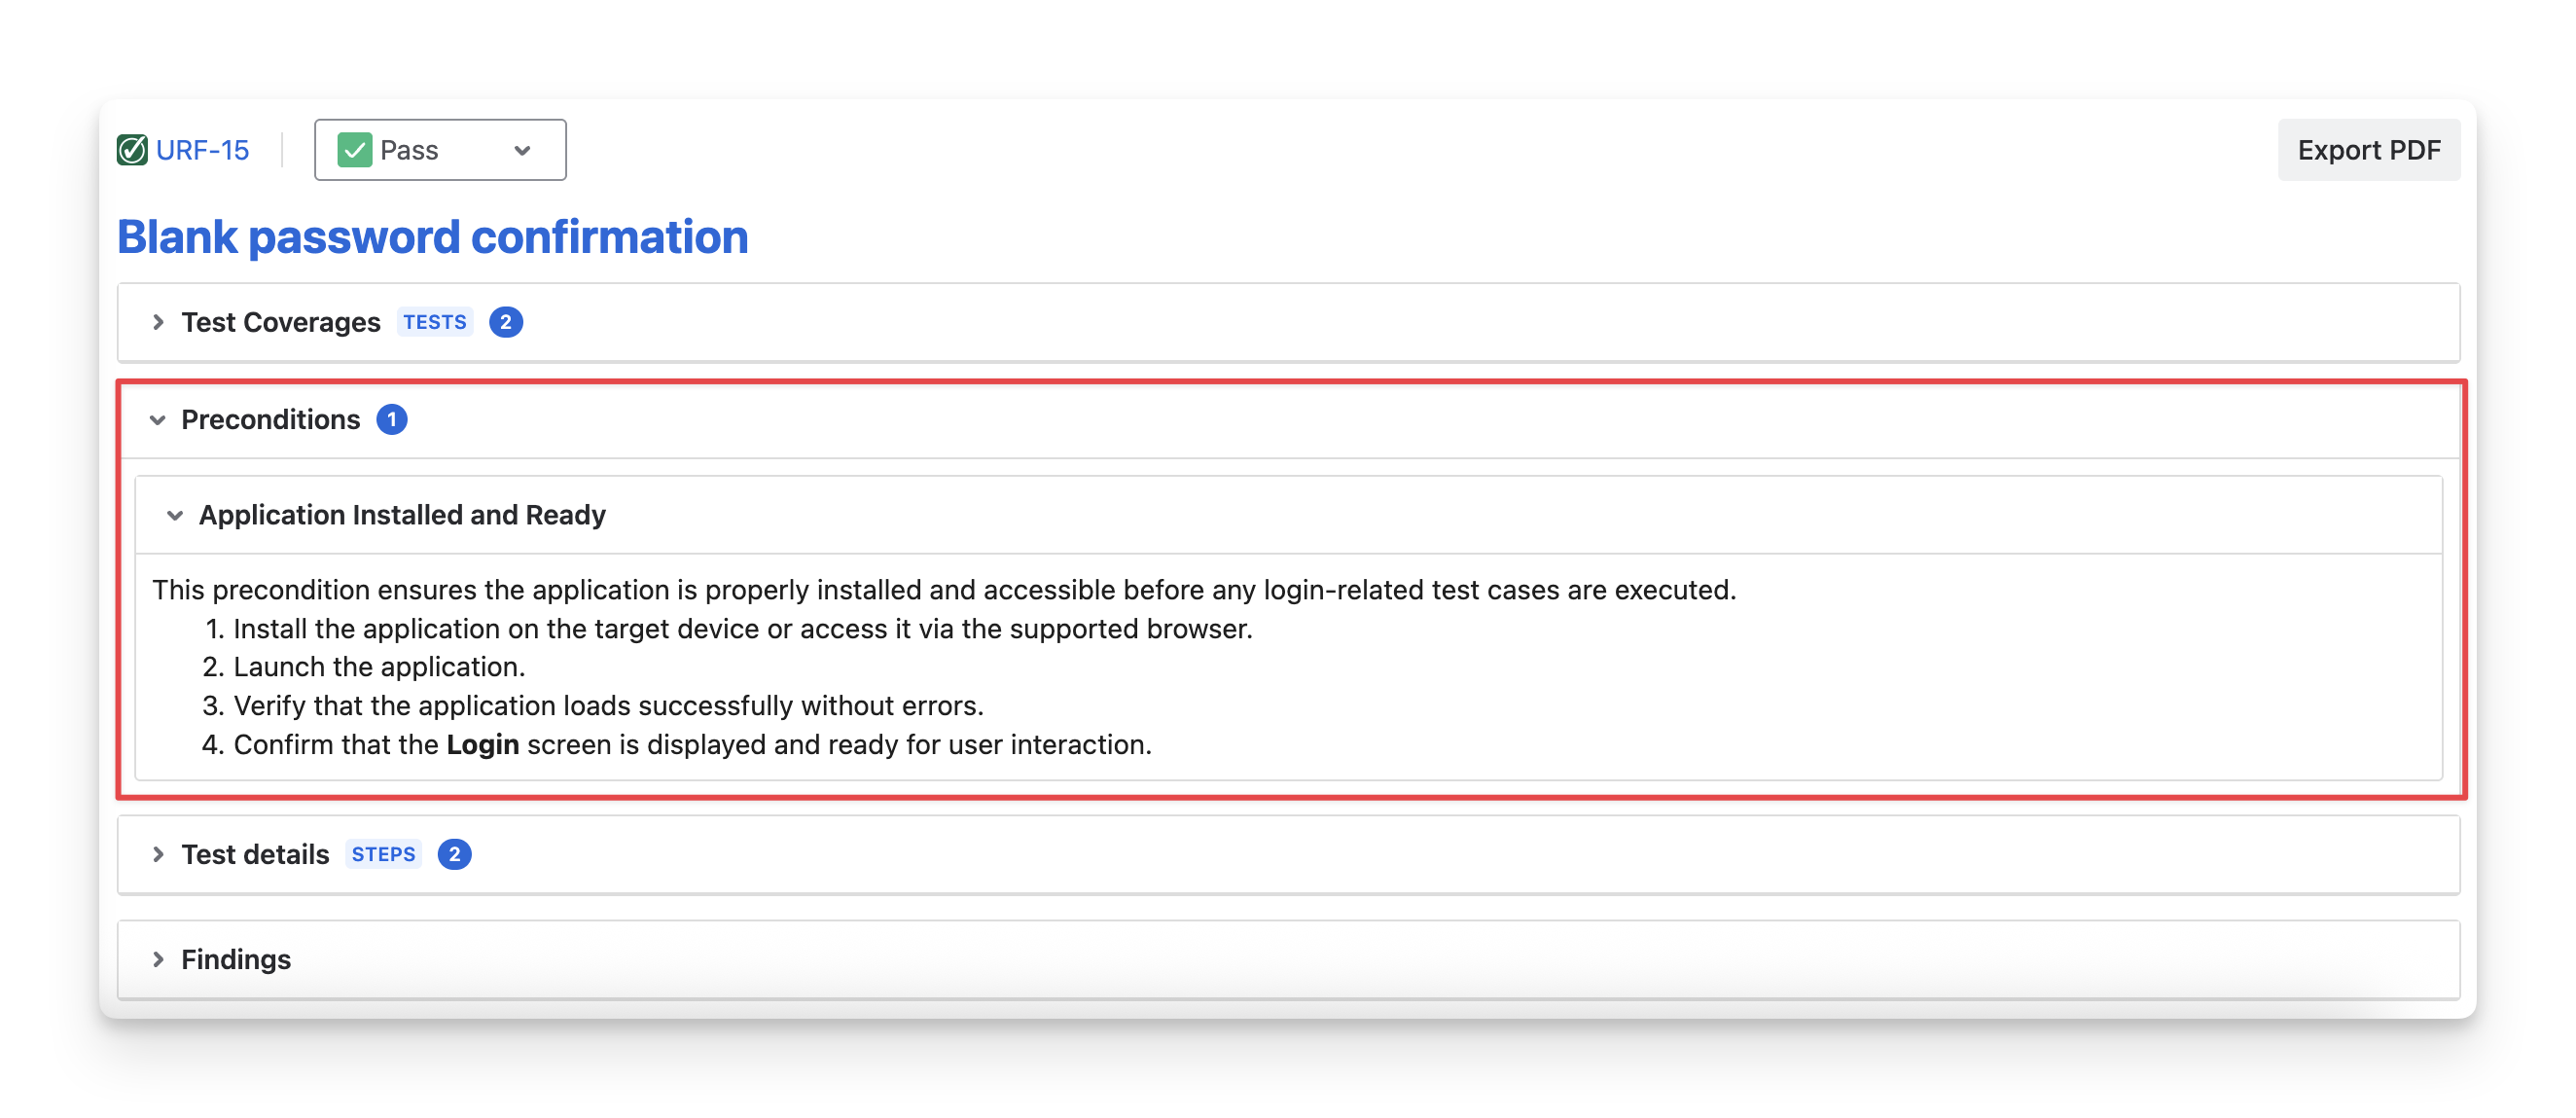
2.2 Preconditions
The Preconditions dropdown shows which preconditions are linked to this test case. This reminds you of the predefined conditions that must be fulfilled before executing the test case.
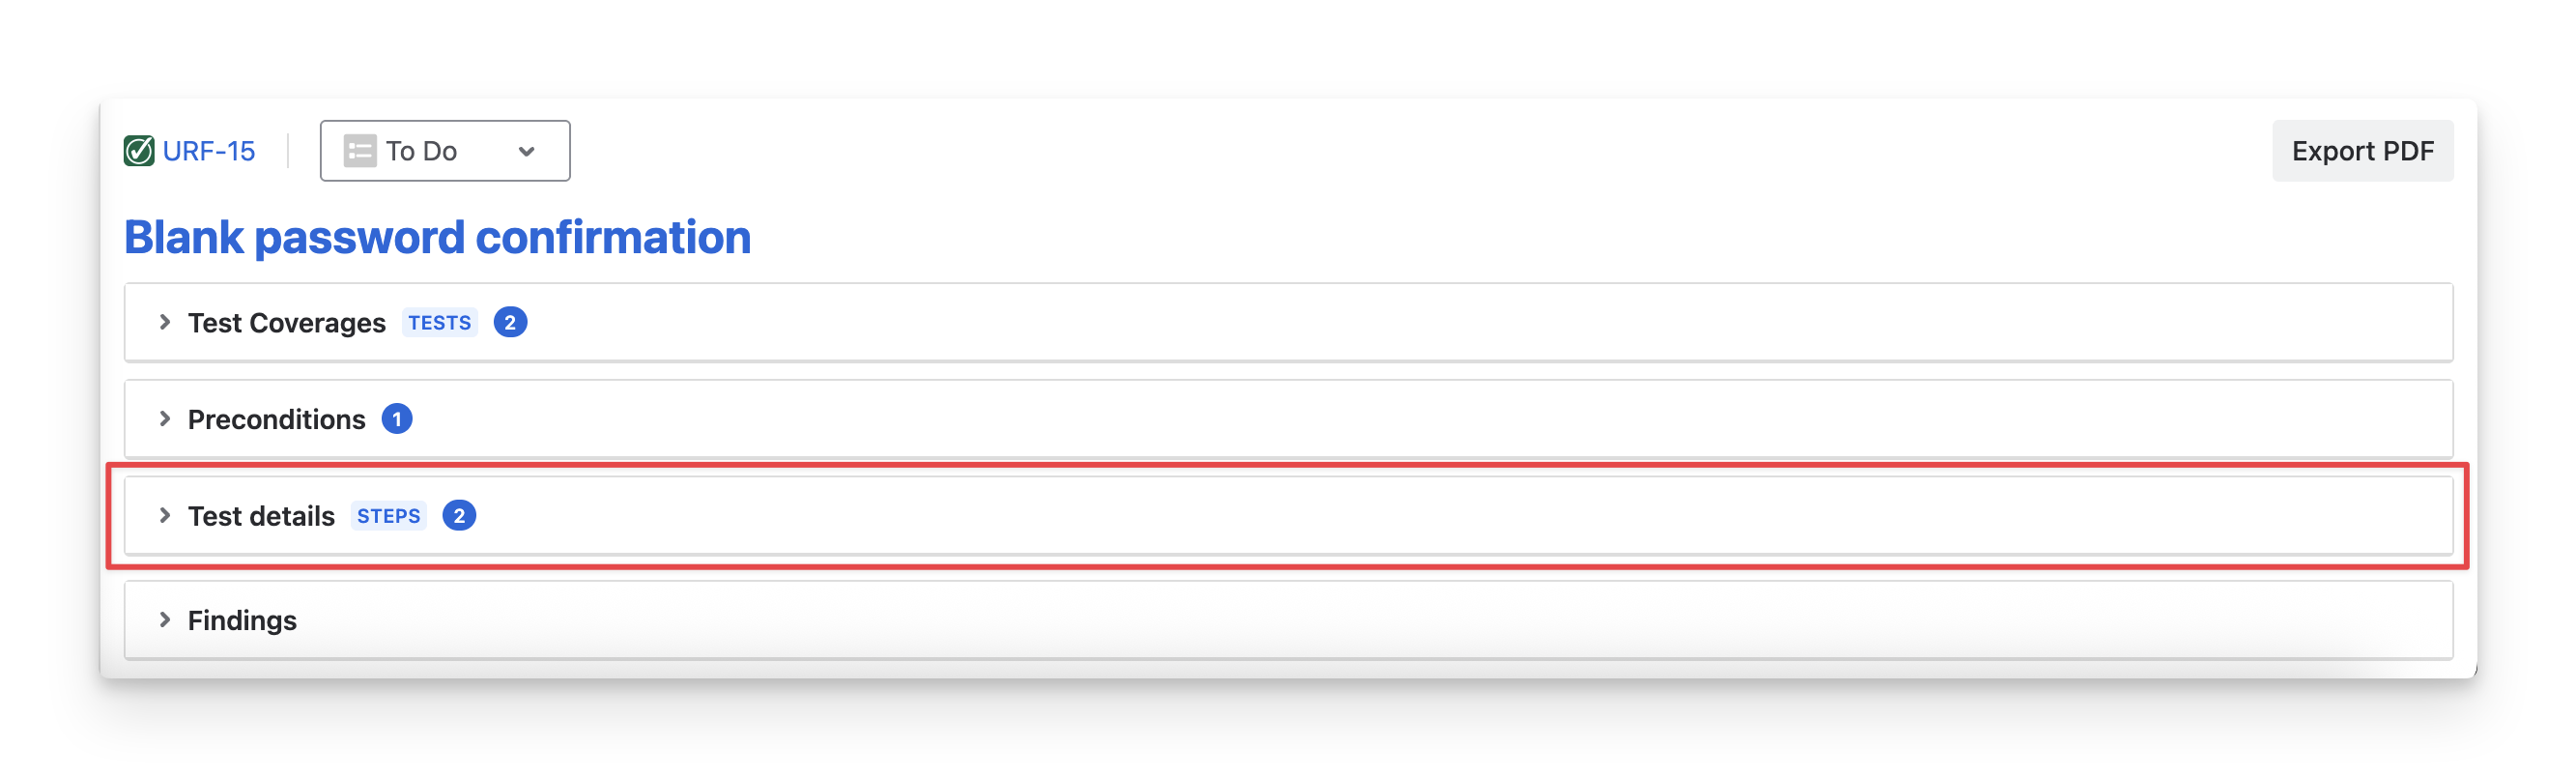
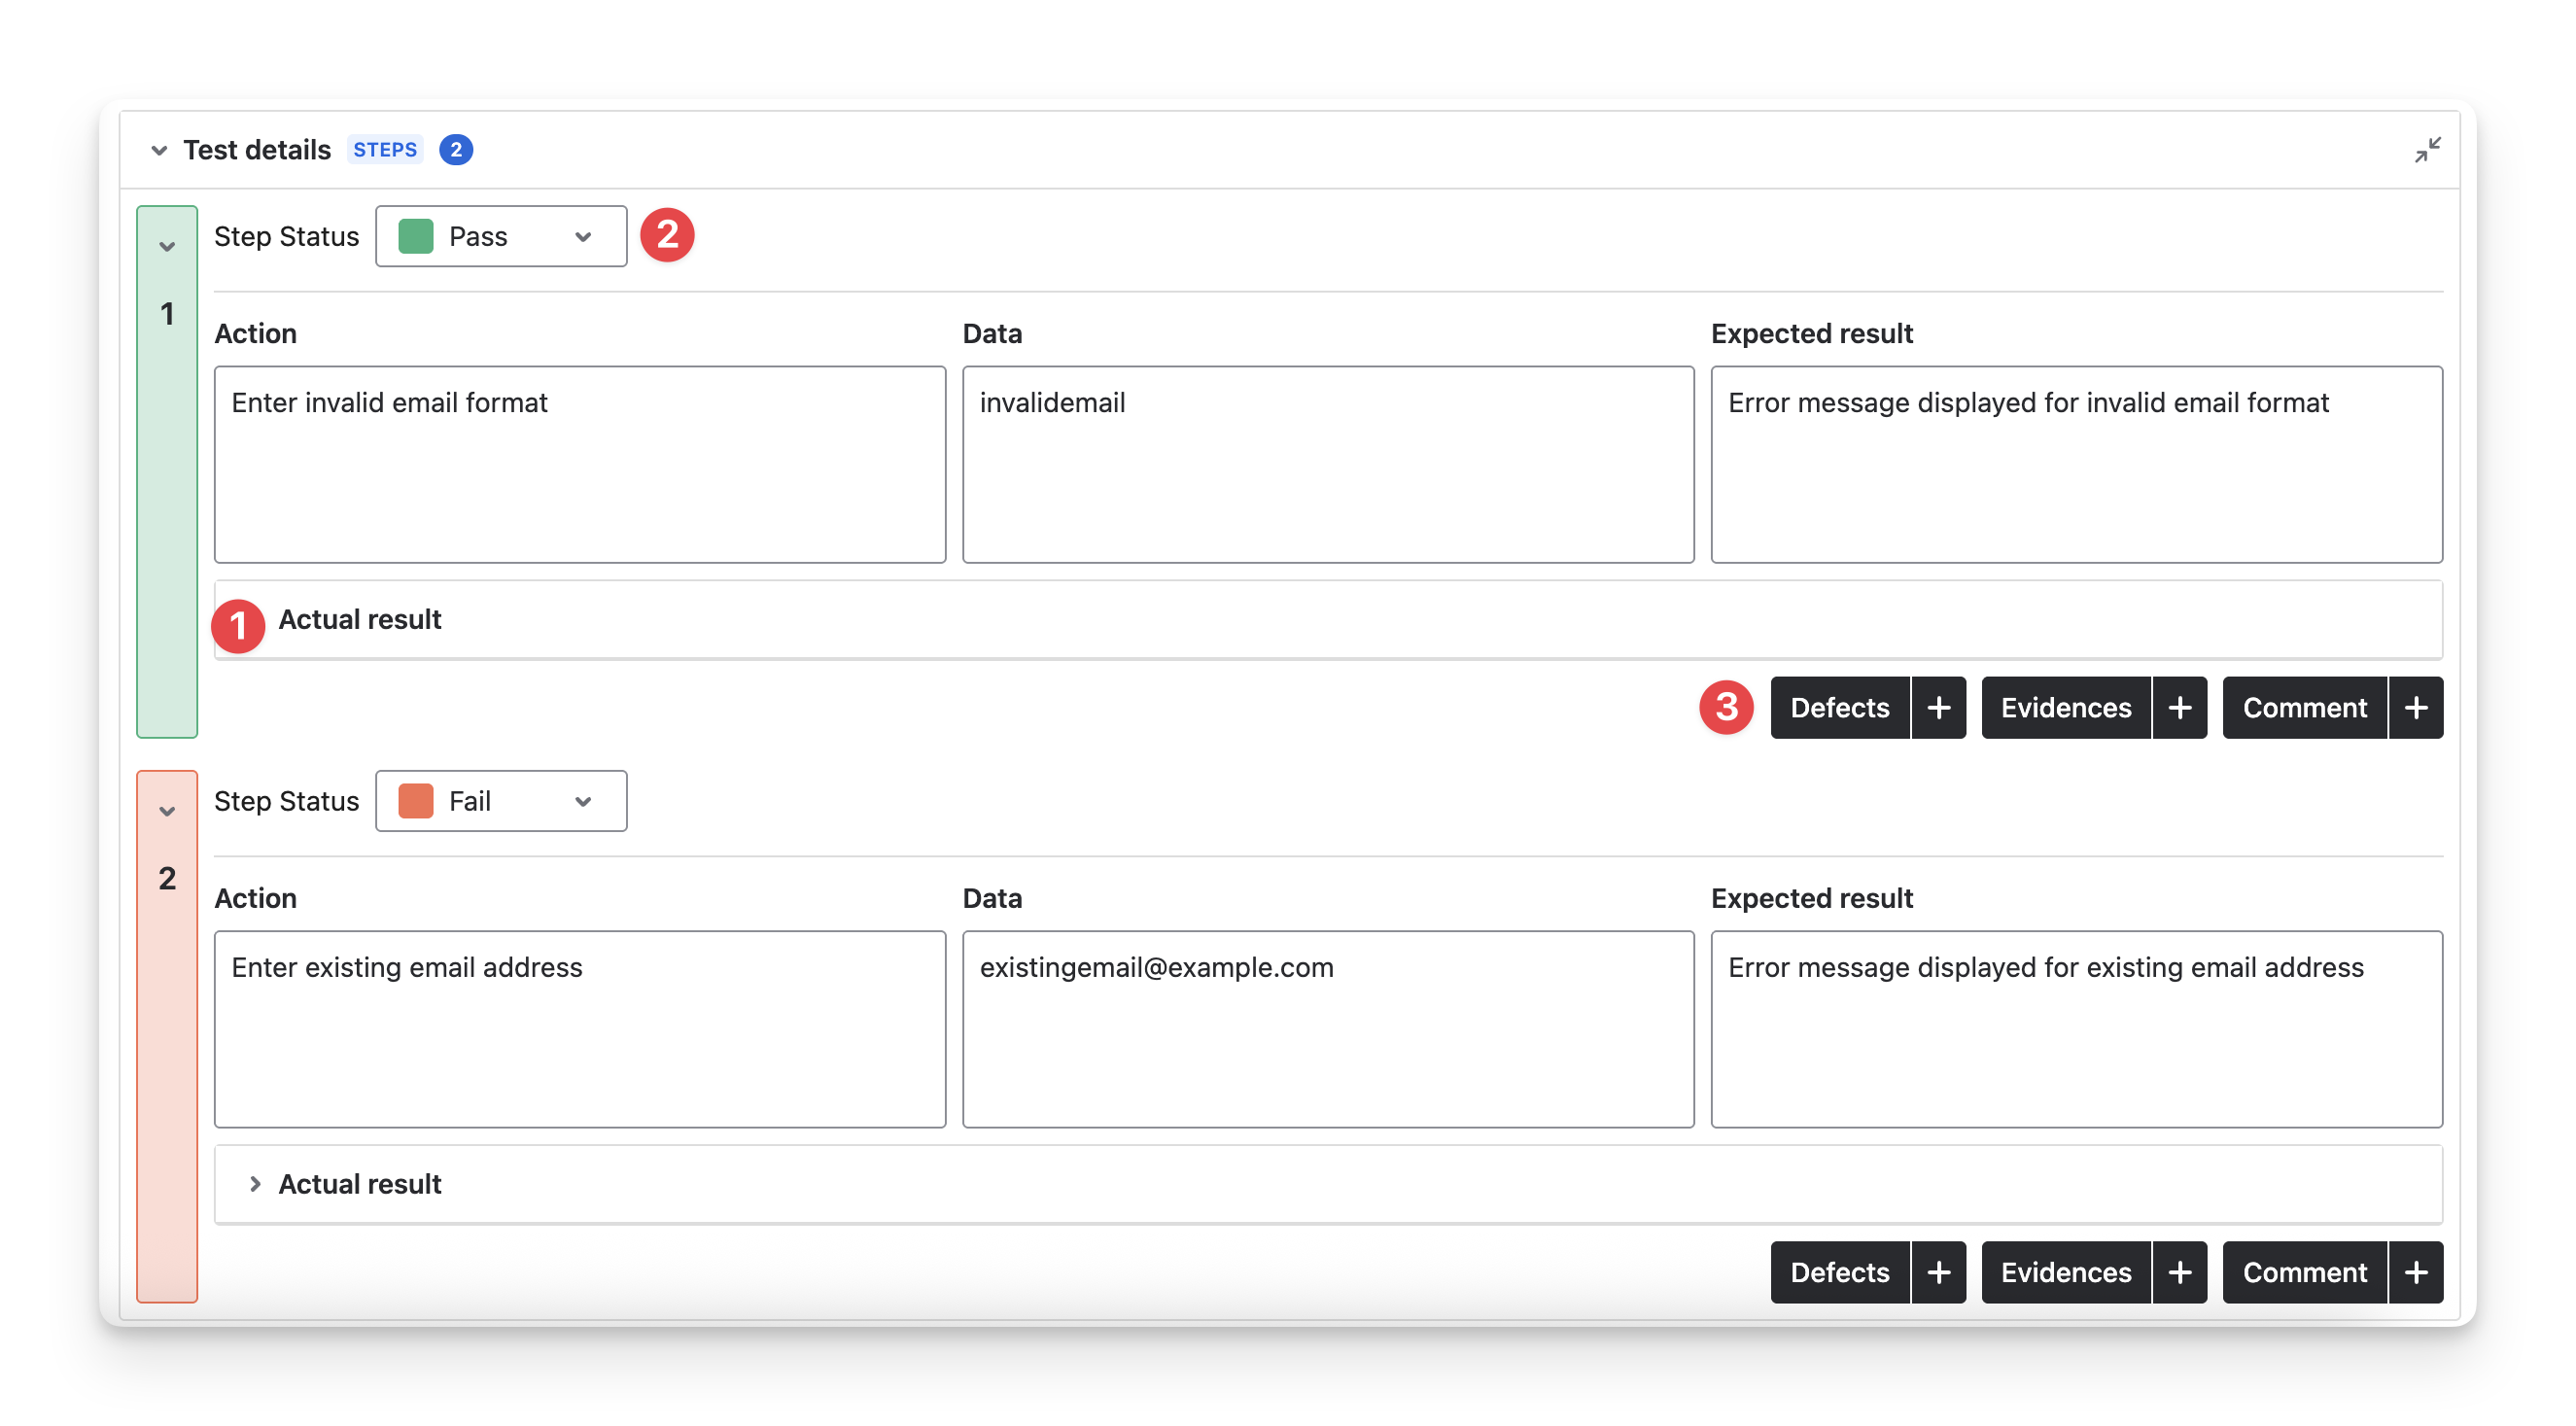
3. Test Details
The Test Details dropdown is the third tab in the Test Execution Space. This is the main area for your executing session.
In this tab, you can perform the following actions:
-
Input the actual result you receive for each test step.
-
Compare the actual result with the expected one, then mark the suitable test step status.
-
Attach related findings (if any) for test steps.
You don’t need to complete all of these actions for every test step in a test case. The process is flexible, allowing you to perform only the necessary actions based on your needs.
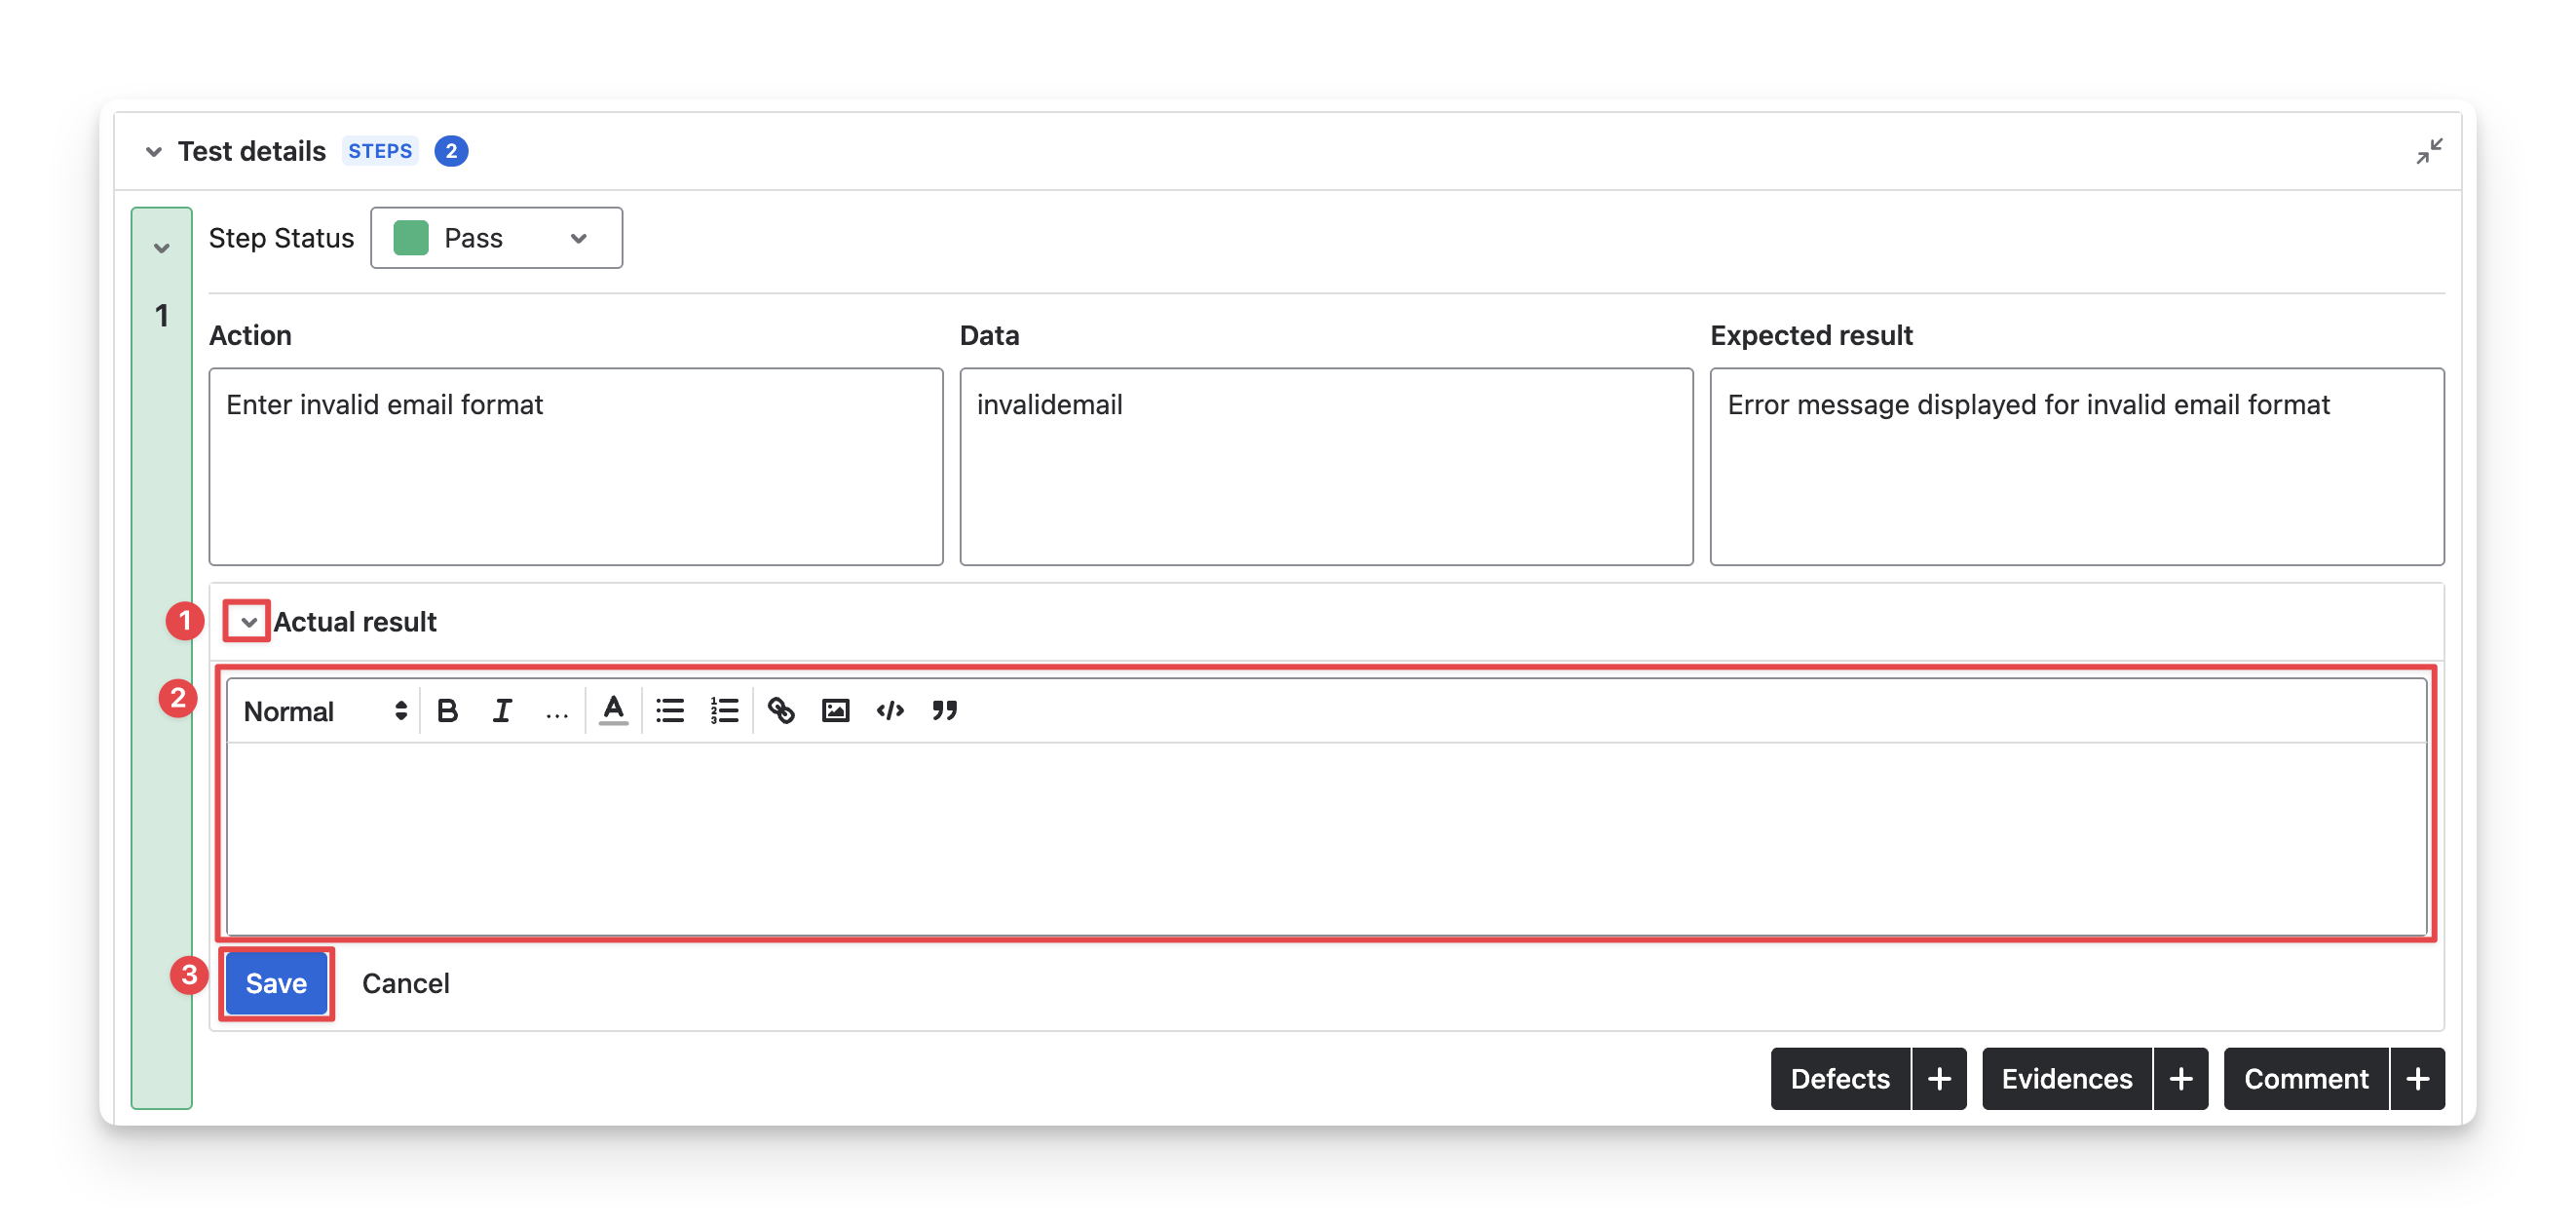
3.1 Input the Actual Result
To input the actual result for each test step, follow these steps:
-
Navigate to the “Actual results” of each test step. Click on the 🔽 button to show the space.
-
Click on this space to input your test results.
-
Select the “Save” button to finish.
3.2 Mark Test Step Status
To mark the test step status, follow these steps:
-
Navigate to the Step Status in each test step, click on the status dropdown menu.
-
Select the test step status that matches the situation when you compare your actual results with the expected ones.

3.3 Add Findings
AgileTest supports you in attaching 3 types of findings to a test step
-
Defects: Link any bugs found during testing to this test step.
-
Evidences: Attach files (images, videos, or data) that support your test results. Each file should not exceed 25MB.
-
Comments: Add any additional notes or observations related to the test step.
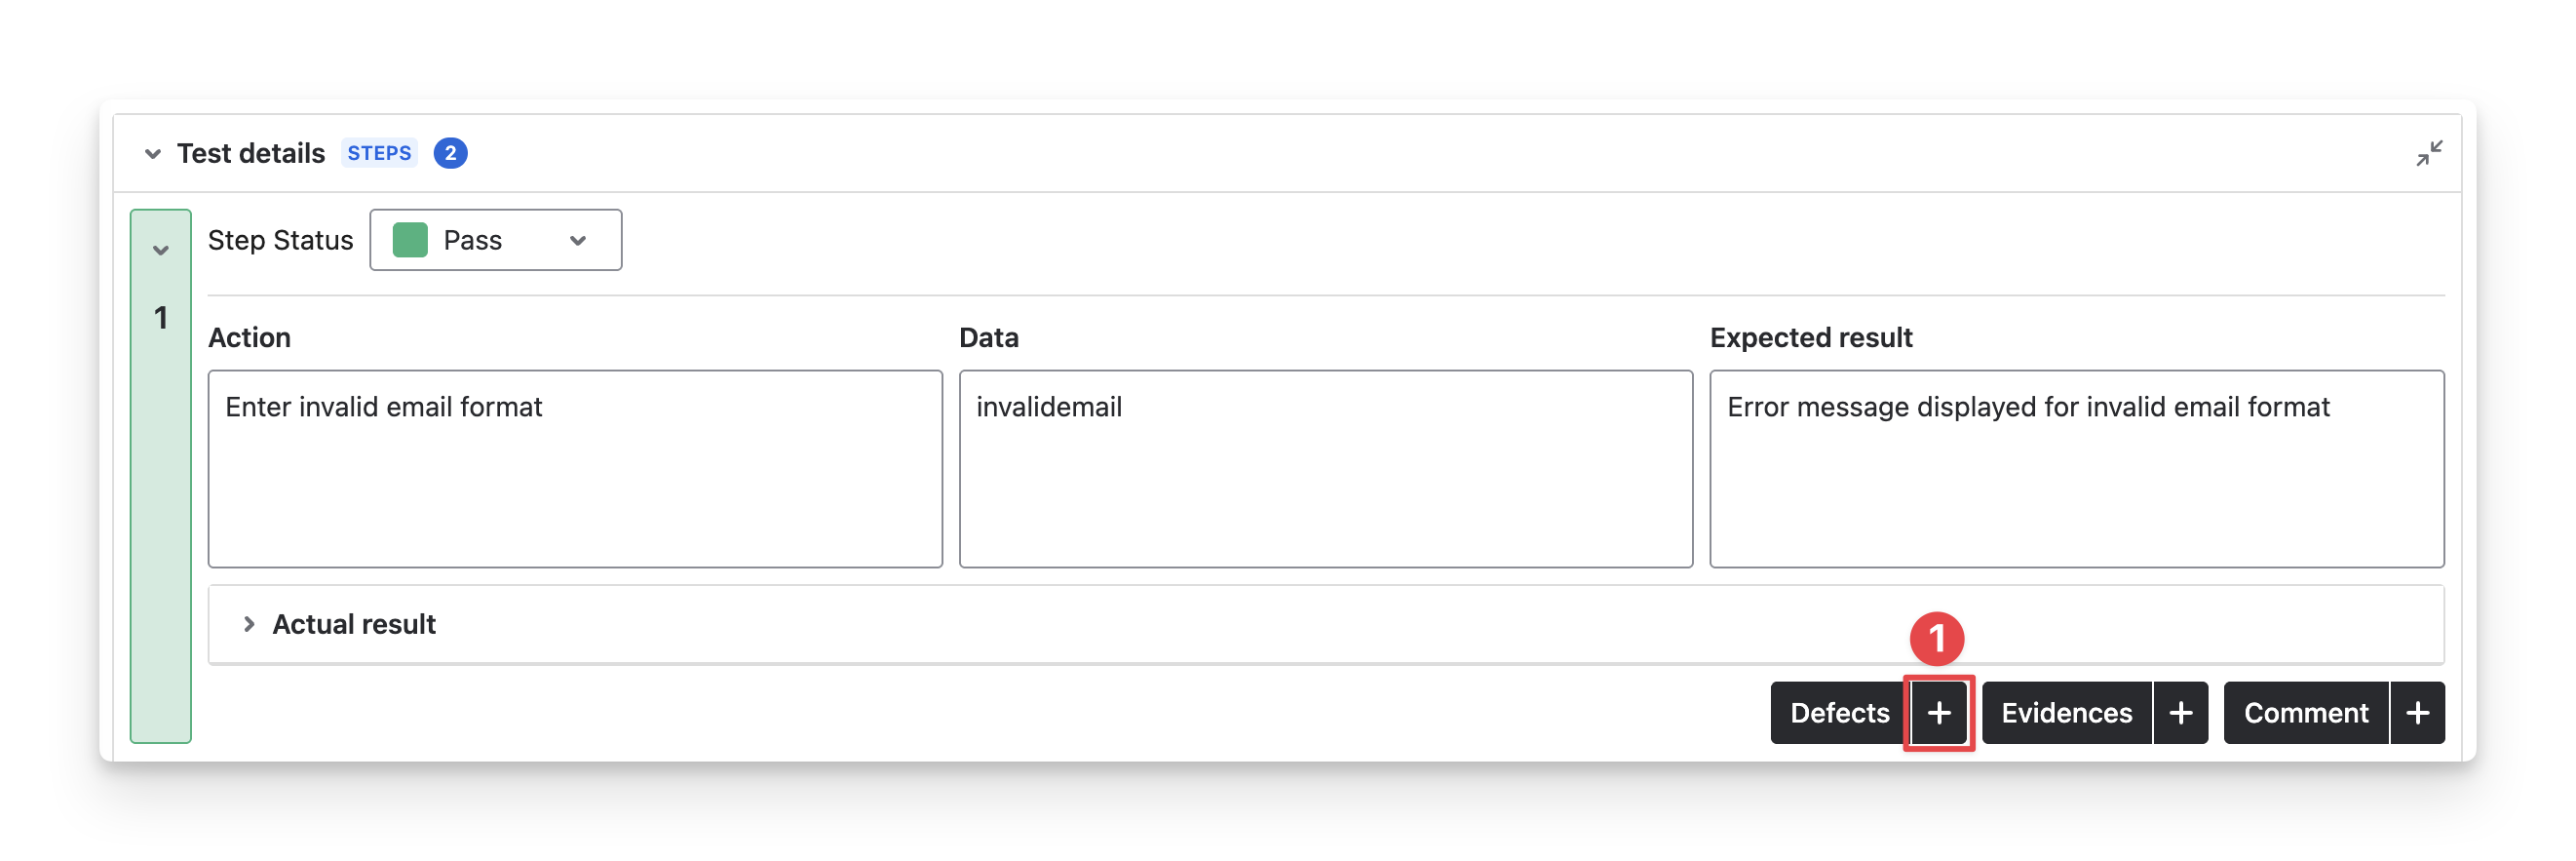
To attach findings for each test step, follow these steps:
-
Identify one of the 3 supported types of attachment you want to add, and click on the “Add” button.
-
Attach your findings to each test step.
-
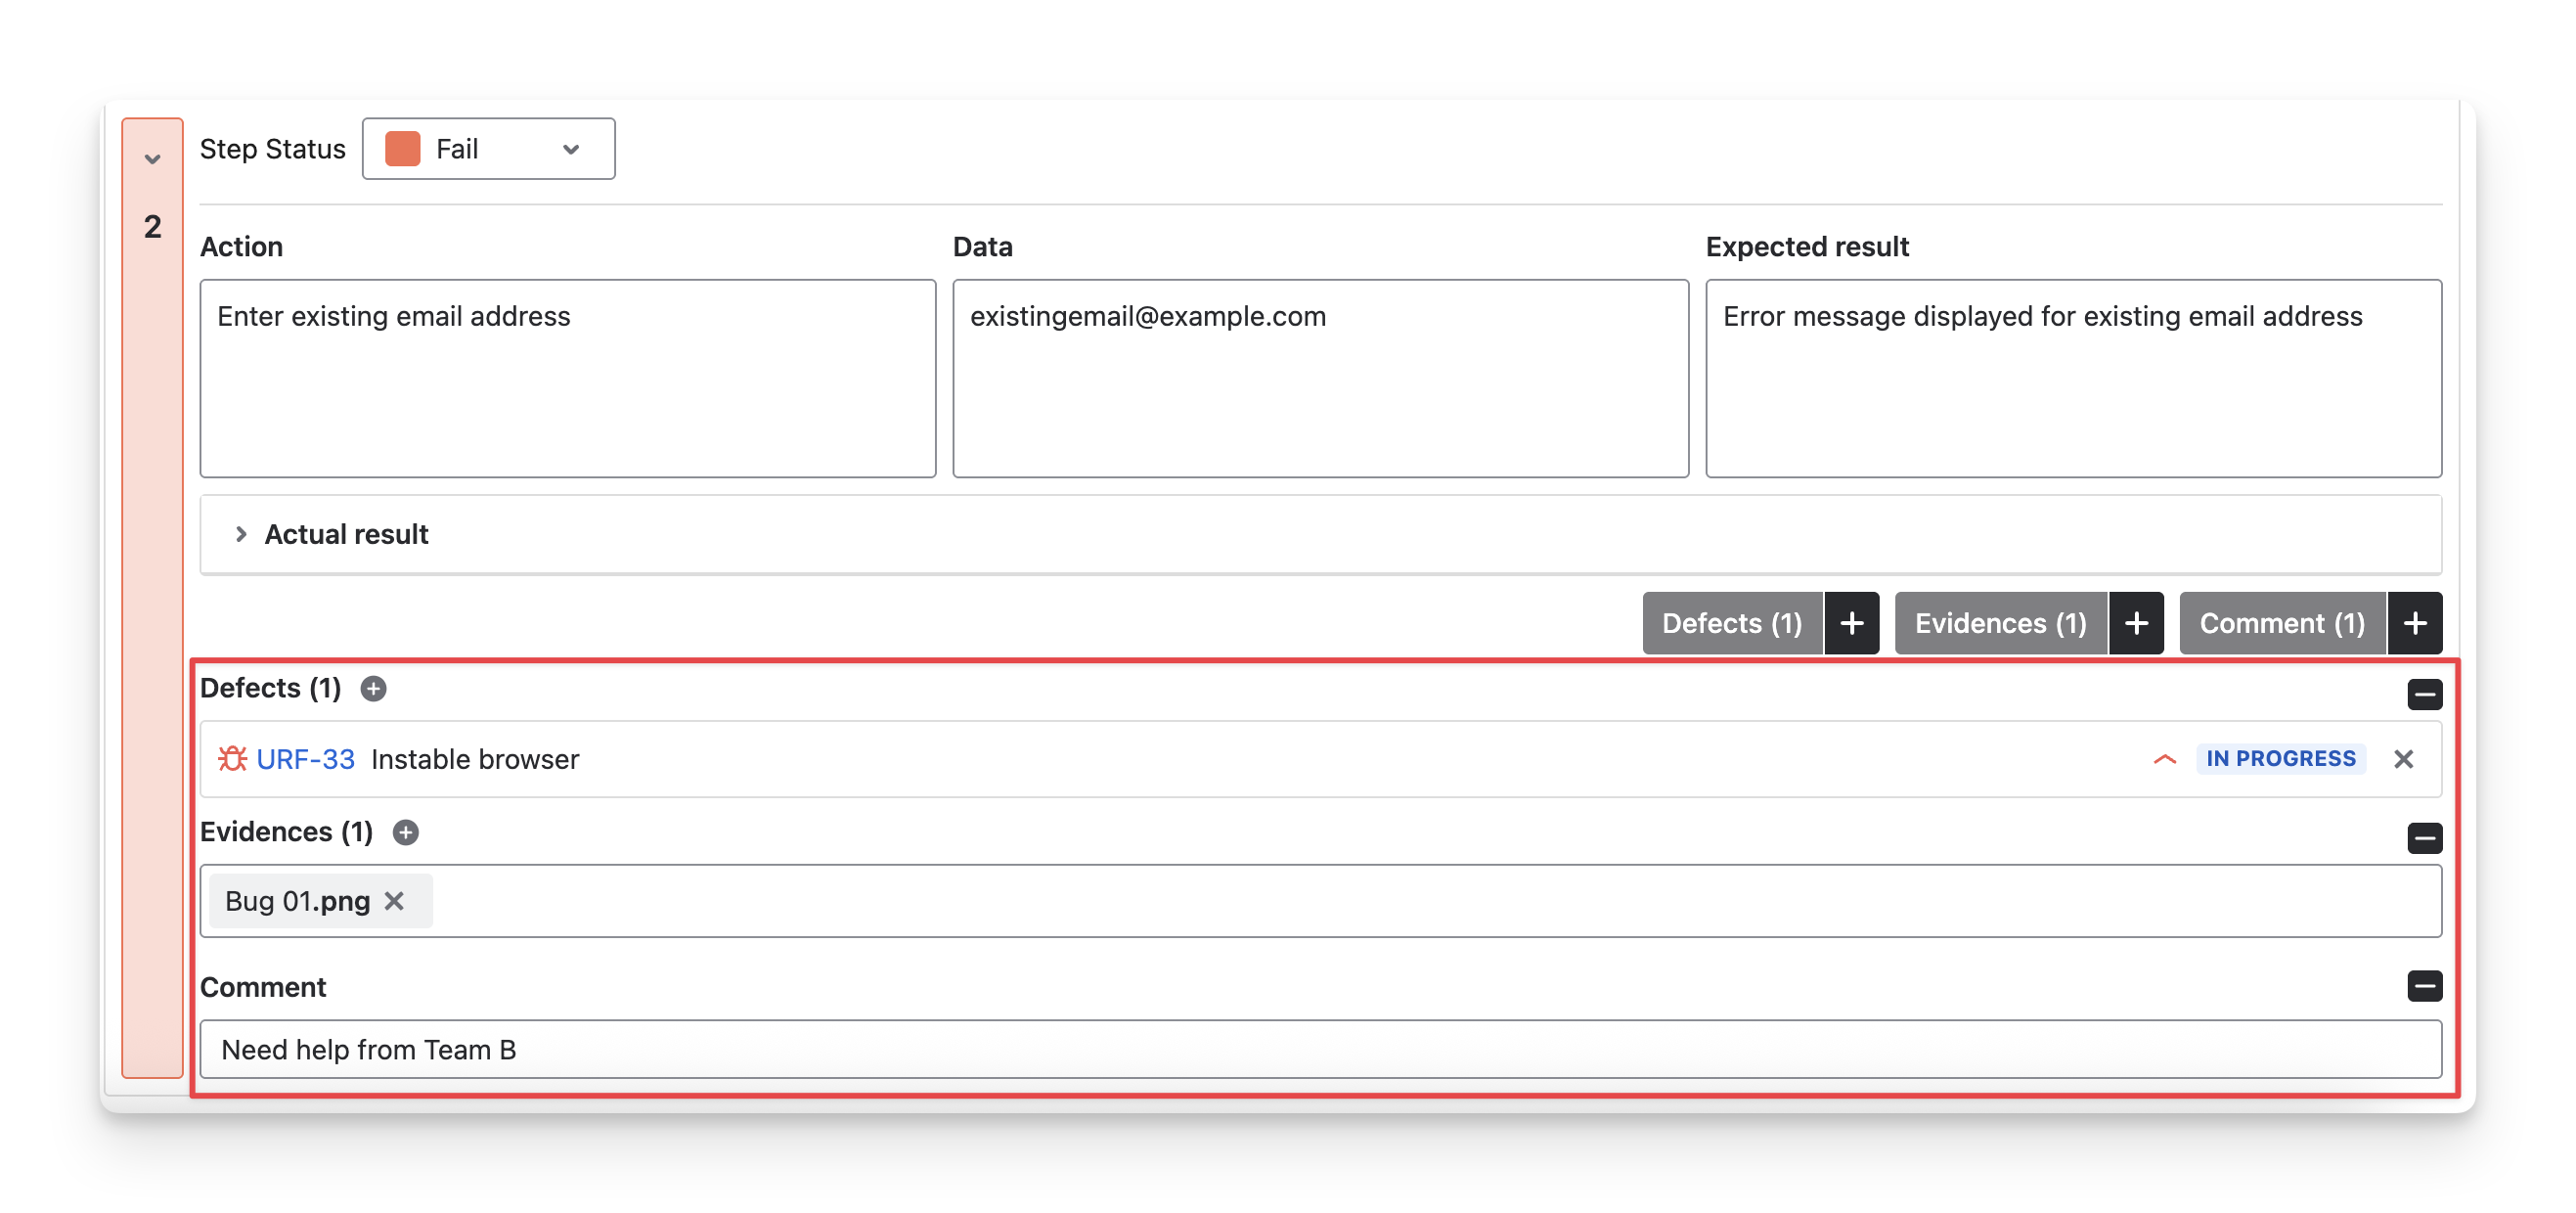
For Defects: choose one of the following options:
-
Link an existing Jira bug item to this test step.
-
Create a new Jira bug item linked to this test step.
-
-
For Evidences: upload files under 25MB from your devices.
-
For Comments: add your notes for internal checks and documentation.
-
These findings will appear at the bottom of your test step.
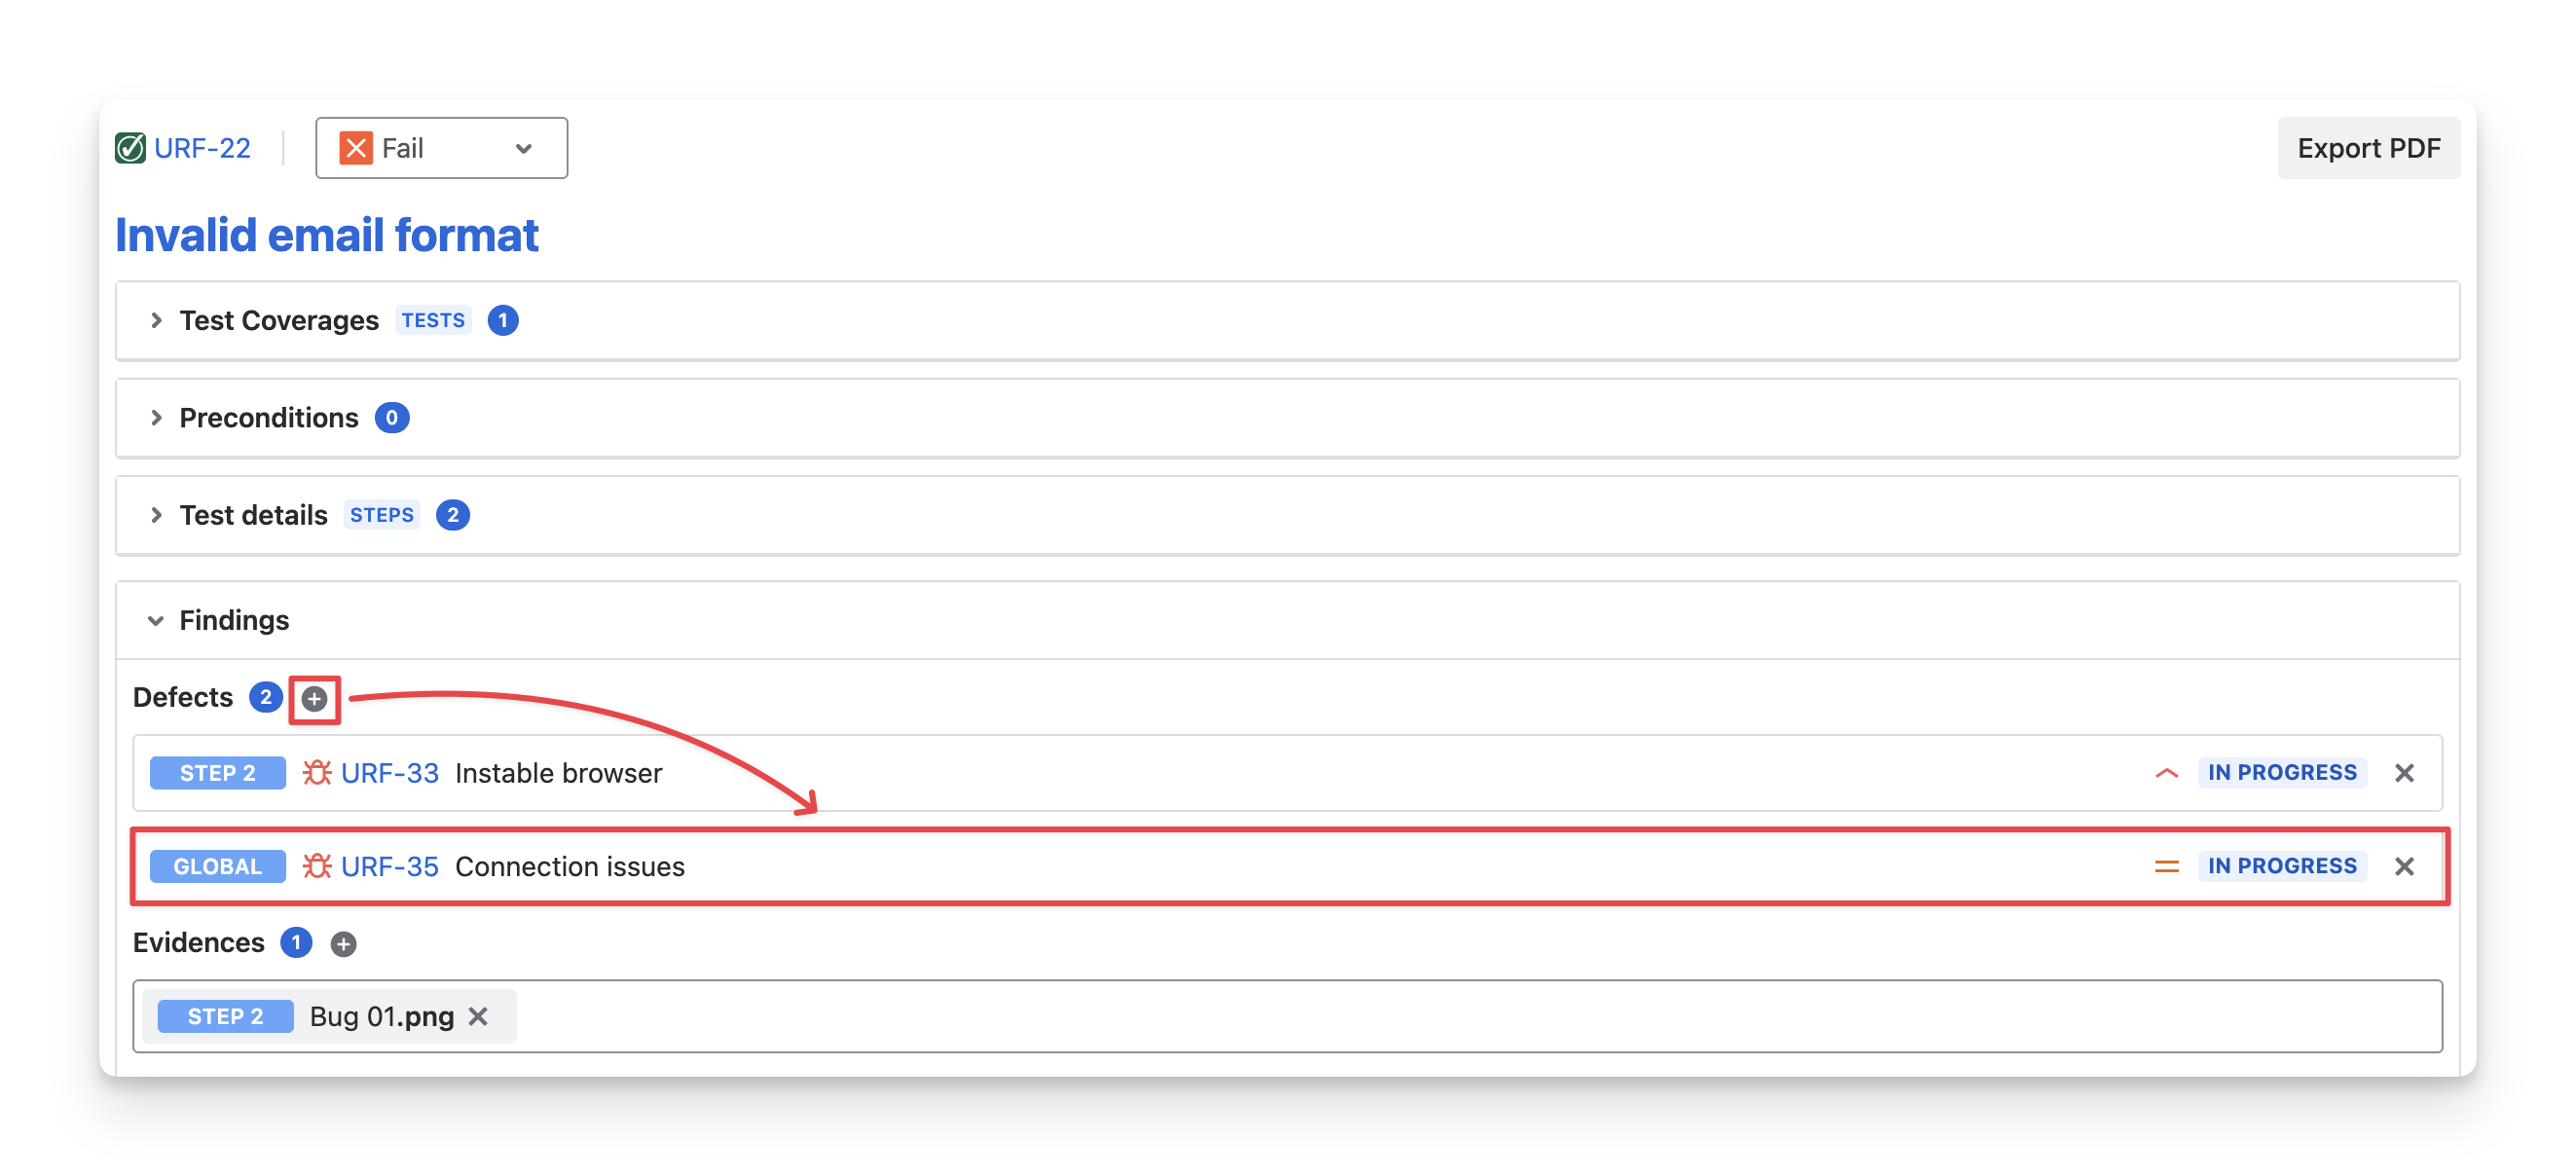
4. Findings
The Findings dropdown displays all findings added to the test steps. It indicates which attachments belong to which steps, helping you gather and classify all findings efficiently.

You can also add new attachments in the Findings tab by selecting the preferred attachment type and clicking the “Add” button. Any findings created this way will have the “Global” label, meaning they are not tied to specific test steps but are linked to the entire test case.
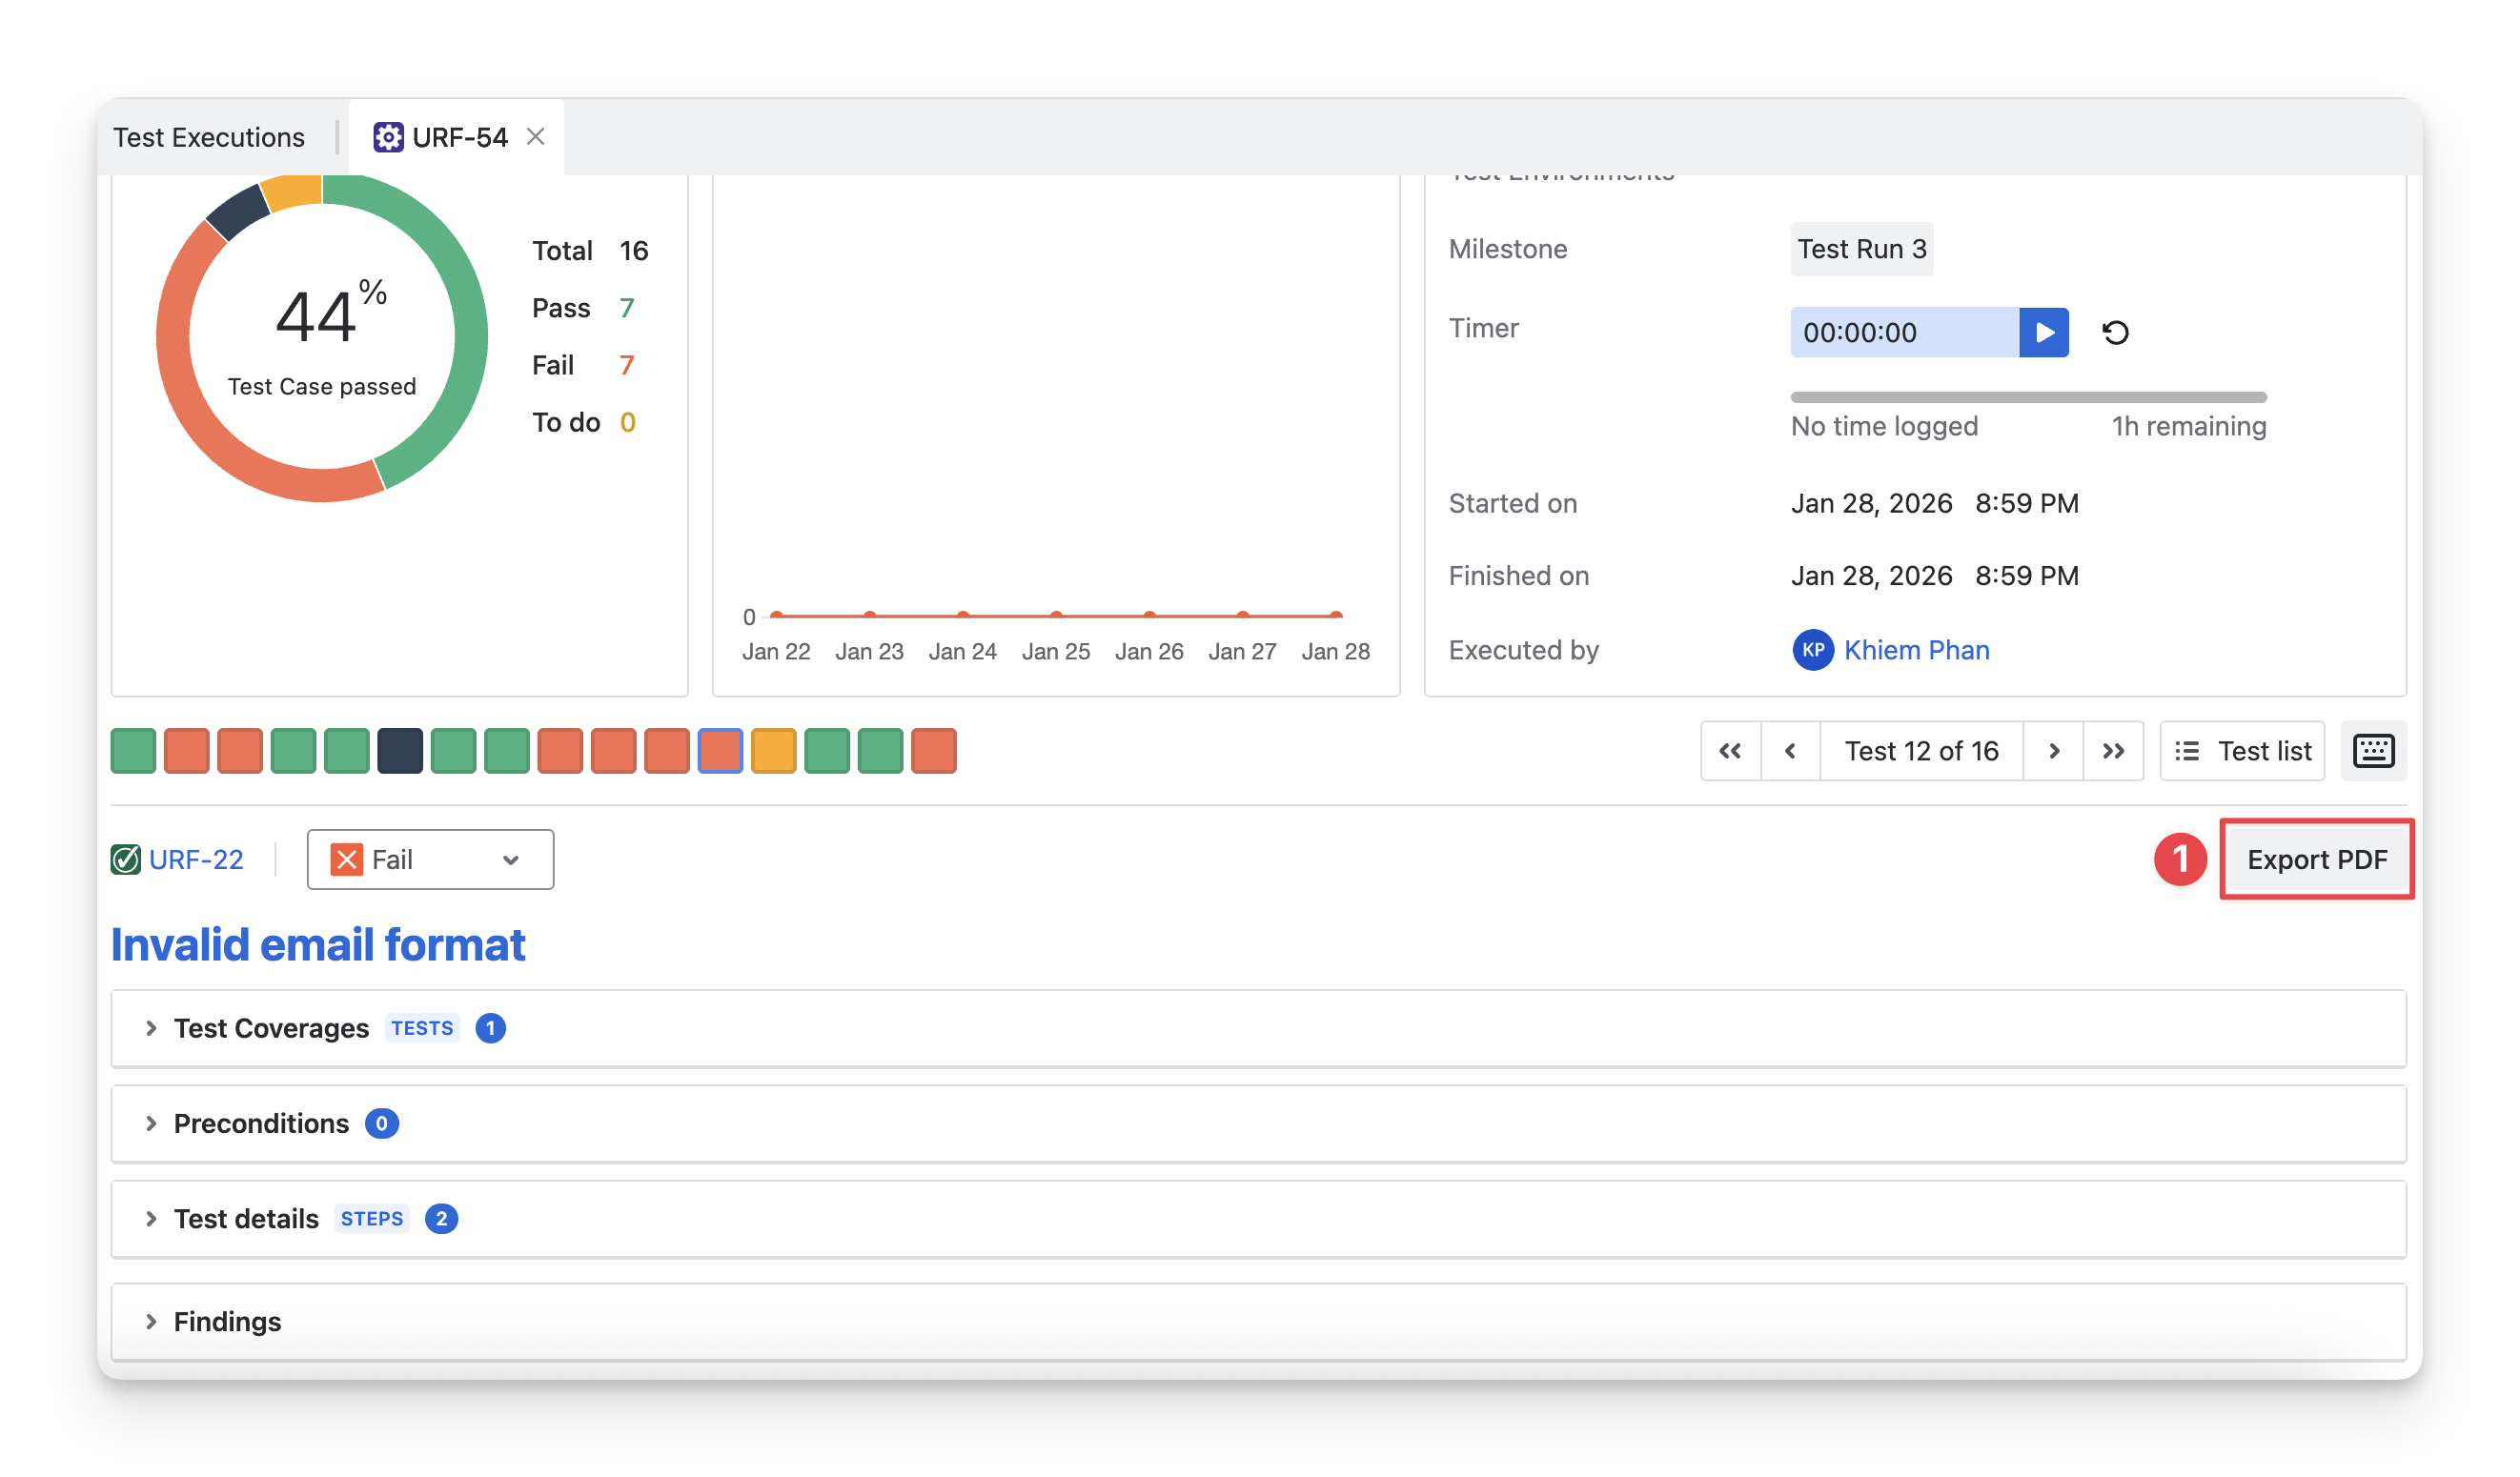
5. Download Execution Results
After finishing executing your tests, you can export the execution result for each test case, along with the attachments. Here is how:
-
In the Executing screen, select the “Export PDF” button.
-
You can now preview your file. By click on the “Display” button, you can tick/untick the options to show/hide specific information in your download file.
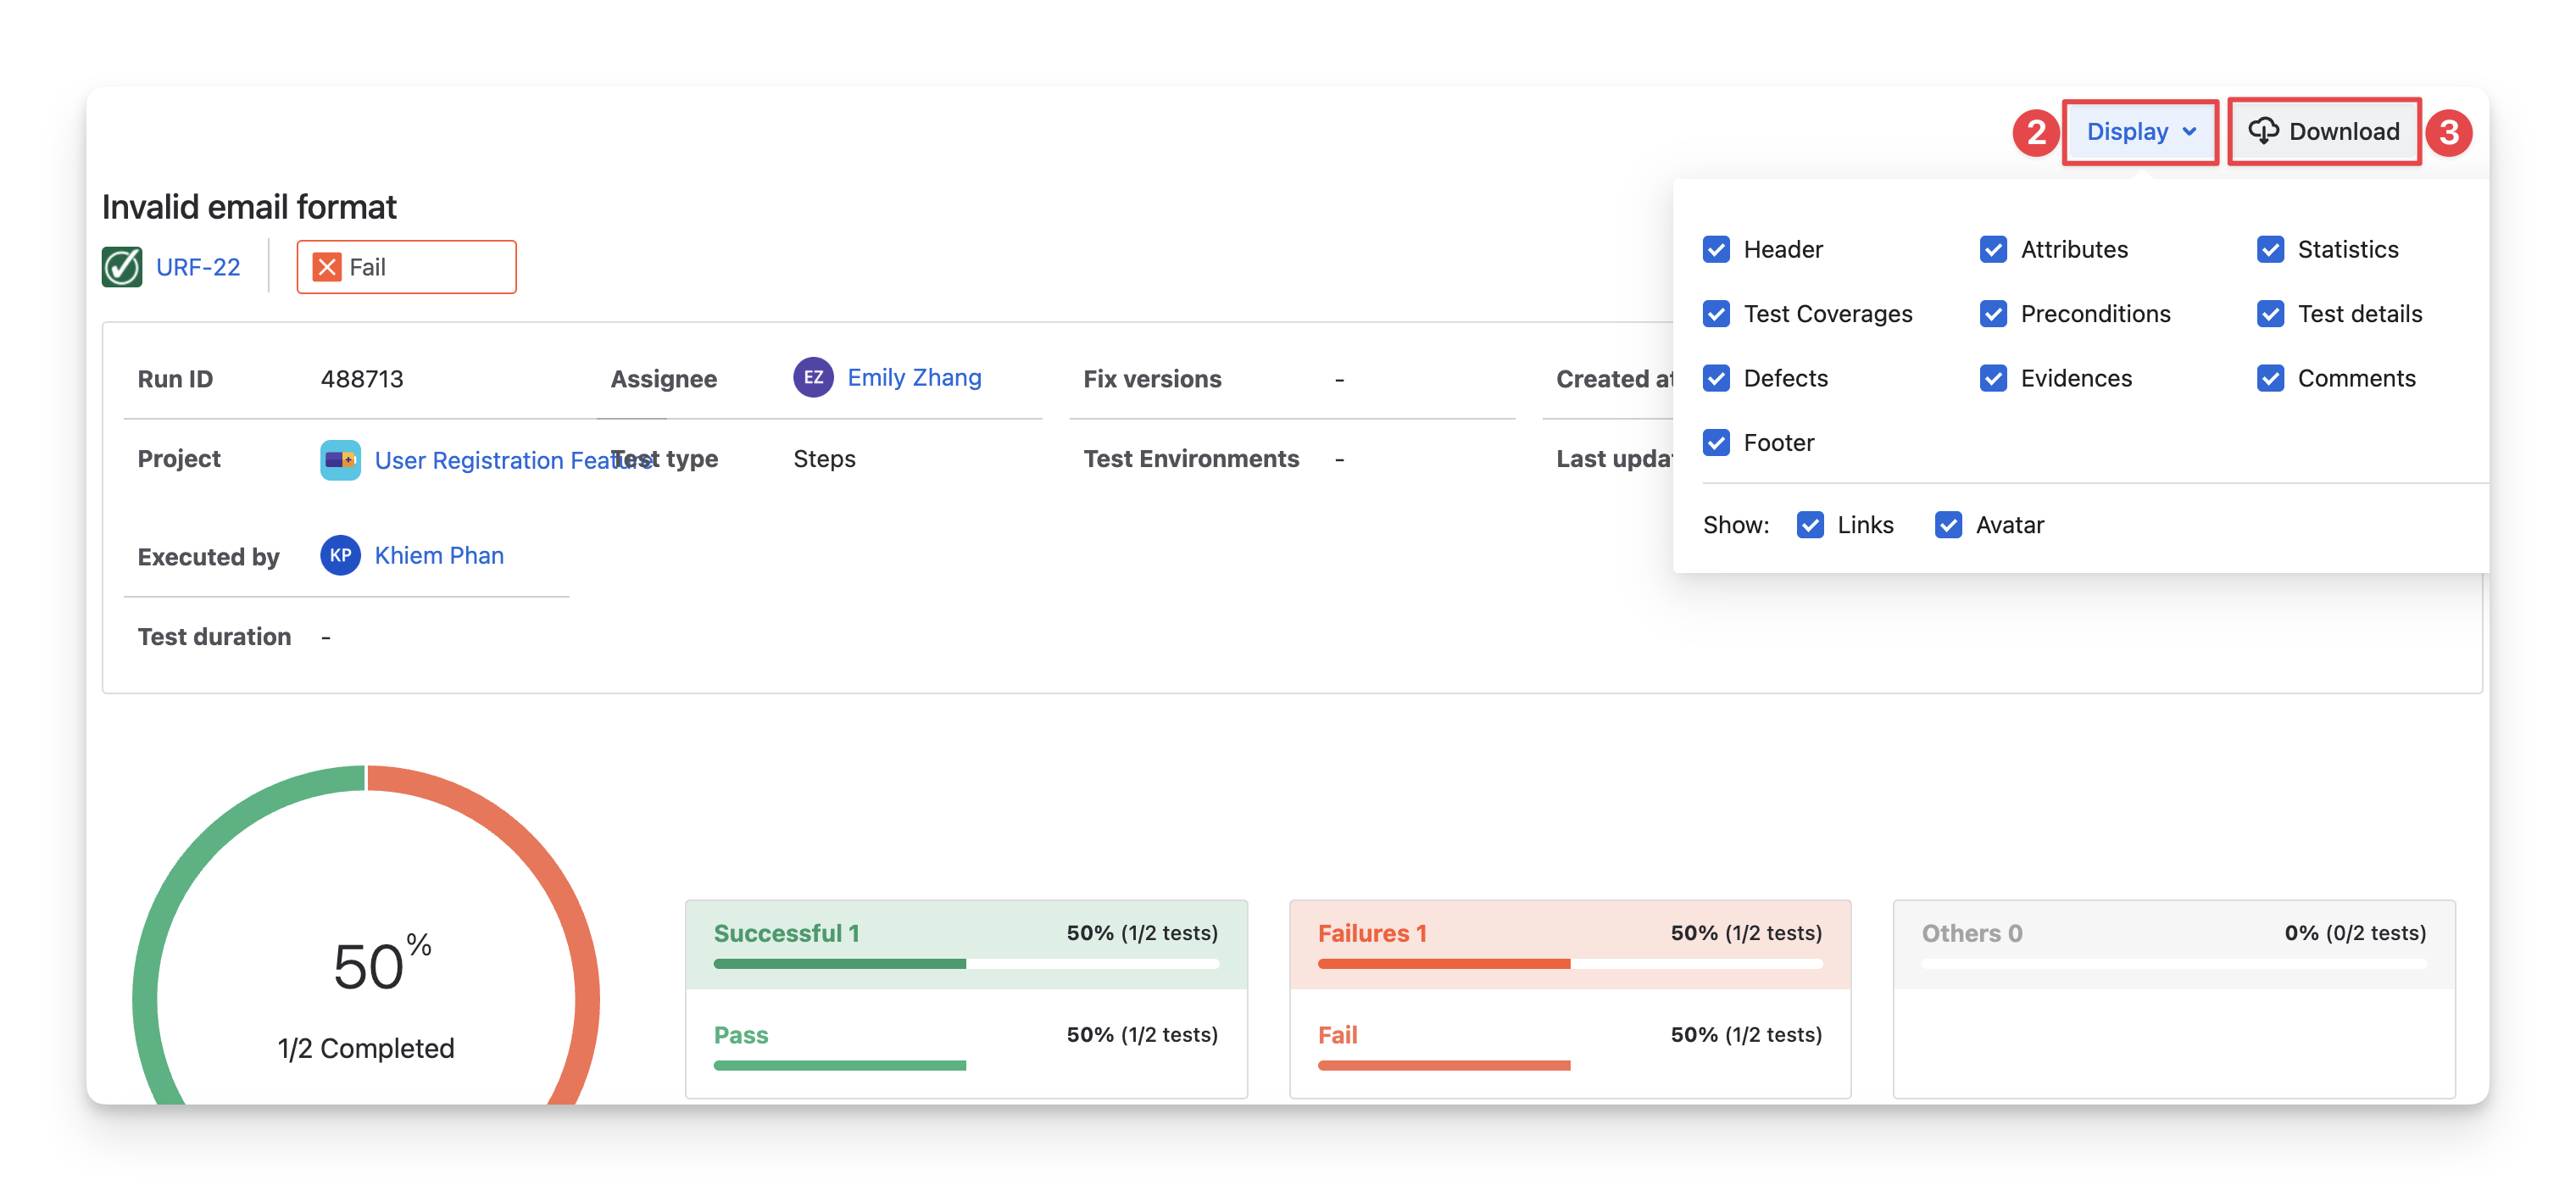
-
Select the “Download” to export your PDF files.
Should you need any assistance or further AgileTest inquiries, contact our 24/7 Support Desk!