.png)
In TimePlanner, Generic Resources are placeholders used in project planning, especially during the early stages when specific team members haven't been assigned yet. They can represent either non-physical entities (e.g., virtual team members) or physical assets (e.g., equipment).
Permissions for Generic Resources
Permissions define what actions different roles can take with Generic Resources. This ensures the right people have the right level of access:
|
Category |
Action |
Admin |
Team admin |
Team leader |
Member |
|---|---|---|---|---|---|
|
|
Create |
|
|
|
|
|
Update information |
|
|
|
|
|
|
Delete |
|
|
|
|
|
|
|
Remove from specific teams |
|
|
|
|
|
Add to a team |
|
|
|
|
|
|
Generic Resource Planning |
View on Schedule board |
|
|
|
|
|
Create tasks |
|
|
|
|
|
|
Update tasks |
|
|
|
|
|
|
Un-plan tasks |
|
|
|
|
|
|
Reassign tasks |
|
|
|
|
-
A member must have the ‘View team schedules’ permission (in Team Permission settings) to view tasks planned for generic resources.
-
A member must have the ‘Manage team schedules’ permission (in Team Permission settings) to create, update, unplan, or reassign generic resource tasks to other members.
Use Case 1: Generic Resource as a non-physical entity
A Generic Resource can serve as a placeholder for a task, representing roles or responsibilities that have not yet been assigned to a specific team member.
Planning from the Work Item Box
Planning tasks for Generic Resources follows the same general approach as planning tasks for resources.
-
Go to the

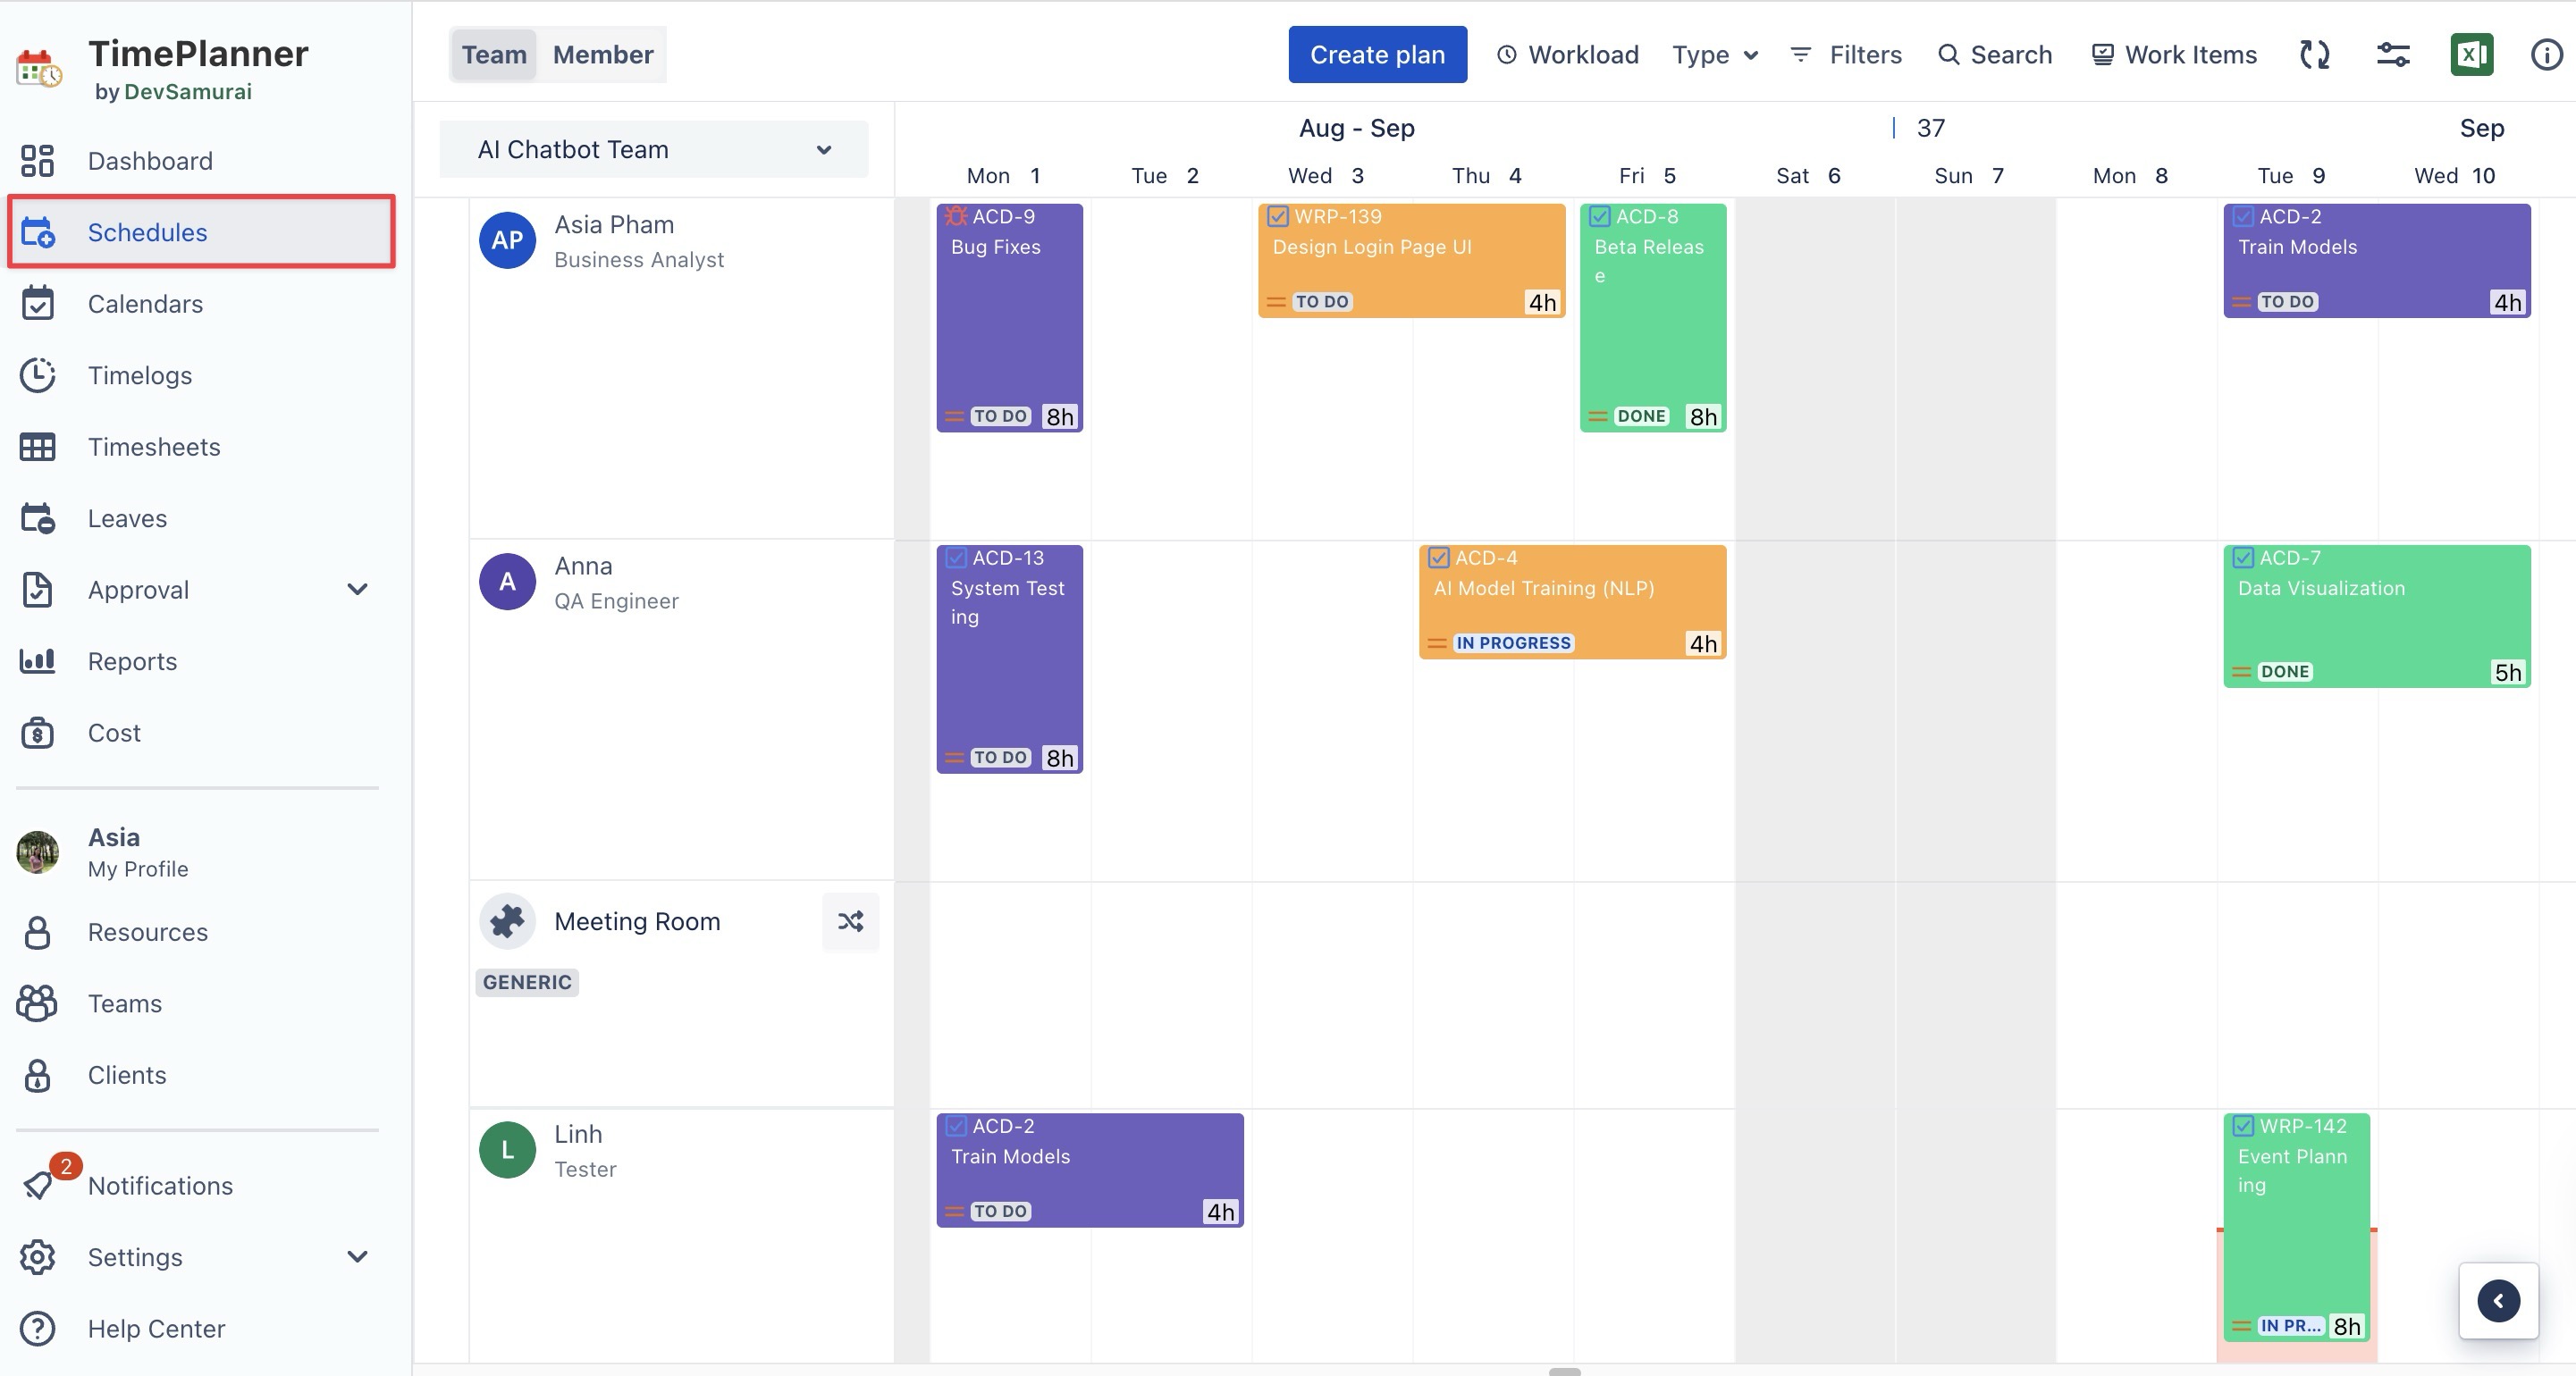
-
Click

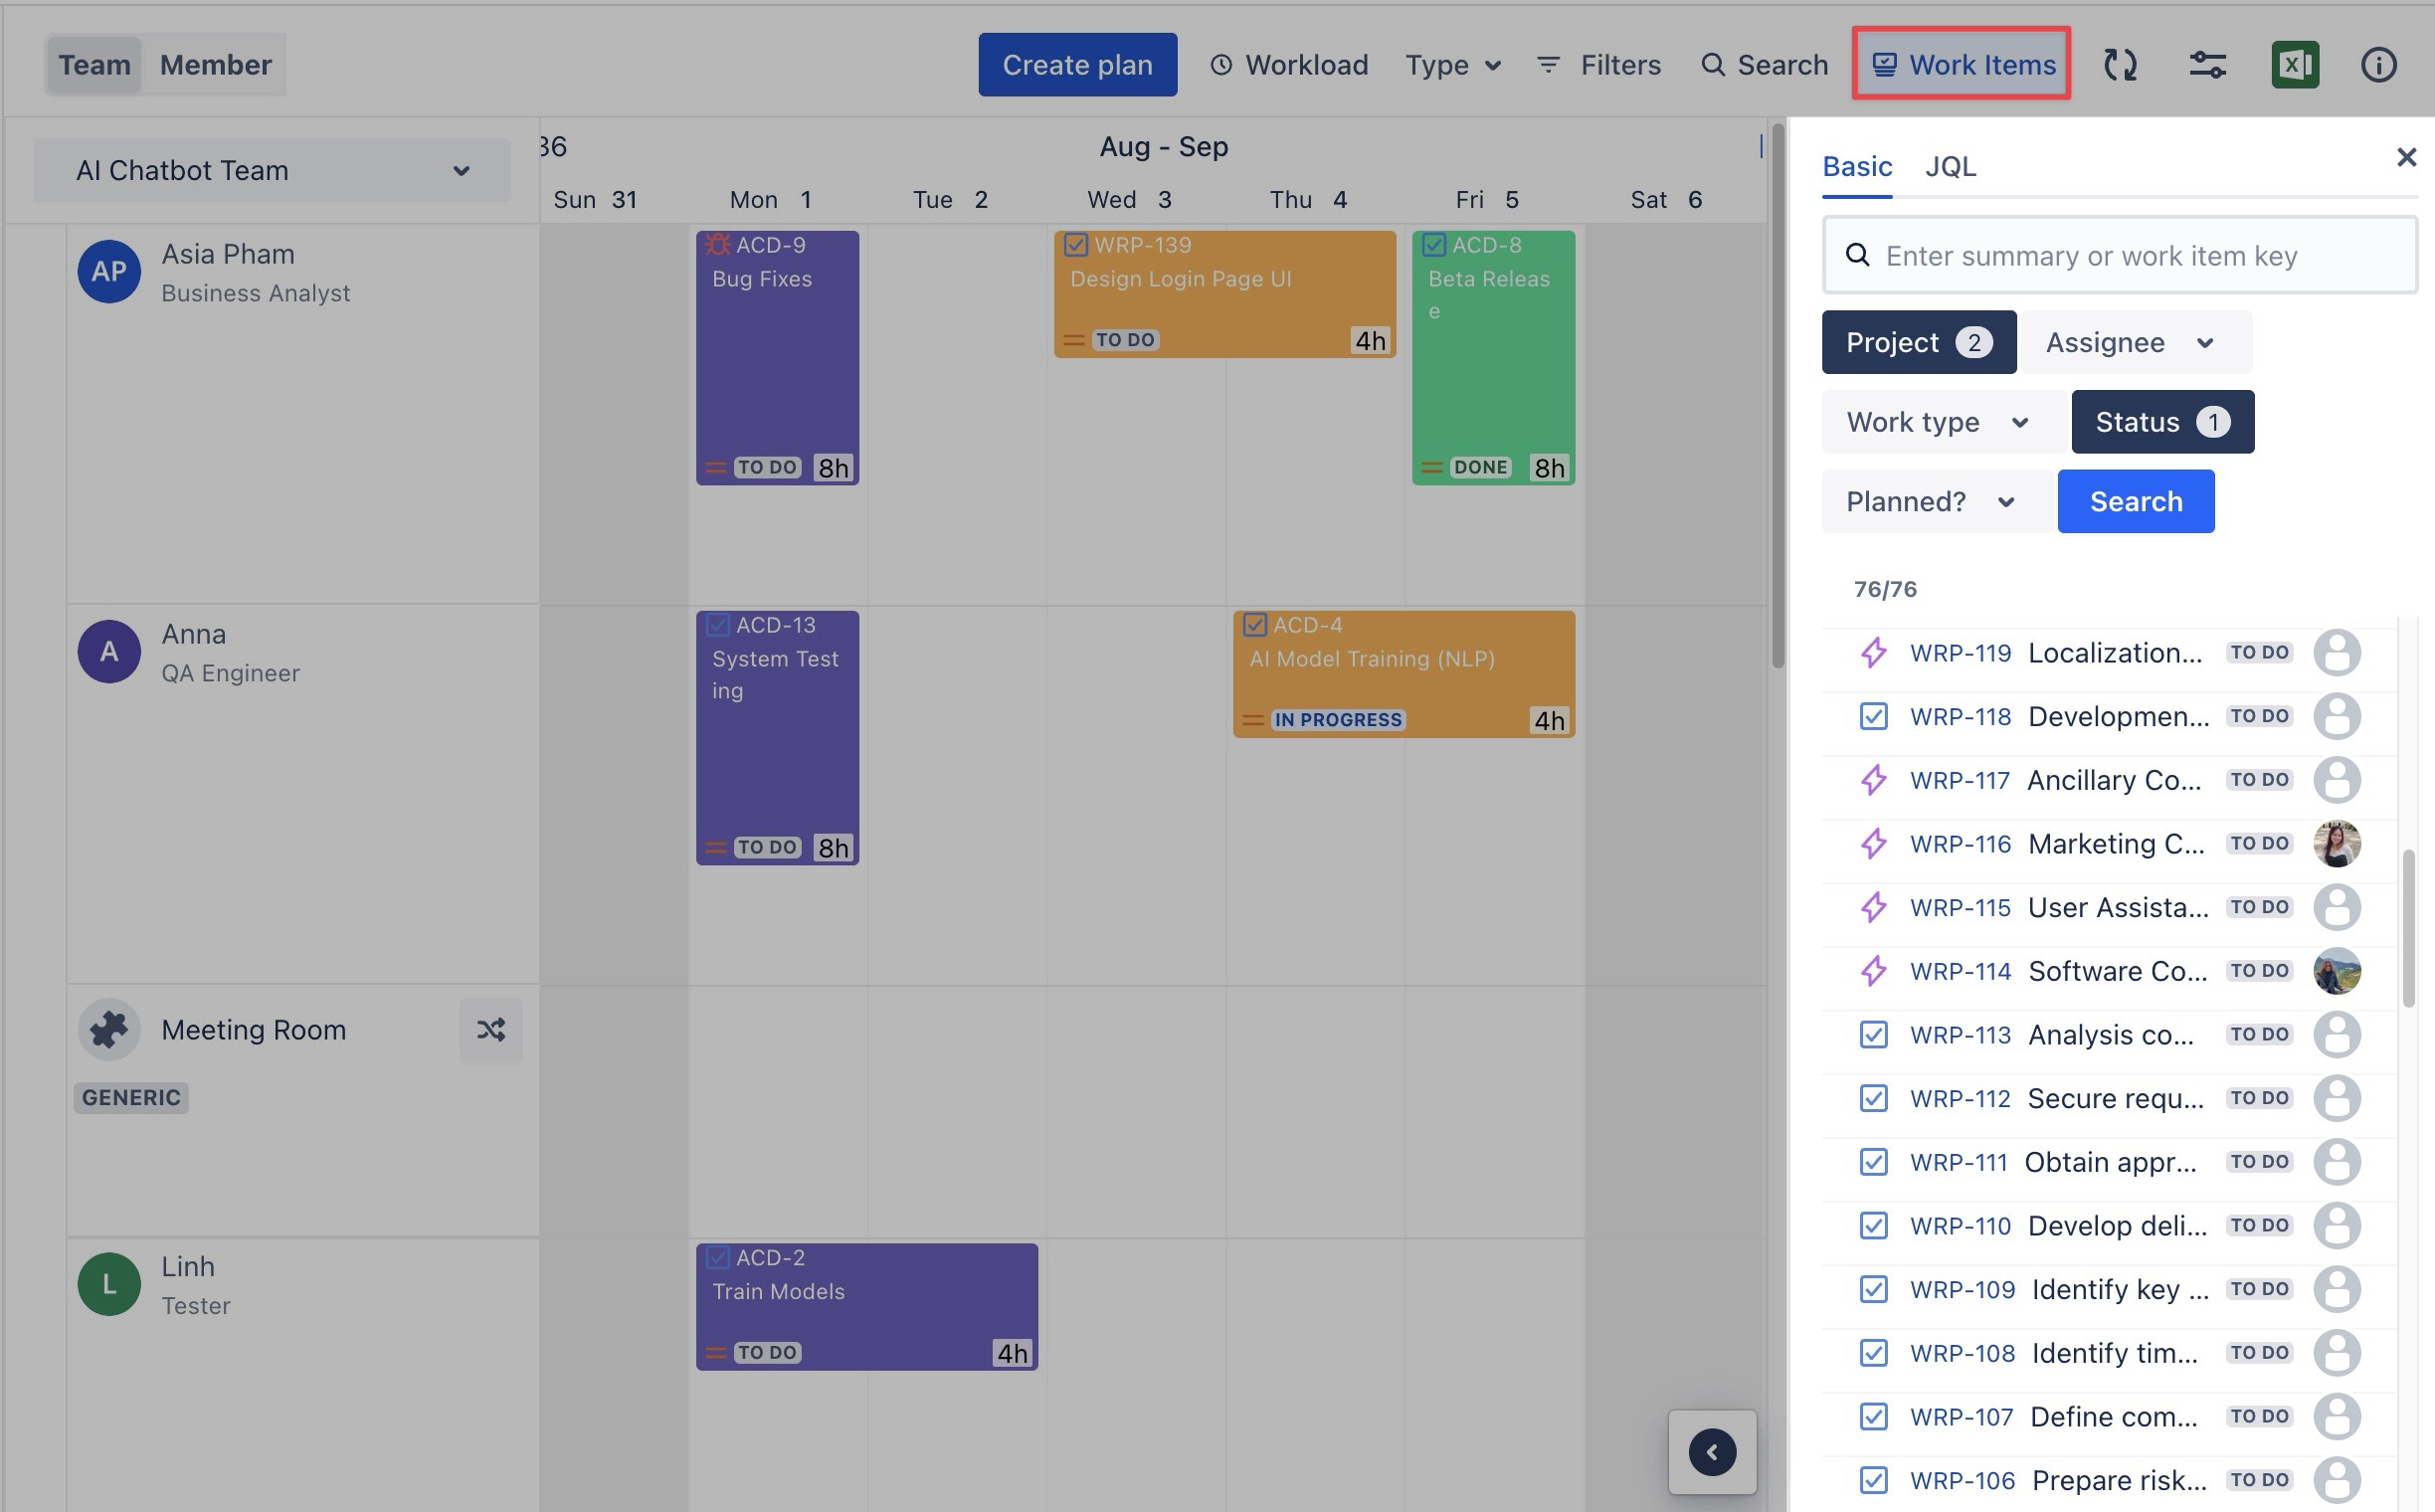
-
Find a work item by typing its summary or key in the search bar:
You can also use filters to quickly narrow down the list:
-
Basic Filter: Use fields like
Project,Assignee,Work type,Status, orPlannedto filter tasks.
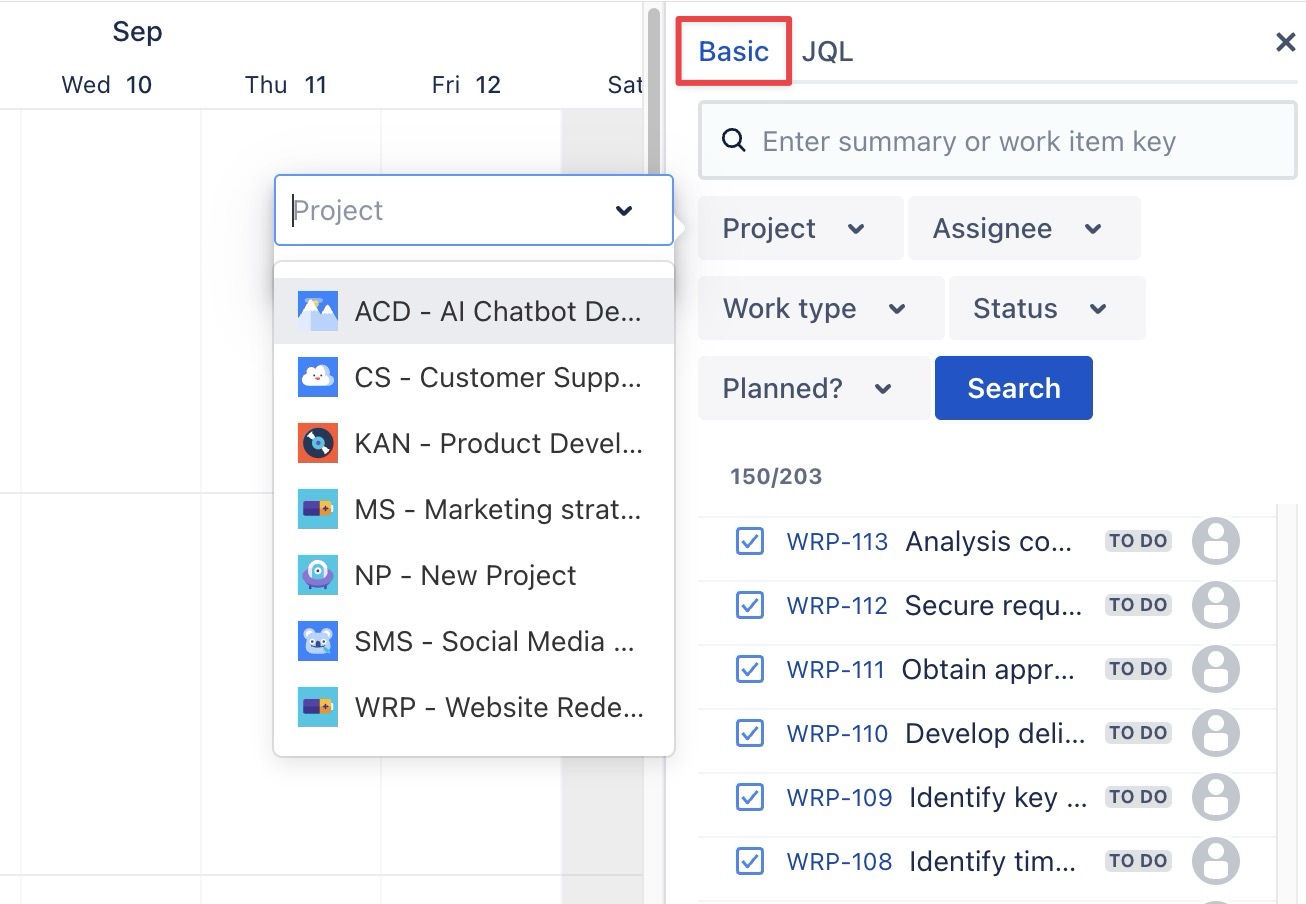
-
JQL (Jira Query Language): For more advanced filtering, switch to the JQL tab and enter your custom query.

Tip: Use the Planned or Status filters to quickly find unscheduled or to-do tasks, helping you stay on top of project progress.
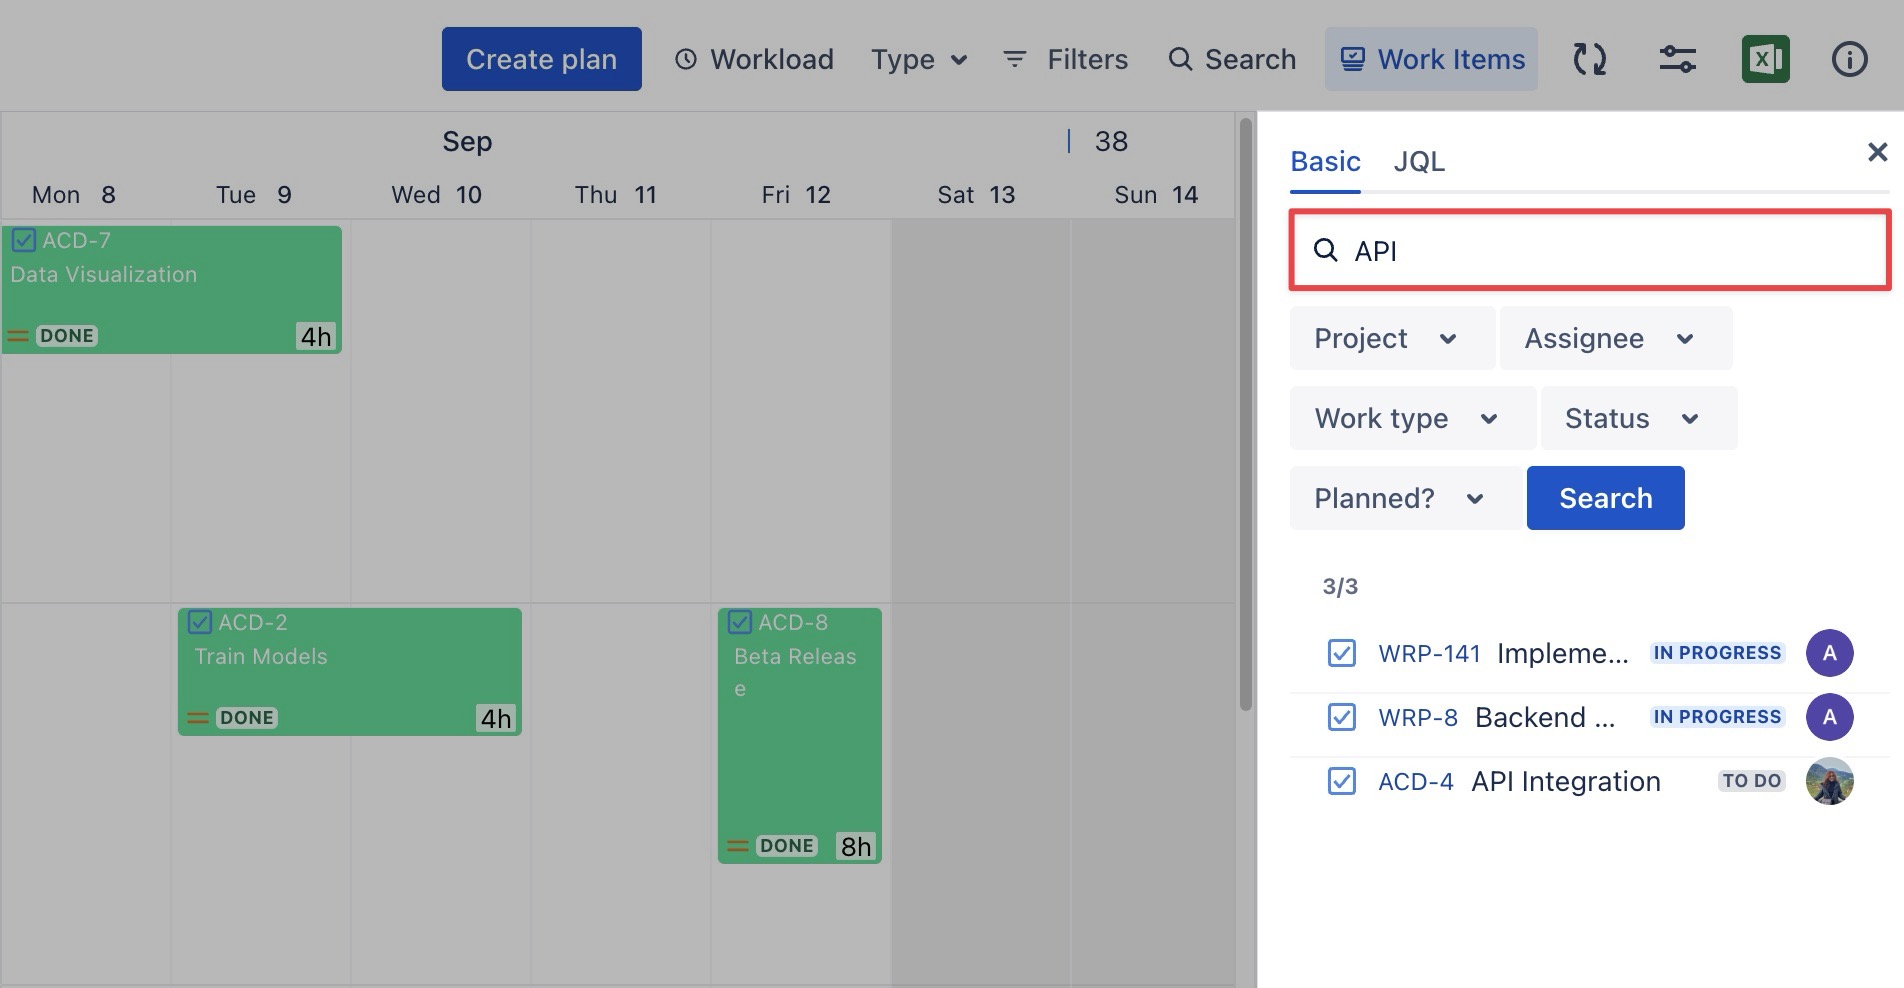
-
Once the work items appear in the list, drag and drop the work items onto the board to plan and assign.
Generic Resources’ Planning can not be counted in the workload scheme and holiday scheme.
Planning via the Planning Dialog
The Planning Dialog is a pop-up window that lets you quickly plan tasks onto the board. You can open this dialog in two ways:
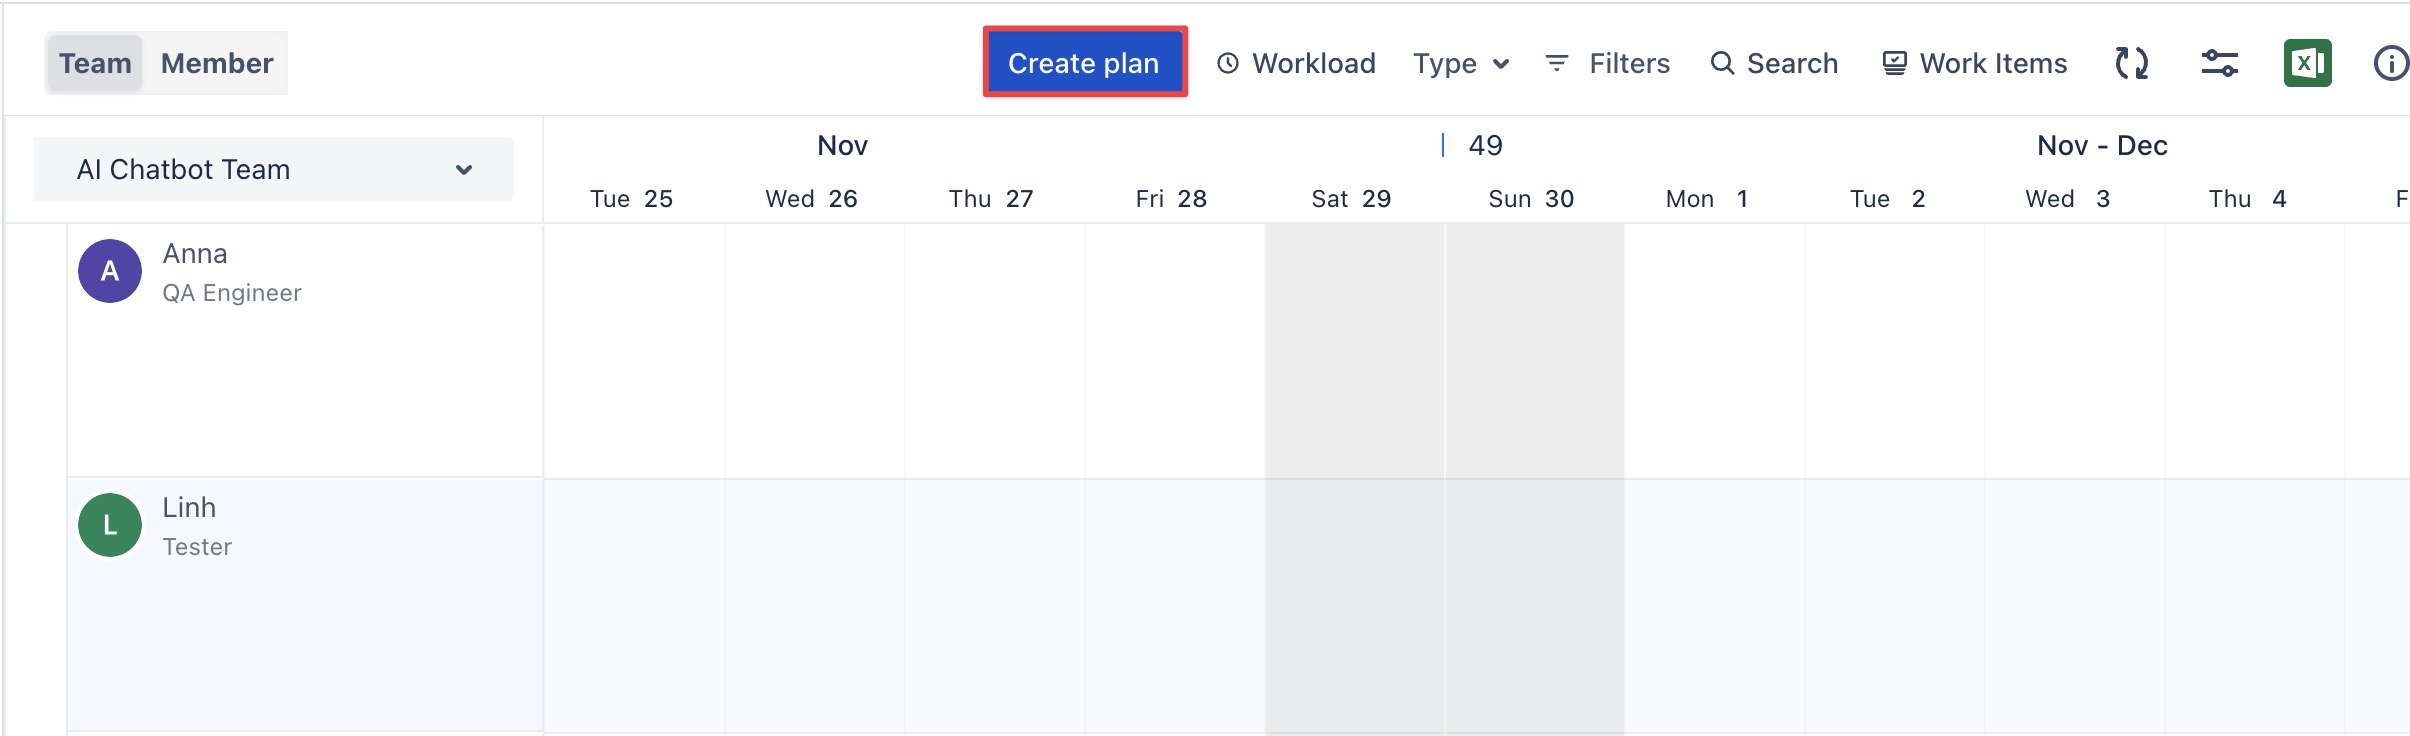
Option 1: Using the “Create plan” button
-
Go to the
-
Click

-
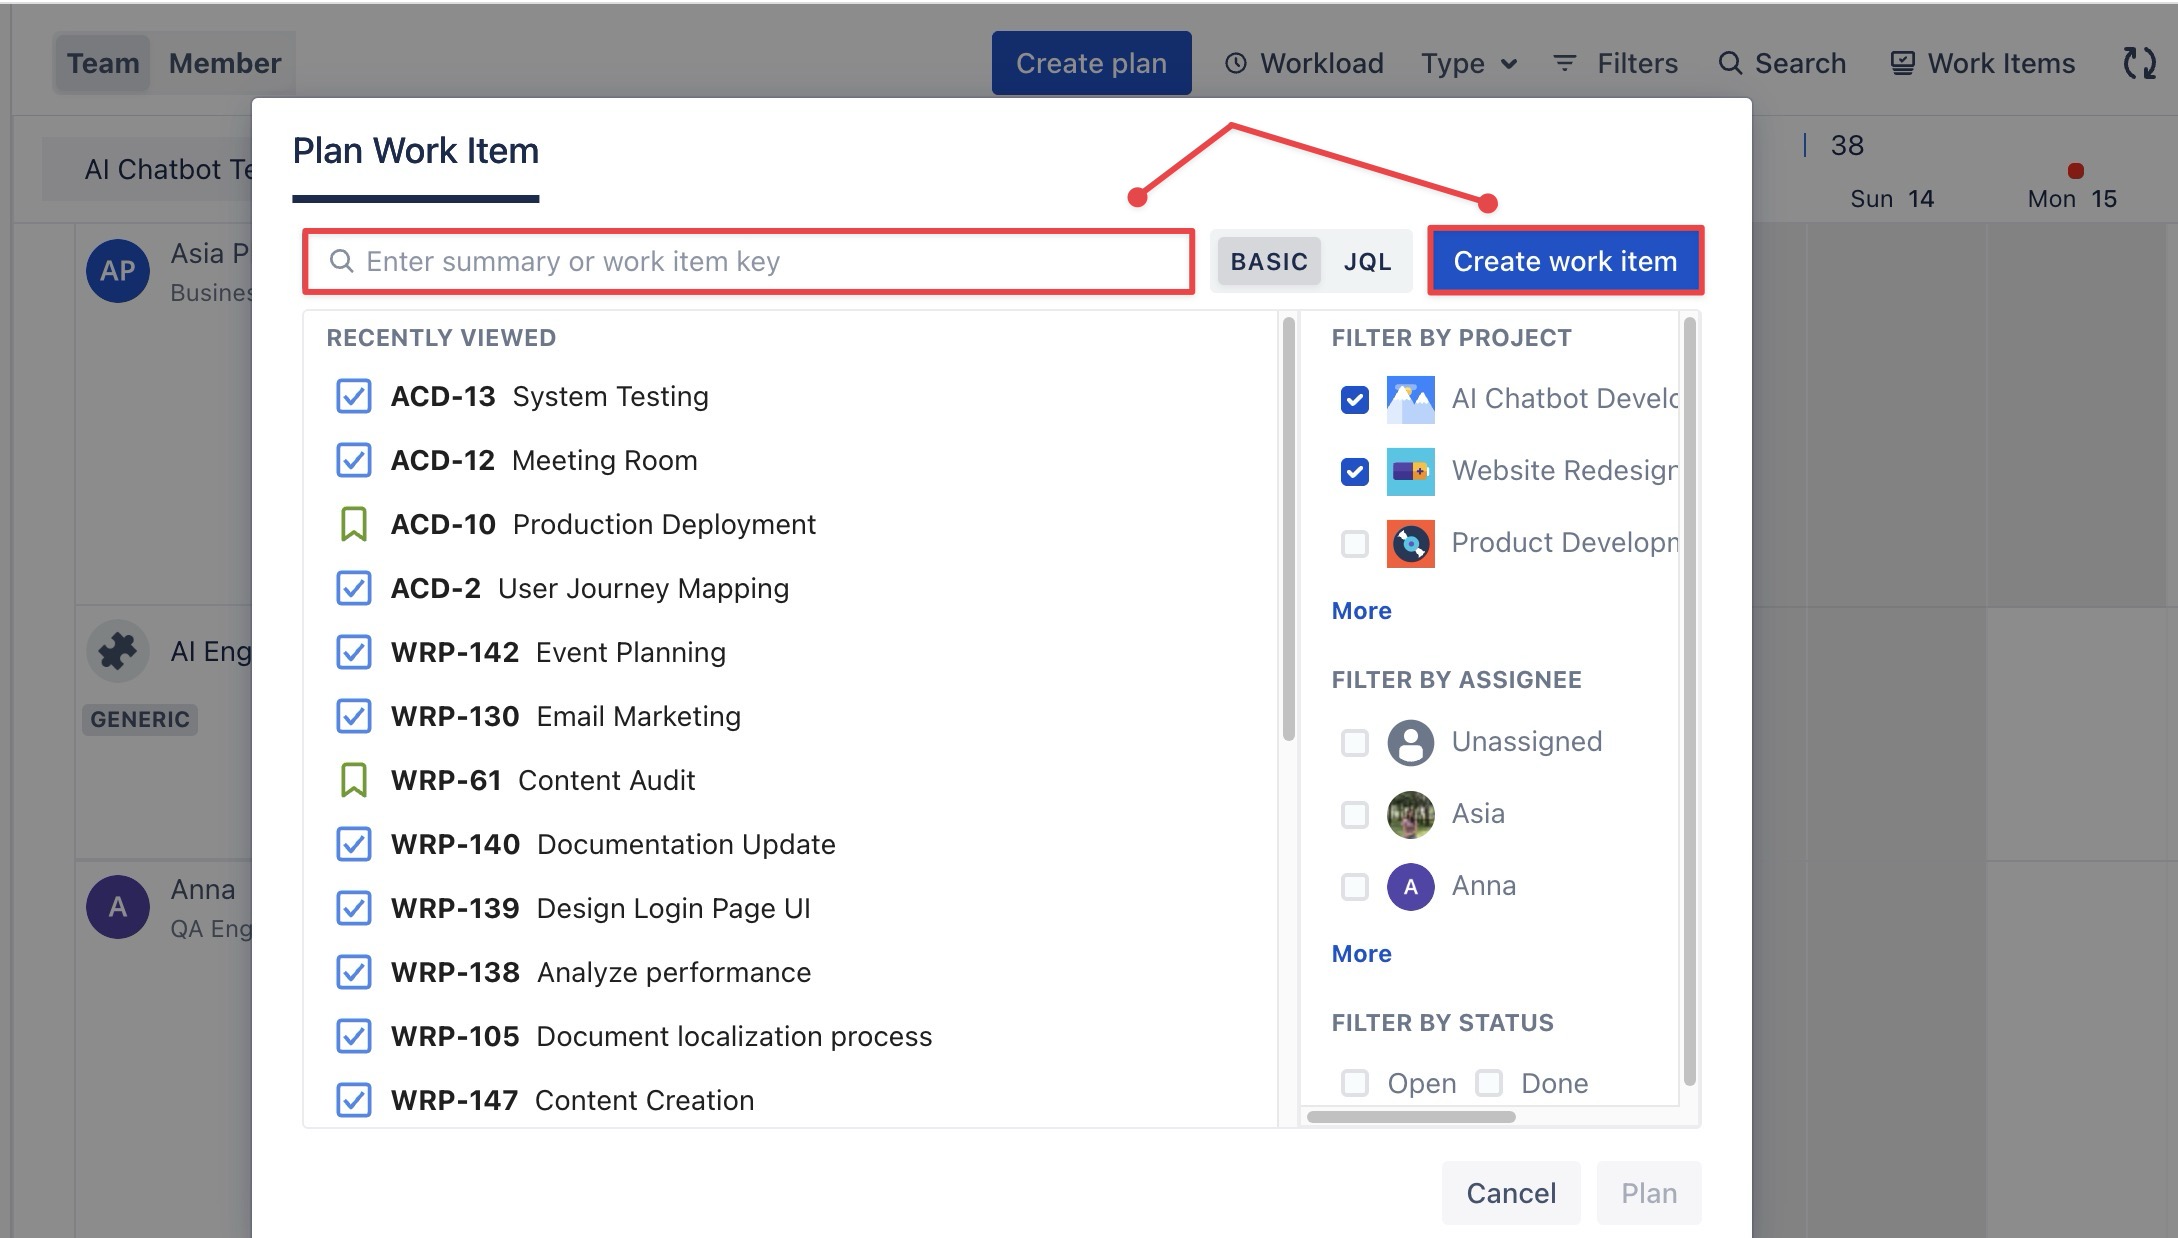
In the Planning Dialog, you can:
-
Search for an existing work item by entering the summary or work item key in the search bar.
-
Create a new work item by clicking the

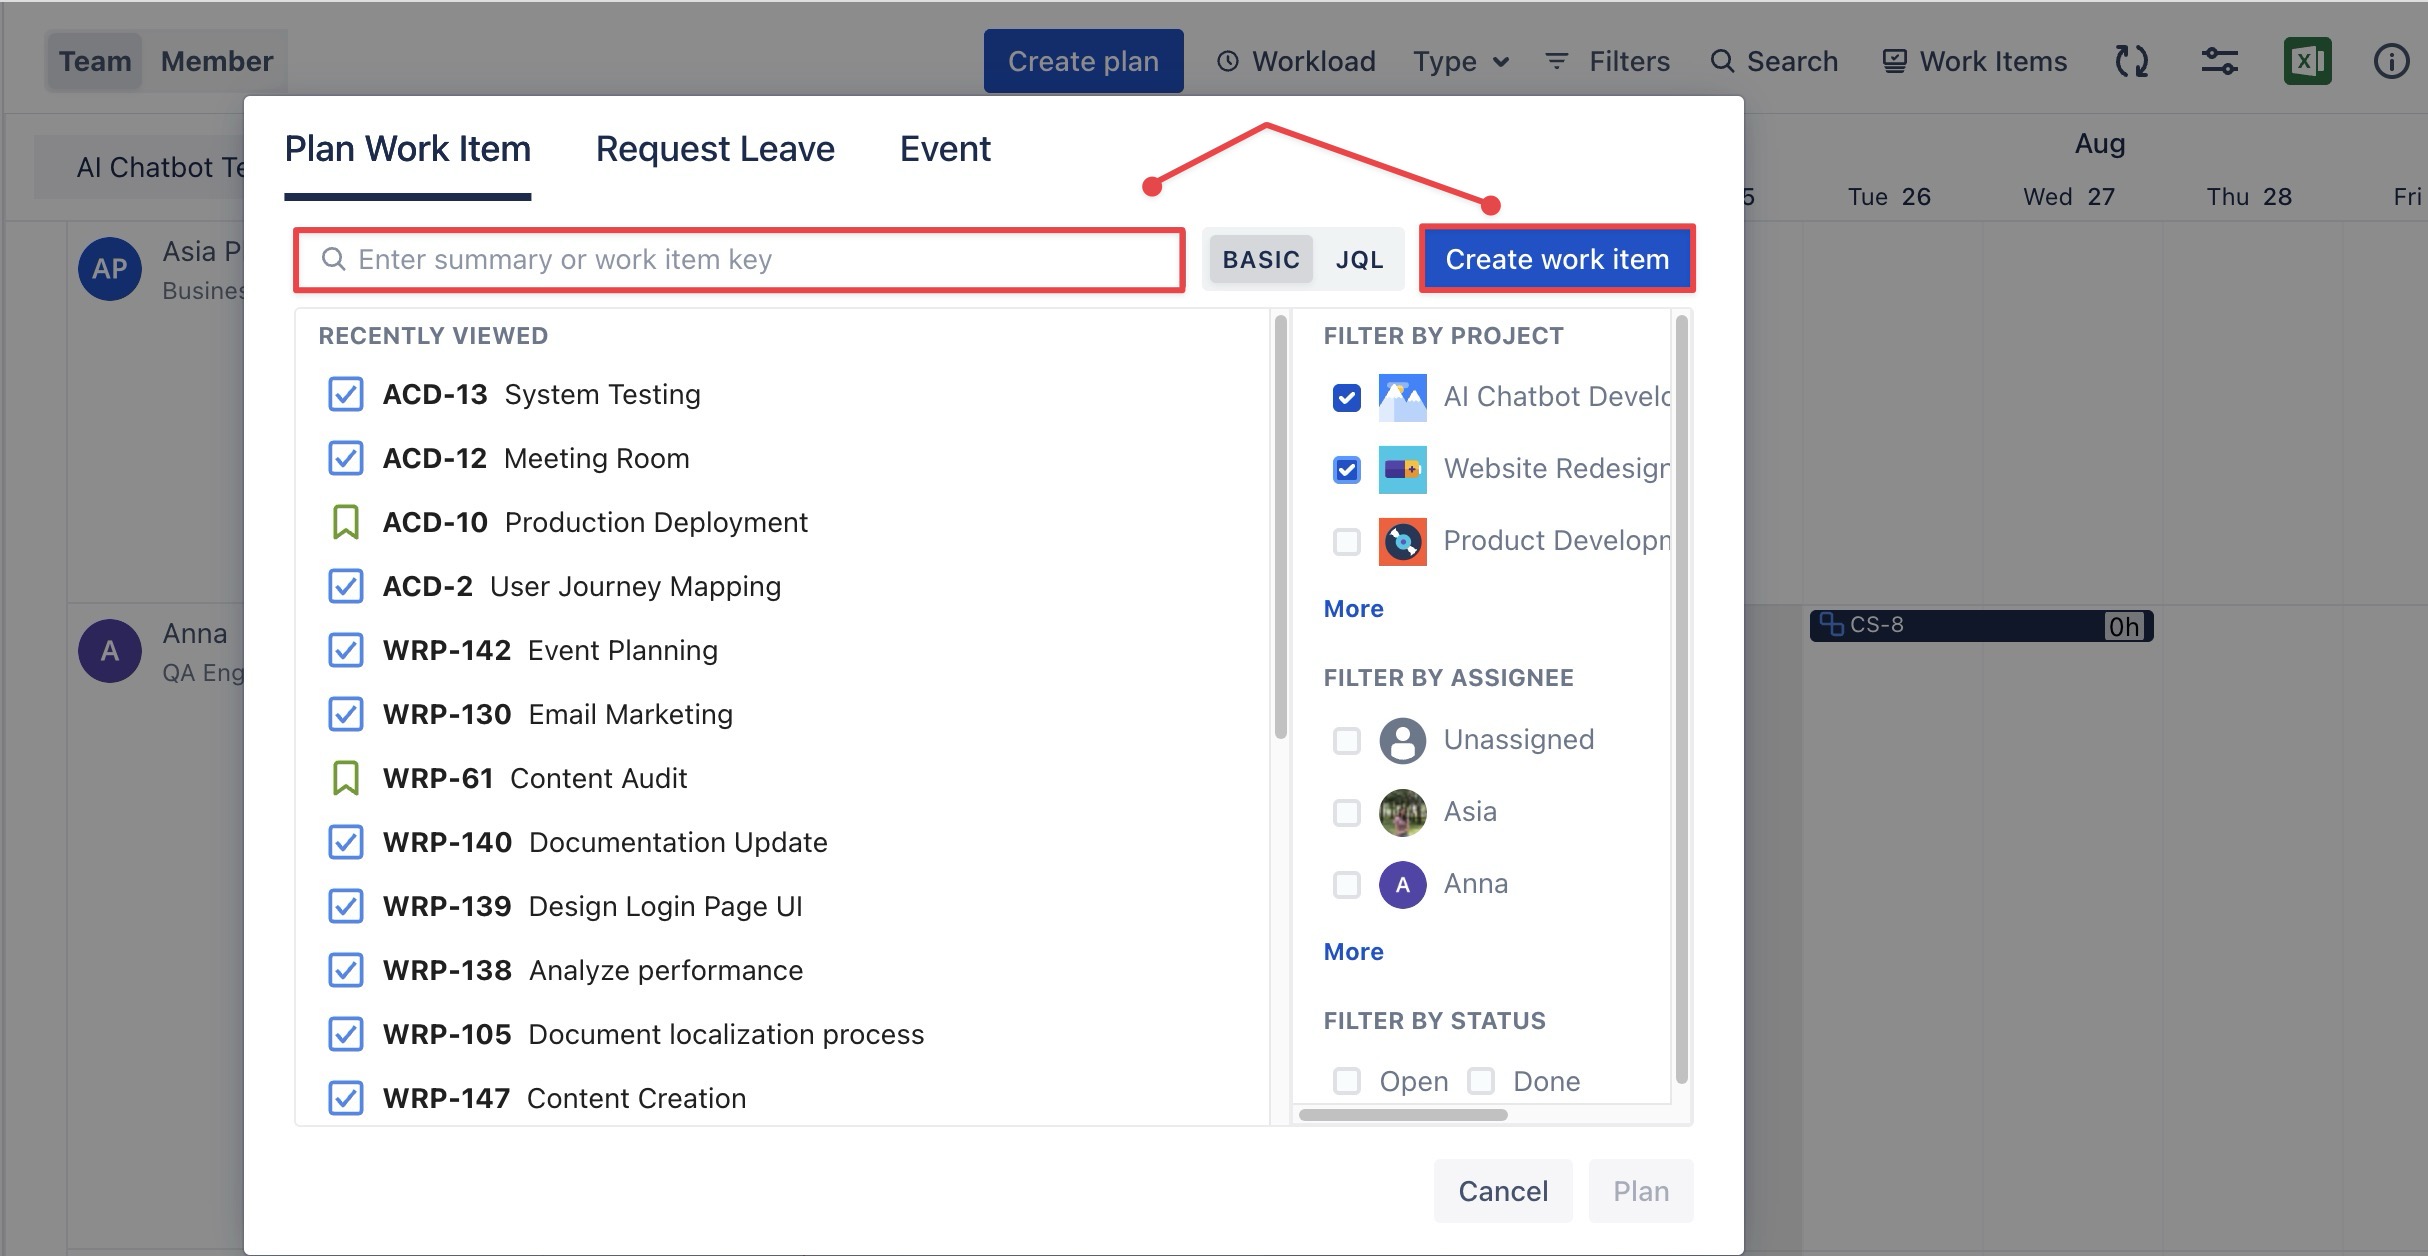
-
Complete the task planning by filling in the following fields:
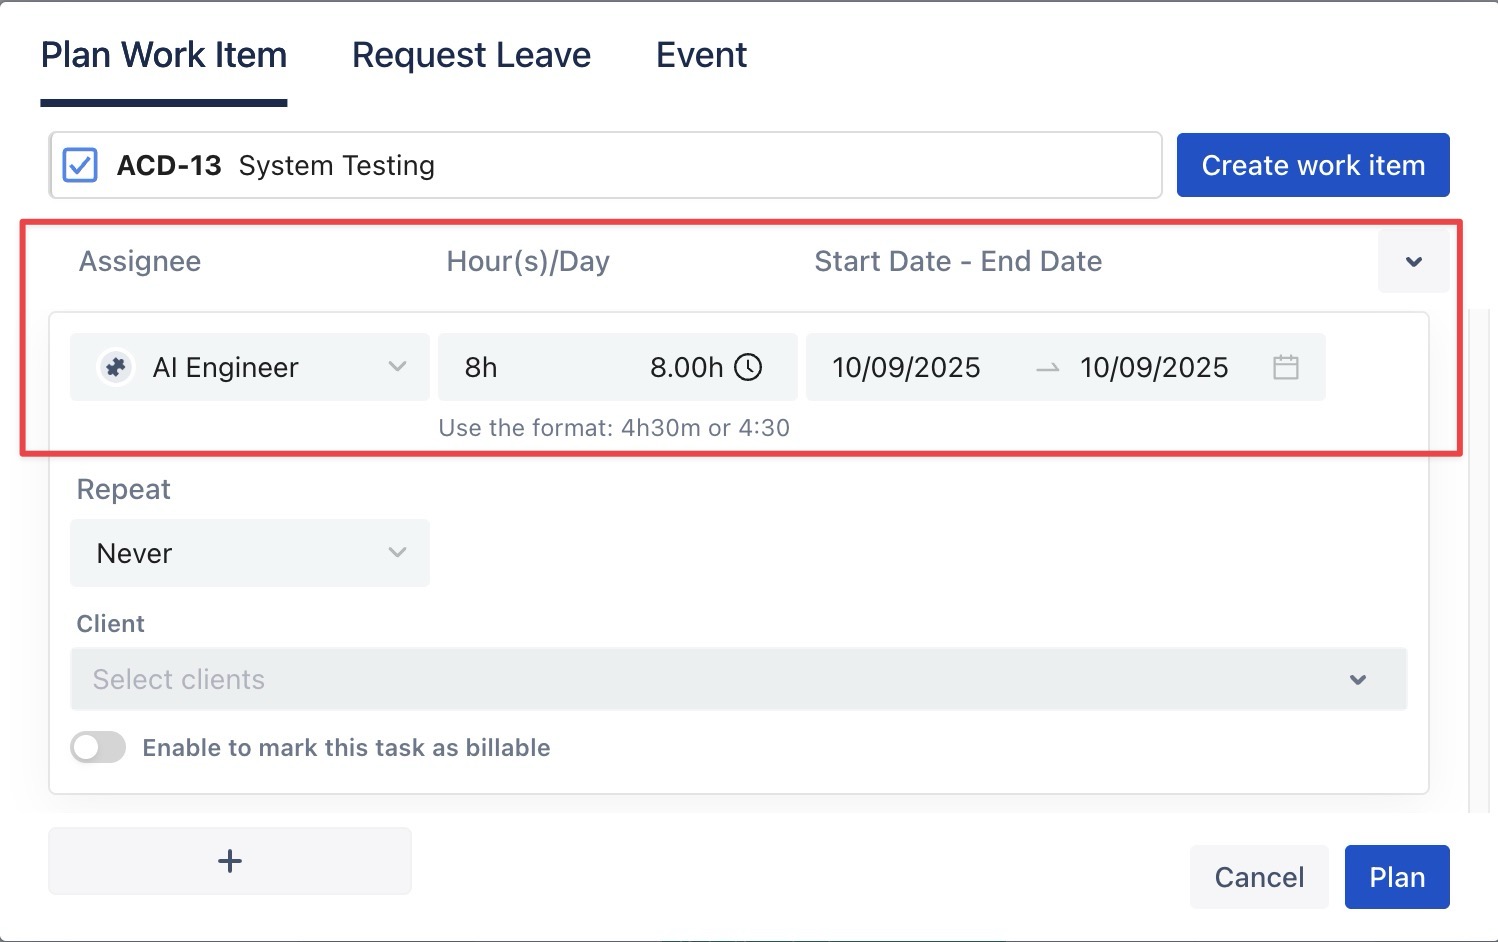
-
Assignee: The team member responsible for completing the task.
-
Start date: The date the task is scheduled to begin.
-
End date: The date by which the task should be completed.
-
Hours/Day: Refer to how many working hours per day a person is planned to work on the task.
When using the Planning Dialog:
-
The Assignee is automatically set to the user creating the task.
-
The Start date and End date are based on the dates you selected while planning.
-
The Hours/Day field defaults to 8 hours.
You can adjust these fields as needed.
-
Click

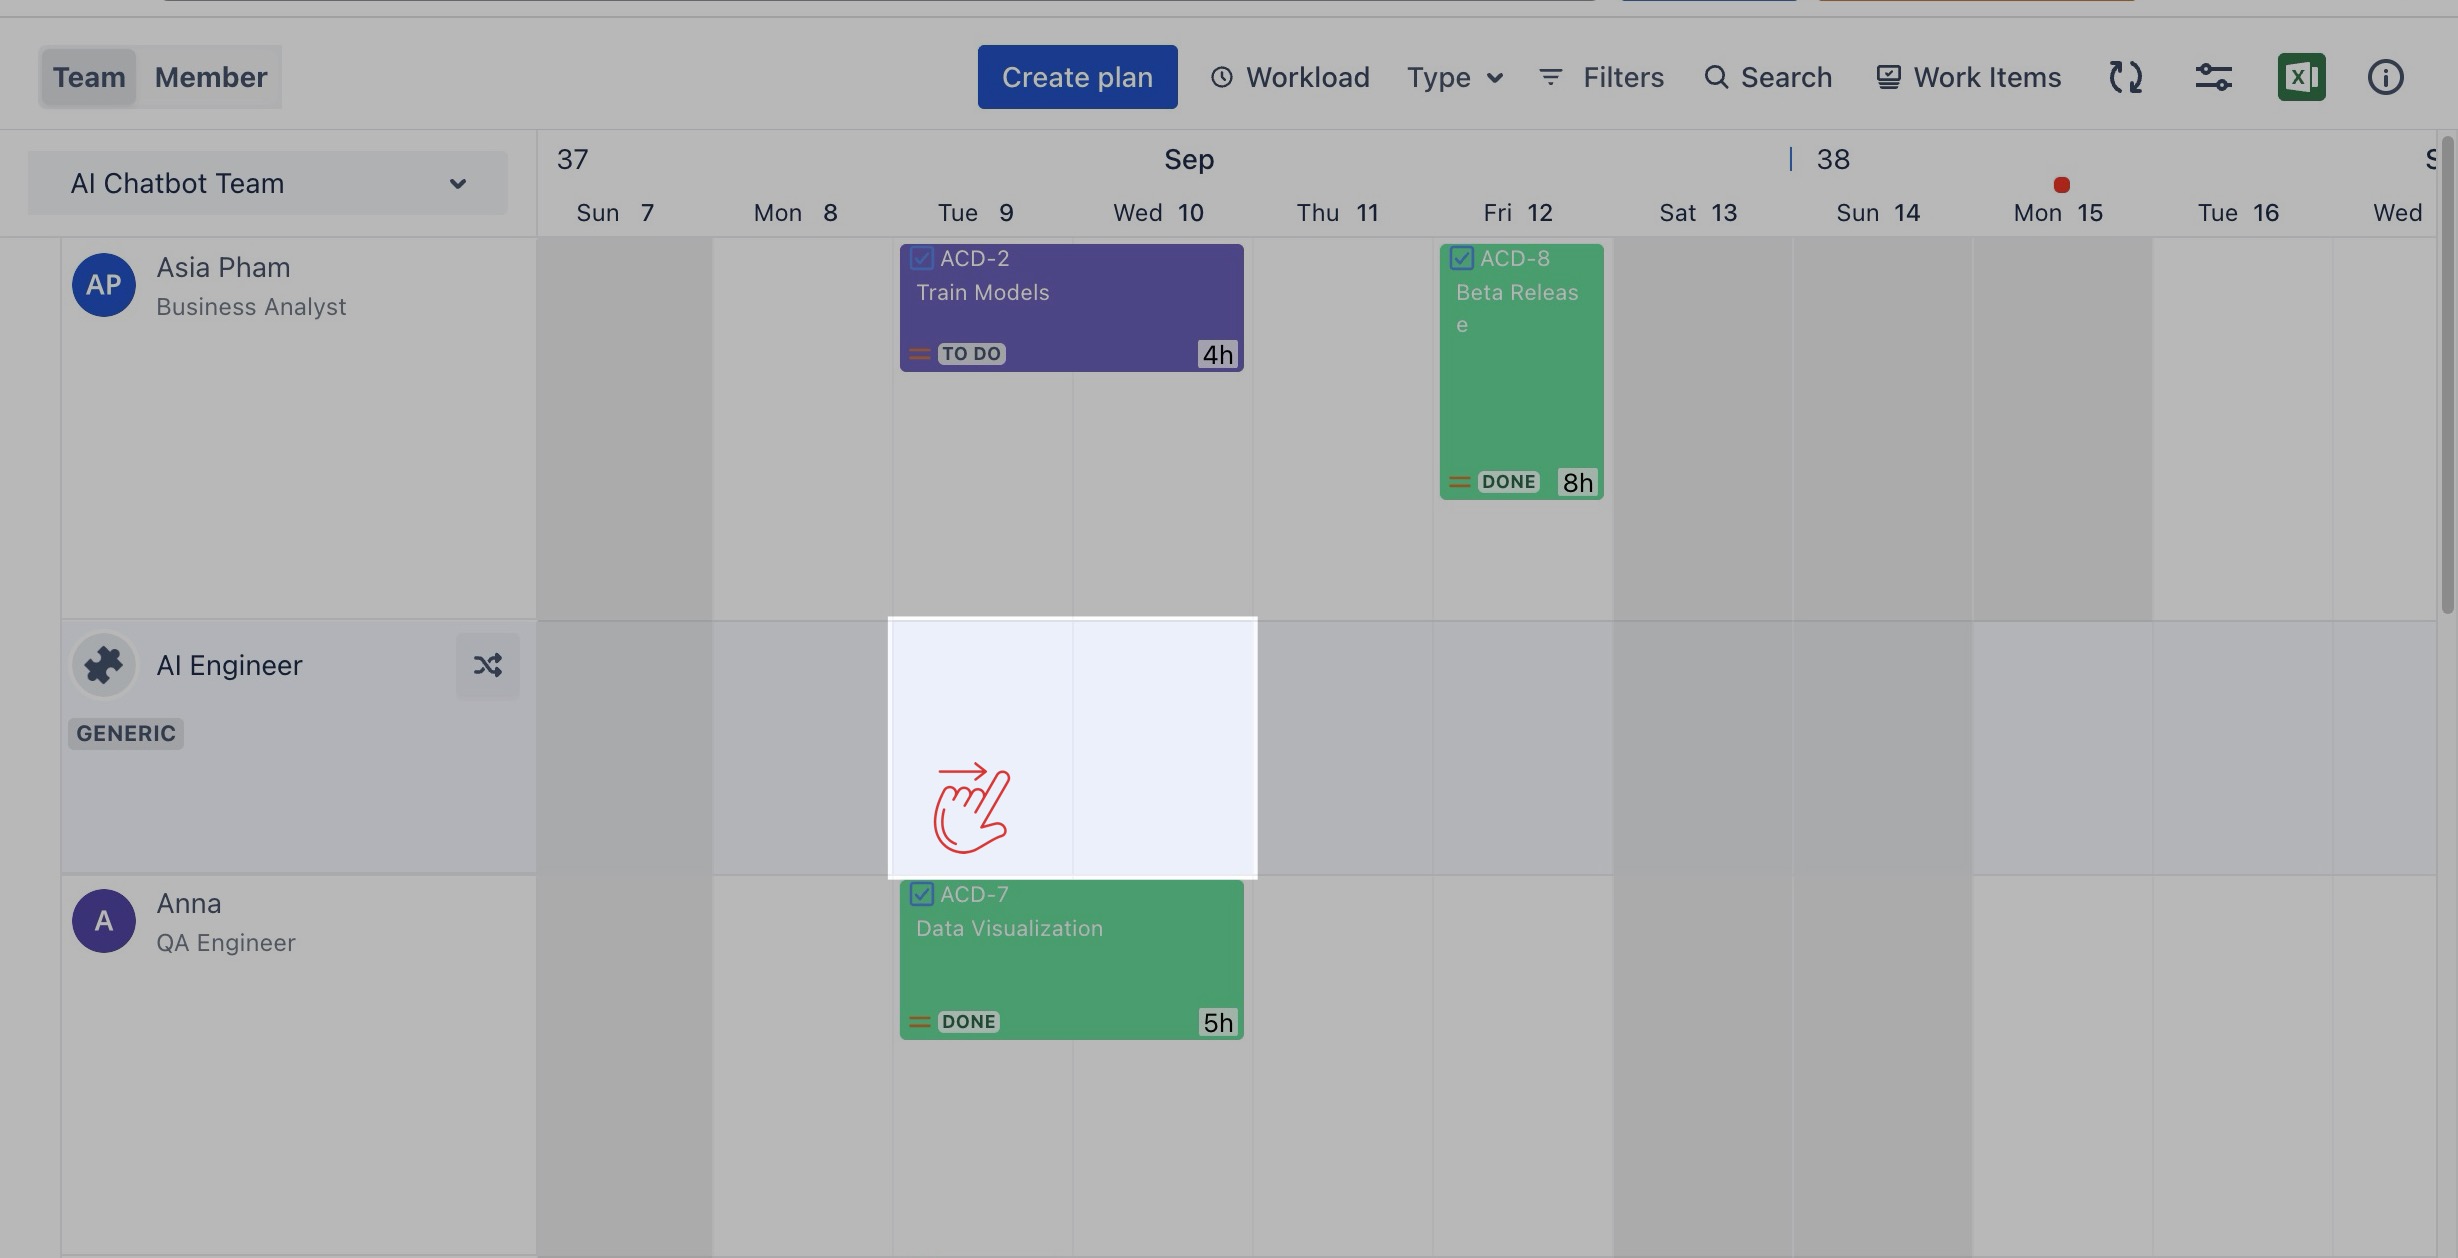
Option 2: Clicking on a date or date range
You can create a plan directly from the Schedule Board by selecting a date or range of dates on a member’s row.
Steps:
-
Go to the
-
Click on a specific date or drag across a range of dates to open the Planning Dialog.
-
In the Planning Dialog, you can:
-
Search for an existing work item by entering the summary or work item key in the search bar.
-
Create a new work item by clicking the
-
Complete the task planning by filling in the following fields:

-
Assignee: The team member responsible for completing the task.
-
Start date: The date the task is scheduled to begin.
-
End date: The date by which the task should be completed.
-
Hours/Day: Refer to how many working hours per day a person is planned to work on the task.
-
Click
Tip: You can open the Planning Dialog from the Calendar Board and plan tasks using the same process as on the Schedule Board.
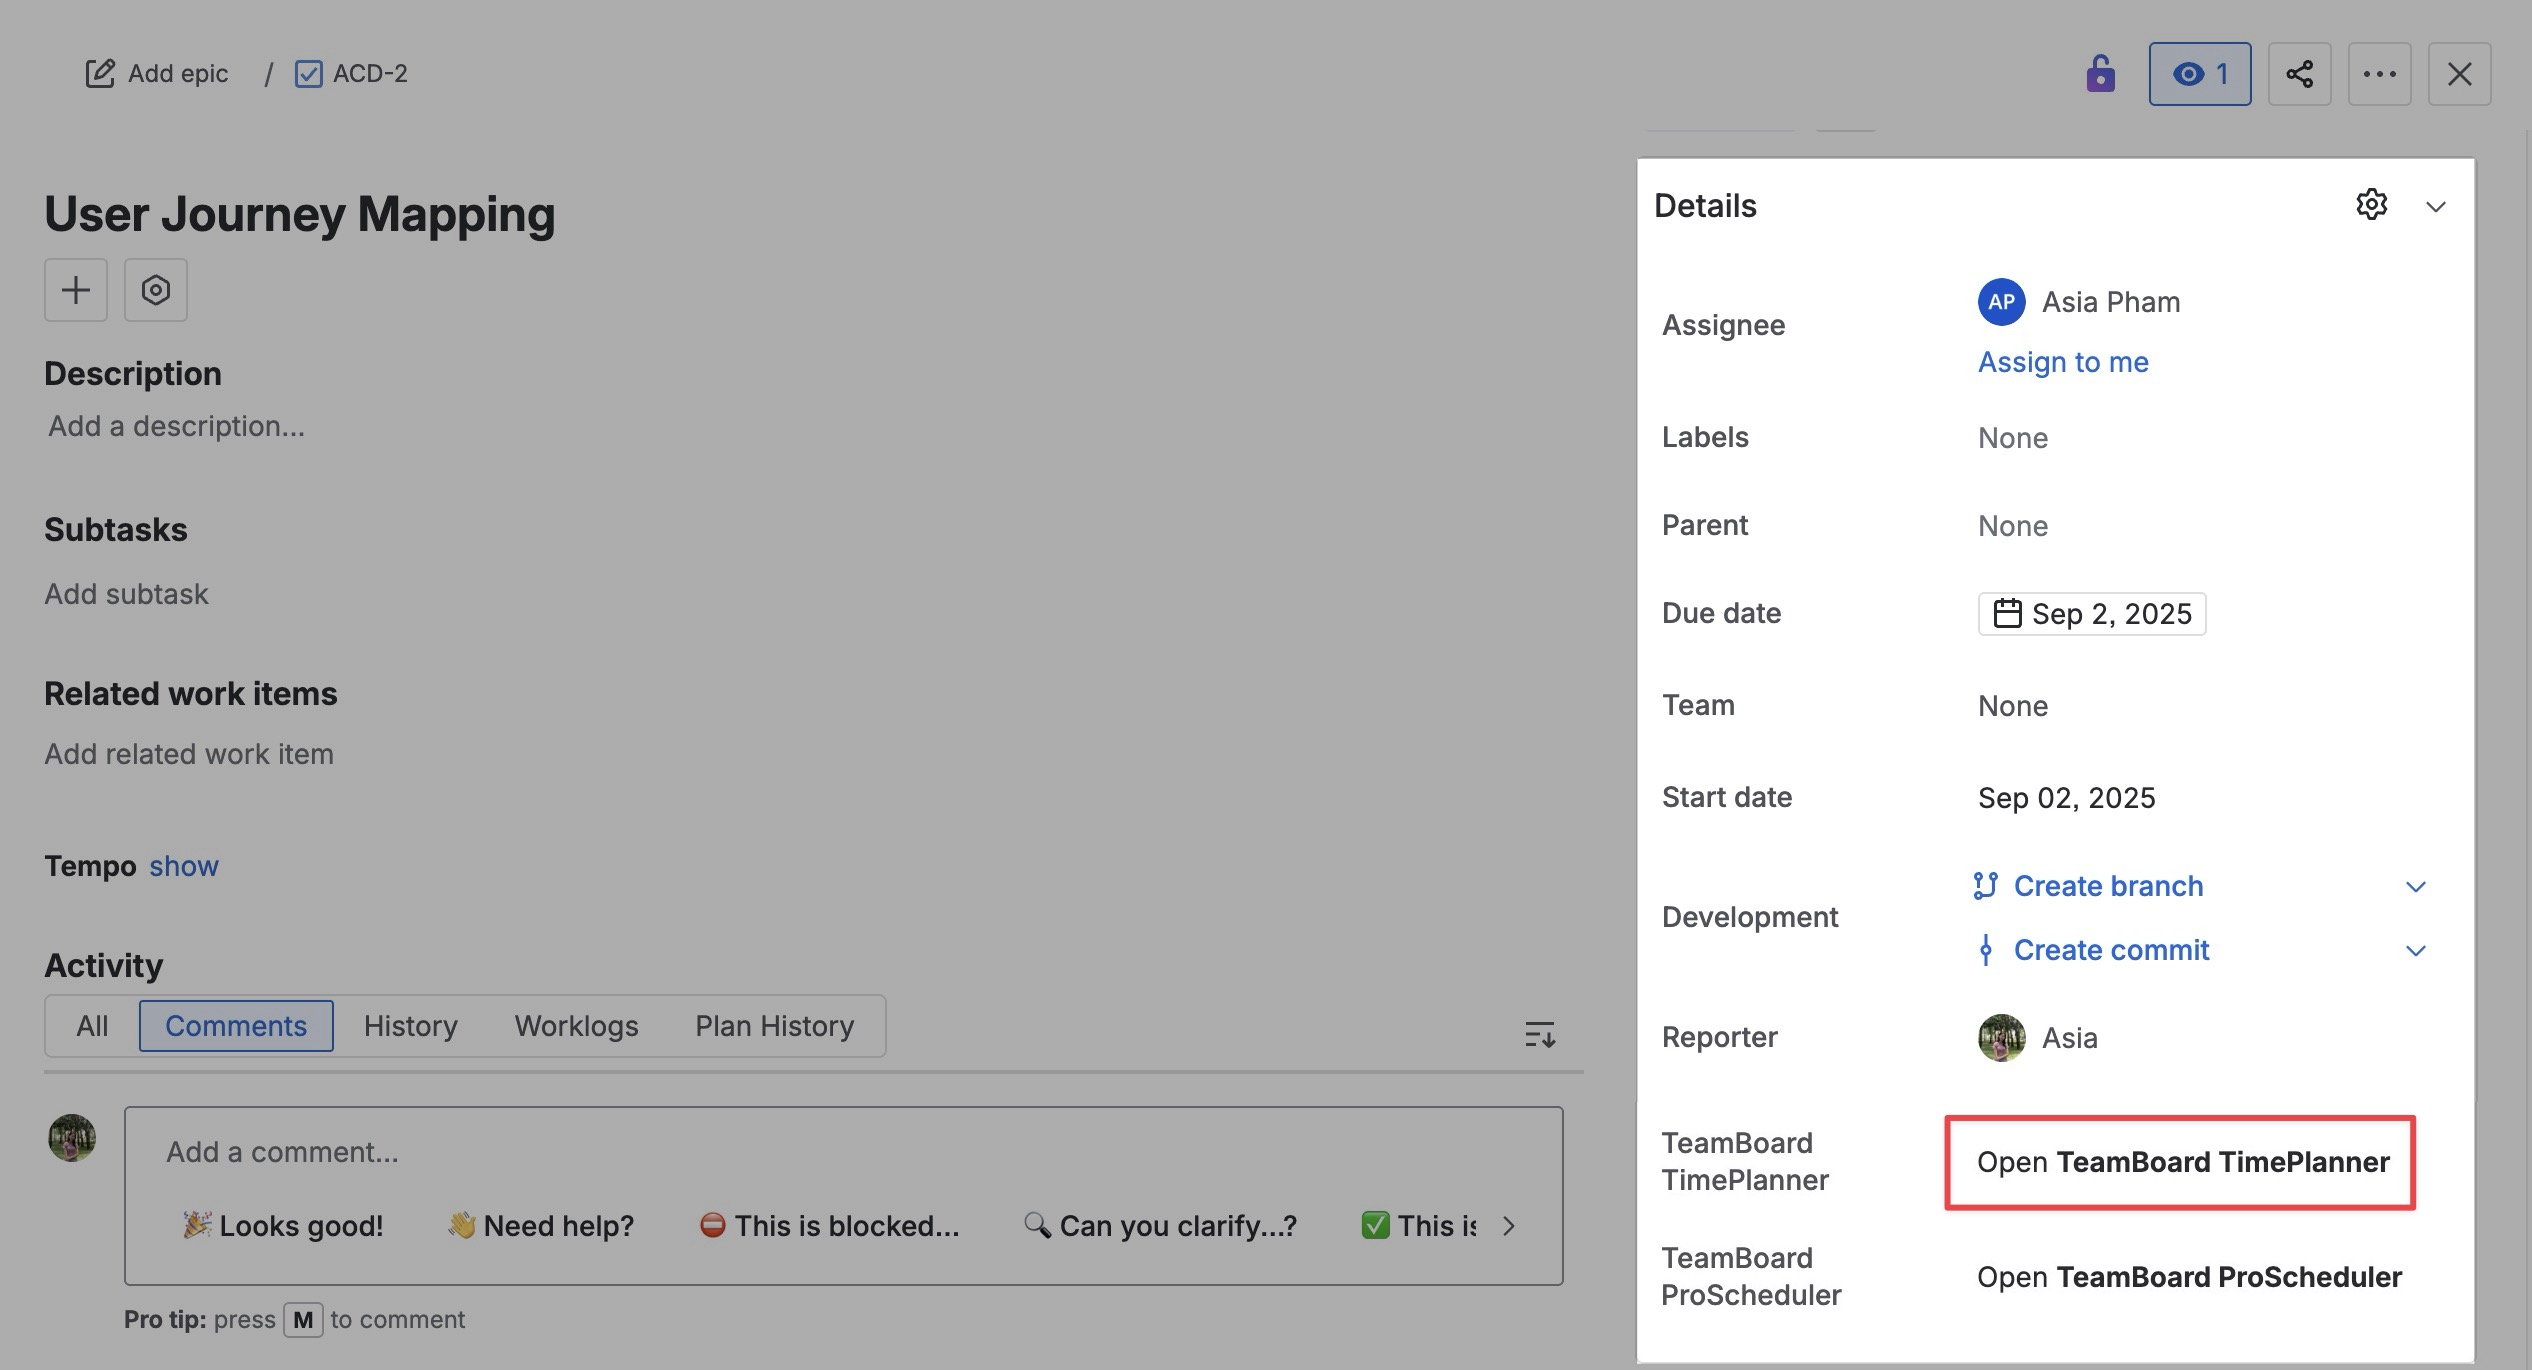
Planning via the Jira Work Item Detail Panel
TeamBoard TimePlanner allows users to plan tasks directly within the Work Item Detail panel without needing to switch to the TimePlanner app. Here is how to do it:
-
Open the Jira Work Item for the task you want to plan.
-
In the right-hand panel, click Open TeamBoard TimePlanner. This will open the planning section for the selected task.
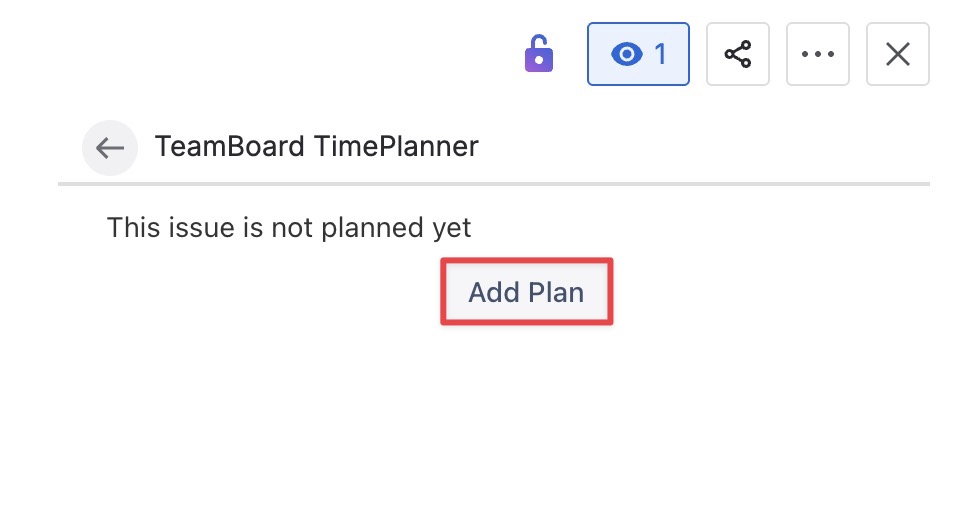
-
In the planning section, click

-
Complete the task planning by filling in the following fields:
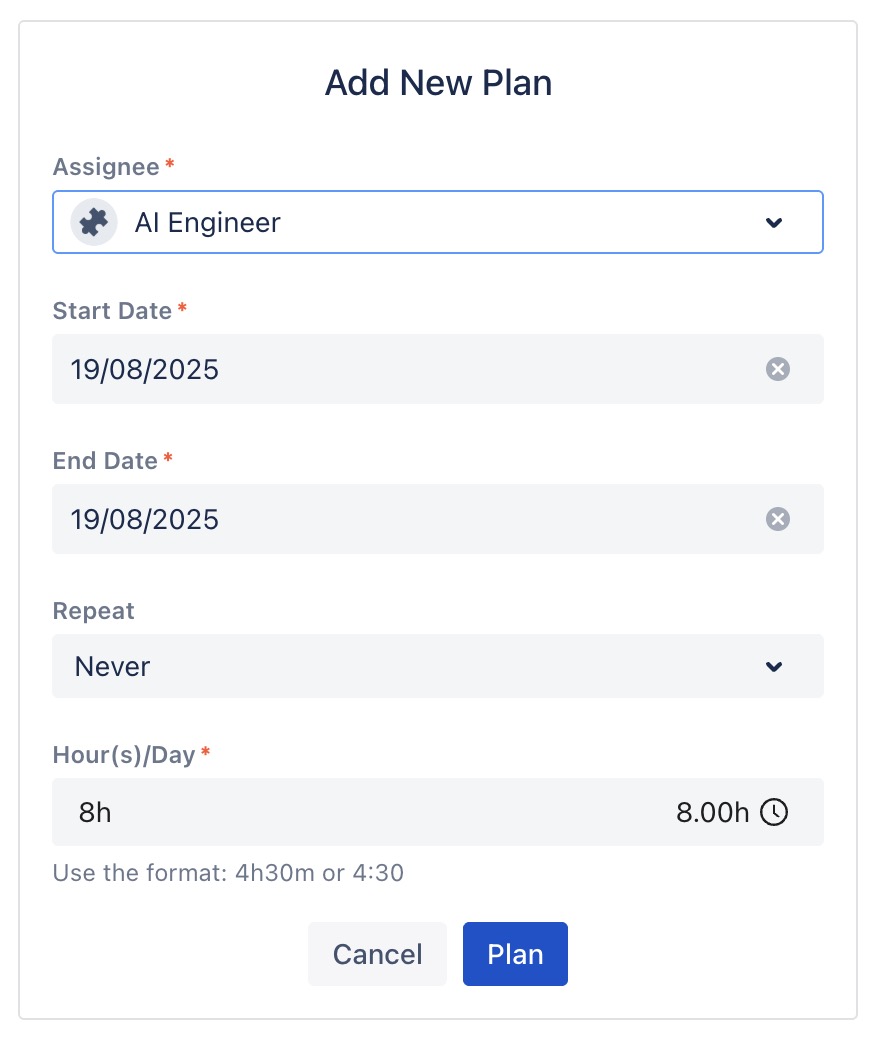
-
Member: The team member responsible for completing the task.
-
Start date: The date the task is scheduled to begin.
-
End date: The date by which the task should be completed.
-
Hours/Day: Refer to how many working hours per day a person is planned to work on the task.
Once you set the task plan, it automatically appears in the TeamBoard TimePlanner. For visual planning, go to the Schedule Board or Calendar Board. You can easily drag and drop the task to adjust its timeline.
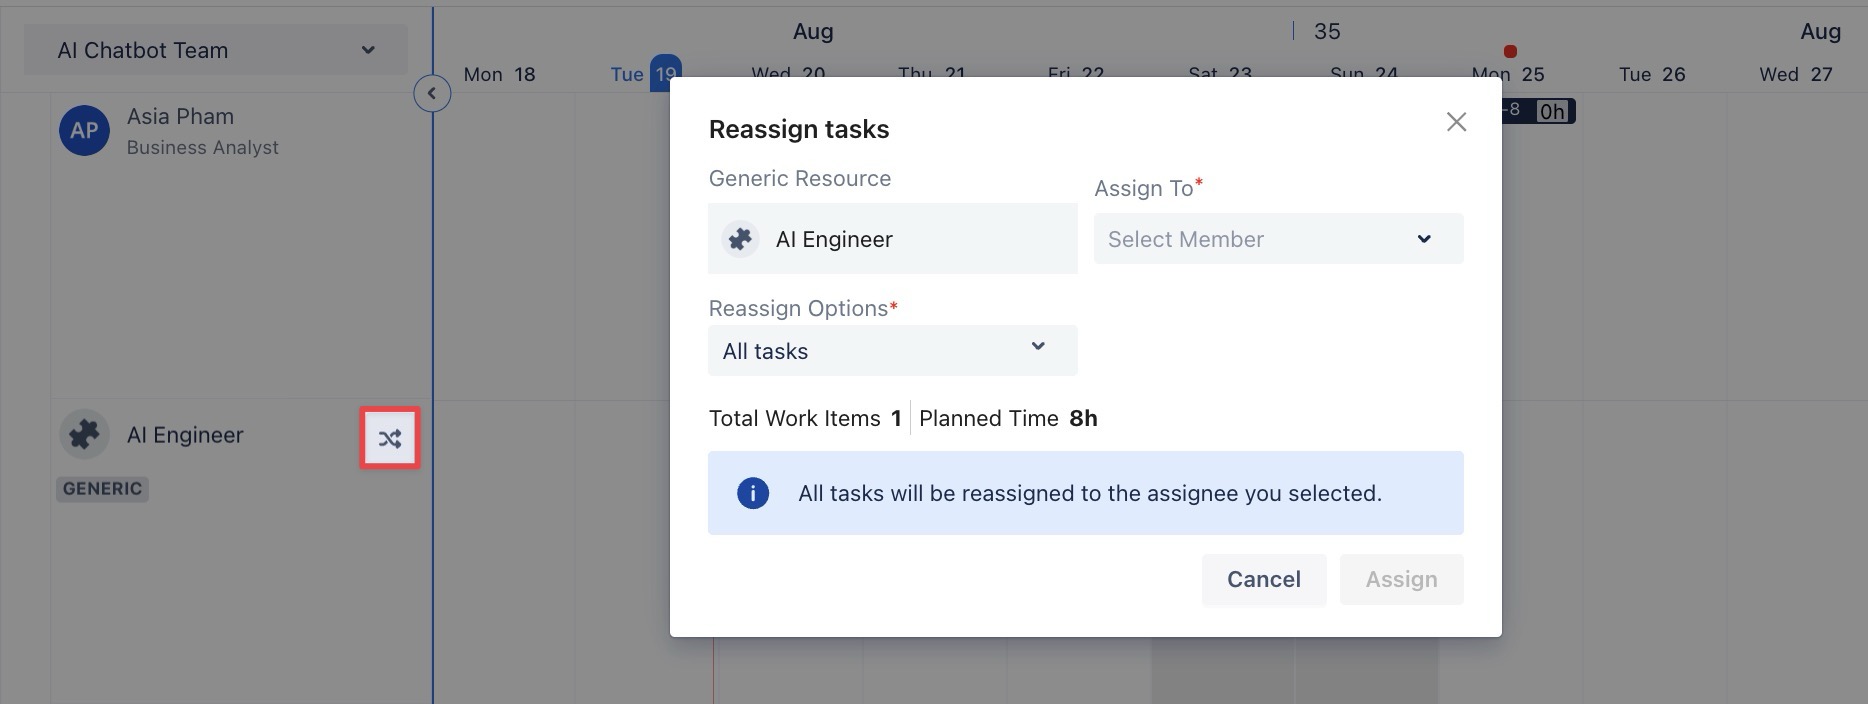
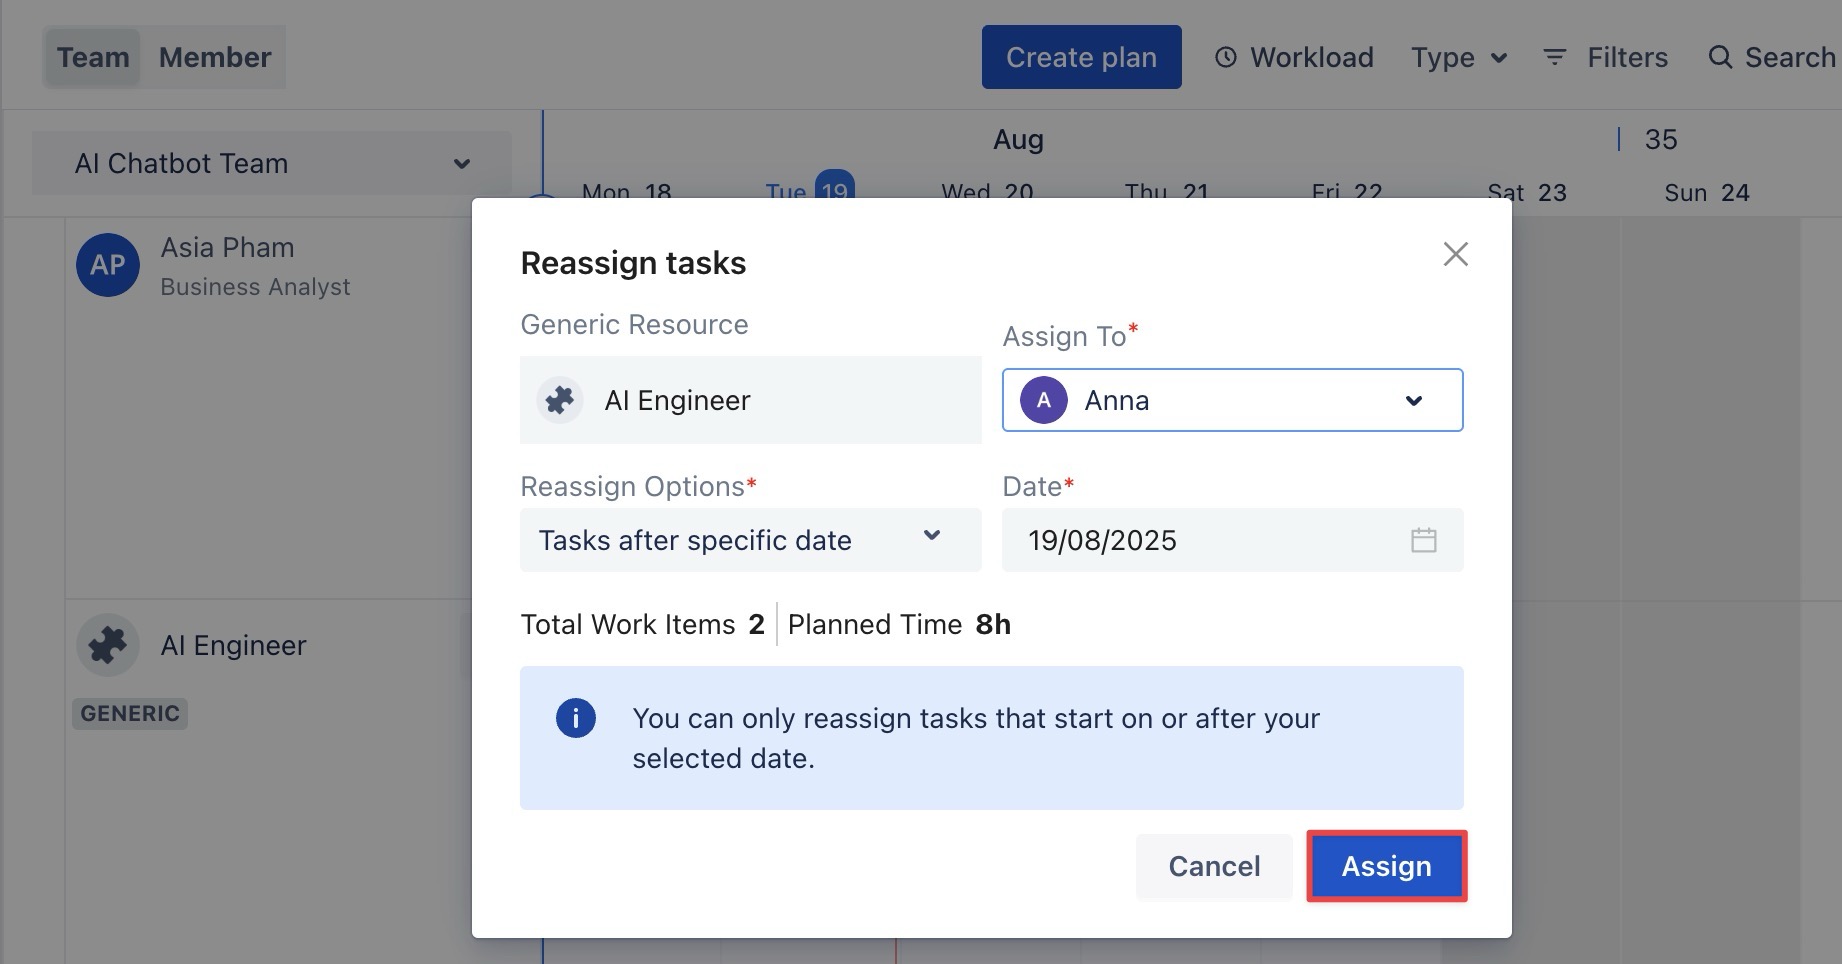
Reassigning tasks
When your team identifies a suitable person to take over a task, you can reassign the Generic Resource to that individual.
Here's how to do it:
-
Click the Reassign icon (

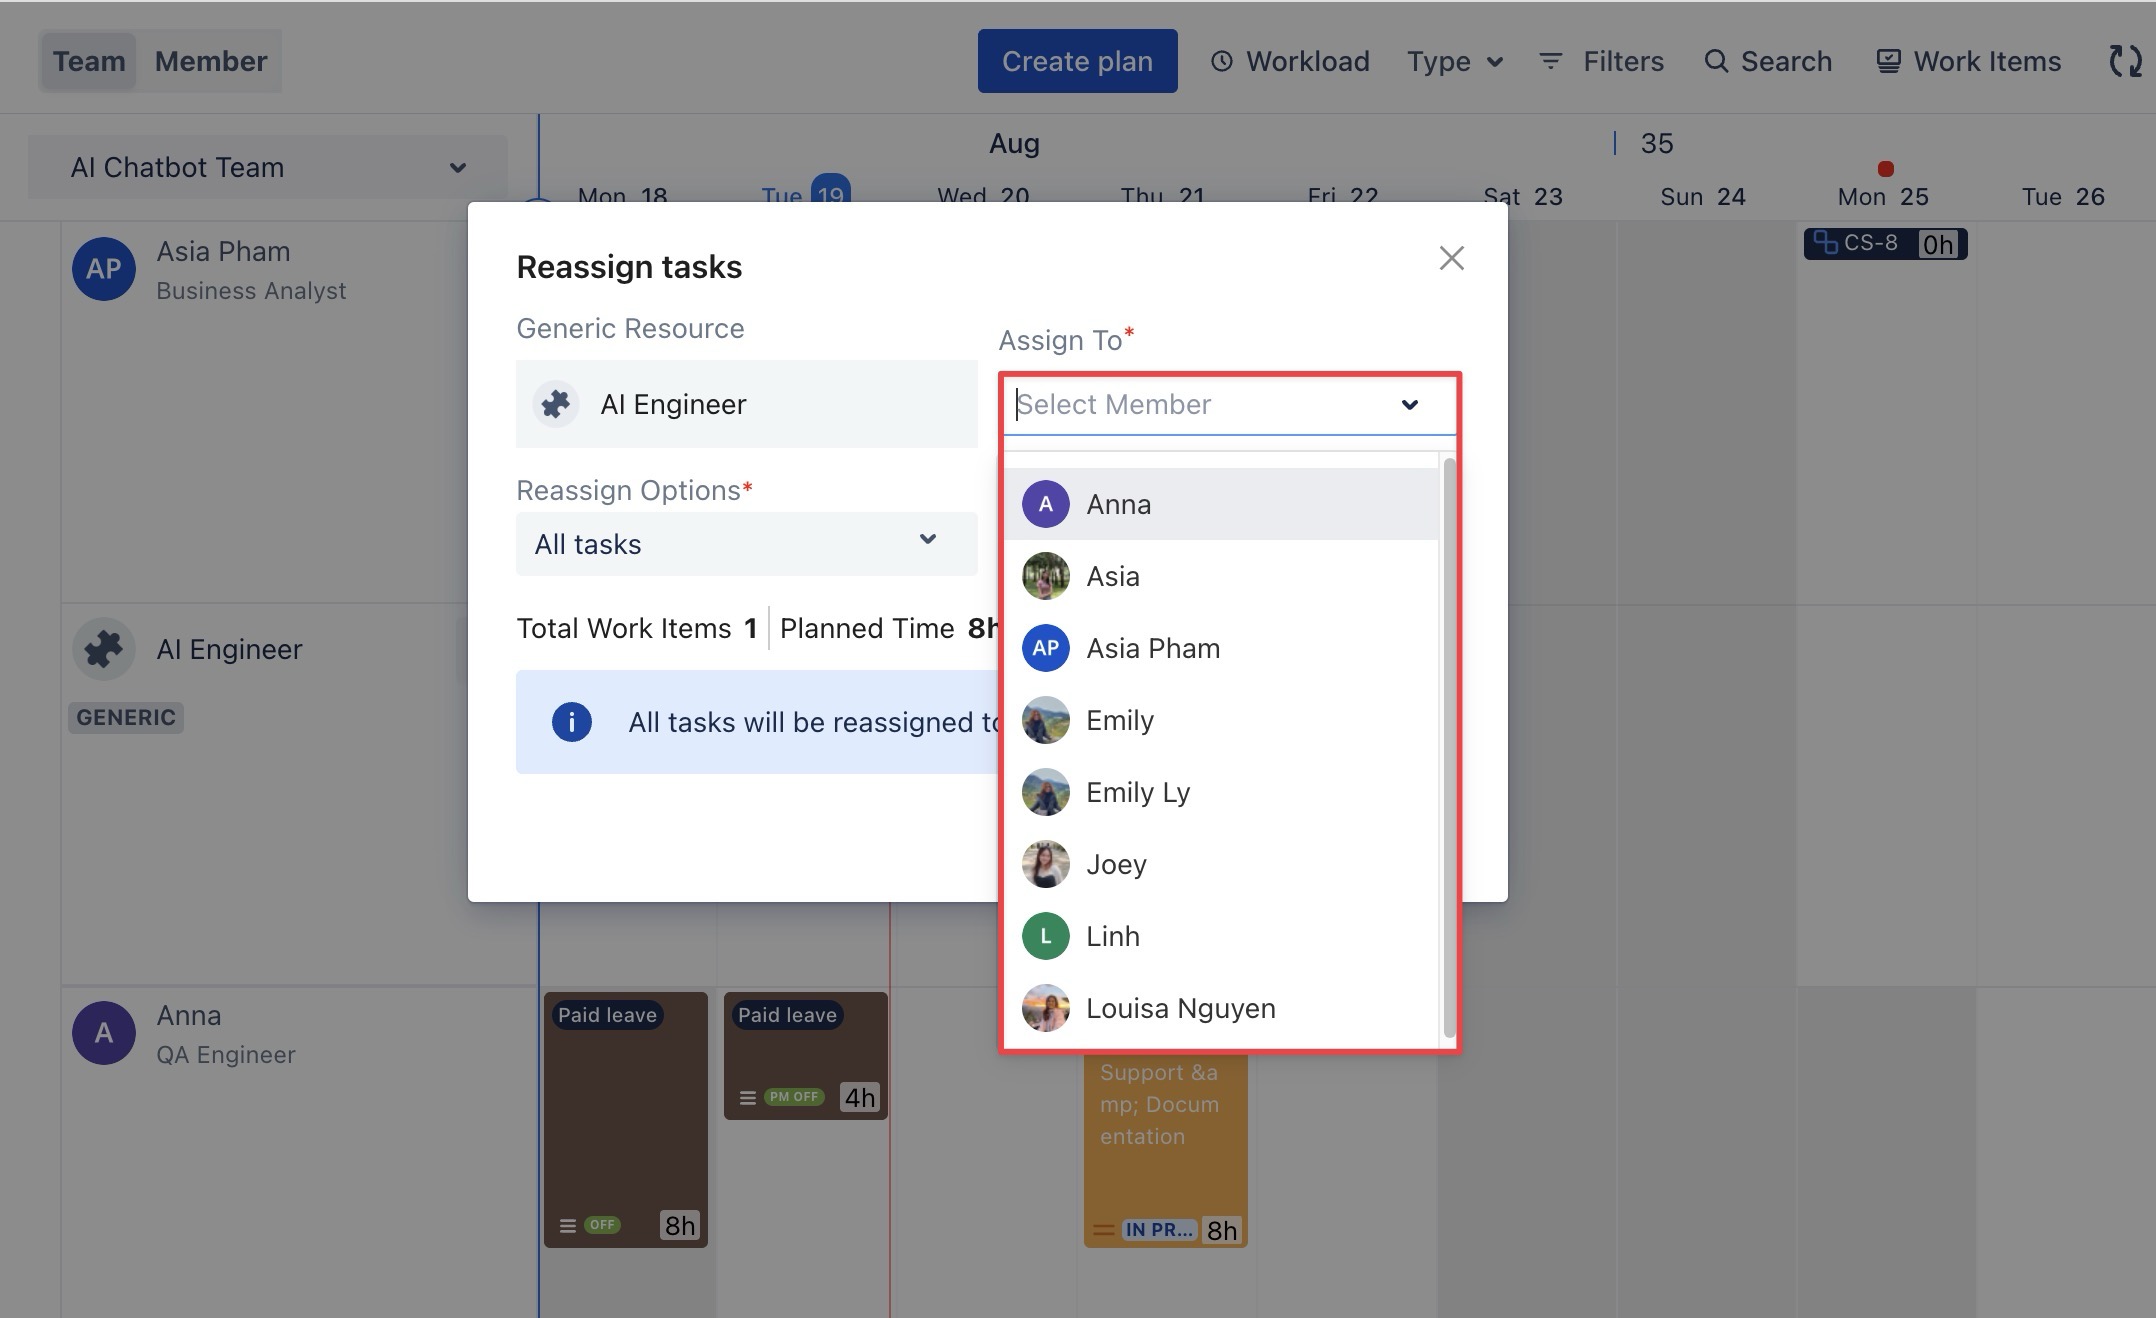
-
Choose the assignee to whom you want to transfer the task.
-
If you are a Team Leader, you can assign tasks only to members within your team.
-
If you are a Jira Admin, App Admin, or Team Admin, you have the flexibility to assign tasks to members of any team.
-
Select one of the following plan options:
-
All tasks: Reassign all tasks to the selected person.

-
Tasks within a date period: Only tasks that fall within the chosen date range will be reassigned.
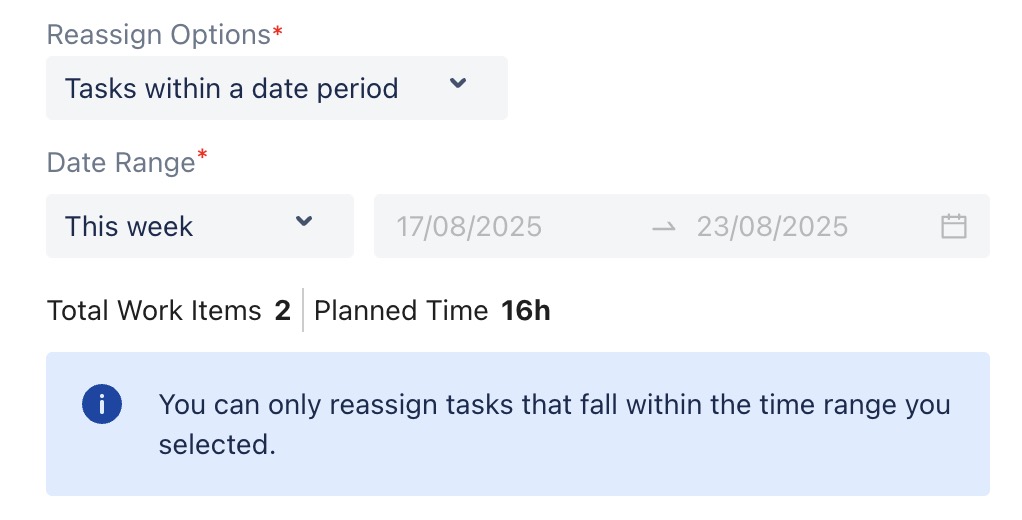
For example, you are planning 2 tasks for Virtual Resource as below:
-
Task A: 10th June, 2025 to 15th June, 2025
-
Task B: 12th June, 2025 to 15th June, 2025
→ If you select a date range from June 12 to June 15 and try to reassign the tasks, only Task B can be reassigned, as Task A starts on June 10th, which is outside of the selected period.
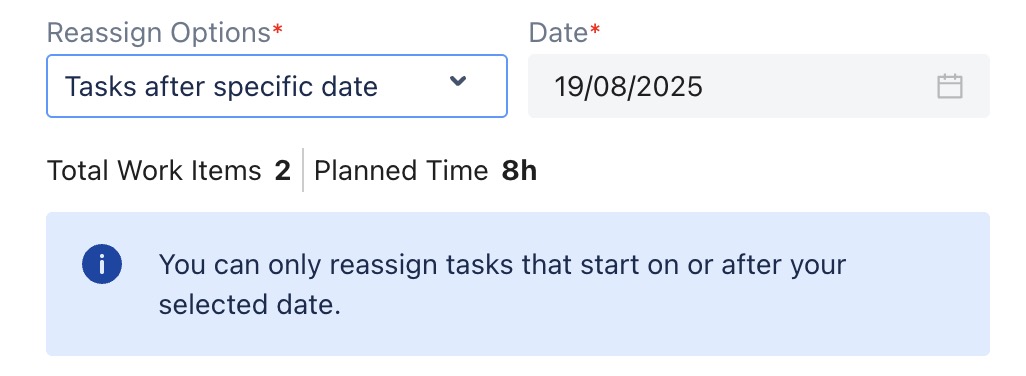
-
Tasks after a specific date: Only tasks starting on or after the selected date can be reassigned.
-
Click

👉 Watch the video below to learn more:
Use case 2: Generic resources serve as a physical asset.
If your team works with physical assets such as hardware, system devices, or laboratory equipment, a Generic Resource can be used to manage their booking. It helps track usage and scheduling, but does not contribute to workload calculations. This makes it ideal for tracking shared assets without impacting individual workload metrics.
Planning Tasks for Generic Resources used as Physical Assets
Planning tasks for Generic Resources used as physical assets follows the same process as planning tasks for non-physical resources.
EXAMPLE: Meeting Room as a Generic Resource
Your team frequently books a meeting room for project meetings and brainstorming sessions. To ensure smooth scheduling and avoid conflicts, you want to:
-
Schedule the meeting room for specific time slots
-
Prevent double-booking of the room
-
Ensure availability when needed
-
Track usage without affecting the workload of team members
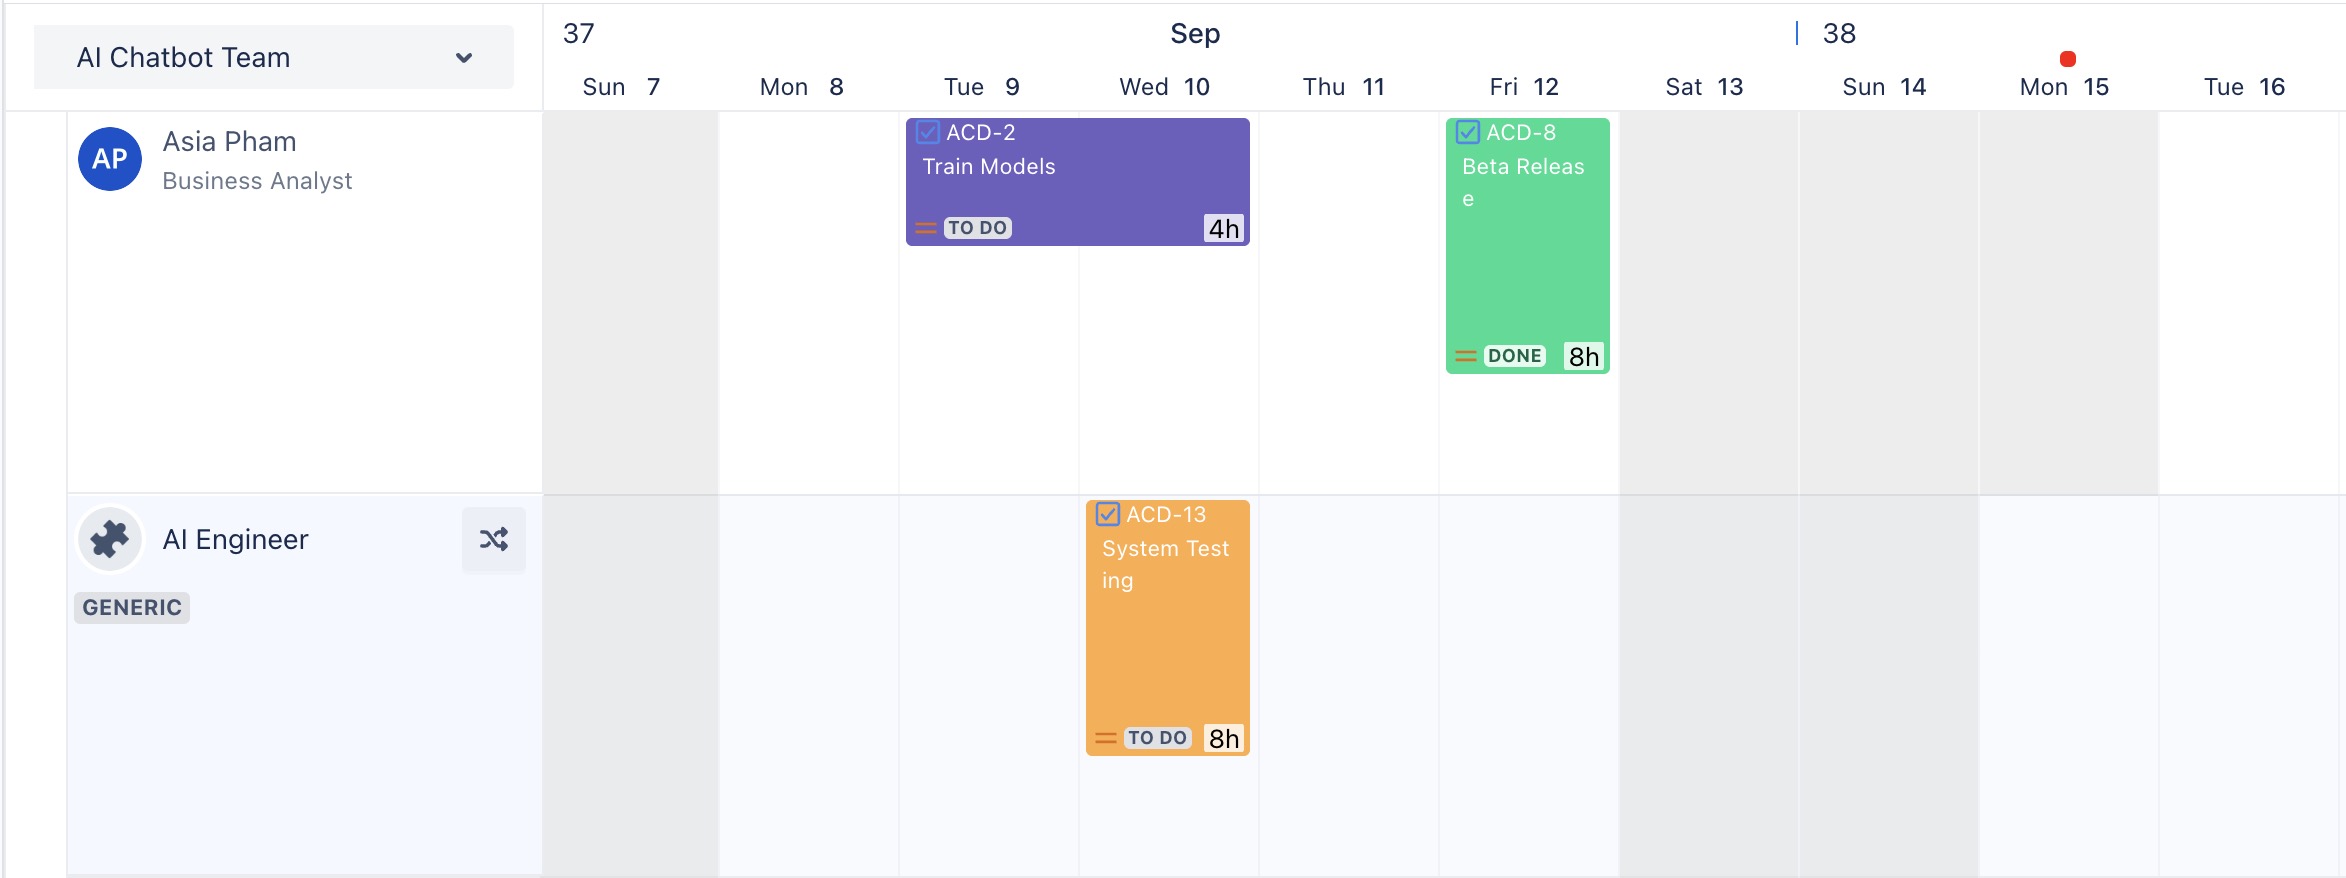
How a Generic Resource helps:
-
Set up the meeting room as a Generic Resource.
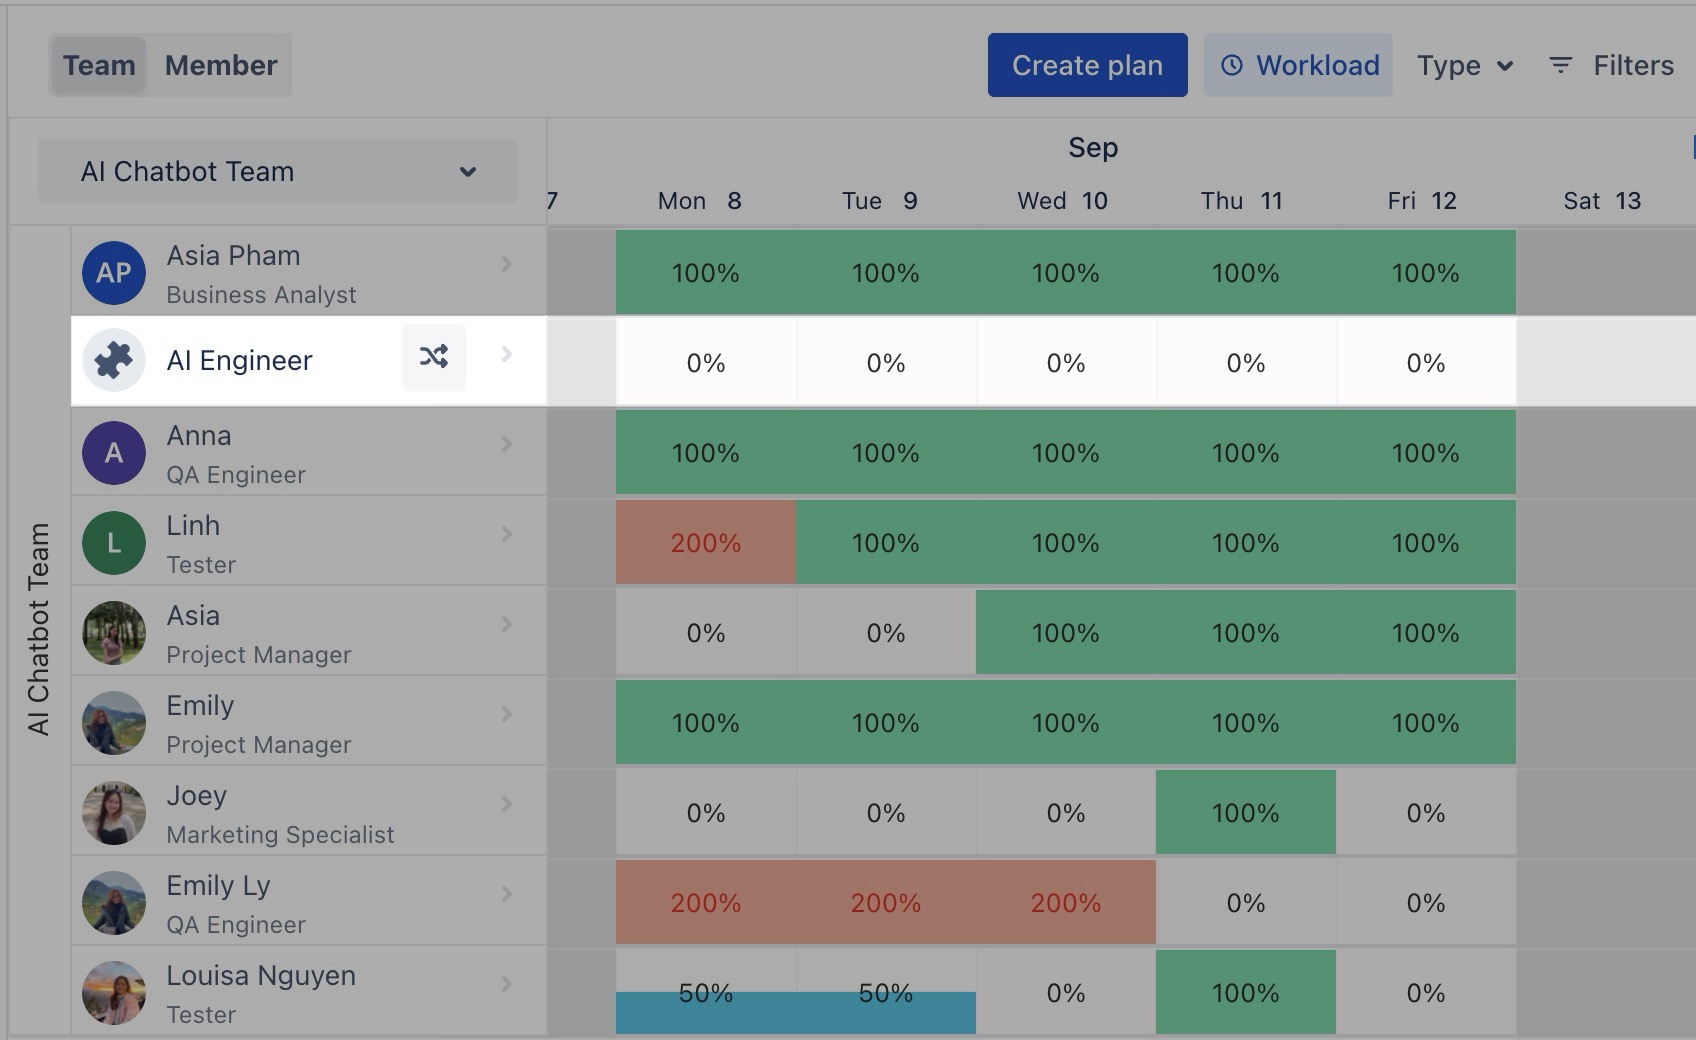
-
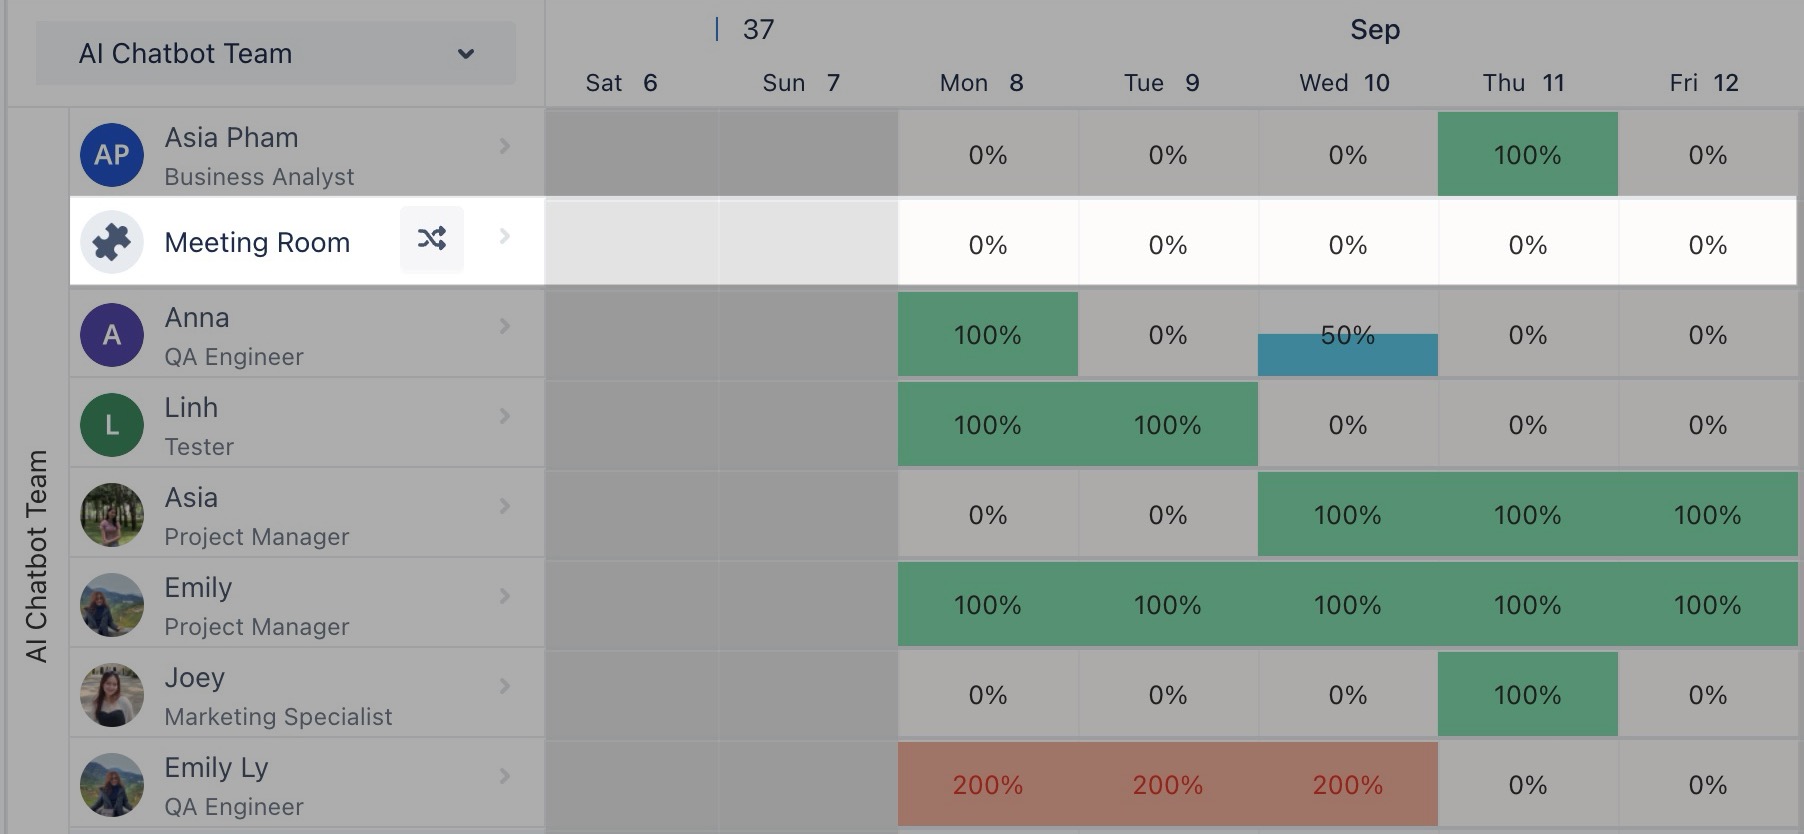
For instance, if the meeting room is reserved from September 9 to 10, it will be marked as unavailable during that time.
-
Anyone viewing the Schedule Board will be able to see the room's booking, preventing overlapping reservations.
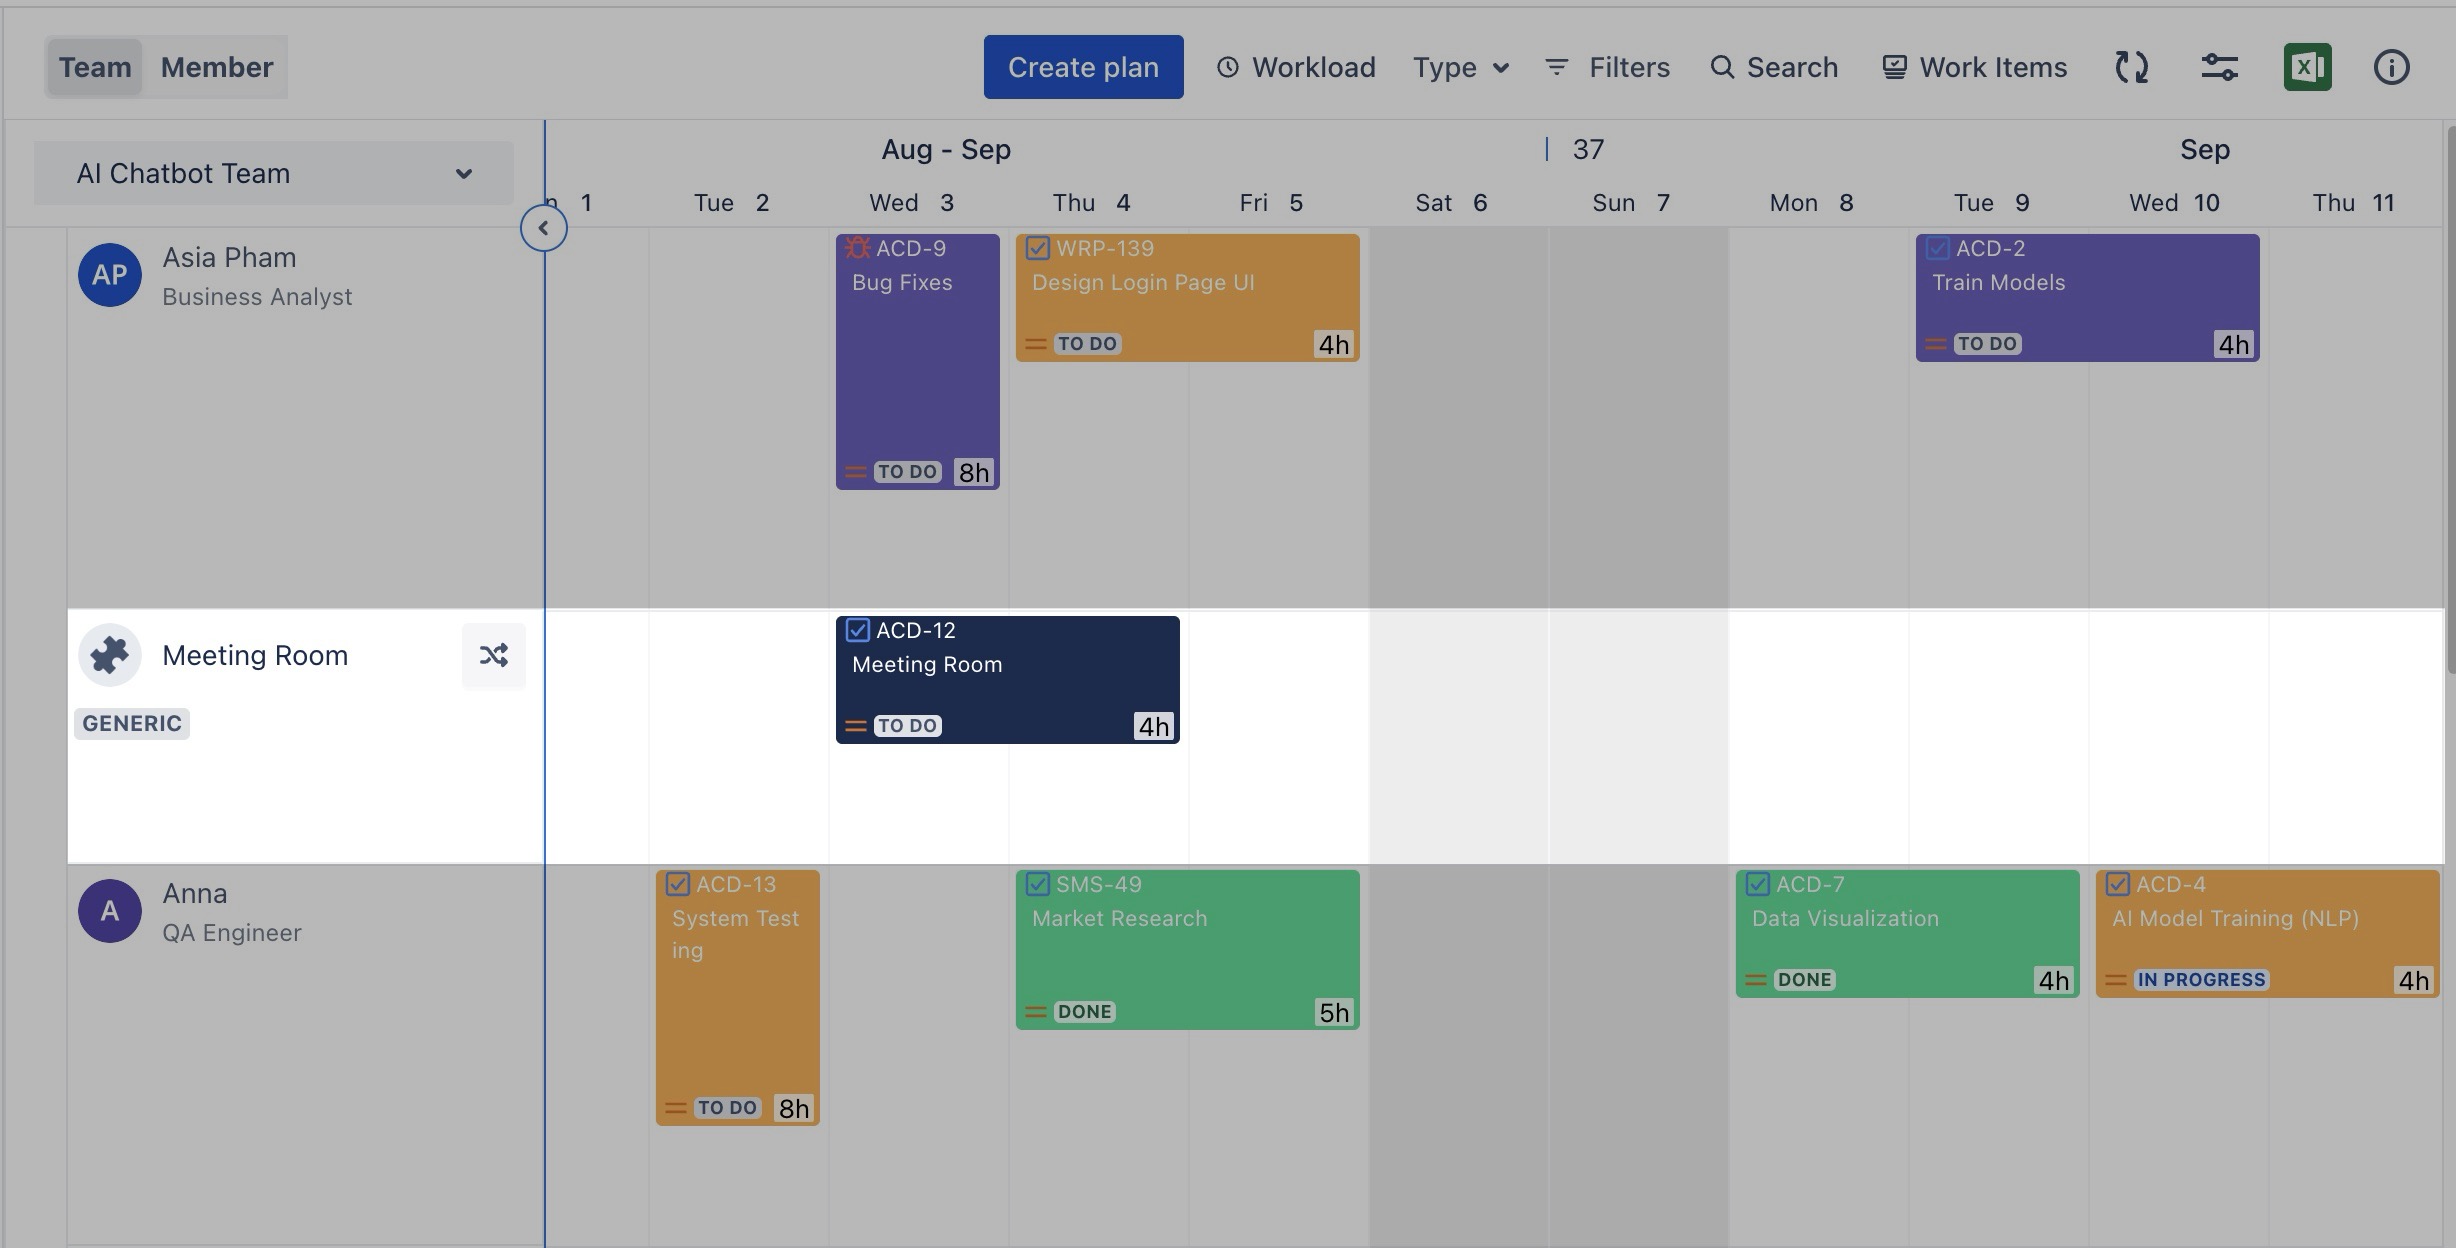
Important Note:
When viewing the meeting room’s schedule, you’ll notice it shows 0 hours of workload. This means the room’s usage won’t affect any team member’s workload, allowing you to track its availability without impacting performance metrics.