.png)
When you click on any Test Plan Key or the “Edit” button in the Test Plan table, you are redirected to the Test Plan Detail screen, where you can view and manage detailed information related to that test plan.

1. Test Plan Basic Information
1.1 Test Plan Timeline
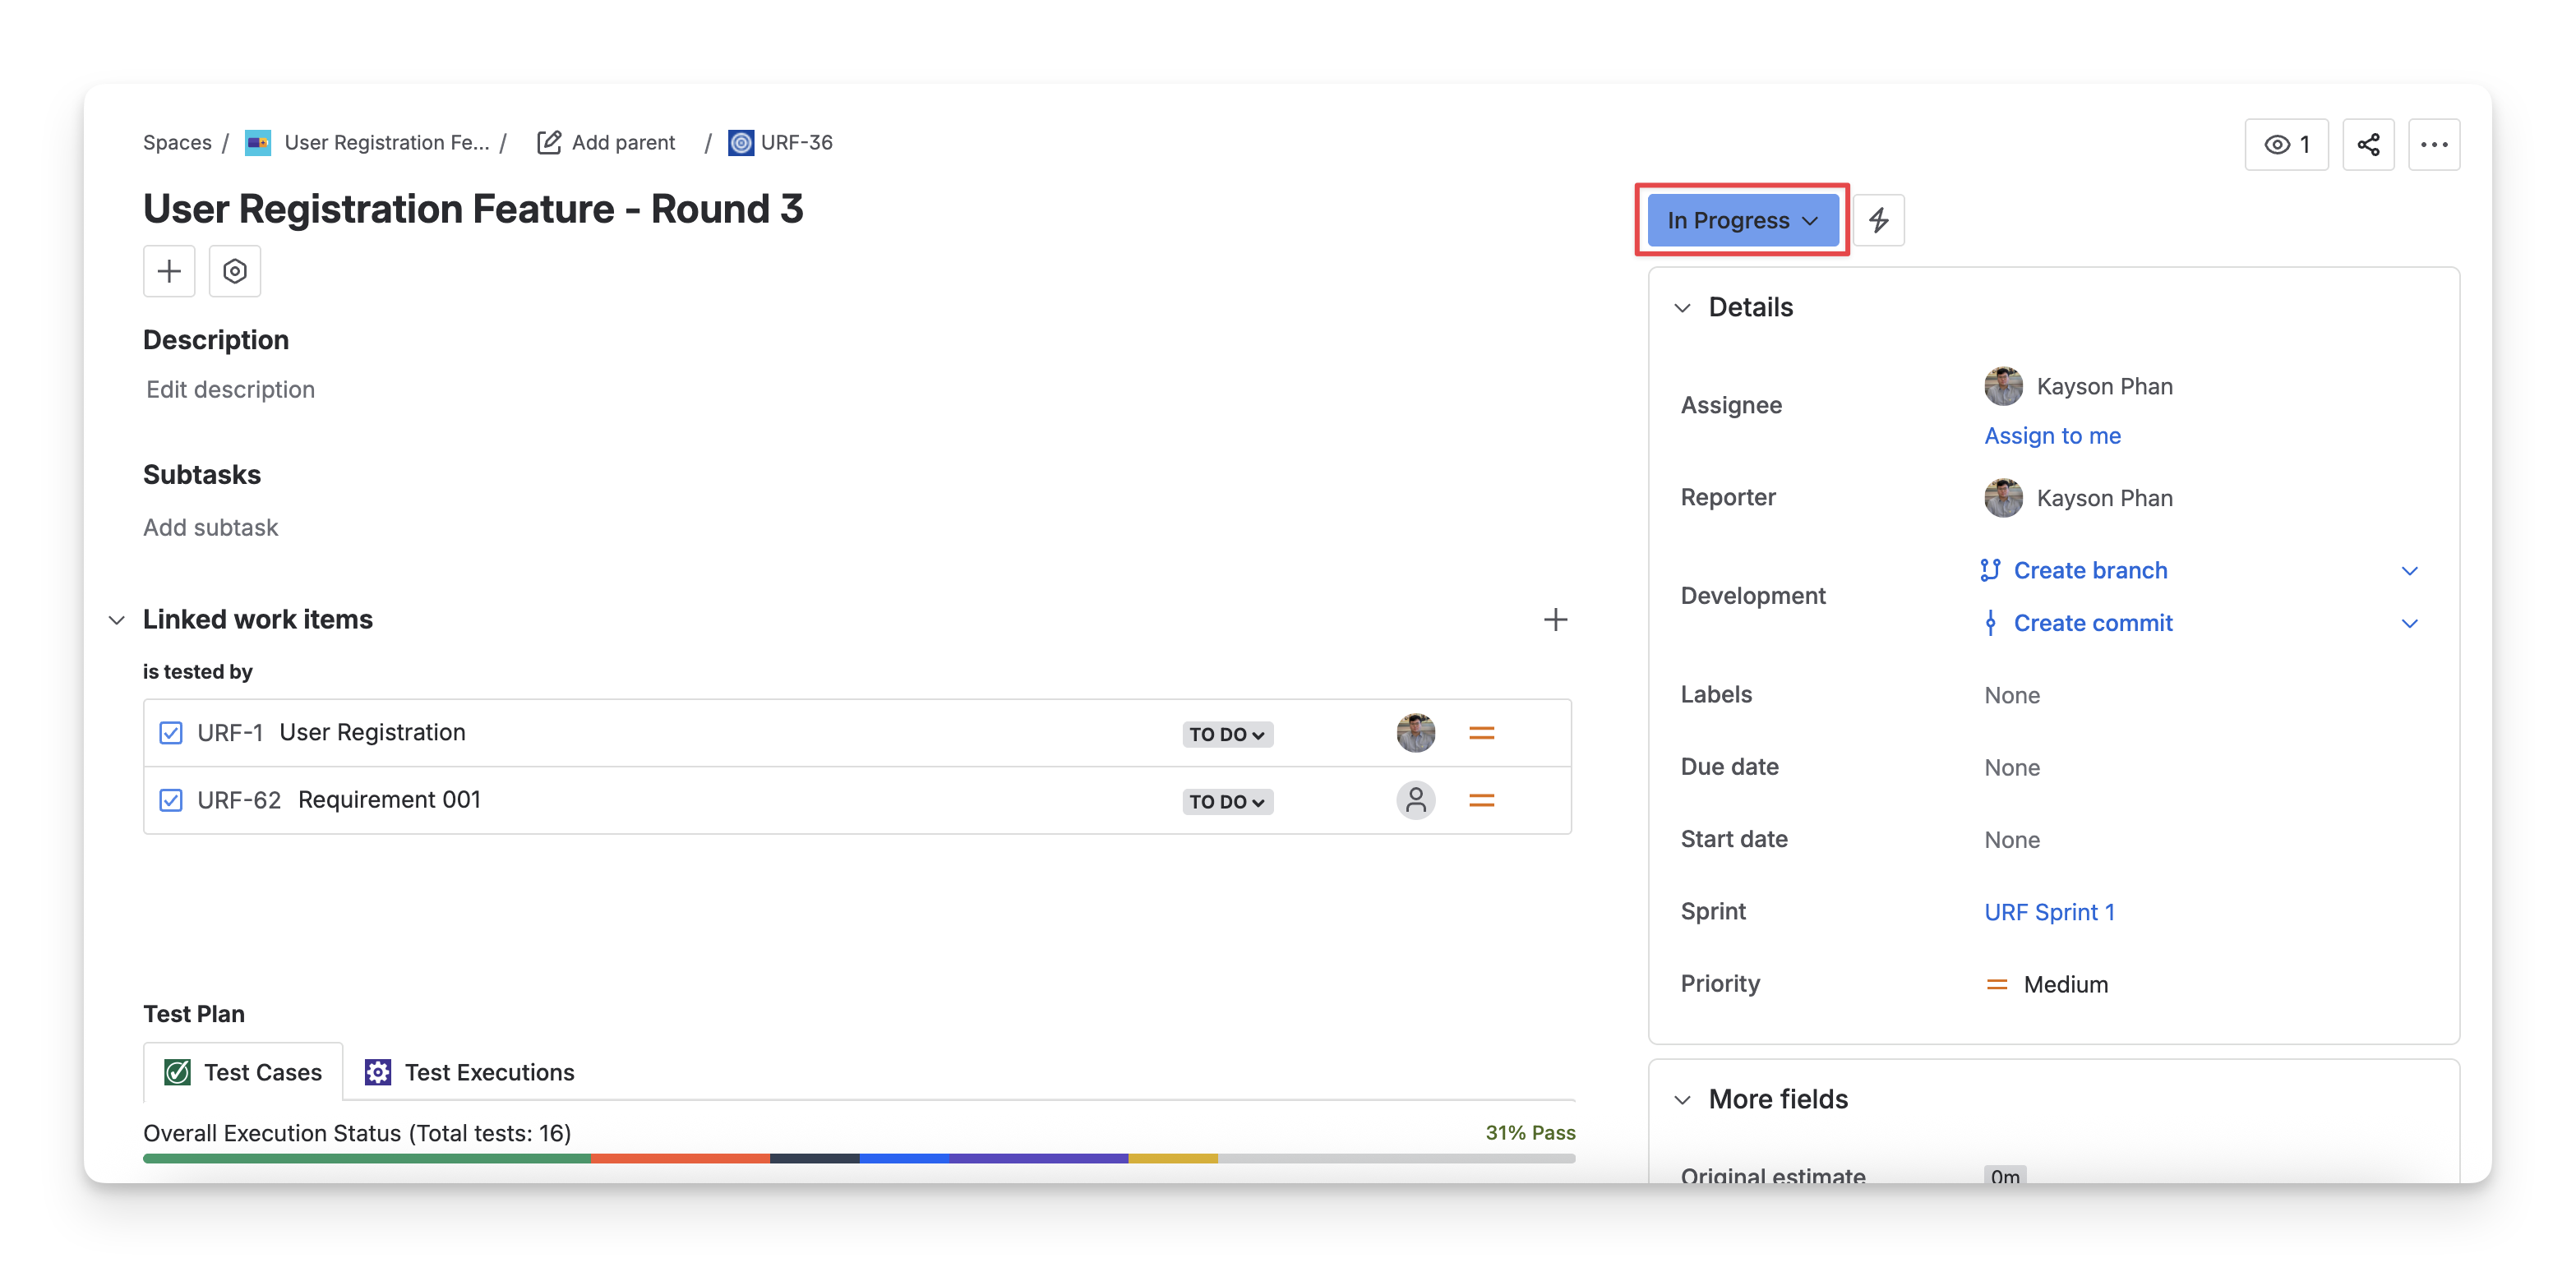
In the top-right corner of the Test Plan detail screen, you can view the timeline of the test plan. Click this area to update the start and end dates, allowing you to align the test plan timeline with your current project schedule.

1.2 Jira Status
The Status box shows the Jira status of the test plan ticket ( todo ; in progress ; done ). It reflects the progress of the test plan in your team's workflow on the Jira board.
To change this status to match your team’s testing process, click on the dropdown and select the right Jira status.

Updating the Jira status on the Test Plan Detail screen syncs it with the Jira ticket, and vice versa.
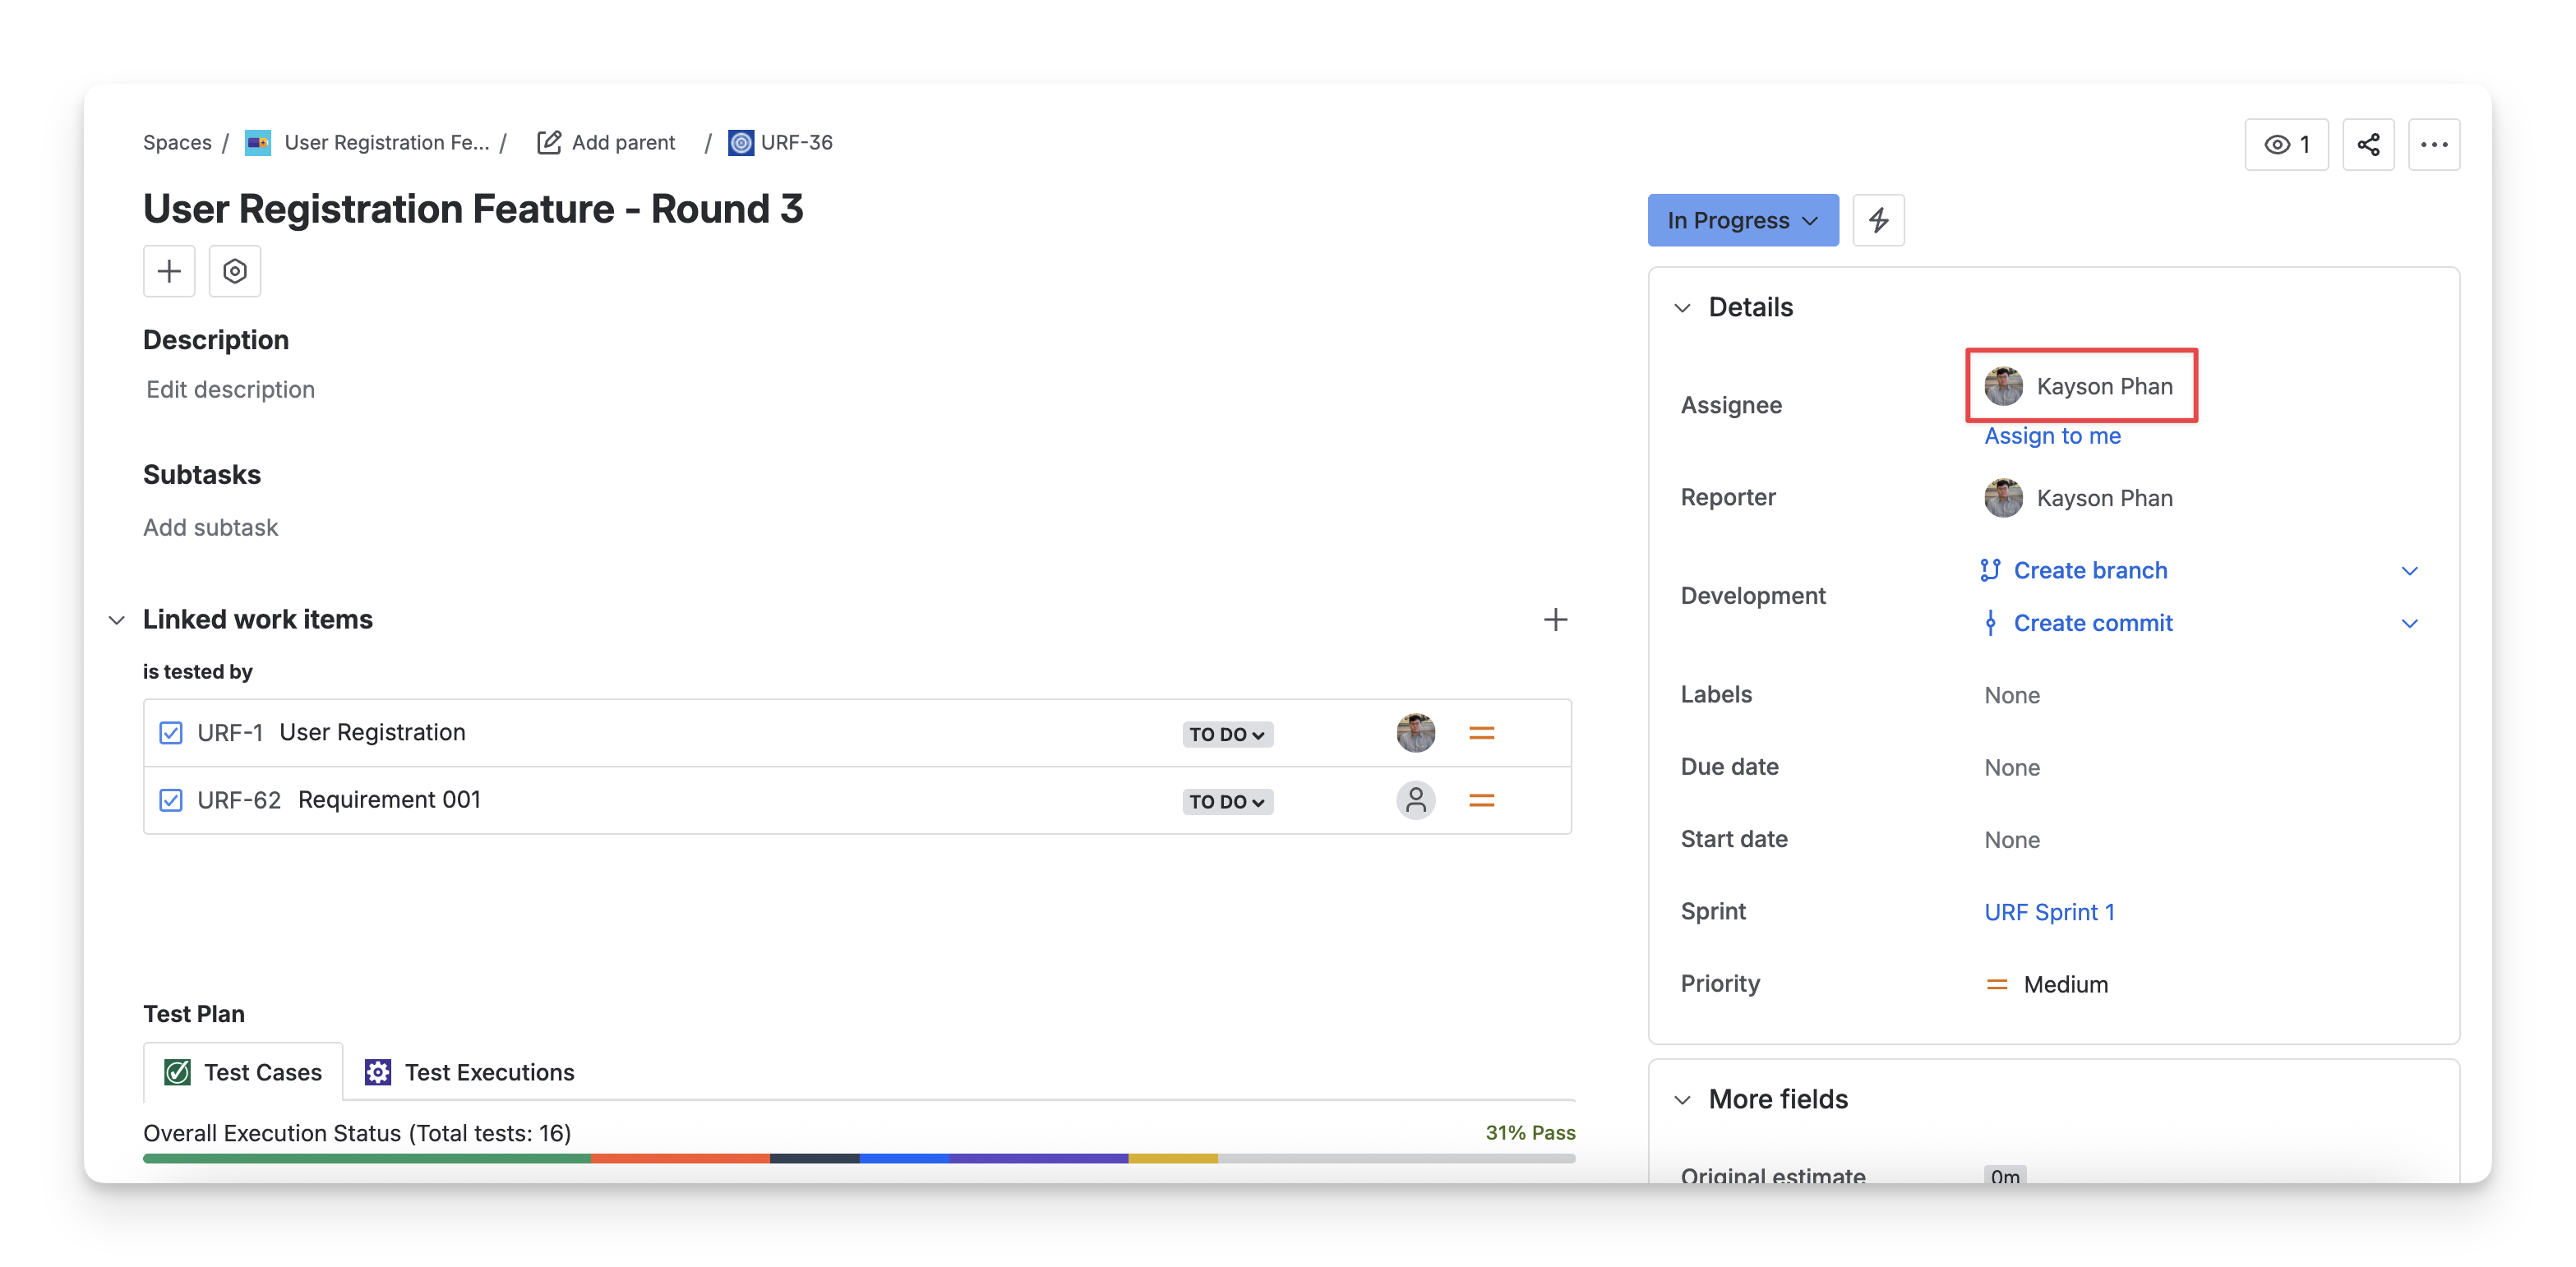
1.3 Assignee
The Assignee box shows who is responsible for this test plan. To change the assignee, click the dropdown and select a team member.

Updating the Assignee on the Test Plan Detail screen syncs it with the Jira ticket, and vice versa.
2. Test Cases
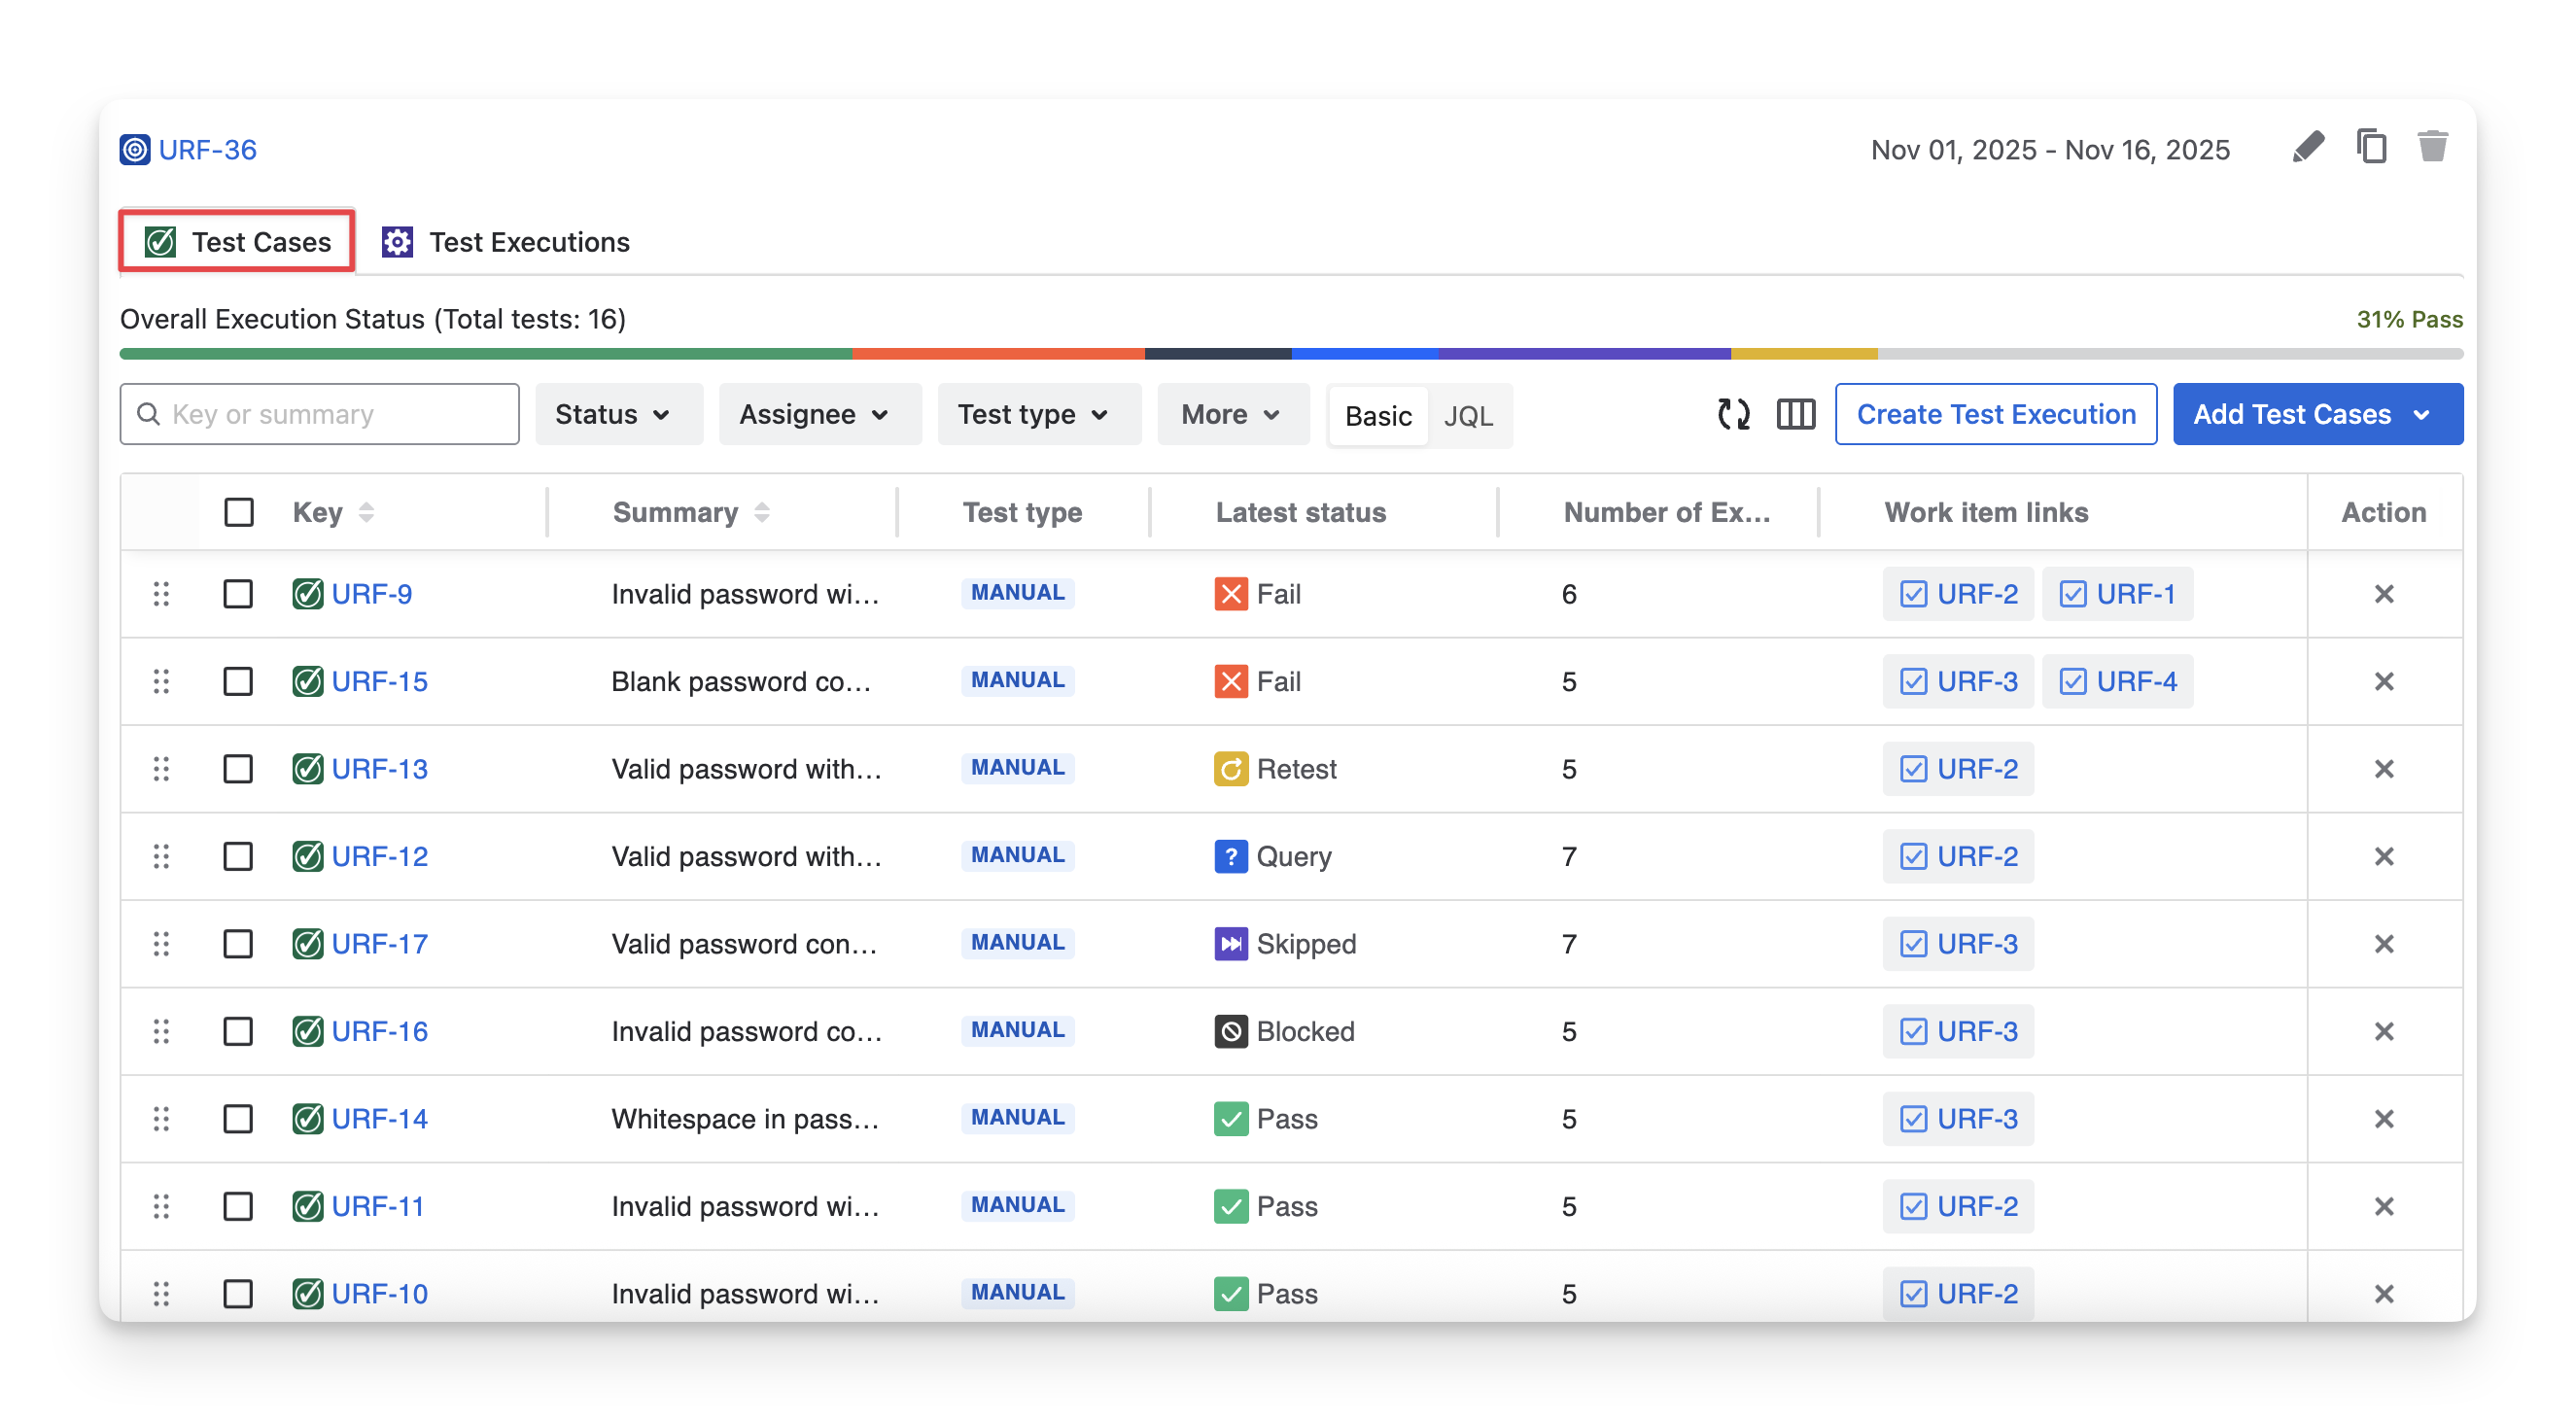
The Test Cases tab of a Test Plan provides you with an overview of all test cases included in the test plan and their latest execution results. Here, you can get updated about:
-
Overall Execution Status: Include the total number of test cases and the latest execution test status ( Fail Pass todo query blocked skipped ), allowing QA teams to quickly understand the current testing health of the plan.
-
Test Case List: Show each test case with detailed information including its key, summary, test type, latest status, etc.
At this tab, you can perform these actions:
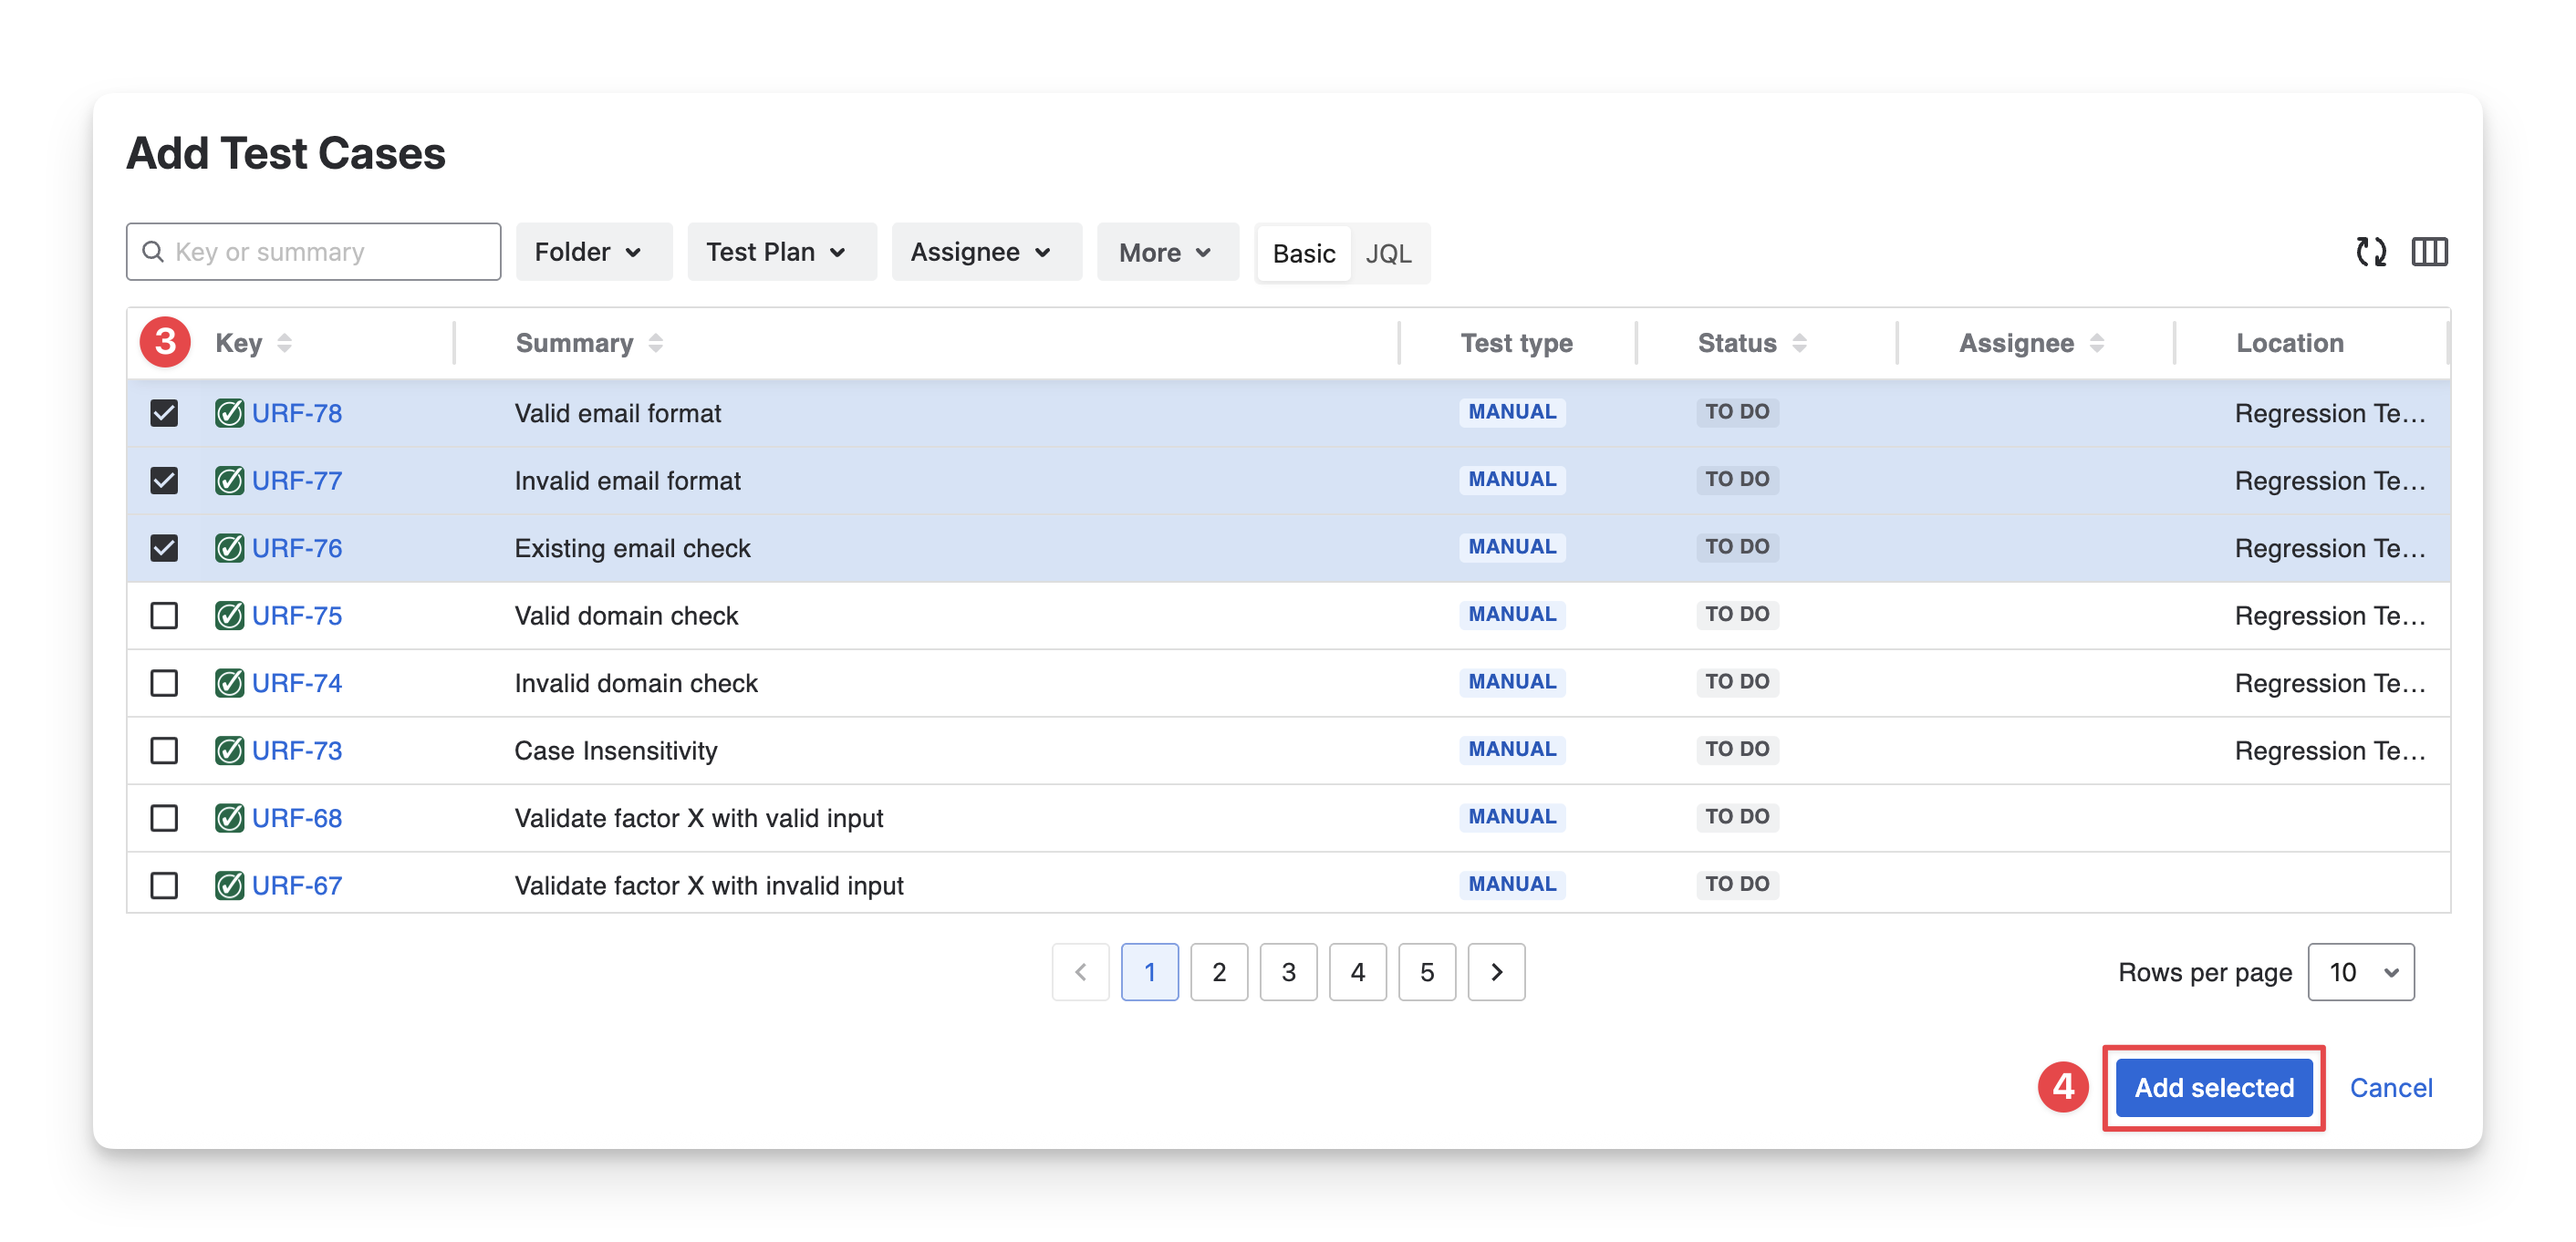
2.1 Add Test Cases to the Test Plan
To add new test cases to a test plan, follow these steps:
-
In the Test Cases tab, click on the “Add test case” button.
-
Choose the “Existing Test Cases” option.
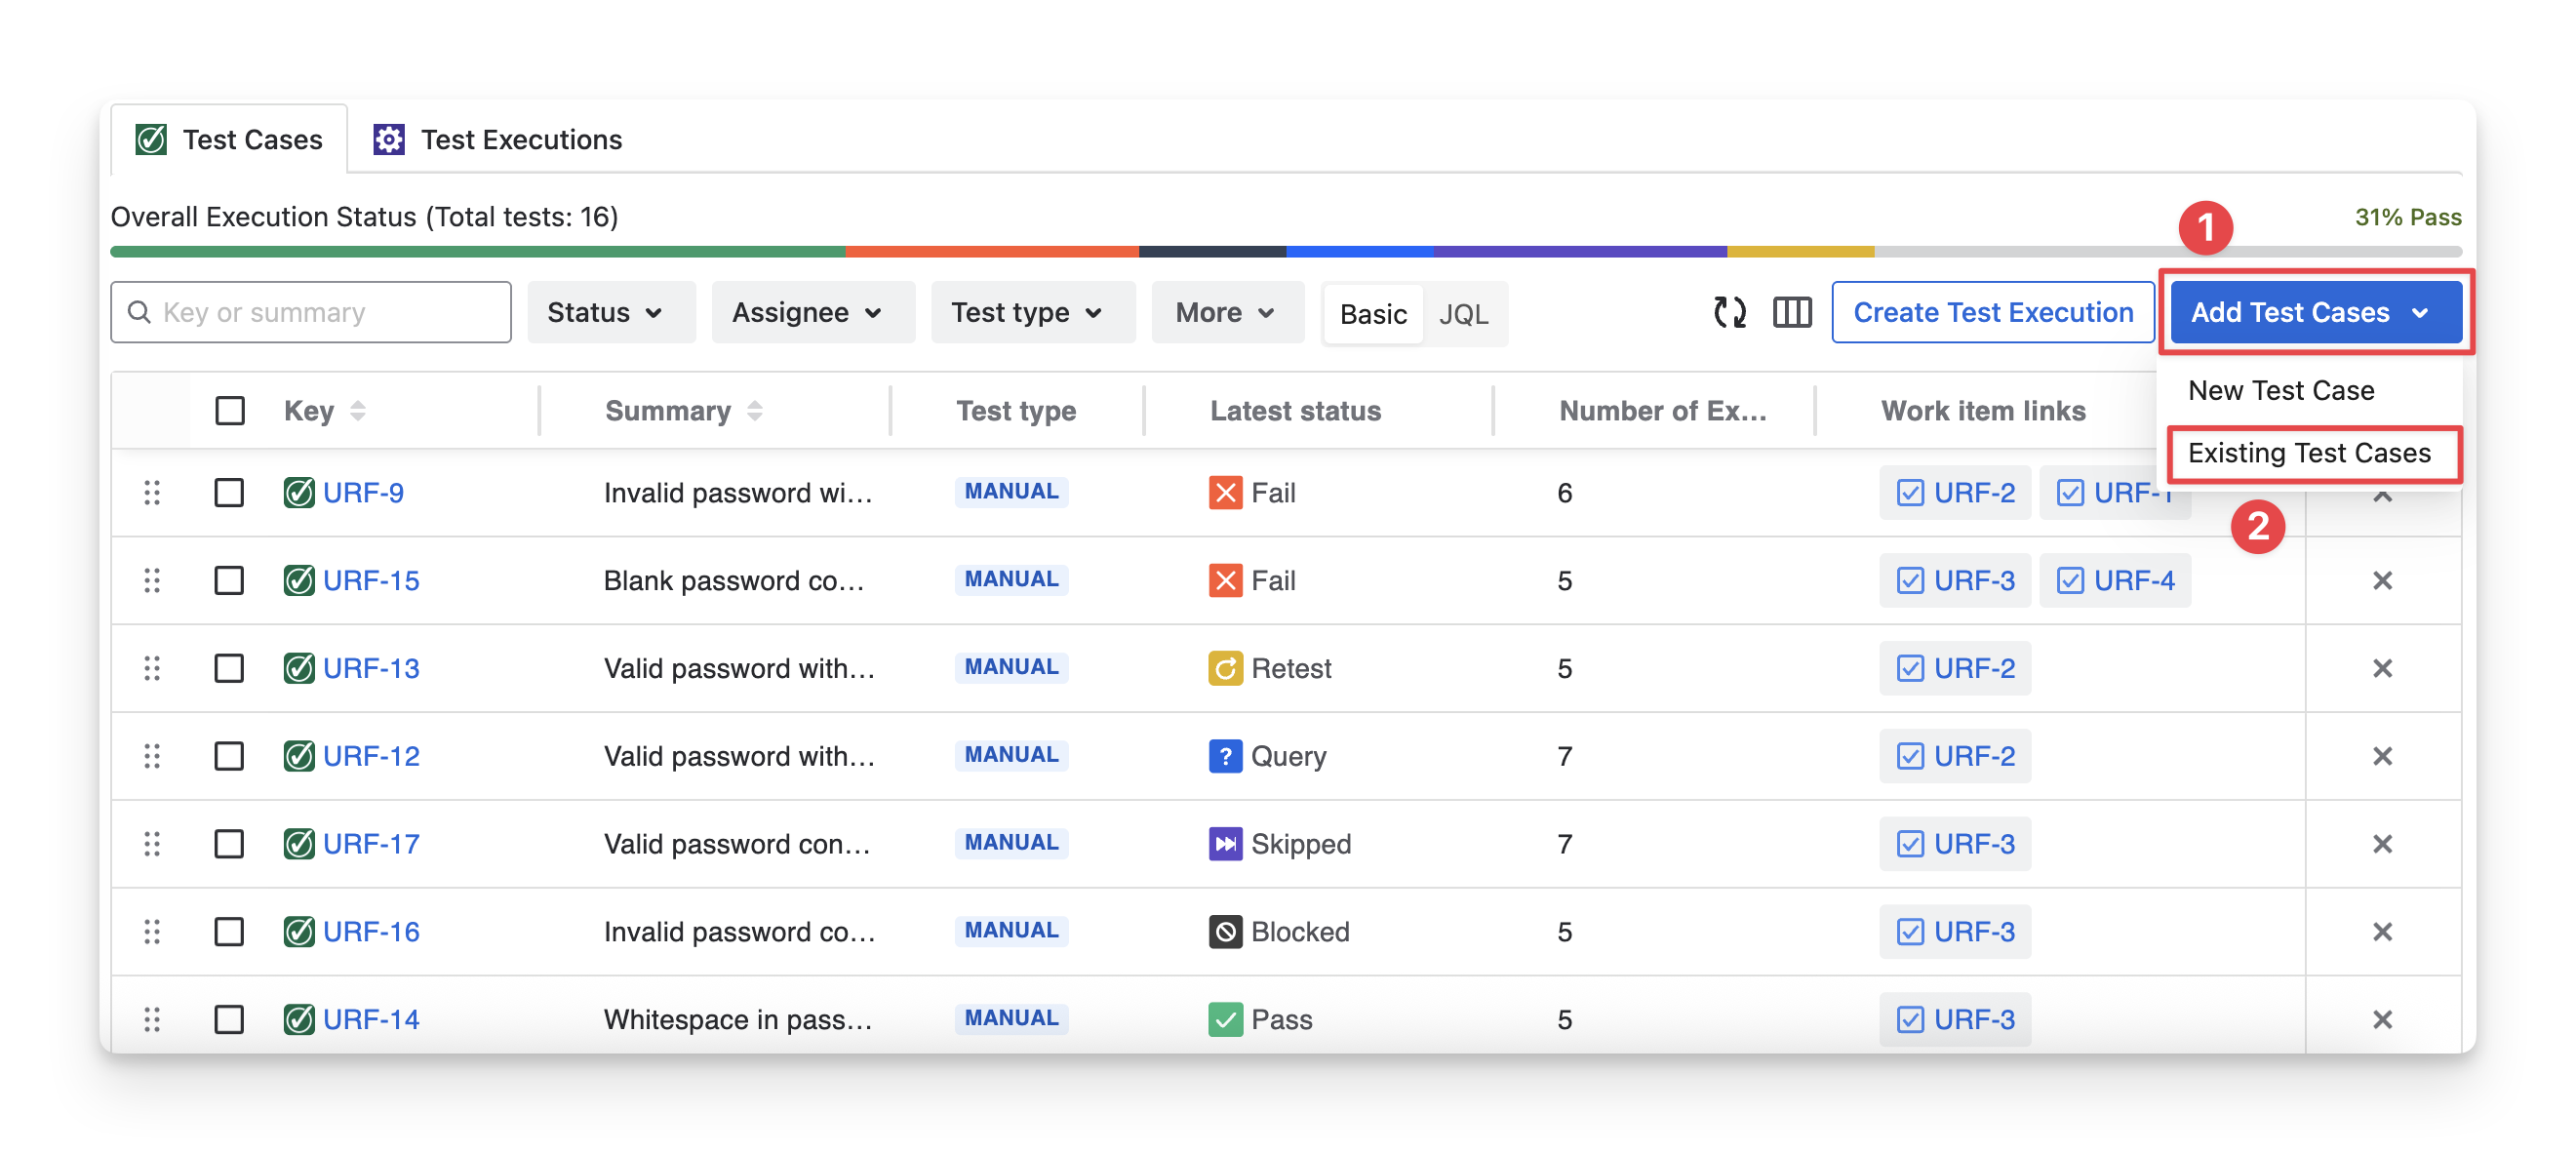
If you choose “New Test Cases” you will manually create a new test case here.
Learn more about creating a test case indirectly in the Test Plan.
-
Select test cases you want to add to the current test plan. You can search for test cases by name, filter with fields, or use JQL.
-
Click the “Add selected” to complete this step.
2.2 Remove Test Cases from the Test Plan
To remove test cases from the current test plan, follow these steps:
-
In the Test Cases tab, multi-select the test cases you want to remove.
-
Choose the “Remove” option in the toolbar.
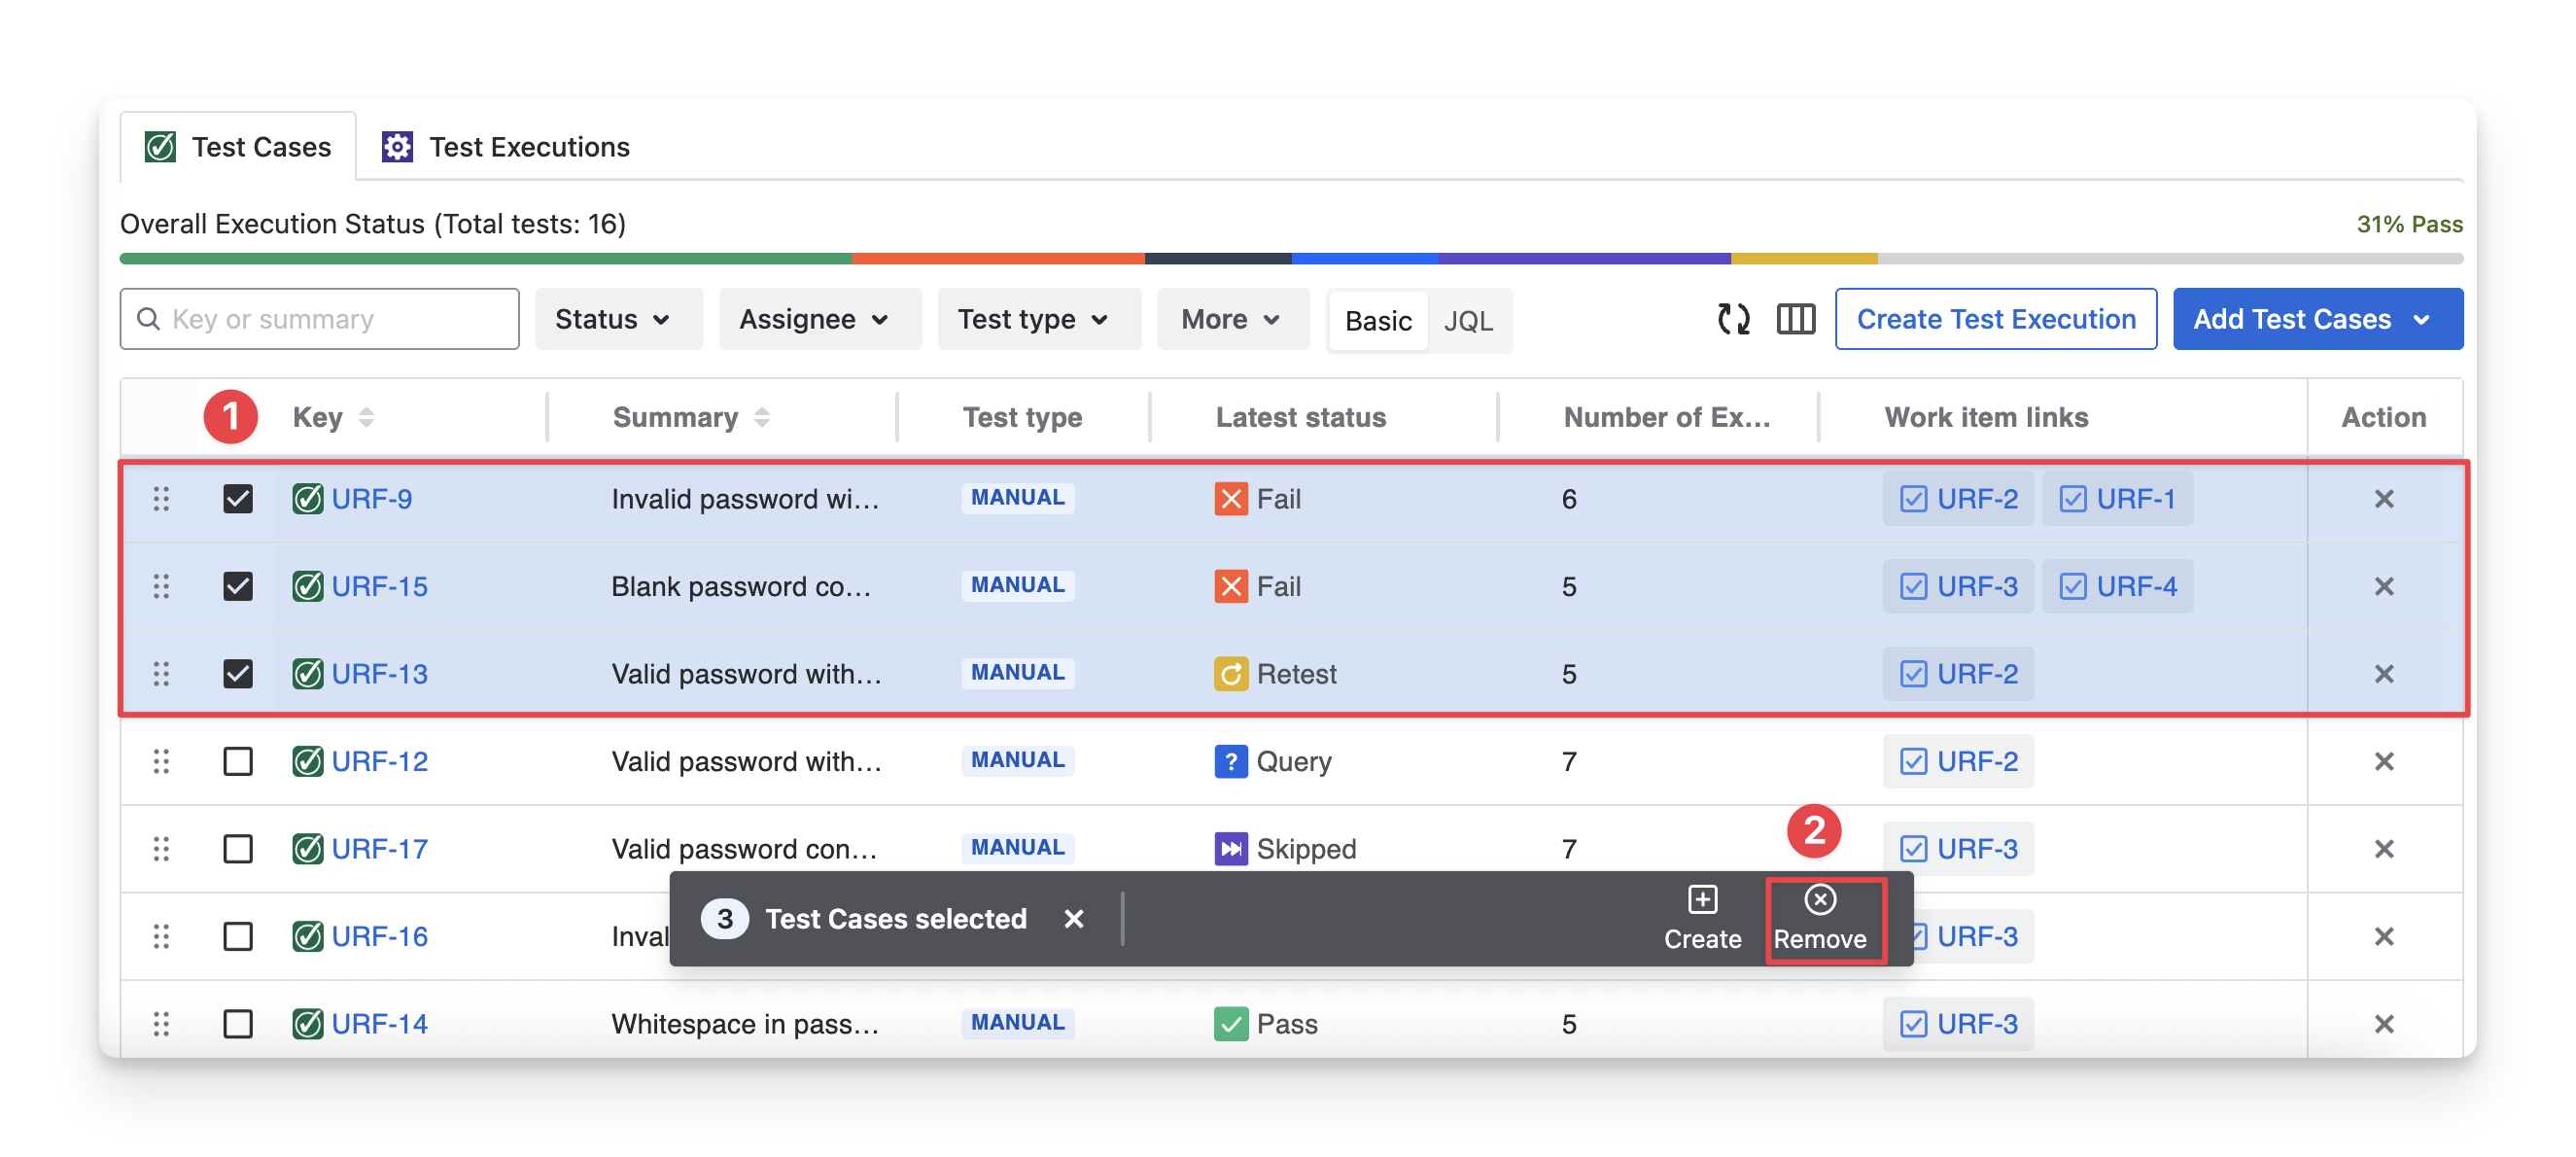
Or you can click the “x” button if you want to remove a single test case only.
When you remove test cases from a test plan, their existing execution results remain unchanged.
However, if you open a test execution that previously included those test cases through the plan, AgileTest will notify you that they are no longer part of the test plan. You can then choose to add them back to the plan or skip them, depending on your testing needs.
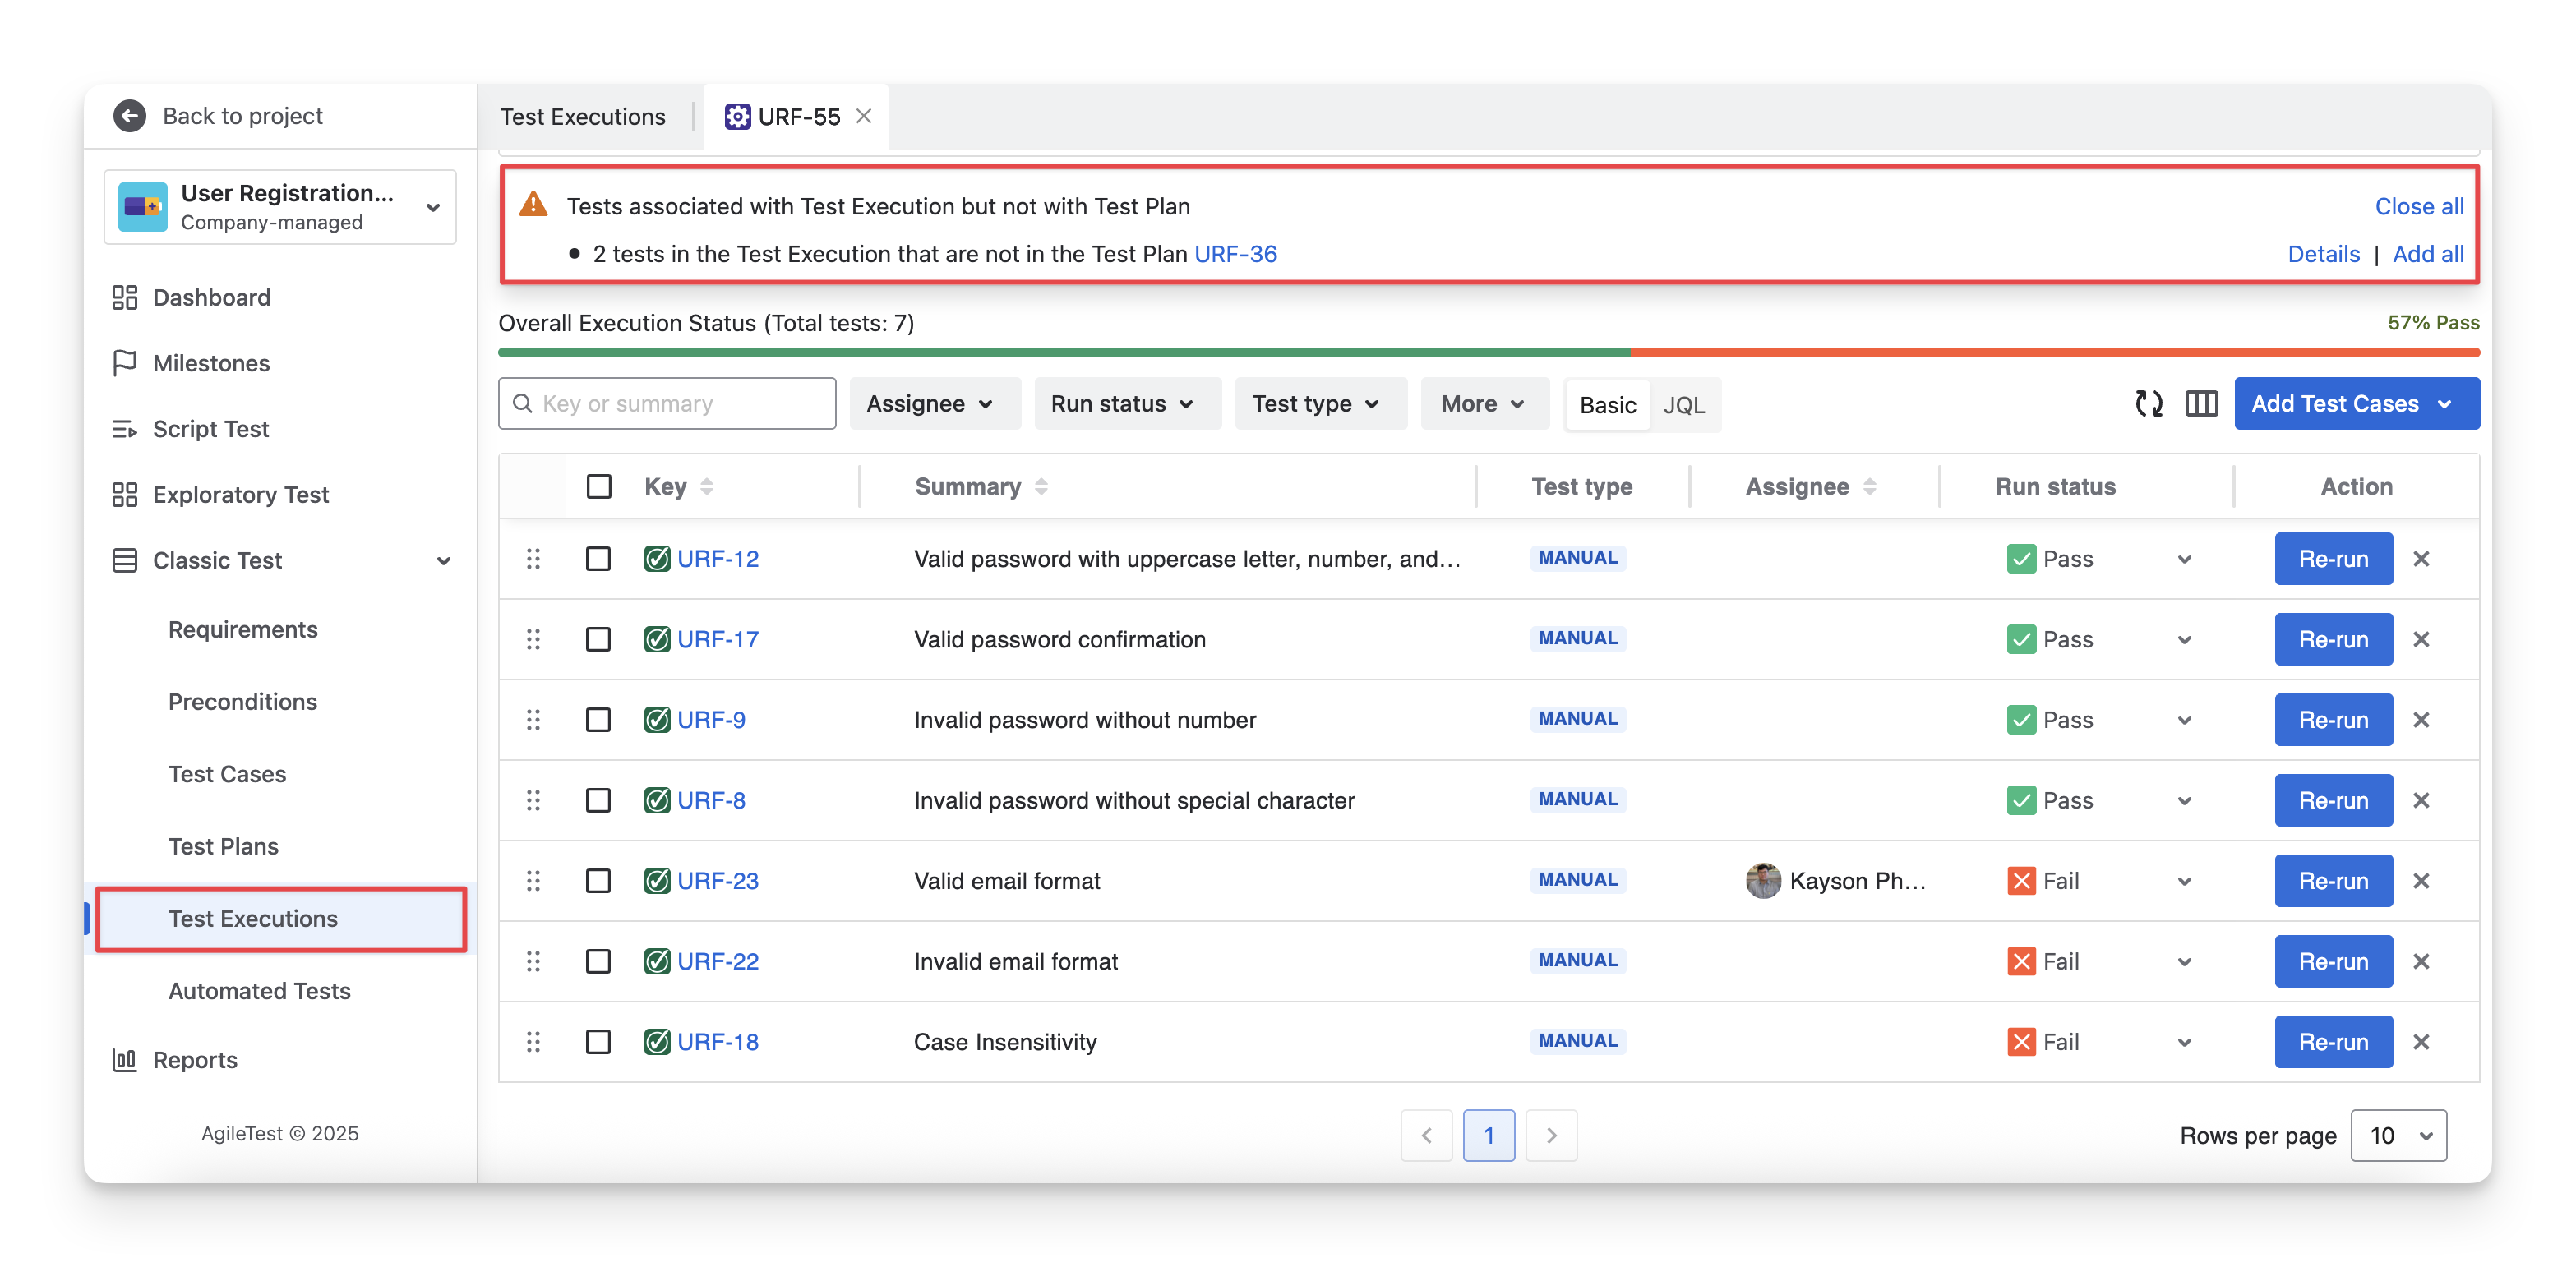
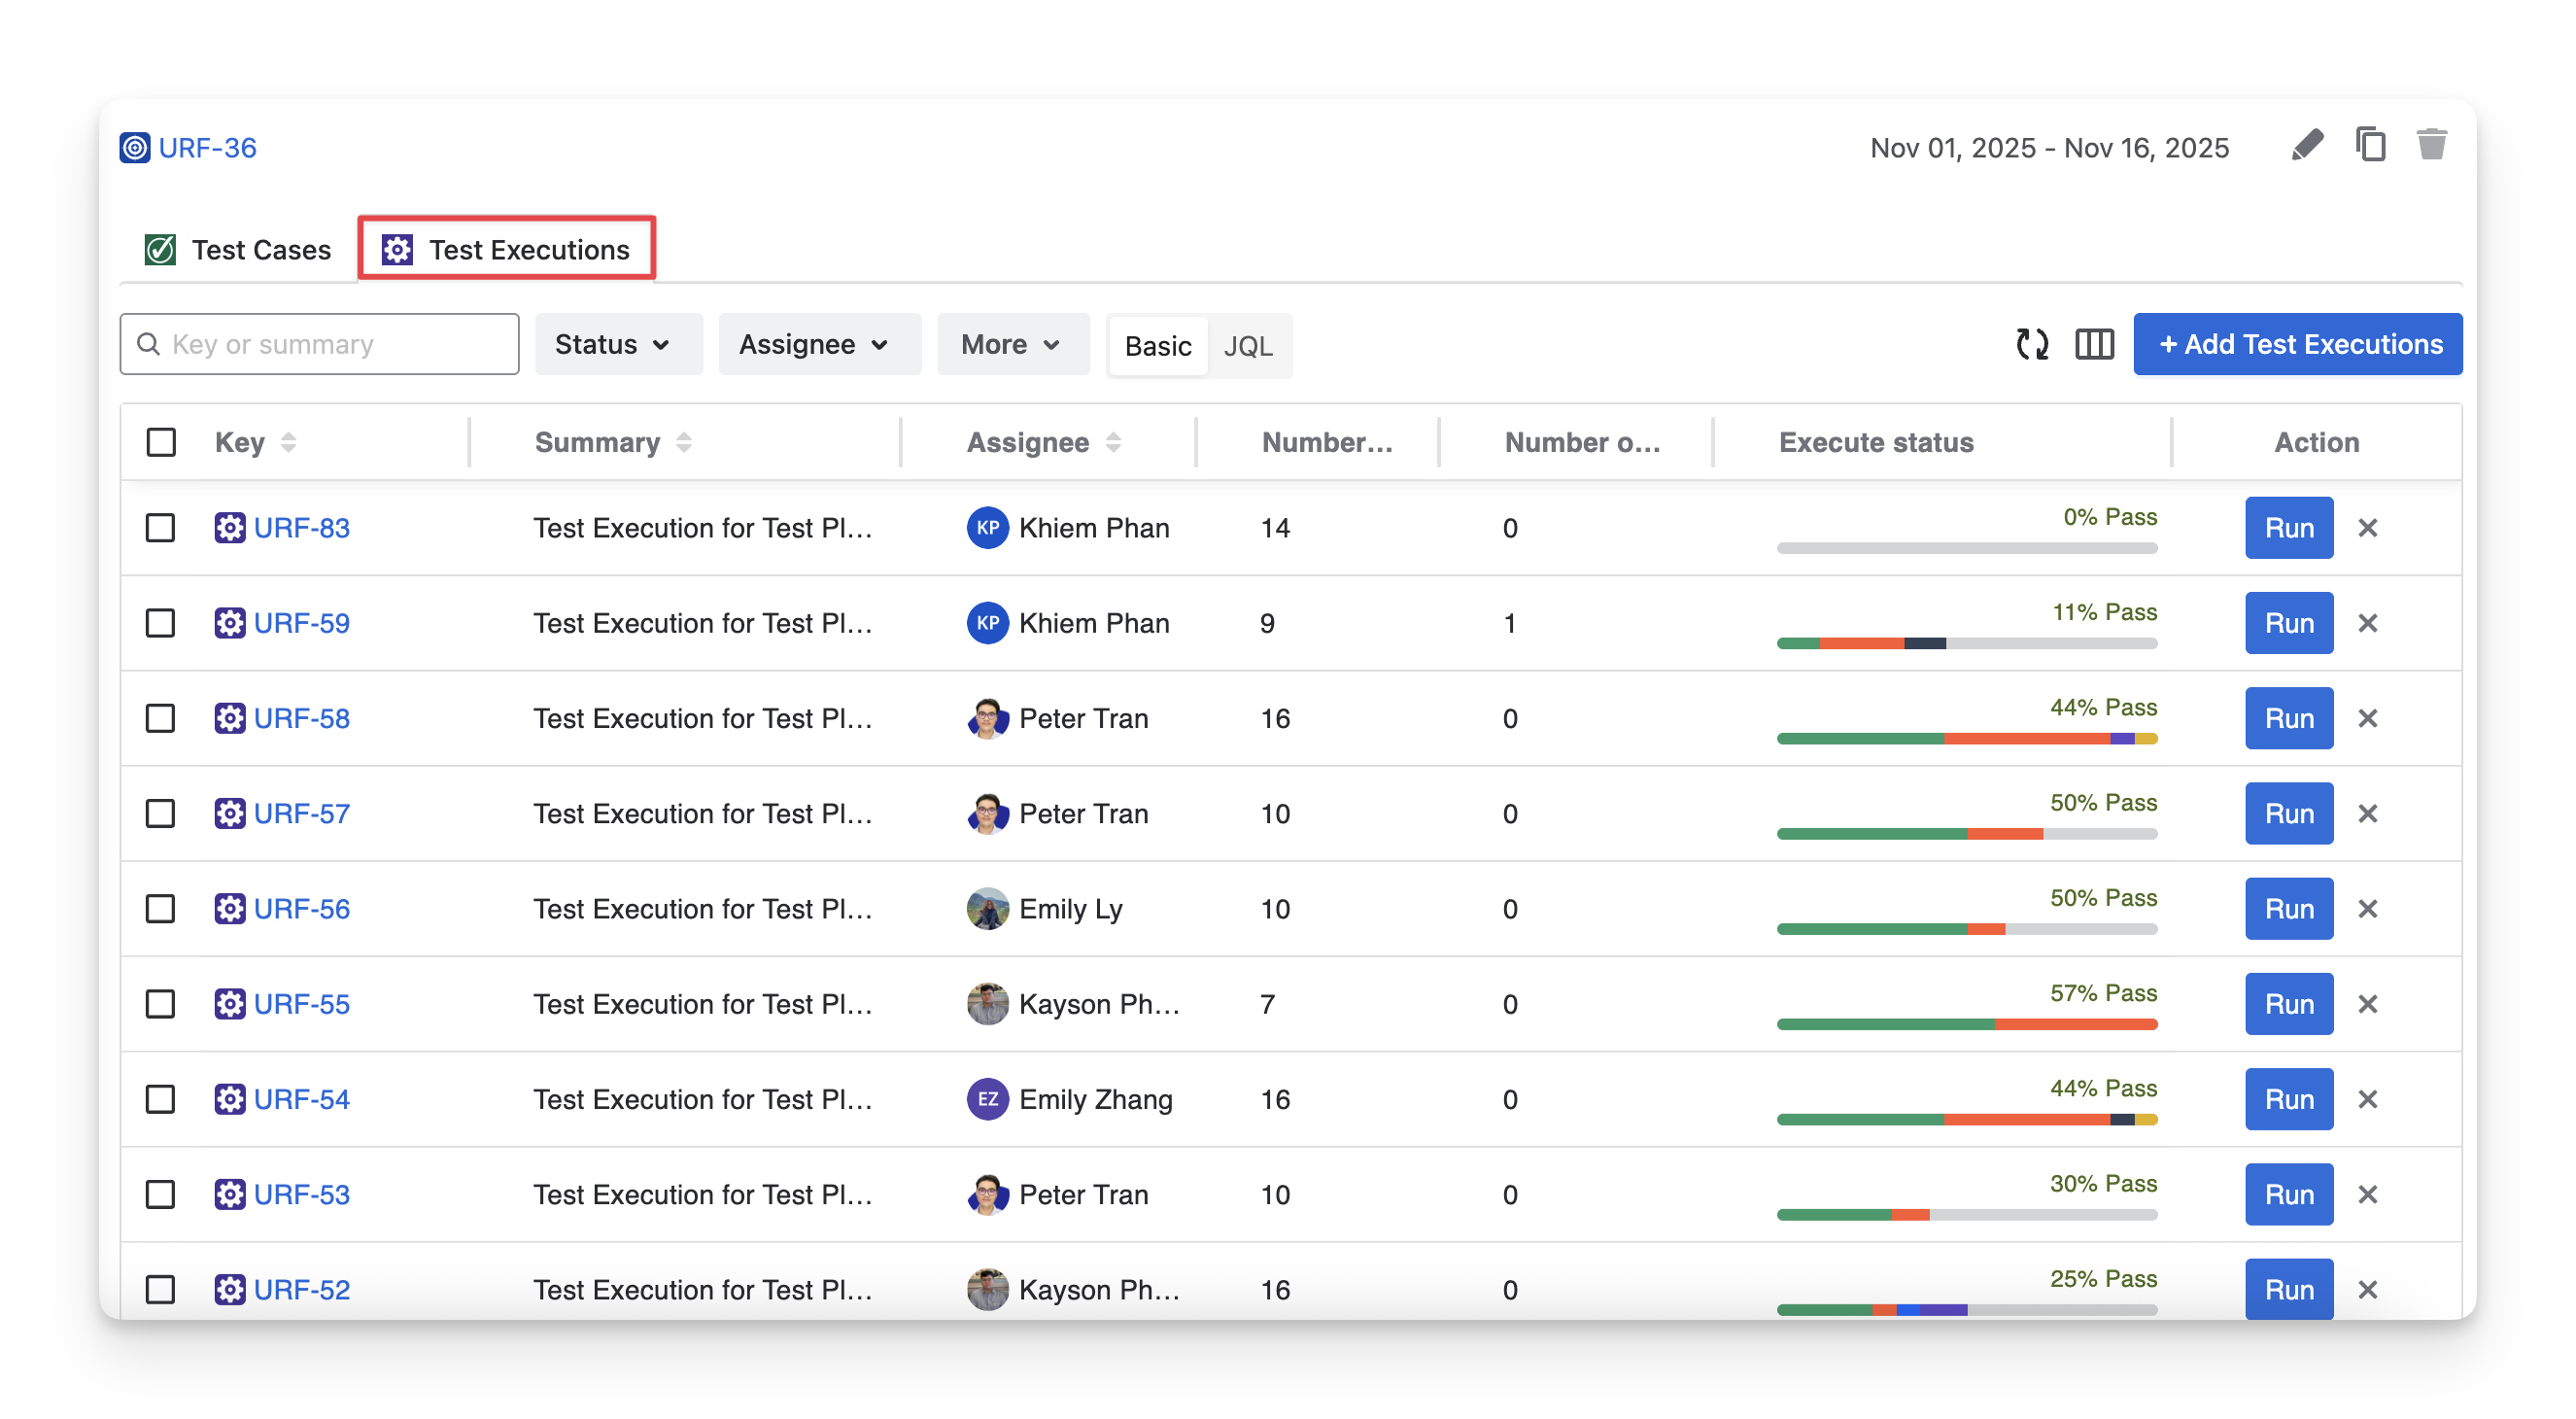
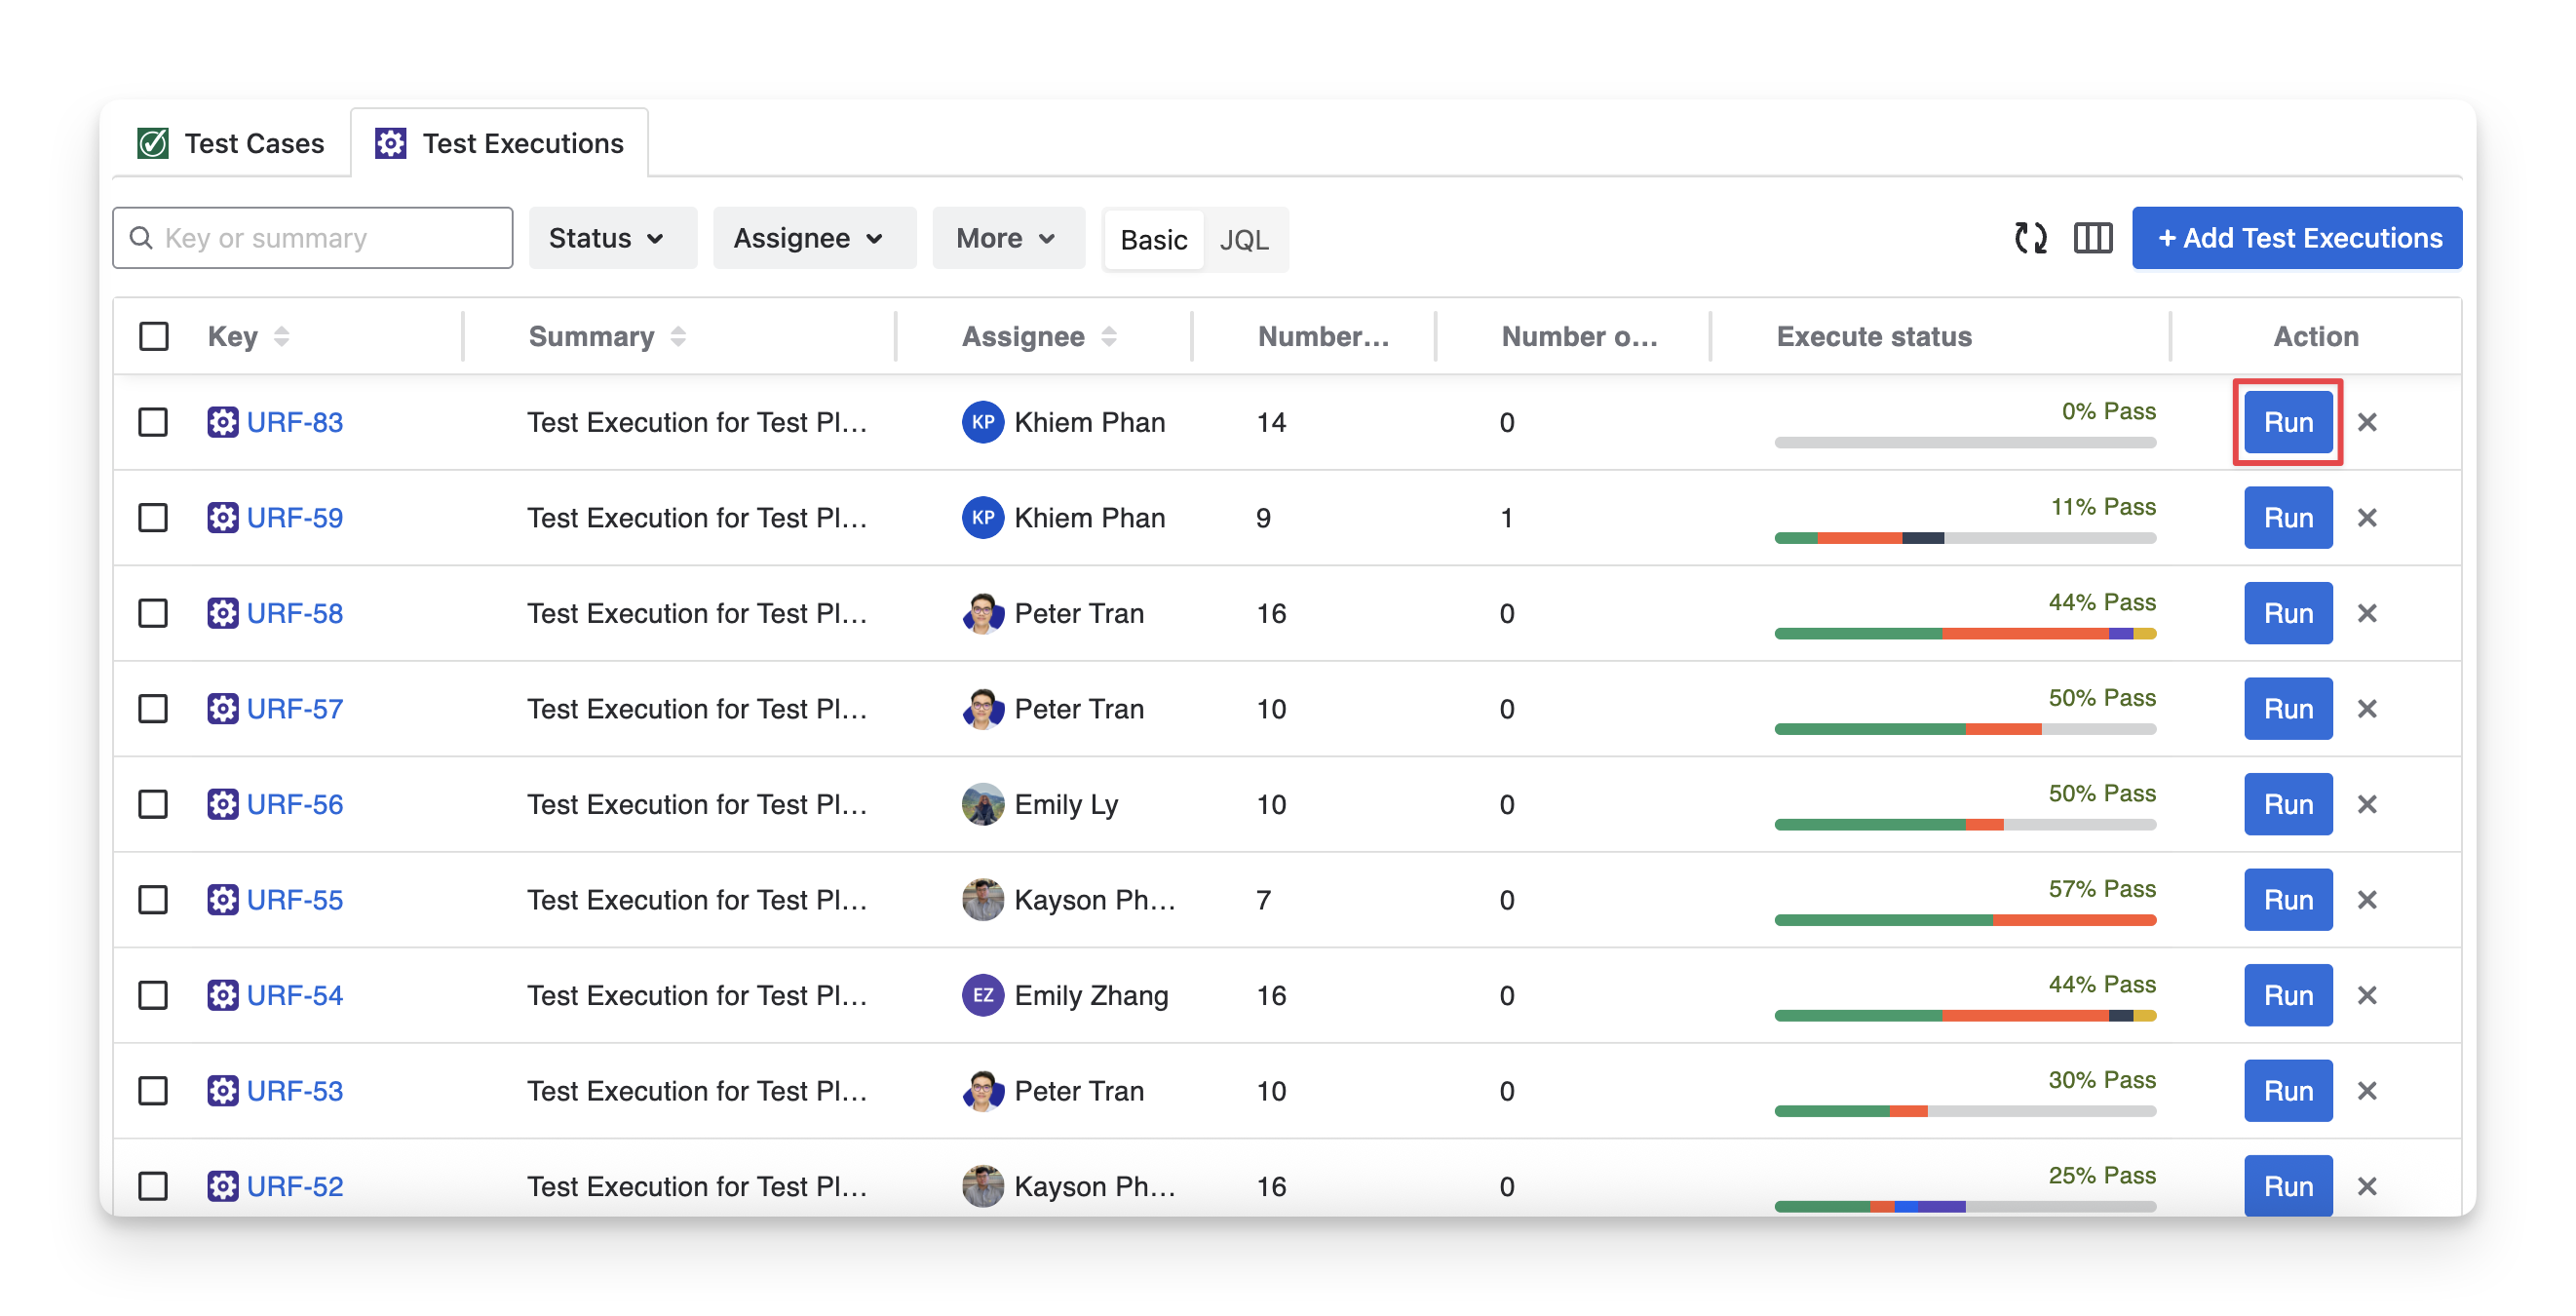
3. Test Executions
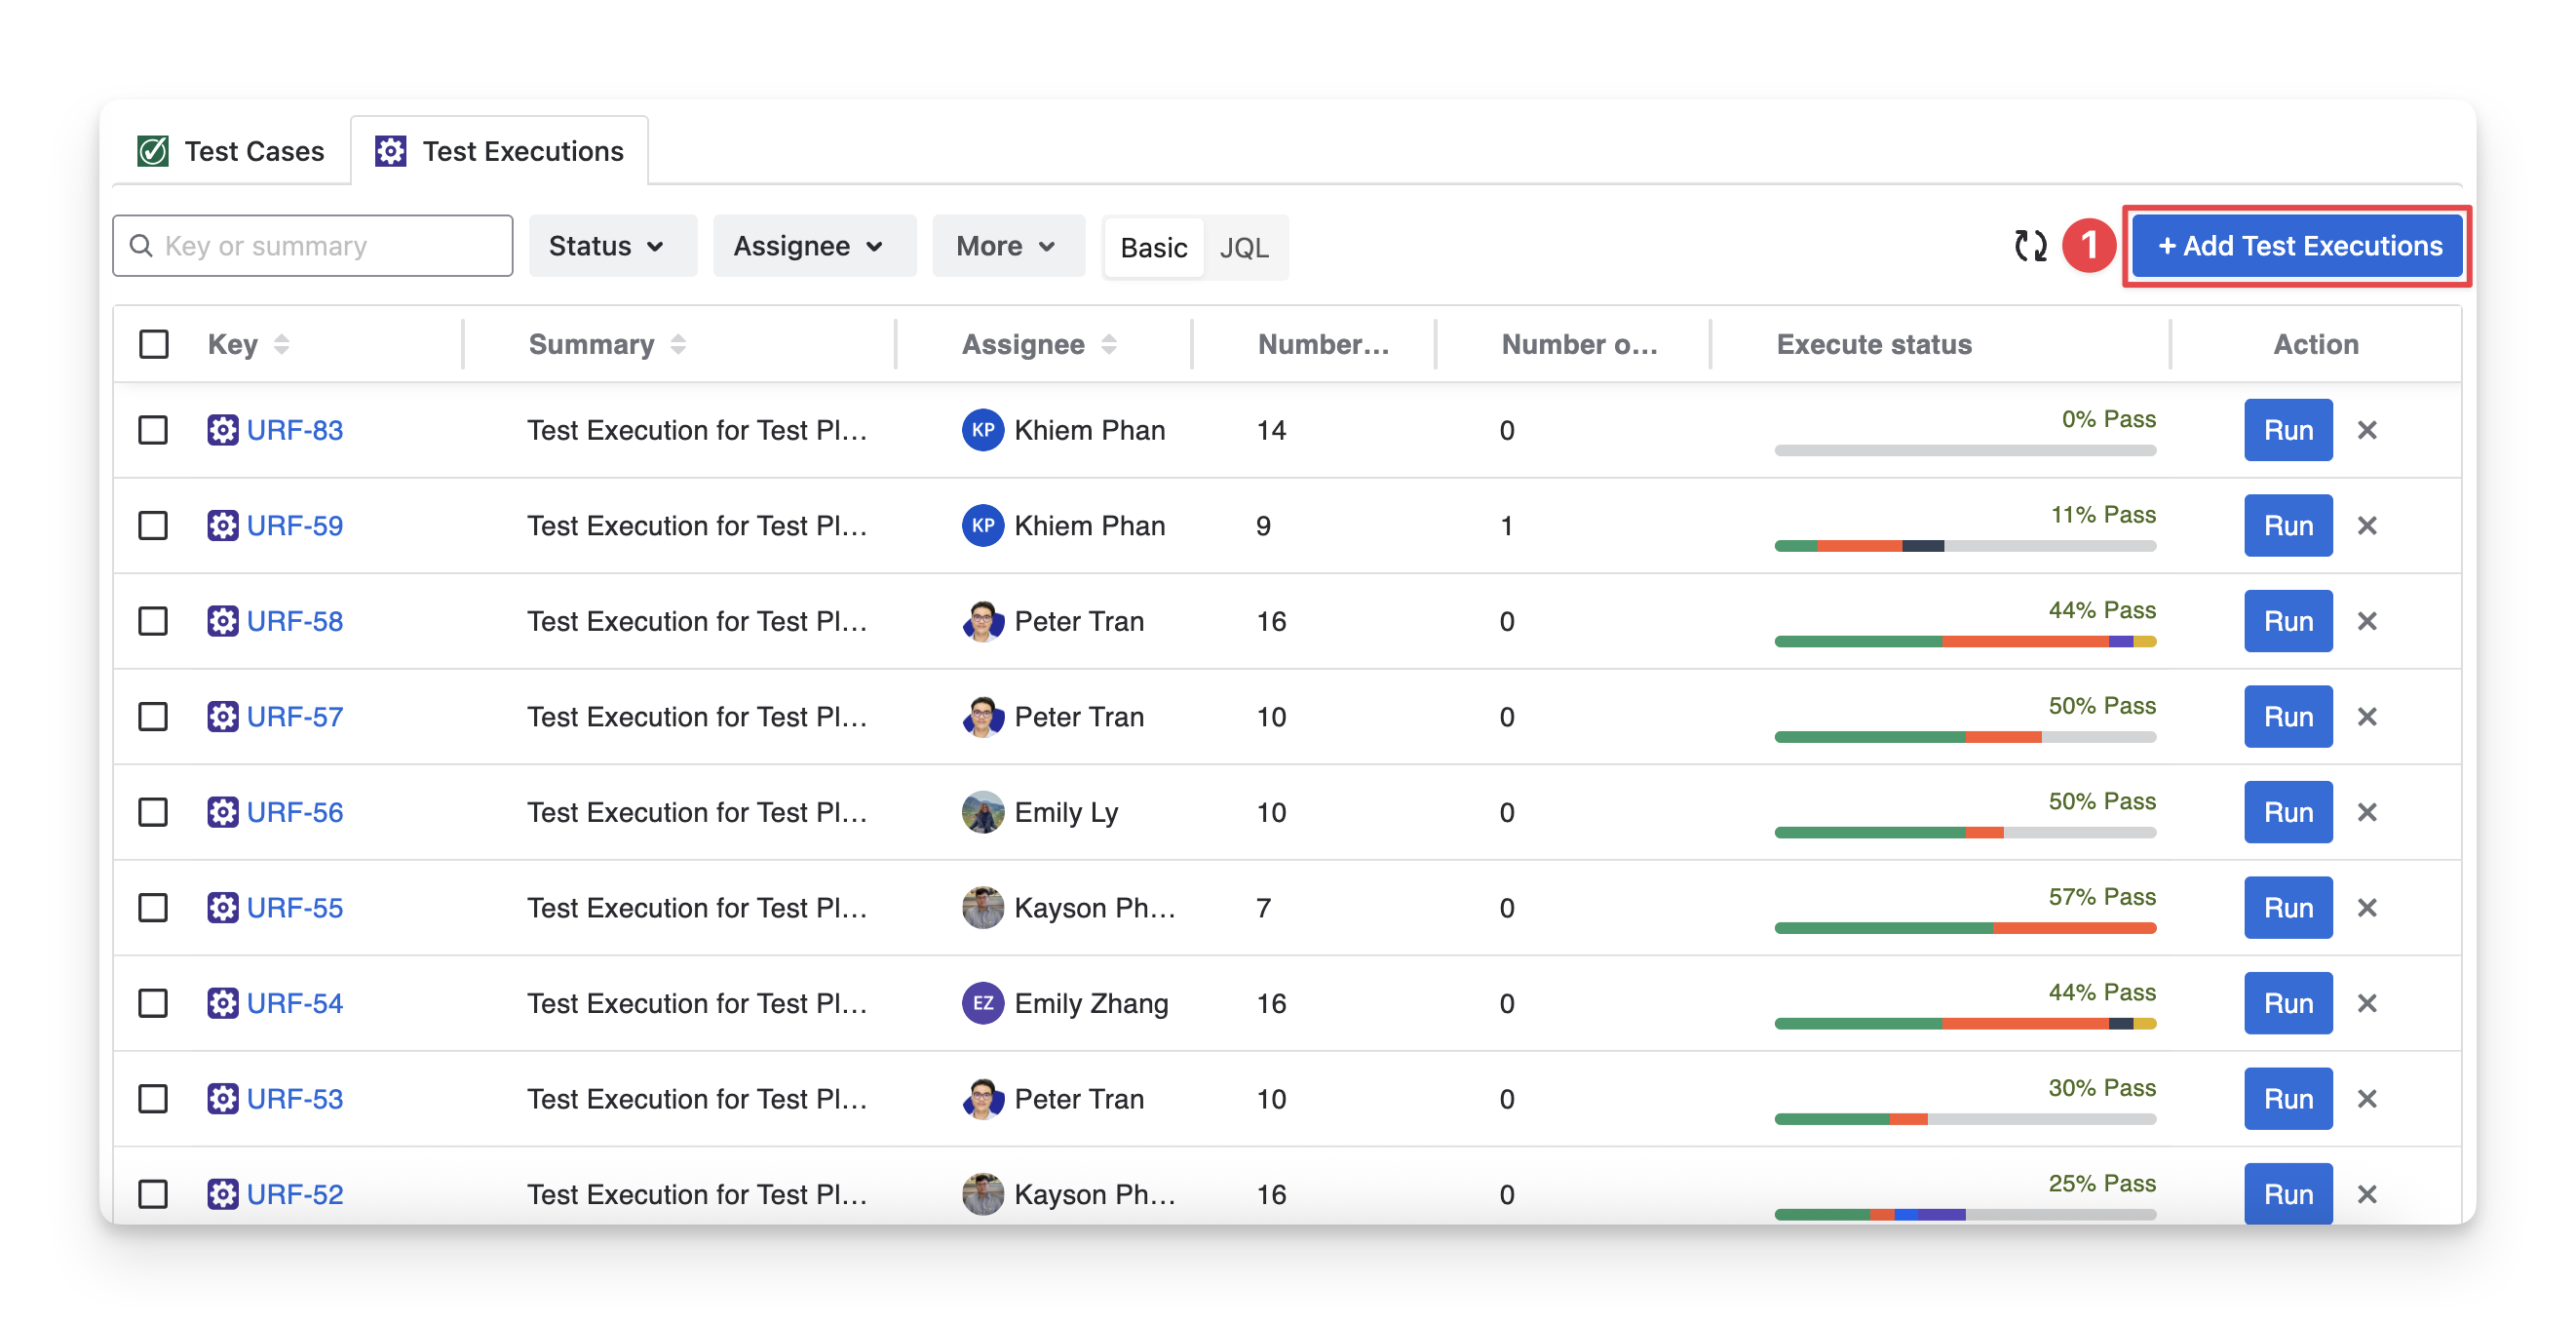
The Test Executions tab of a Test Plan informs you about all test executions created from the test plan and their progress. It helps QA teams track how testing is being carried out over time and across different runs. Here, you can review:
-
Execution Overview: Display each test execution with the execution progress ( Fail Pass todo query blocked skipped ). This helps you quickly understand the current execution status and plan which execution to run next.
-
Execution List: Show all test executions associated with the test plan, including execution keys, summaries, assignees, number of tests, etc.
At this tab, you can perform 3 main actions:
3.1 Add Test Executions to the Test Plan
You can add test executions to a test plan in two ways:
-
Add existing test executions that were created but are not yet associated with the test plan.
-
Create new test executions directly from the test cases included in the test plan.
3.1.1 Add Existing Test Executions to the Test Plan
To add existing test executions to a test plan, follow these steps:
-
In the Test Executions tab inside a Test Plan, click on the “Add Test Executions” button.
-
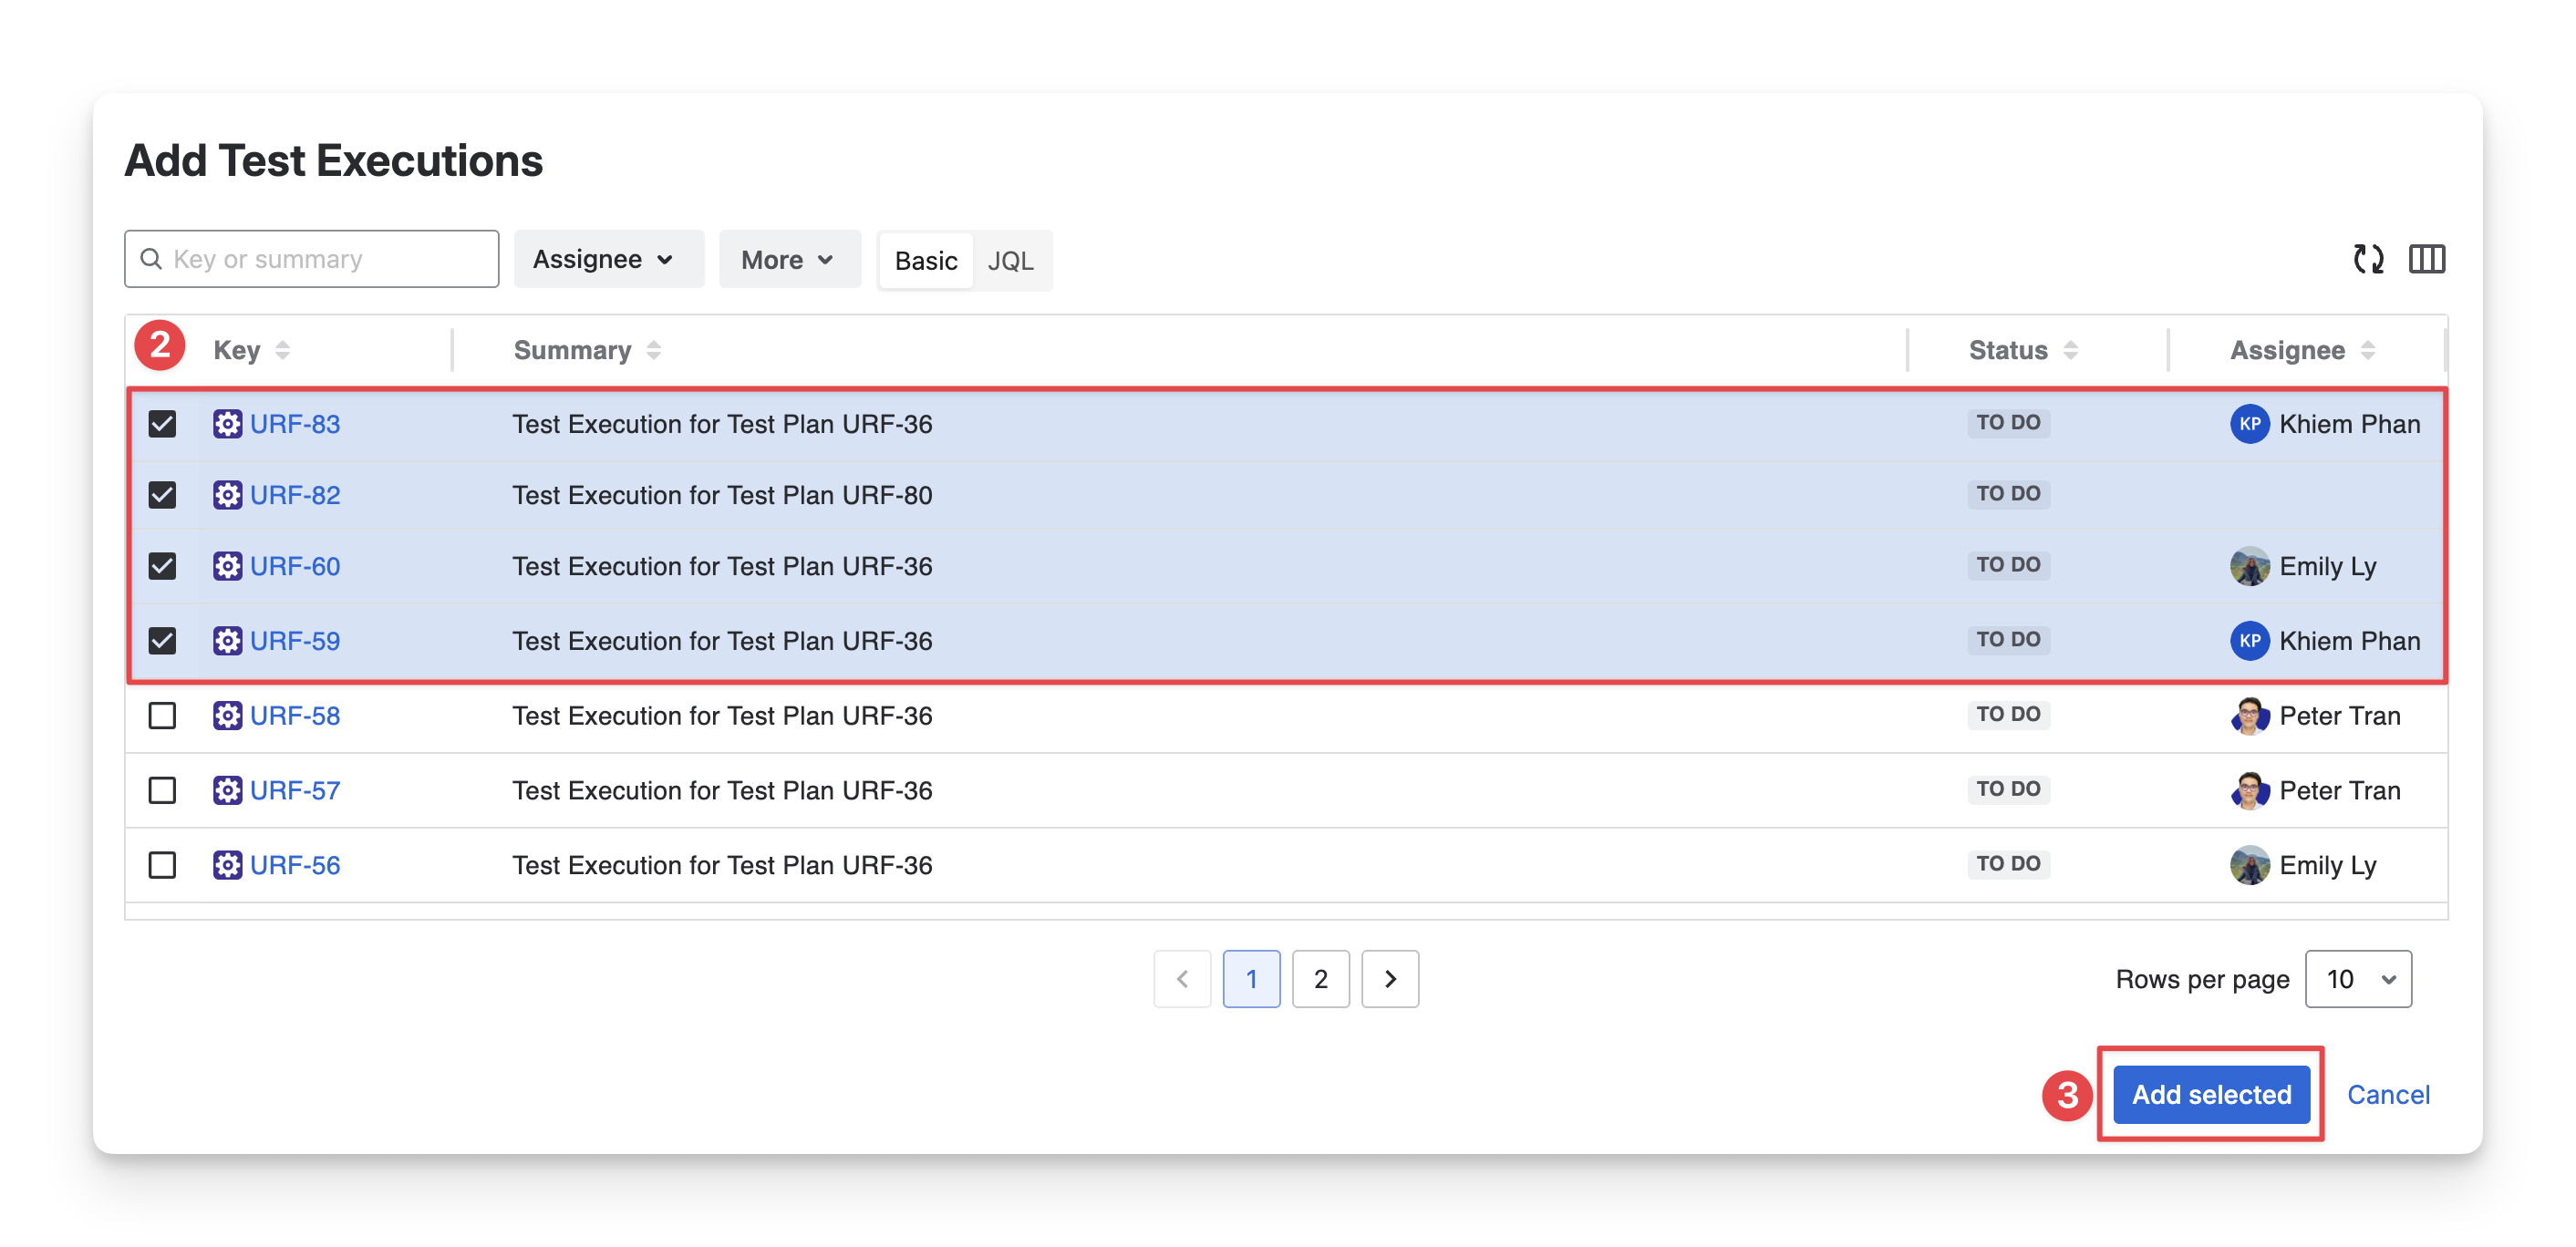
Select test executions you want to add to the current test plan. You can search for test executions by name, filter with fields, or use JQL.
-
Click the “Add Selected” button.
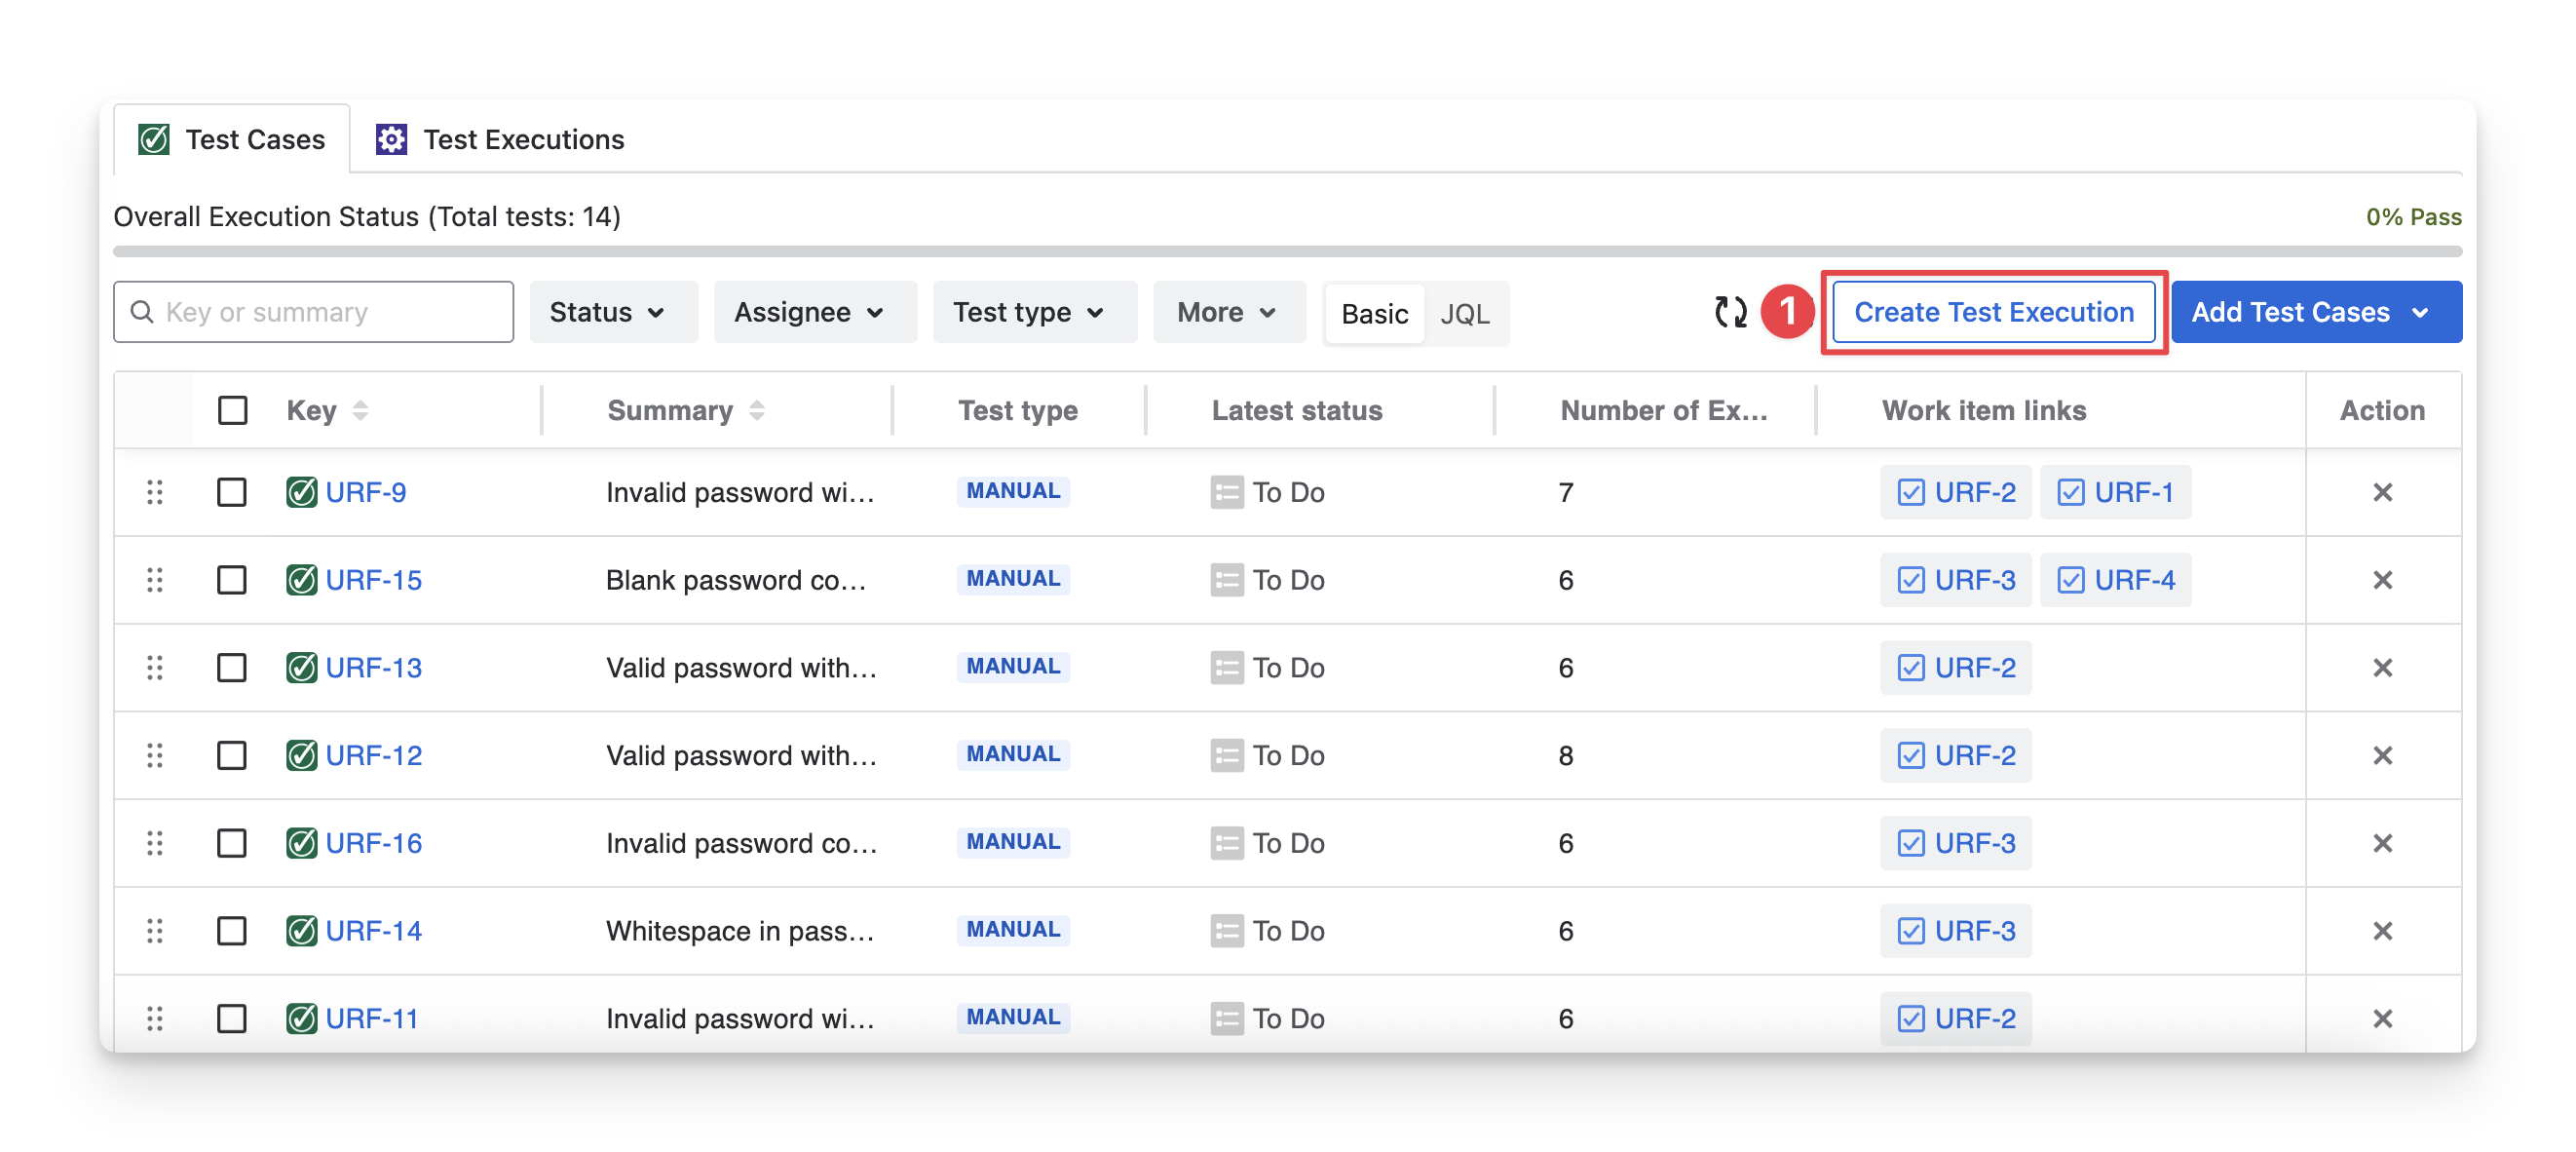
3.1.2 Create New Test Executions From Available Test Cases
All test executions created under this approach will automatically be linked to this test plan.
To create a test execution in the test plan, follow these steps:
-
In the Test Cases tab inside a test plan, click on the “Create Test Execution” button.
-
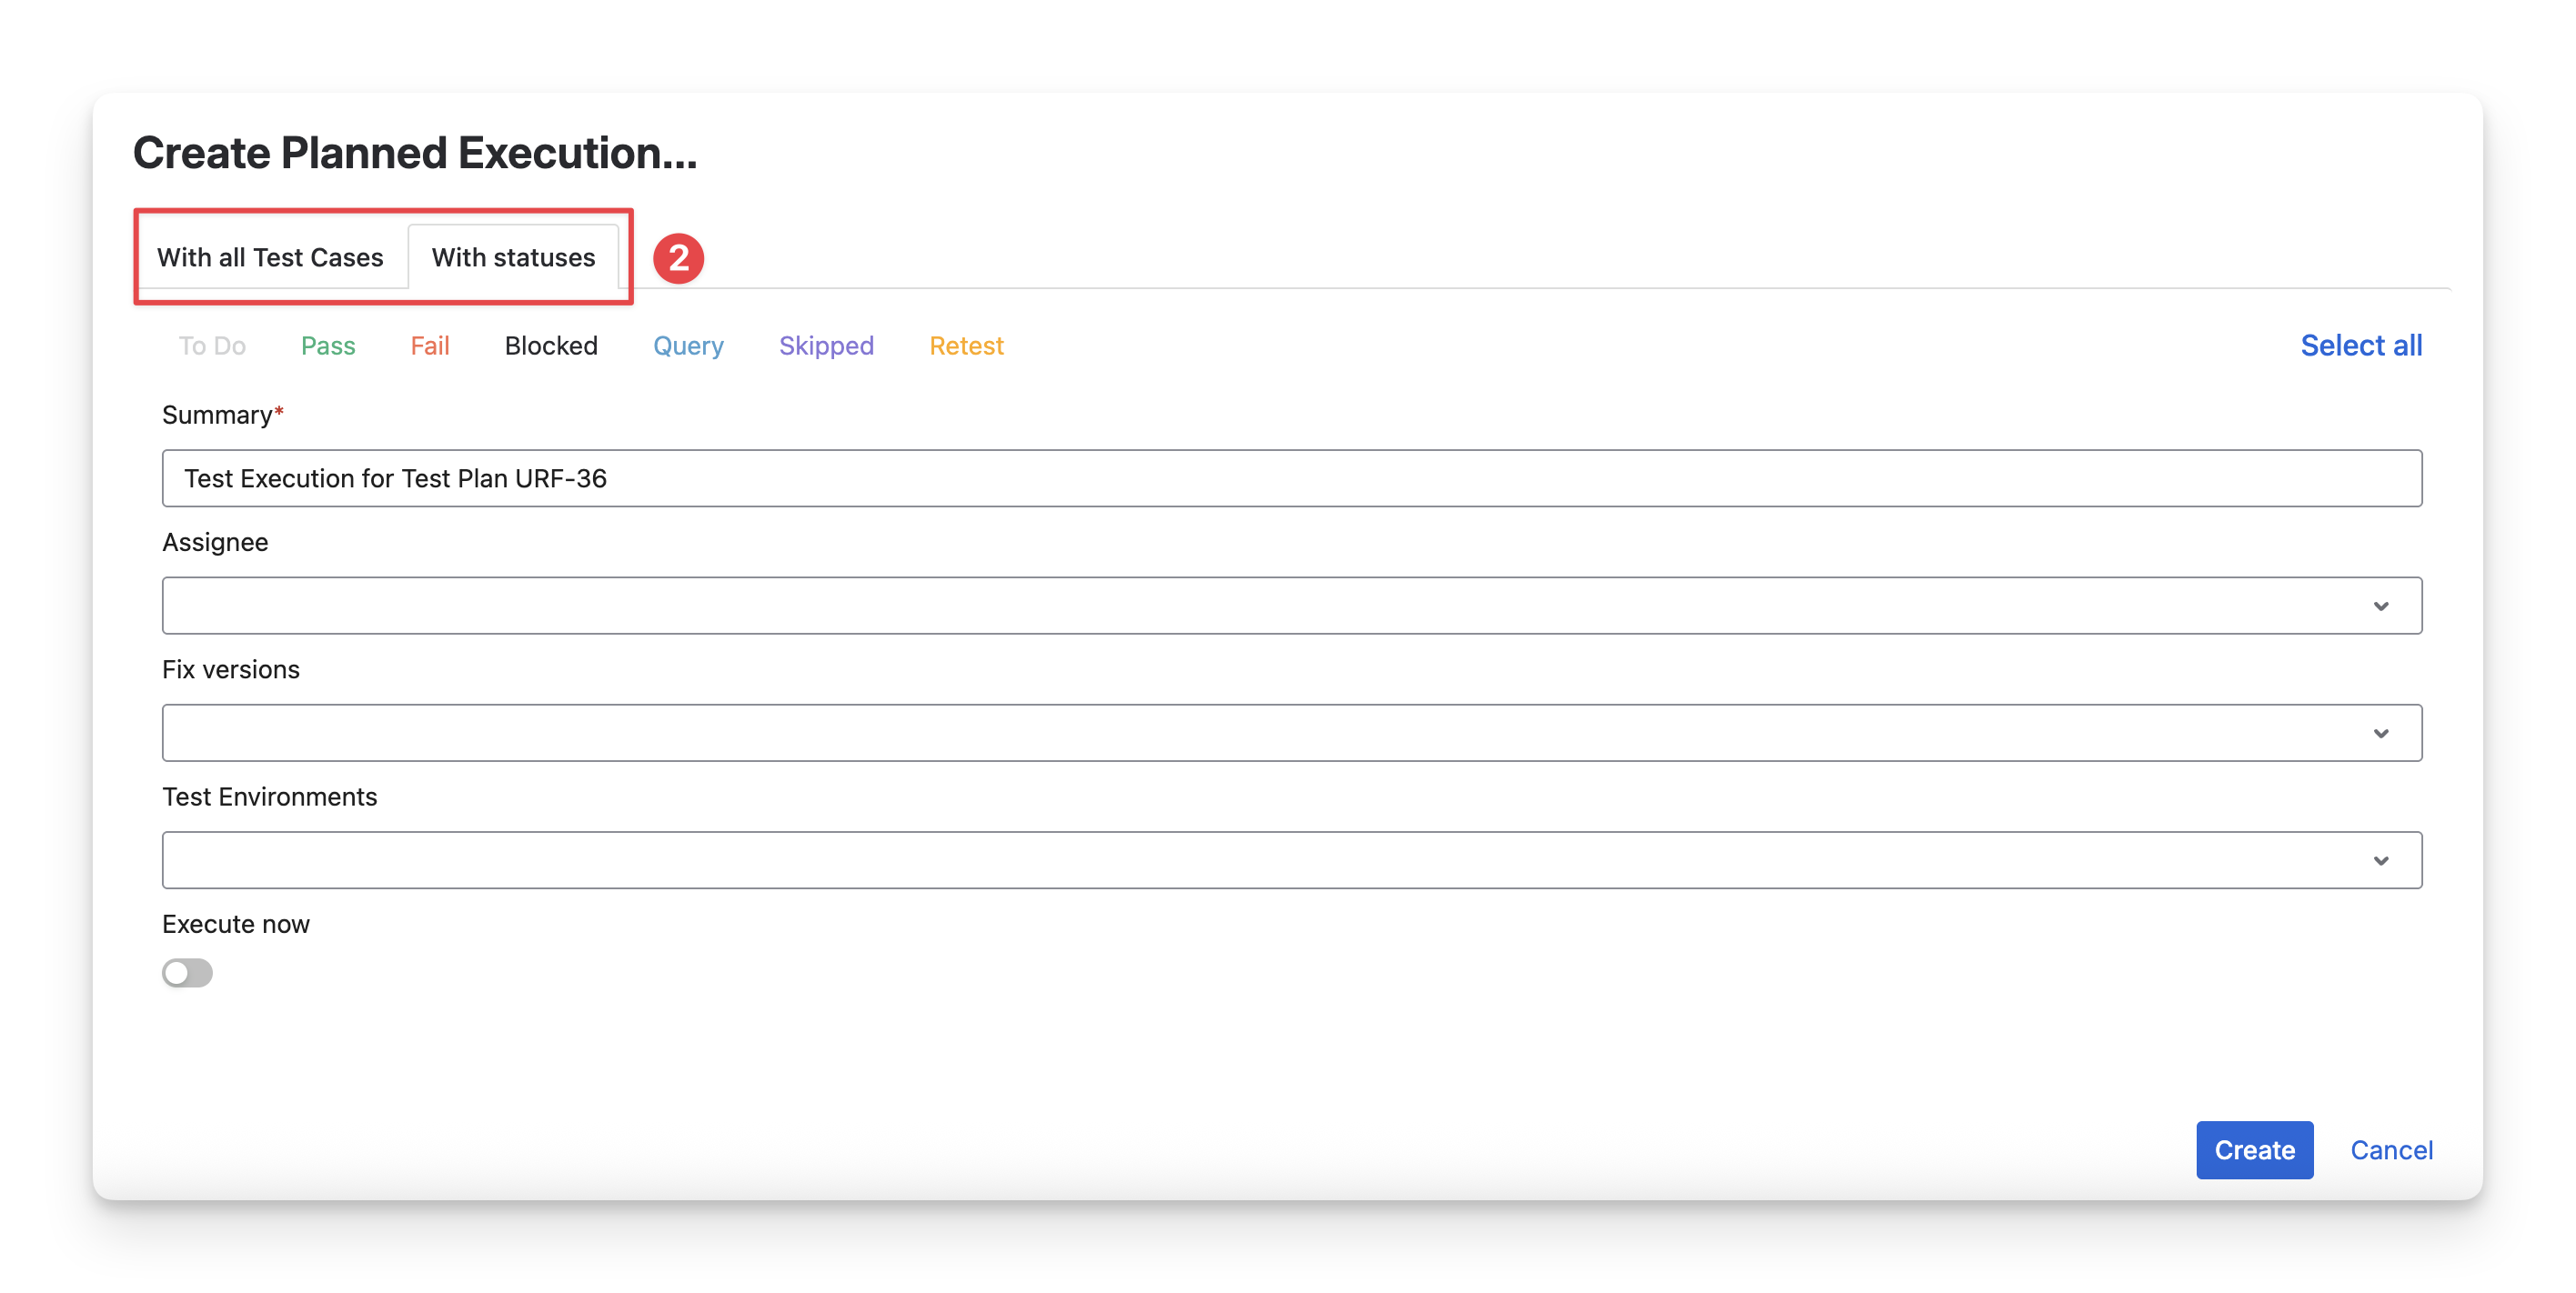
A dialog to create a test execution will appear. You can see 2 tabs:
-
With All Test Cases: Select this tab to create a new test execution that includes all test cases currently in the test plan.
-
With Statuses: Select this tab to create a new test execution based on the latest execution status of test cases, allowing you to include only test cases with specific statuses (for example, Fail or blocked ).
-
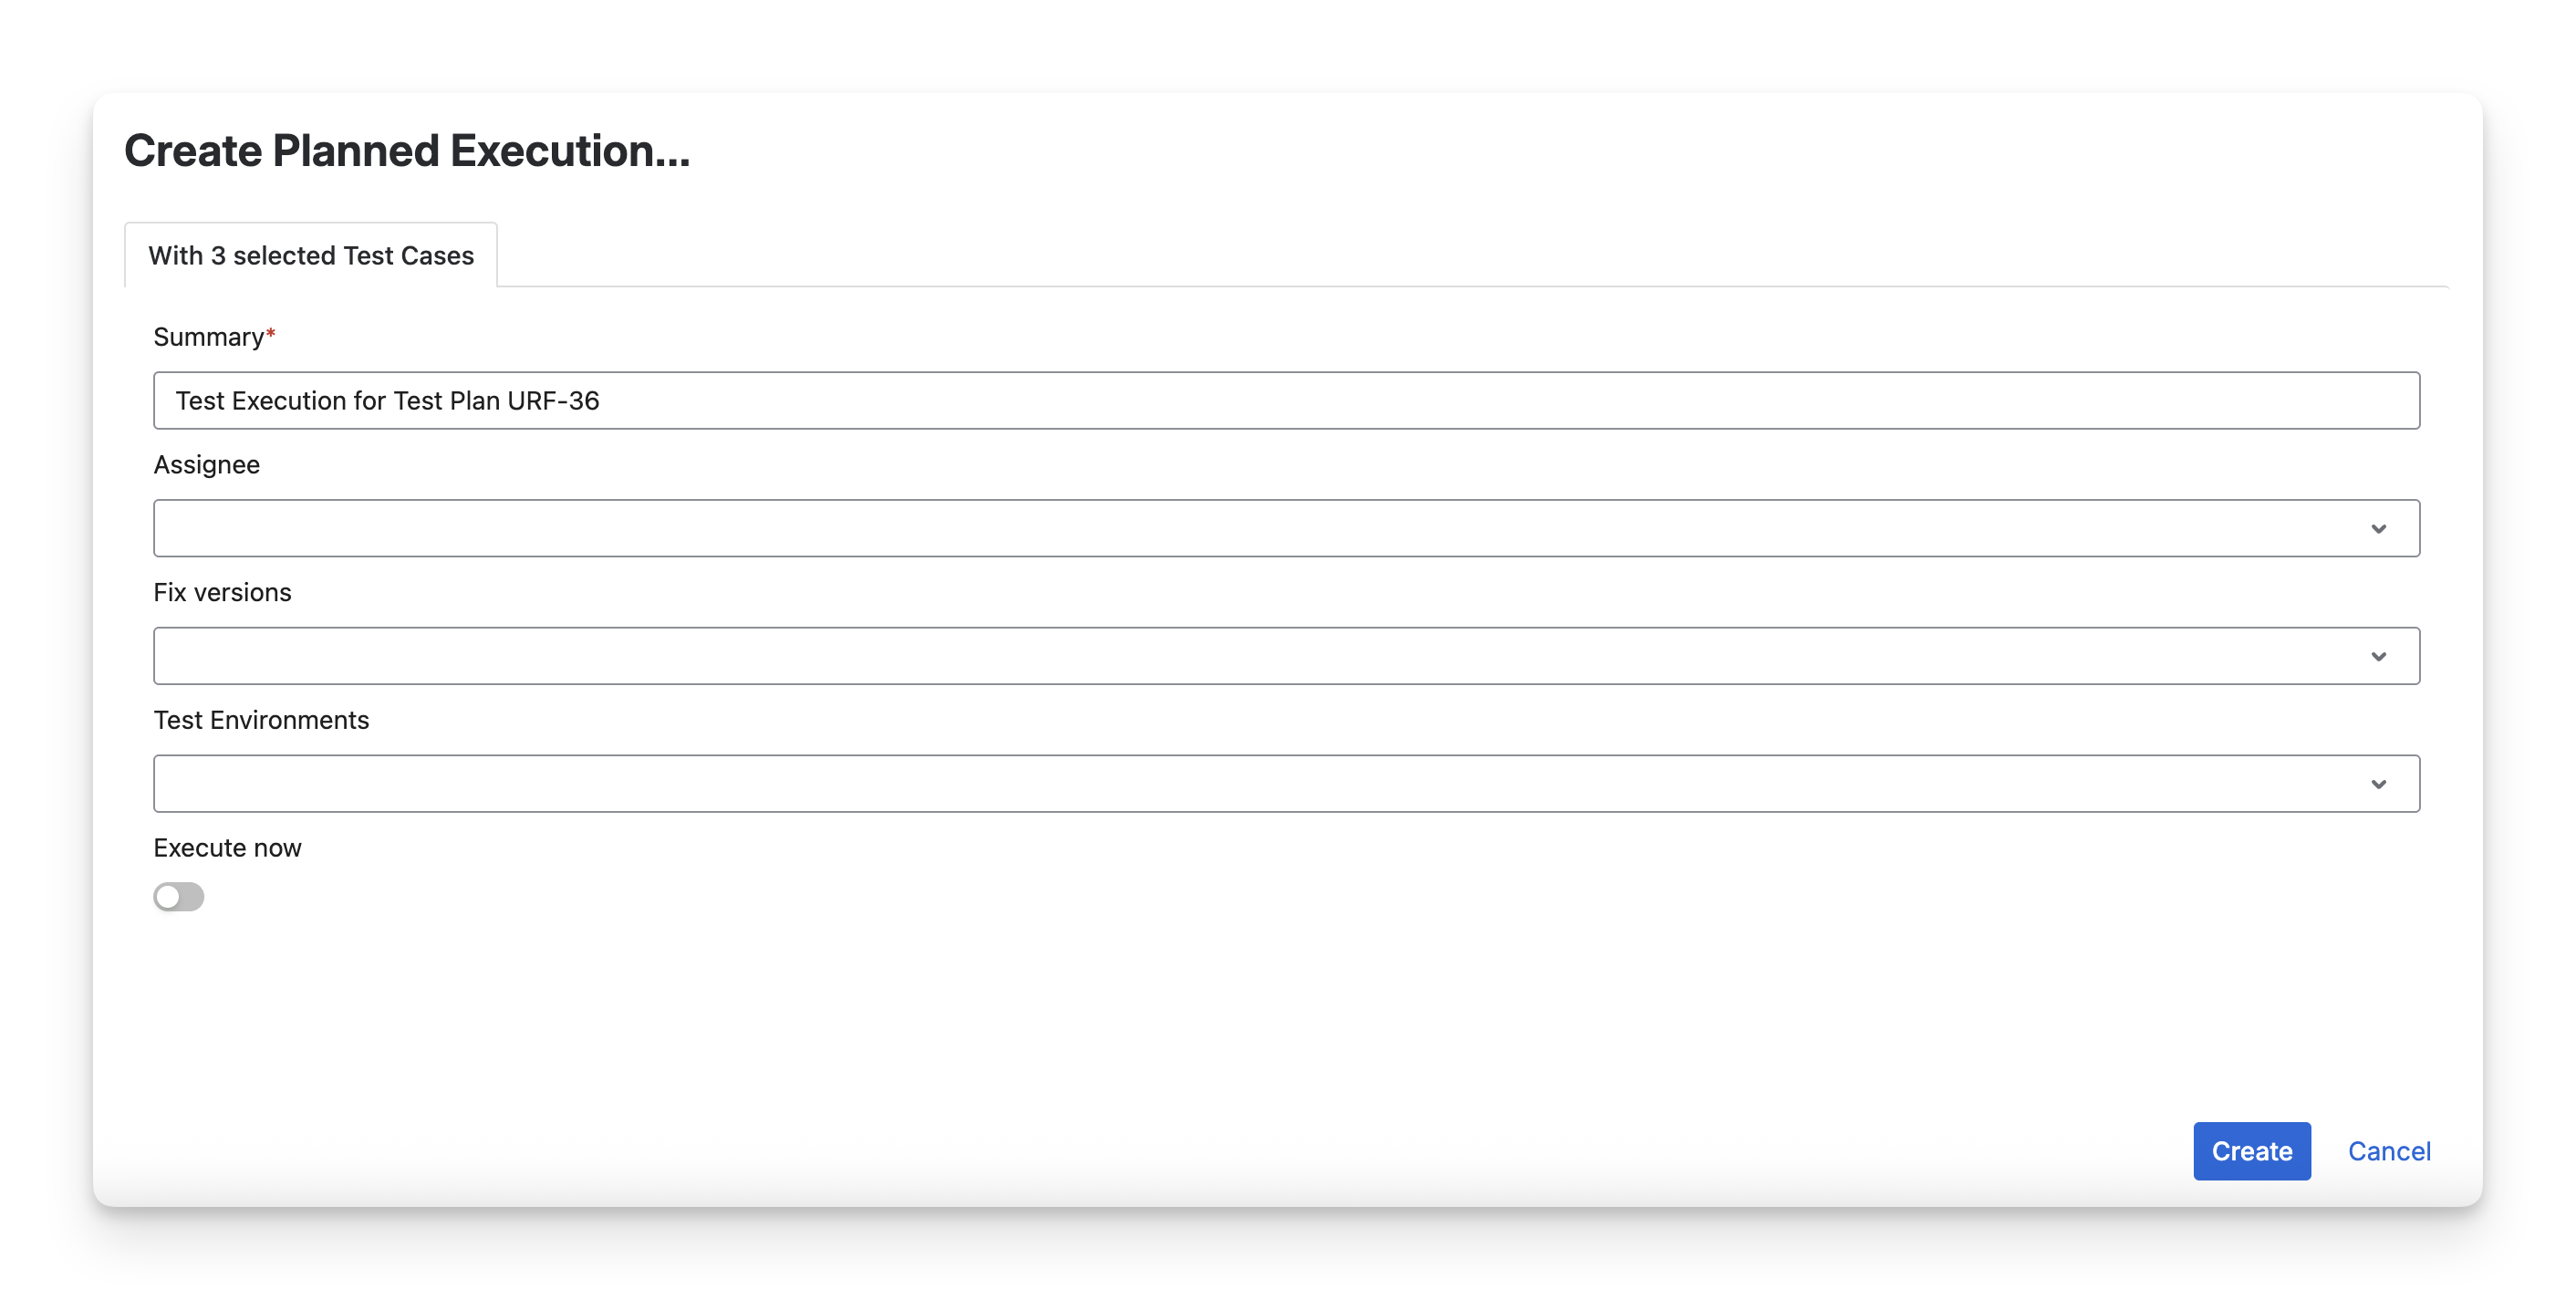
Fill in the Test Executions details. Click the “Create” button to finish.
-
Summary: Enter a short, descriptive name for the test execution to identify its purpose (for example, the test cycle name).
-
Assignee: Select the team member responsible for running and managing this test execution.
-
Fix version: Choose the product version or release that this test execution is validating.
-
Test Environment: Specify the environment where the tests will be executed (such as QA, Staging, or Production).
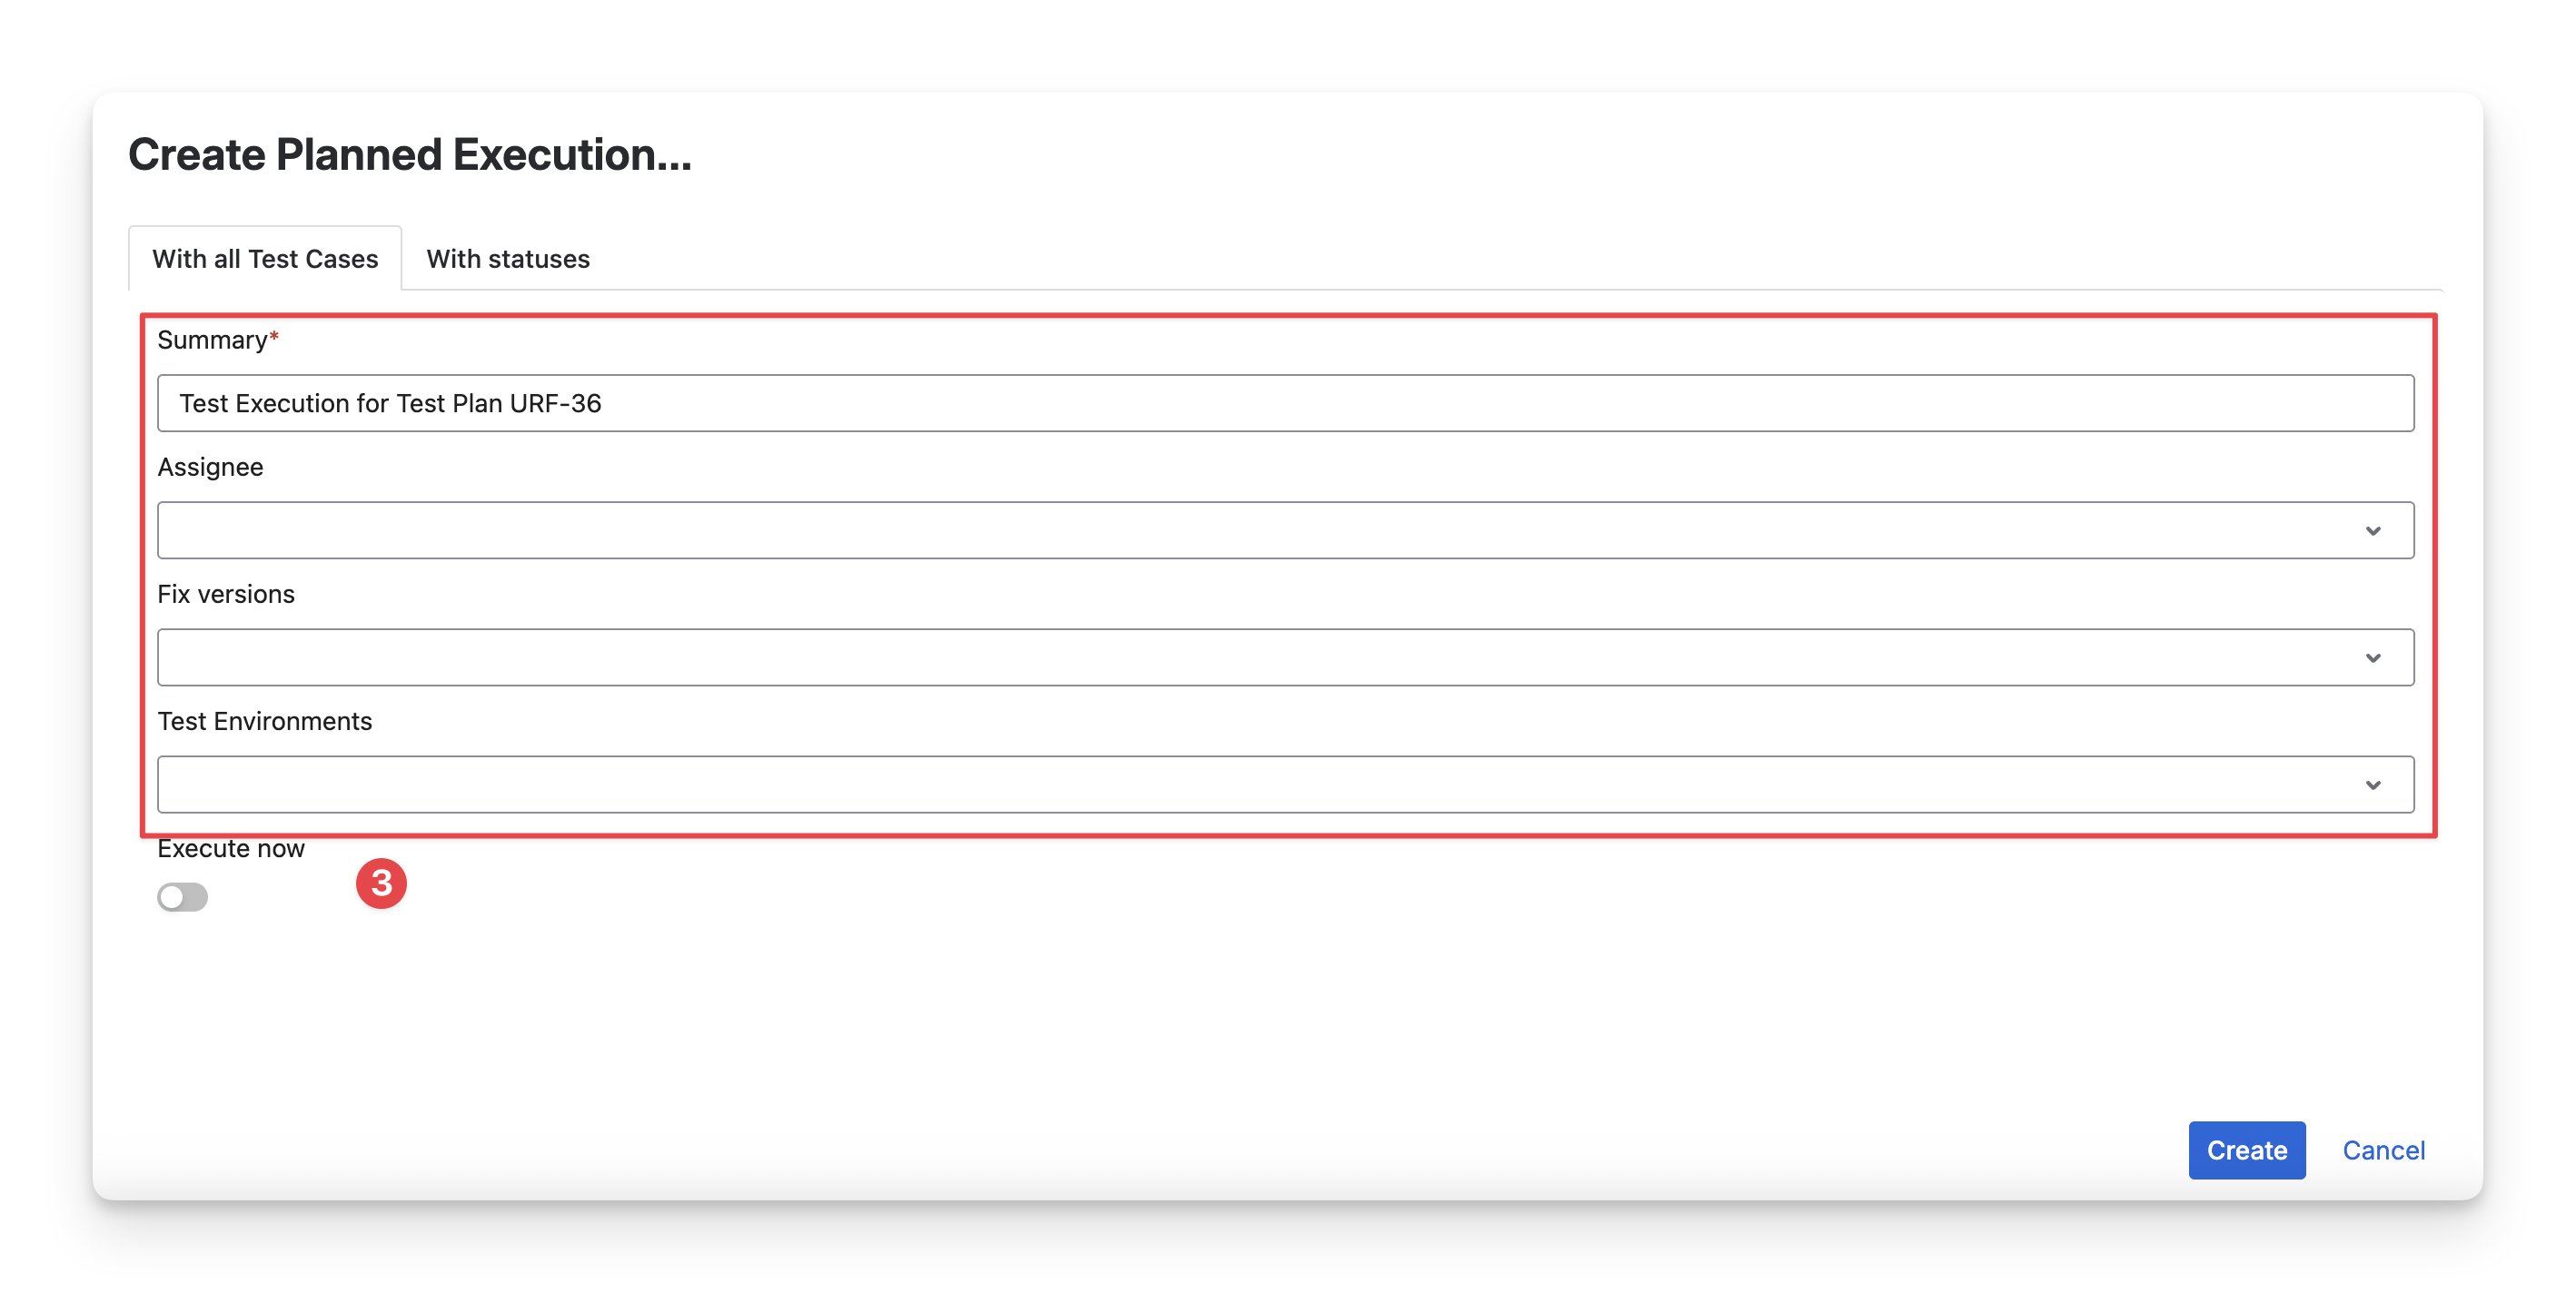
You can turn the “Execute now” option on or off to decide whether the test execution should start immediately after it is created or be run at a later time.
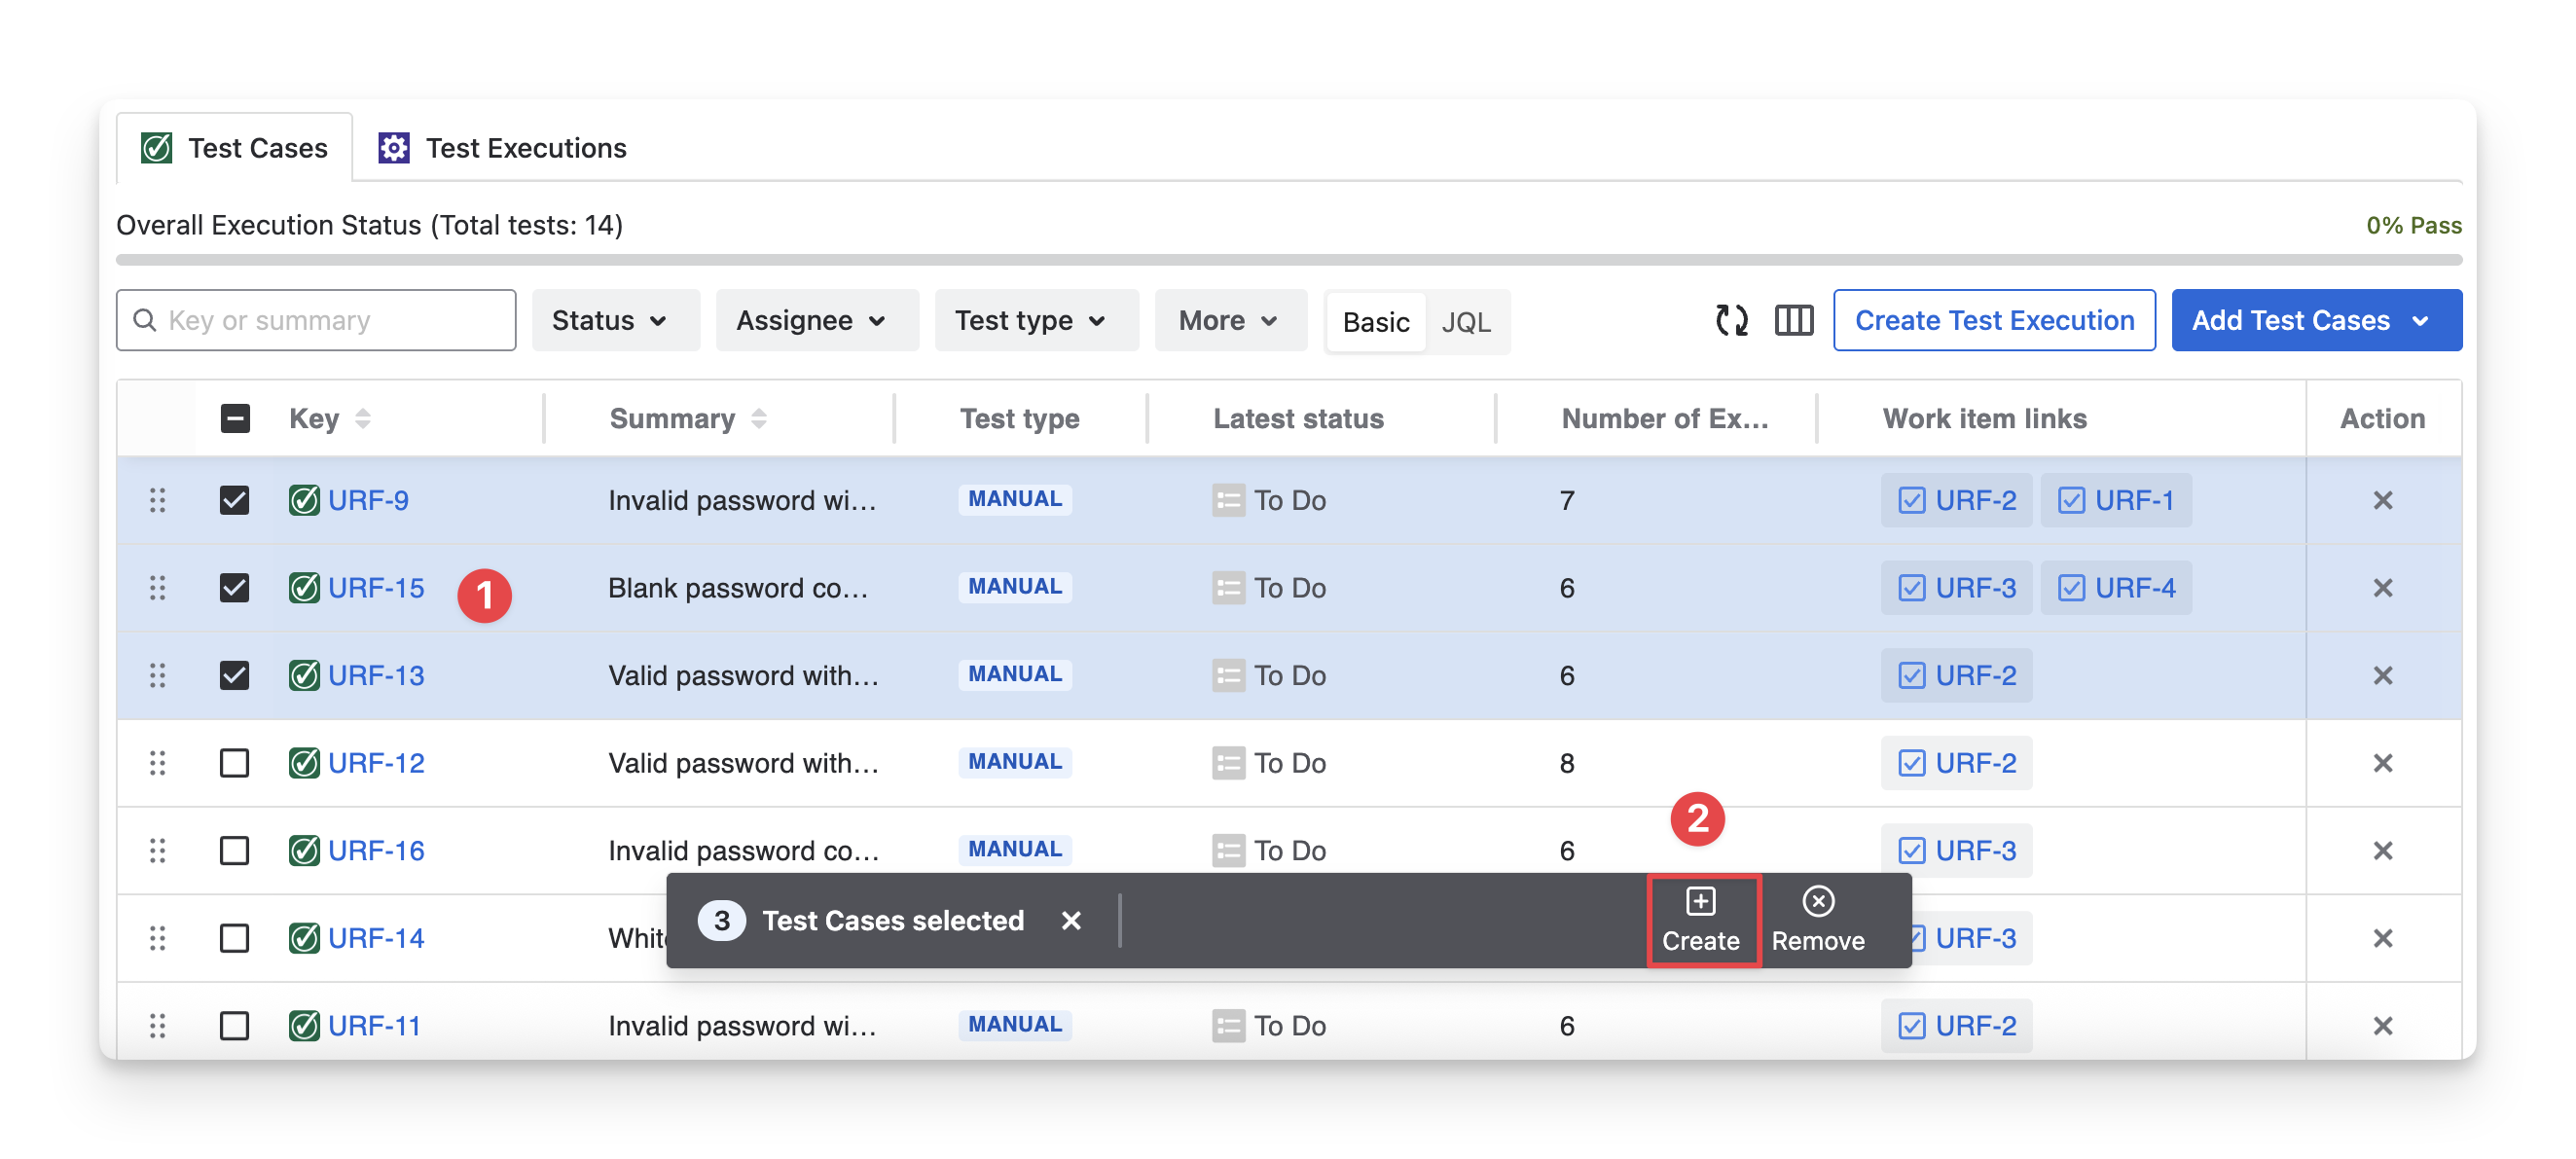
You can also add test execution from selected test cases only. Here is how:
-
In the Test Cases tab, multi-select the test cases you want to include in the test execution.
-
Choose the “Create” button in the toolbar.
-
Fill in the Test Execution details. Click the “Create” button to finish.
3.2 Remove Test Executions from the Test Plan
To remove test execution from the current test plan, follow these steps:
-
In the Test Executions tab, multi-select the test executions you want to remove.
-
Choose the “Remove” option in the toolbar.
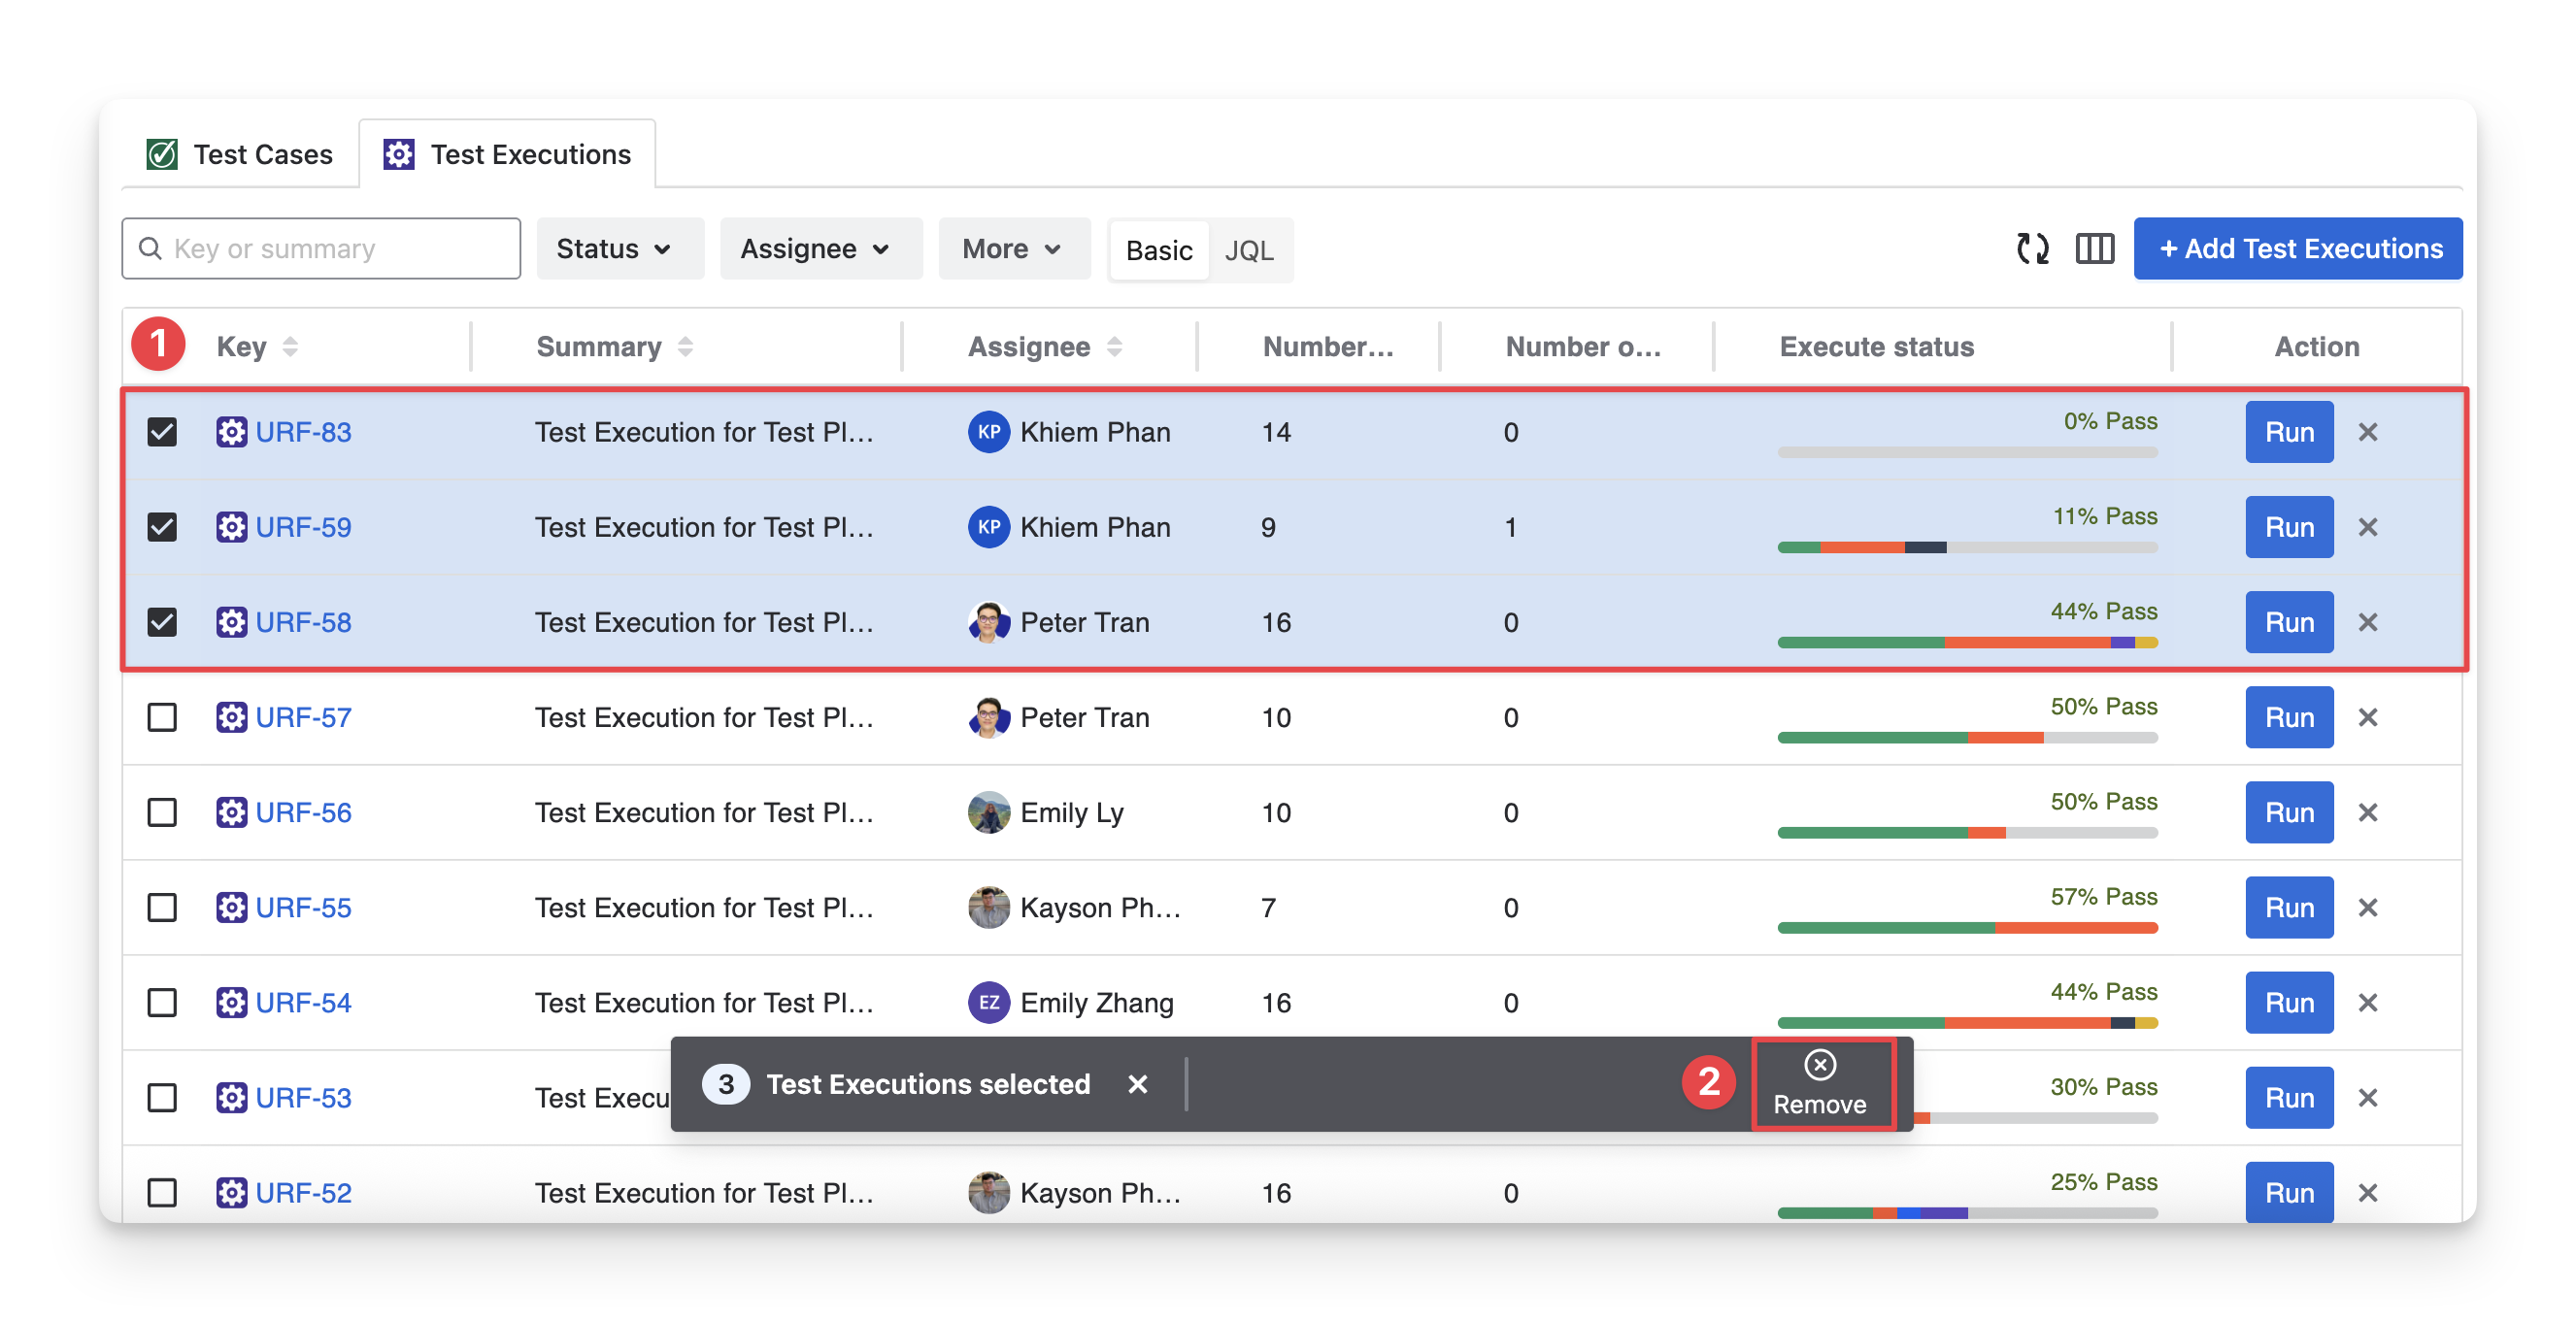
Or you can click the “x” button if you want to remove a single test execution only.
3.3 Run Test Executions
When you click the “Run” button of a test execution, you will be redirected to the test execution screen.
This is the main area where you will conduct your test execution.
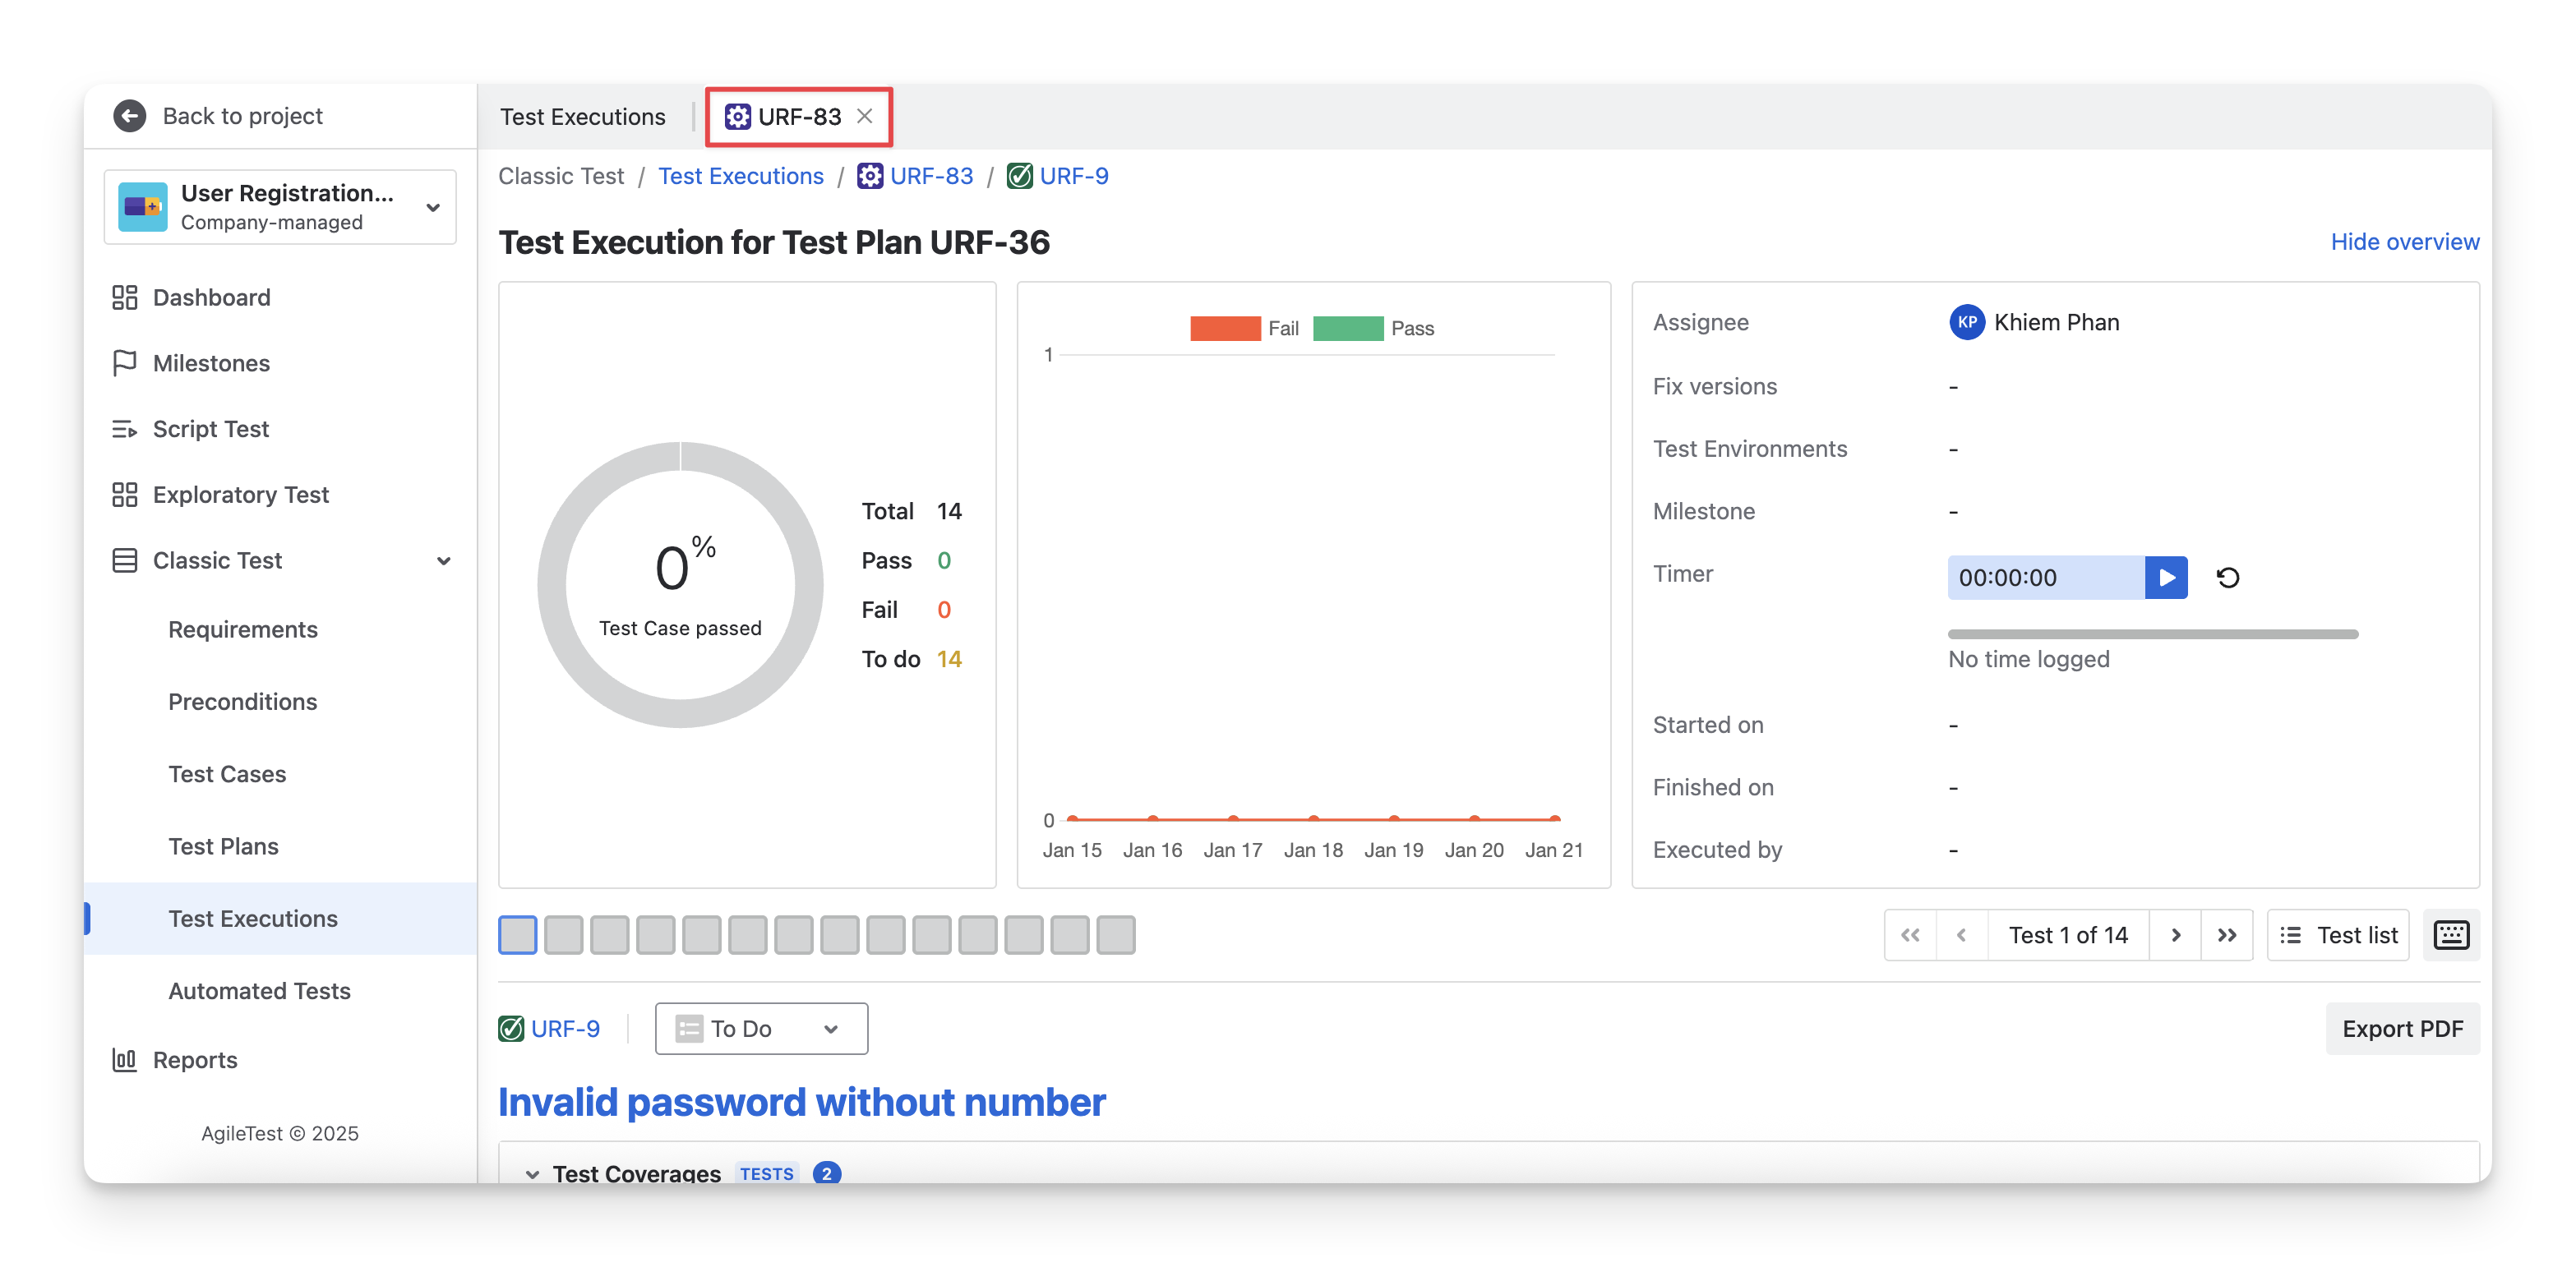
Learn more about Test Execution.
Should you need any assistance or further AgileTest inquiries, contact our 24/7 Support Desk!