
Use dashboard widgets to customize what you monitor, how each metric is displayed, and how your dashboard is arranged.
Widget changes affect your dashboard layout only. They do not change project data, schedules, worklogs, leave requests, or capacity settings.
Add a widget
Add widgets to show the information you want to track on the Dashboard.
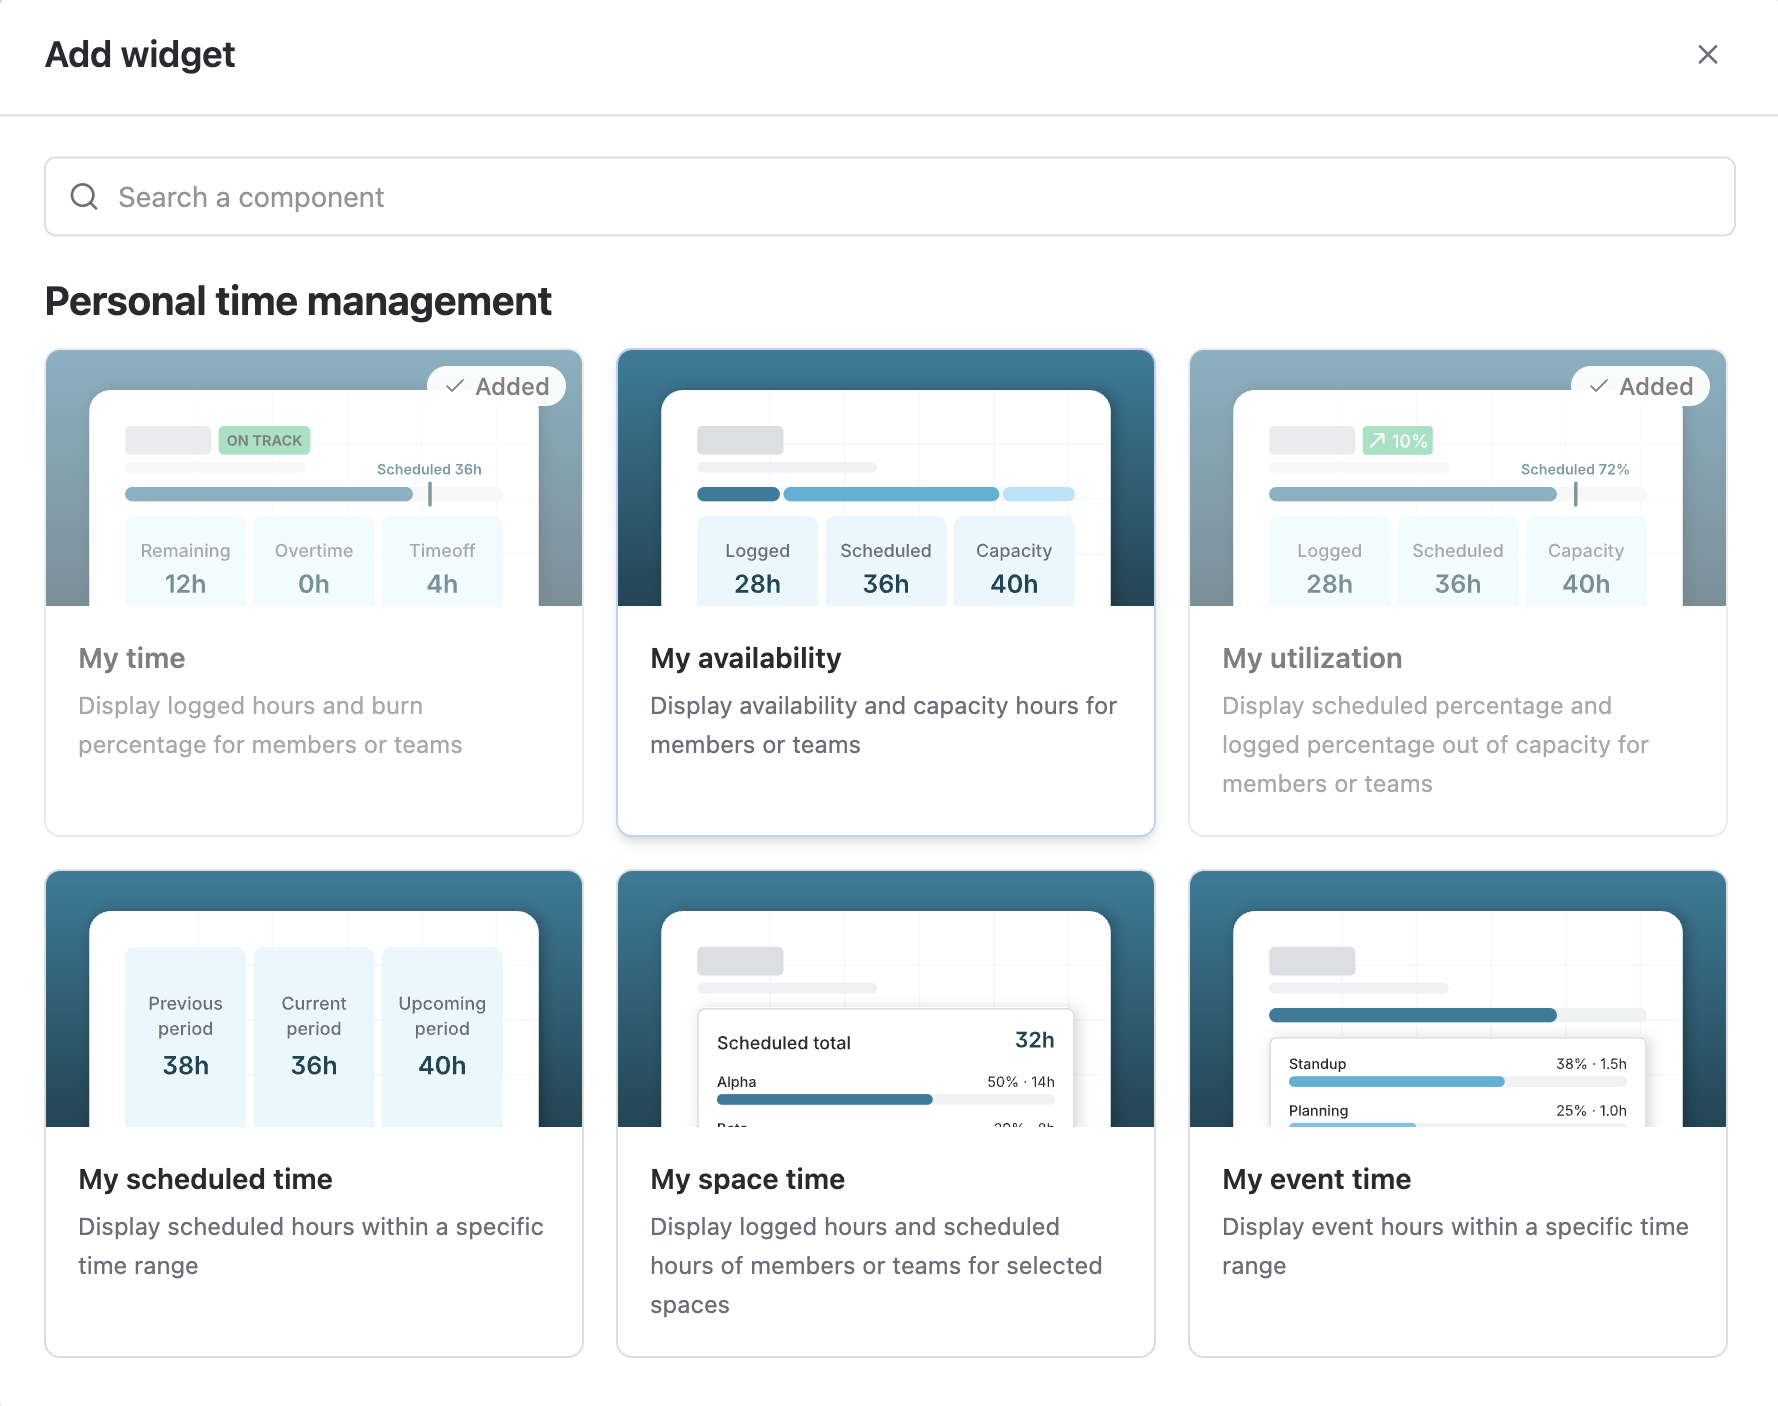
-
Click Add widget in the upper-right corner of the Dashboard.
-
Search for a widget by name, or browse the available categories.
-
Select the widget you want to add.
The widget appears in the Dashboard workspace.
Configure a widget
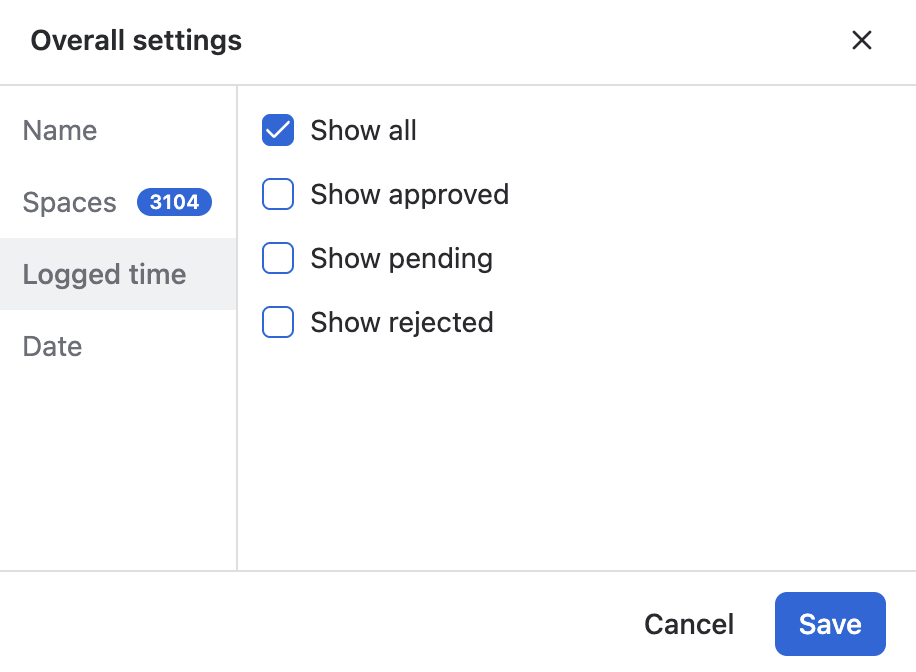
After adding a widget, use its settings to control the data it displays. Available settings vary by widget type.
-
Locate the widget you want to update.
-
Open the widget’s more options menu.
-
Select Settings.
-
Update the available fields.
-
Select Save to apply your changes.
|
Setting |
Description |
|---|---|
|
Name |
Change the widget name shown on the Dashboard. |
|
Projects |
Select which projects the widget includes. |
|
Logged time |
Choose whether to show all, approved, pending, or rejected logged time. |
|
Date |
Select the date range or grouping, such as day, month, or year. |
Use widget actions
Each widget has its own actions menu, so you can manage one widget without changing the rest of the dashboard.
|
Action |
Use it to |
|---|---|
|
Refresh |
Reload the widget’s data without refreshing the entire Dashboard. |
|
Settings |
Open the widget configuration panel. |
|
Export to Image |
Save the widget as an image for a report, presentation, or team update. |
|
Delete |
Remove the widget from your dashboard. |
Refresh widget data
Use Refresh when schedules, worklogs, leave requests, or capacity settings have recently changed and you want to update one widget.
To refresh all widgets at once, use the Refresh button in the top navigation bar.
Export a widget
Select Export to Image from the widget’s more options menu, then save the generated image to your device.
The exported image reflects the data and filters currently shown in the widget.
Delete a widget
Select Delete from the widget’s more options menu to remove it from your dashboard.
Deleting a widget only removes the card from your dashboard. The related project, member, schedule, and time data remain unchanged.
Arrange your dashboard layout
Resize and rearrange widgets to keep the most important information easy to review.
|
Layout option |
How it works |
|---|---|
|
Resize a widget |
Click and drag the widget edge to make the card larger or smaller. |
|
Move a widget |
Click and hold the top area of the widget, then drag it to a new position. |