.png)
Keep in mind
This initial configuration guide is intended for app admins who are responsible for setting up the workspace.
If you're a team member, you only need to complete your setup under My settings.
Before using TeamBoard ProScheduler, it’s essential to set up a few key elements to ensure the tool functions properly for your team. This guide explains how to configure basic settings.
To set up the initial configuration, go to the ⚙️ Settings on the sidebar in TeamBoard ProScheduler.
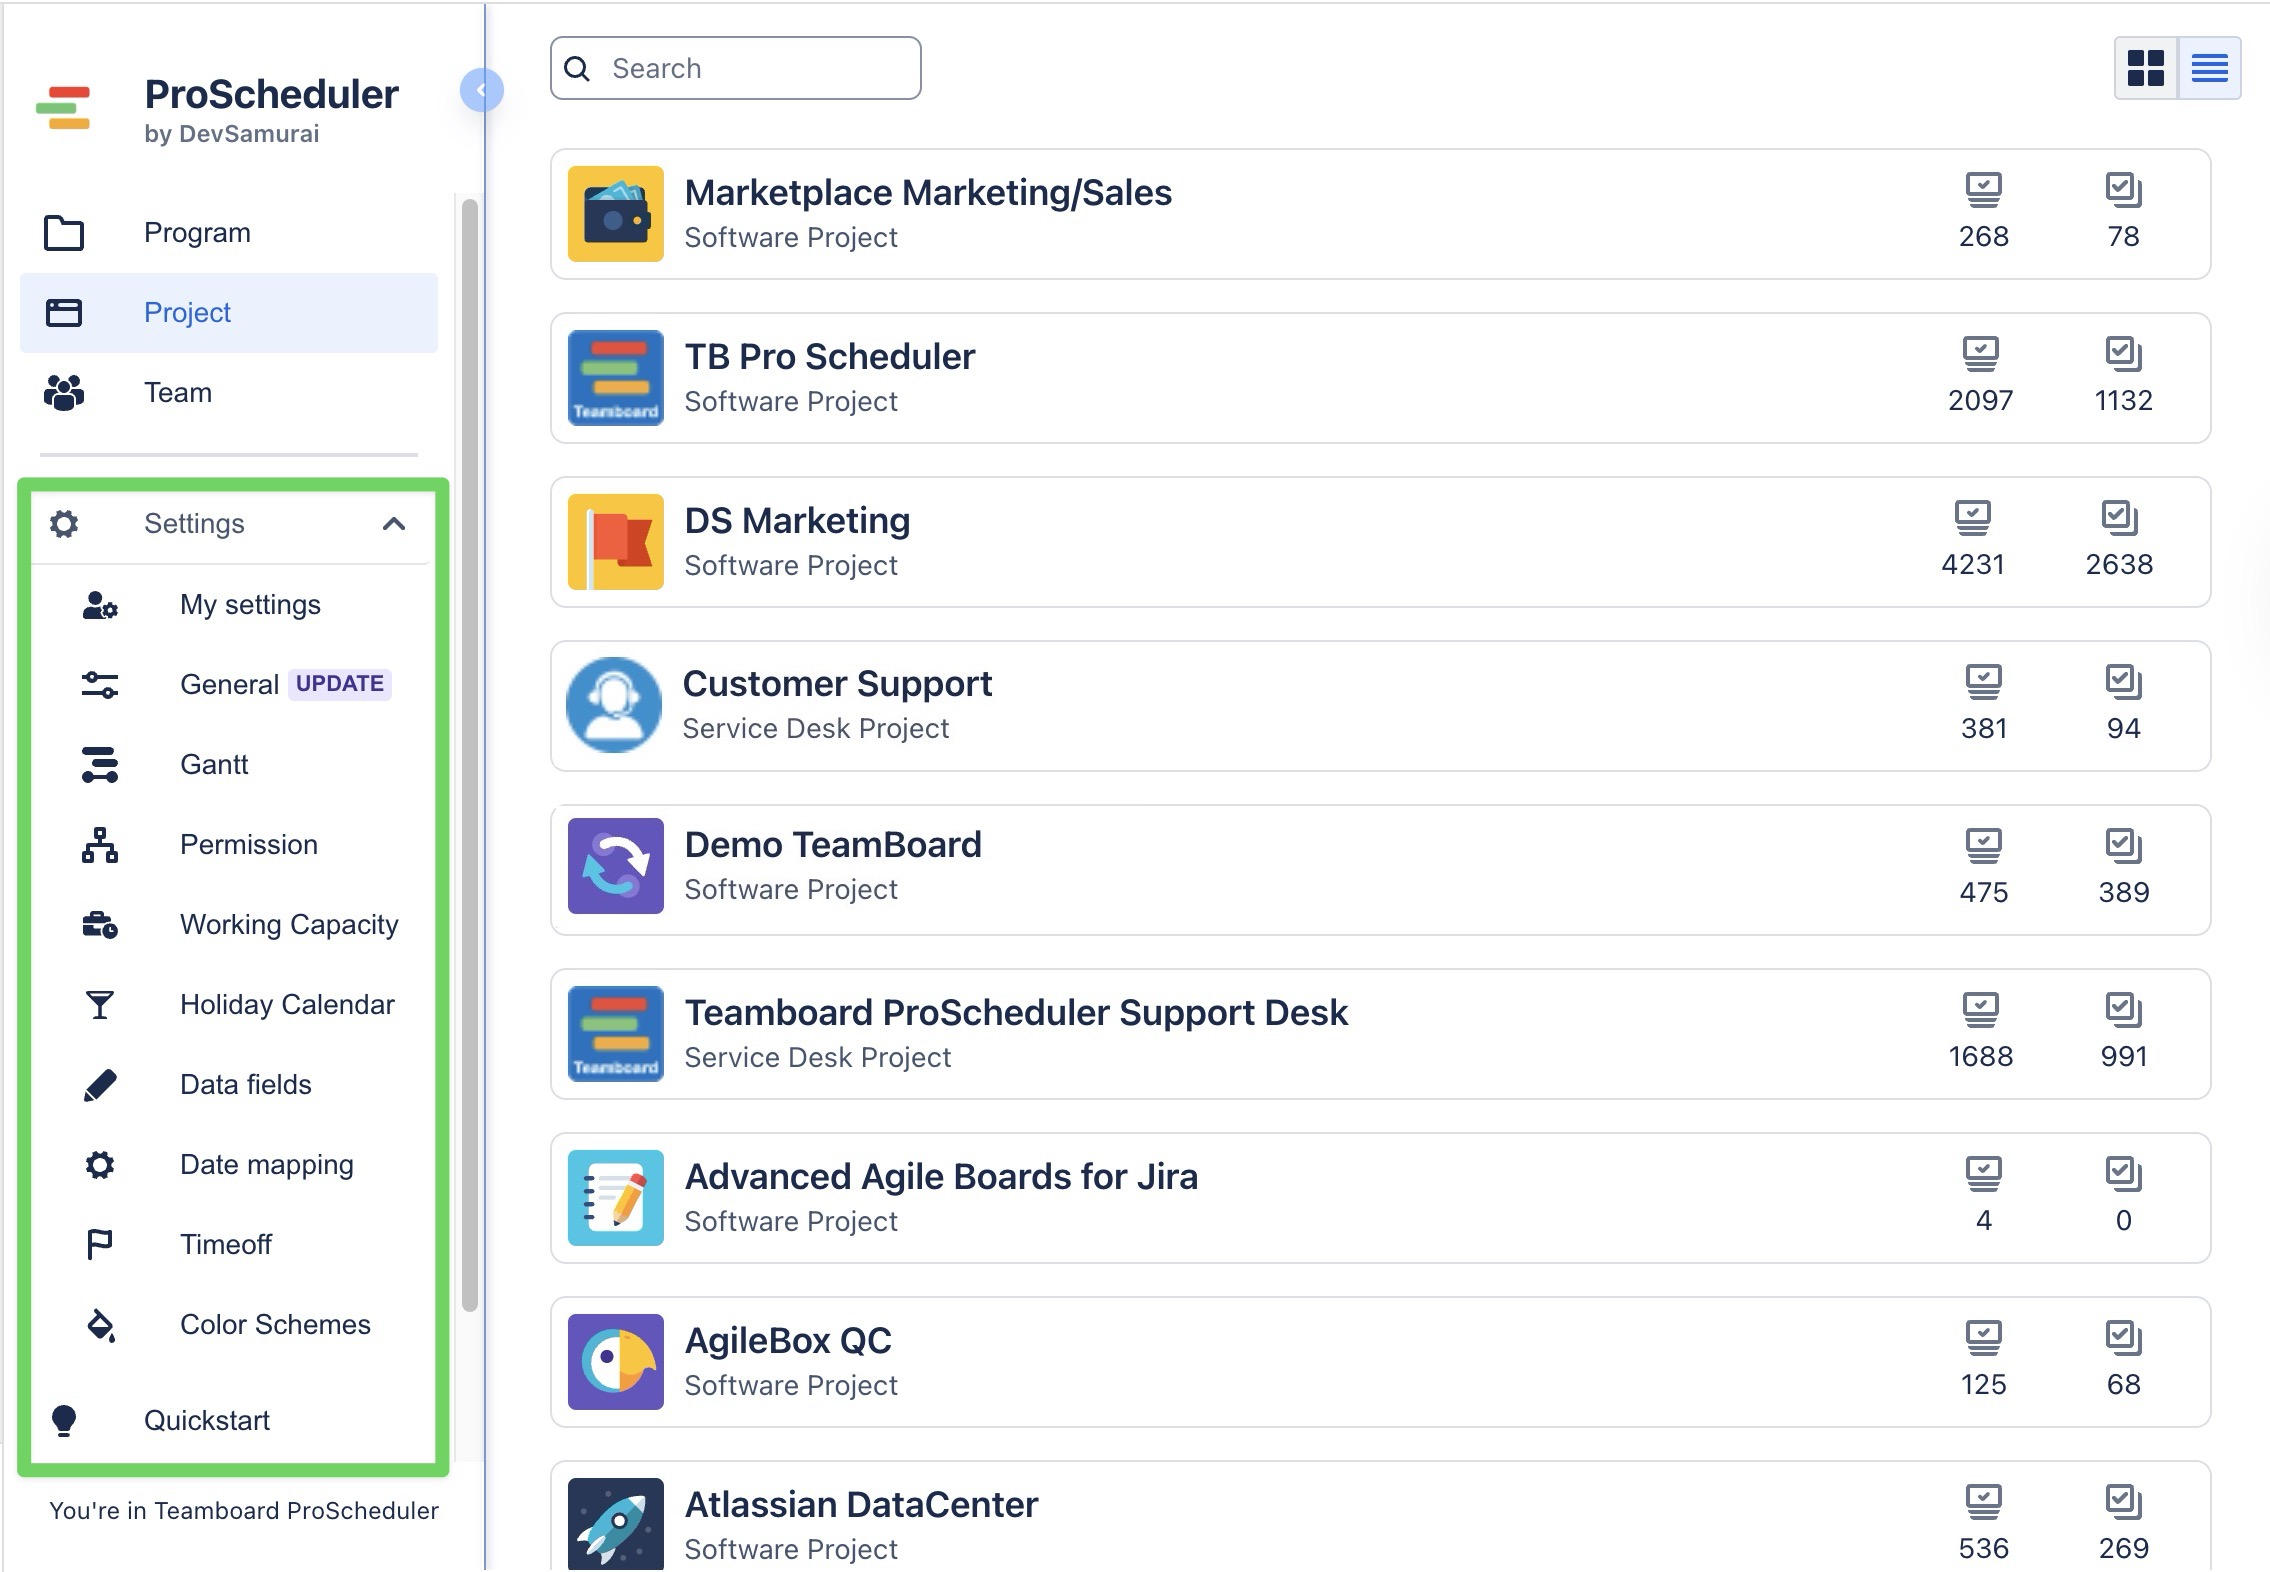
Setting up permission
The Permission in app settings allows administrators to control who can access and manage the app and its features. This ensures the right users have the appropriate level of control while keeping your workspace organized and secure.
Permissions are divided into two levels:
-
App admin: Can configure all app settings.
-
Team admin: Can create teams, manage team members, and access each team’s workspace, including the Schedule, Timelog, and Report Board.
How to set app permissions:
-
Select the

-
Under each role, click the

-
When you're done, click the

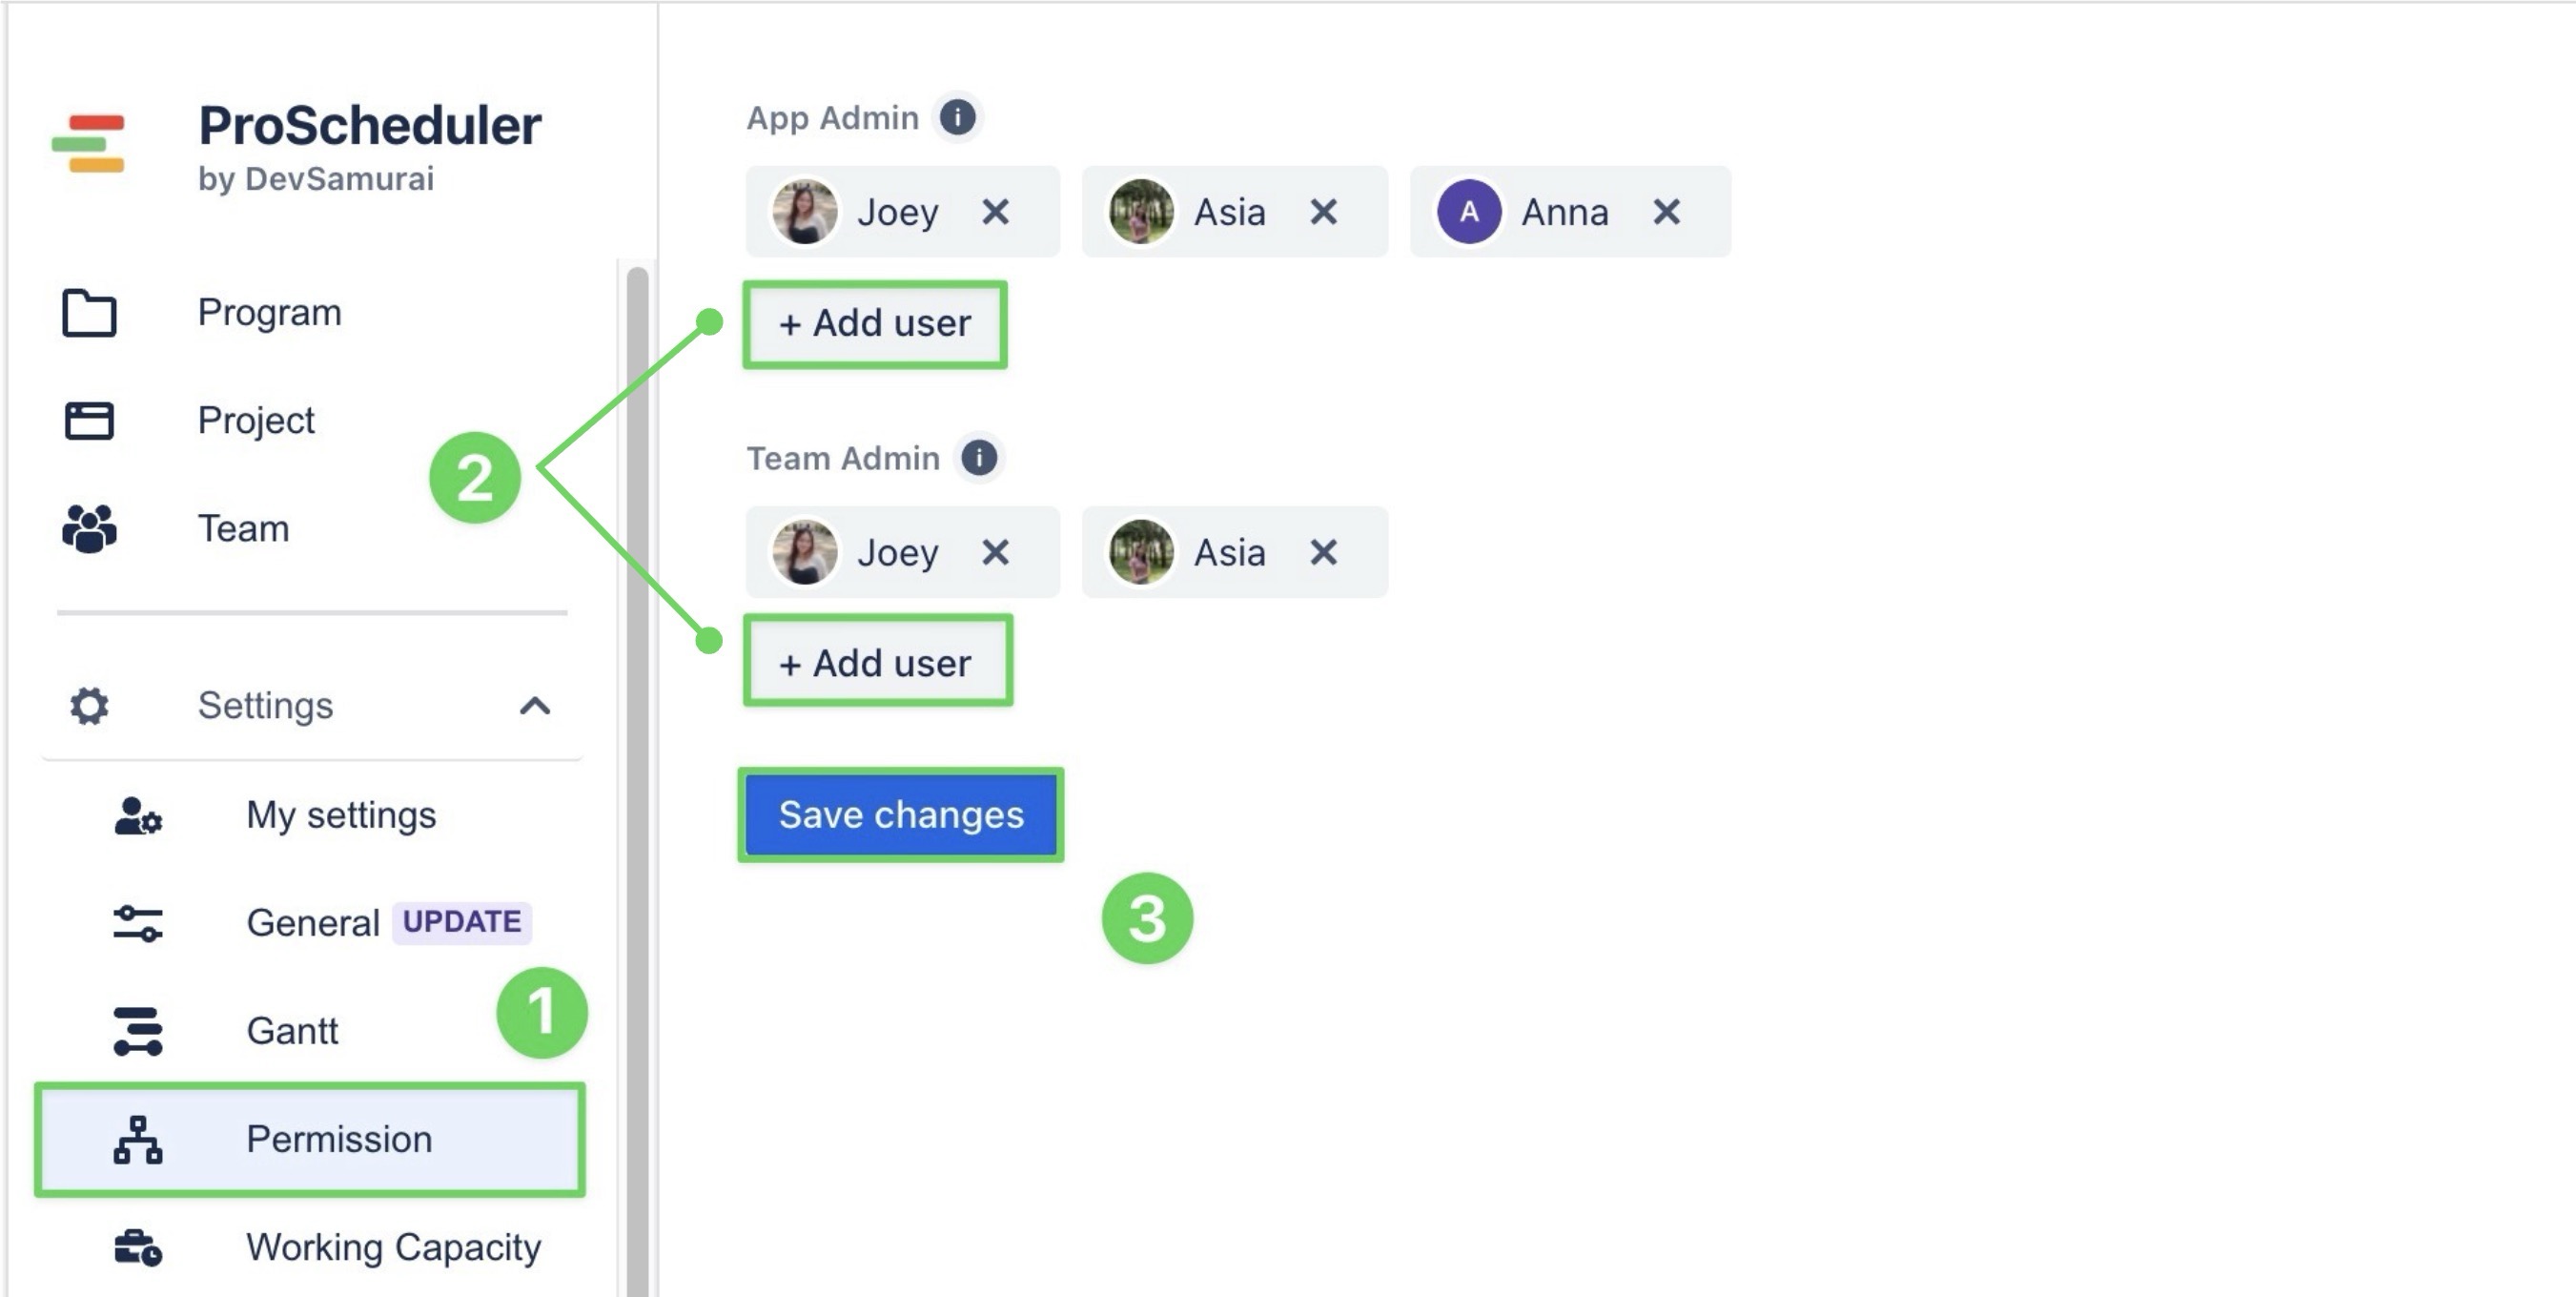
Tips: You can assign one or multiple users to each role.
Setting up Working Capacity
Working Capacity refers to the total amount of work a person or team can handle in a certain period, based on their available time and resources. It helps make sure no one is given more work than they can realistically do.
How to set up Capacity schemes:
-
Select

-
Click the

-
Click

-
Assign the scheme to team members
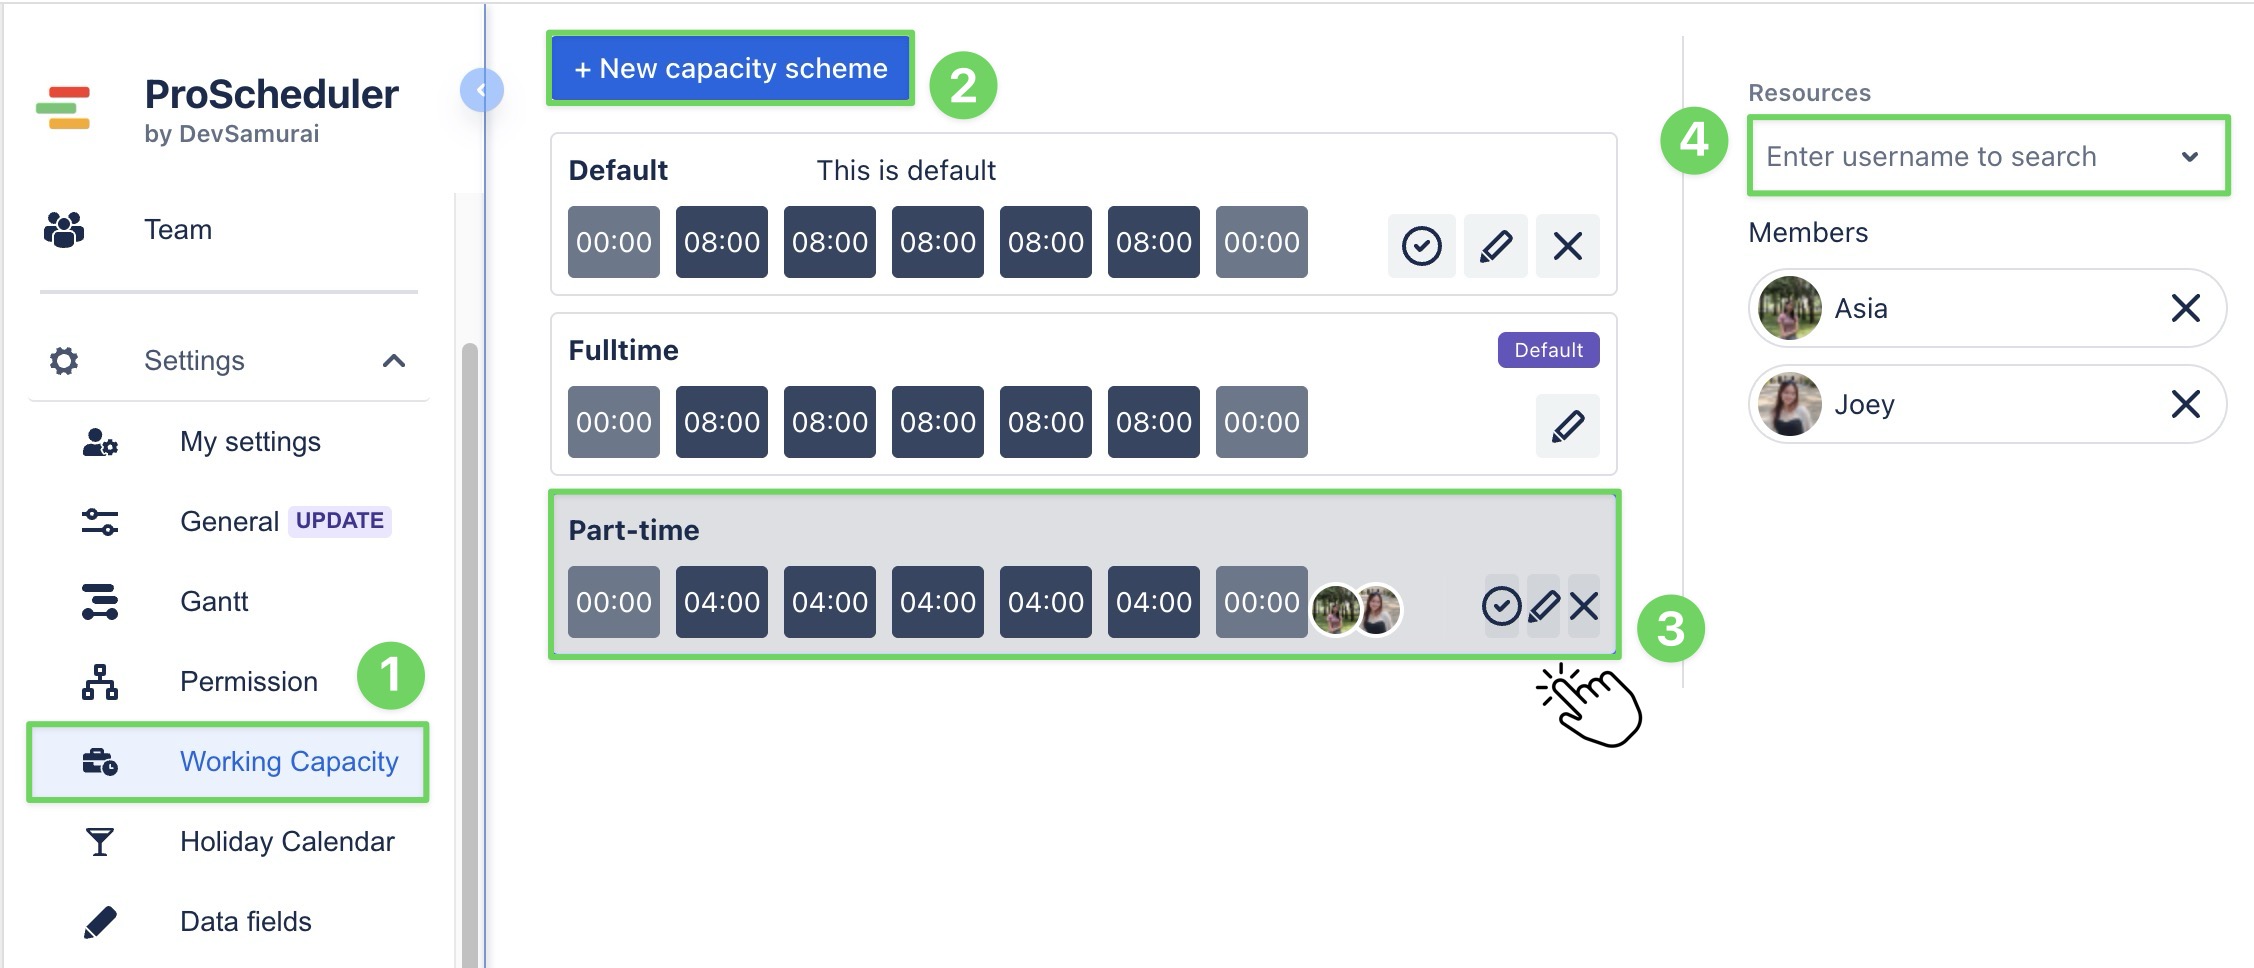
Tips: You can assign a capacity scheme to one or multiple team members. If a user is not assigned to any capacity scheme, the default scheme will be used automatically. (Click 
Learn more: Step-by-step guide on how to set up and assign Working Capacity schemes
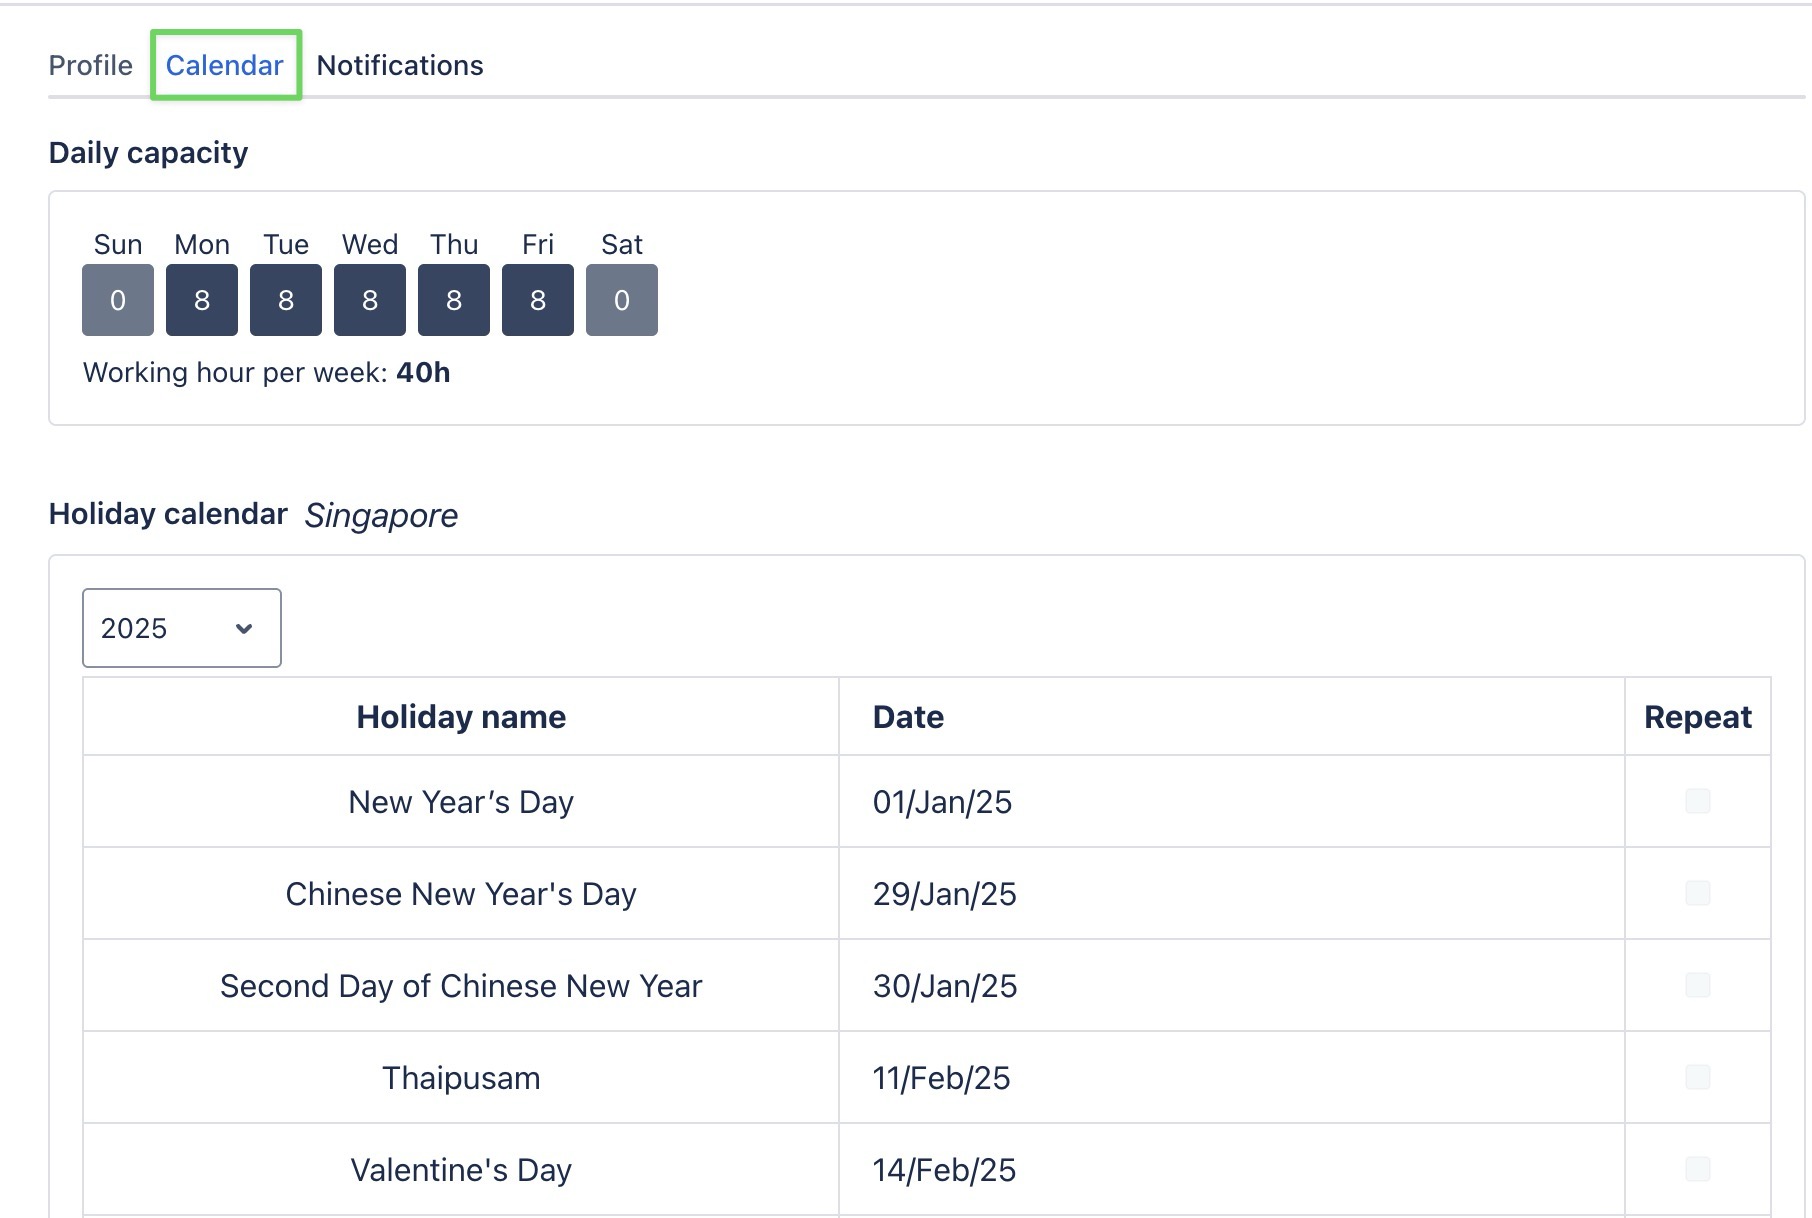
Setting up Holiday Calendar
The Holiday Calendar lets you define official non-working days. These dates are used to automatically block time on schedule views, helping team leads and project managers avoid planning tasks on days.
How to set up Holiday Calendar:
-
Select

-
Click

-
Click

Tips: You can create multiple holiday calendars for different regions or departments.
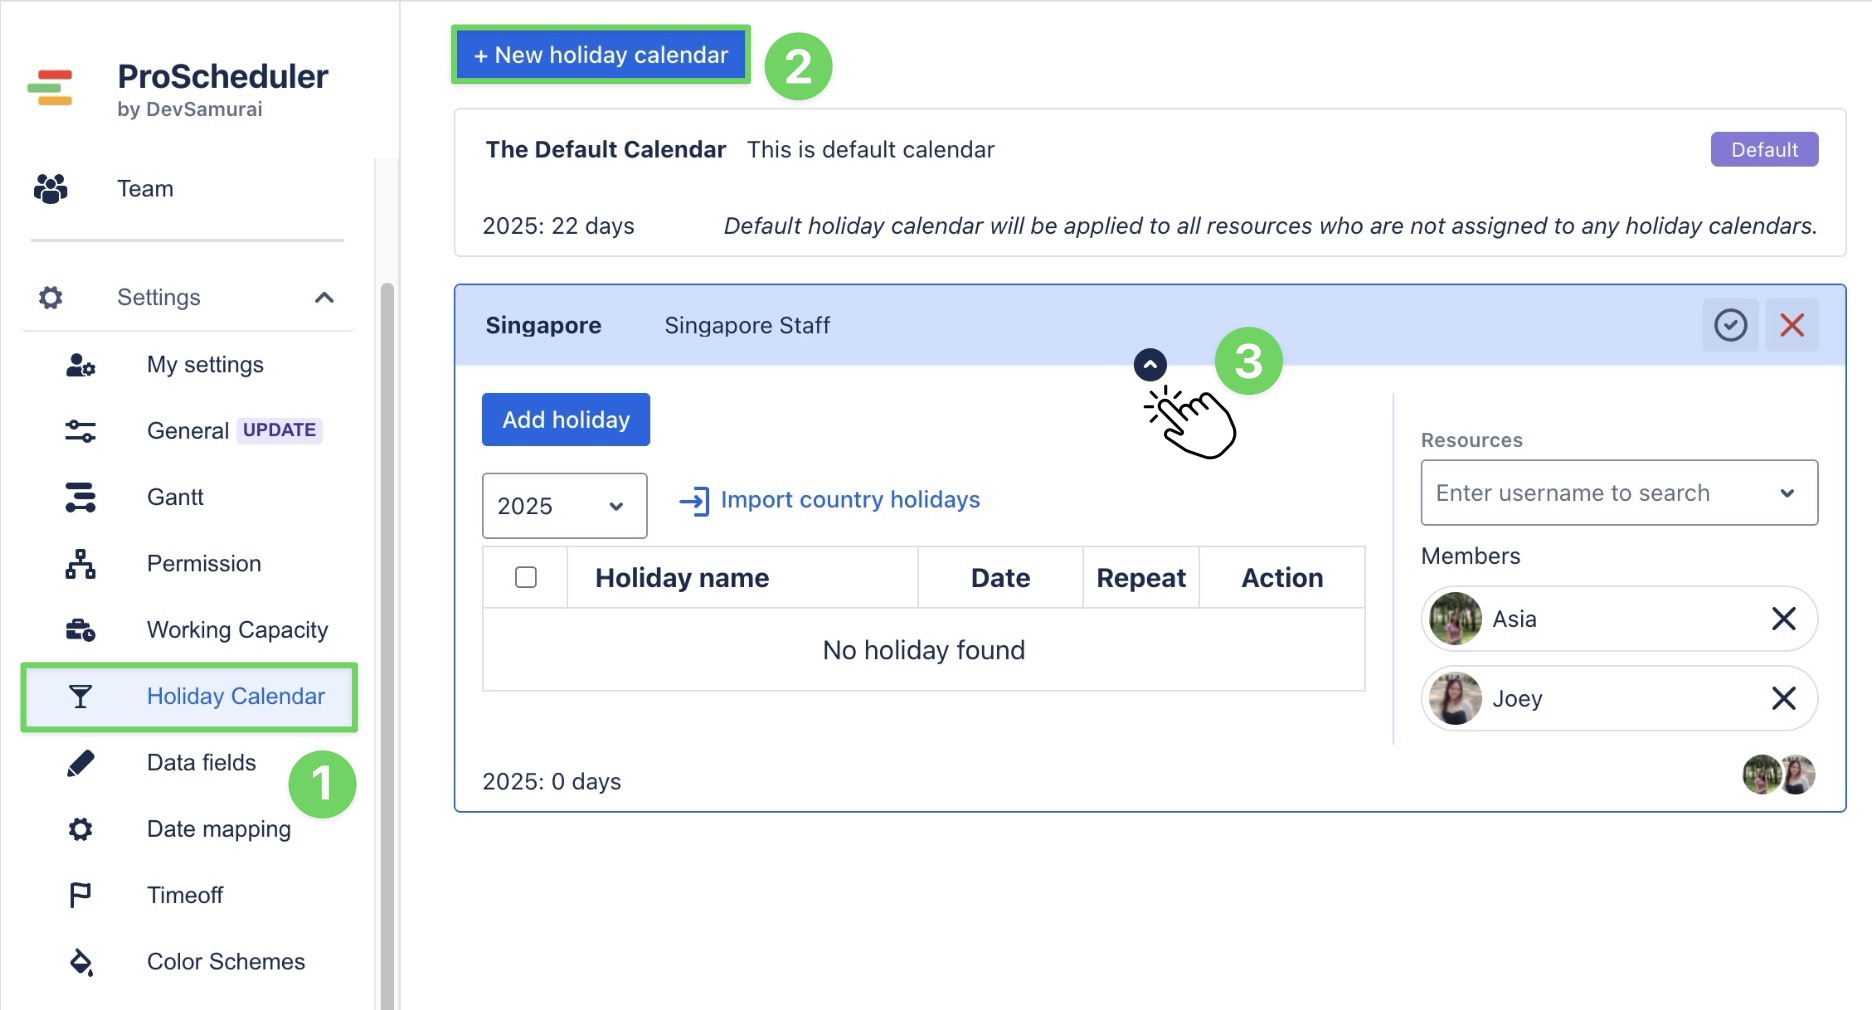
The default holiday calendar will be applied to all resources who are not assigned to any holiday calendars.
Learn more: Step-by-step guide on how to set up and assign the Holiday scheme.
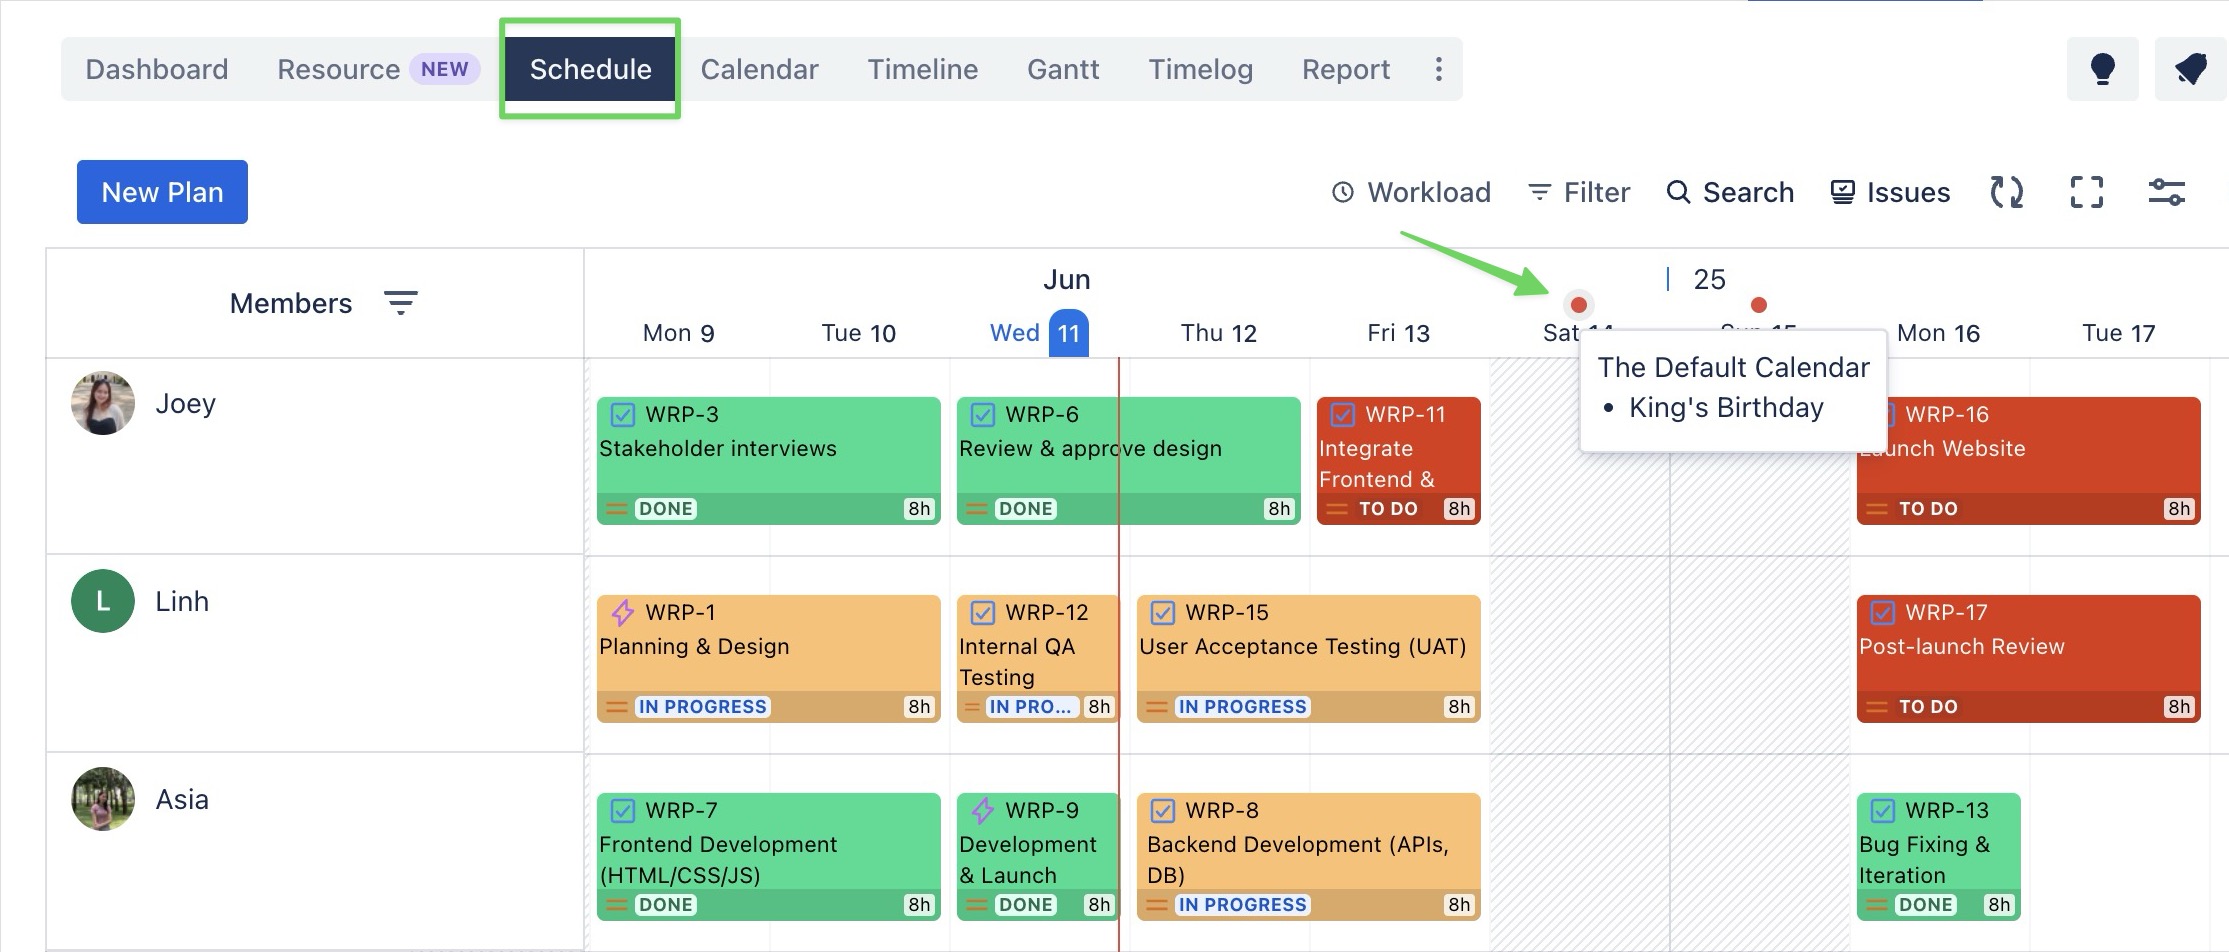
Holidays are indicated on the Scheduler Board with a red dot. Hovering the cursor over them will display the details. On holidays, the capacity is set to zero.
Creating Data Fields
Data fields are labels like Departments, Positions, and Skills that admins create to organize team members. Once set up, team members can use them to update their profiles.
To create data fields, go to the ⚙️ Settings > ![]()
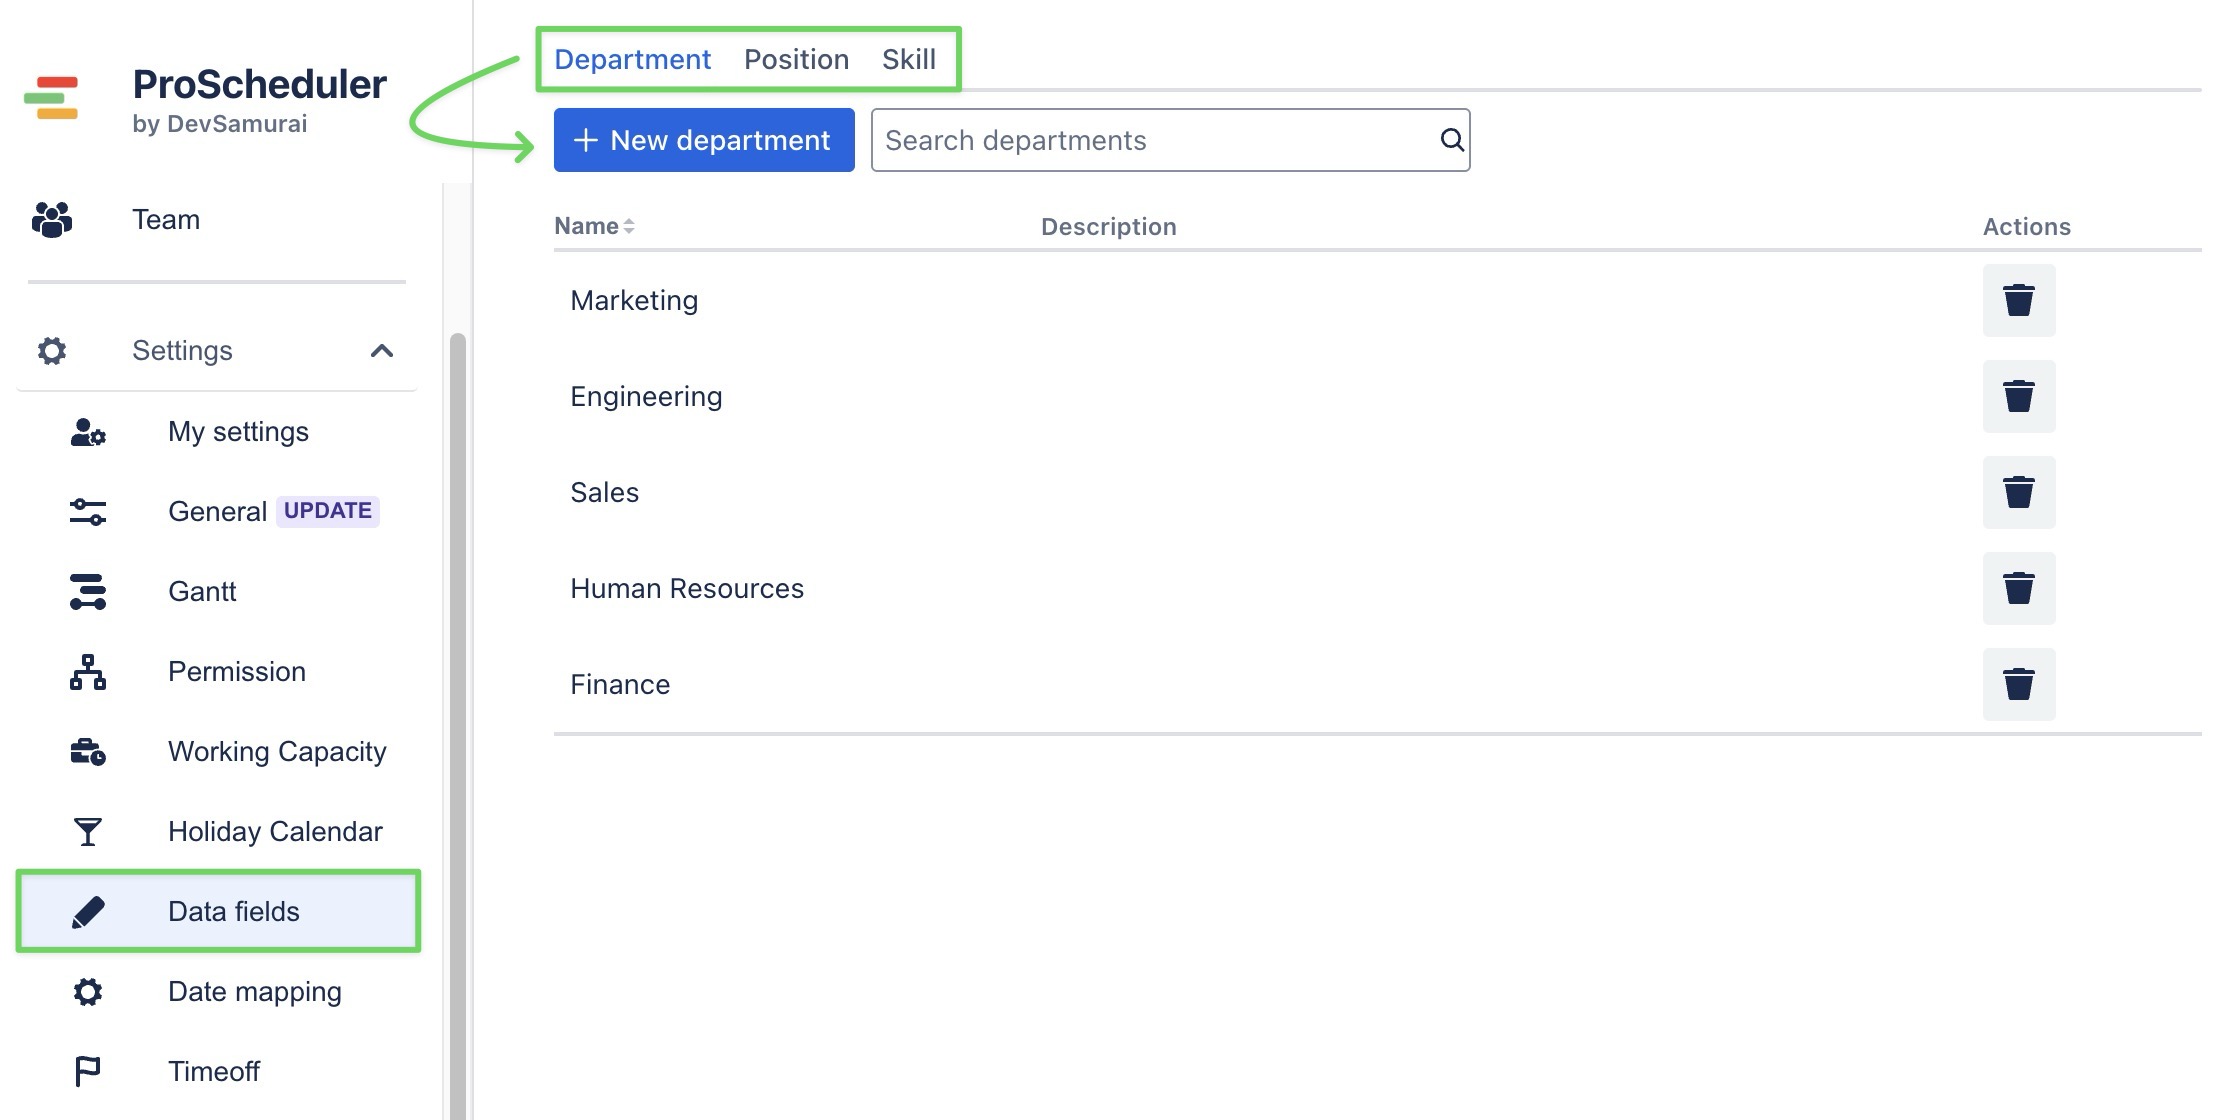
-
Only Jira admins and App admins have permission to add and configure Data fields.
-
Team members can only apply Data fields to their profile information.
Learn more: Step-by-step guide on how to set up and apply Data fields
Setting up Time off
Time off refers to any planned absence or leave taken by a team member, such as paid vacation, sick leave, unpaid leave, etc.
Setting up Time off types ensures your scheduling and resource planning reflect actual team availability. It also helps avoid assigning work to team members during their leave.
-
Select

-
Click Add new to create a new time off type
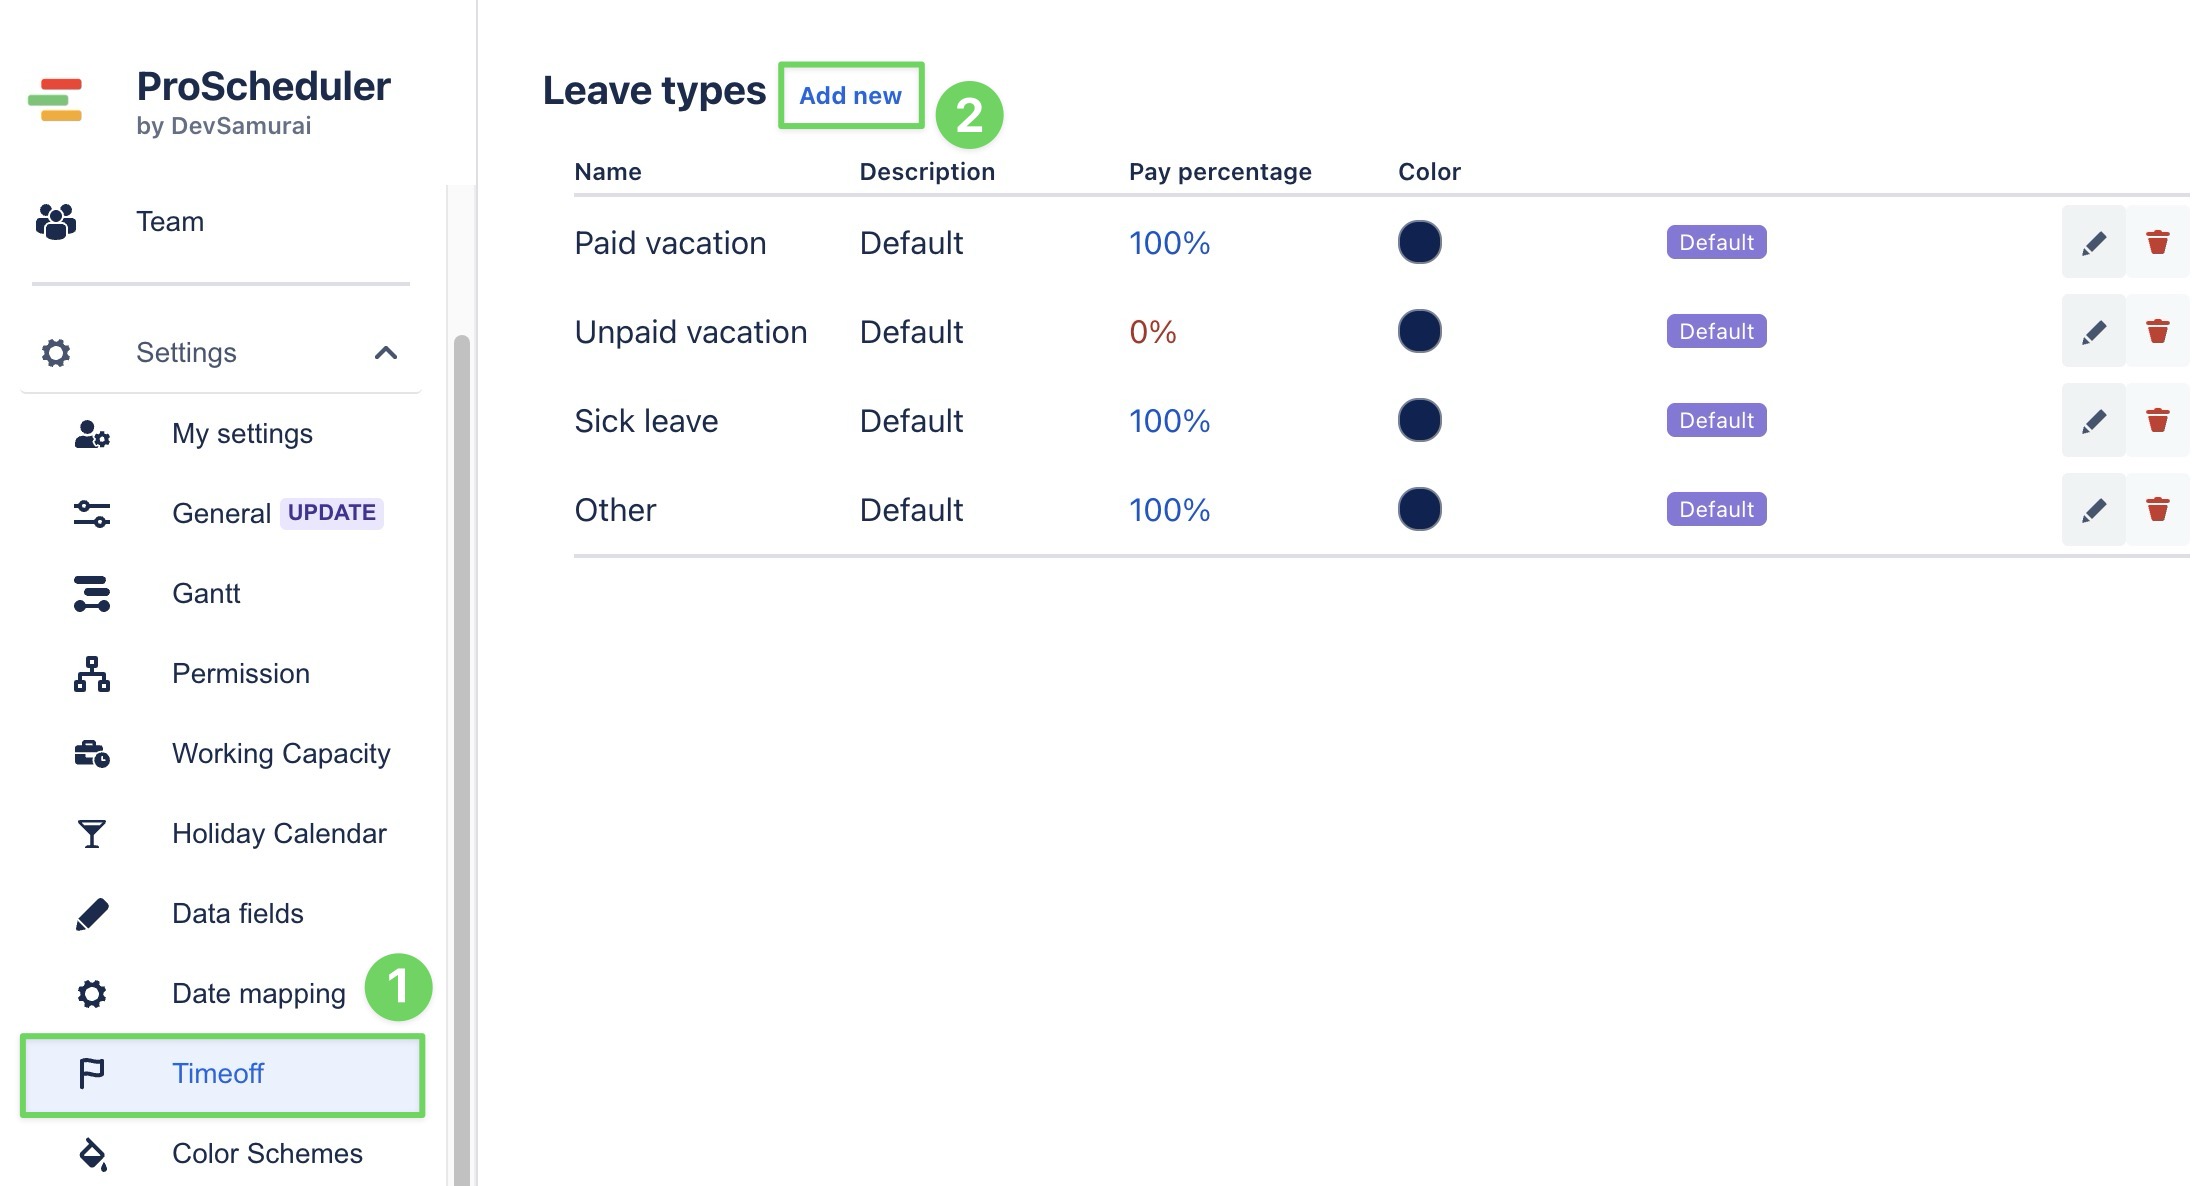
Learn more: Step-by-step guide on how to set up Time off types
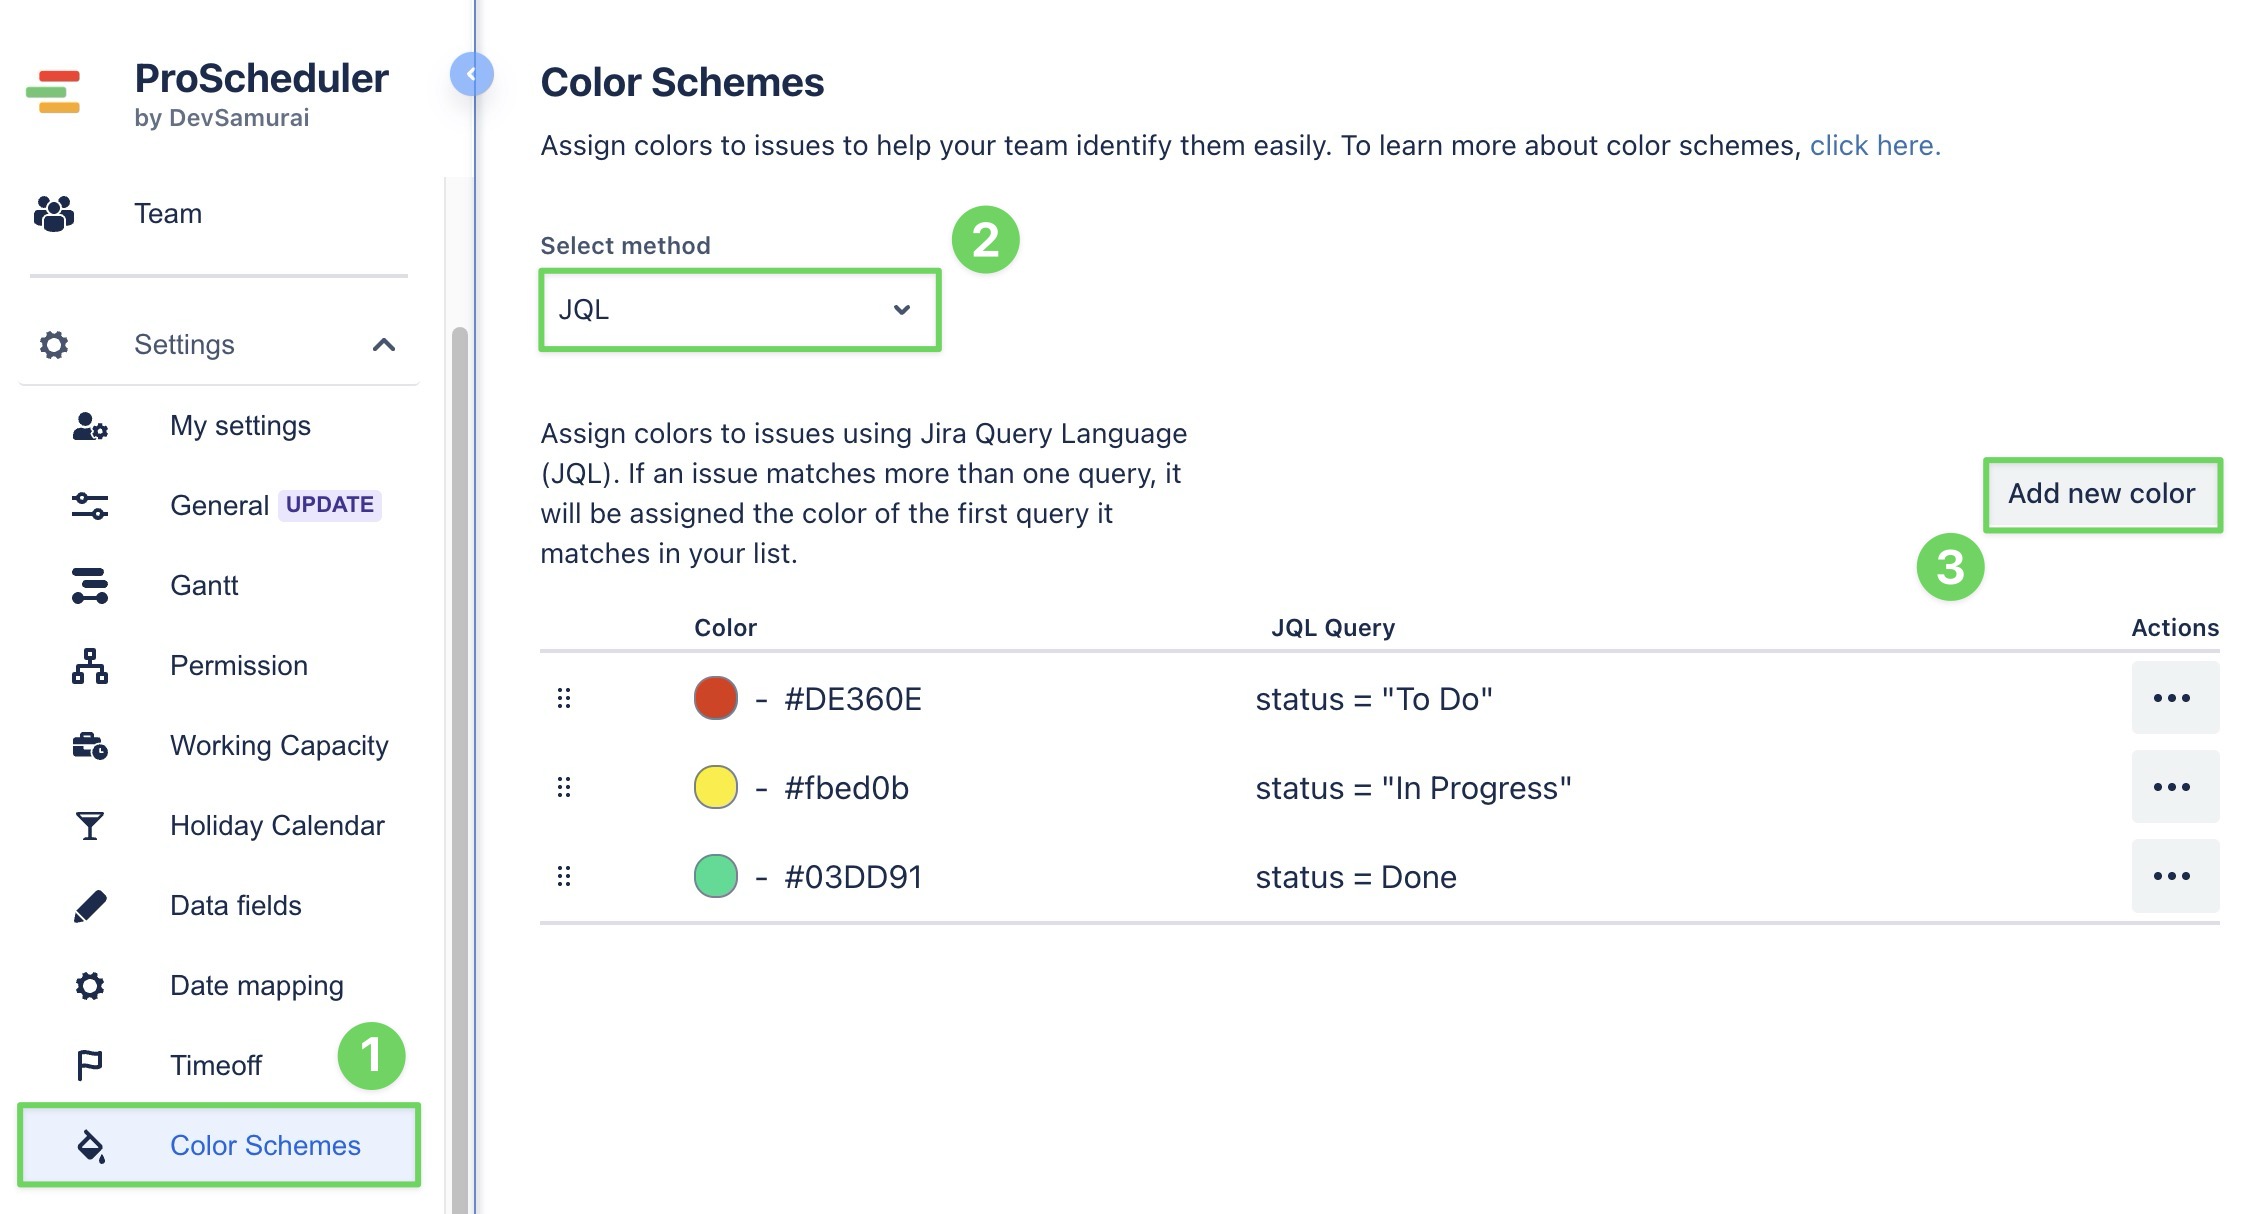
Configuring Color schemes
The color scheme sets the default color for tasks on the Schedule, Timeline, and Gantt board. It helps your team quickly recognize and organize tasks visually.
You can assign colors based on:
-
Resource: Use different colors for each assignee.
-
JQL (Jira Query Language): Set colors based on conditions like status, priority, issue type, etc.
-
Go to the ⚙️ Settings >

-
Select Resource or JQL method
-
Click the

Learn more: Step-by-step guide on how to configure Color schemes.
Adjusting My settings
In ![]()
Profile
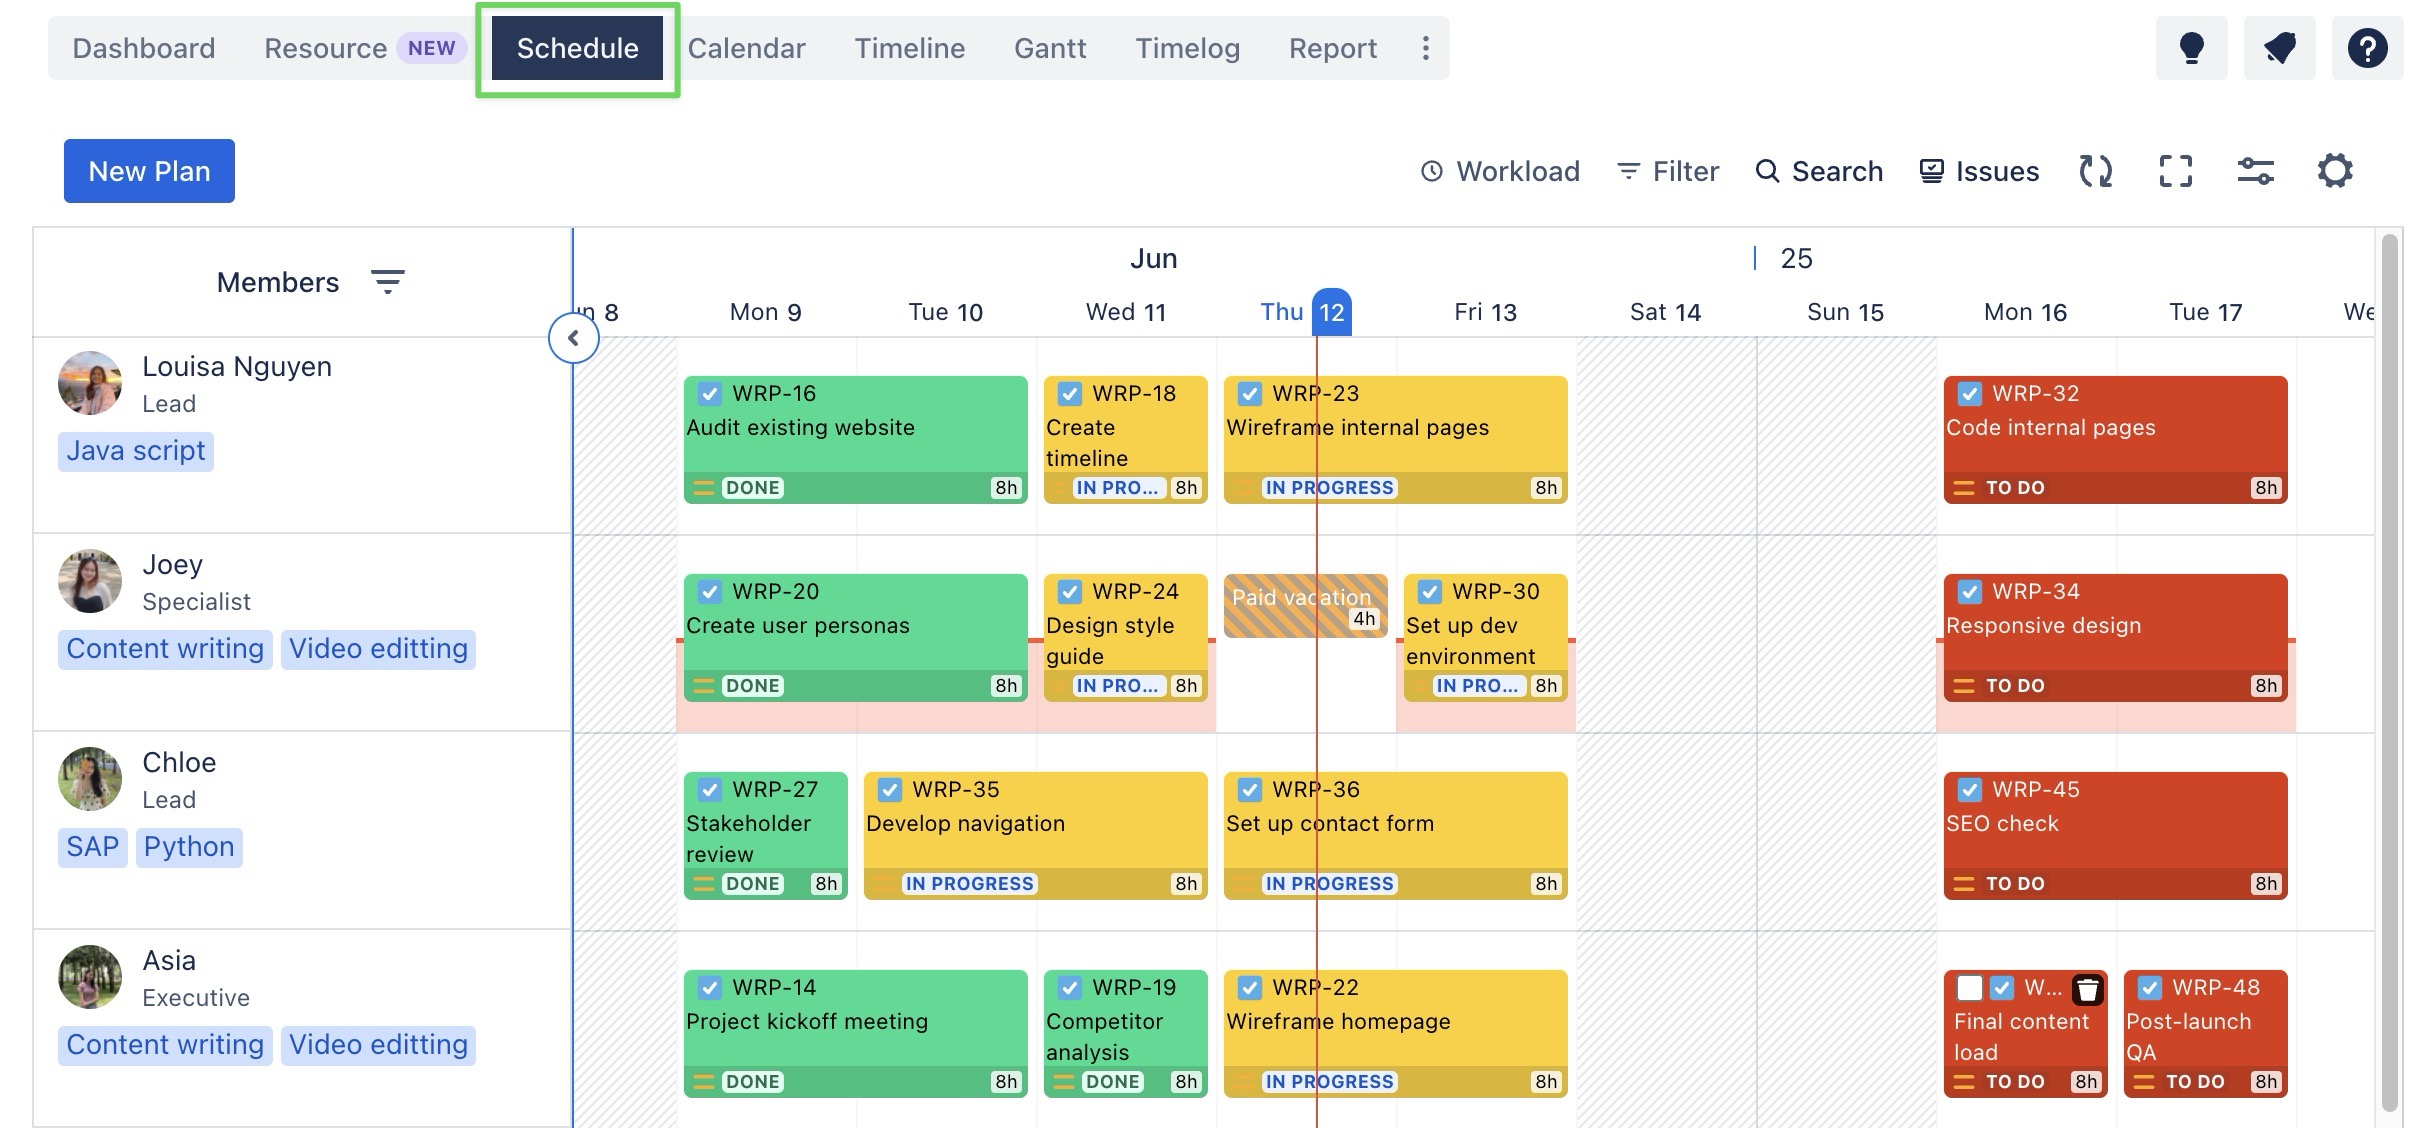
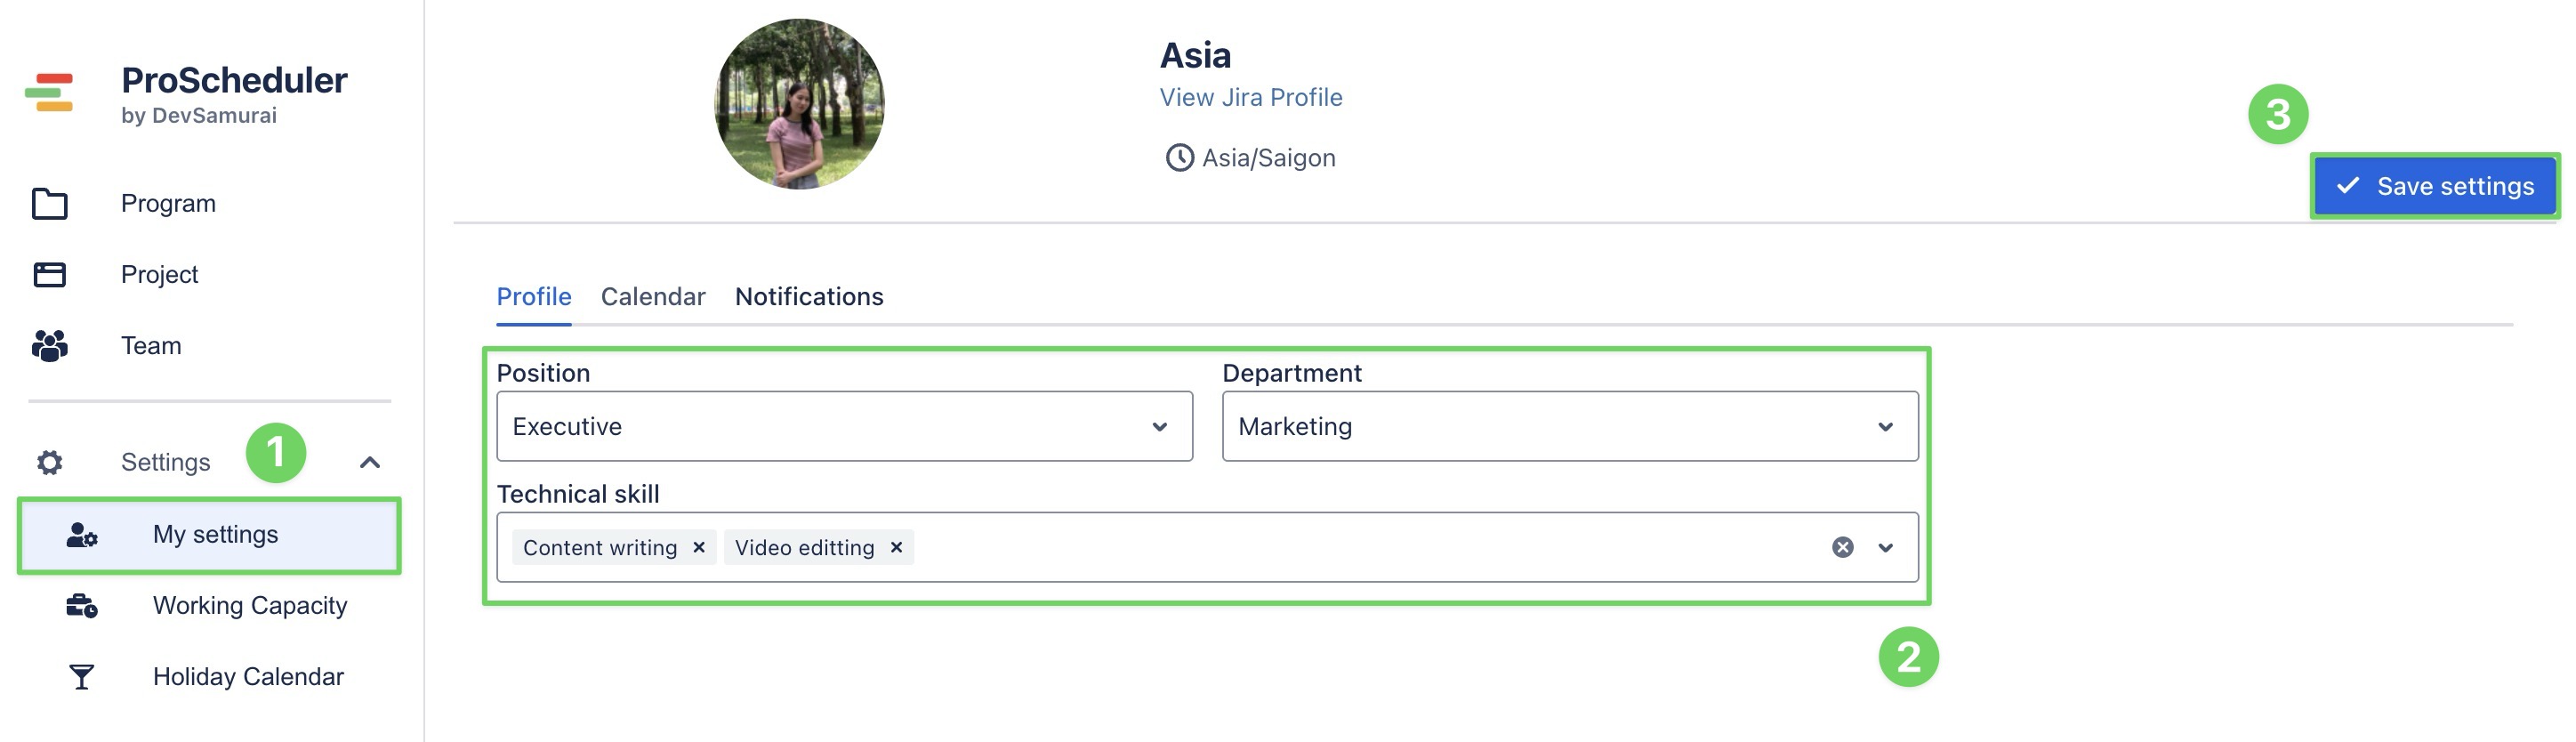
Individuals can update their profile details, including Department, Position, and Technical Skills, to ensure accurate team data and planning.
To update your profile:
-
Go to the ⚙️ Settings >

-
Edit your information in the Profile tab
-
Click

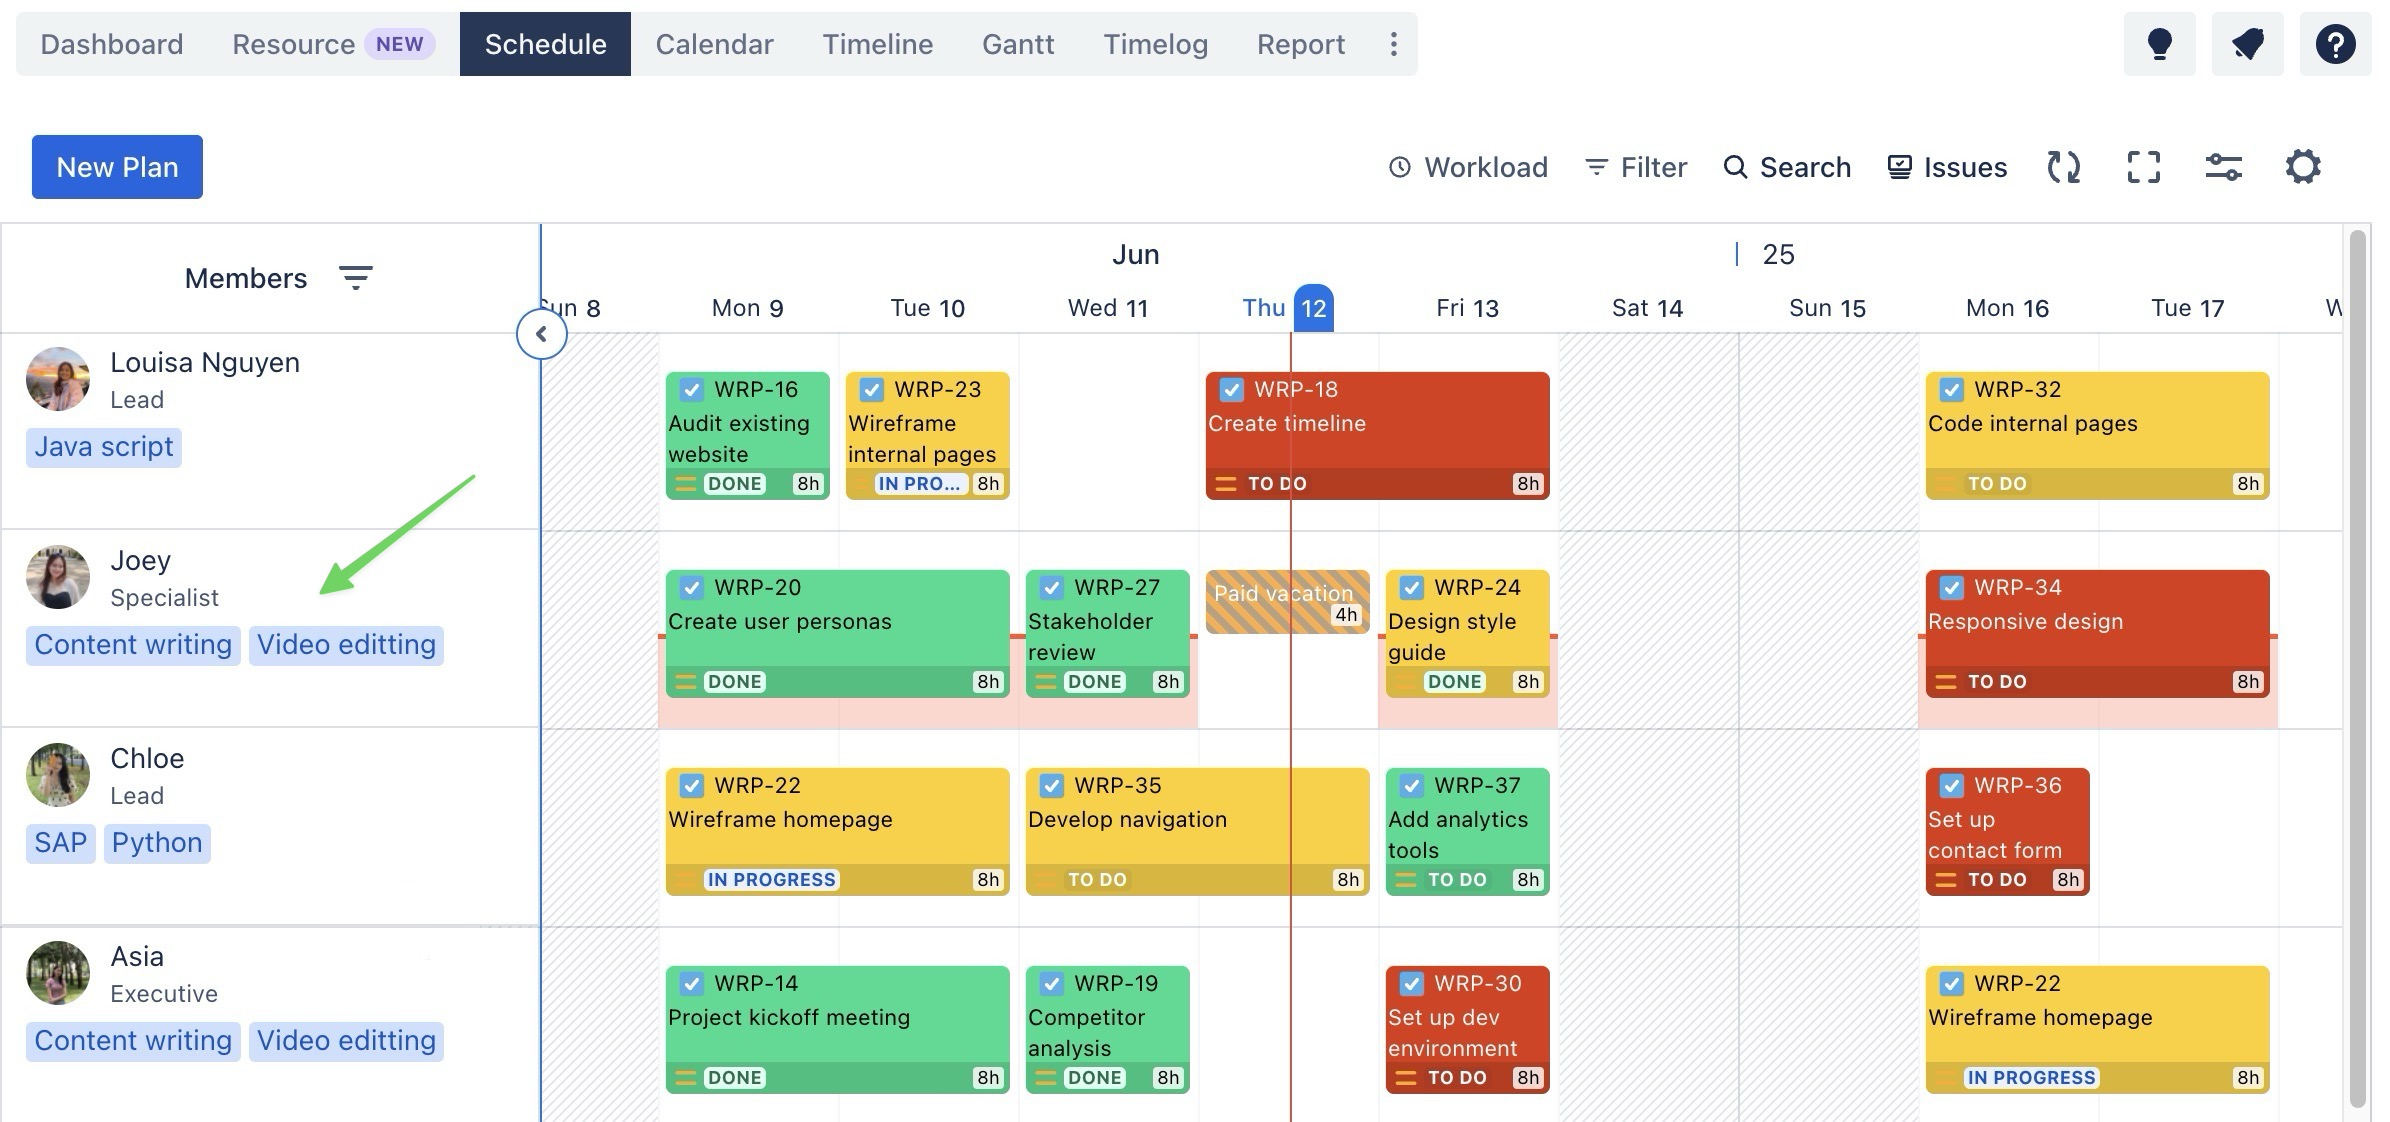
Your updated profile information will appear under your name on the Schedule Board, as shown in the image below:
Only Jira Admins and App Admins can create new options for Positions, Departments, and Skills in the Data fields section.
Calendar (View only)
The Calendar tab shows your personal work schedule and assigned holiday calendar.
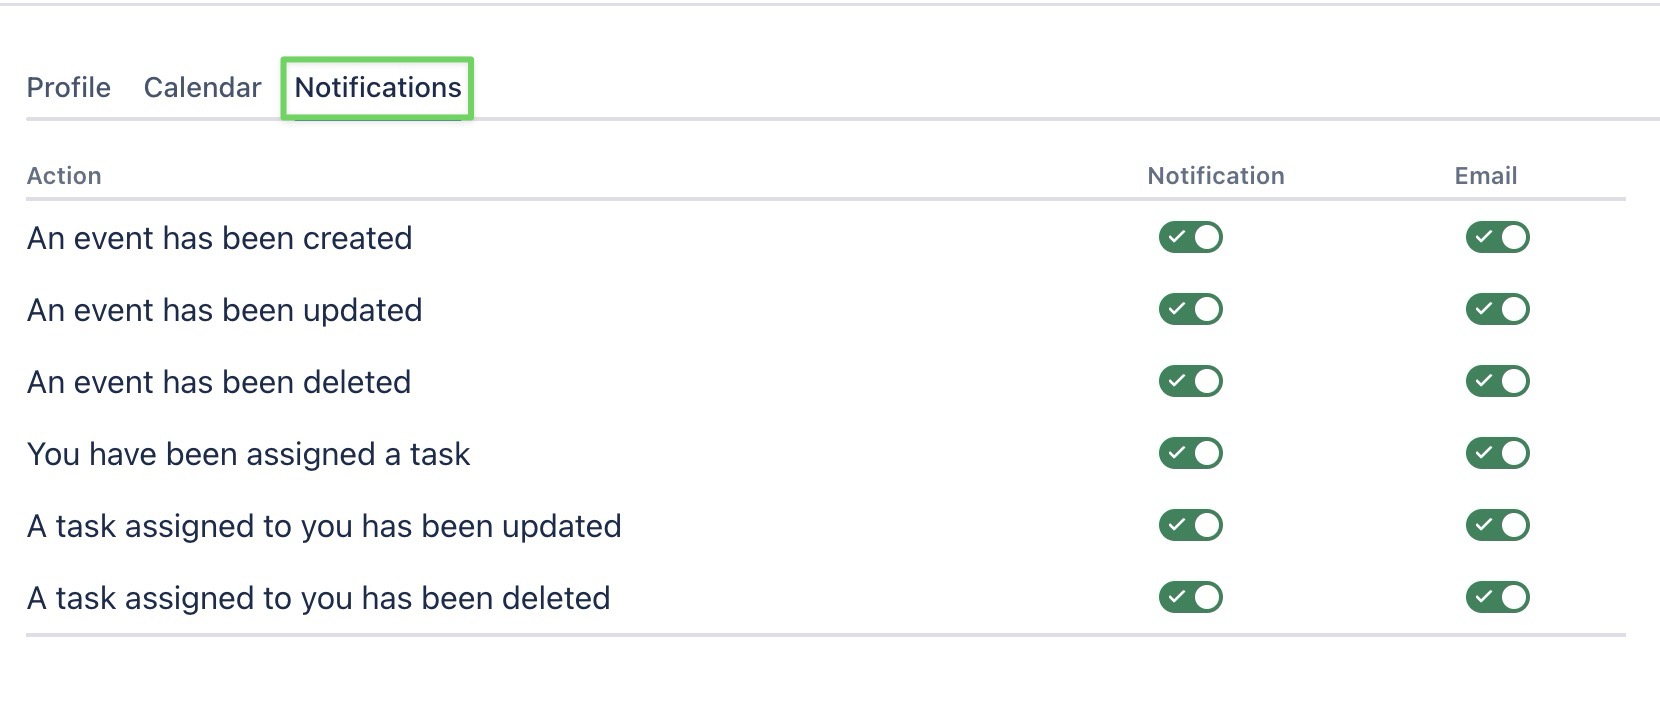
Notifications
You can customize which notifications you want to receive in-app and via email.