.png)
Only Jira admins and Project admins can manage the AgileTest project configuration.
The Project Settings page allows administrators to configure how AgileTest works within a specific project. From this section, admins can customize testing strategies, define mappings between AgileTest entities and Jira work item types, configure automated test integrations, and manage language preferences.
To access App project settings, go to ⚙️ Settings on AgileTest Sidebar. Below are the settings along with their explanations and configuration steps.
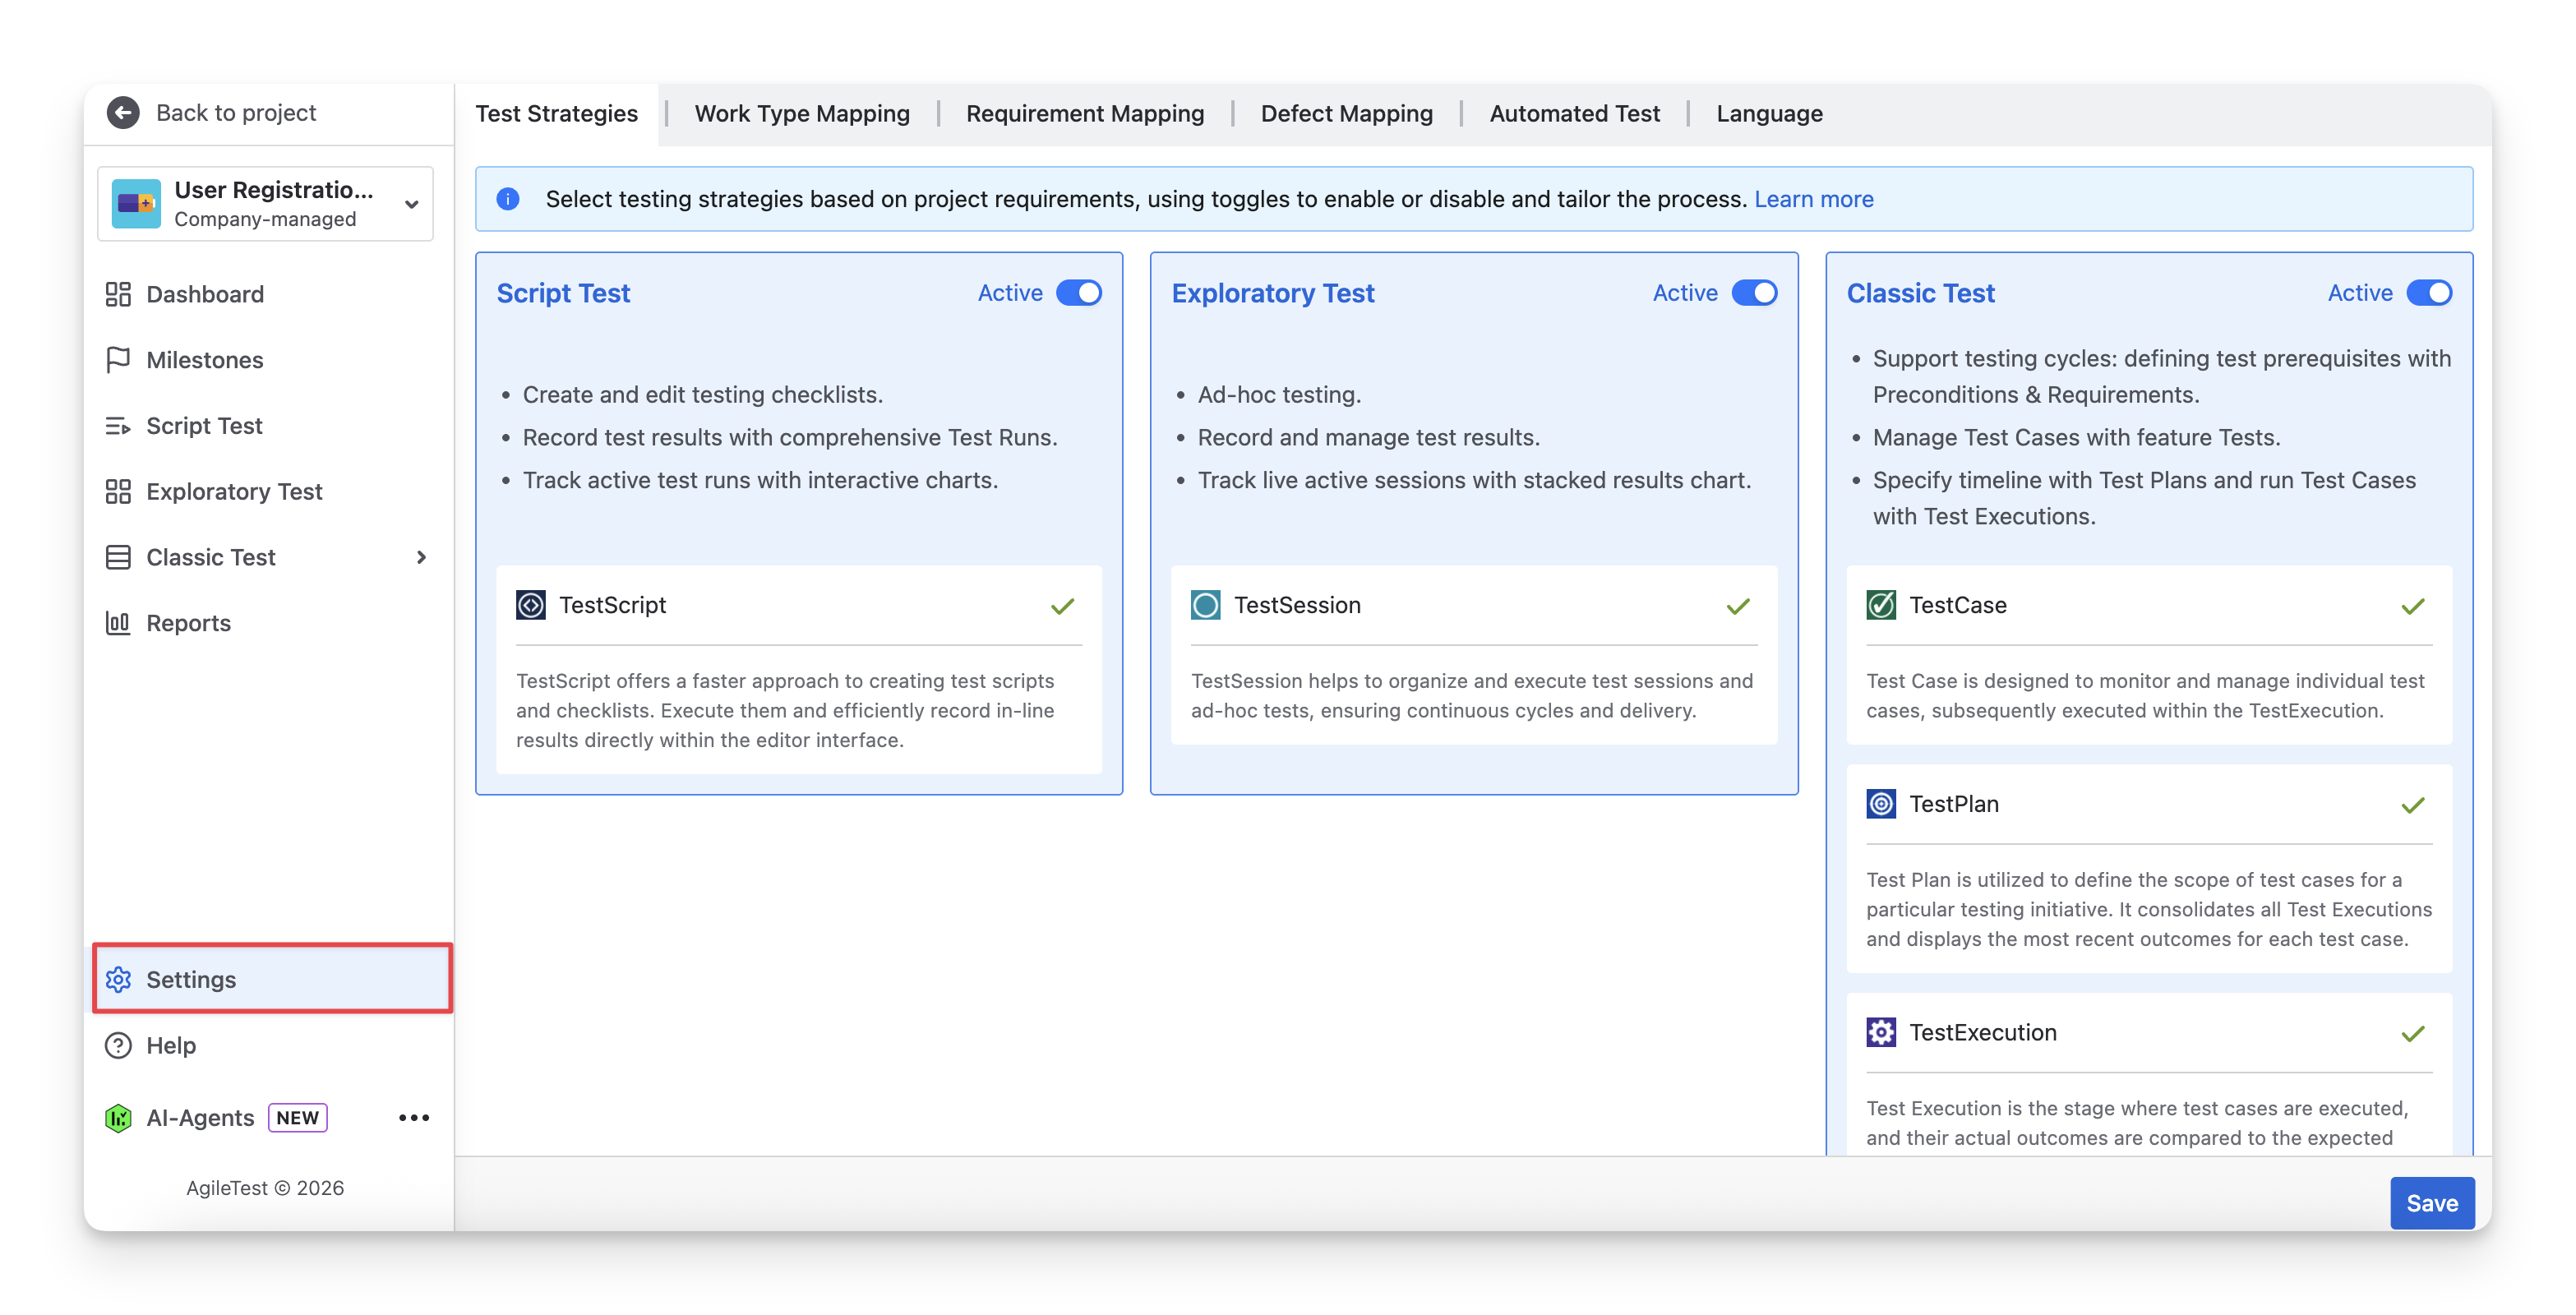
1. Test Strategies
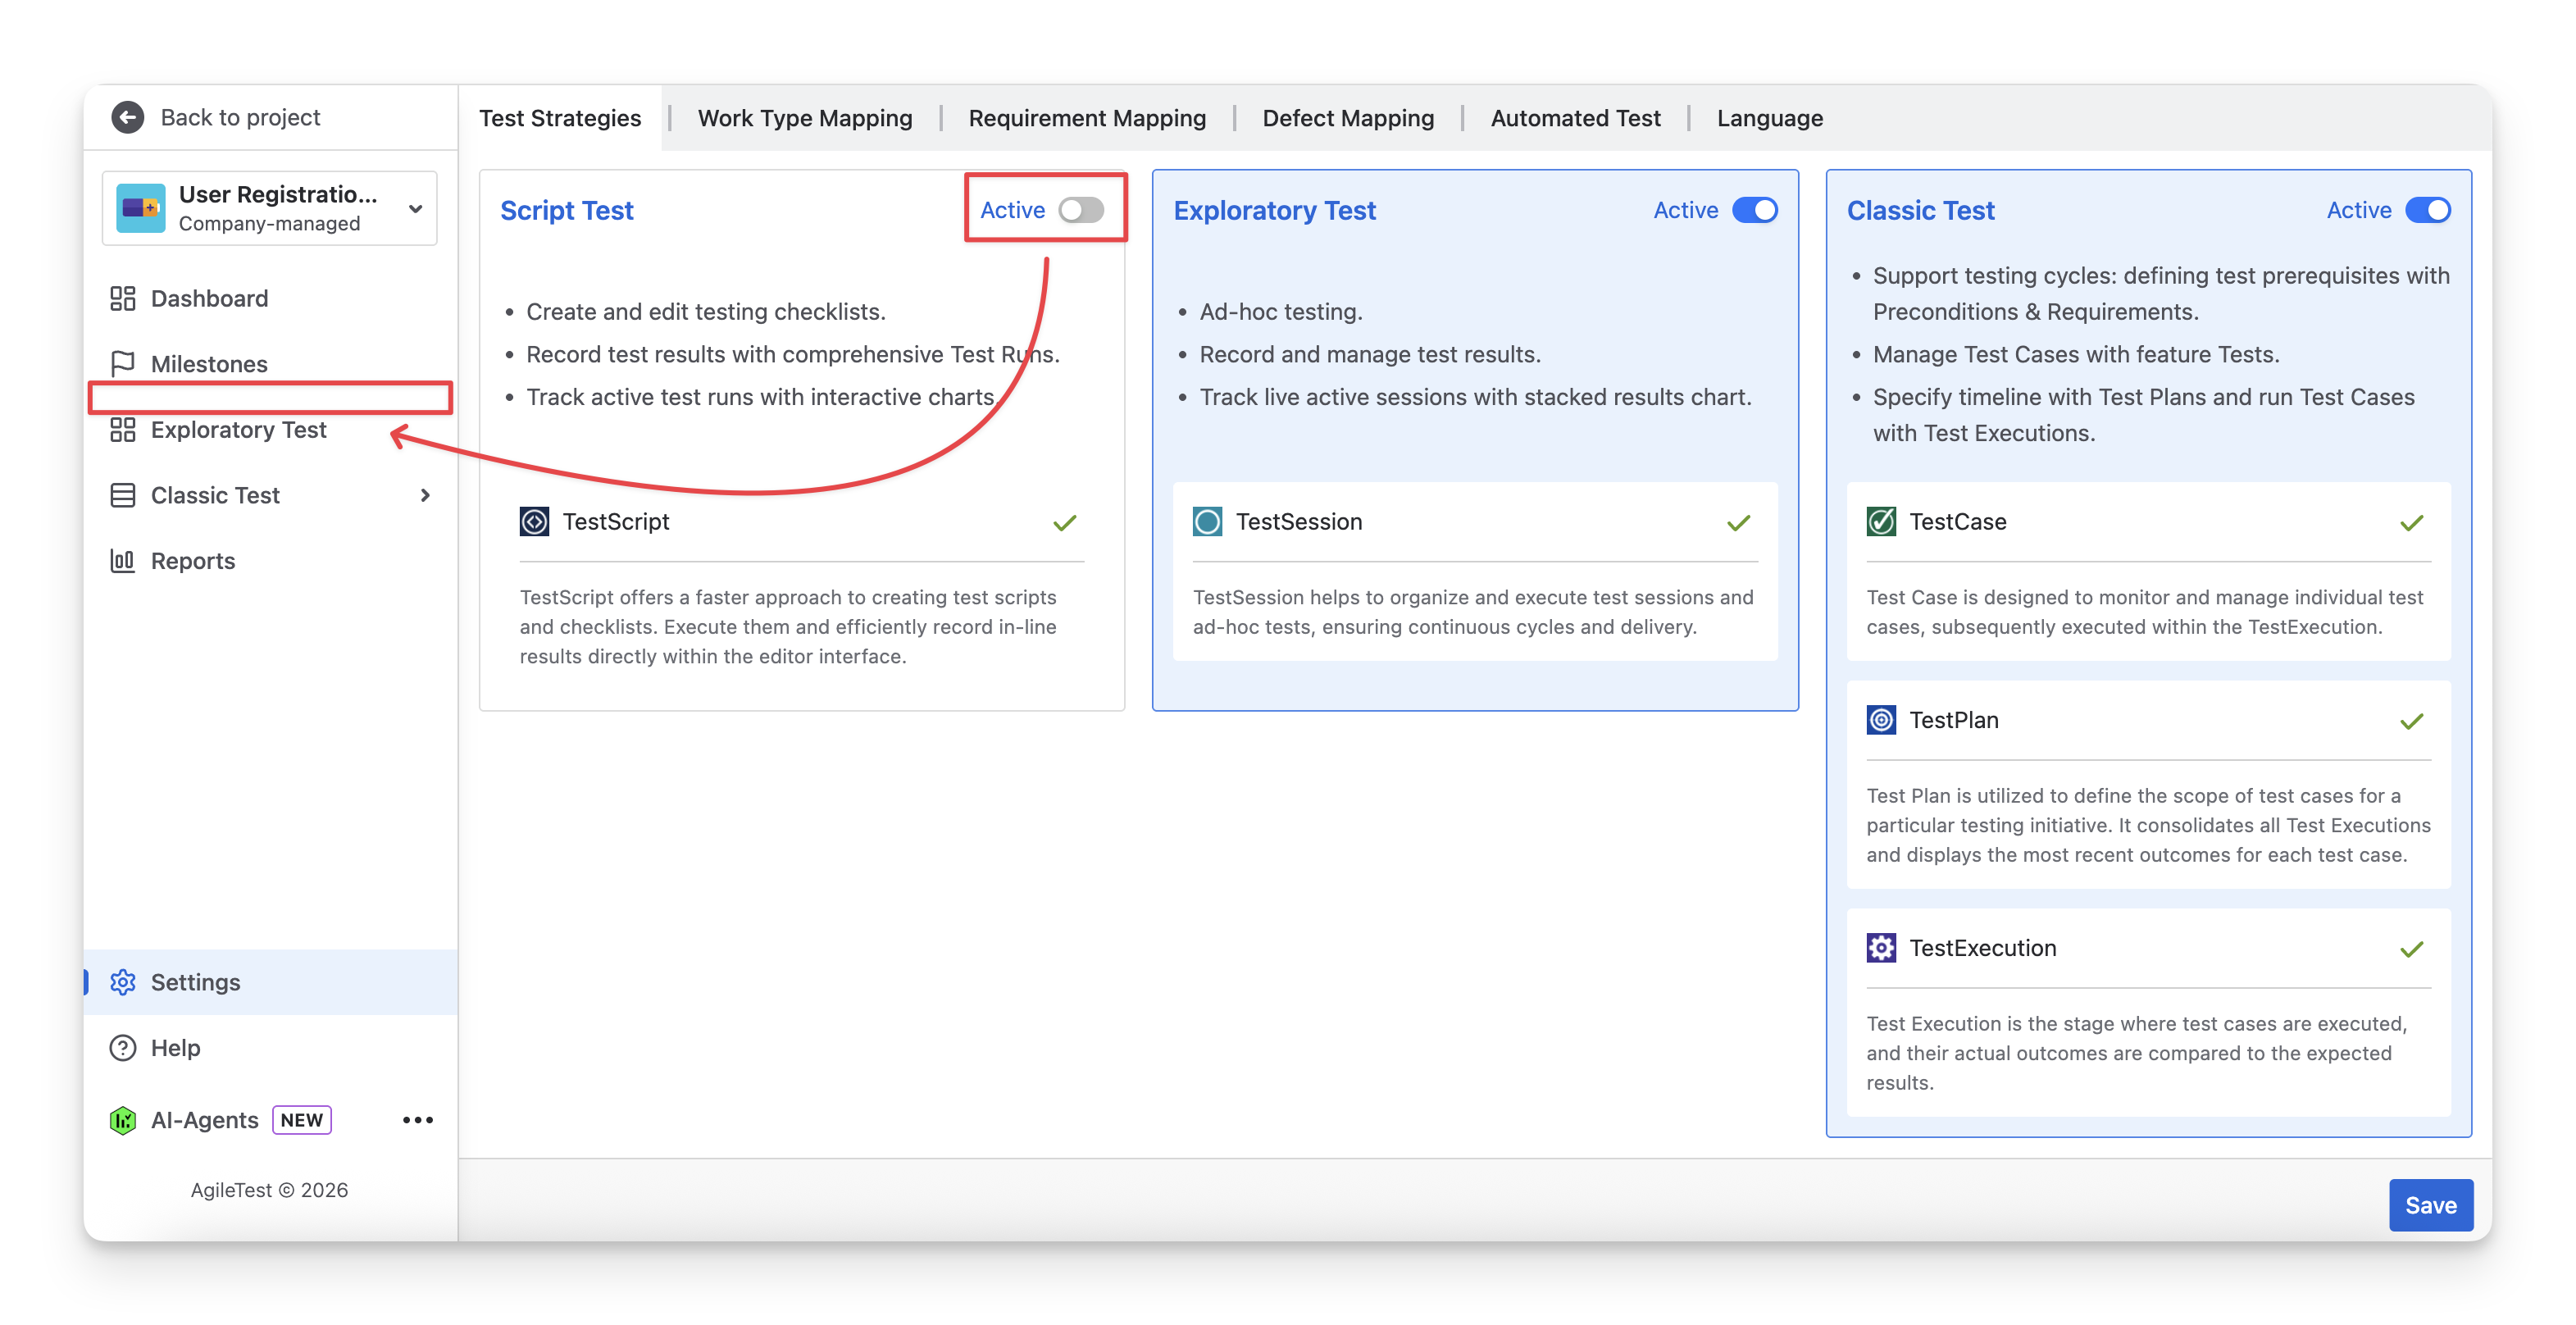
The Test Strategies setup allows administrators to control which testing strategies are active or not in AgileTest. You can enable or disable these strategies by switching the Active toggle at the top right of each board and clicking Save to apply the changes.
When a strategy is disabled, the corresponding feature will be hidden from the project, but all existing data will remain intact.
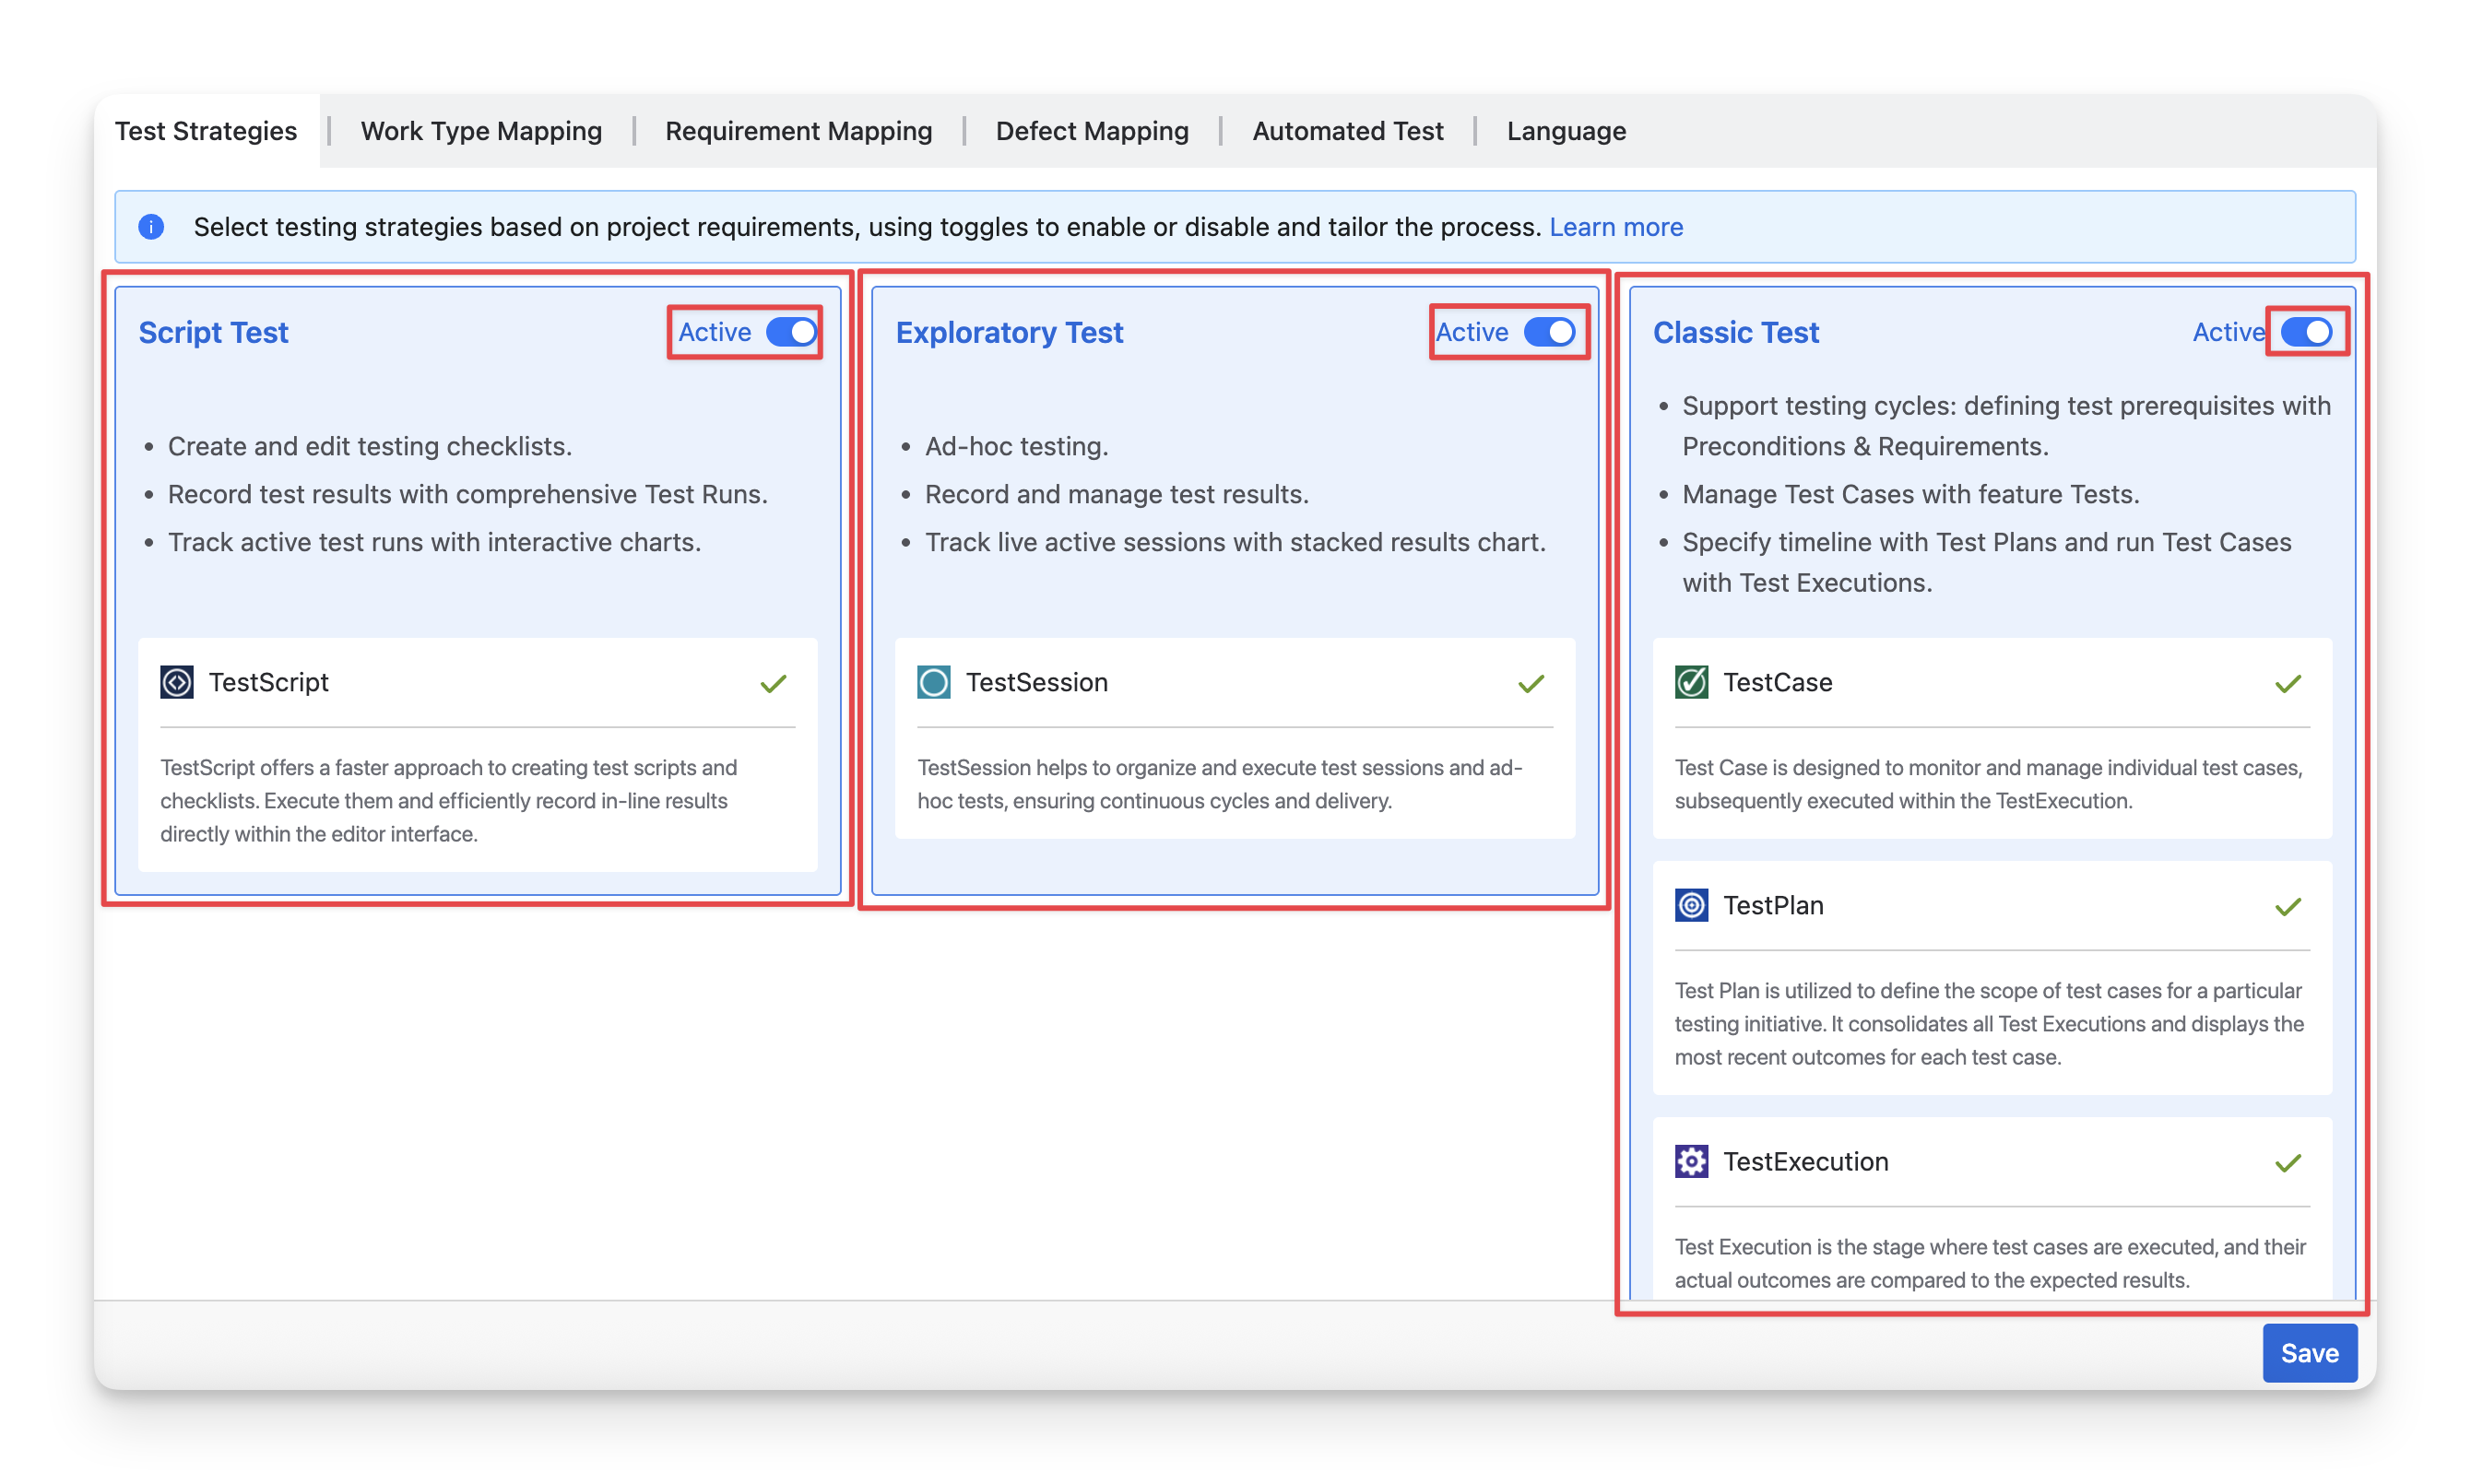
On the Test Strategies tab, you can find settings for 3 Test strategies, including:
-
Script Test: enables teams to create and manage test scripts with checklists, then execute them through Test Runs.
-
Exploratory Test: supports ad-hoc testing sessions where testers can freely explore the application while recording findings and results during live test sessions.
-
Classic Test: provides a traditional testing workflow where teams manage Test Cases, organize them into Test Plans, and execute them through Test Executions with defined timelines and requirements.
Learn more about: Script Test | Exploratory Test | Classic Test.
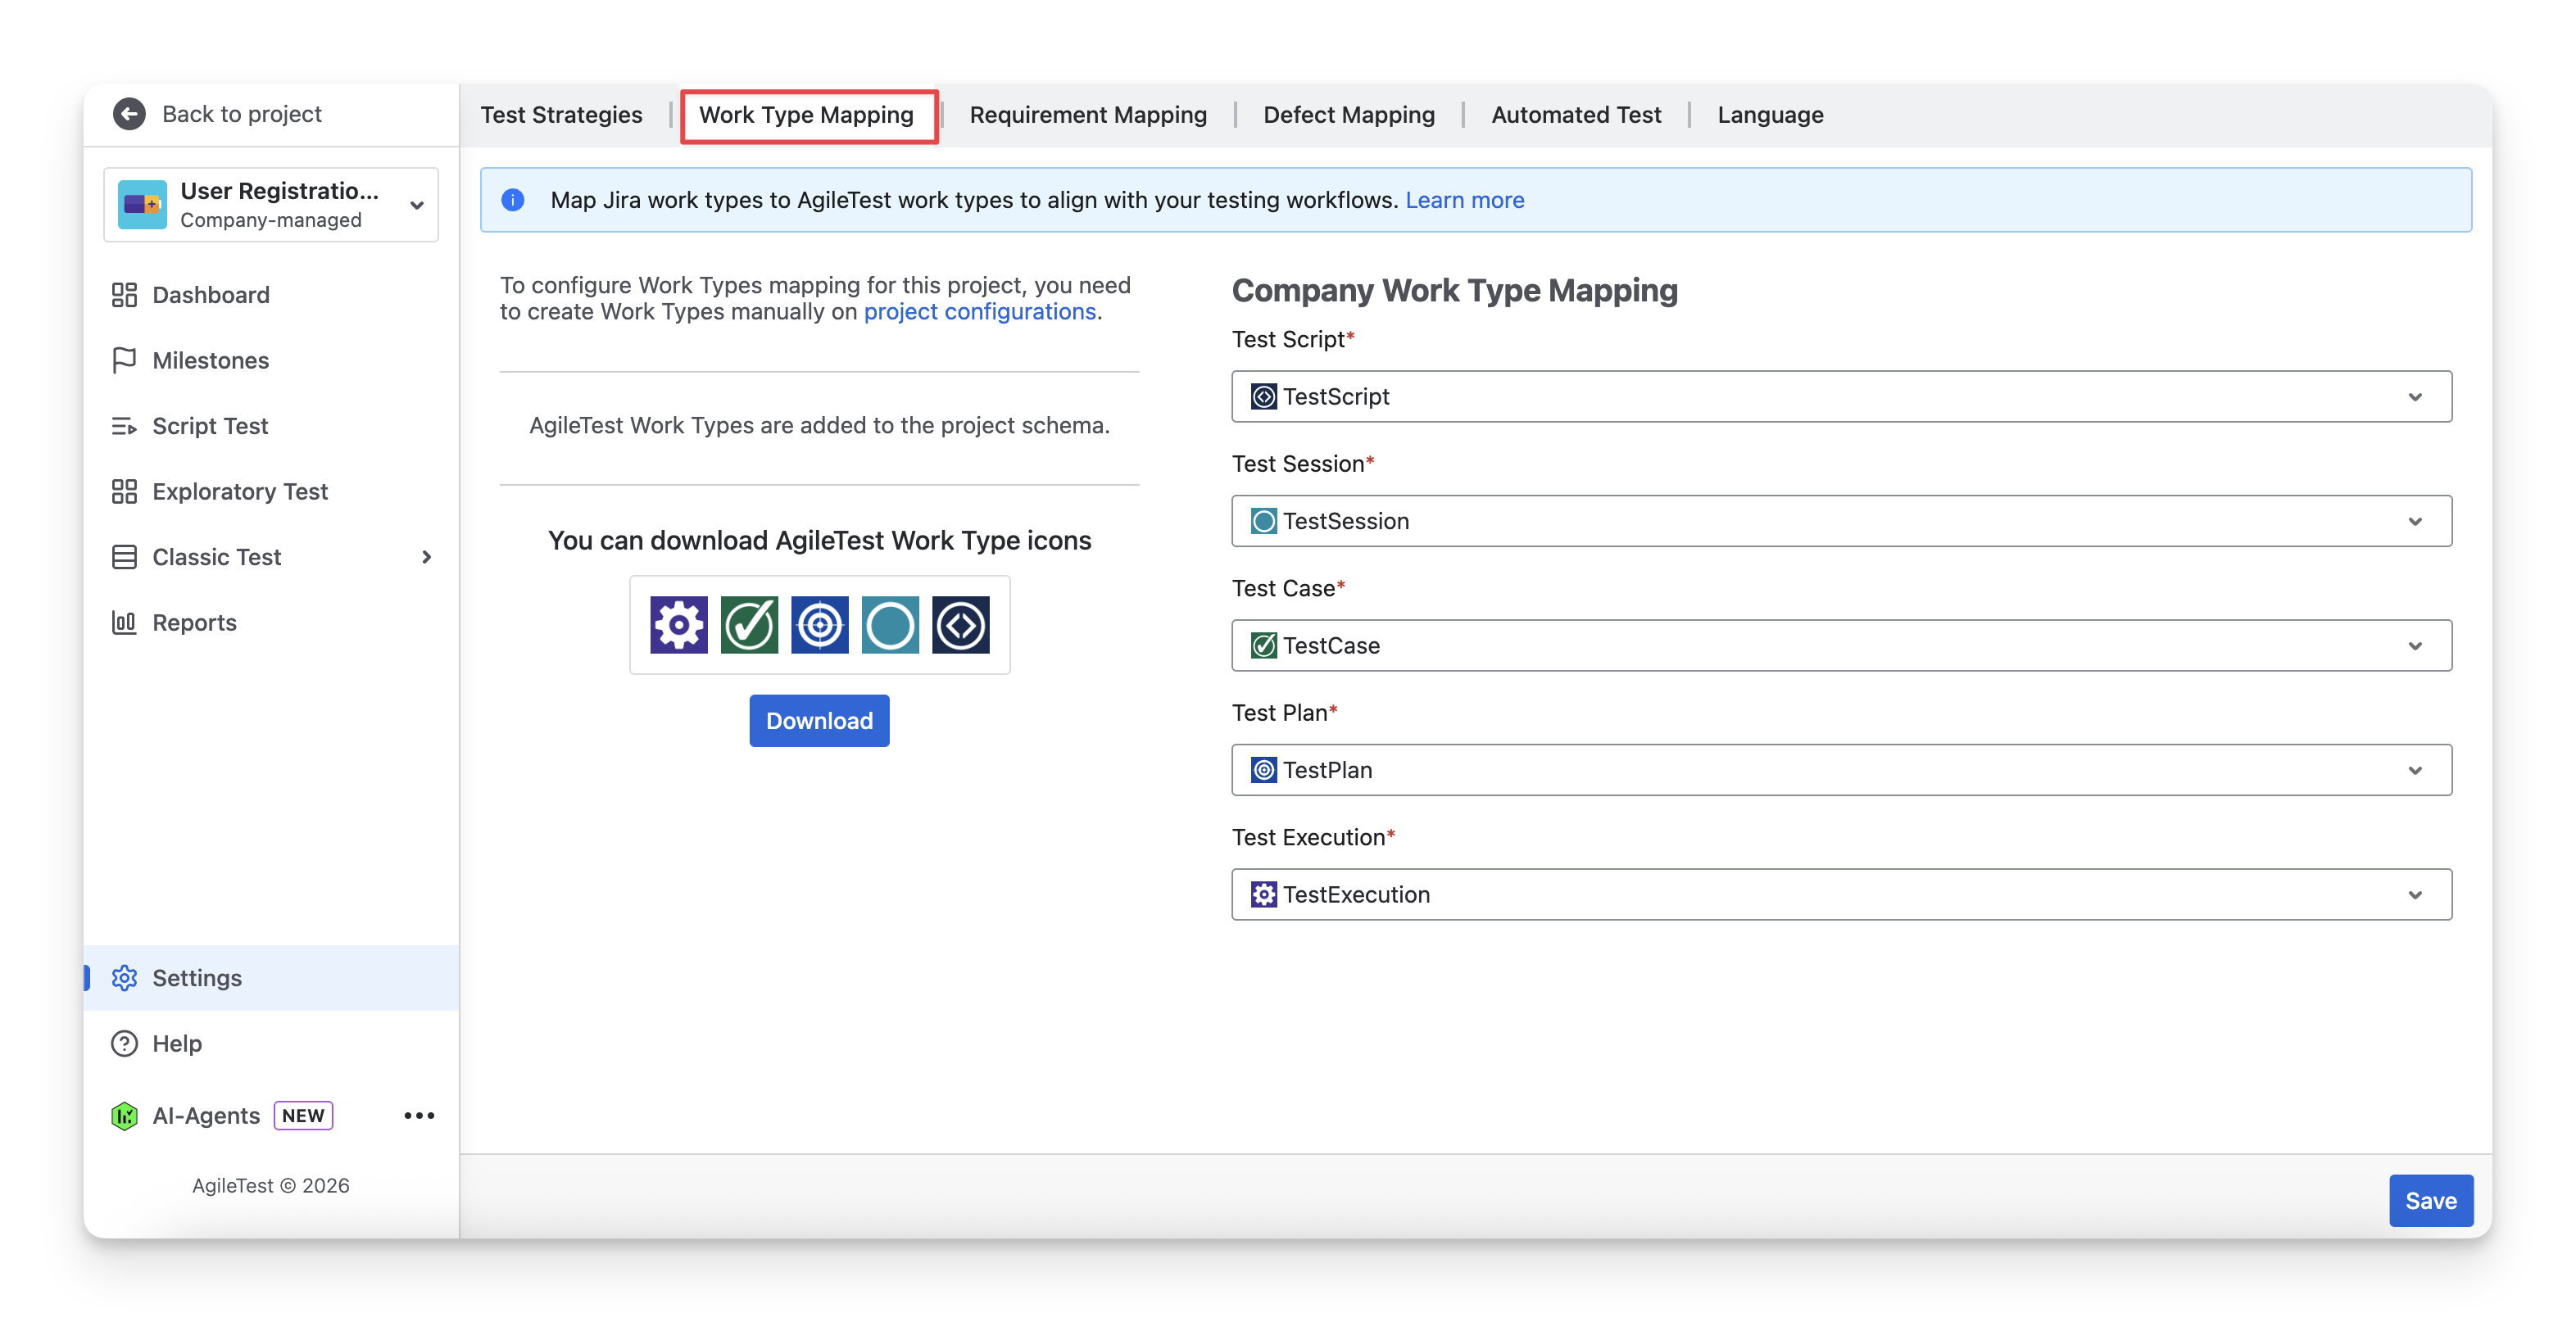
2. Work Type Mapping
In Jira Cloud, a work item is the general term for anything you track (such as tasks, bugs, or stories). The specific categories of these items, previously called issue types, are now commonly referred to as work types.
The Work Type Mapping tab allows admins to map available Jira work types to their respective AgileTest items. This configuration ensures that when AgileTest creates or manages testing items, such as Test Cases, Test Plans, or Test Execution, they are aligned with the correct Jira issue types used in the project.
Setting up work type mappings for the first time varies by project type:
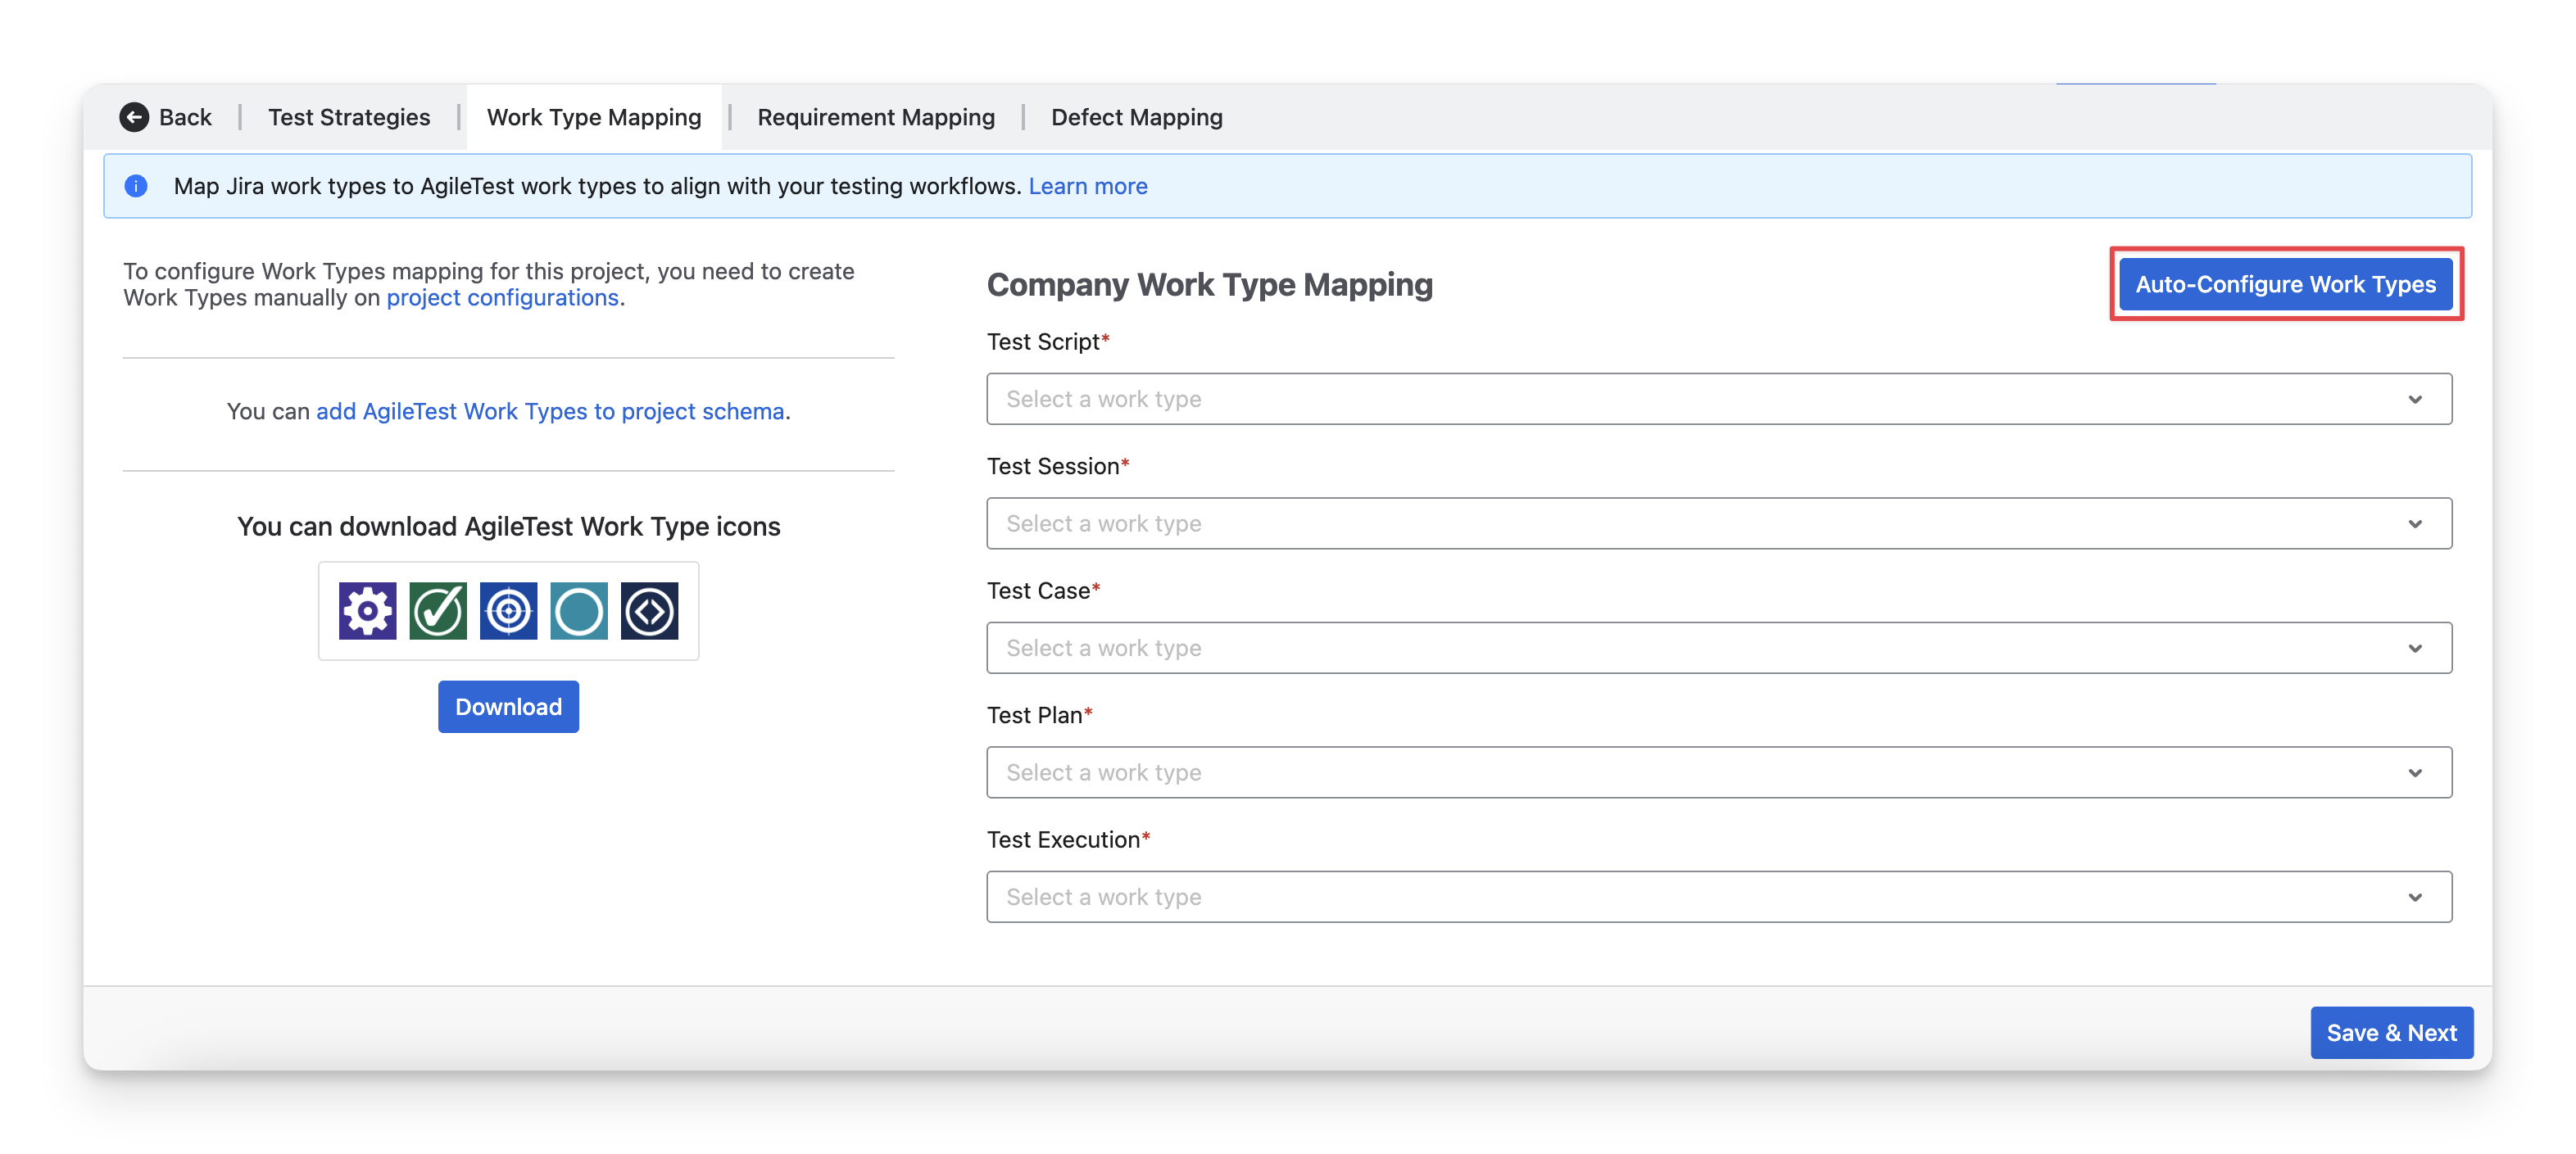
2.1 For Company-managed project
For Company-managed projects, you can click on Auto-Configure Work Types. AgileTest will automatically configure the mappings with the appropriate Jira work types for each AgileTest item.
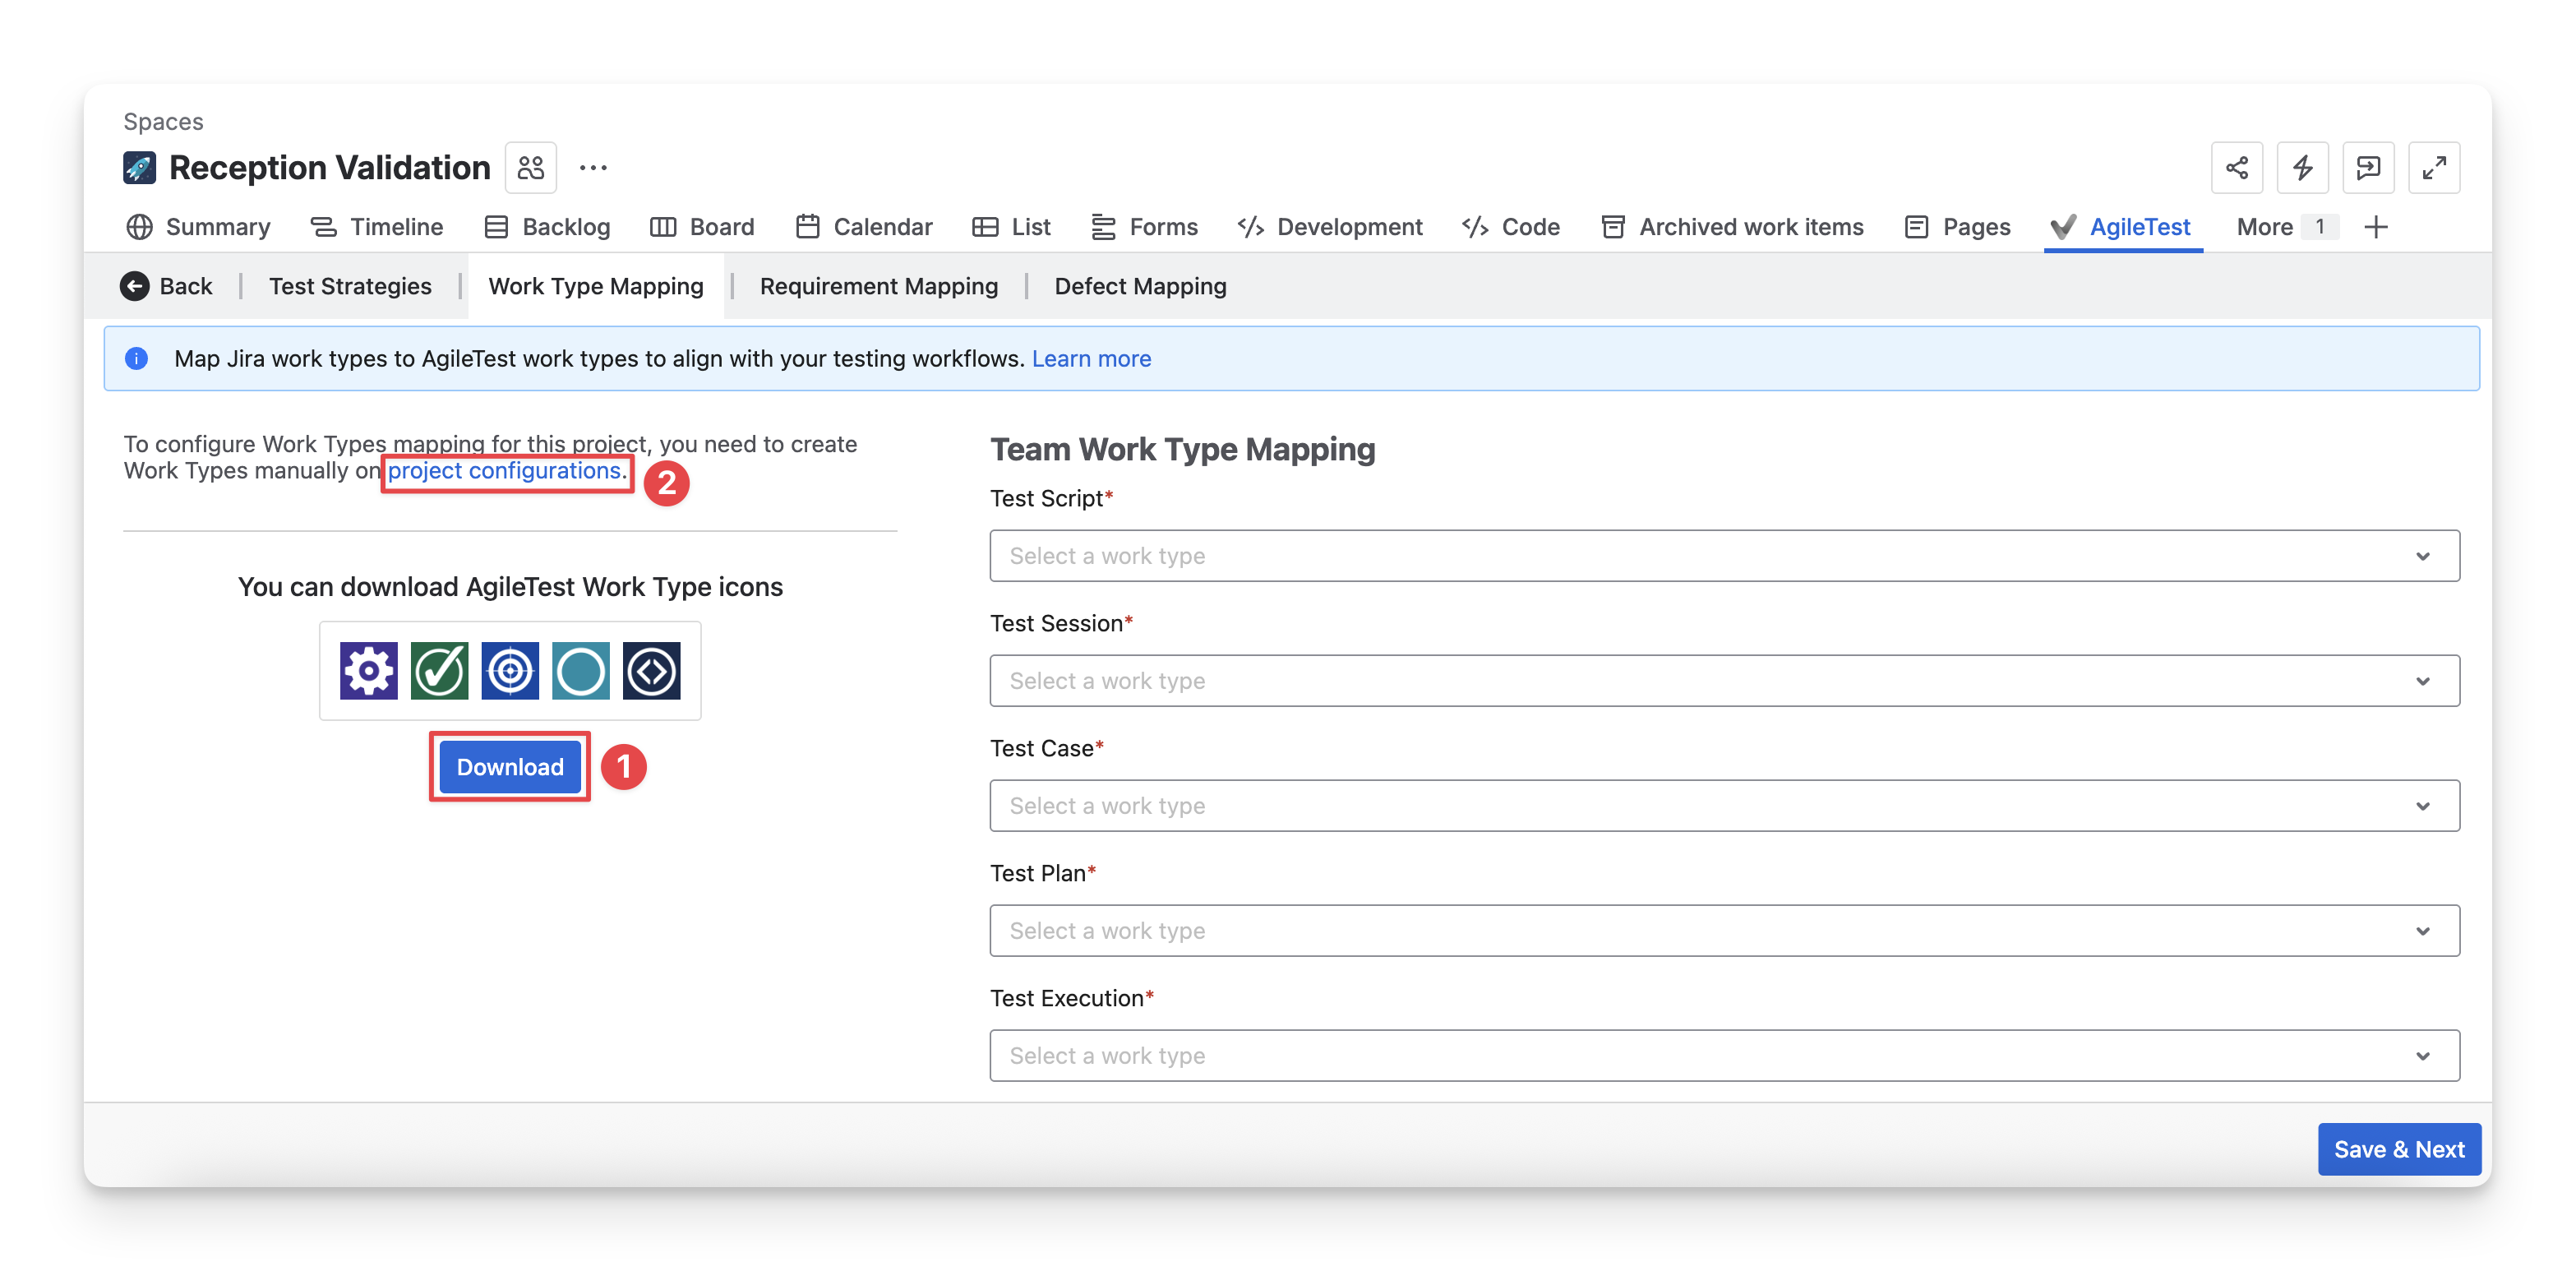
2.2 For Team-managed project
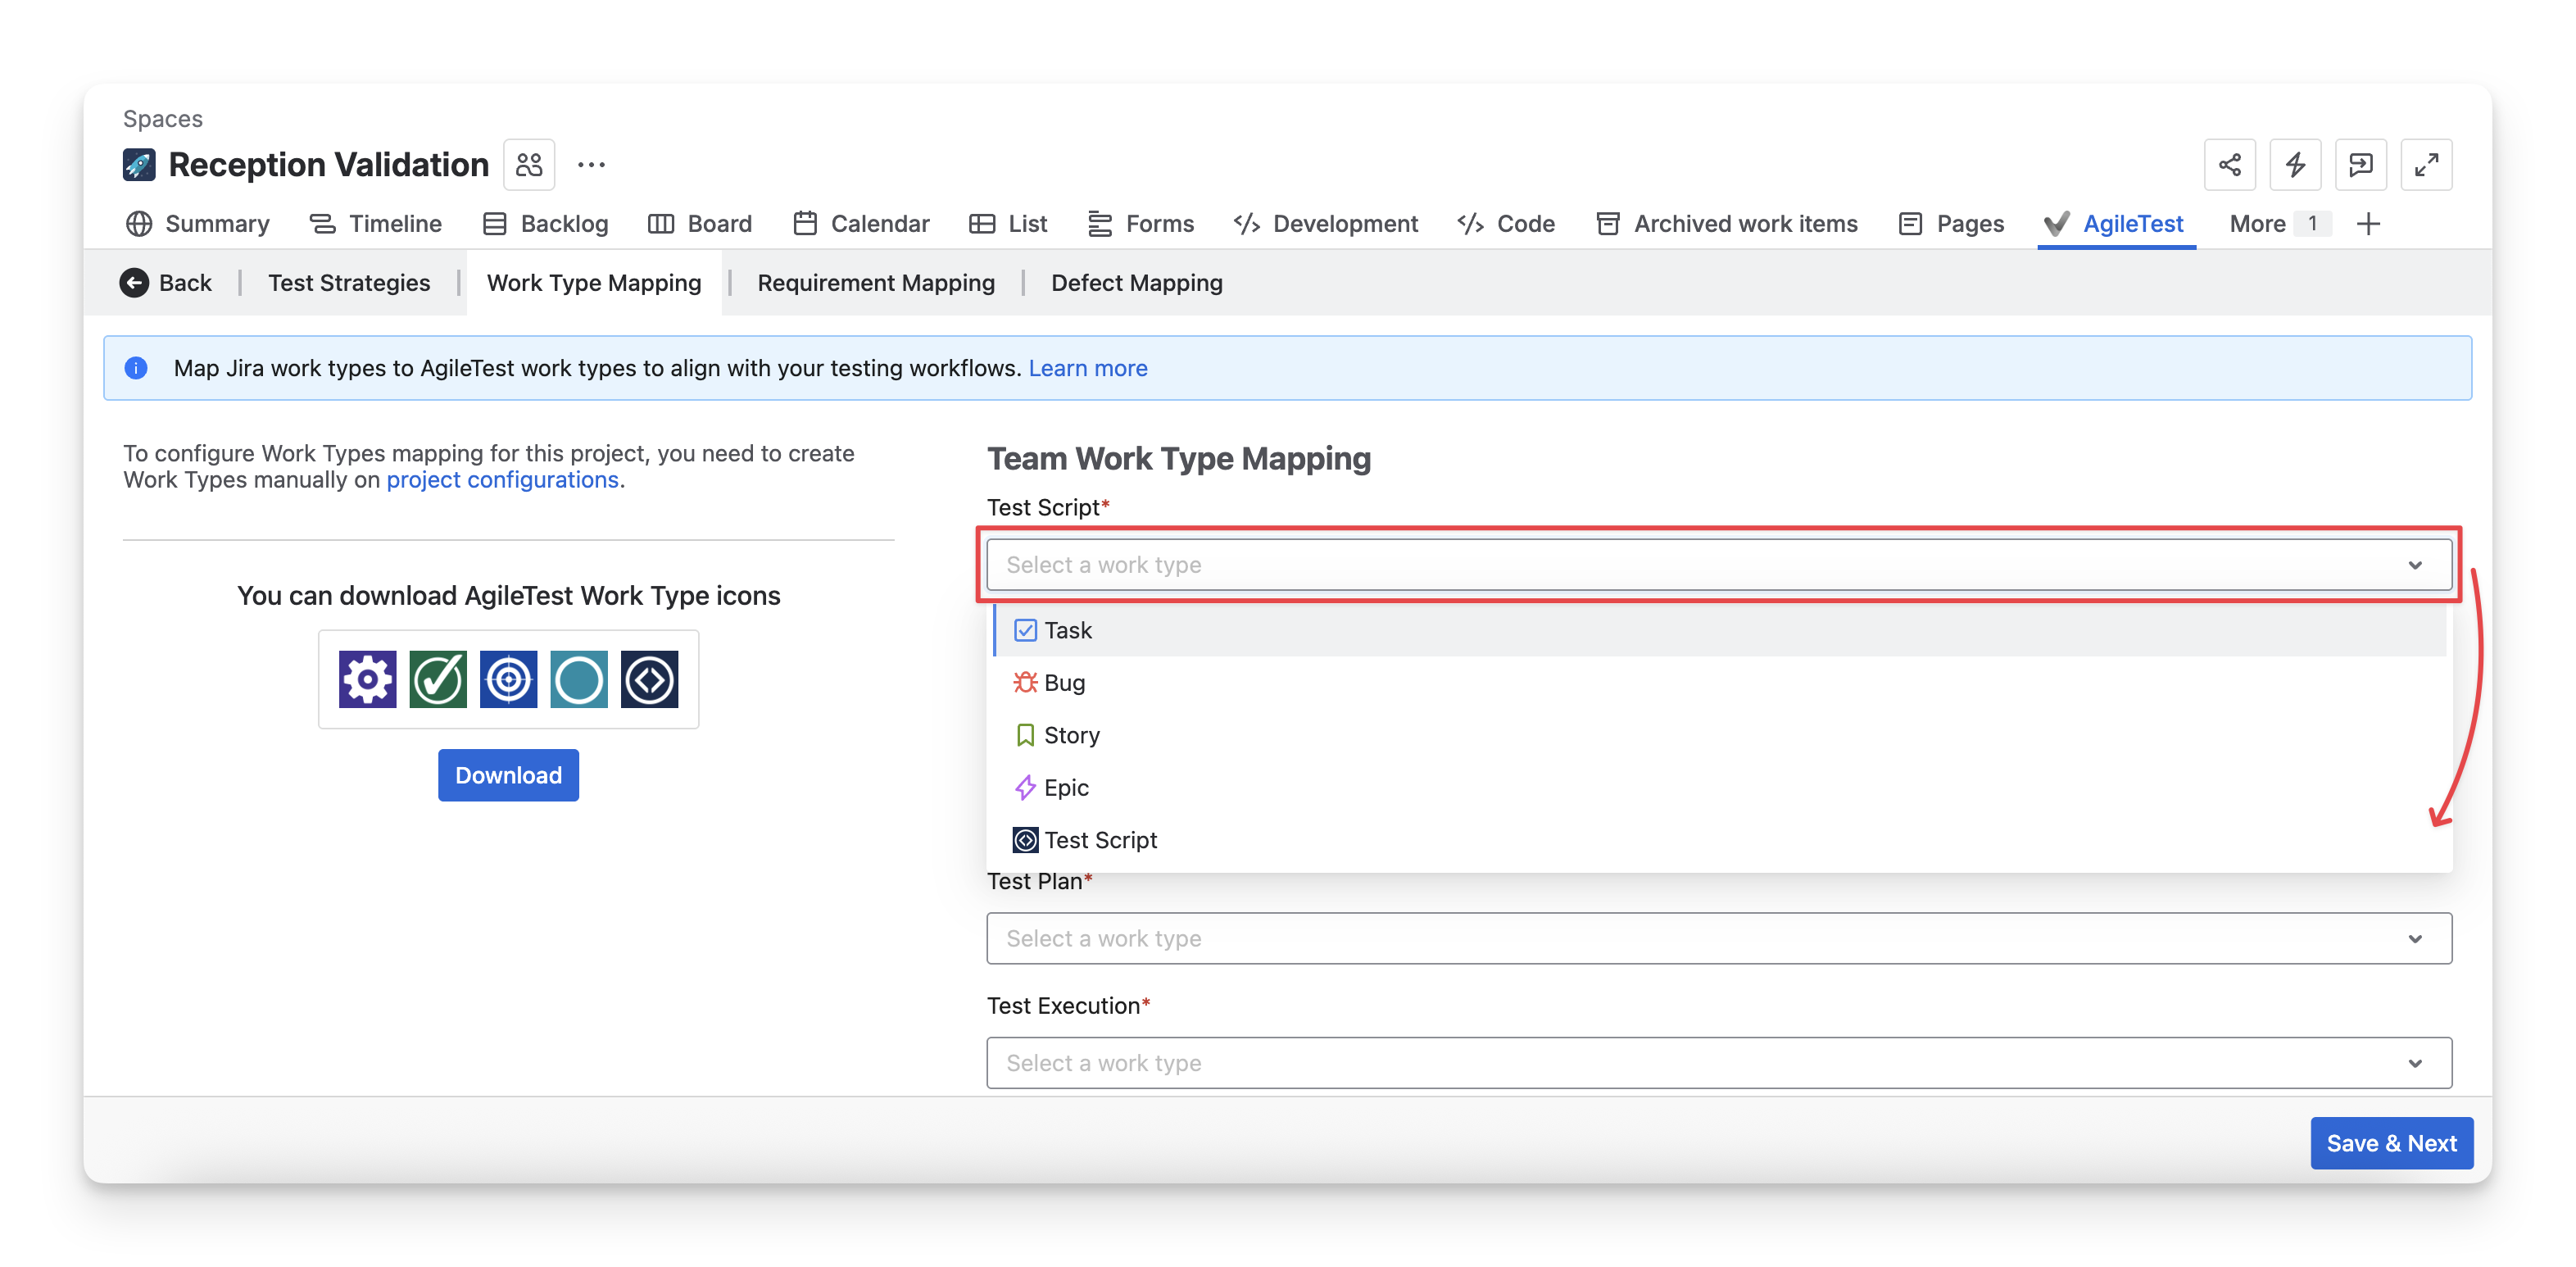
For Team-managed projects, you need to create and map work types manually. To do this, follow these steps:
-
Download AgileTest work type icons.
-
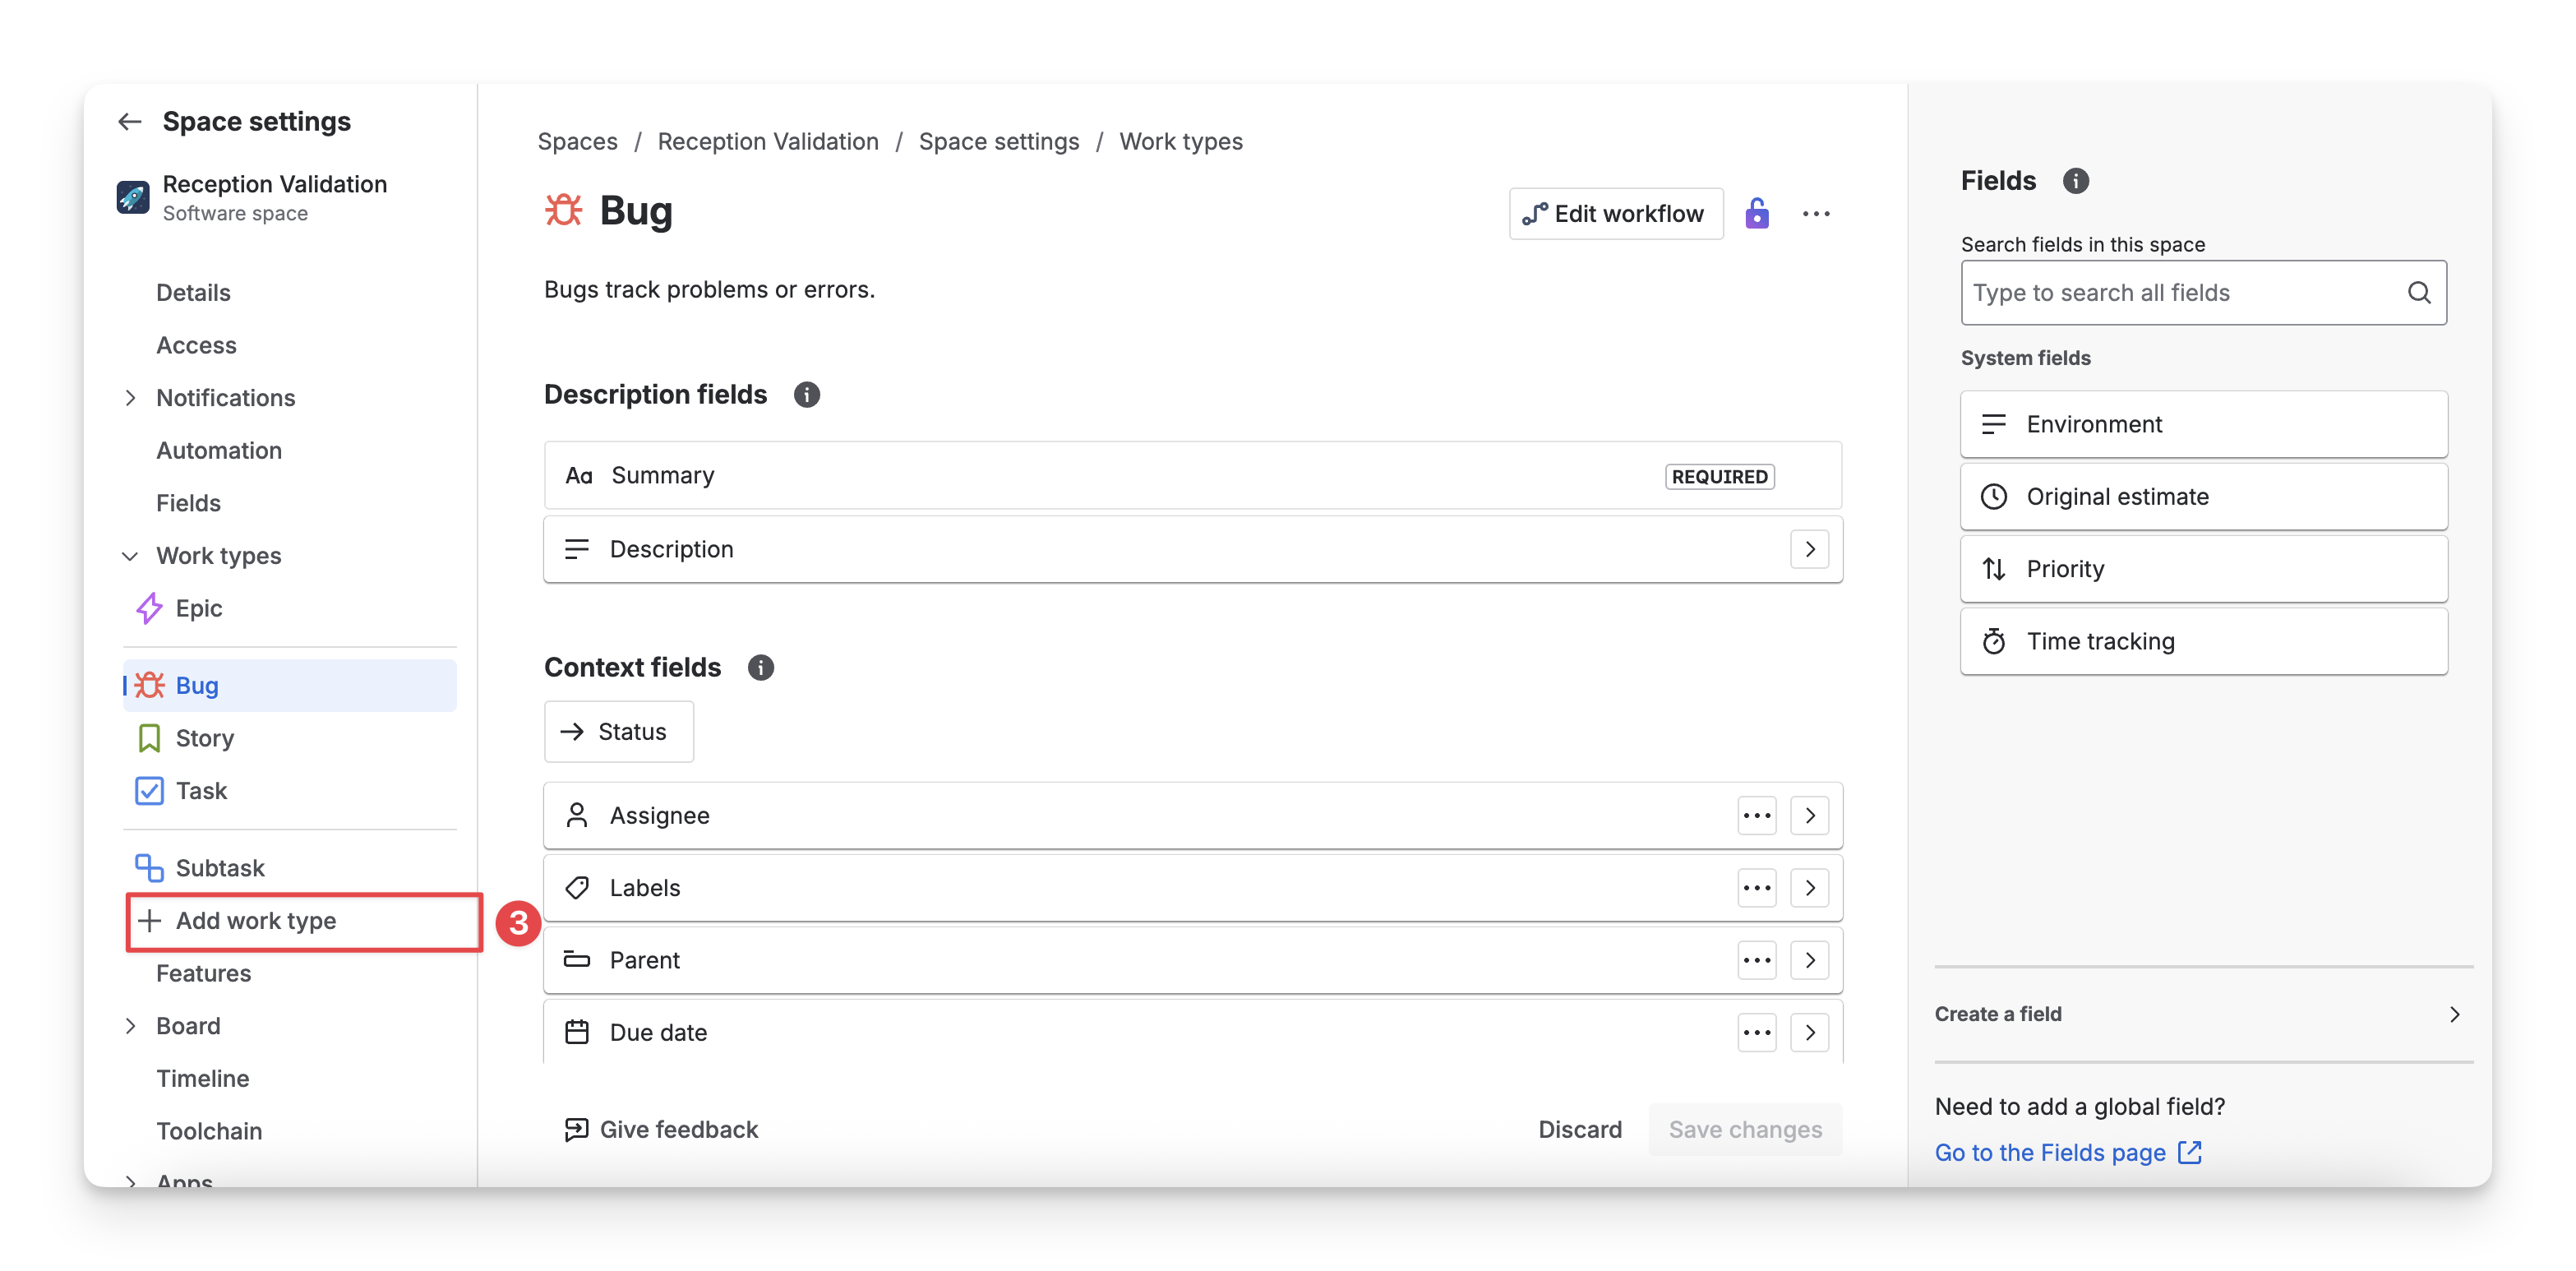
Navigate to the Work Type configuration screen.
-
Select “+ Add work type” button.
-
Fill in the work type information. We recommend that you use the same work type Name and Icon that AgileTest provided to avoid confusion. Click “Save” to complete this process.
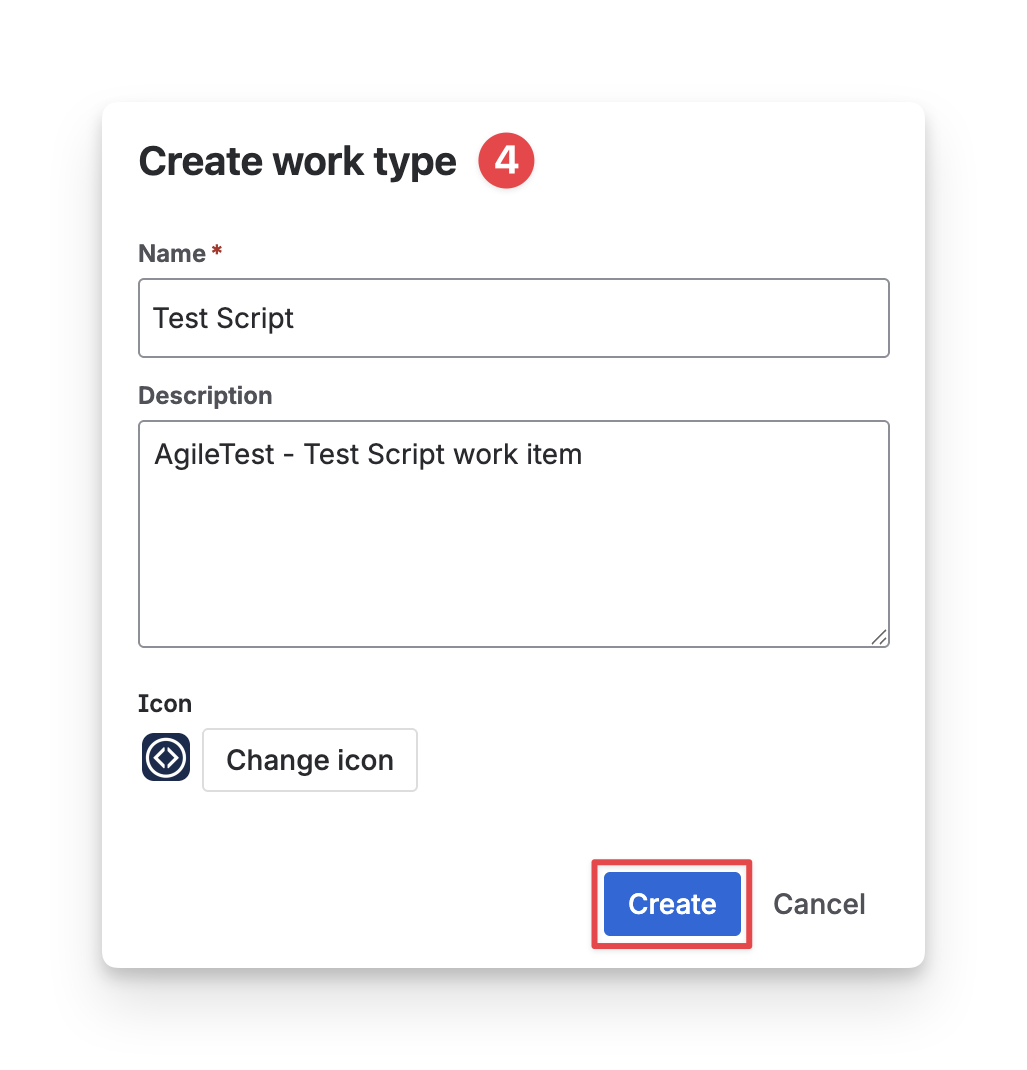
Repeat this creation step for the four remaining work types.
-
After creating AgileTest work types, return to the Work Type Mapping tab to select and map them.
3. Requirement Mapping
This setting allows users to link and map their available Jira work types to AgileTest’s Requirements. Once mapped, these work types will appear as Requirements and can be managed directly within the app.
Changing work types mapping after a period of using the app could cause data loss. We recommend that you finalize this configuration on the first access to the app in the new project.
You can conduct 3 settings in this tab:
3.1 Map Requirement Work Type
This setting allows administrators to customize which Jira work types are used as Requirements in AgileTest. By default, AgileTest maps Task and Story as Requirement work types. However, admins can modify this configuration by selecting other available Jira work types if their project uses a different structure.
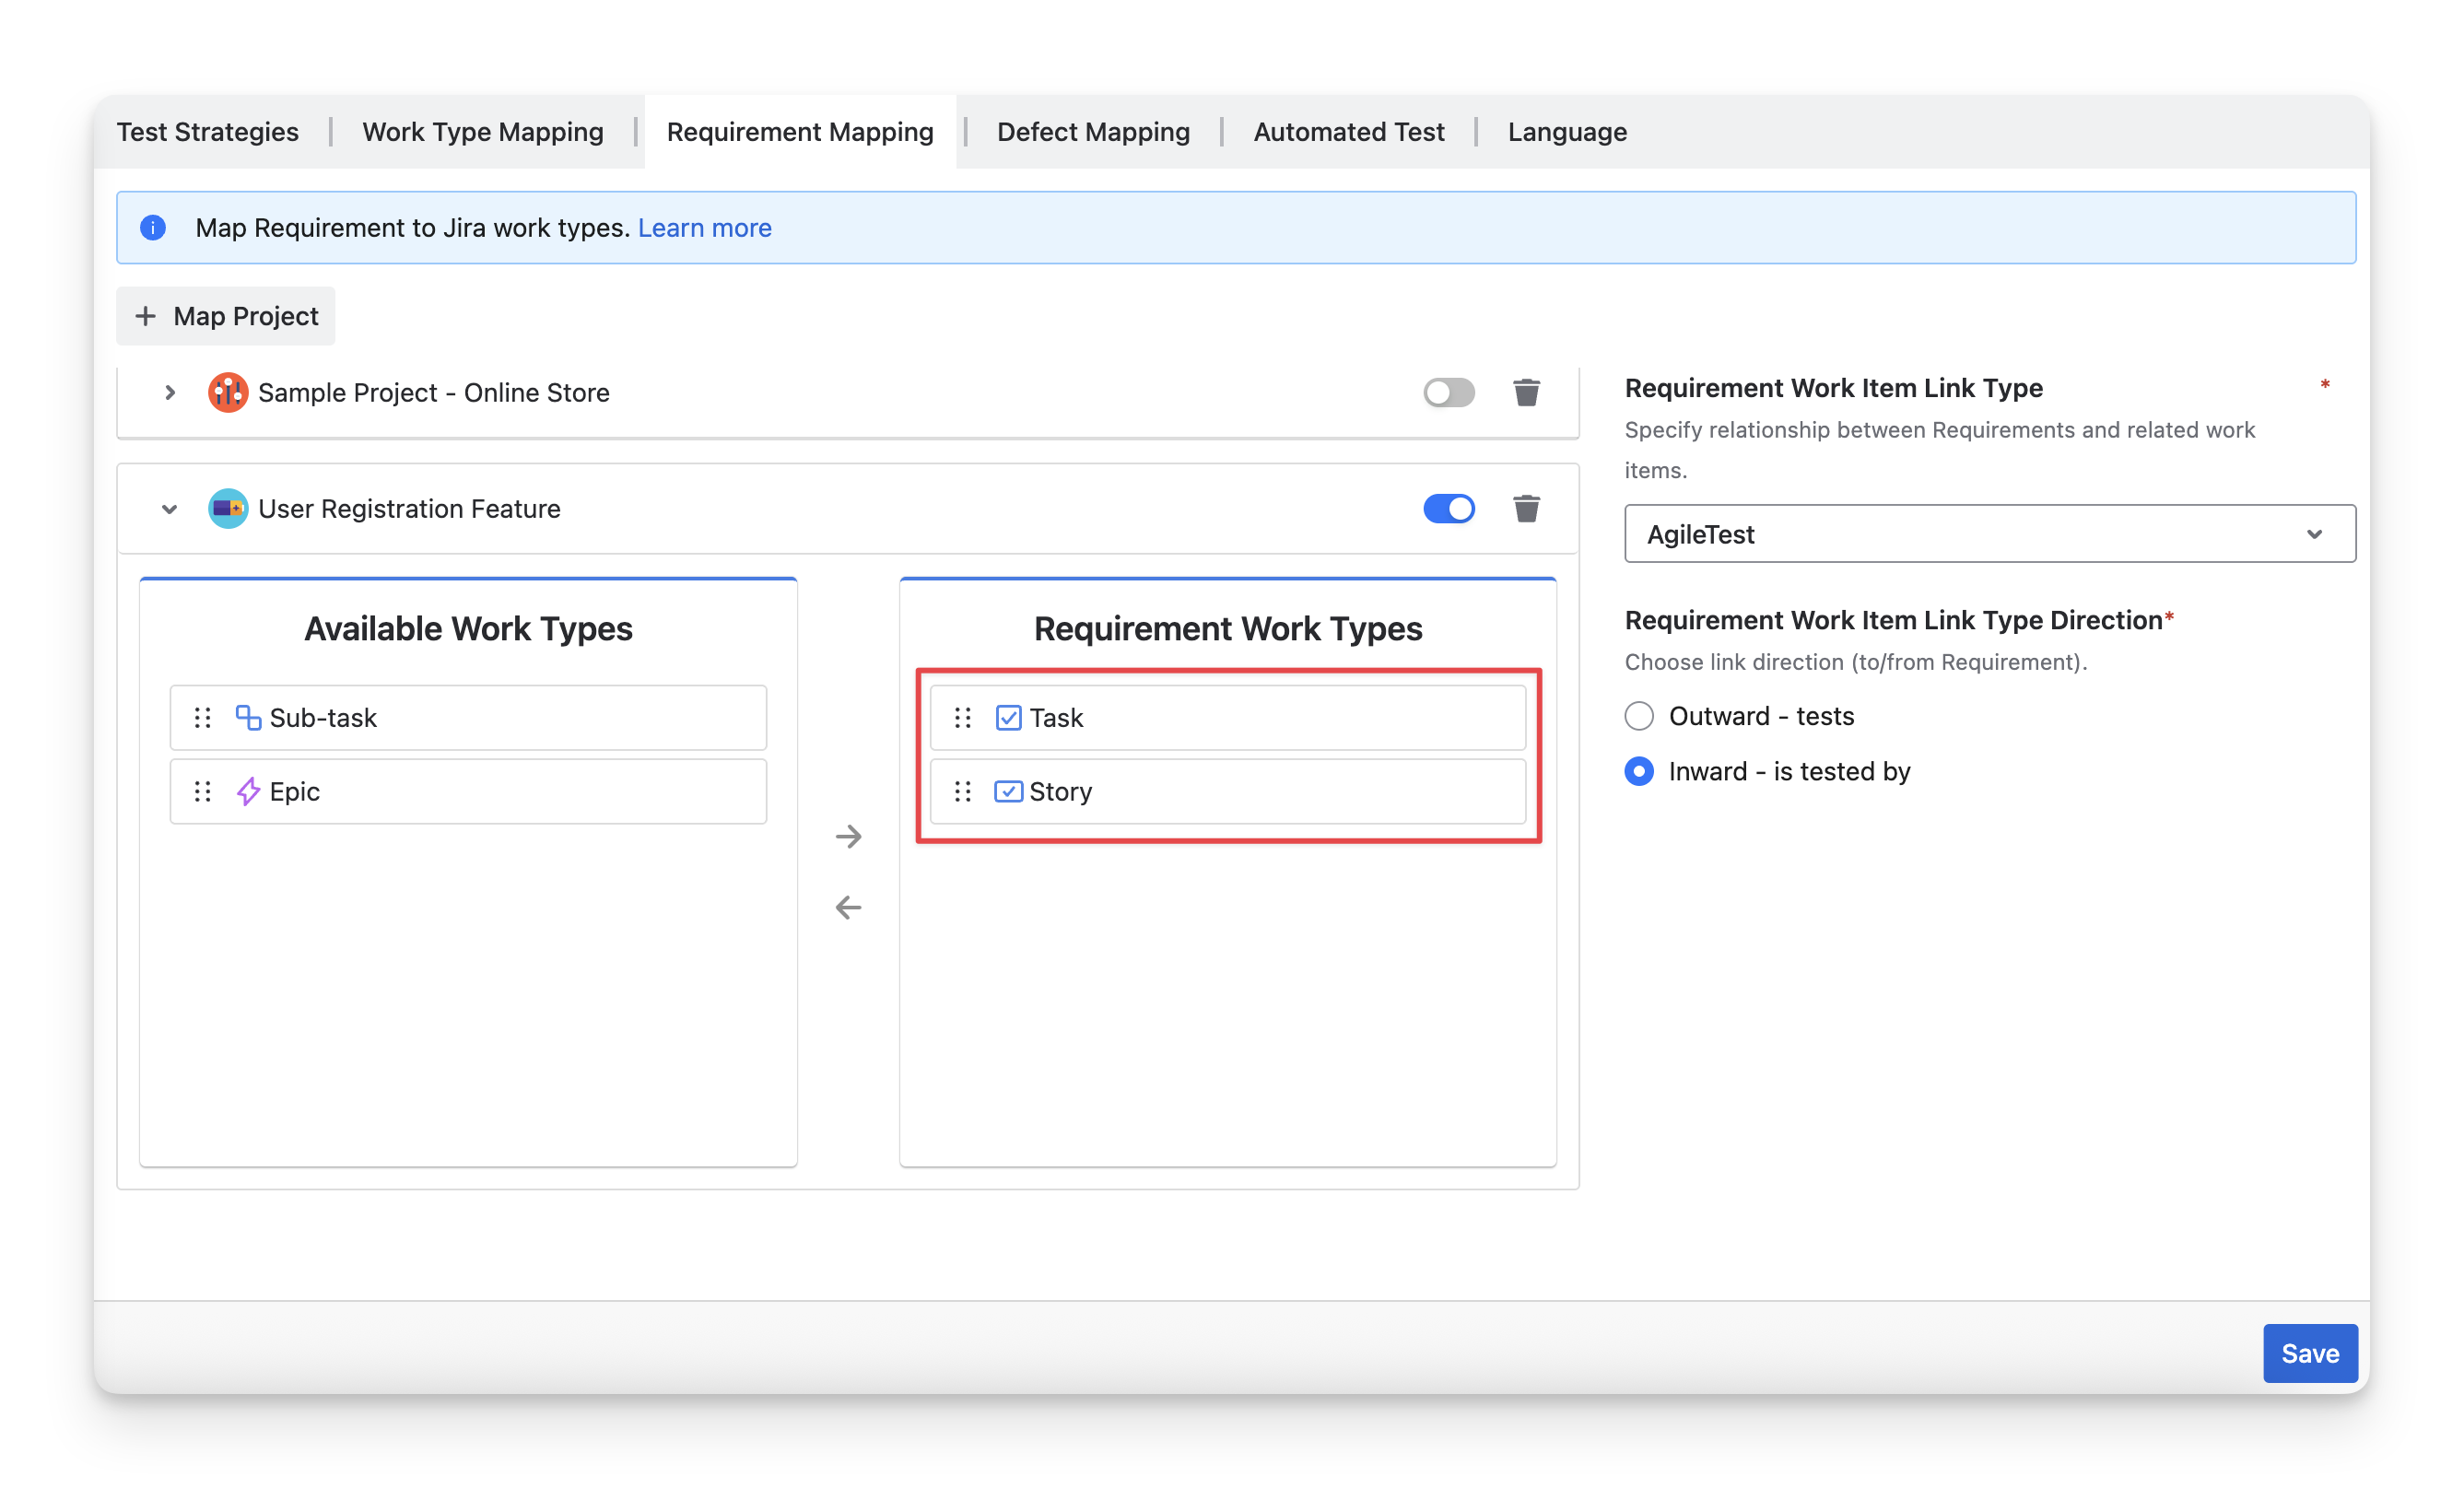
To change the mapping, you can drag and drop individual or multiple Jira work items from the “Available Work Types” column to the “Requirement Work Types” column to map them to AgileTest’s Requirements.
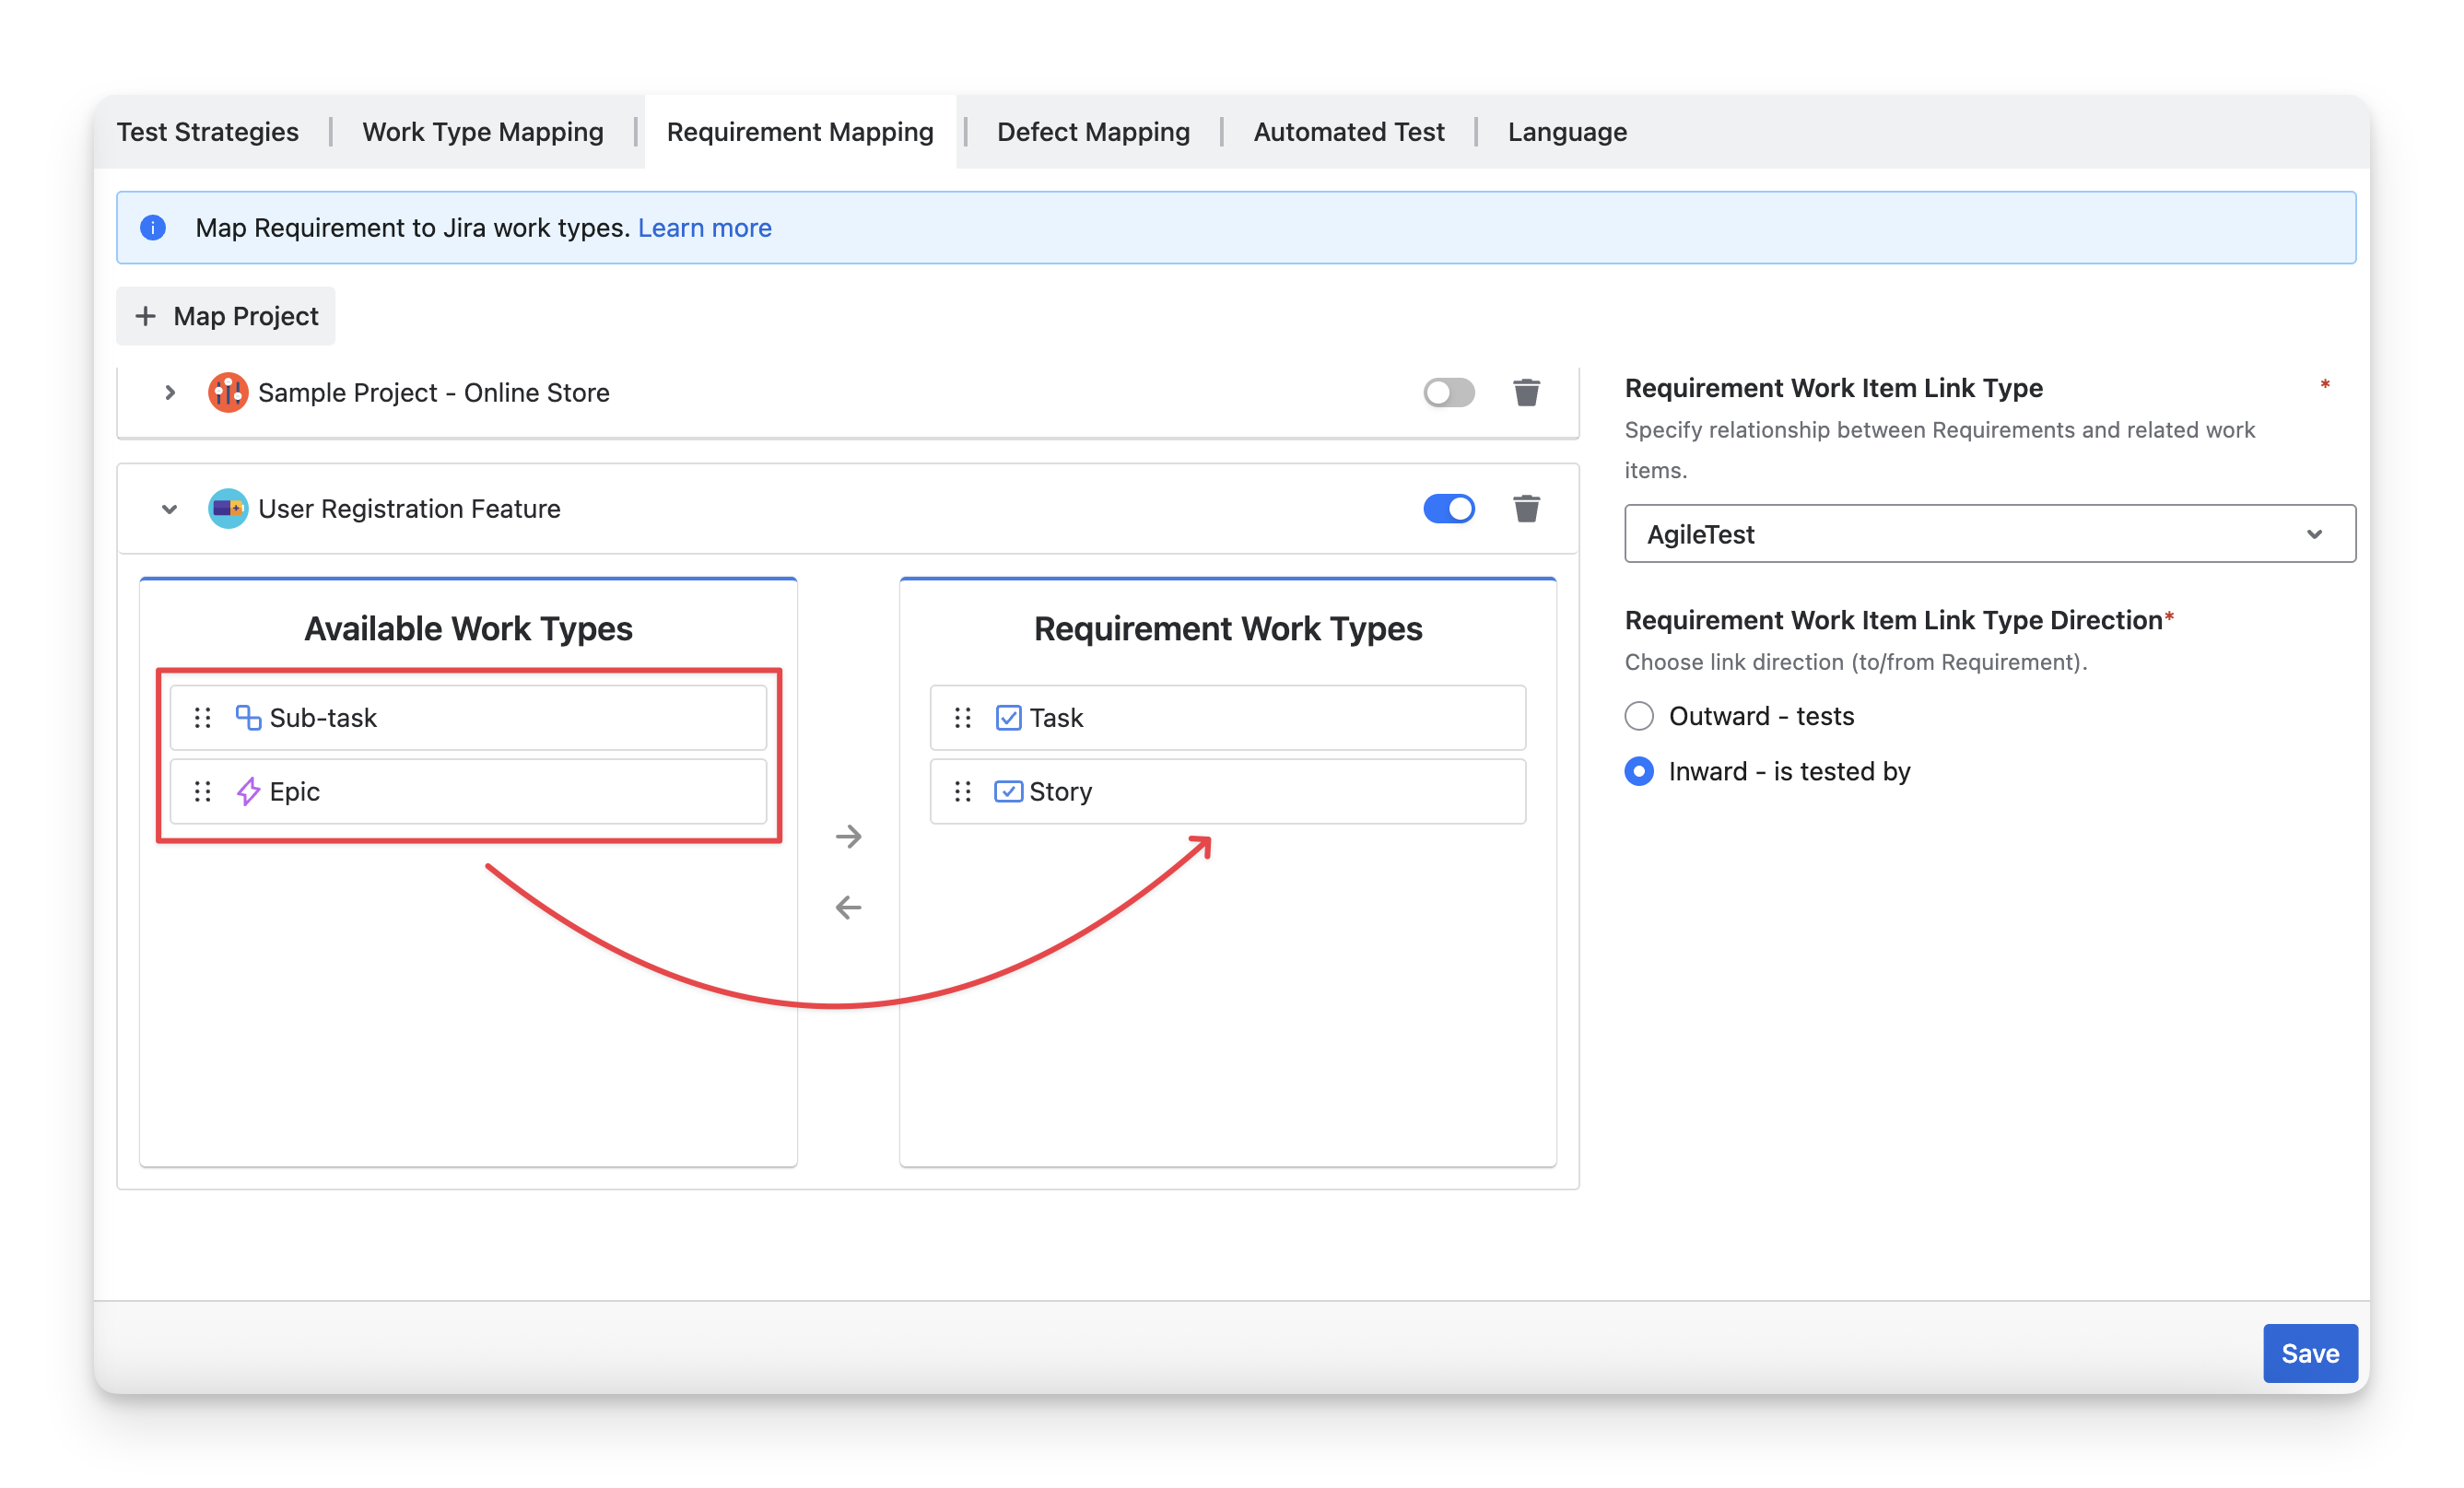
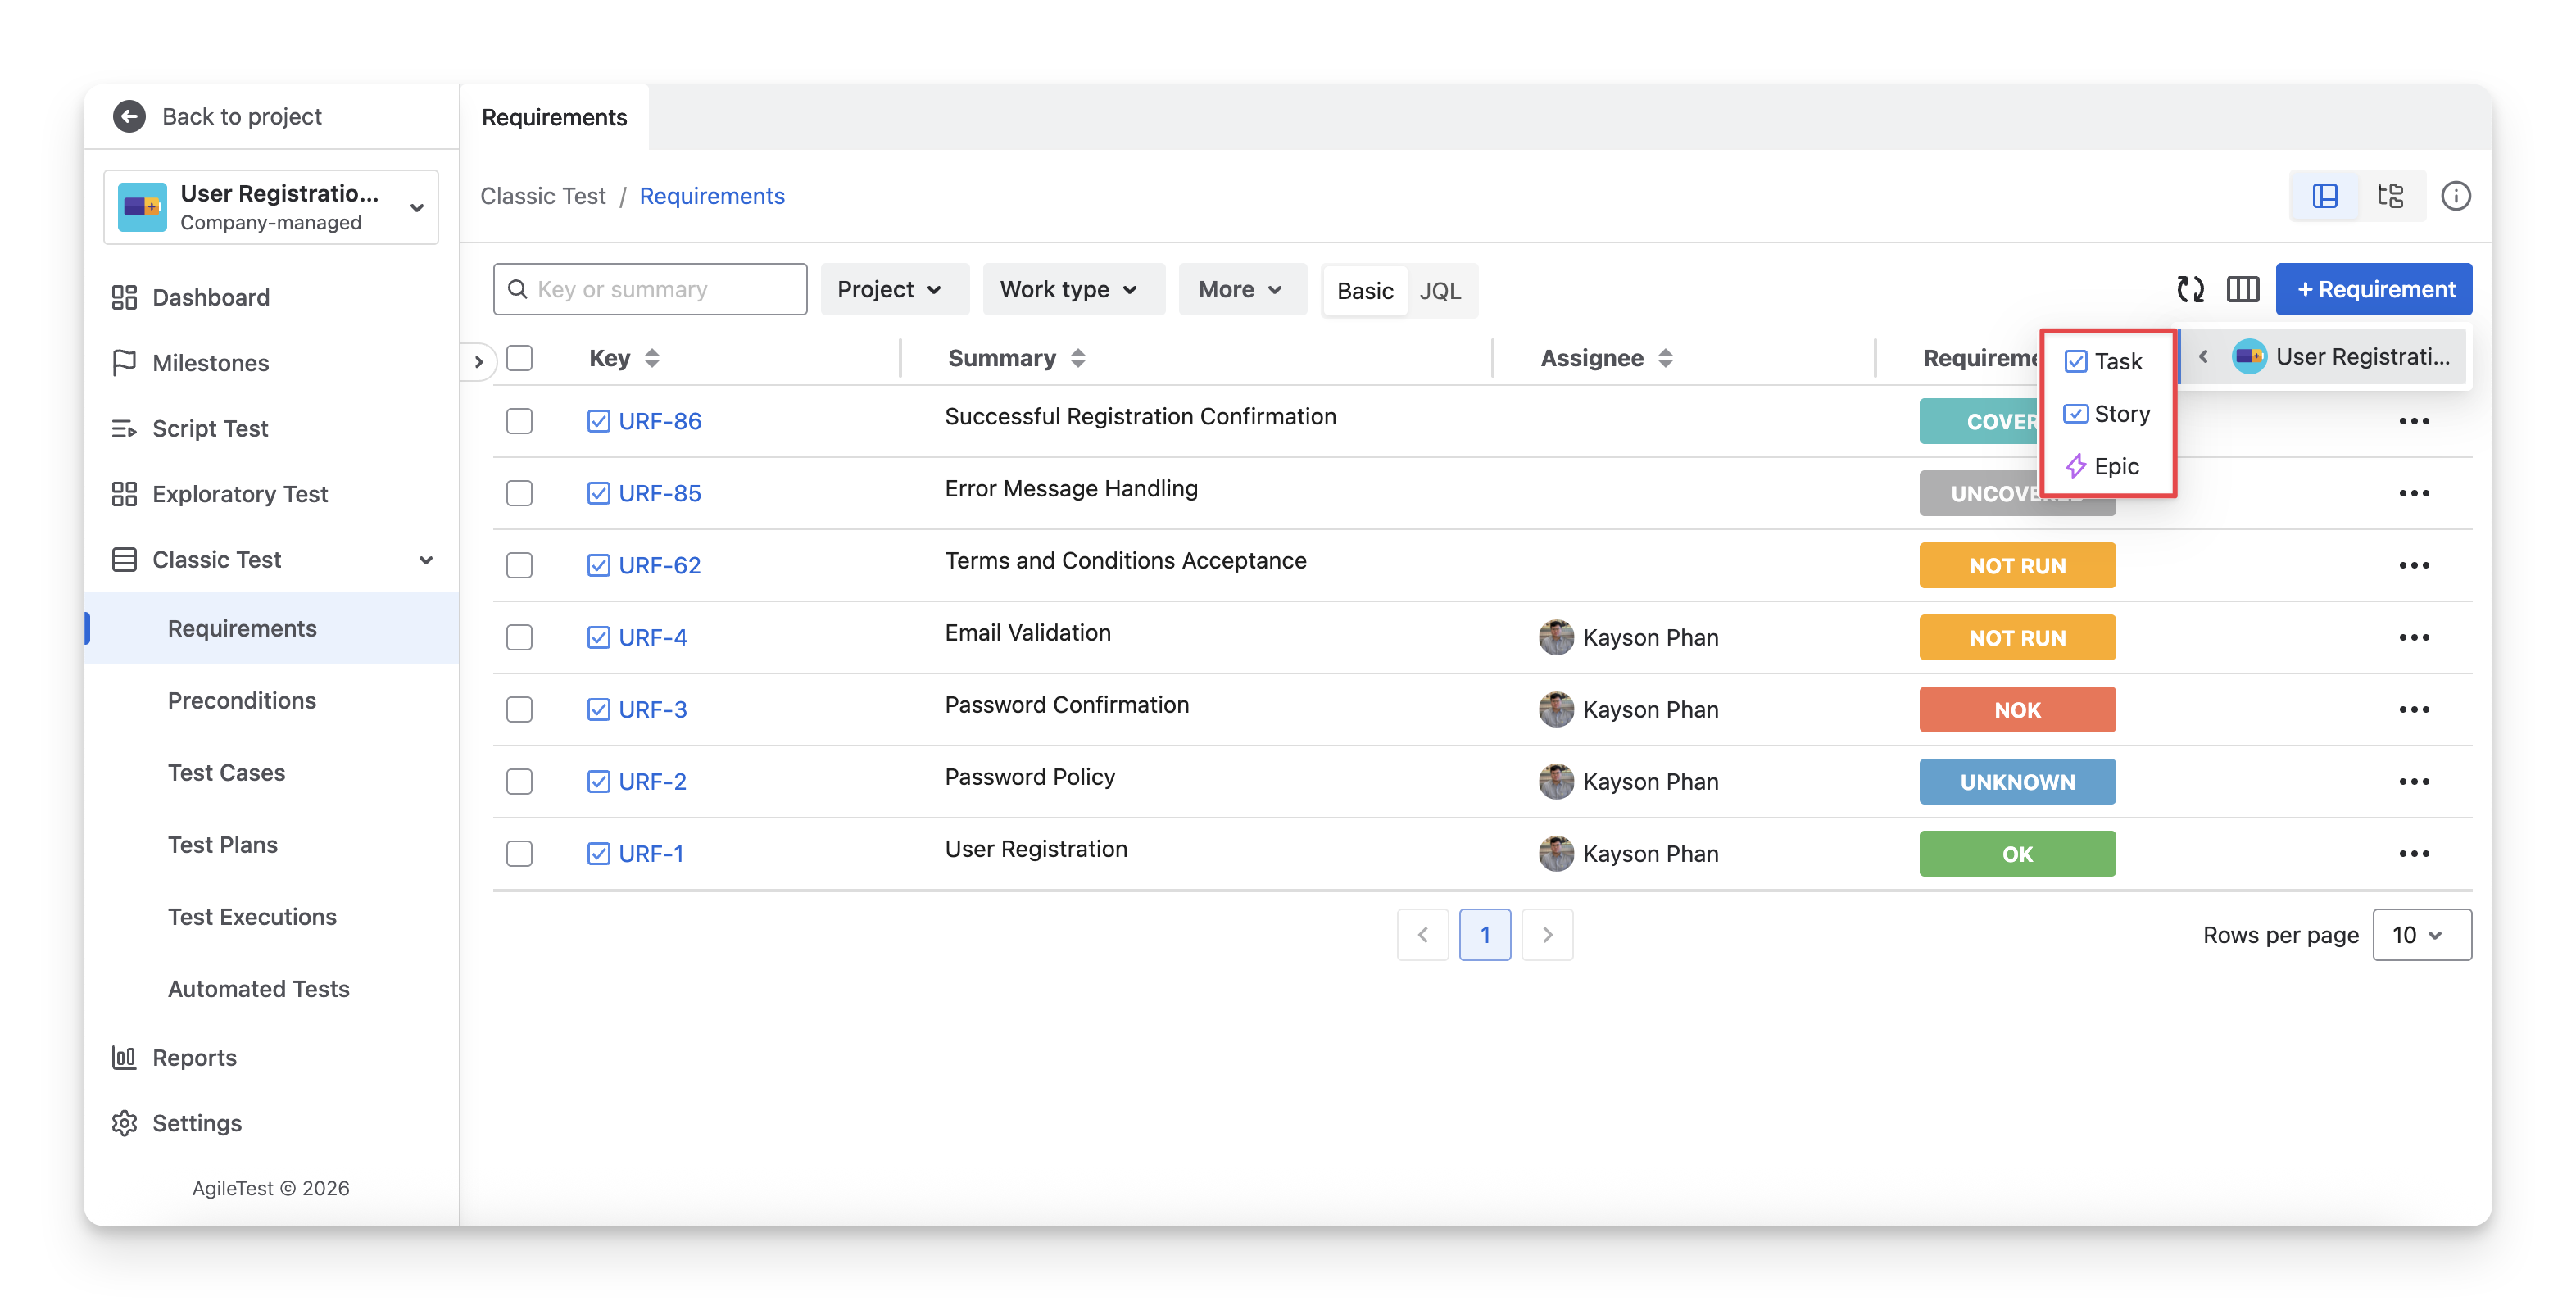
Once configured, you can create Requirements under these work types.
3.2 Requirement Work Item Link Type & Direction
3.2.1 Requirement Work Item Link Type
This setting allows administrators to define which Jira link type is used to establish the relationship between Requirements and their related testing items.
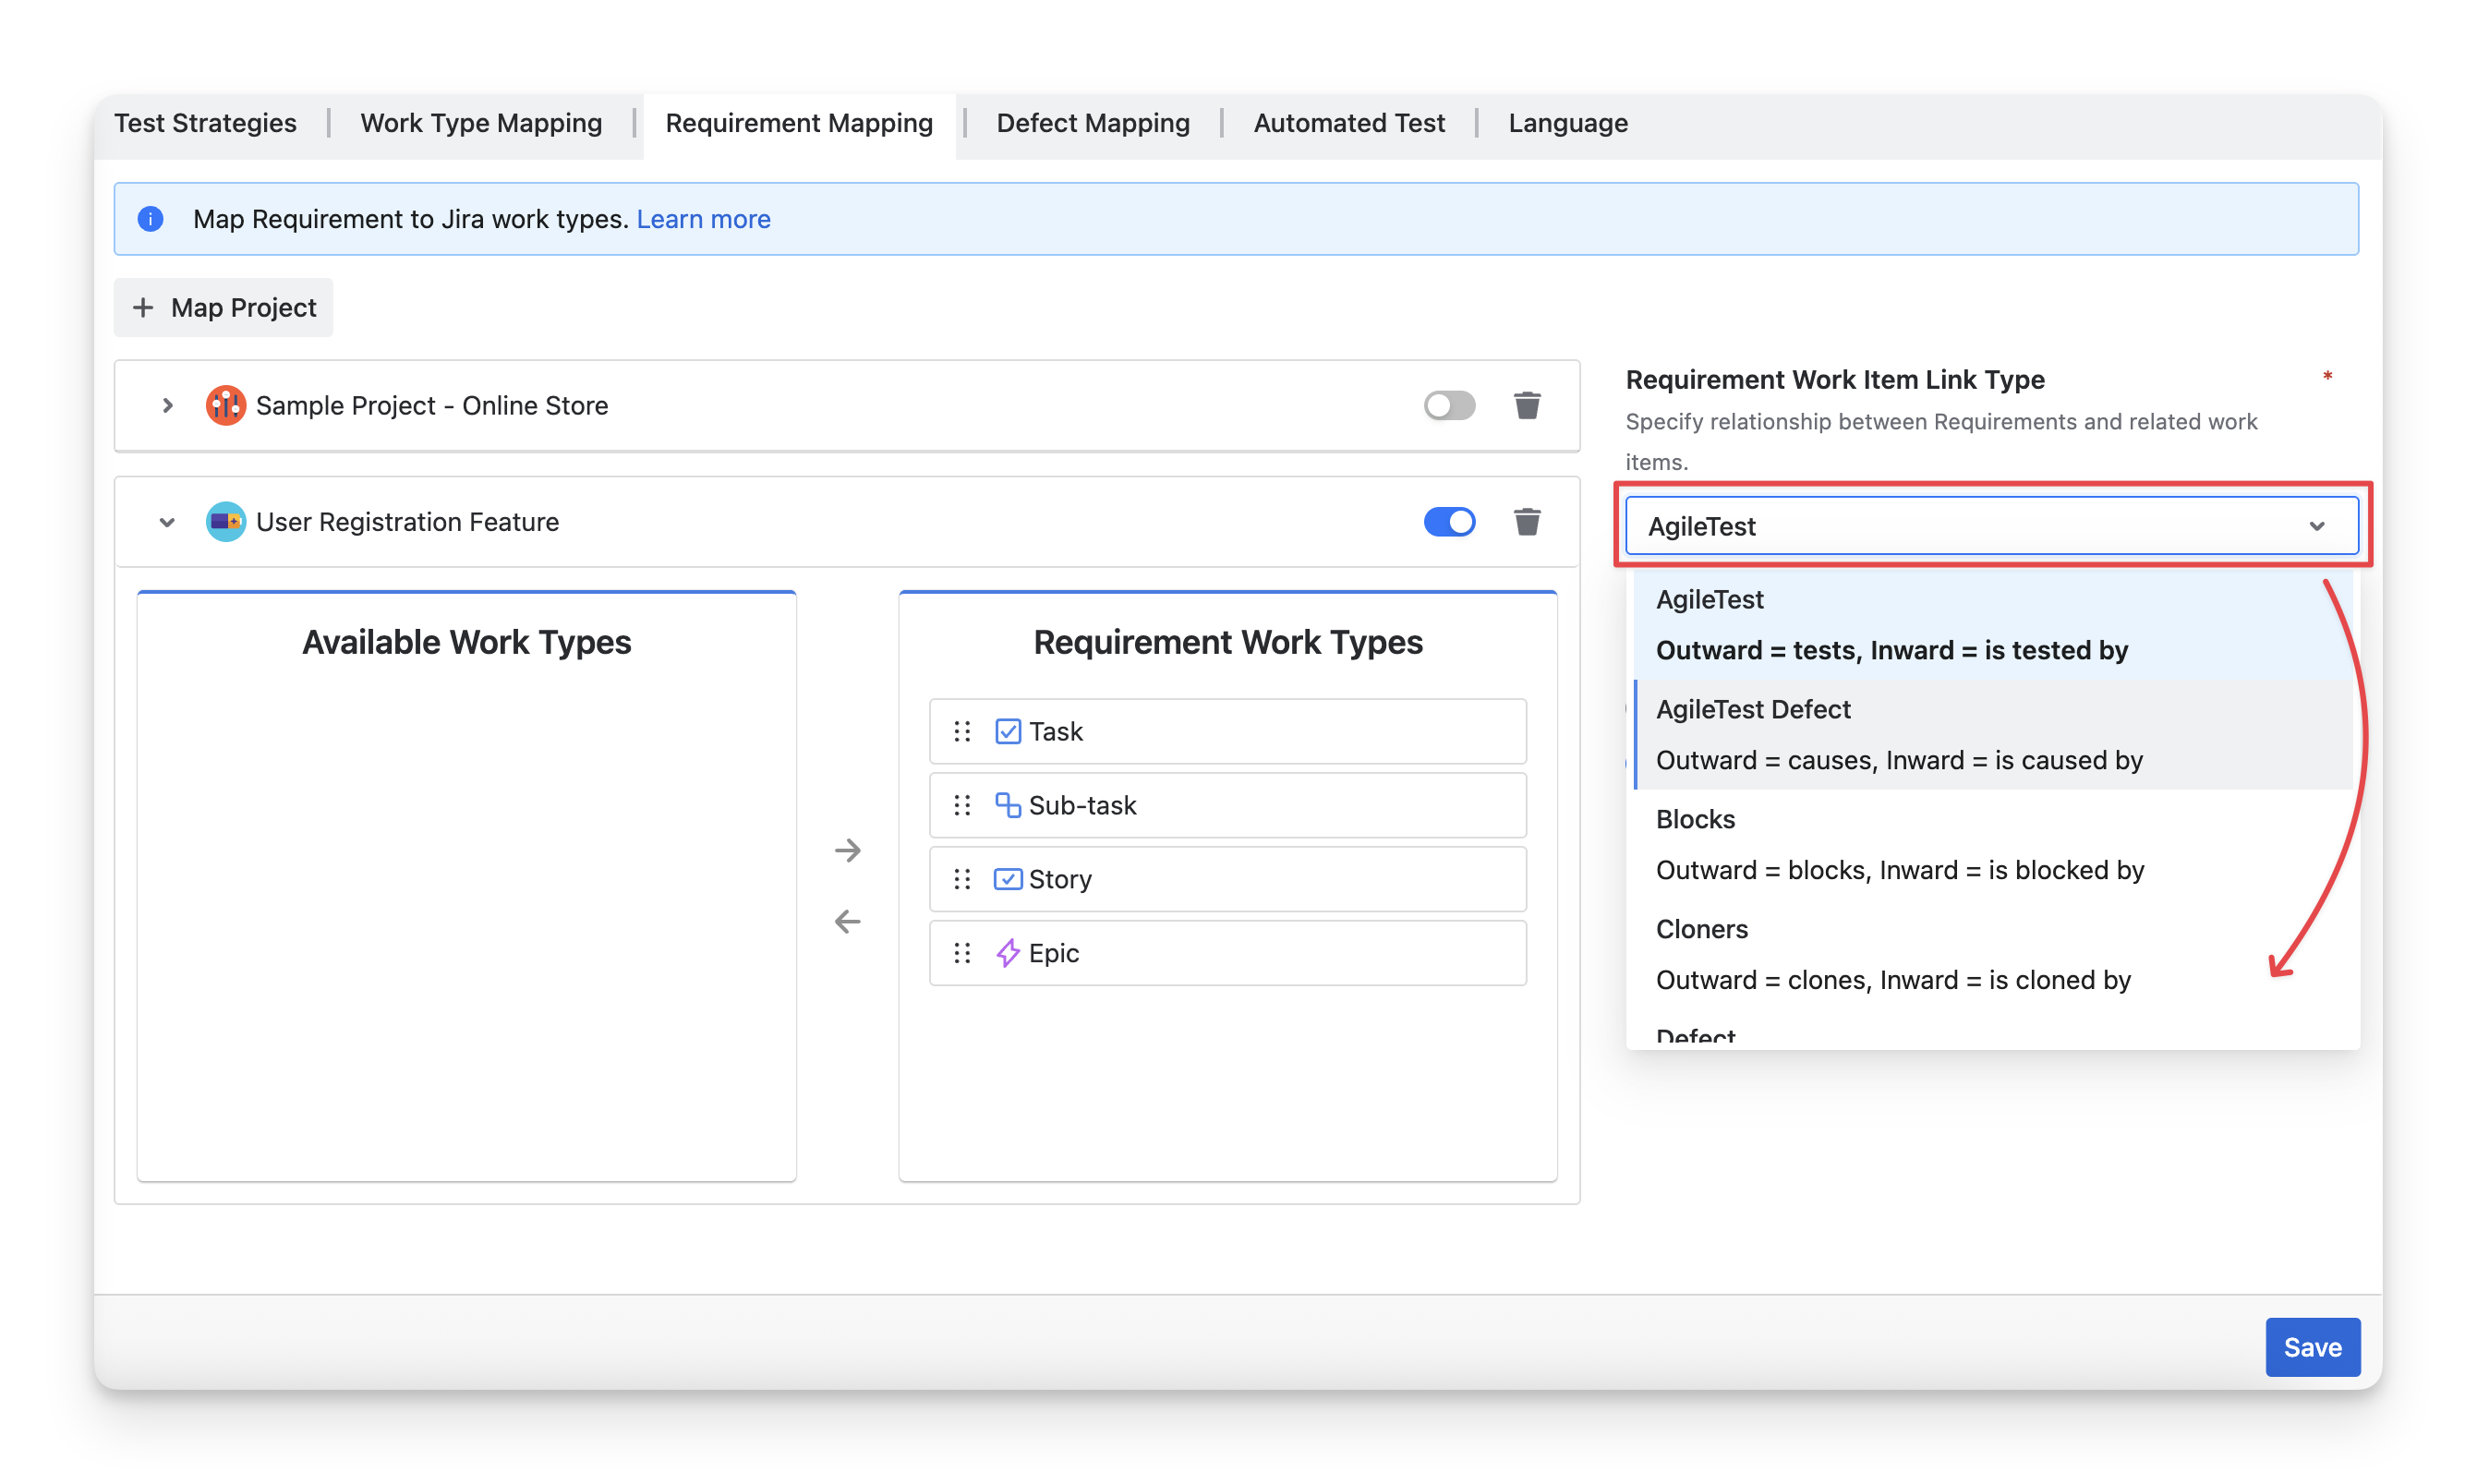
For example, if you select AgileTest (Outward = tests, Inward = is tested by), AgileTest will only consider work items linked using this relationship when identifying tests associated with a Requirement.
If you prefer to use a different link type, you can change it as needed. Otherwise, it’s recommended to keep the default value, “AgileTest”, for optimal integration.
3.2.2 Requirement Work Item Link Type Direction
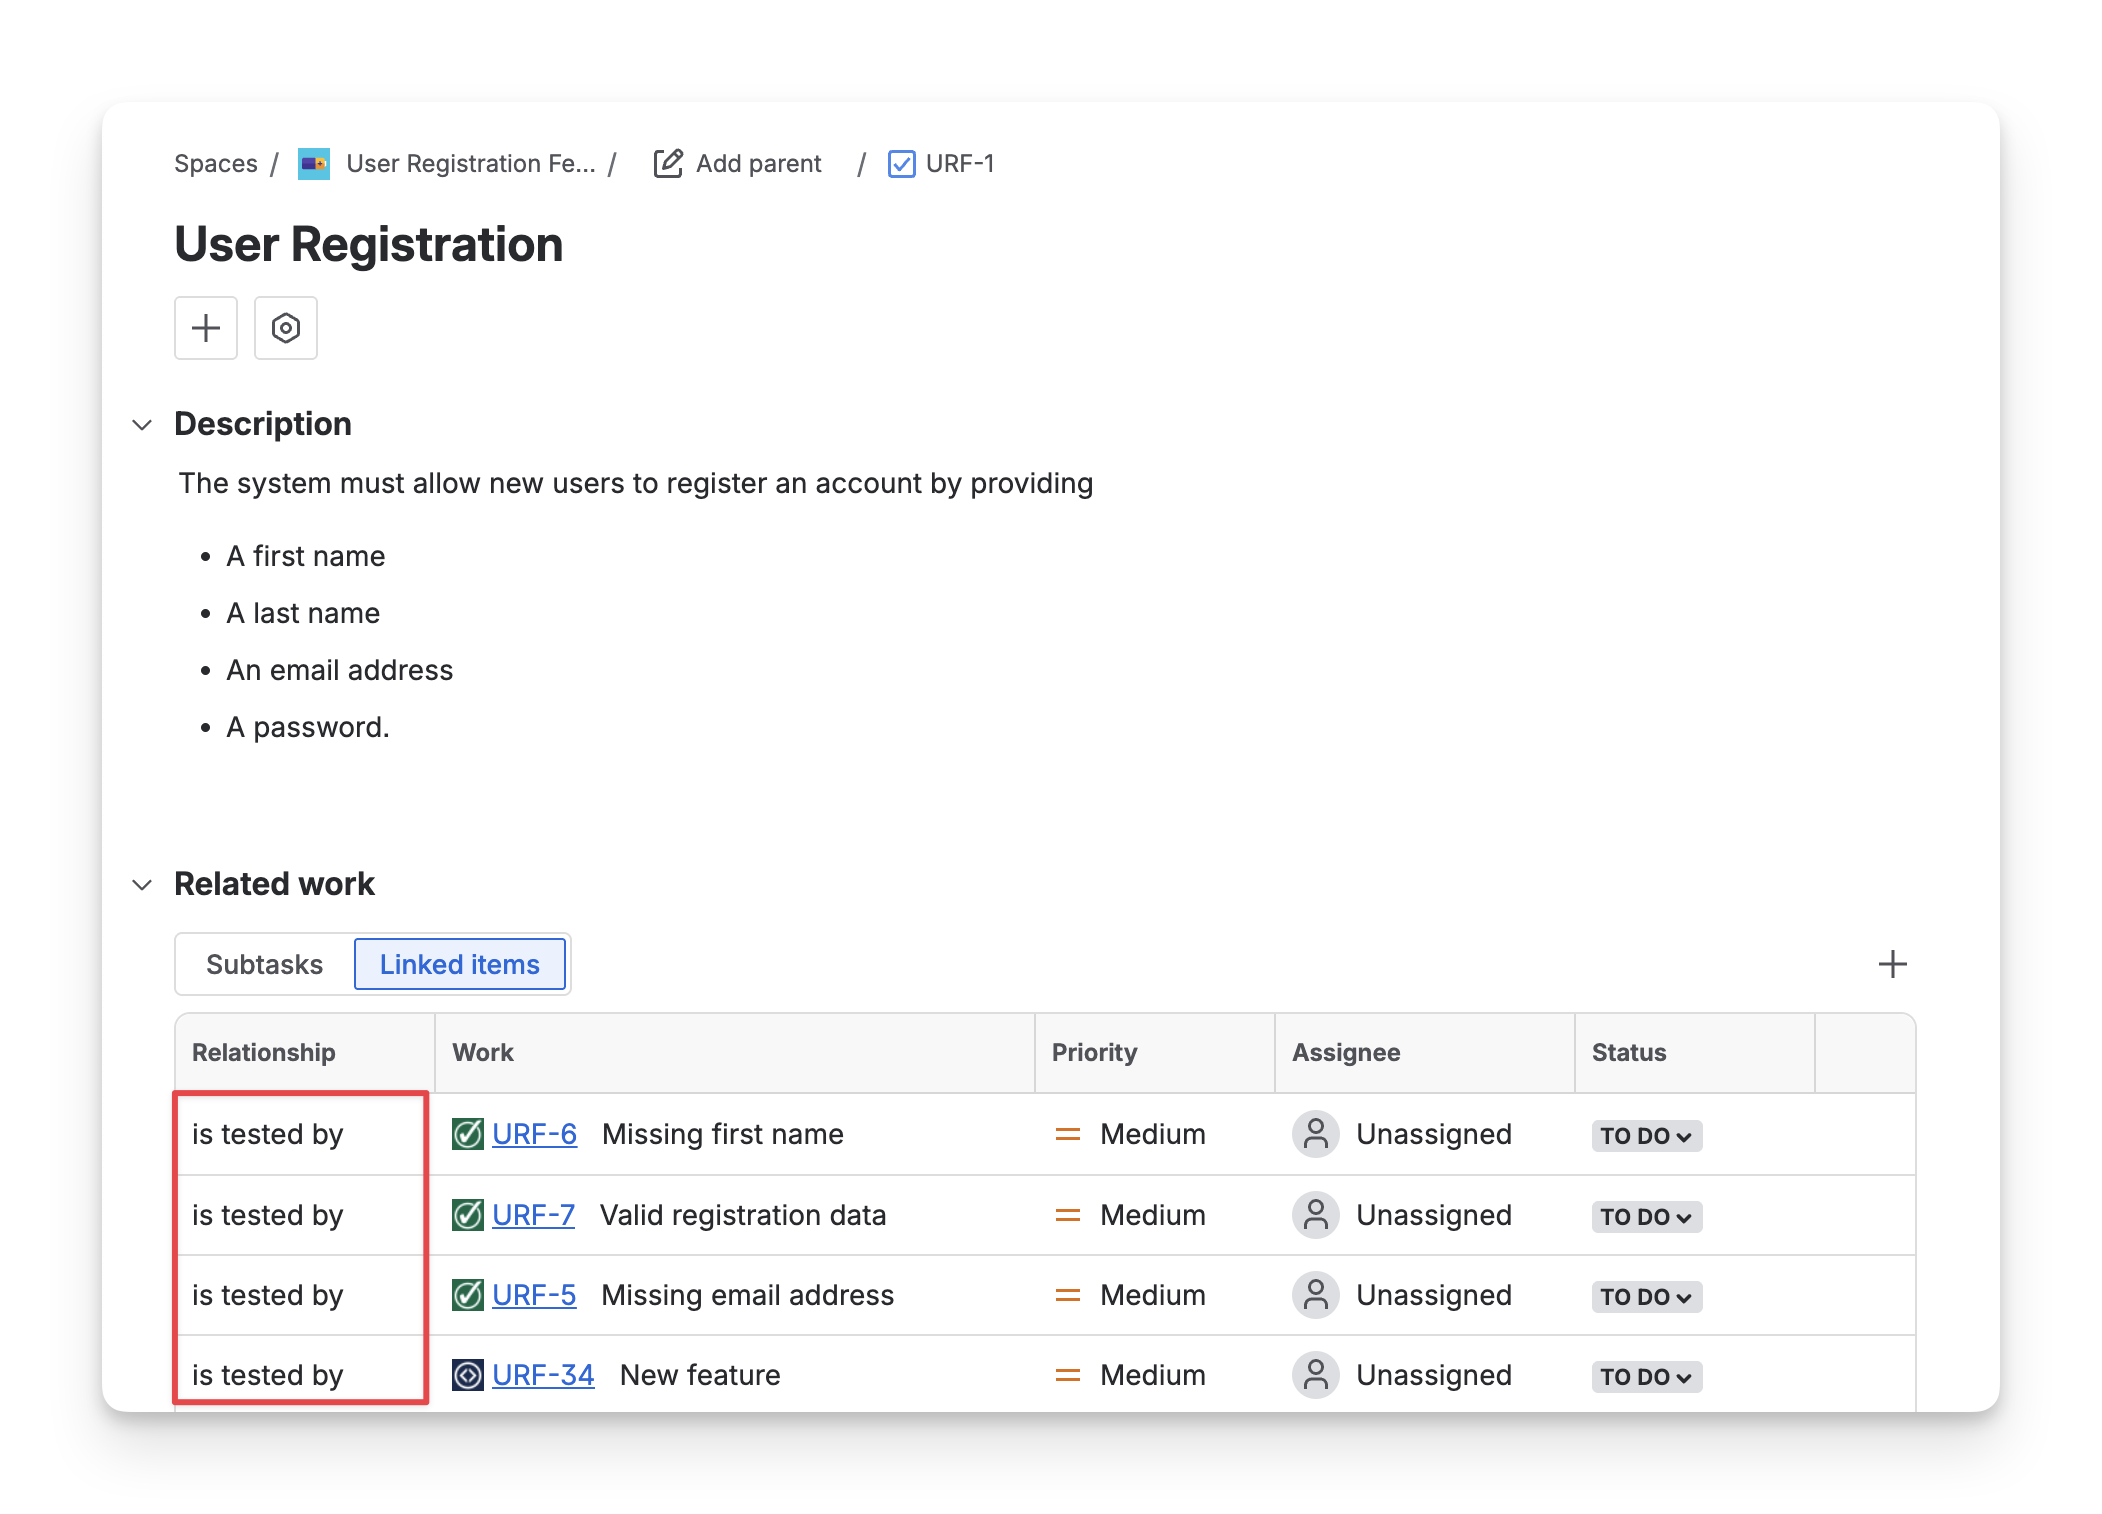
By setting Inward or Outward, you can define the direction of the link between Requirements and their related testing items. This determines how the relationship will appear in Jira when a Requirement is linked to a test item.
-
If you select Inward – is tested by, when a Requirement is linked to a test item, such as a test case, the link description on the Requirement will appear as “is tested by”, indicating that the Requirement is tested by that Test Case.
-
If Outward – tests is selected, the Requirement will show that it “tests” the linked Test Case.

We recommend that you keep the “Inward - is tested by” direction unless any special setup is needed.
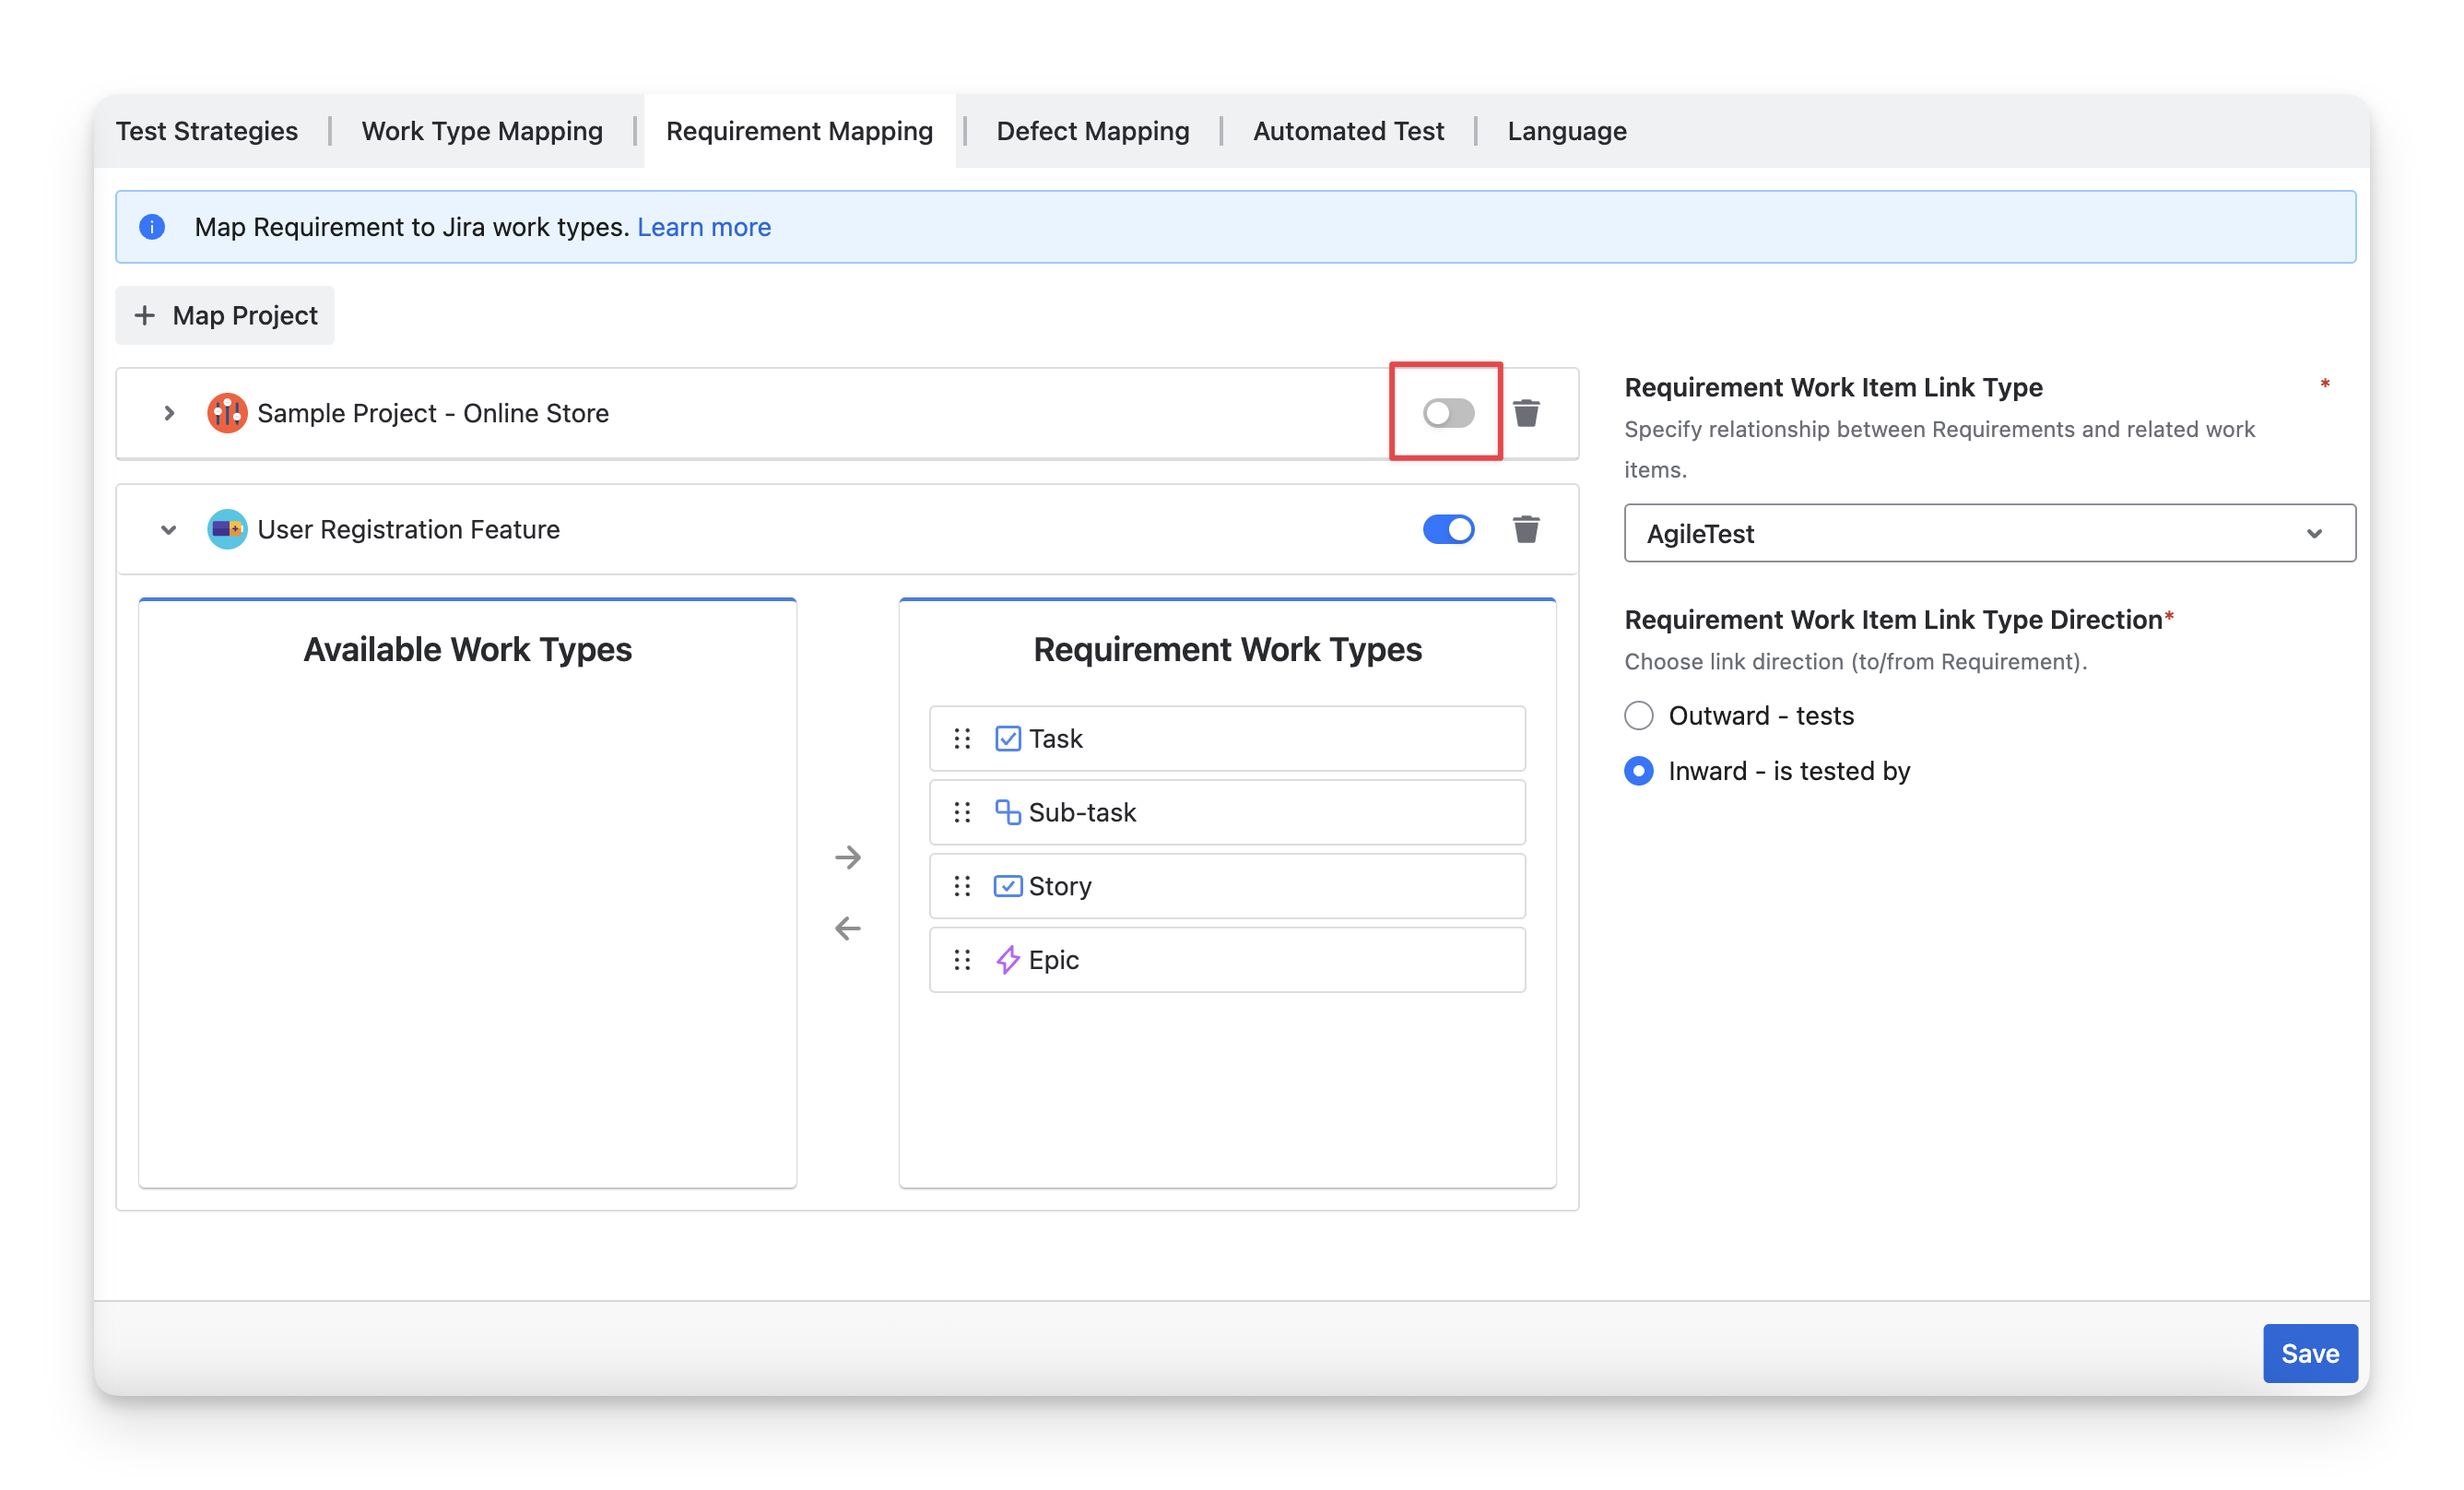
3.3 Map Projects
You can map up to 3 projects (including your own) from the same Jira instance. Once mapped, you’ll be able to manage Requirements from those projects within your selected project.
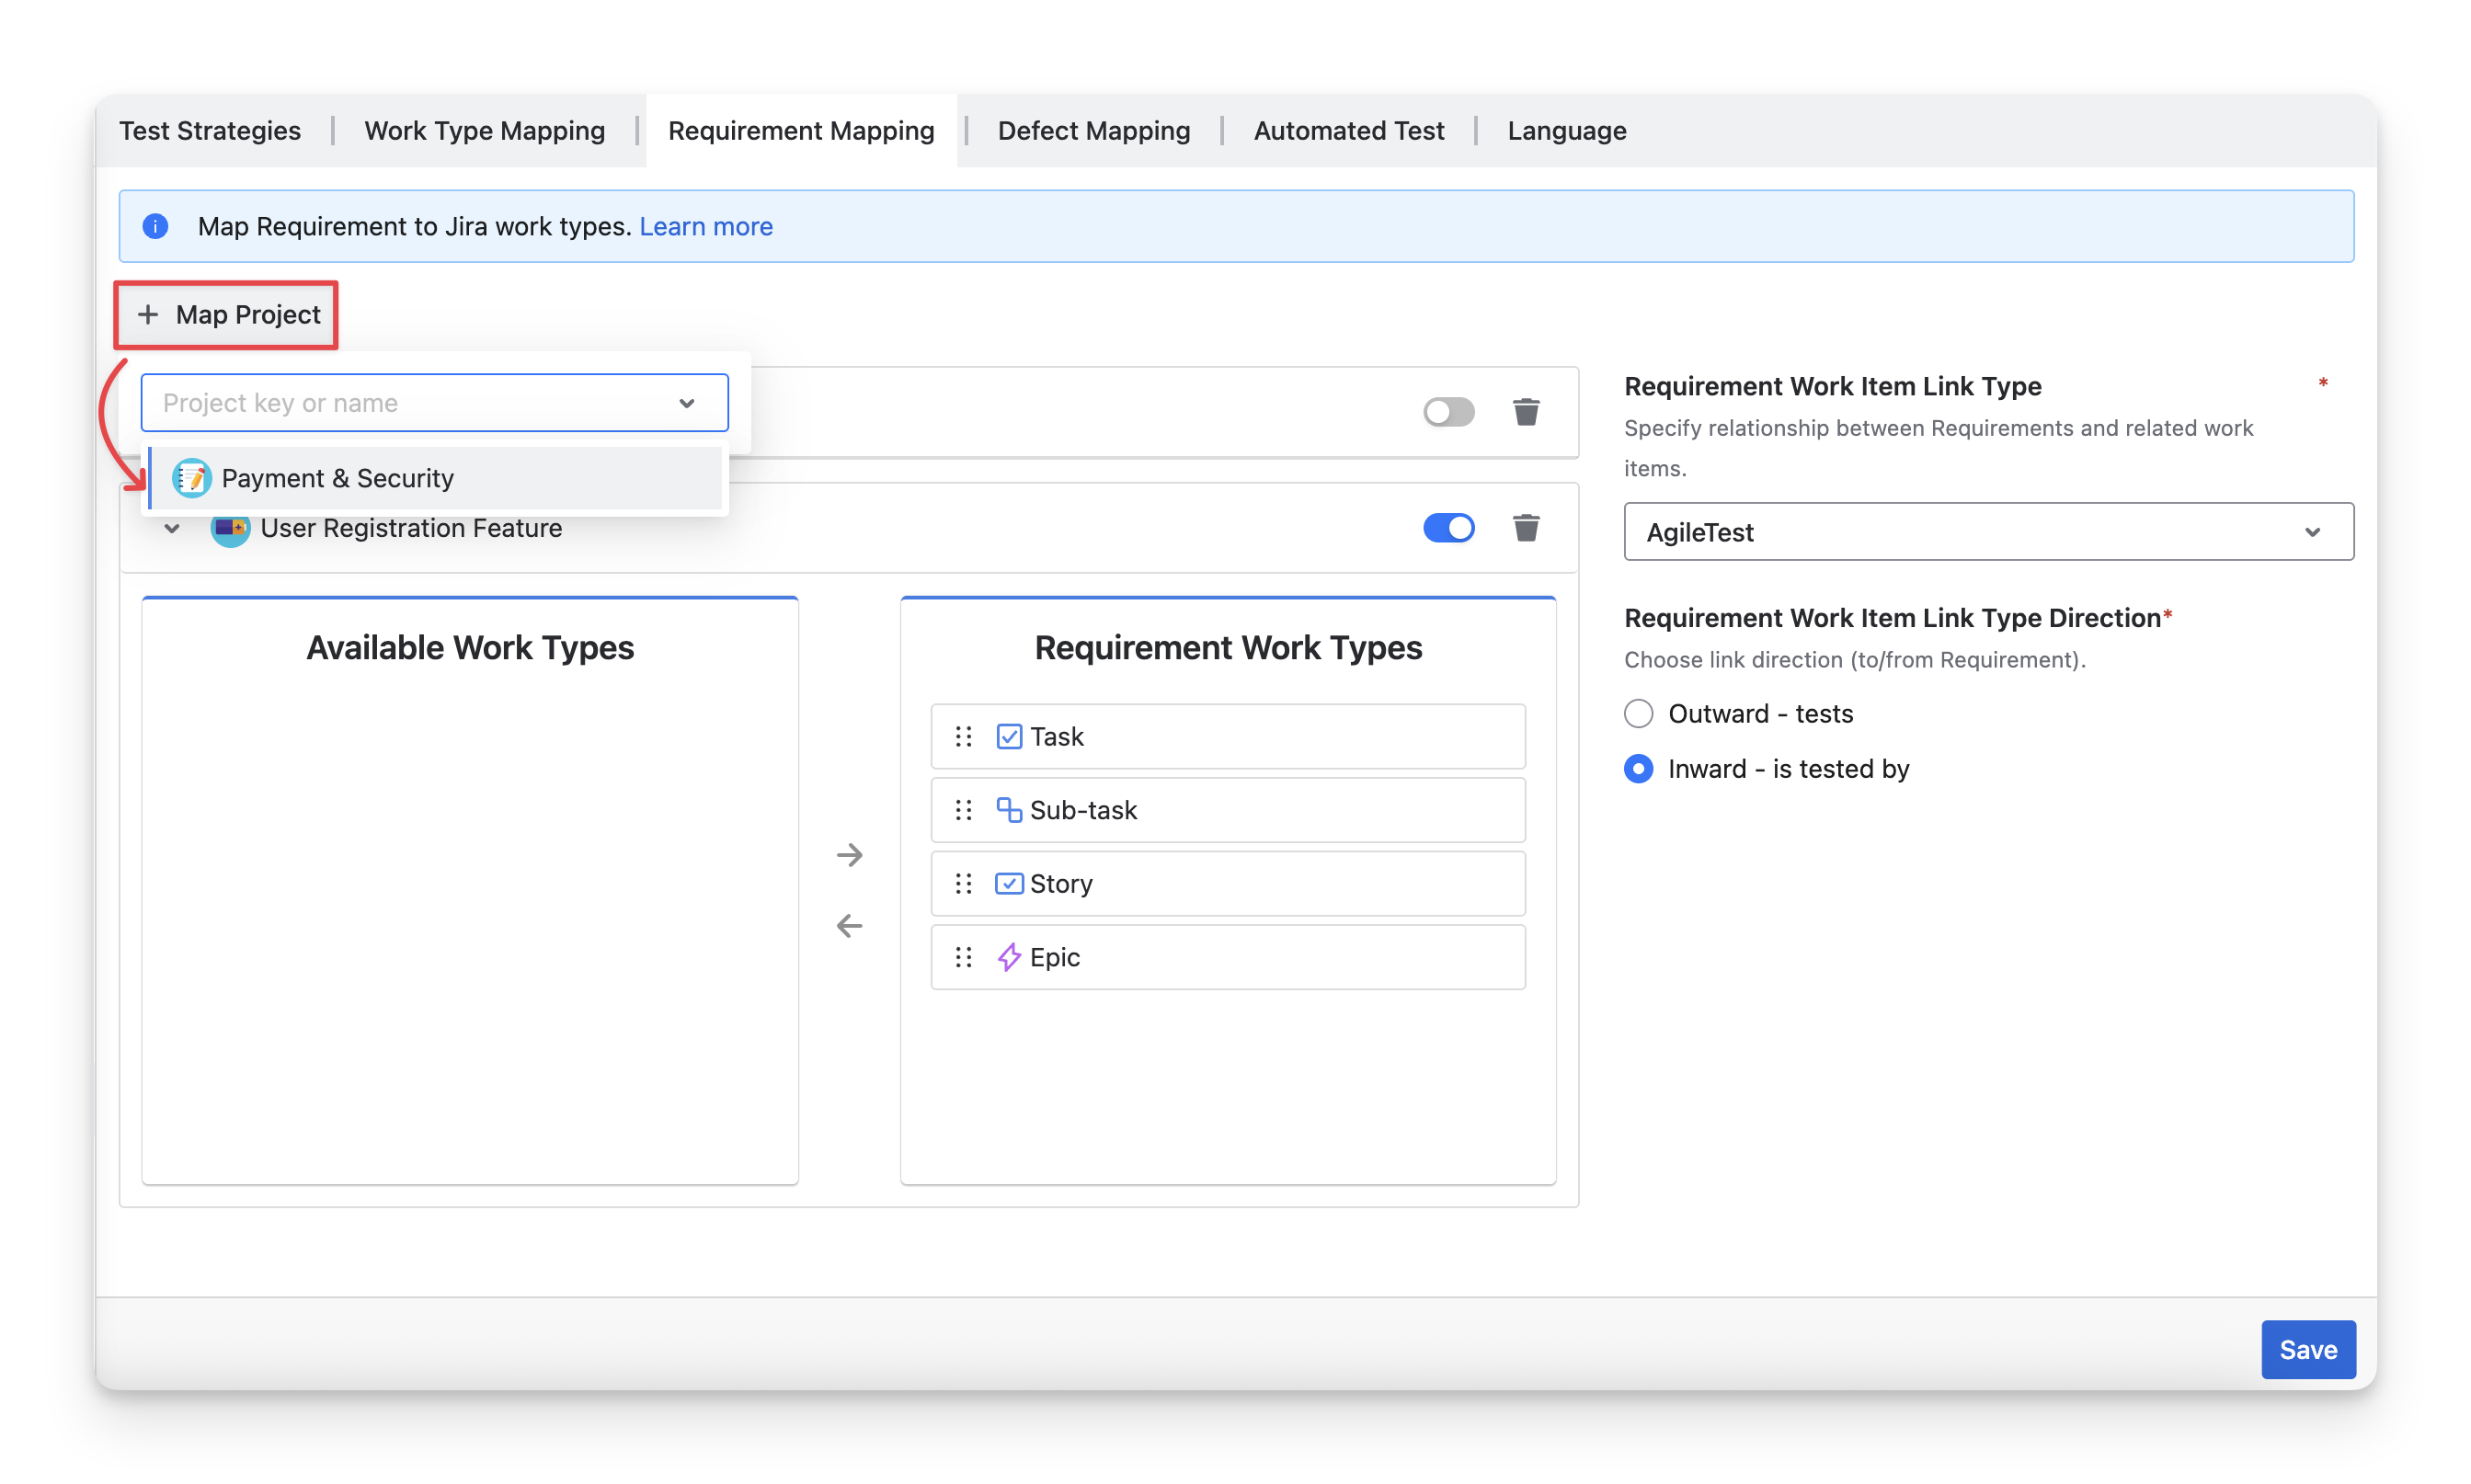
After mapping, you can also disable/enable to disable project mapping.
4. Defect Mapping
This setting allows users to link and map their available Jira work types to AgileTest’s Defect. Once mapped, these work types will appear as Requirements and can be managed directly within the app.
Changing defect types mapping after a period of using the app could cause data loss. We recommend that you finalize this configuration on the first access to the app in the new project.
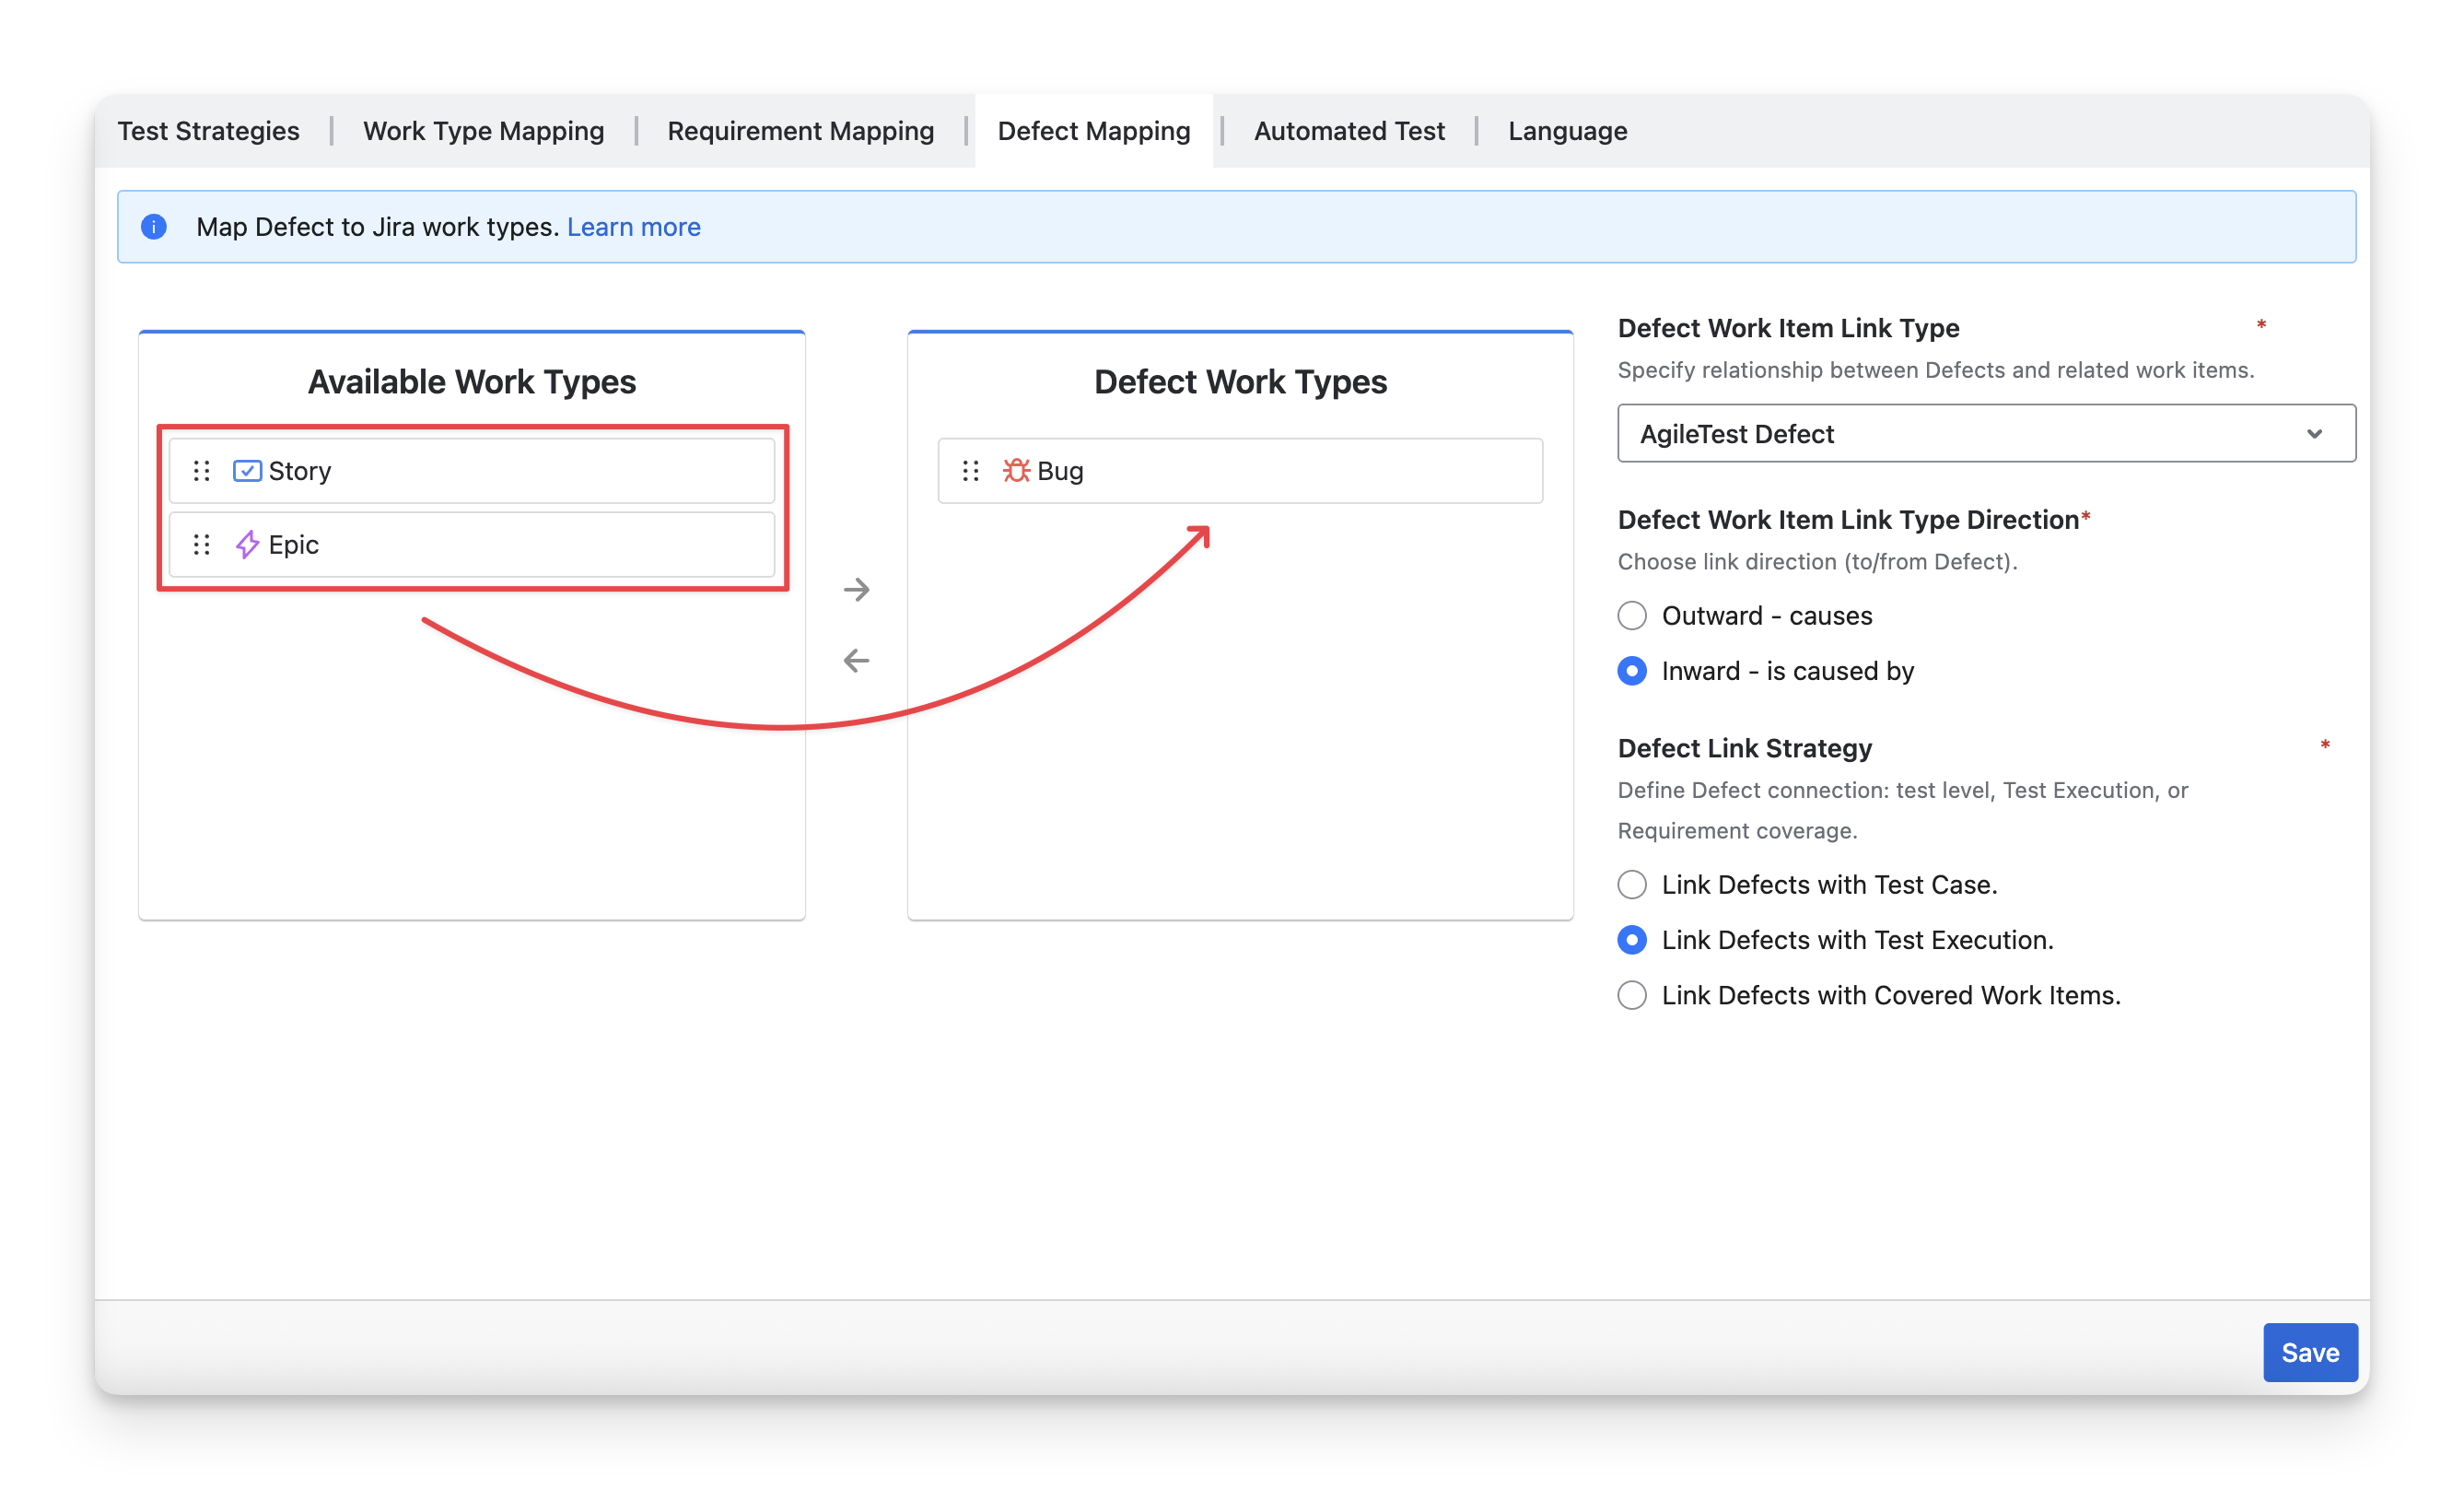
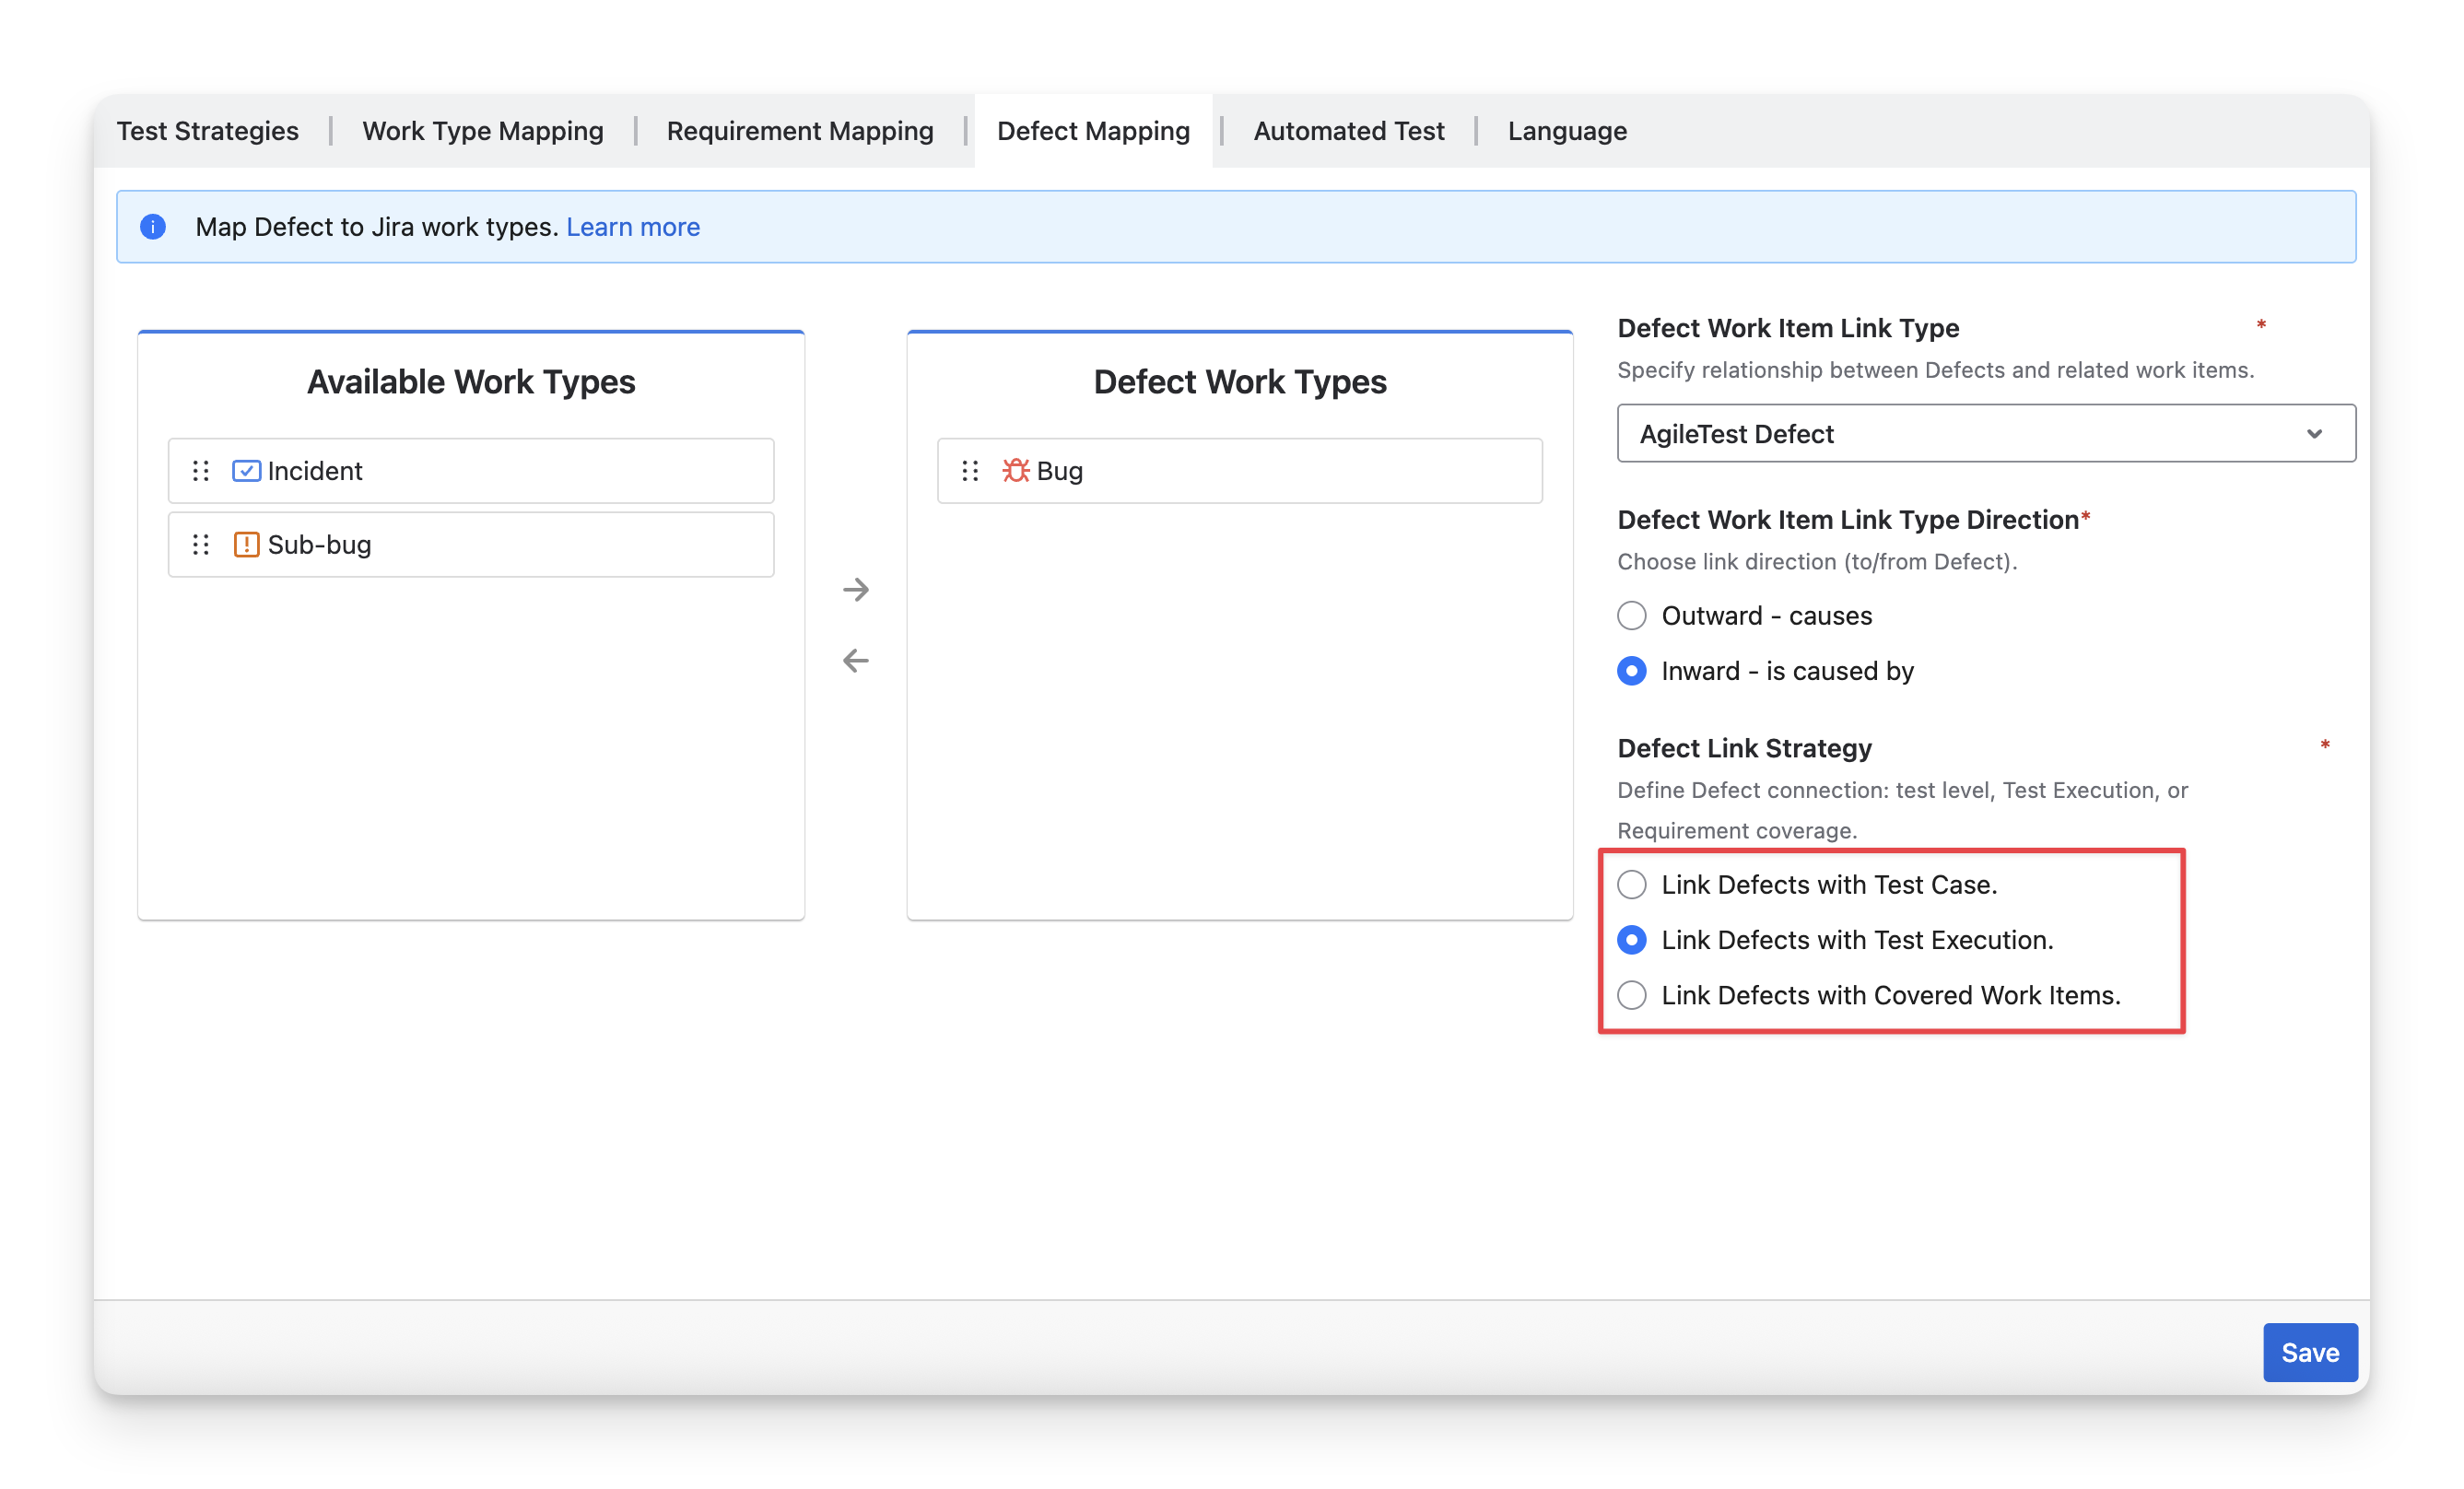
4.1 Map Defect Work Type
This setting allows administrators to define which Jira link type is used to establish the relationship between Defects and their related testing items.
AgileTest’s Defect on default is mapped with the project’s Defect Work Type. To map other work types, you can drag and drop individual or multiple Jira work items from the “Available Work Types” column to the “Defect Work Types” column to map them to AgileTest’s Defects.
4.2 Defect Work Item Link Type & Direction
4.2.1 Defect Work Item Link Type
This setting allows administrators to define which Jira link type is used to establish the relationship between Defects and their related testing items.
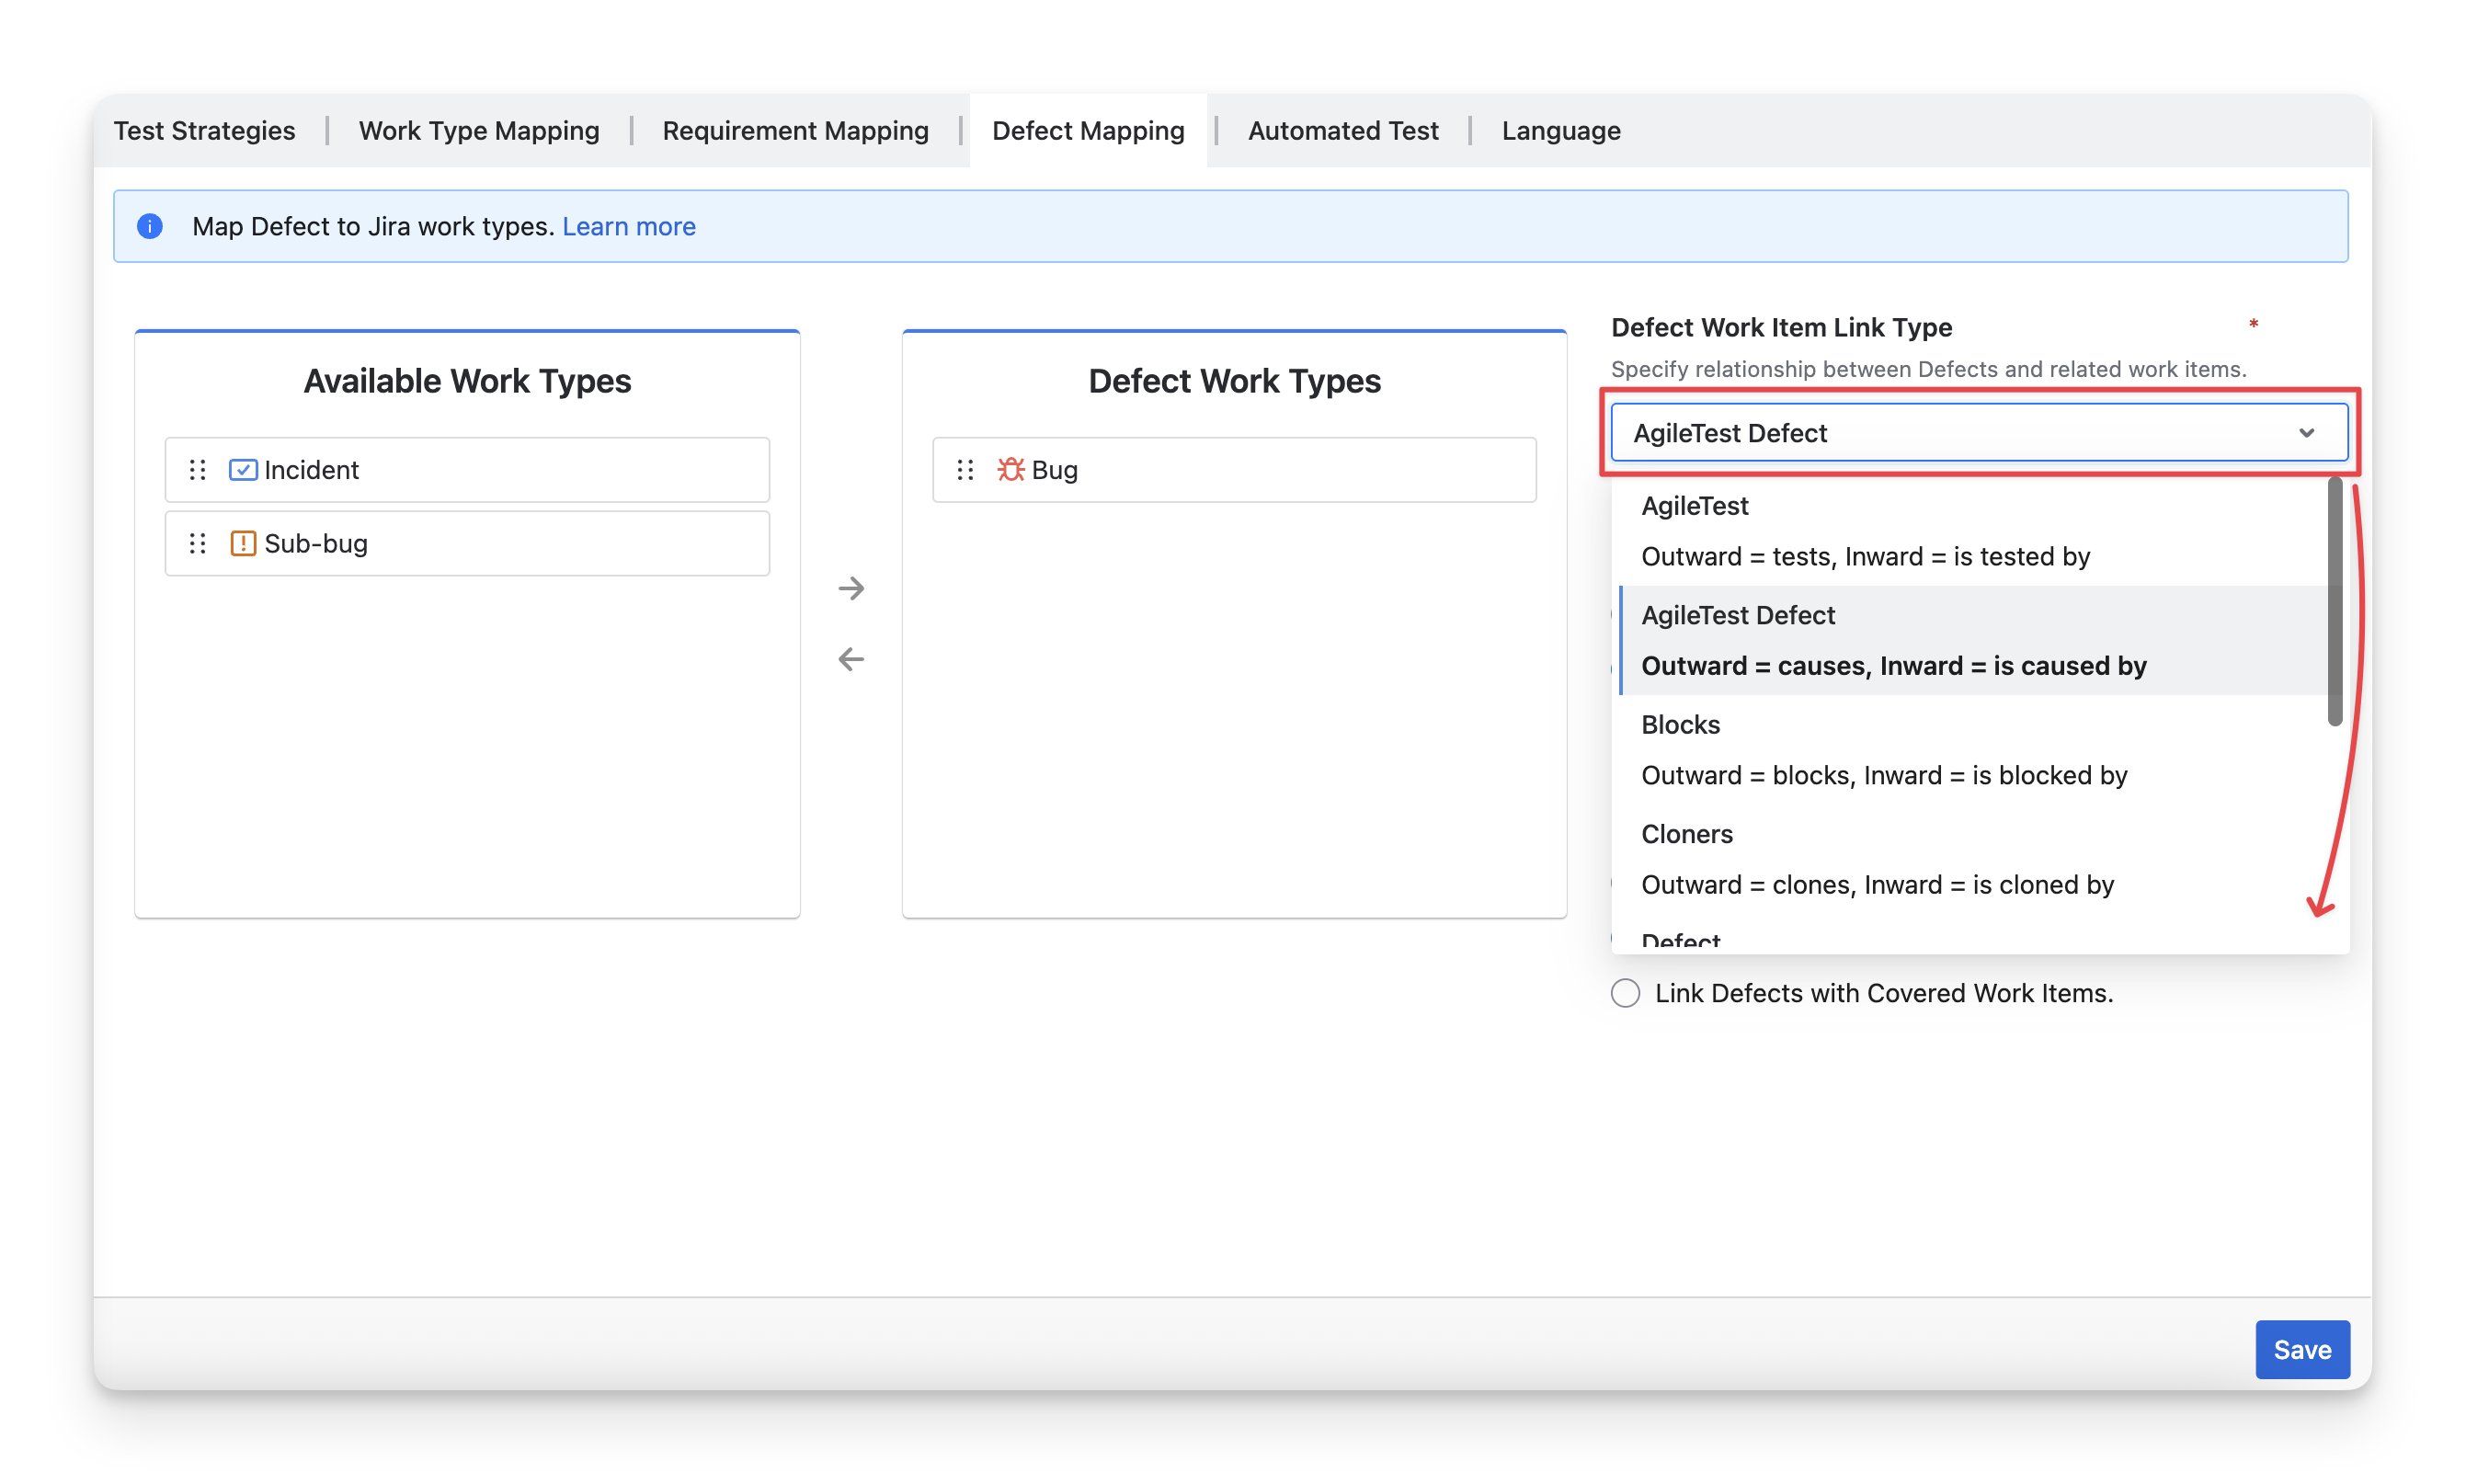
For example, if you select AgileTest Defect (Outward = causes, Inward = is caused by), AgileTest will only consider work items linked using this relationship when identifying tests associated with a test item.
4.2.2 Defect Work Item Link Type Direction
By selecting Inward or Outward, you can define the direction of the link between Defects and their related testing items. This determines how the relationship will appear in Jira when a defect is linked to a test item.
-
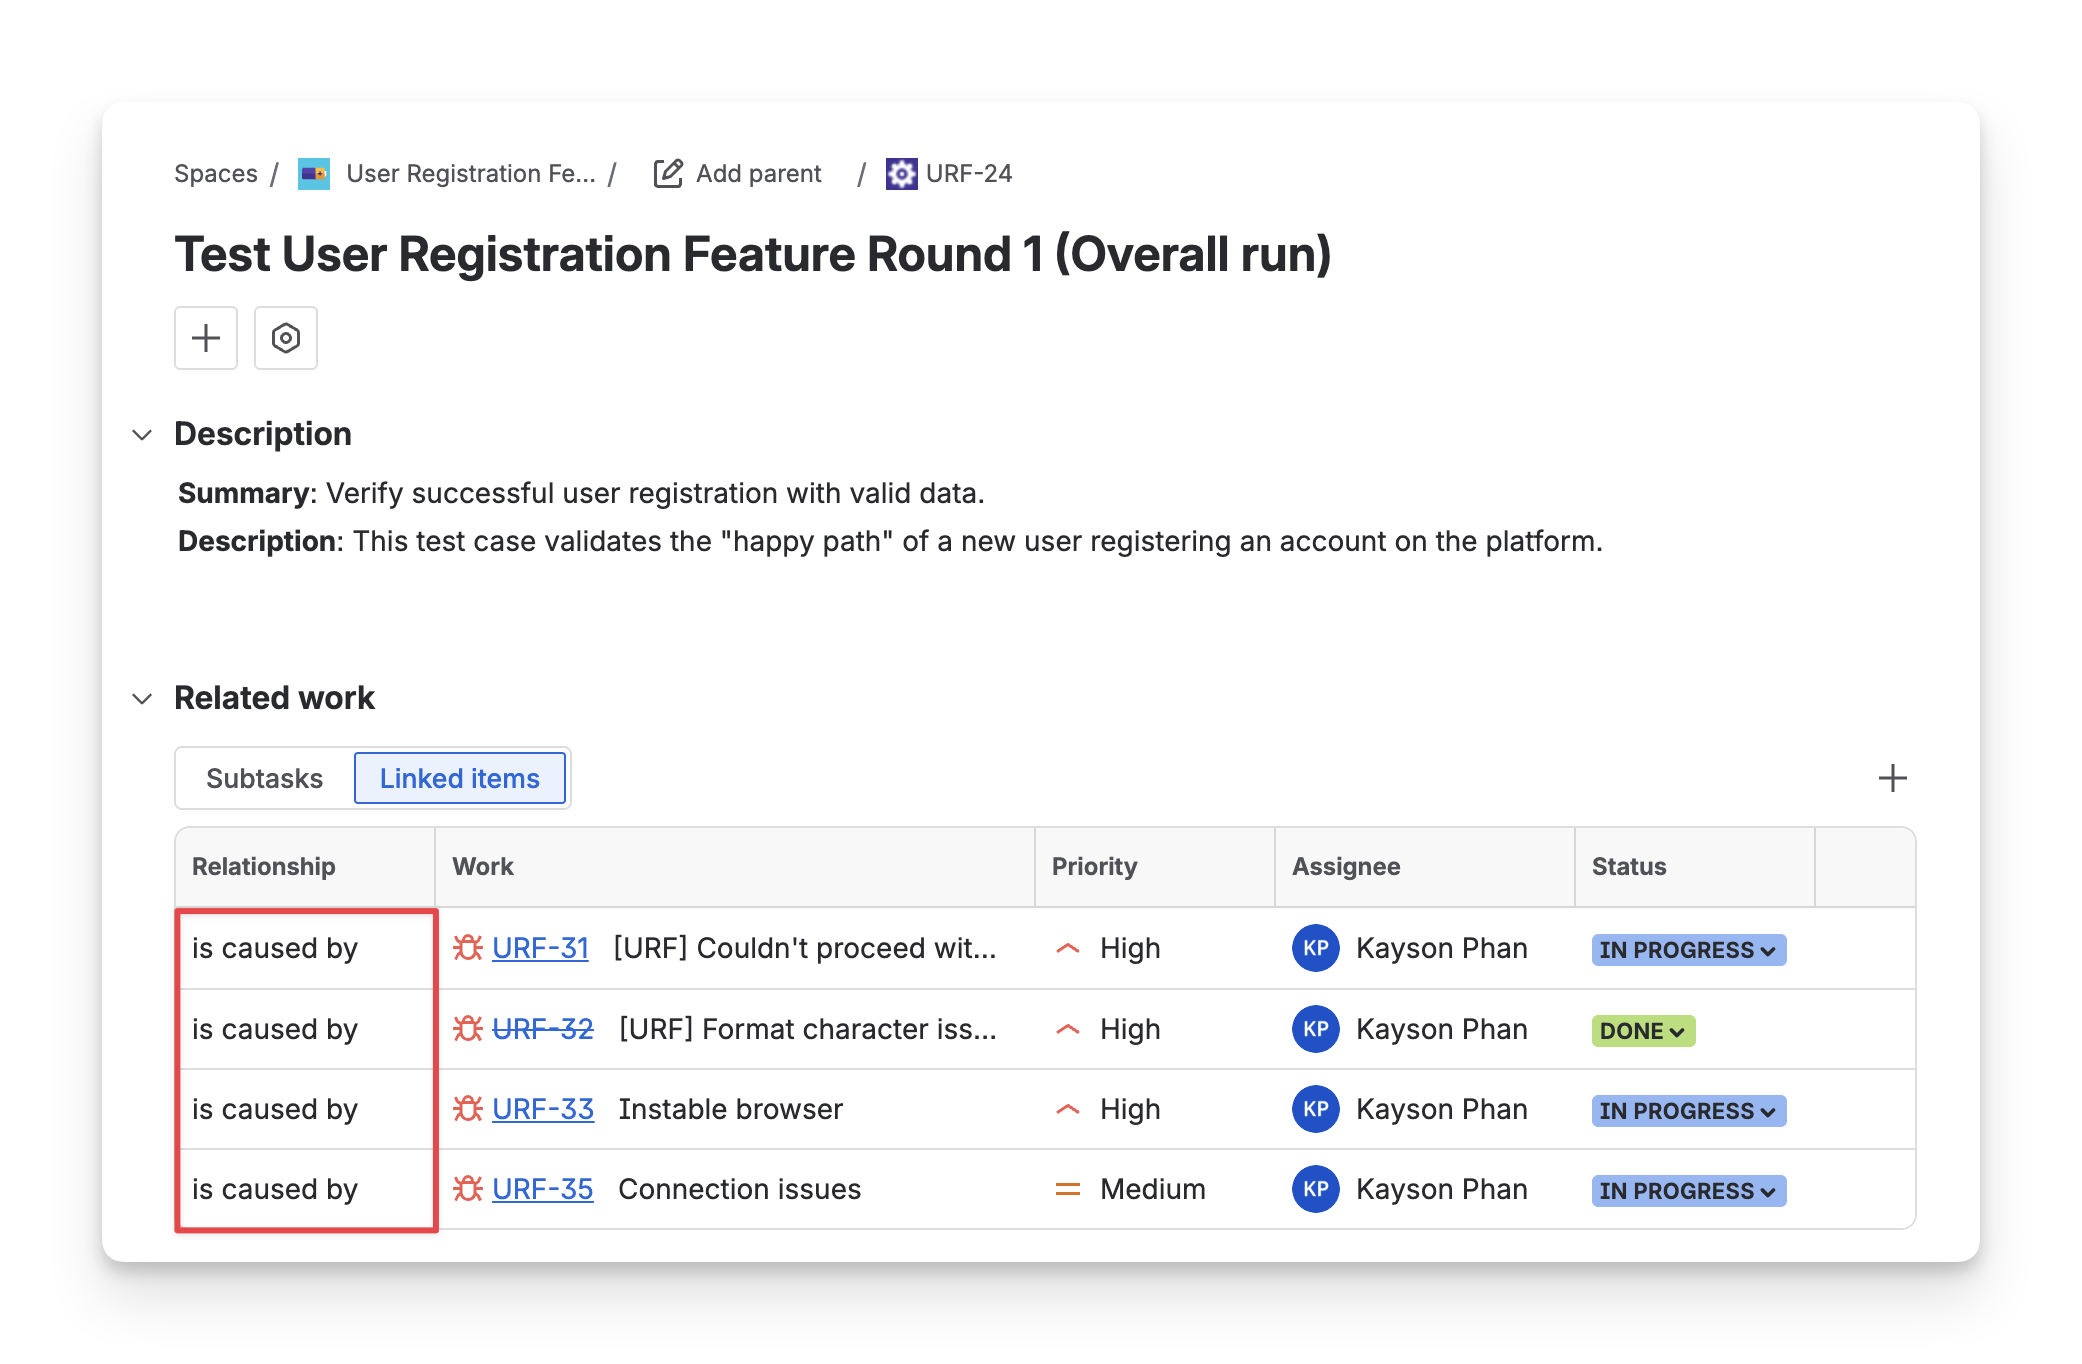
If Inward – is caused by is selected, when a Defect is linked to a Test Case or Test Execution, the link description on the Defect will appear as “is caused by”, indicating that the defect was caused by that testing item.
-
If Outward – causes is selected, the Defect will show that it “causes” the linked testing item.
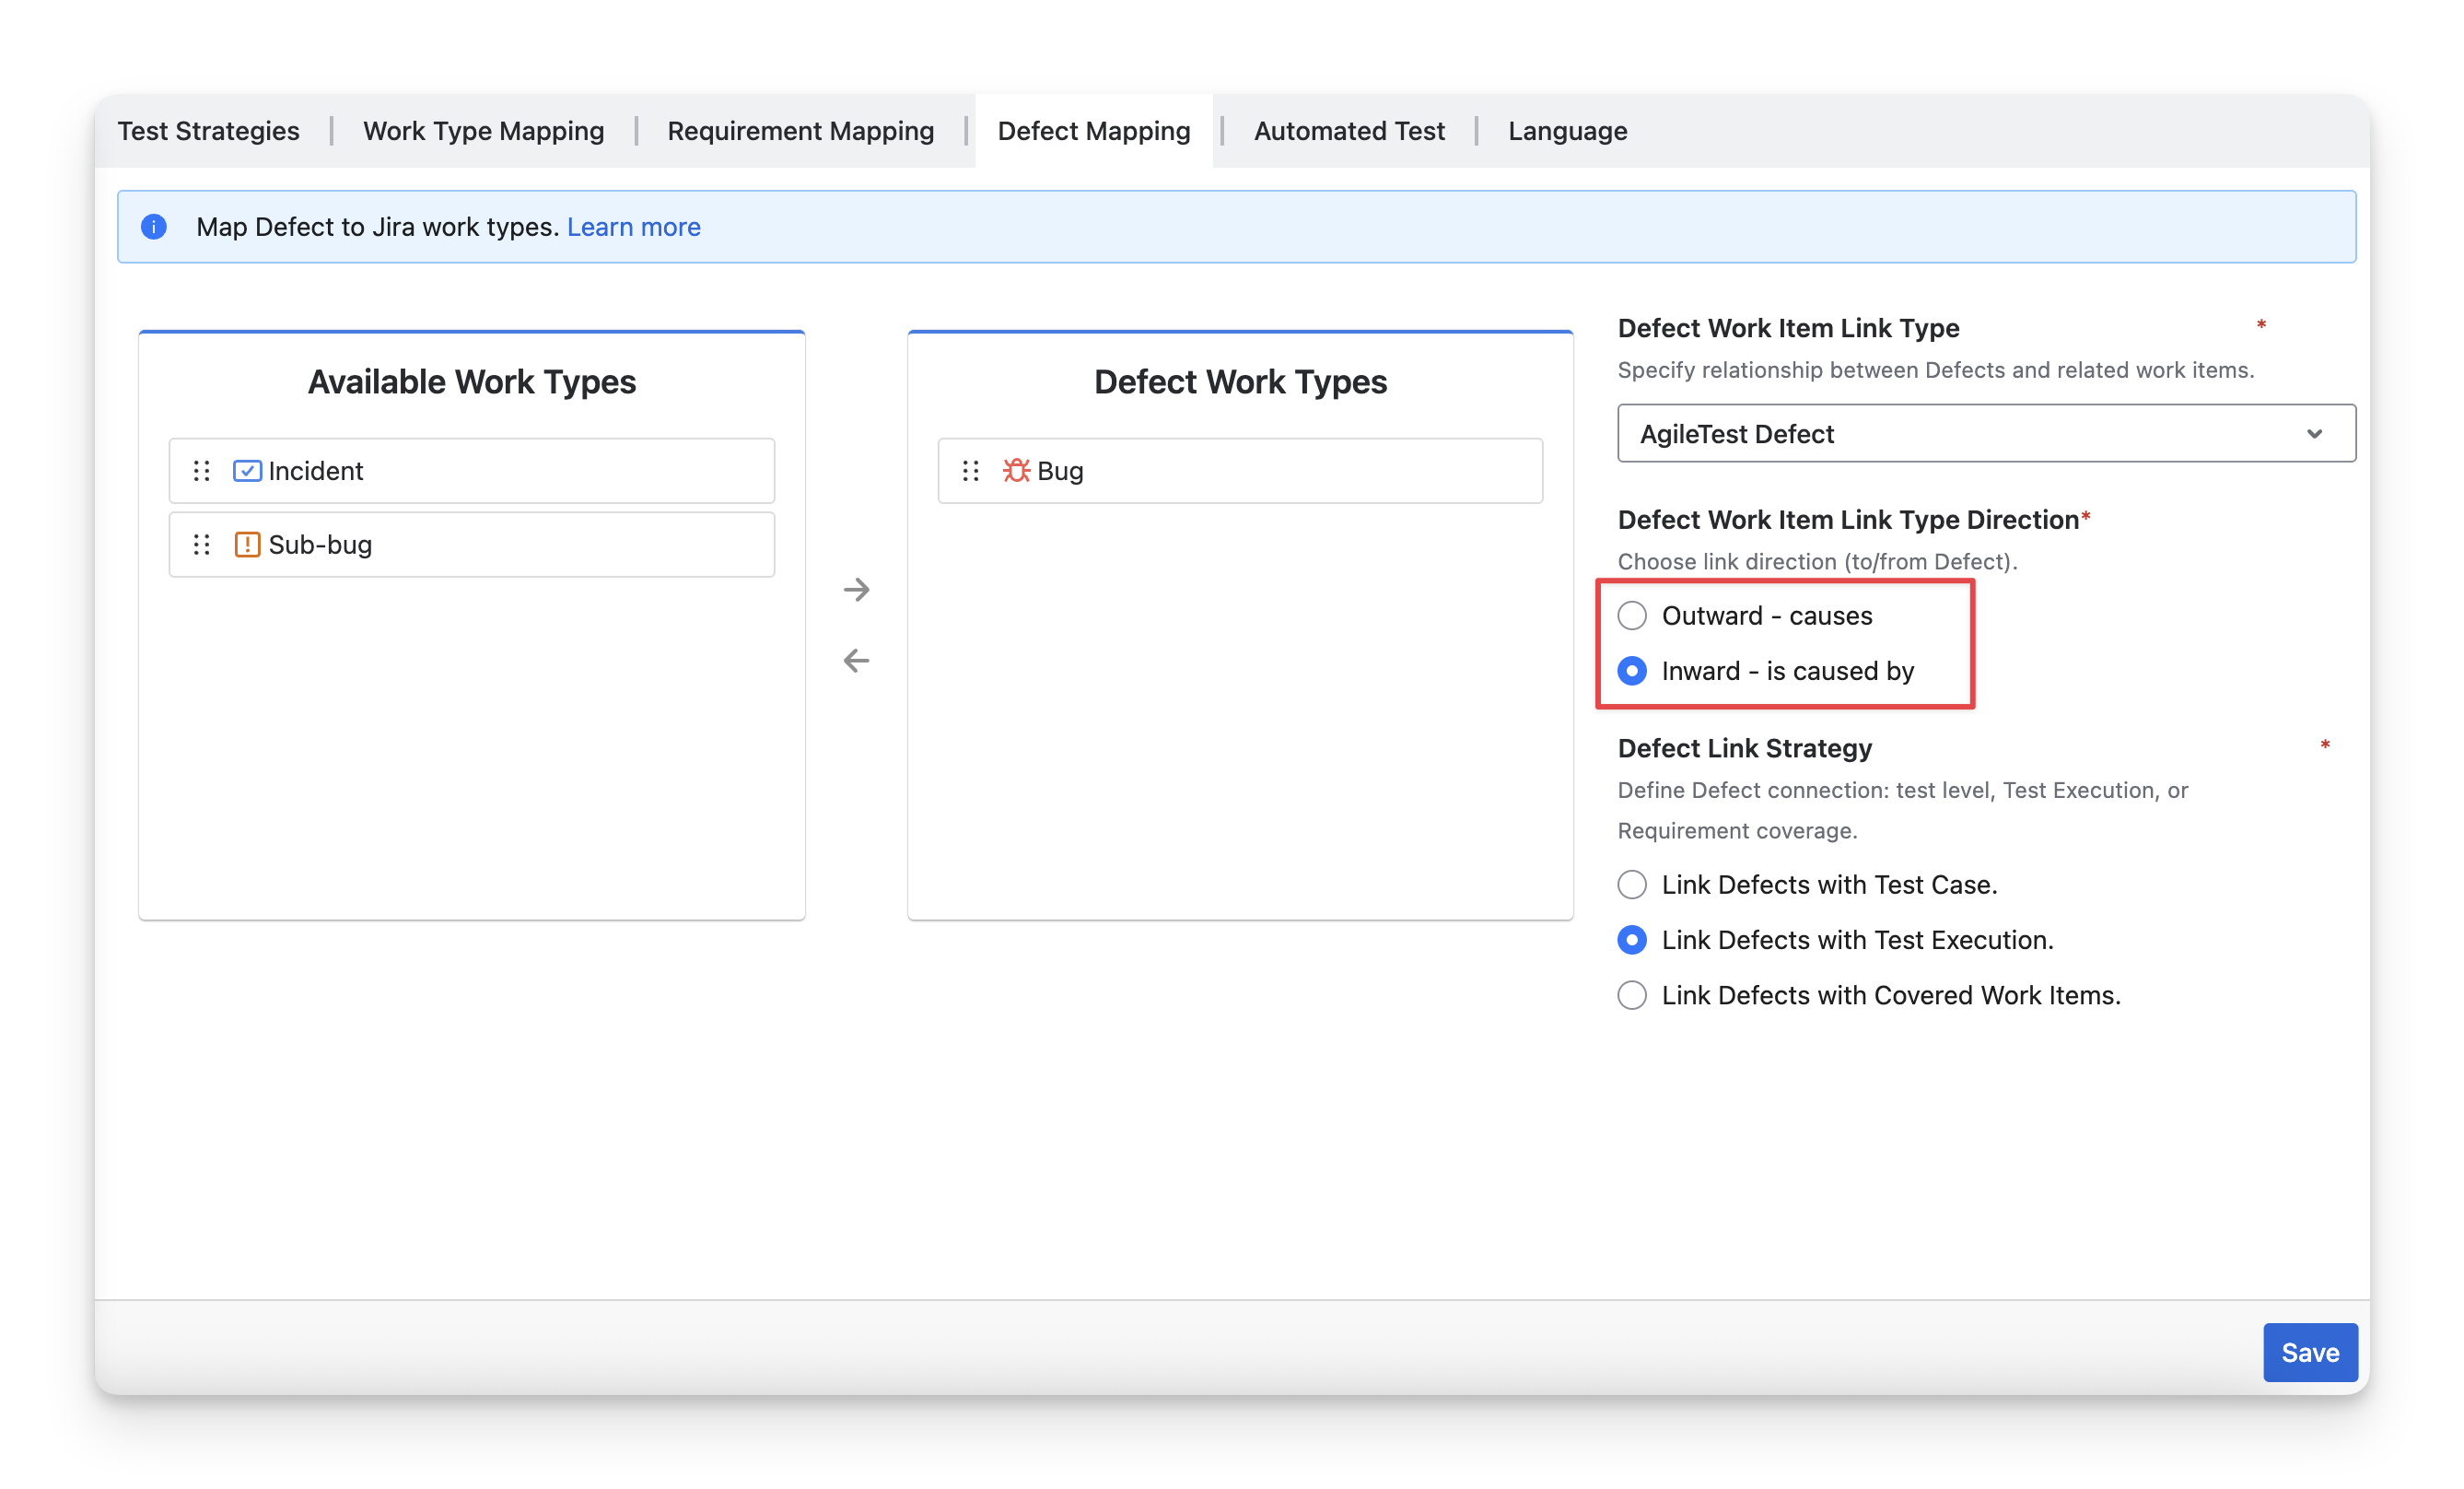
We recommend that you keep the “Inward - is caused by” direction unless any special setup is needed.
4.3 Defect Link Strategy
You can choose from three options to determine how Defects are linked during testing:
-
Link Defects with Test – Defects will be linked to the Test Case tickets.
-
Link Defects with Test Execution – Defects will be linked to the Test Execution tickets. (Default setting)
-
Link Defects with Covered Issues – Defects will be linked to the associated Requirement tickets.
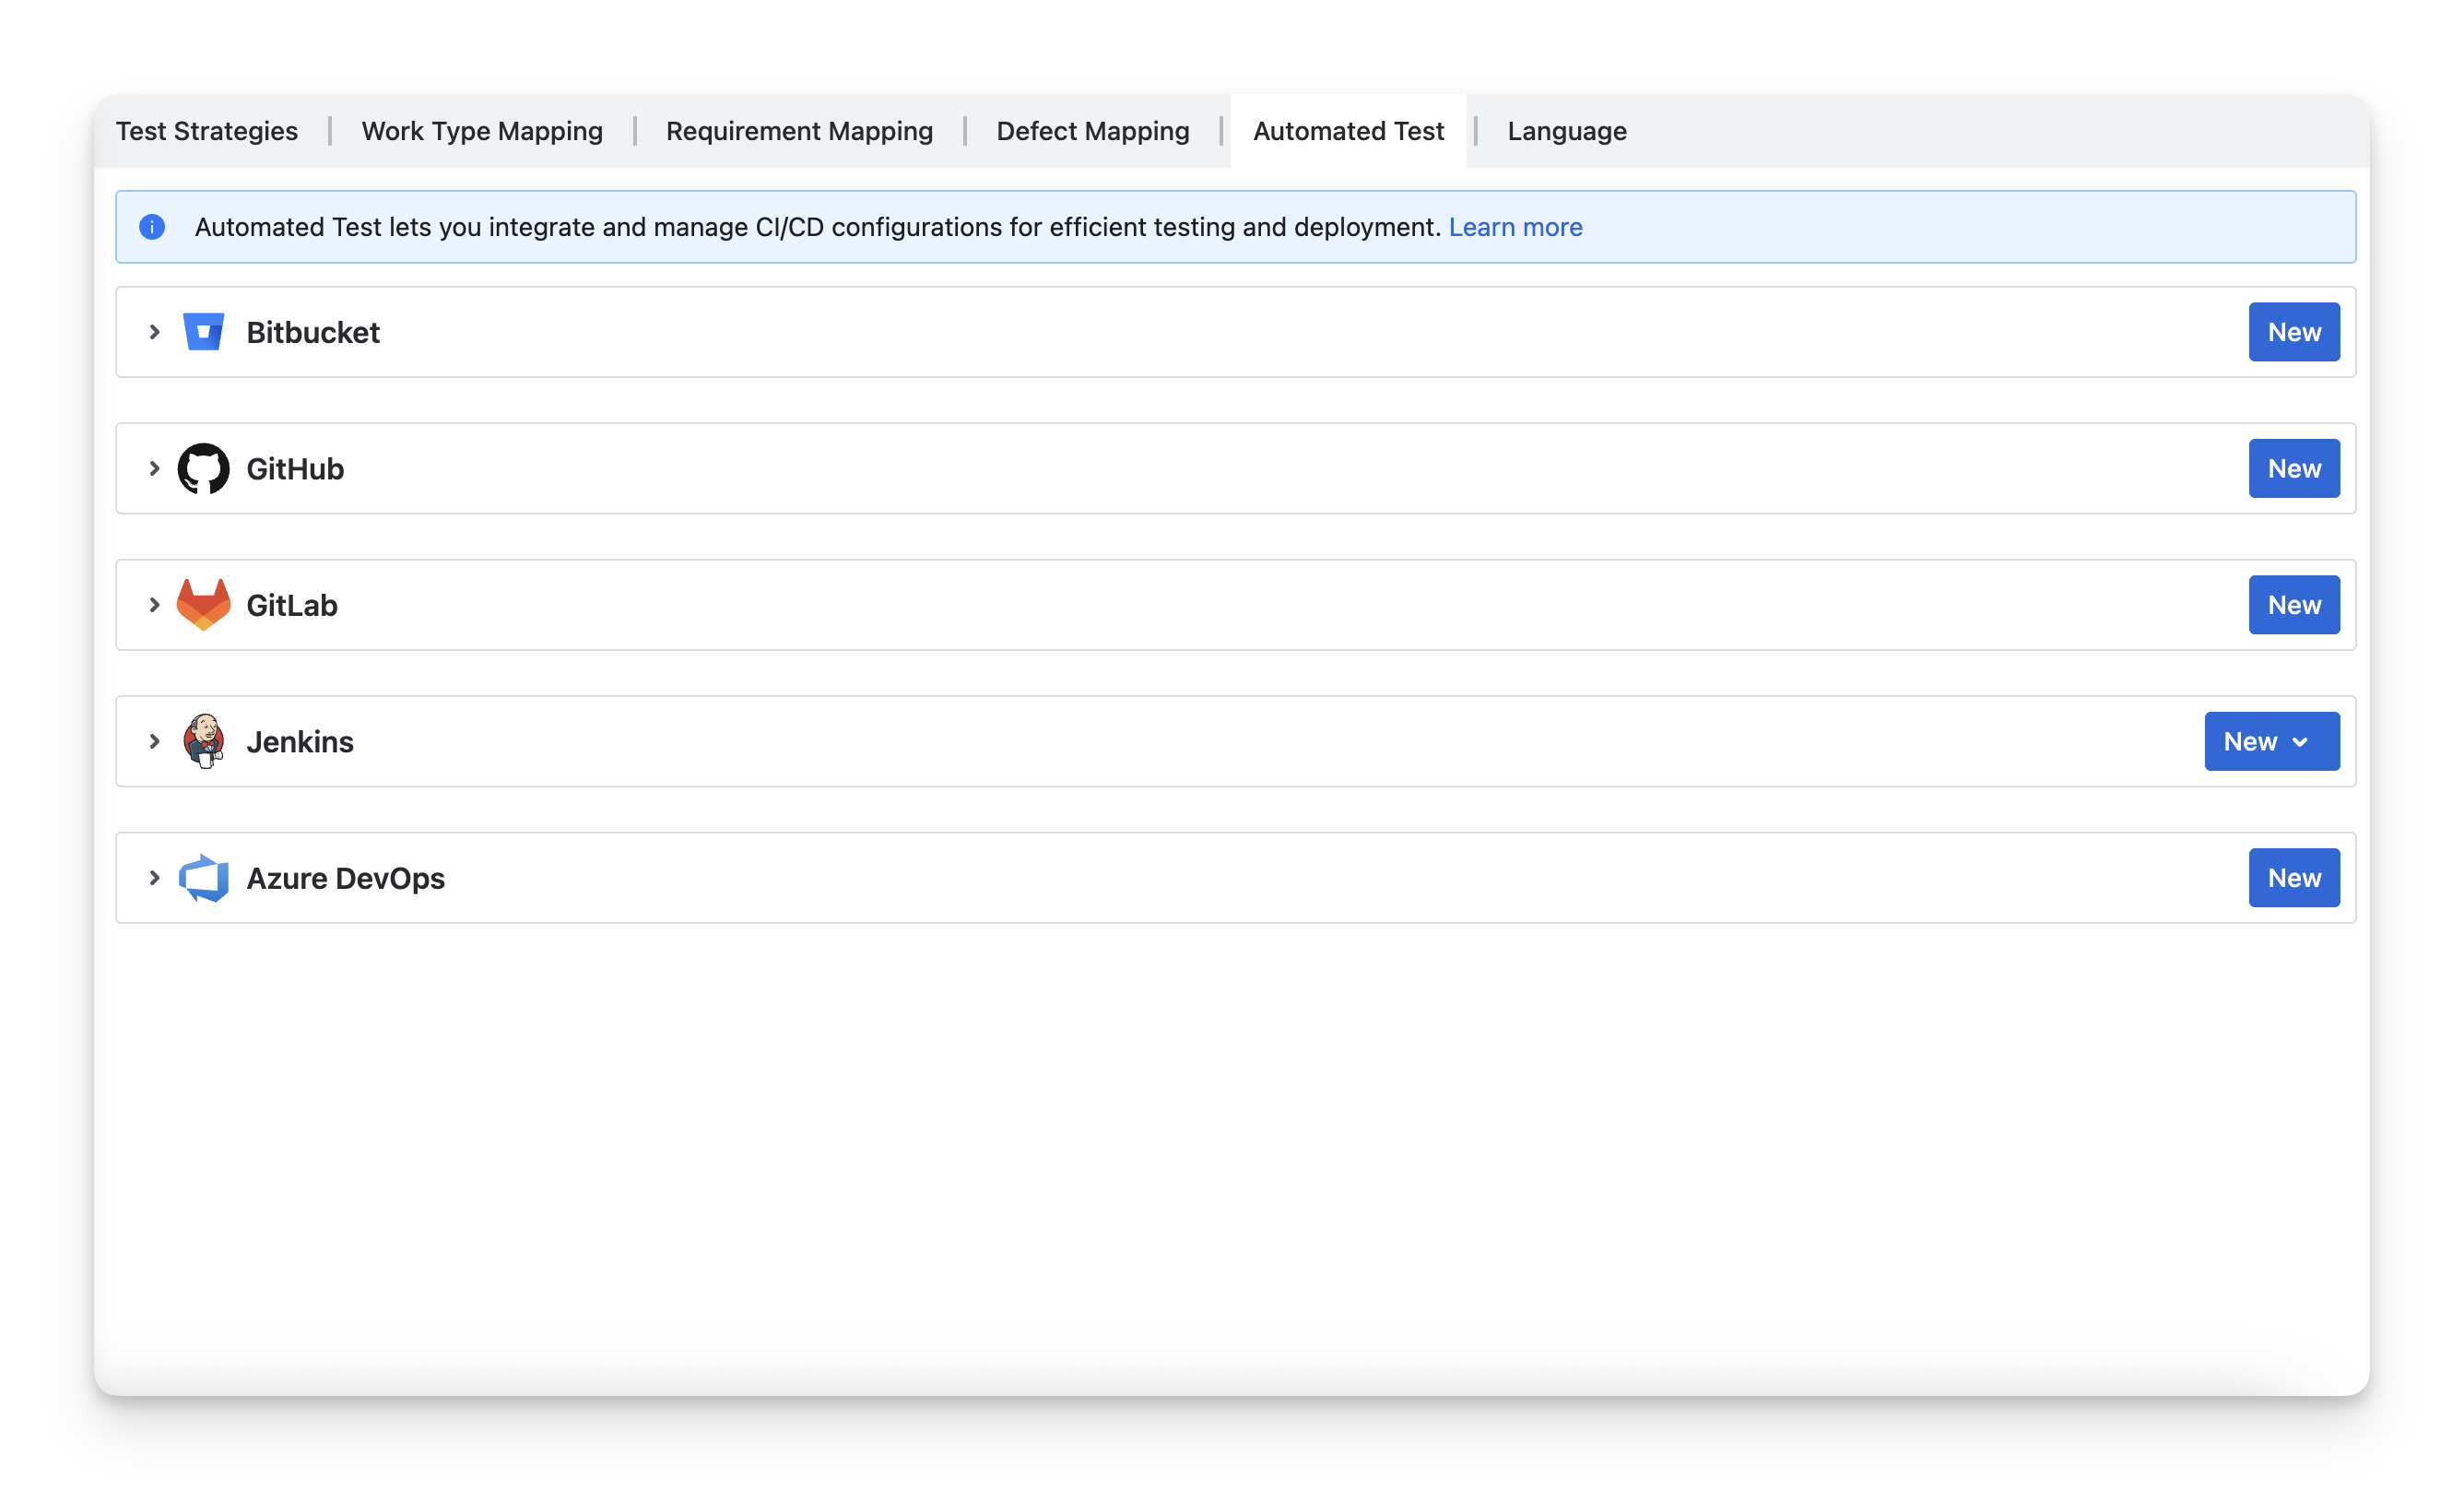
5. Automated Test configuration
The Automated Test configuration is an optional choice. You can skip it on your first time setup. This setting allows you to trigger the automated test on your CI/CD pipelines.
Read more: Trigger build remotely with AgileTest
6. Language
This setting lets you change the app language. Currently, AgileTest supports you in 13 languages.
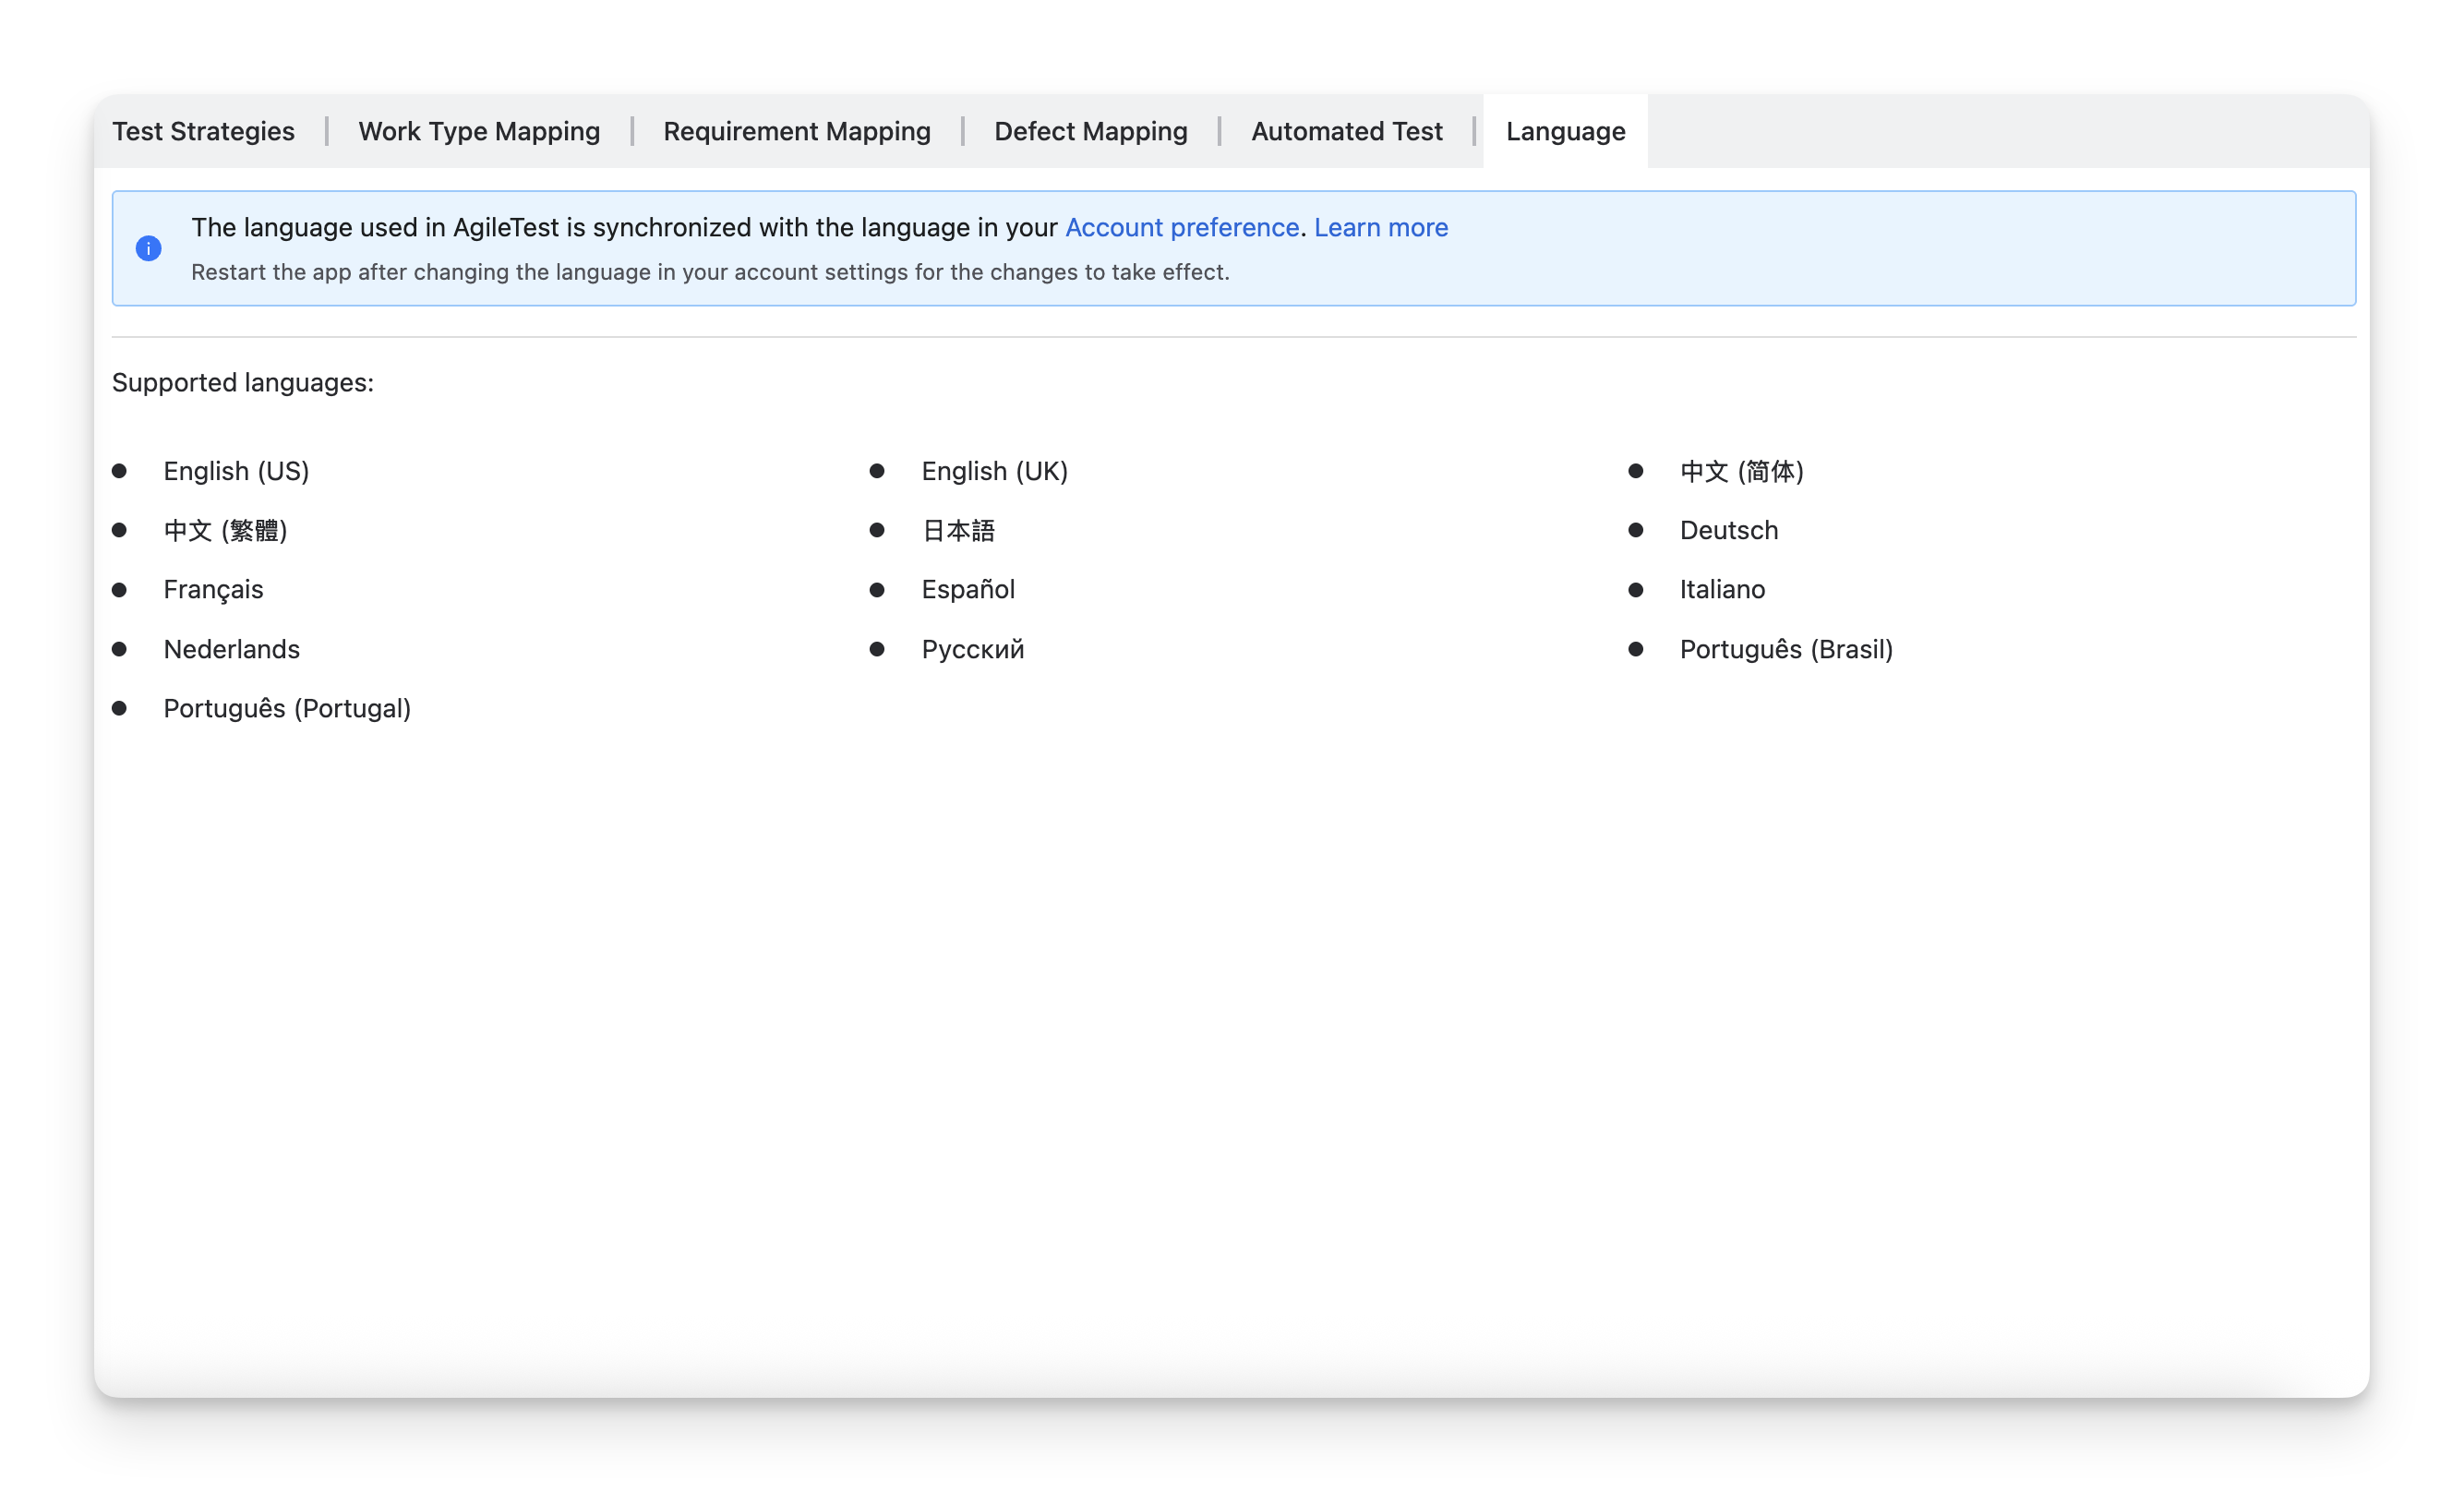
AgileTest supports multiple languages by syncing its interface with your Jira Account Preferences.
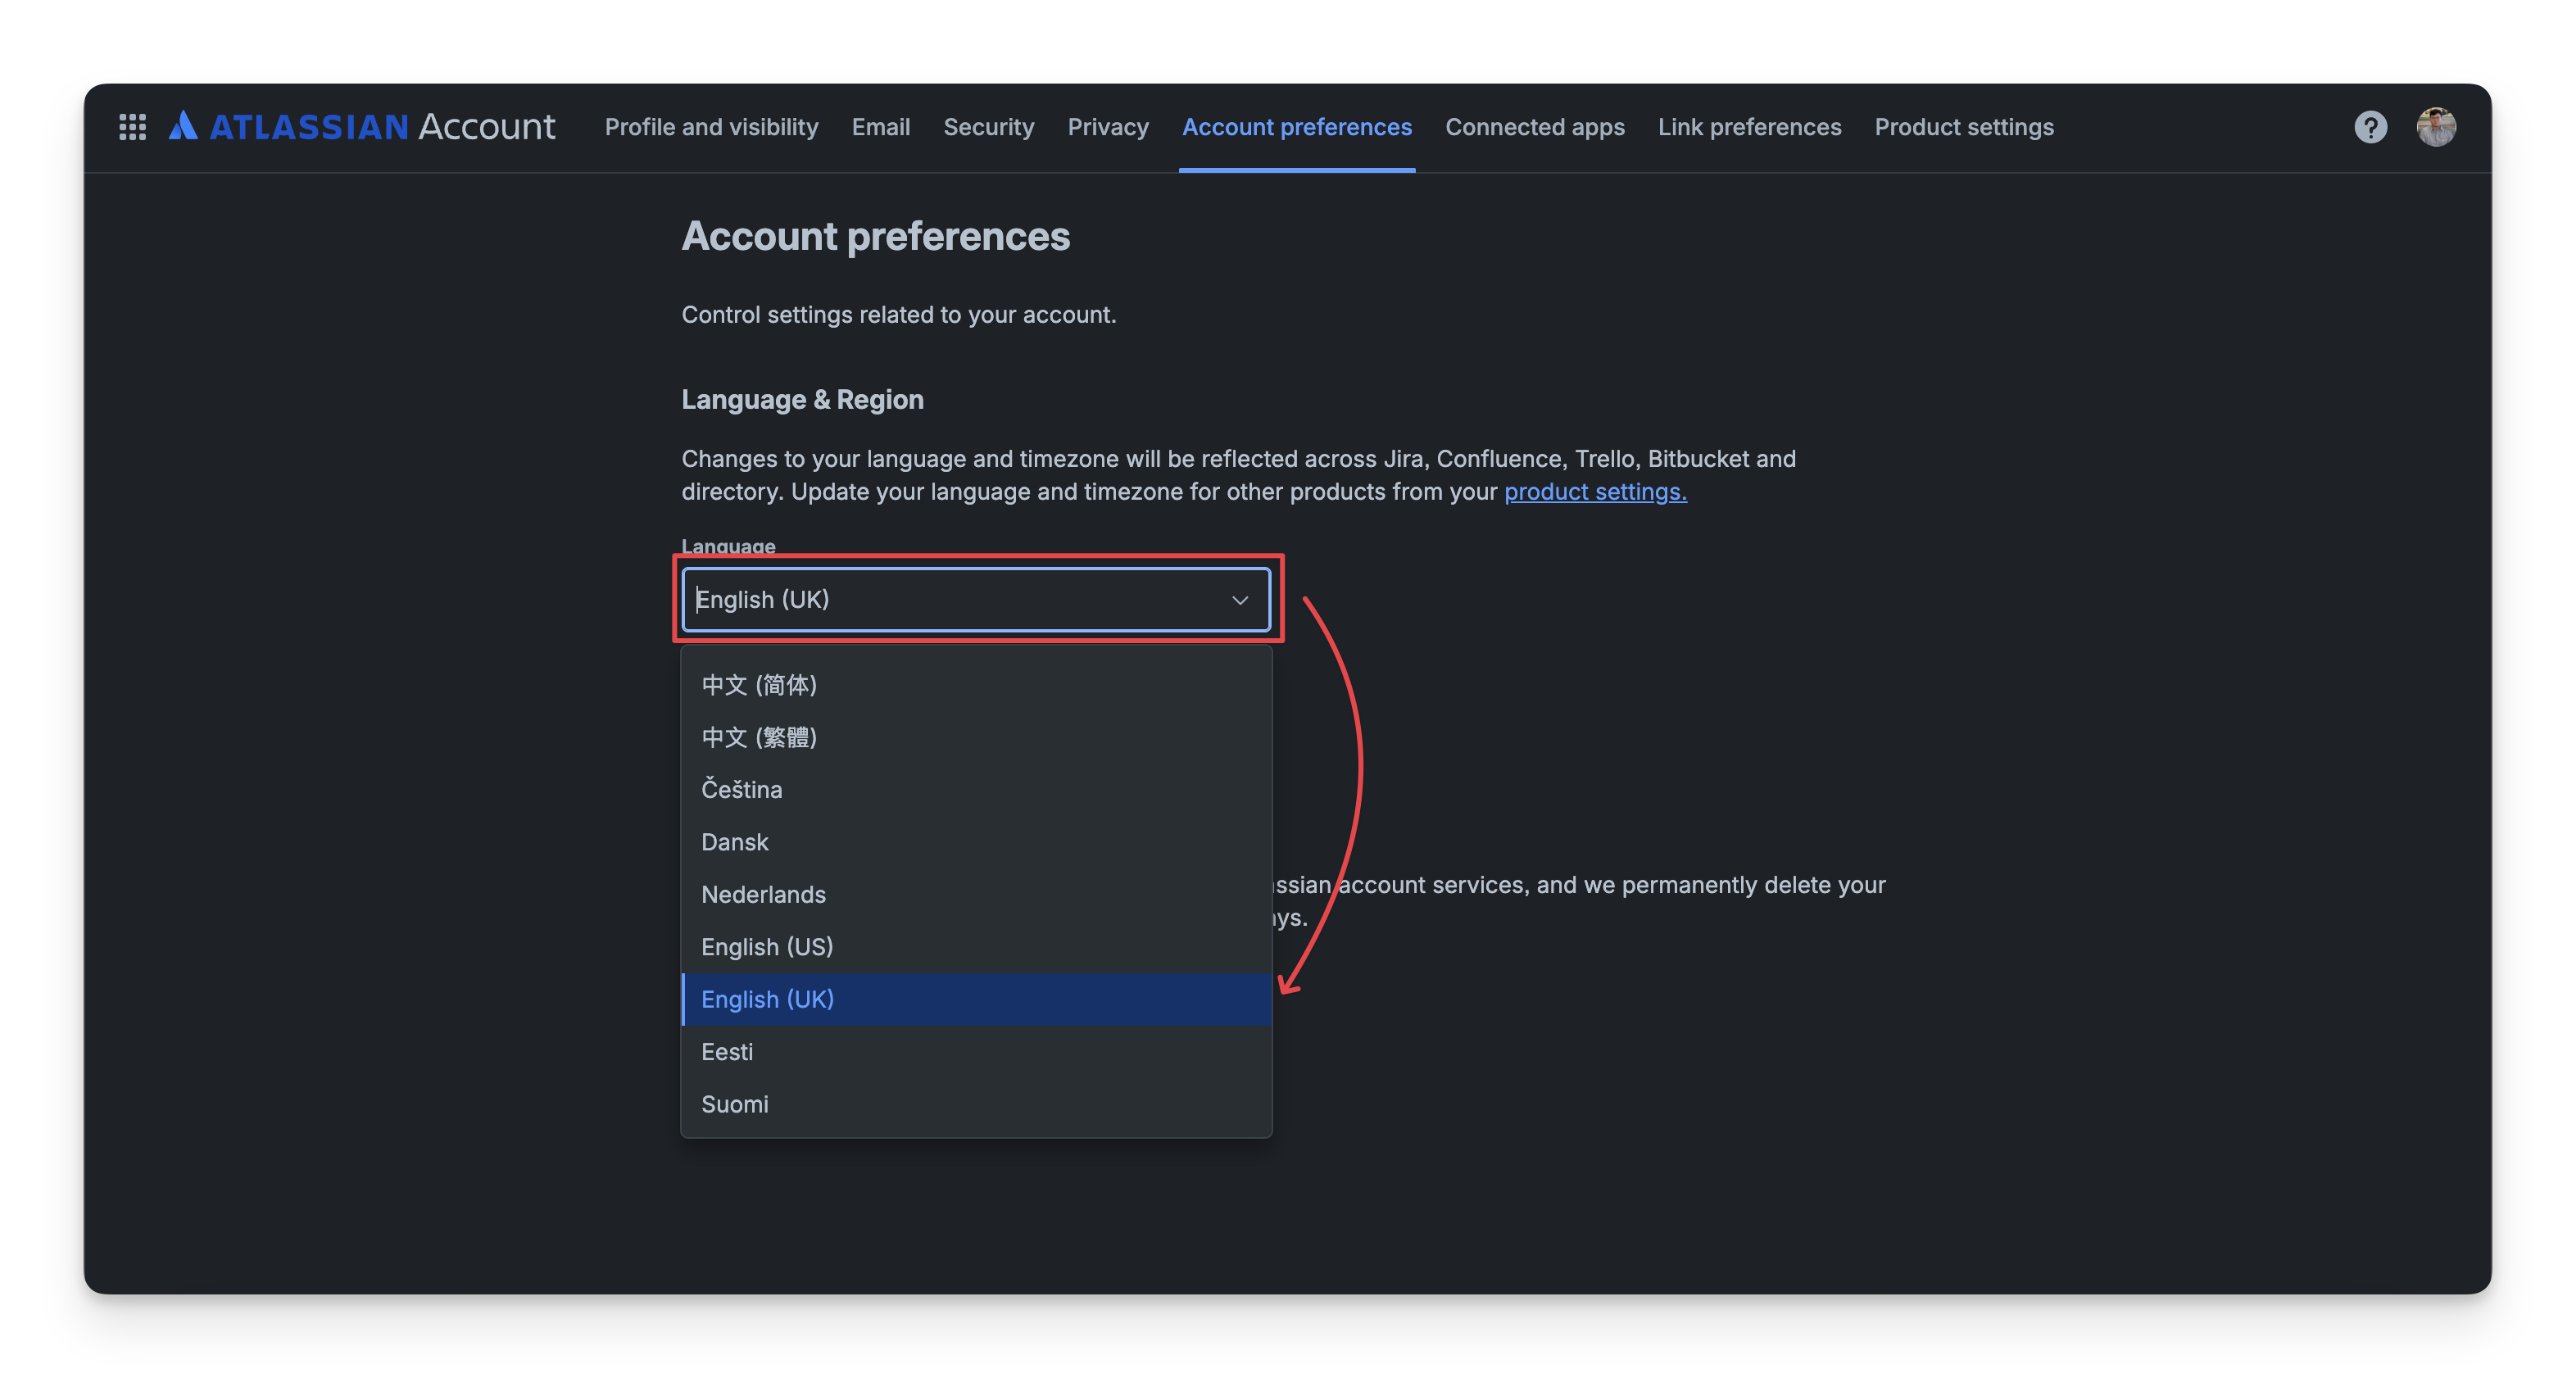
After changing your preferred language in Jira, please refresh AgileTest for the changes to take effect. Then, AgileTest’s UI interface will be translated into the selected language.
Should you need any assistance or further AgileTest inquiries, contact our 24/7 Support Desk.