.png)
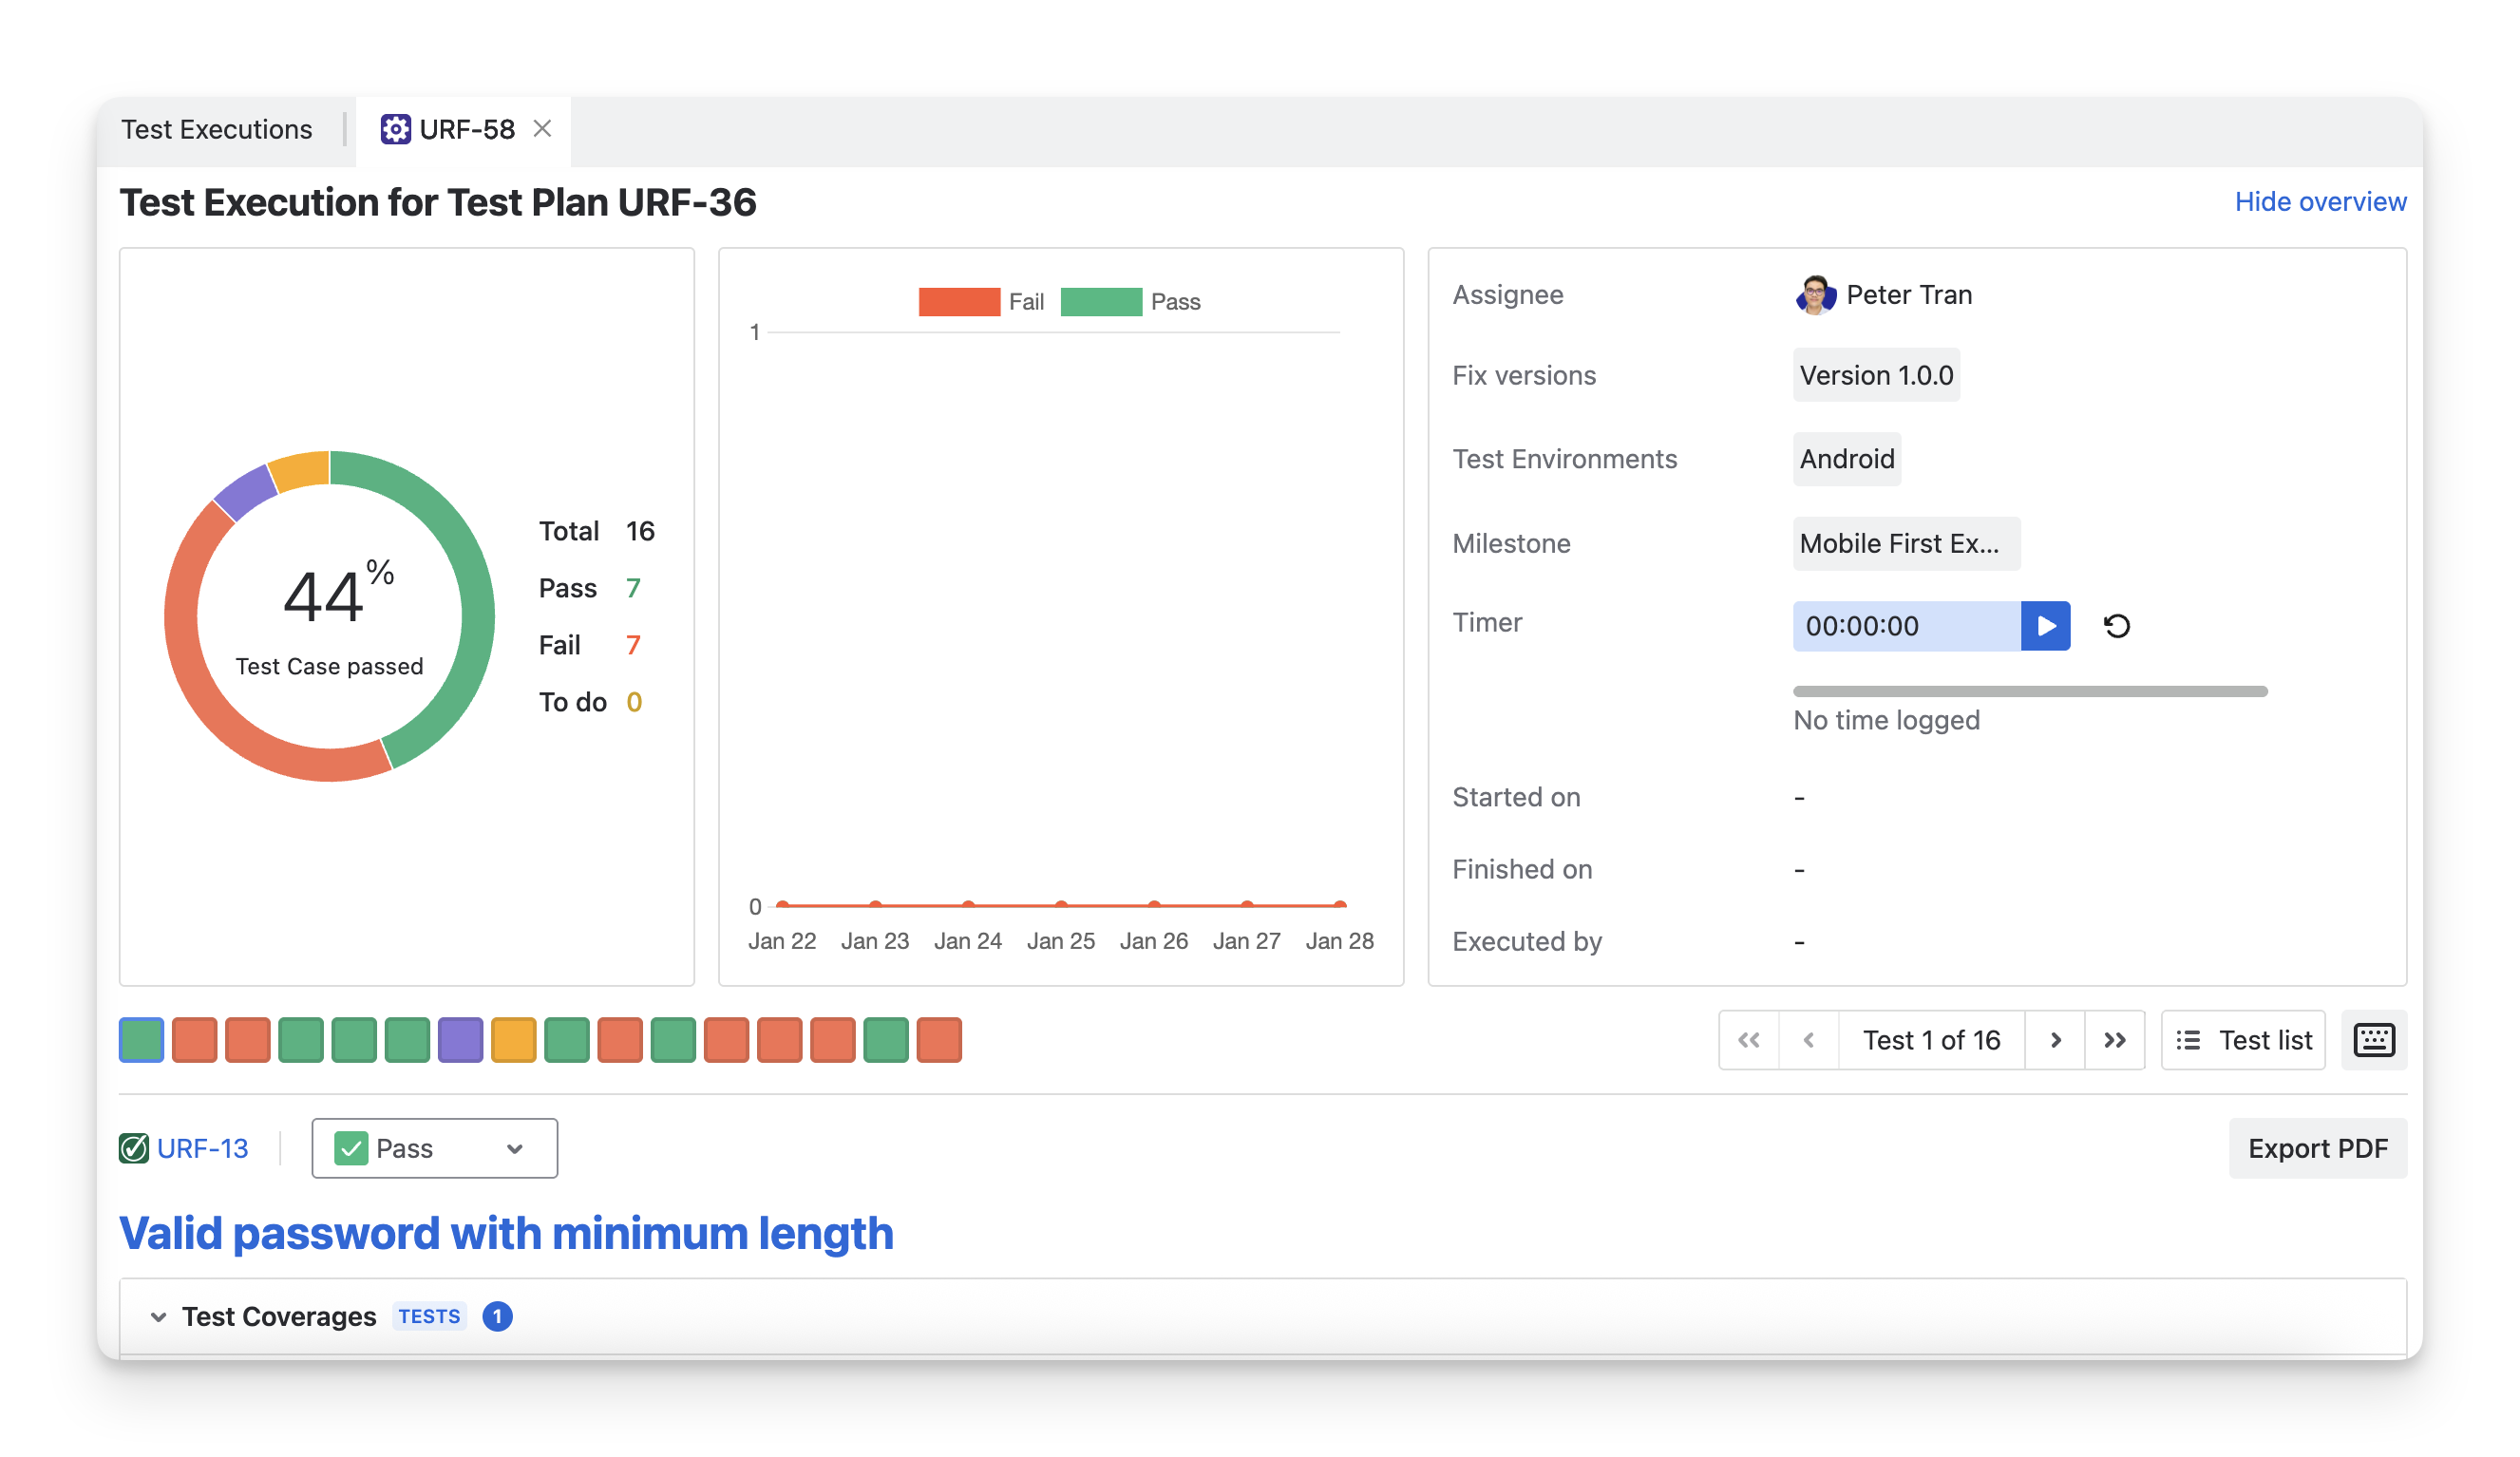
When you click on any Test Execution Key or the “Run” button in the Test Execution table, you are redirected to the Test Execution Detail screen, where you can view and manage detailed information related to that test execution.
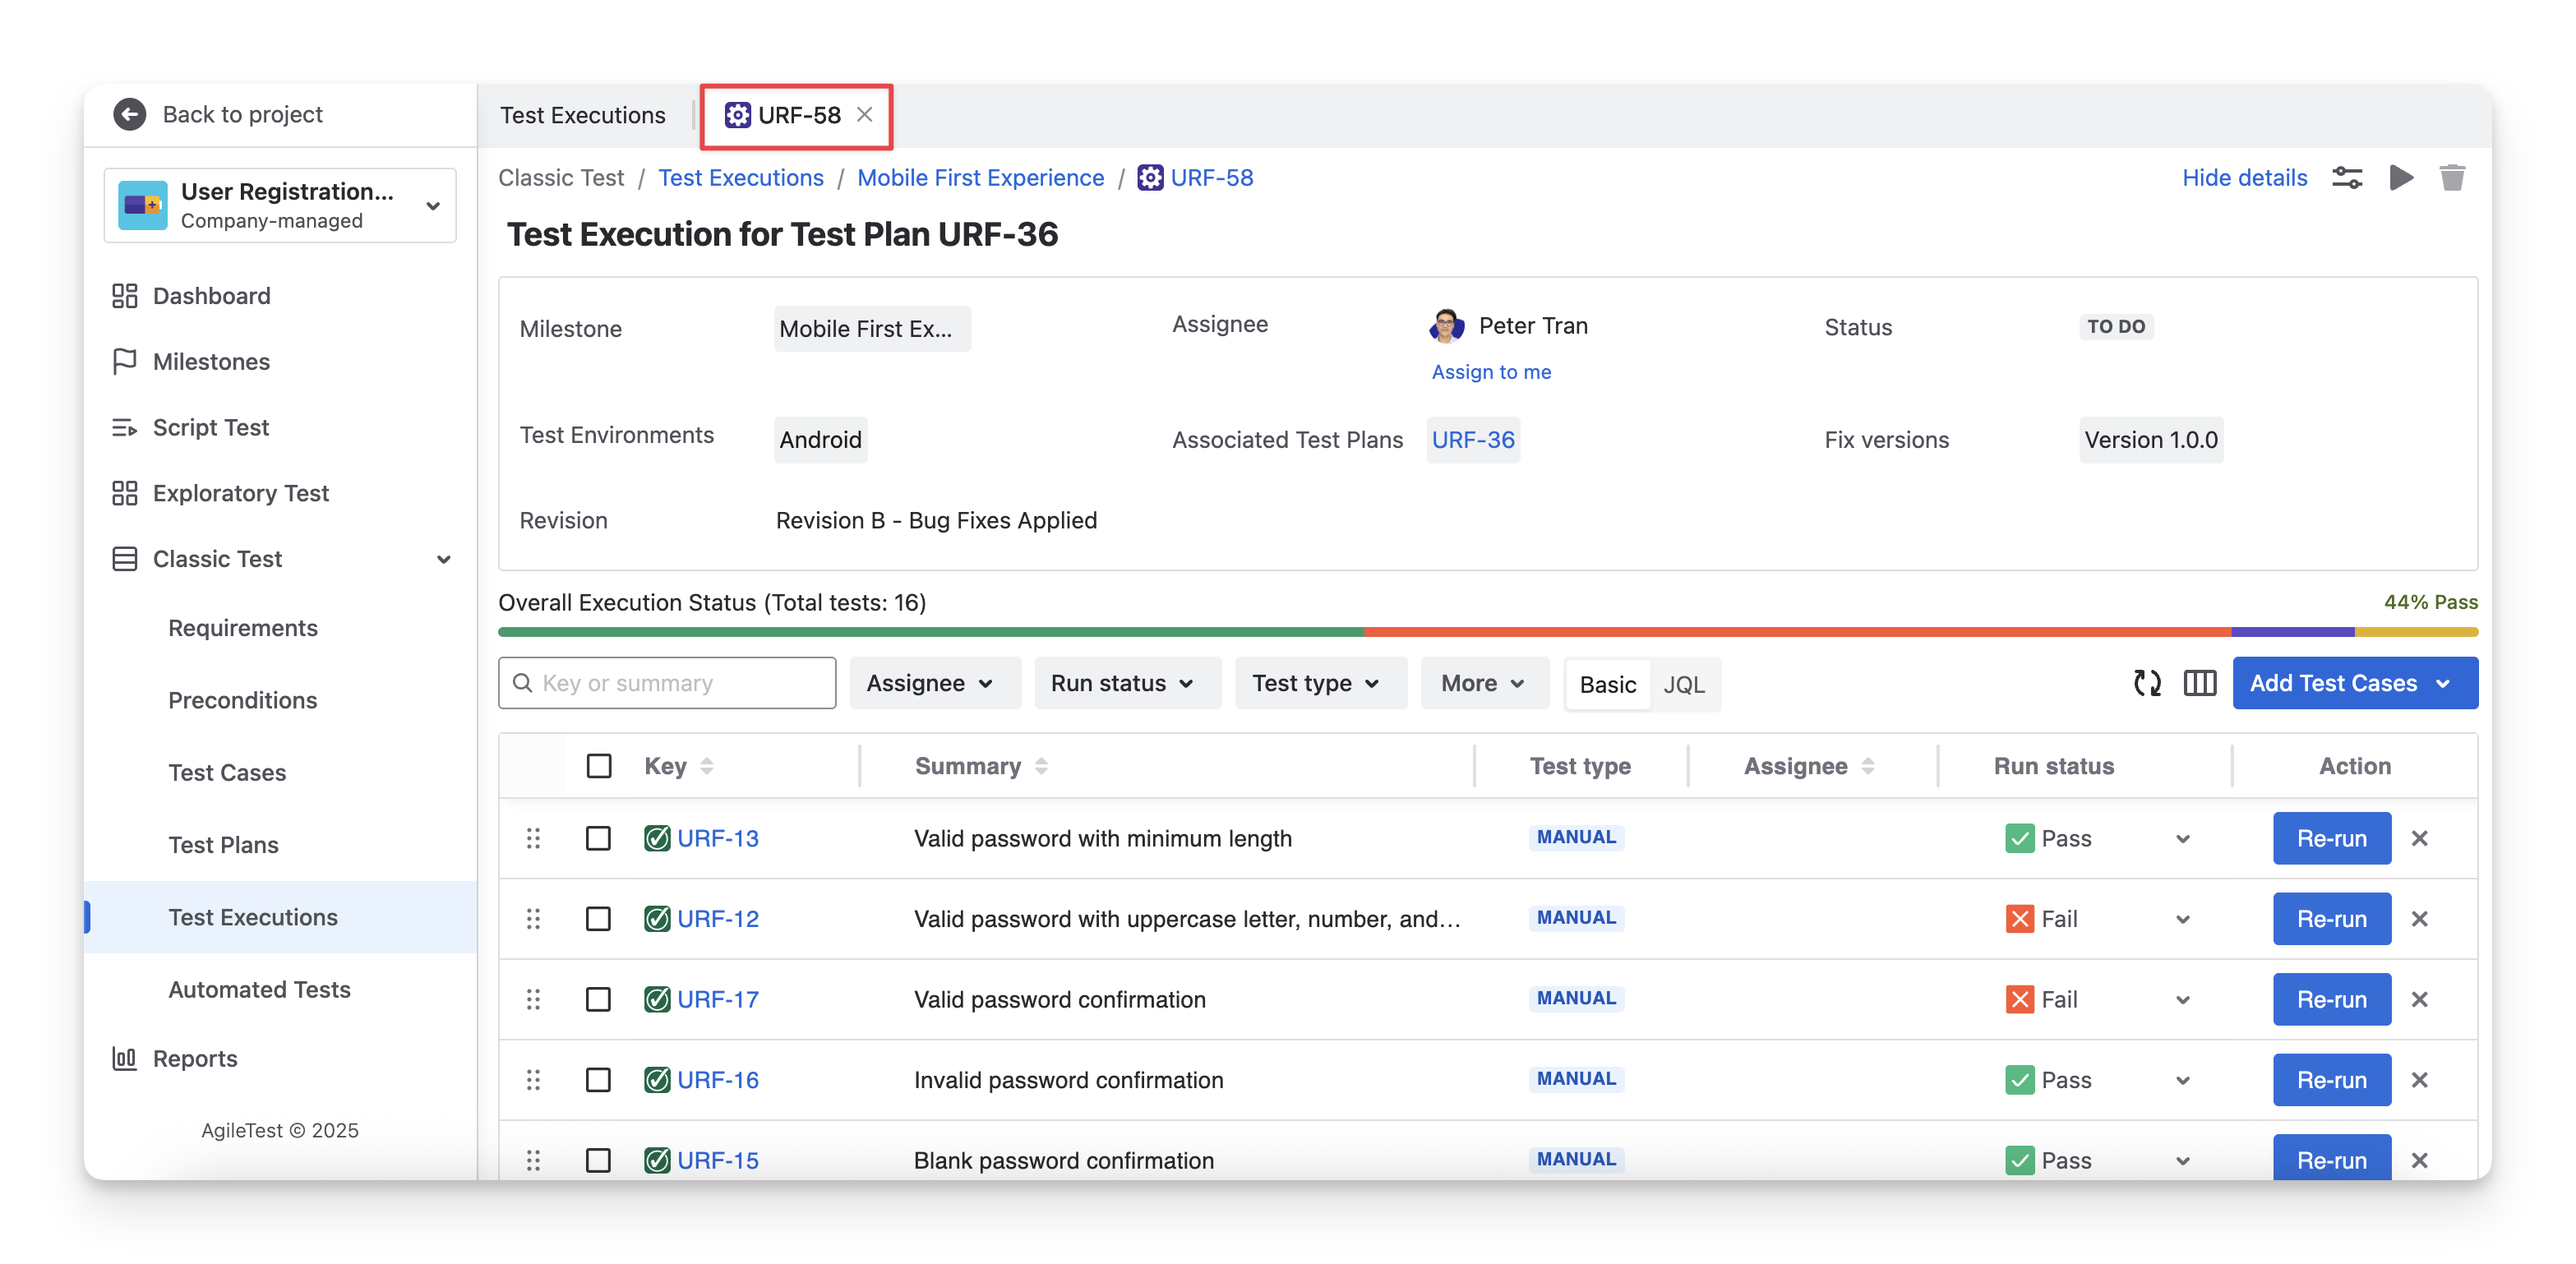
In the Test Execution Detail Screen, you can see 2 sections:
-
(1) Test Execution Basic Information
-
(2) Test Case Status

1. Test Execution Basic Information
Any updates made in this section will automatically sync with the related information in the Jira ticket, and vice versa.
1.1 Milestone
The Milestone box shows the milestone to which this test execution is linked. You can click on this field to select and change it to a different milestone.
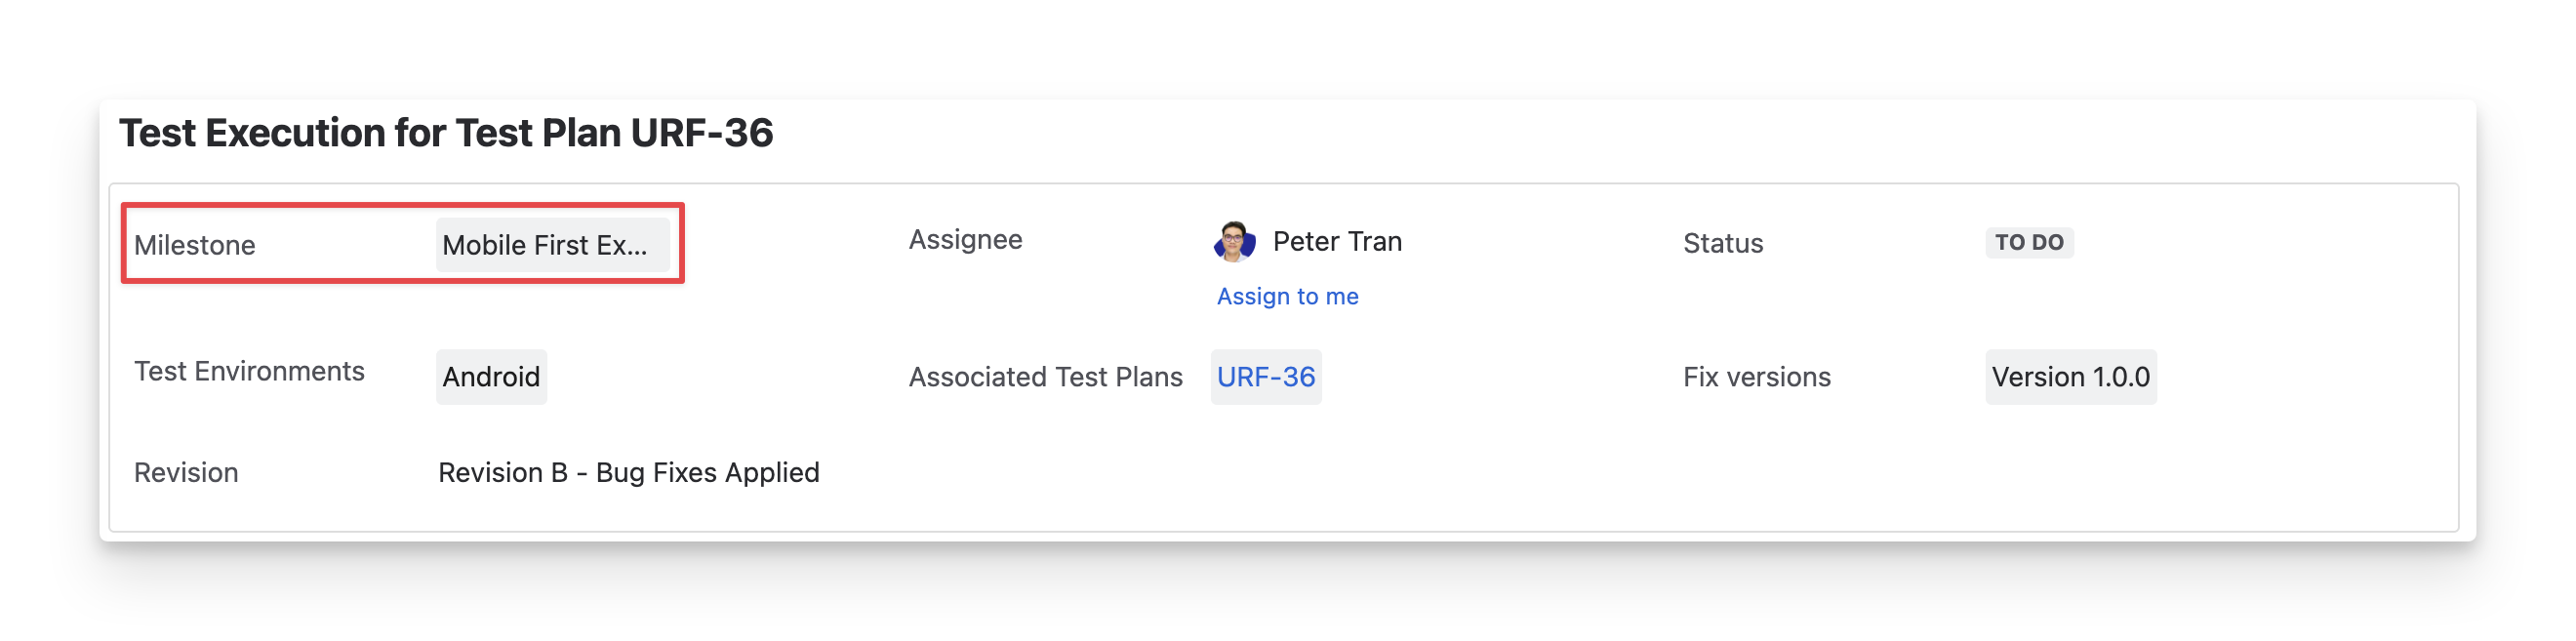
You need to create AgileTest milestones in advance to have milestone options available for your selection.
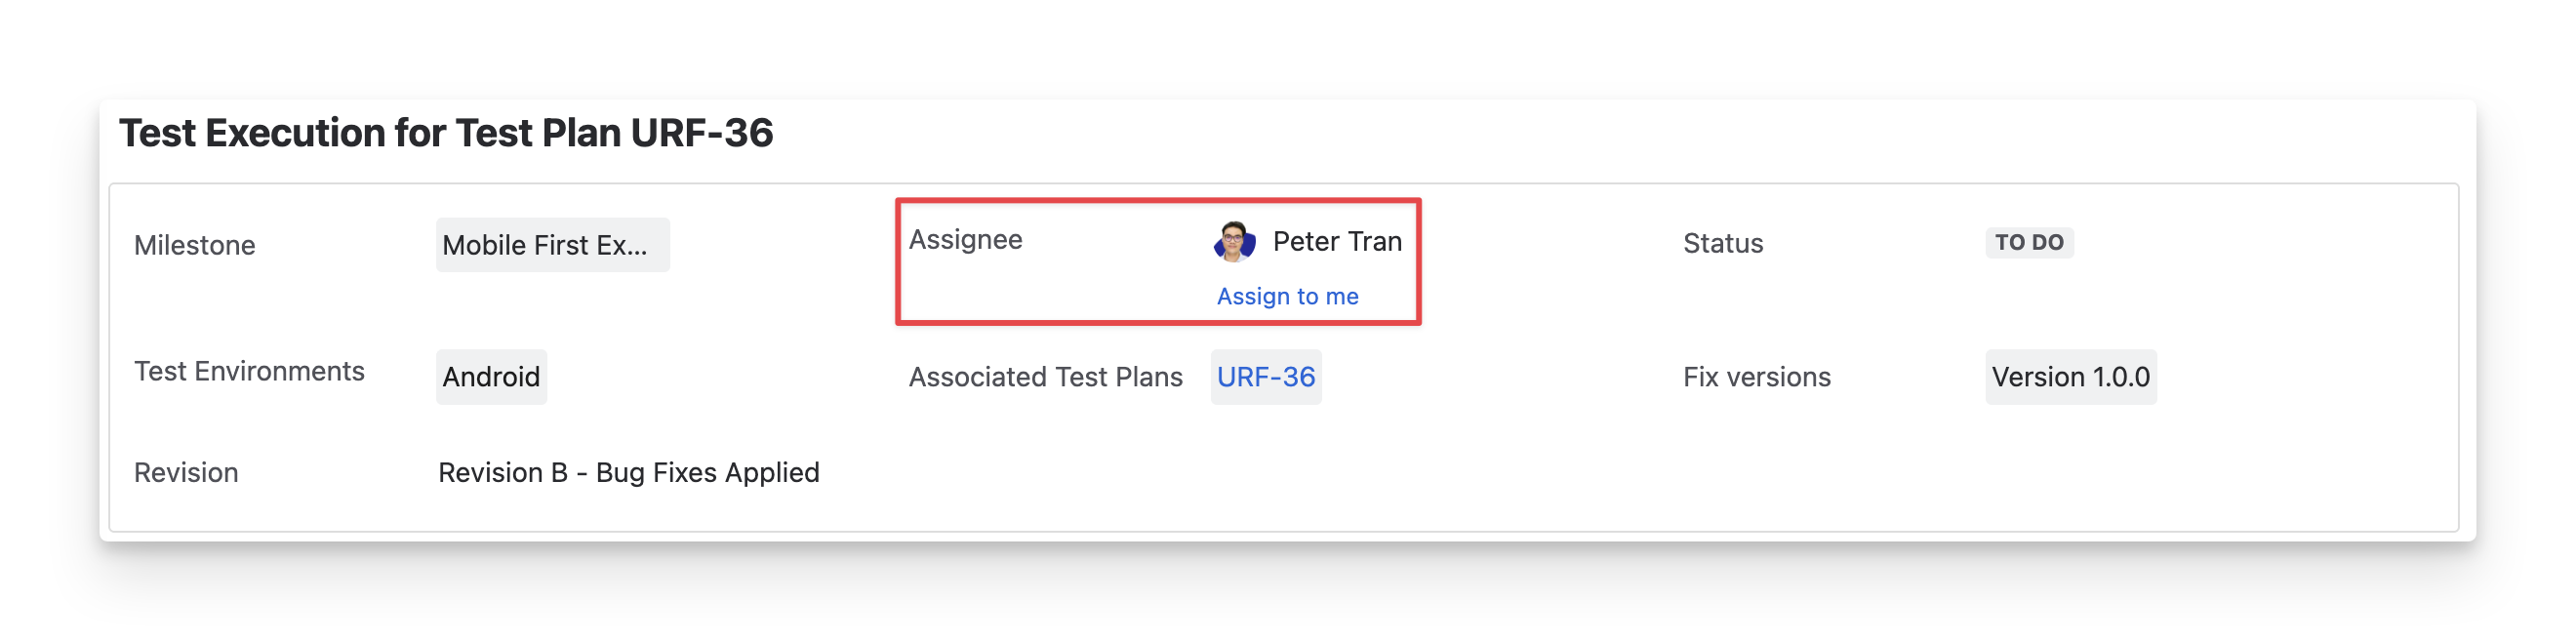
1.2 Assignee
The Assignee box shows who is responsible for this test execution. To change the assignee, click the dropdown and select a team member.
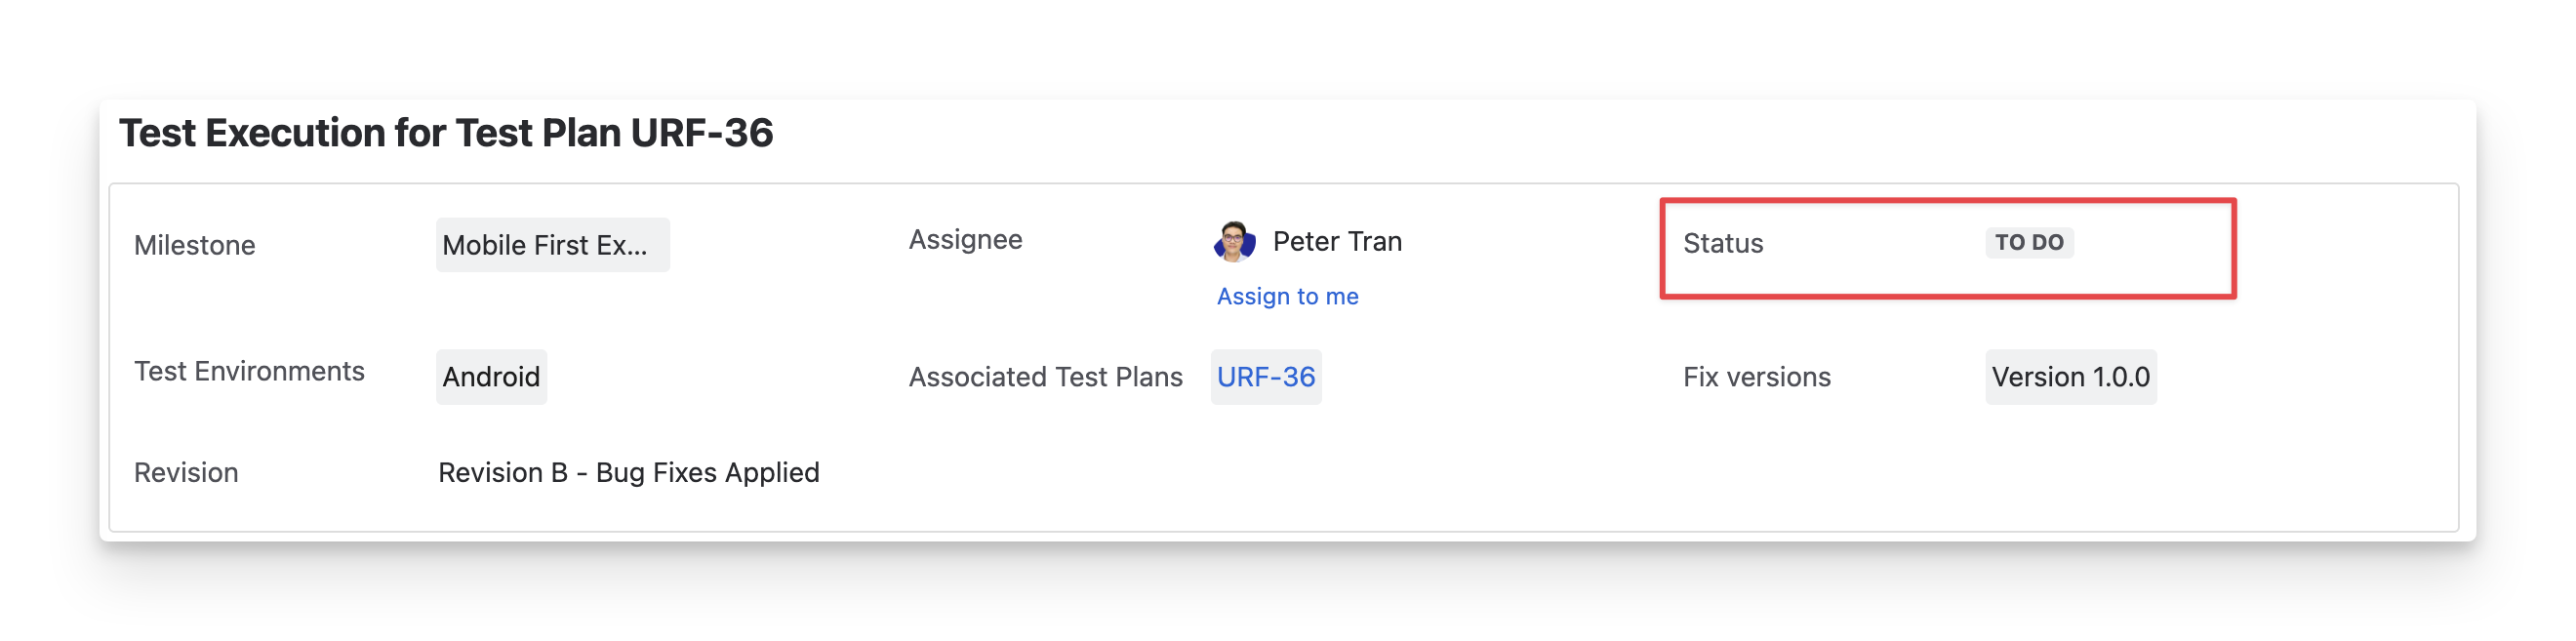
1.3 Jira Status
The Status box shows the Jira status of the test execution ticket ( todo ; in progress ; done ). It reflects the progress of the test execution in your team's workflow on the Jira board.
To change this status to match your team’s testing process, click on the dropdown and select the right Jira status.
1.4 Test Environment
The Test Environment box displays the predefined and simulated testing space where the test execution occurs.
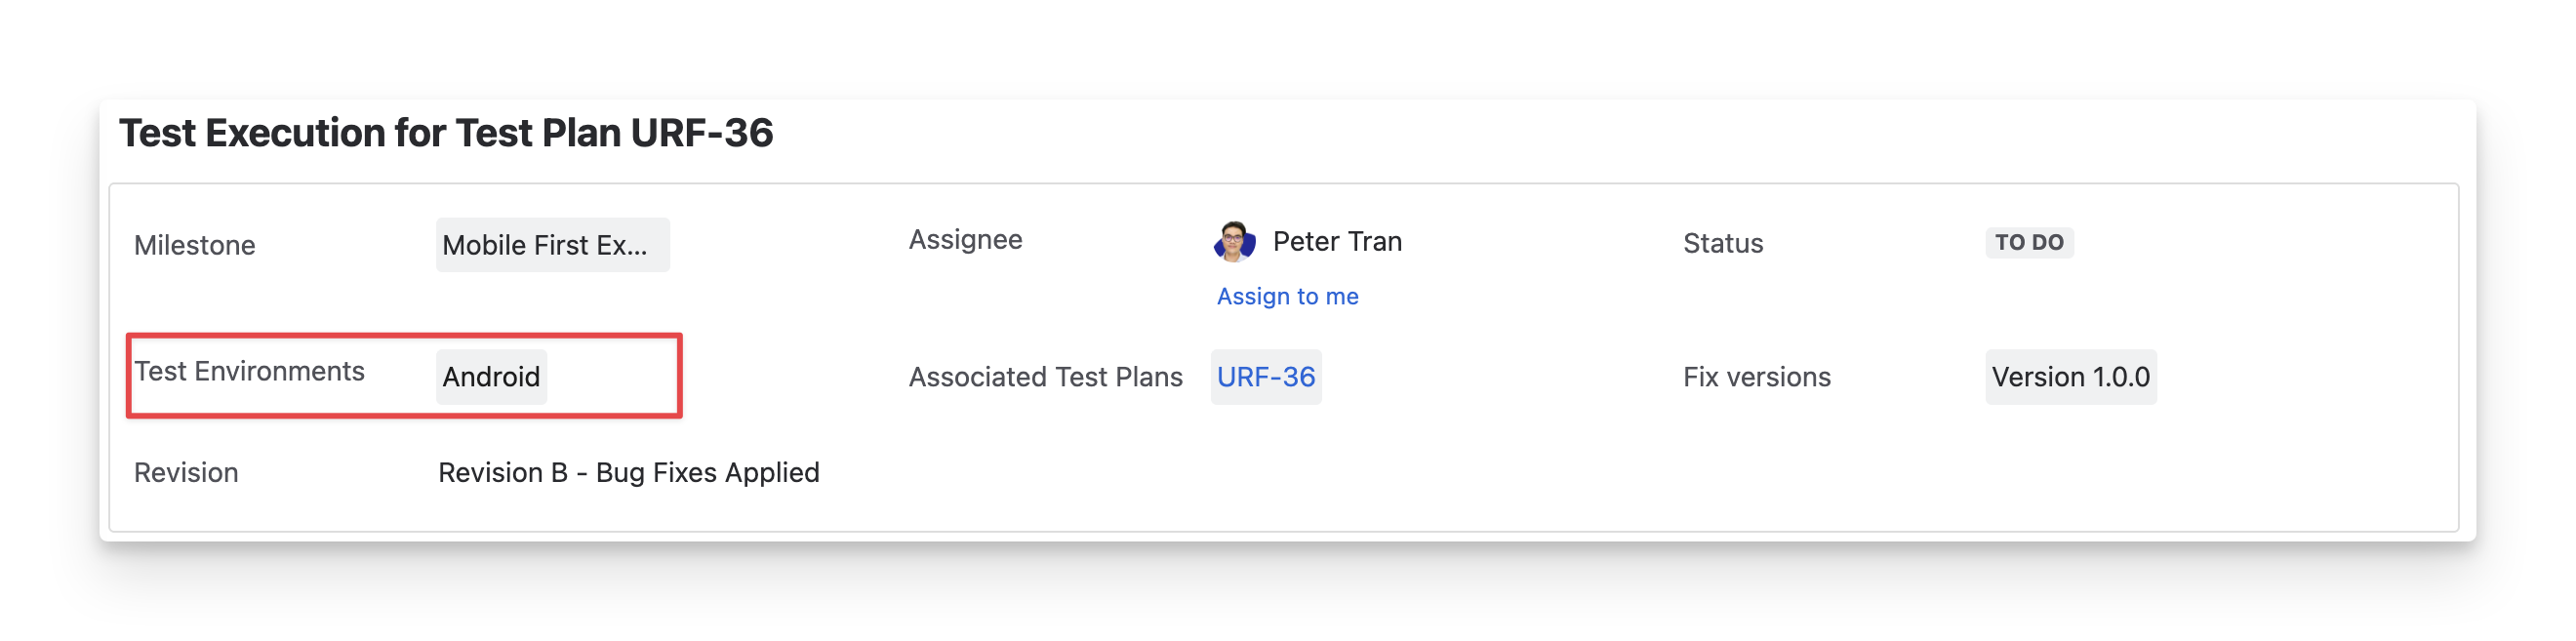
You can click on this field to select and update the environment if needed.
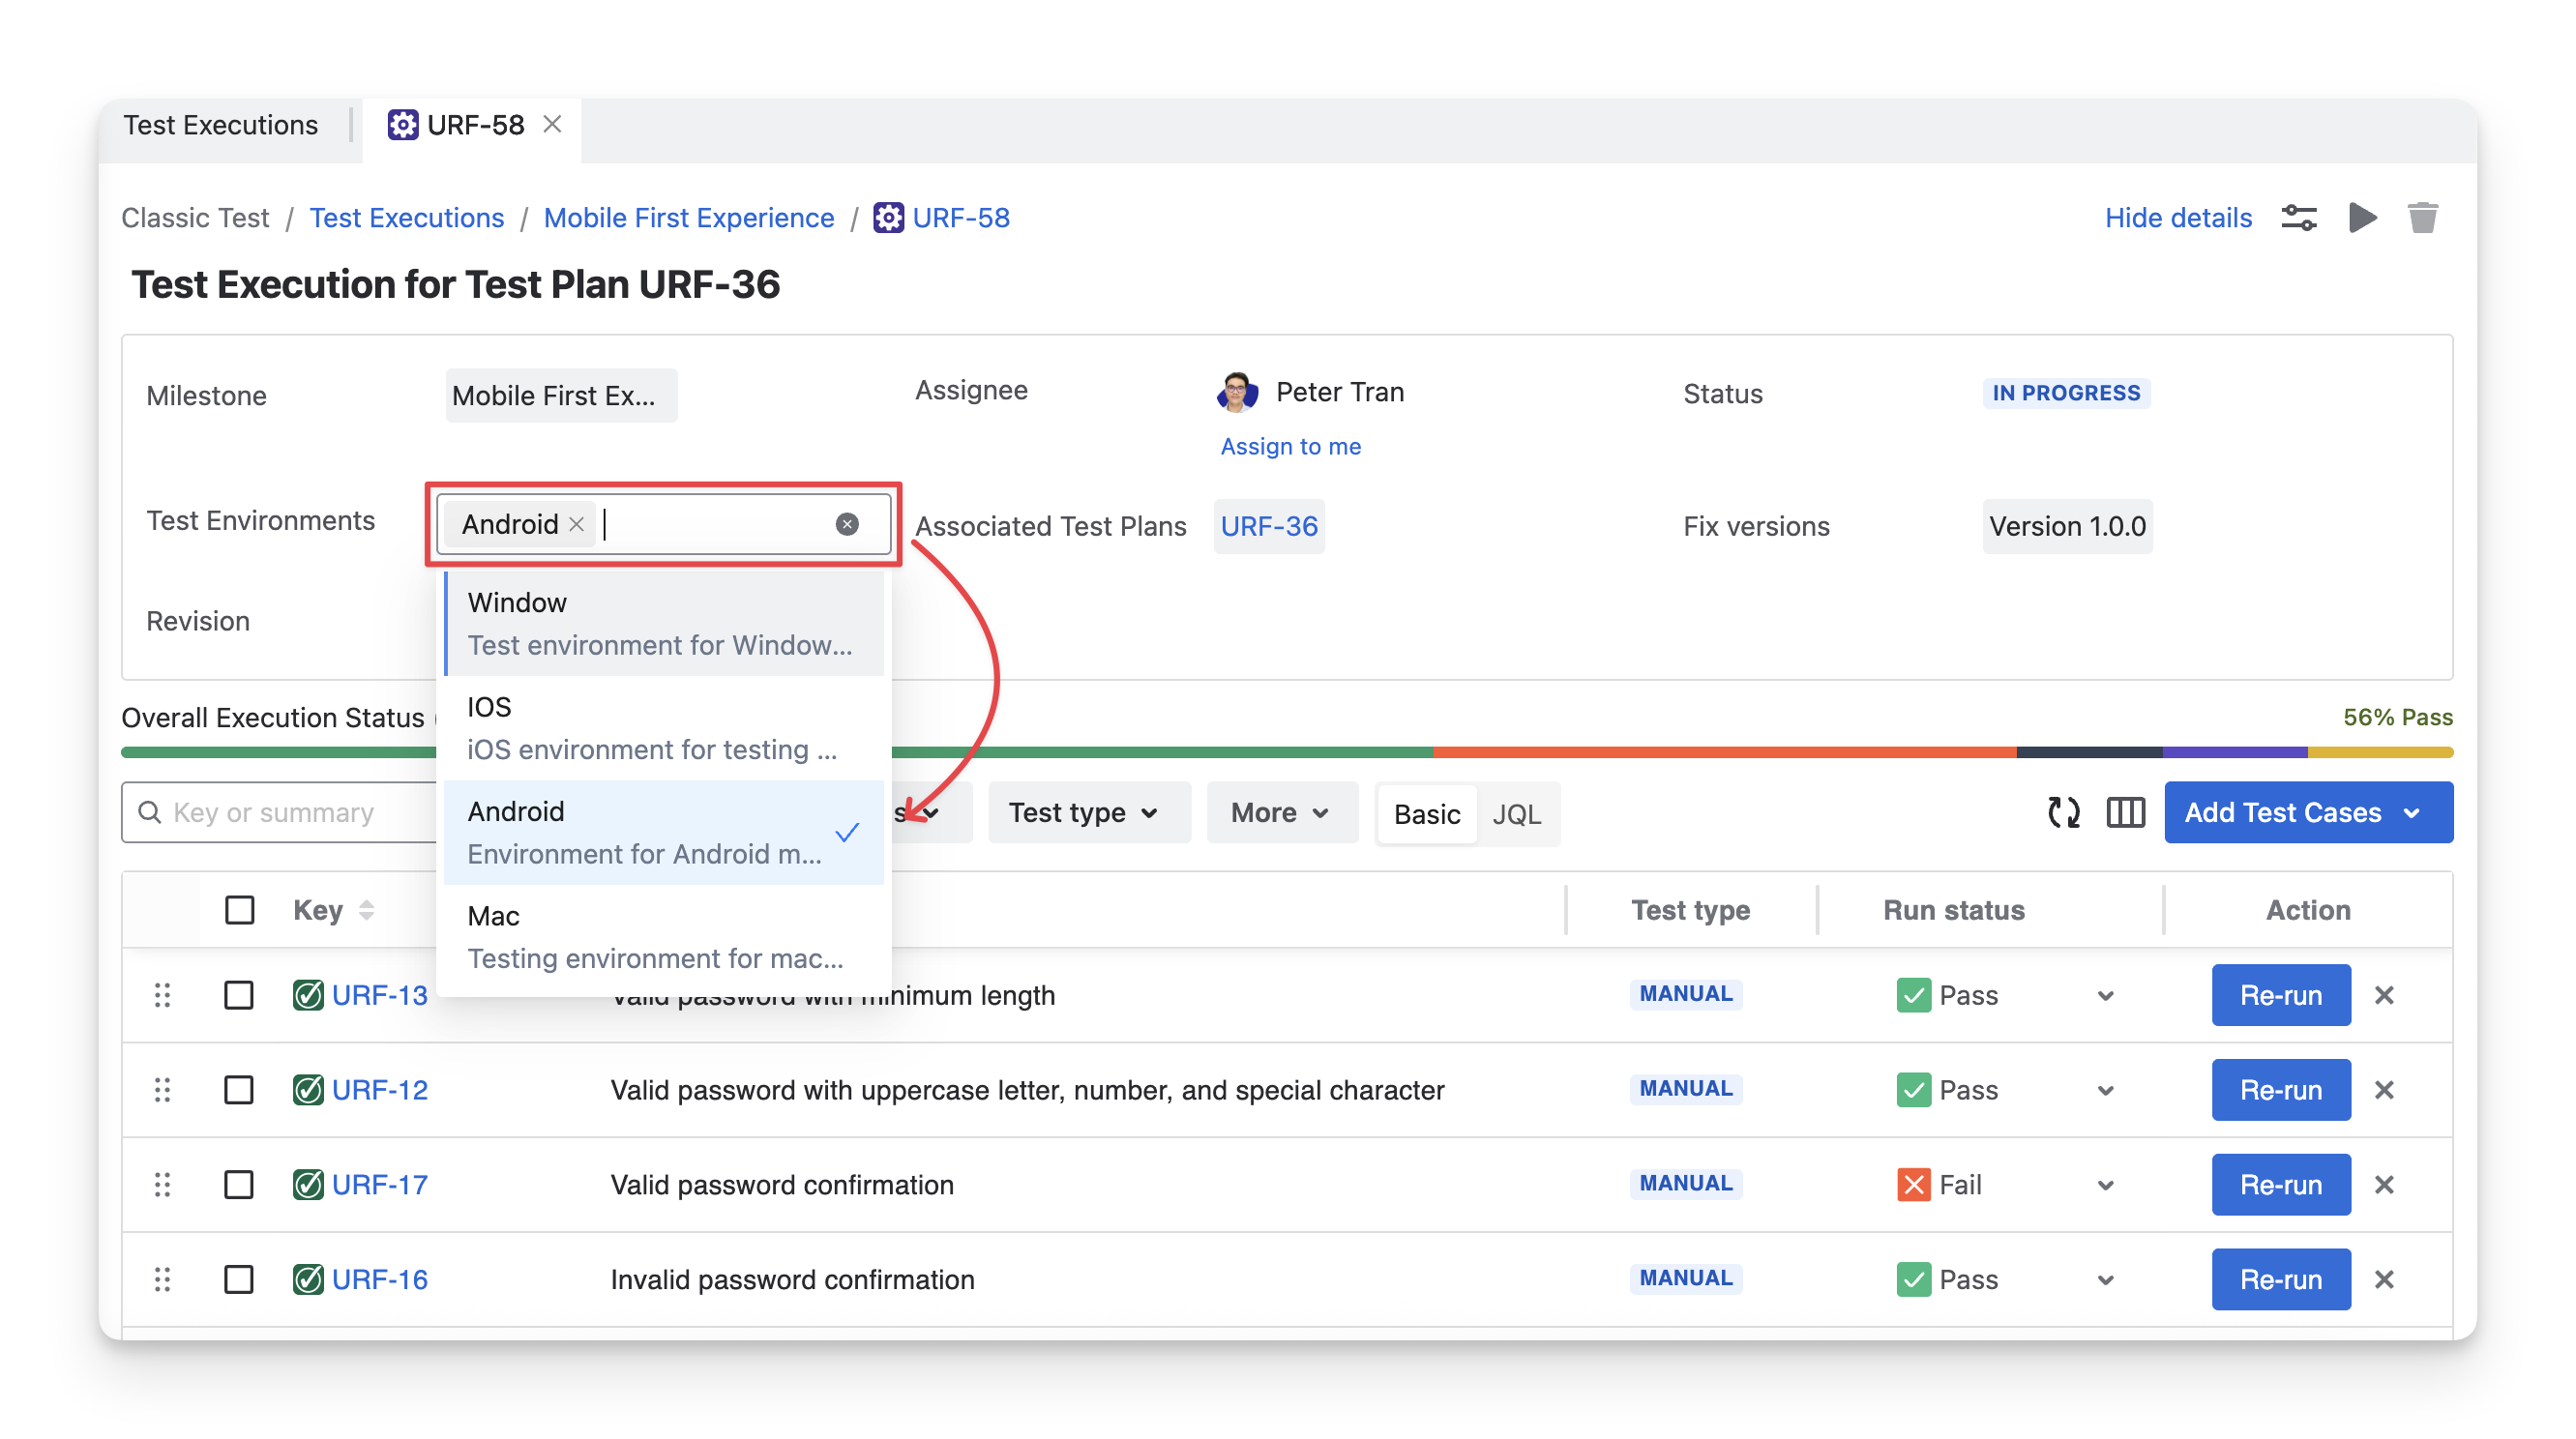
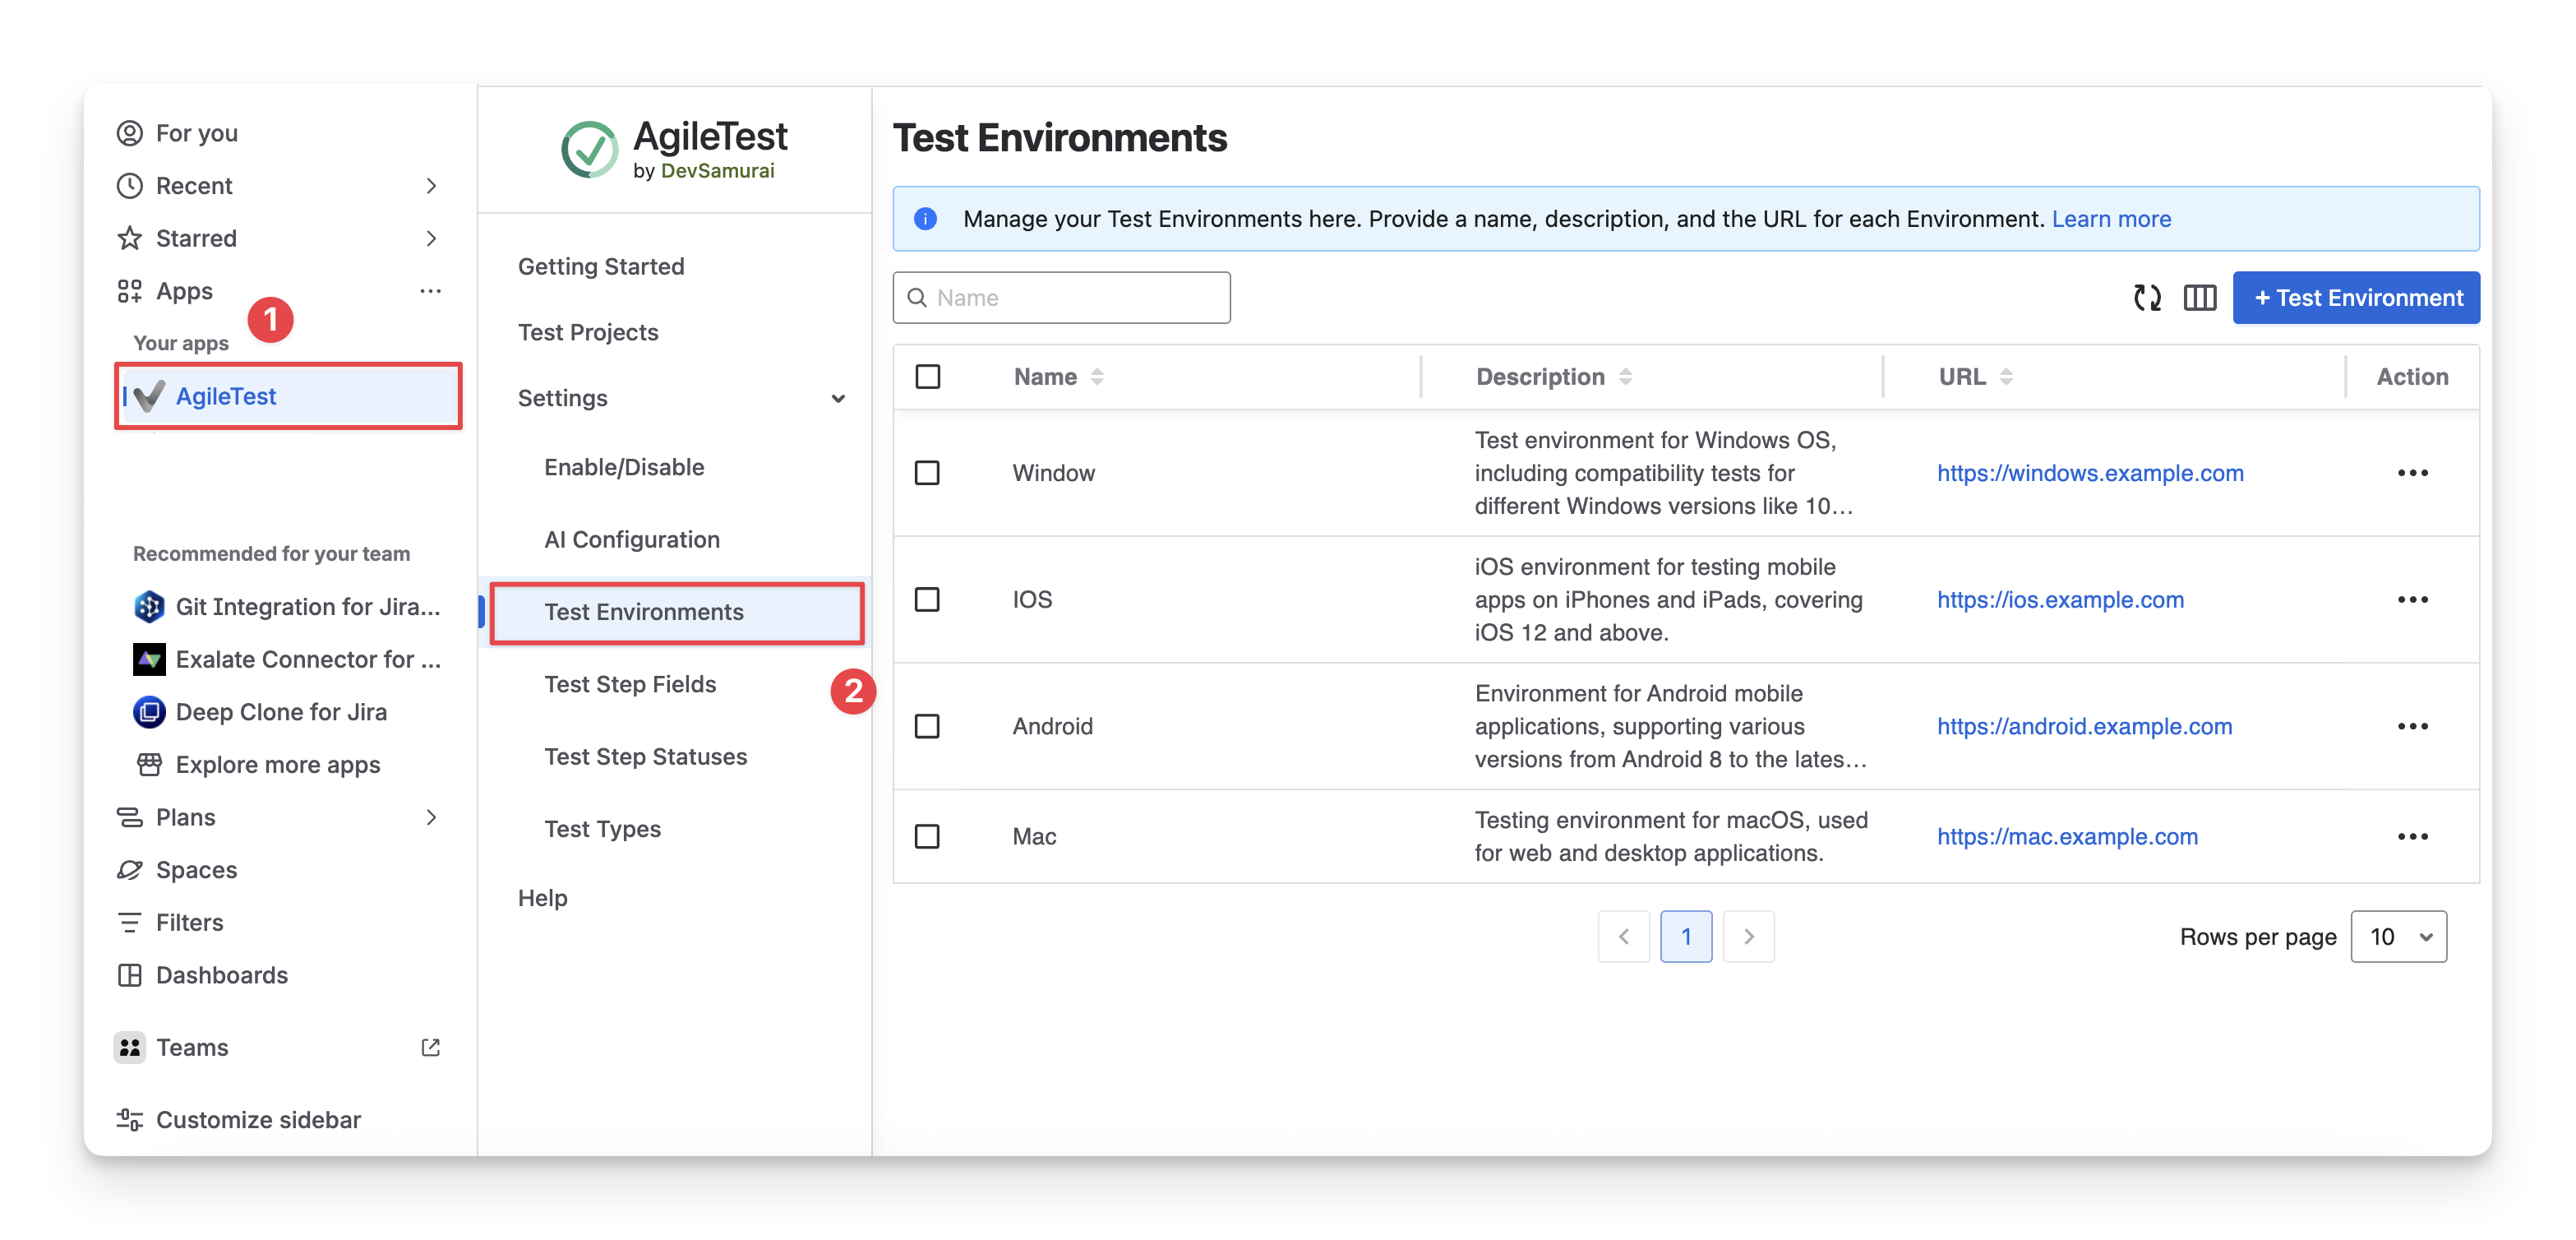
Initially, you need to configure the test environment information before you can select it.
-
On the Jira Menu sidebar, navigate to the App section and select AgileTest.
-
Navigate to the Settings section, choose the Test Environments.
-
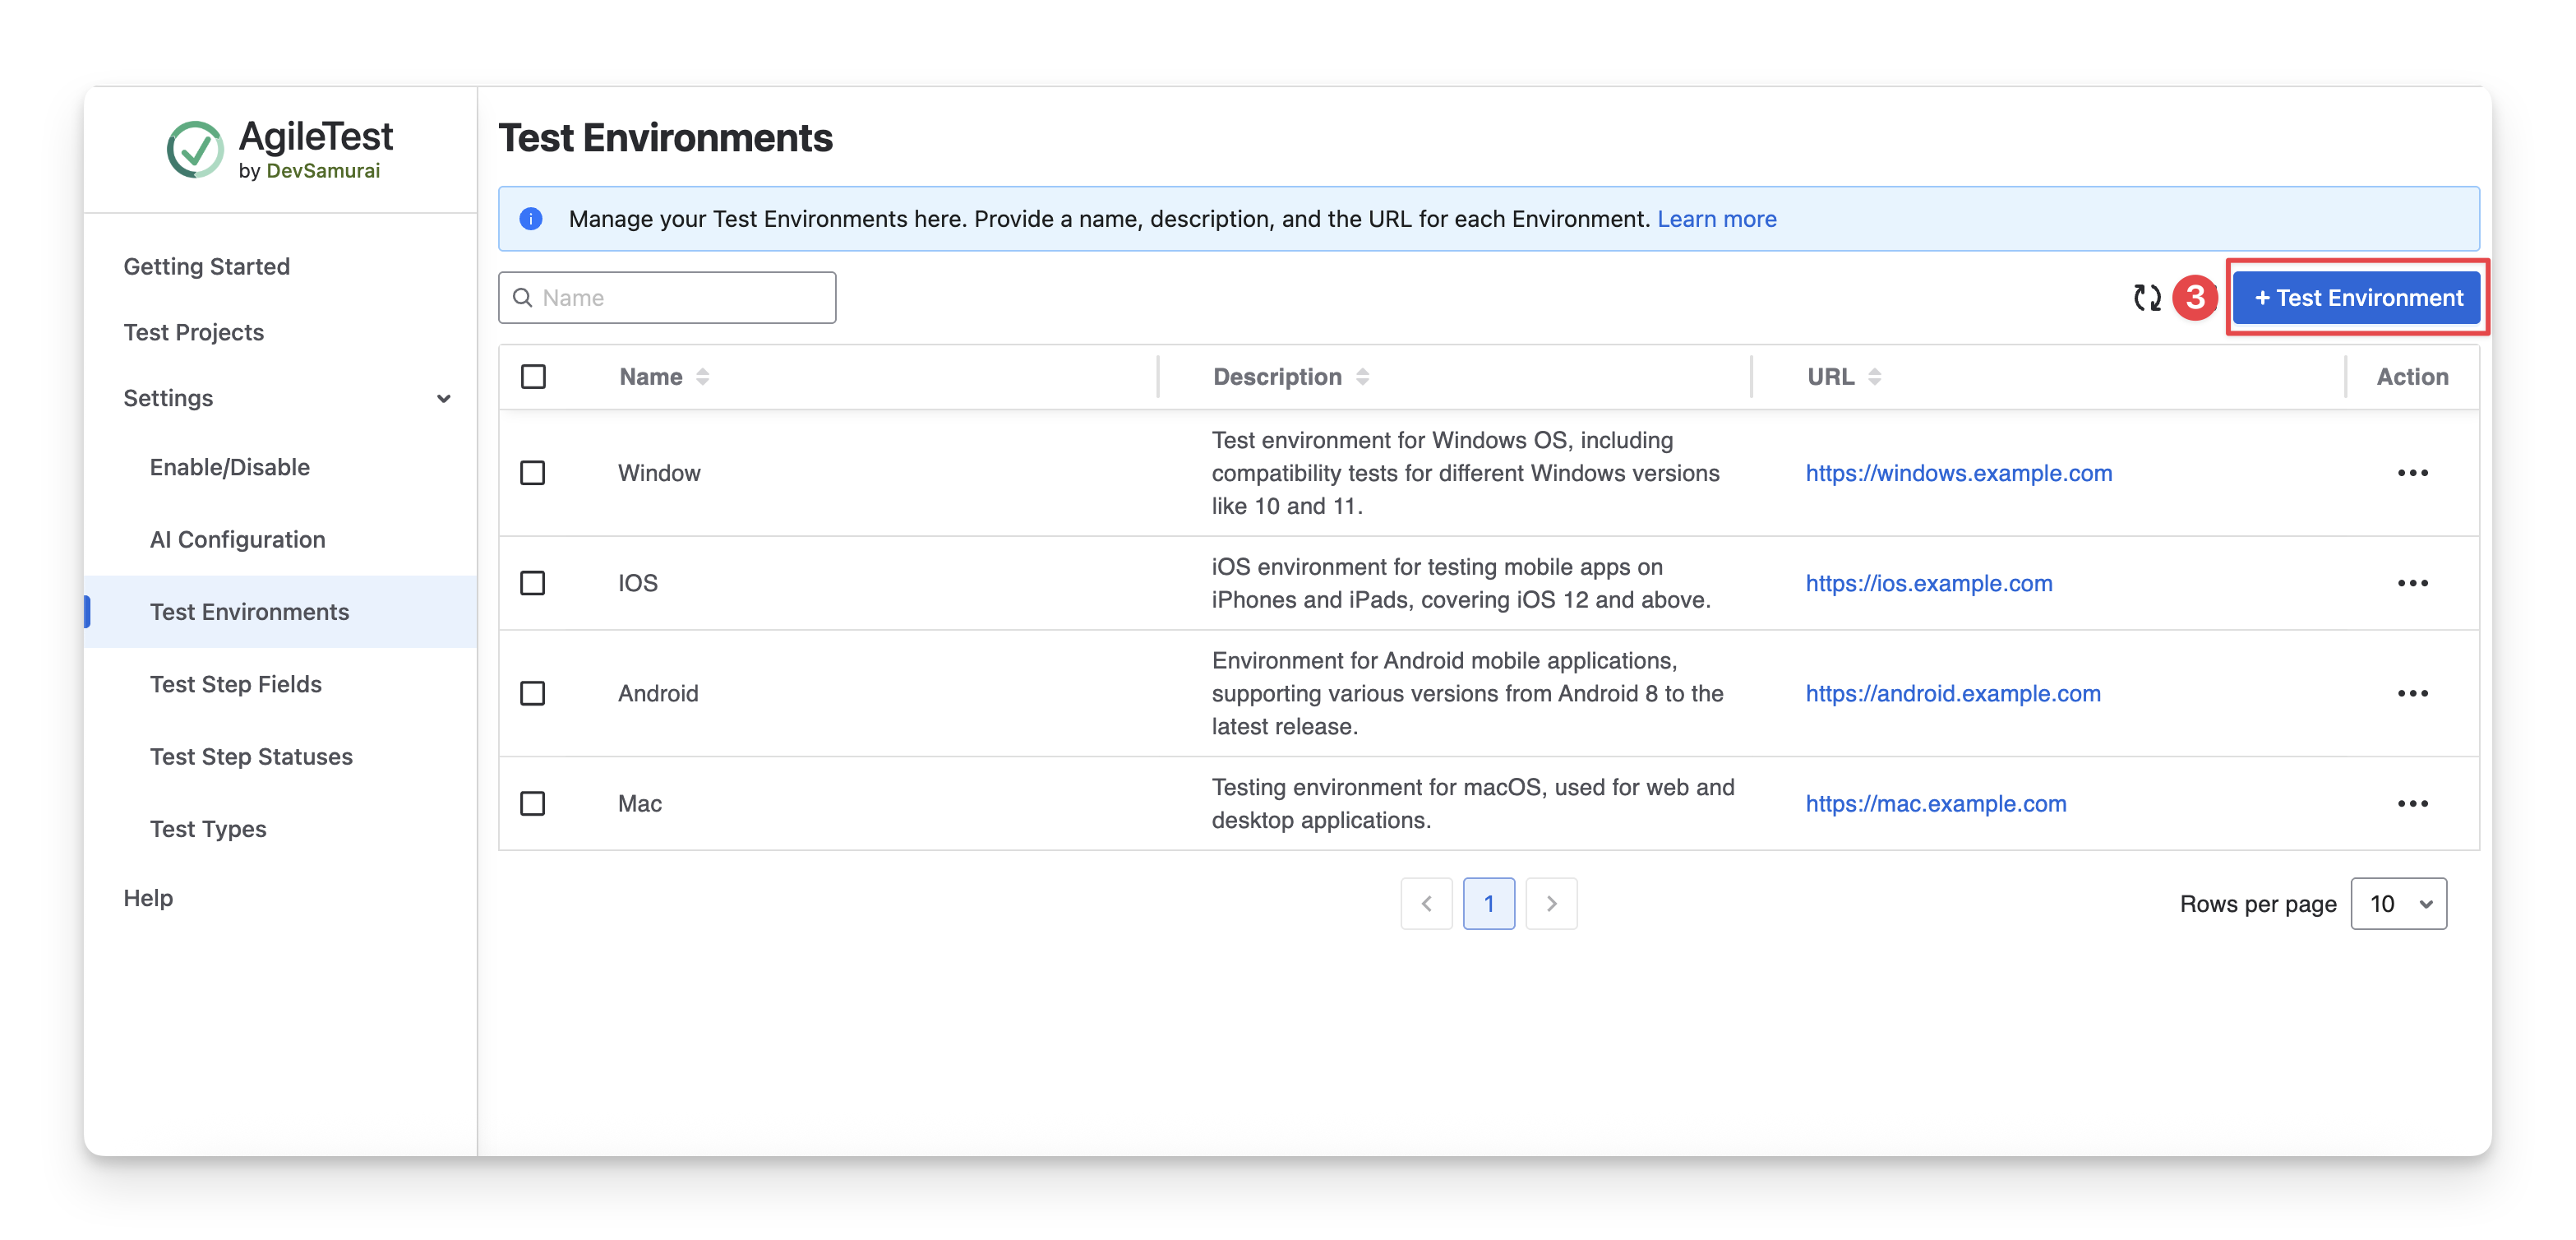
Click on the “+ Test Environment”. Here, you can edit the name, description, and URL for each test environment.
Learn more about Test environment.
1.5 Associated Test Plan
The Associated Test Plan displays the test plan that is linked to the current test execution. This helps you track and manage test execution progress within the context of the related test plan.
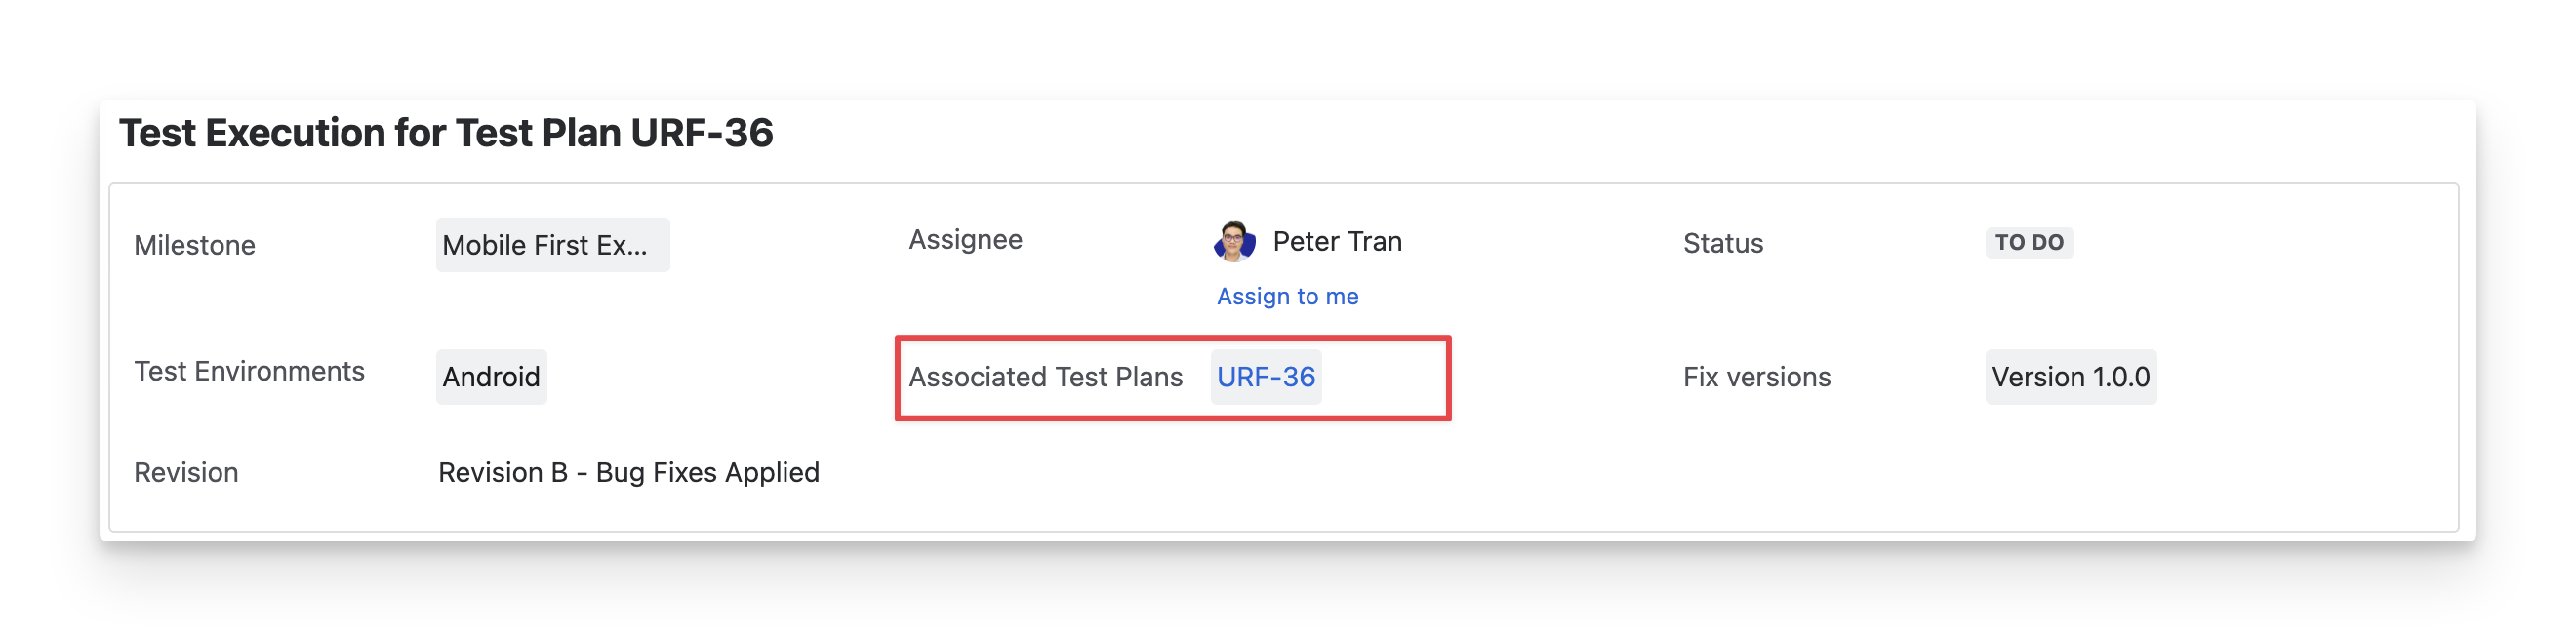
To change the linking relationship with other test plans, click on the dropdown and select the preferred test plans.
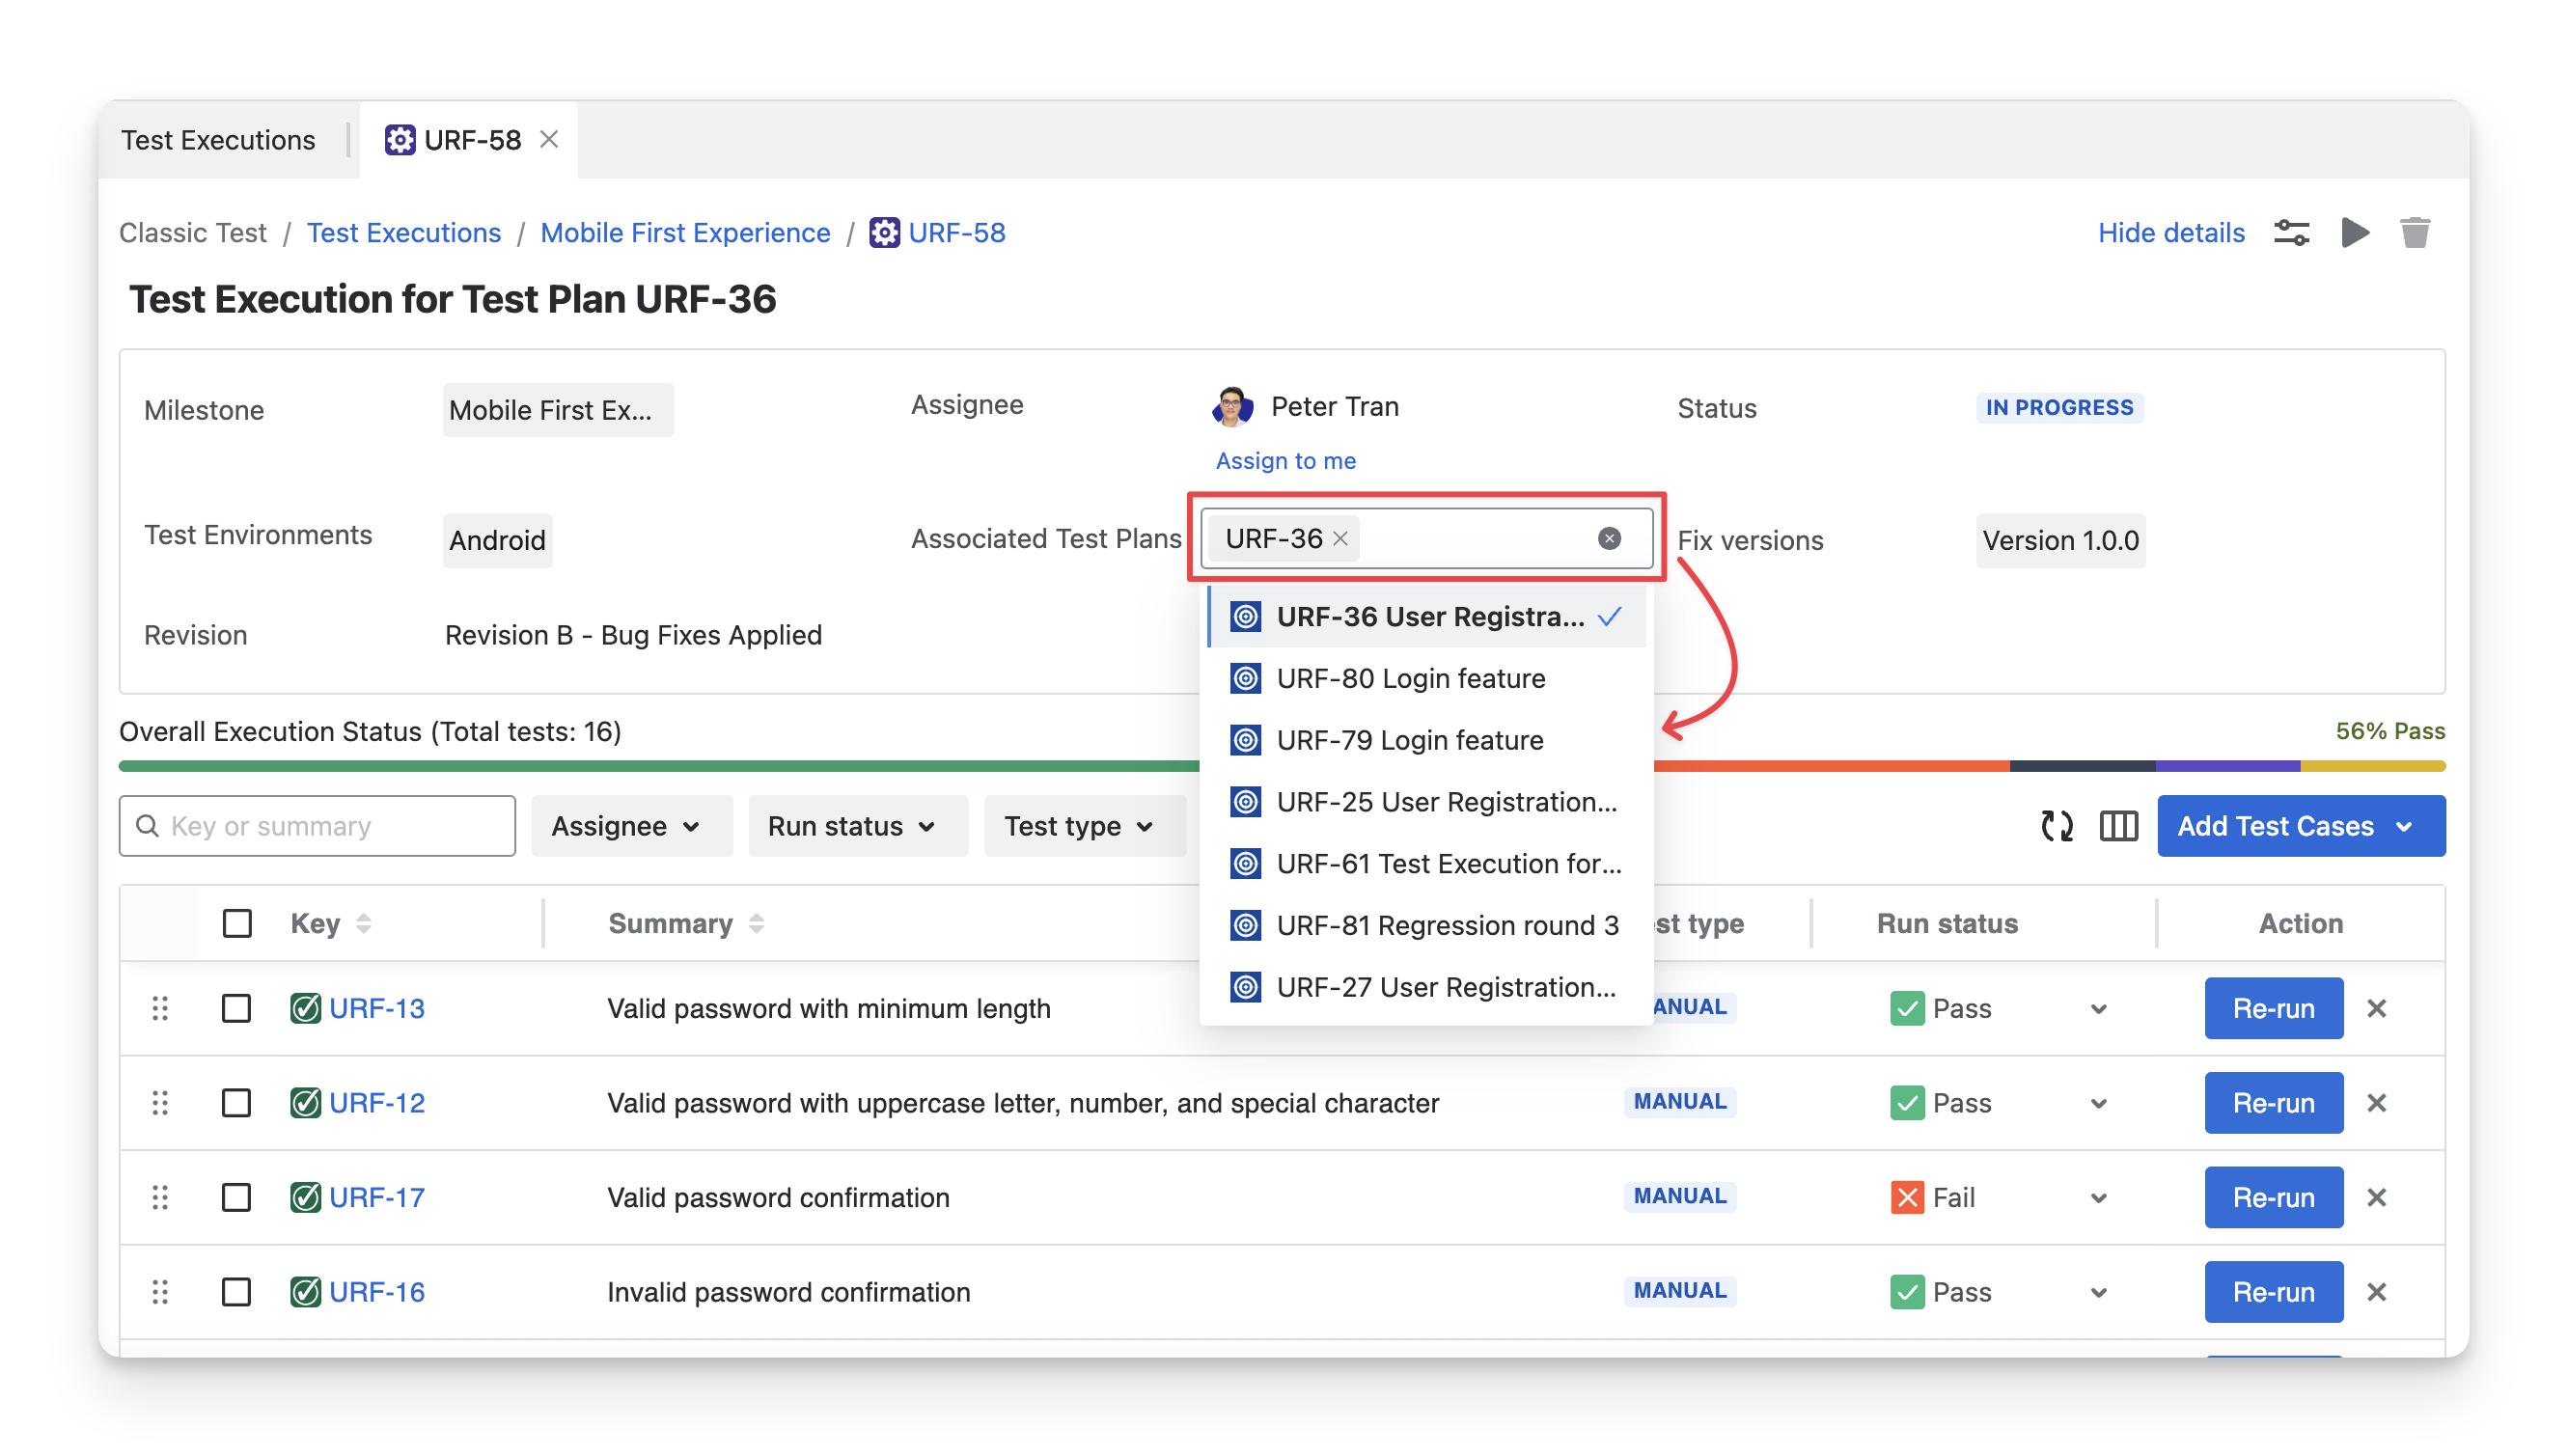
You need to create AgileTest Test Plans in advance to have test plan options available for your selection.
1.6 Fix Versions
The Fix Version displays the Jira version in which the test execution is intended to be fixed or completed. This helps track which version or release the test execution is associated with.
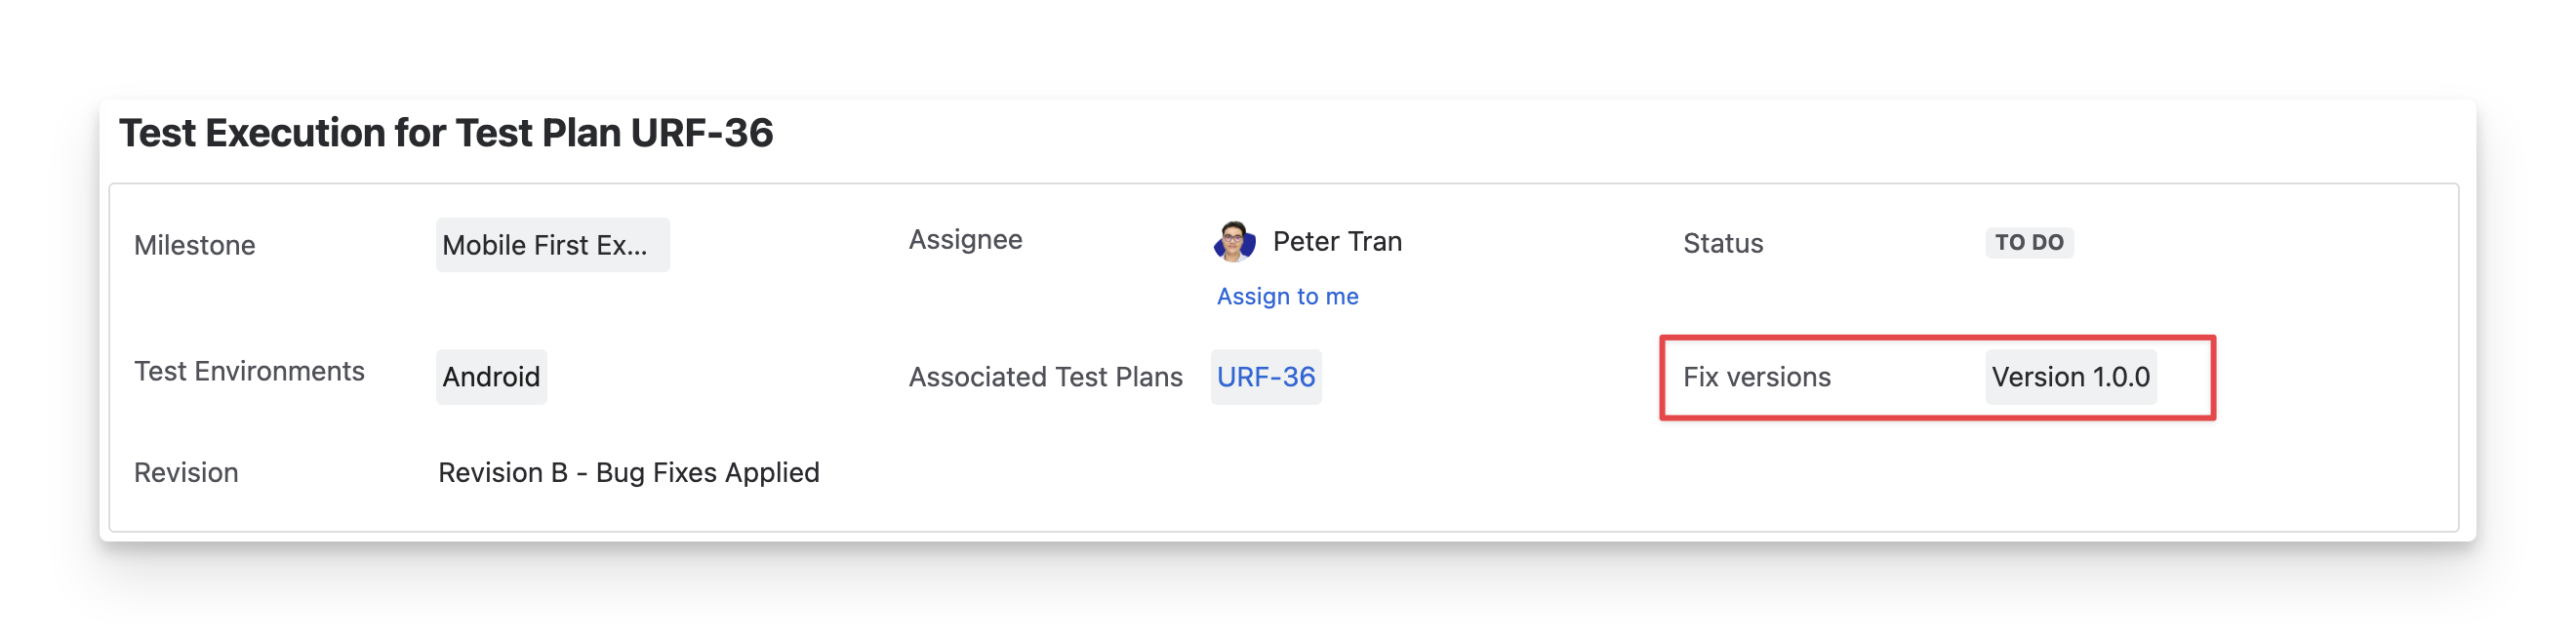
To change the fix version, select the dropdown to associate the test execution with a different version.
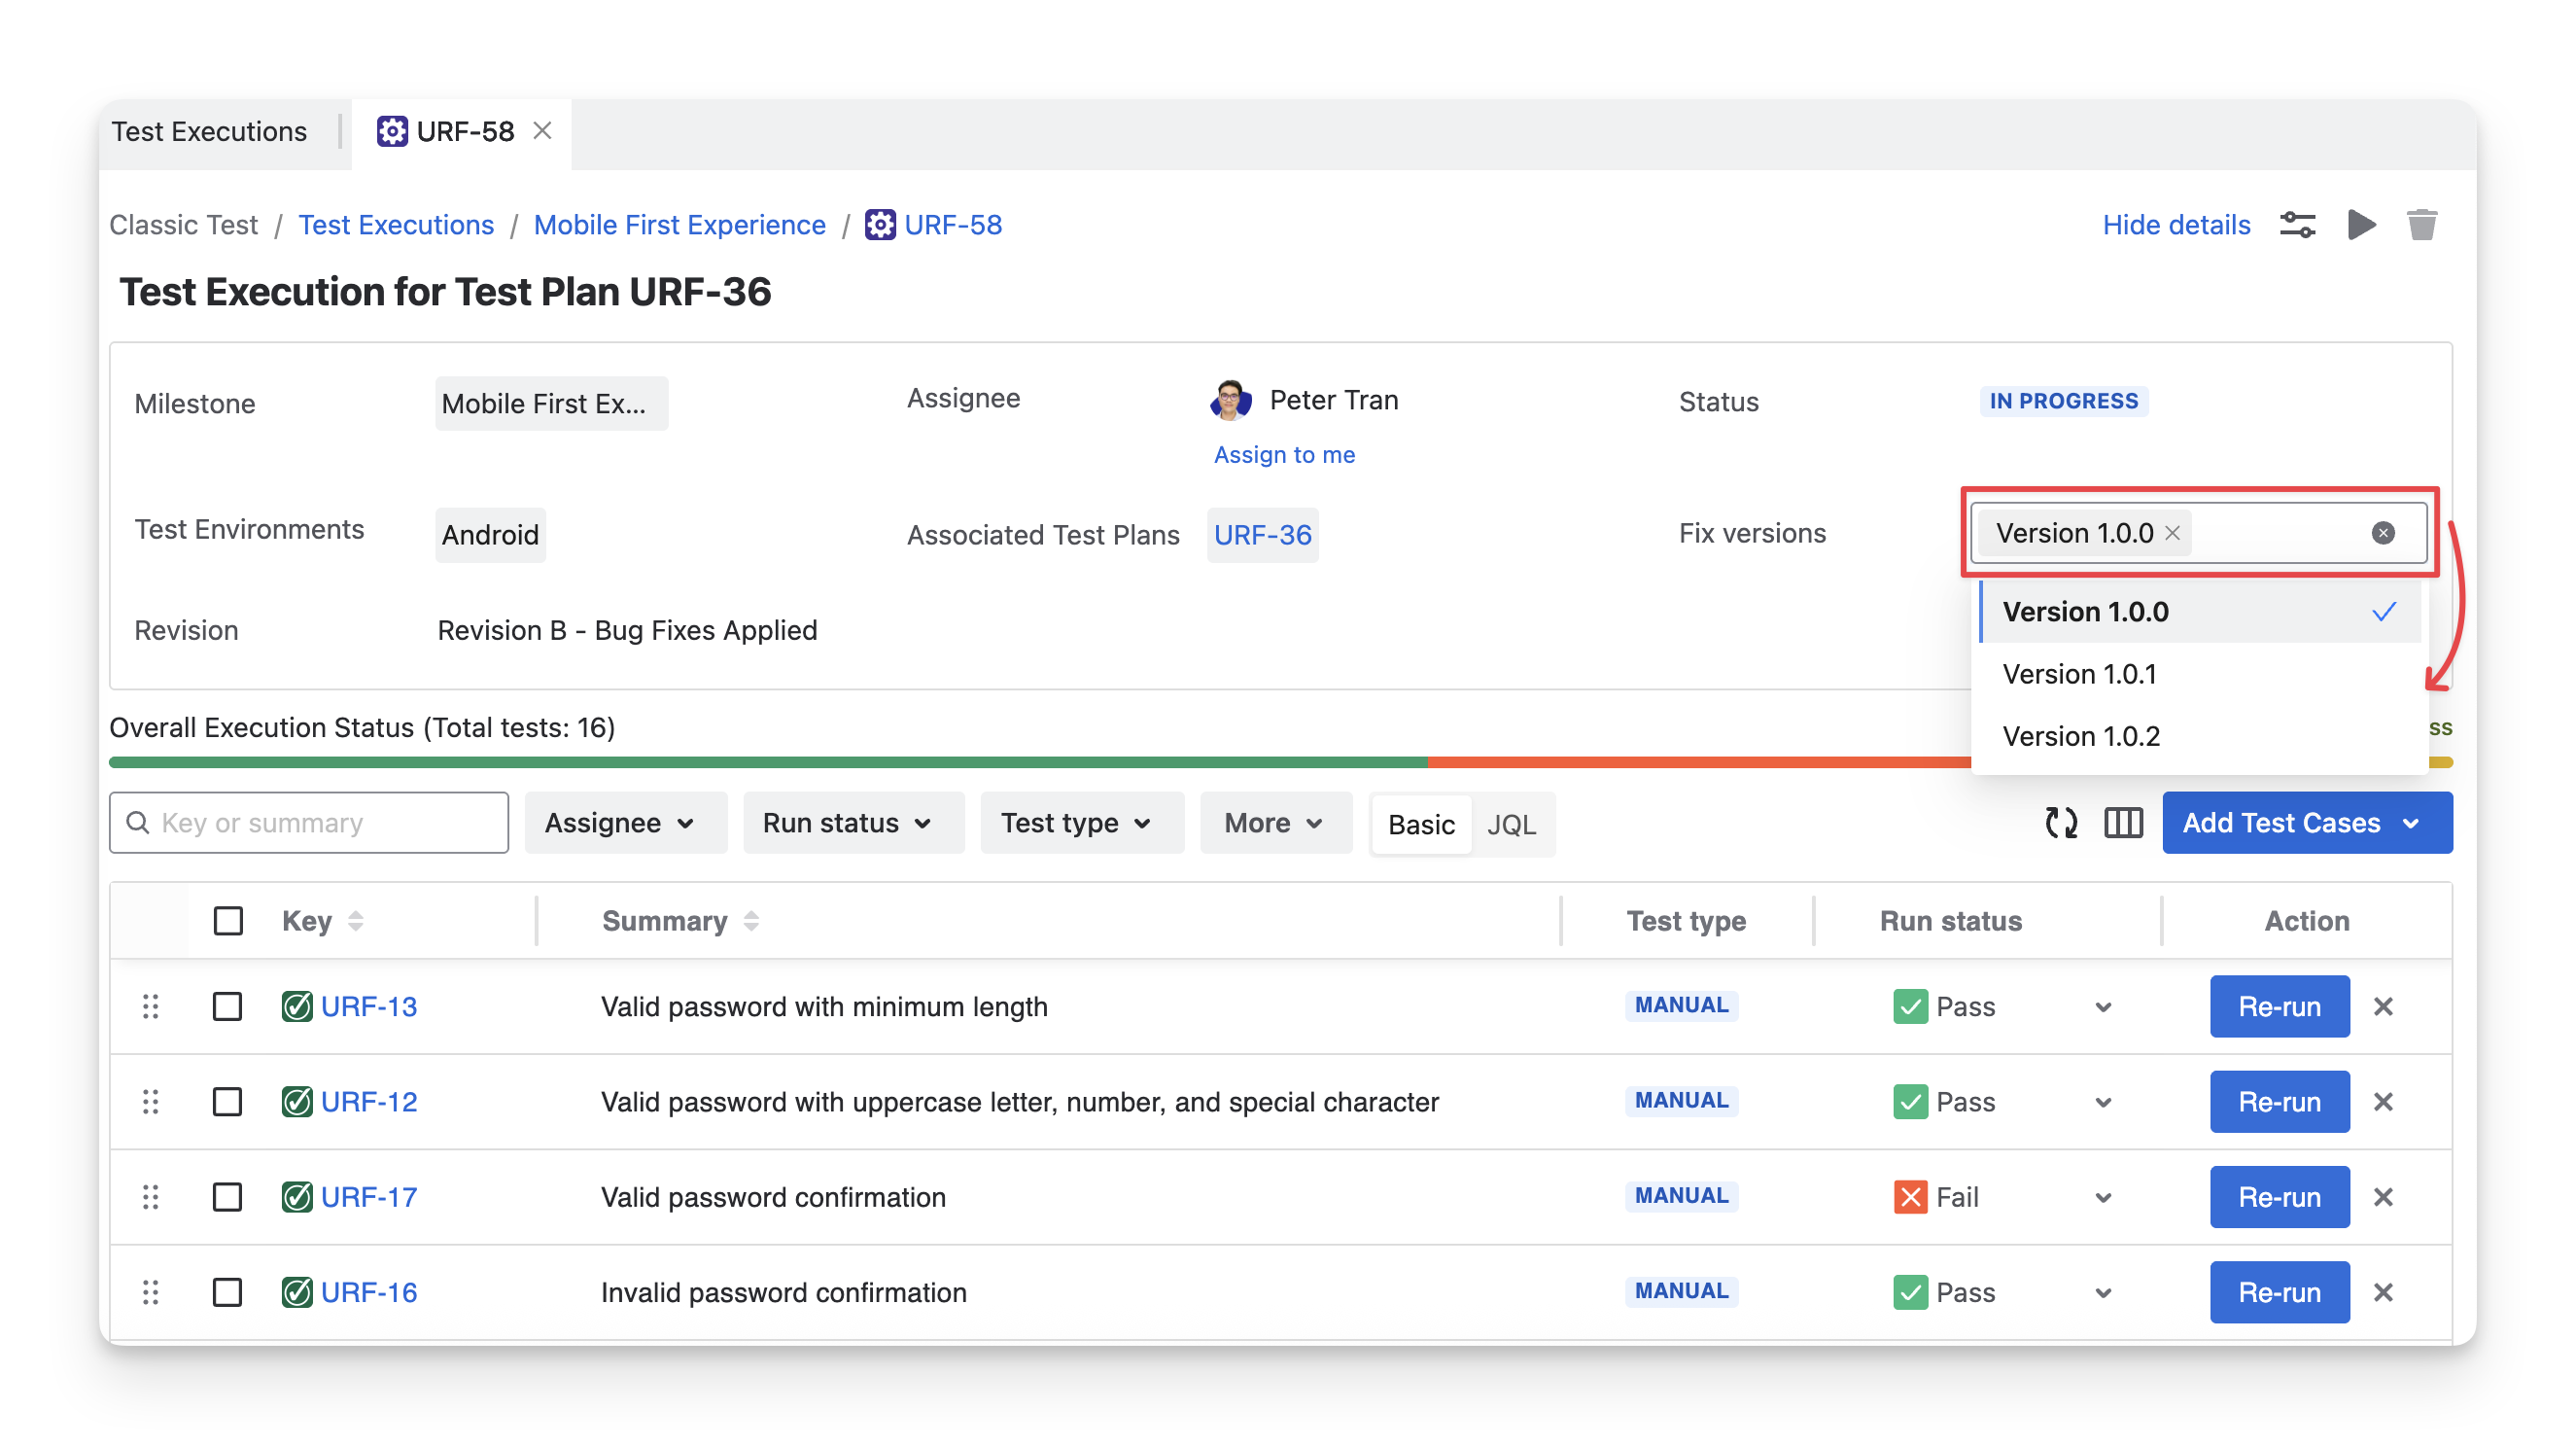
You need to create Jira Fix versions in advance to have these options available for your selection.
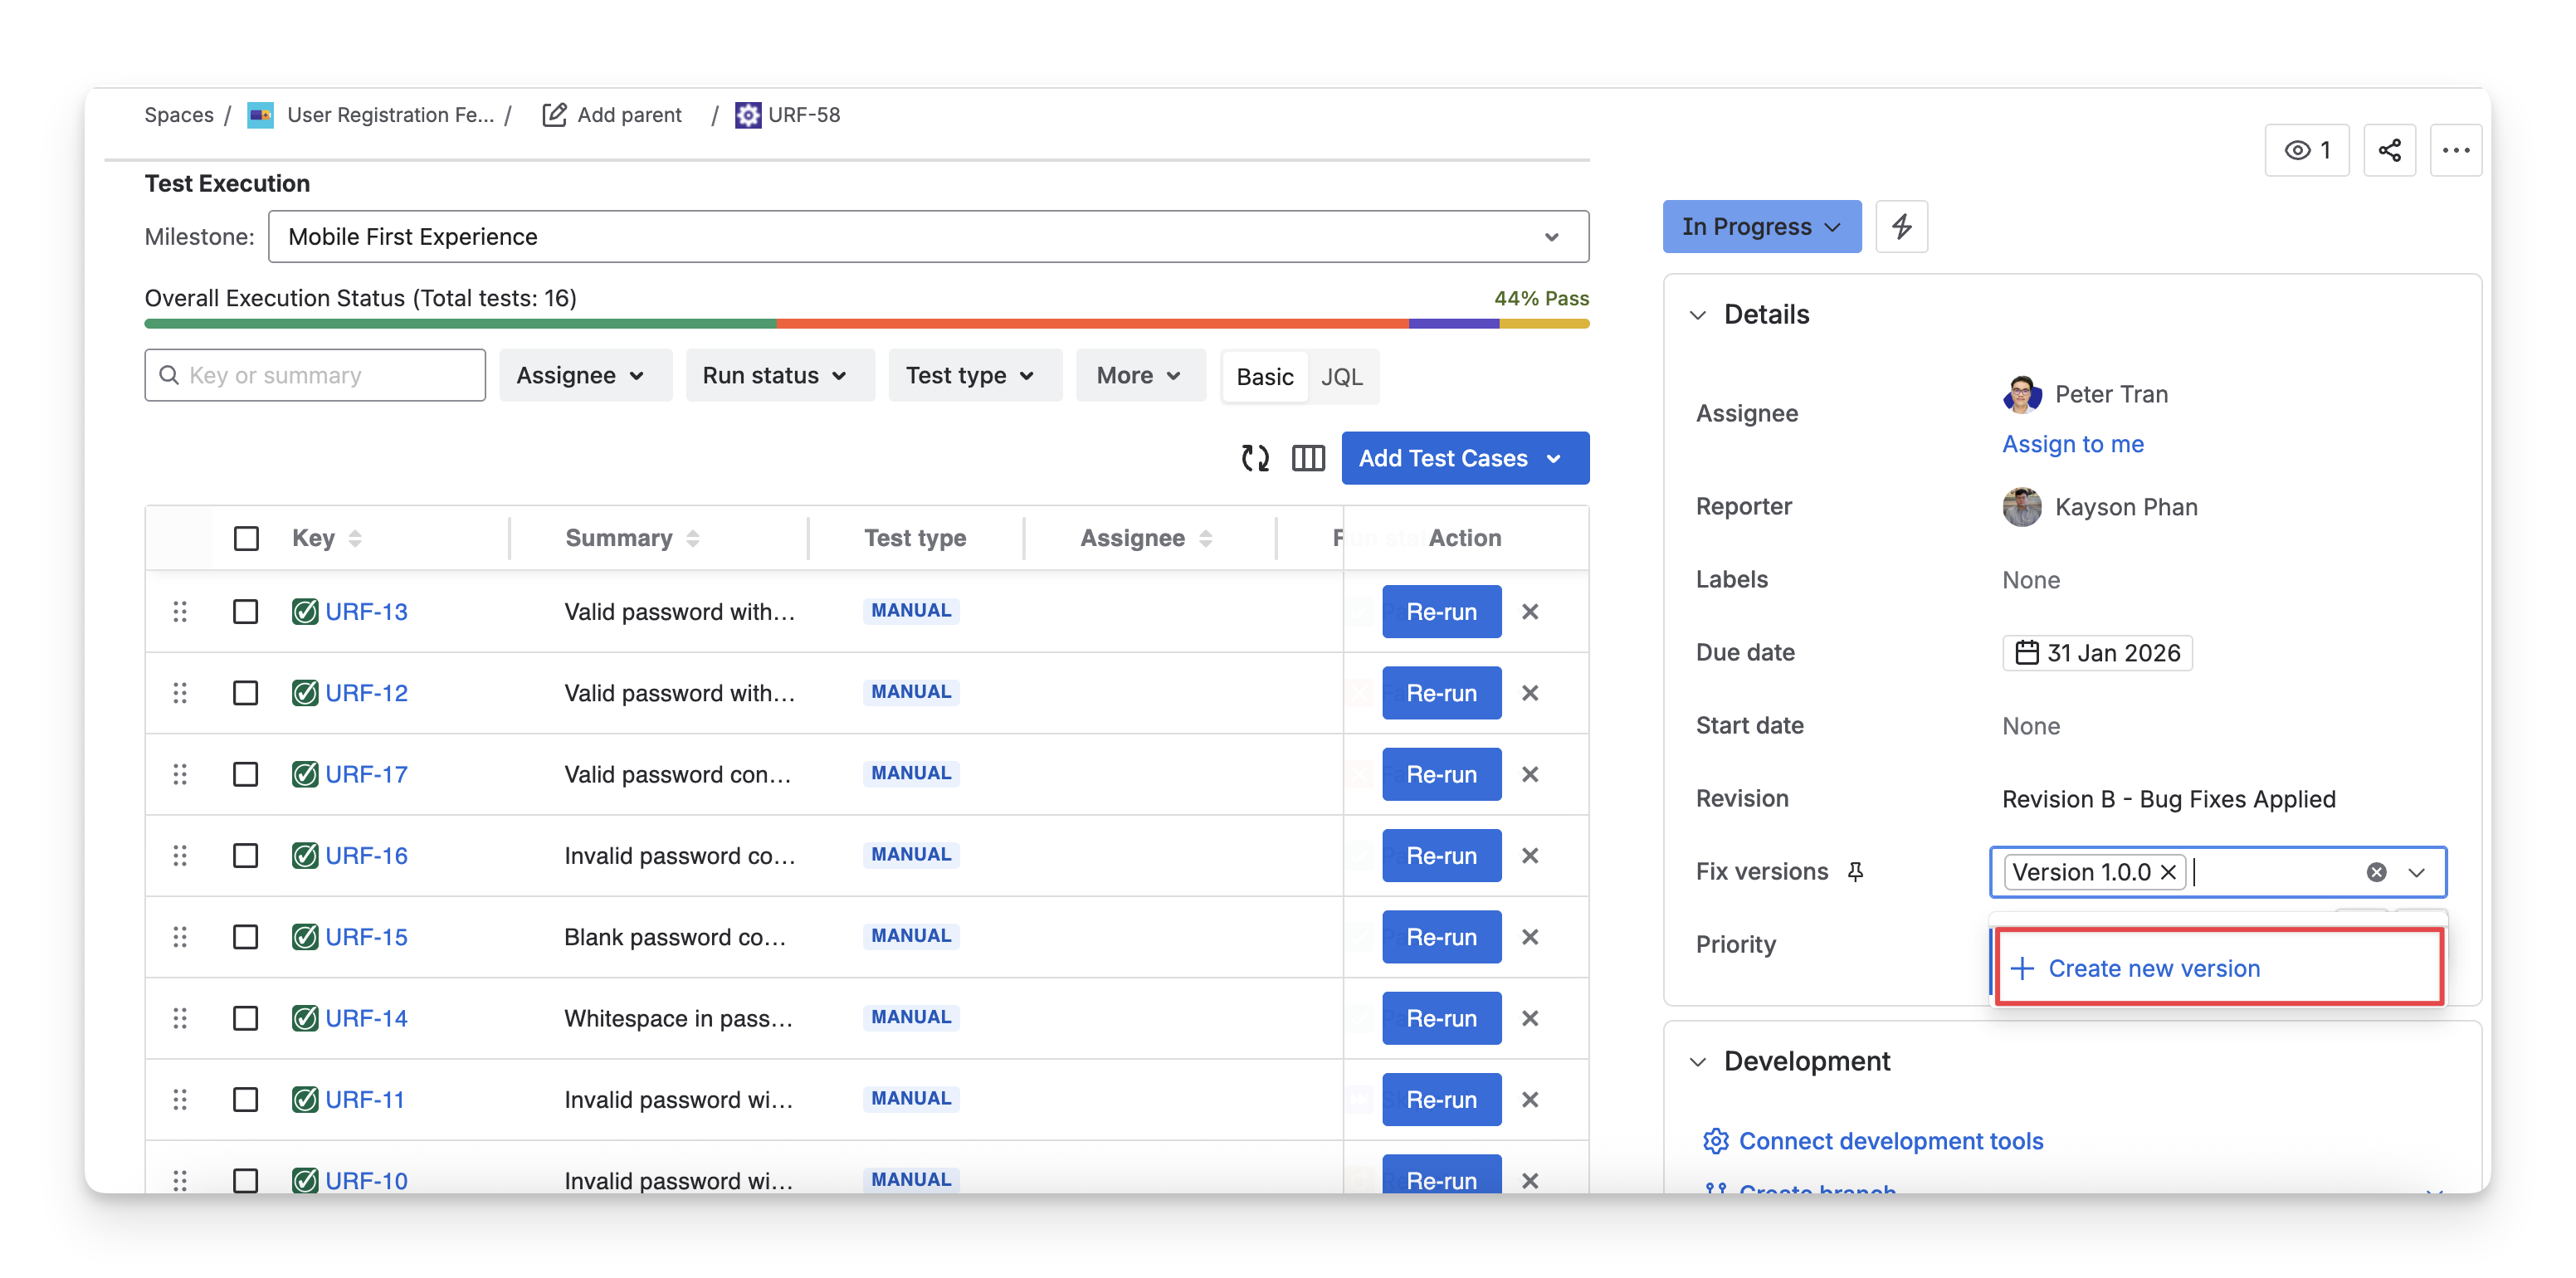
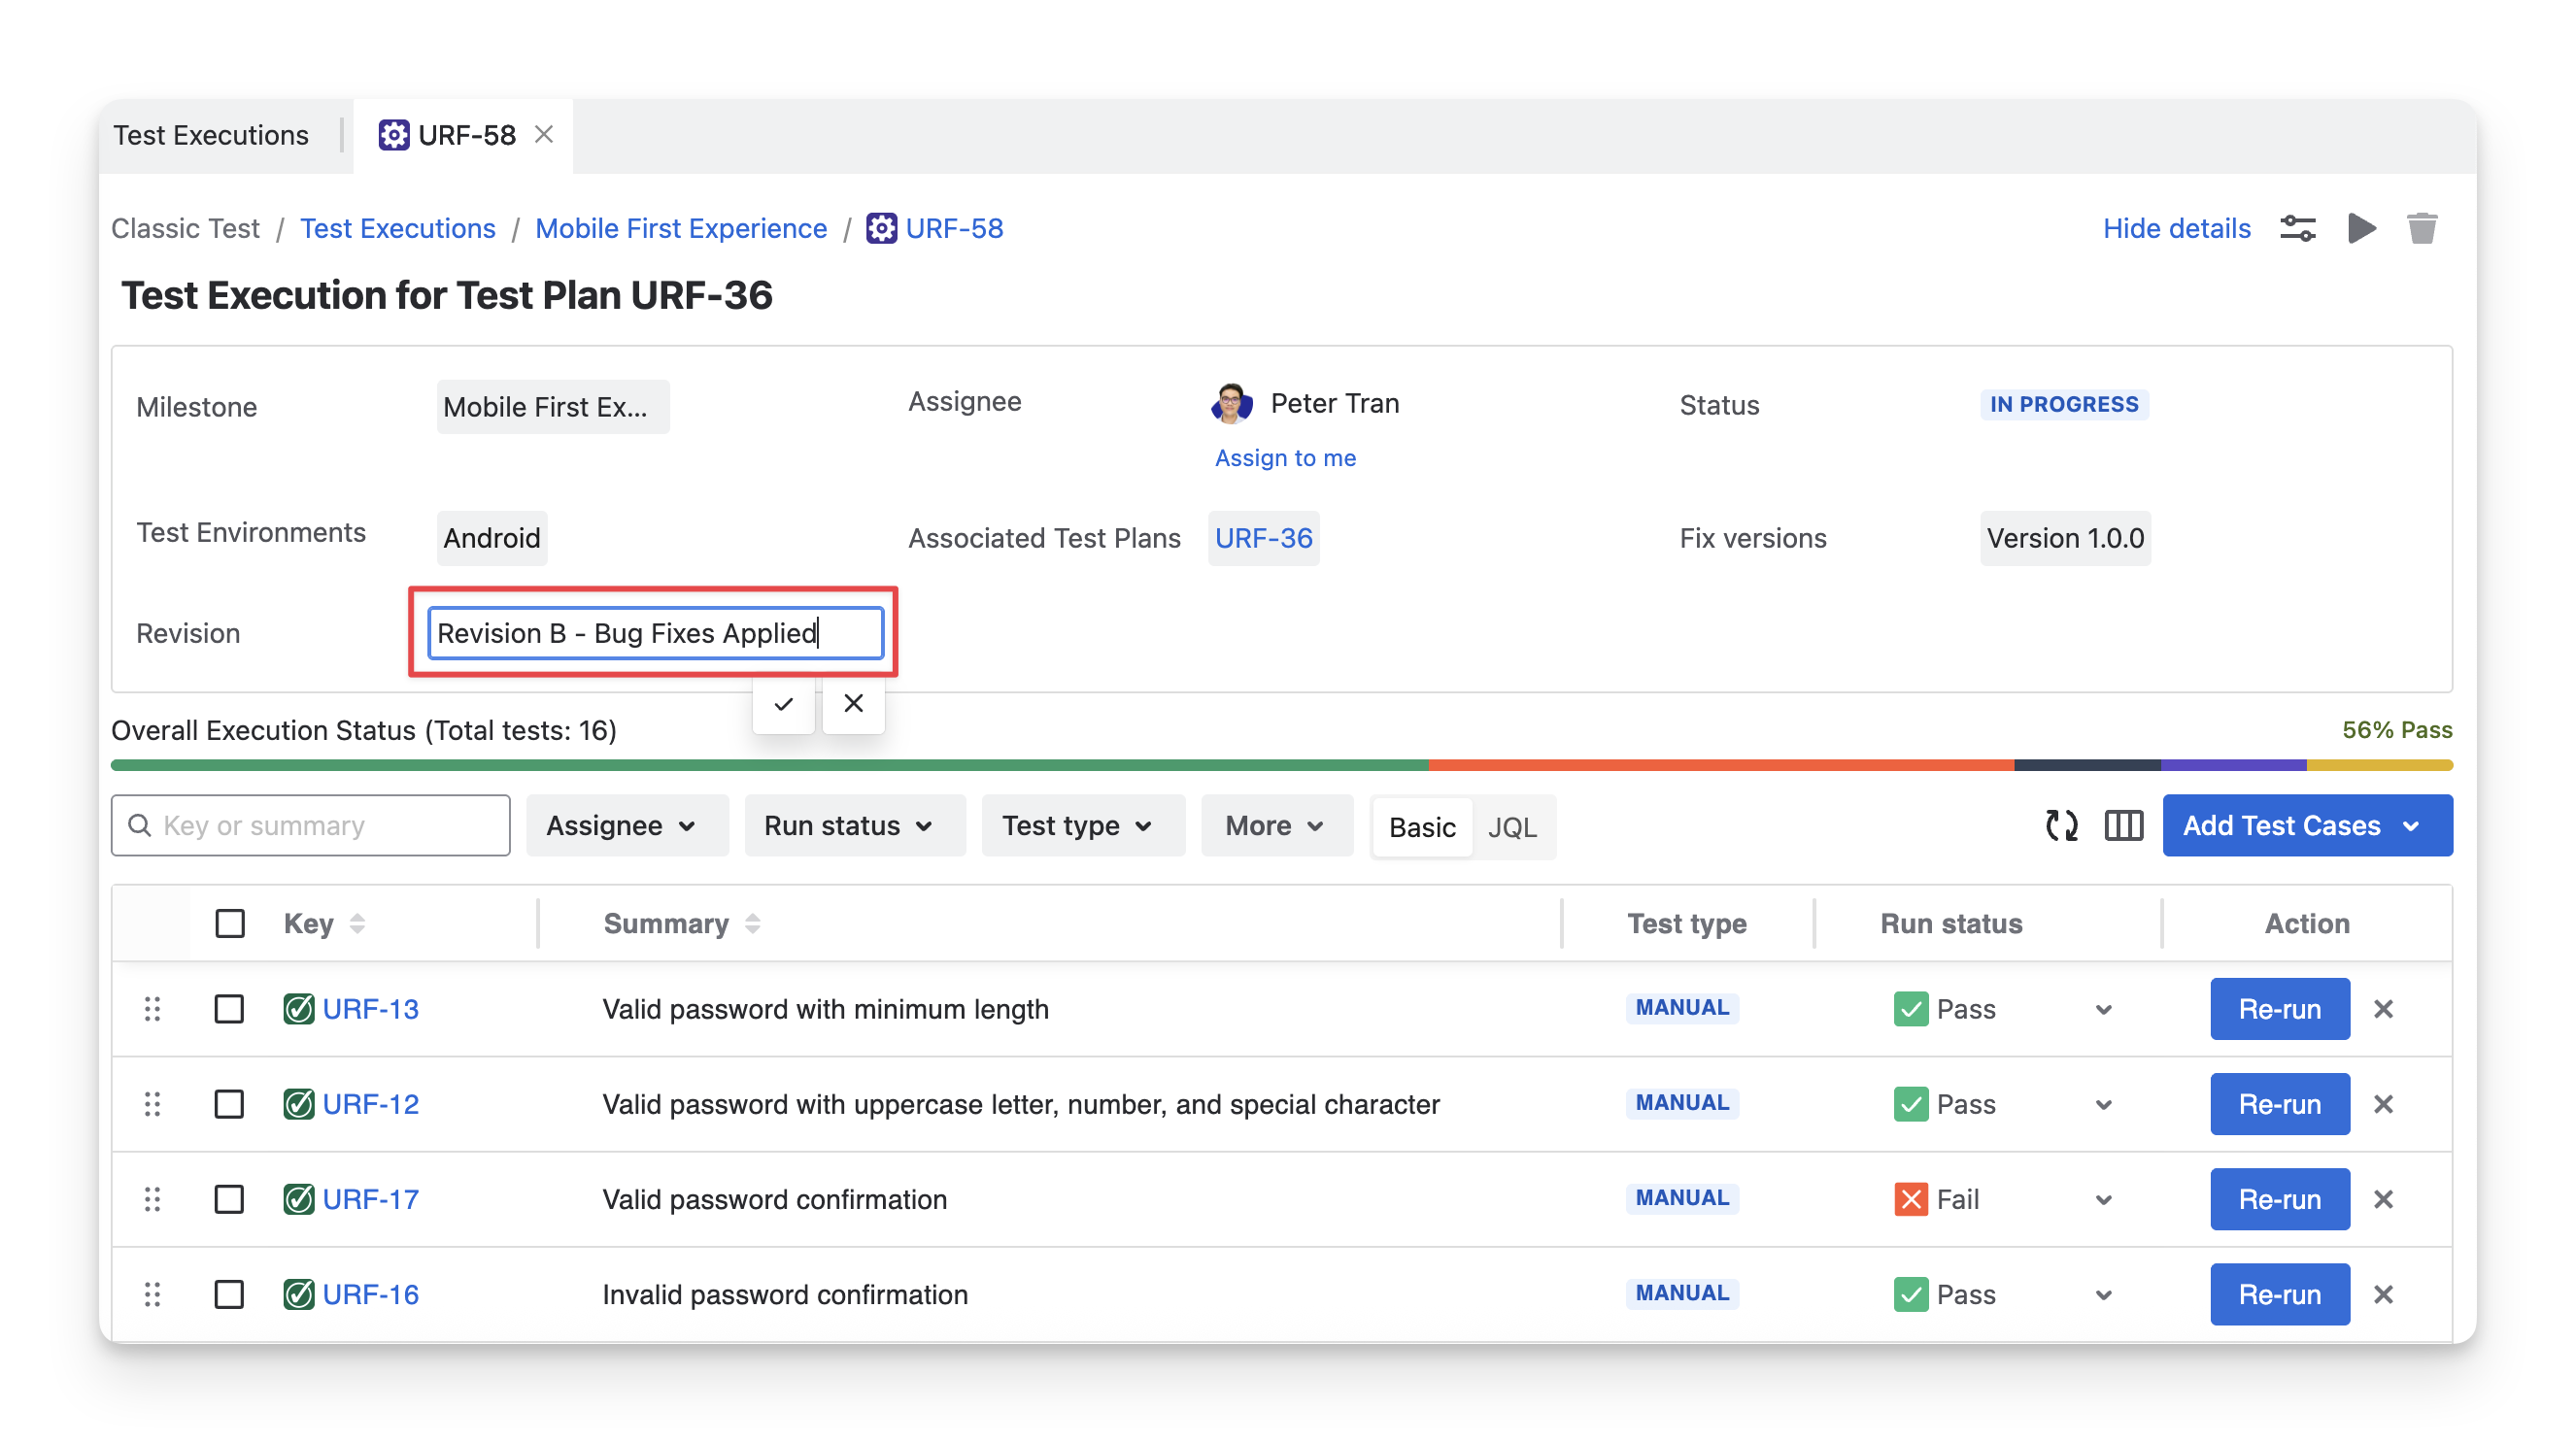
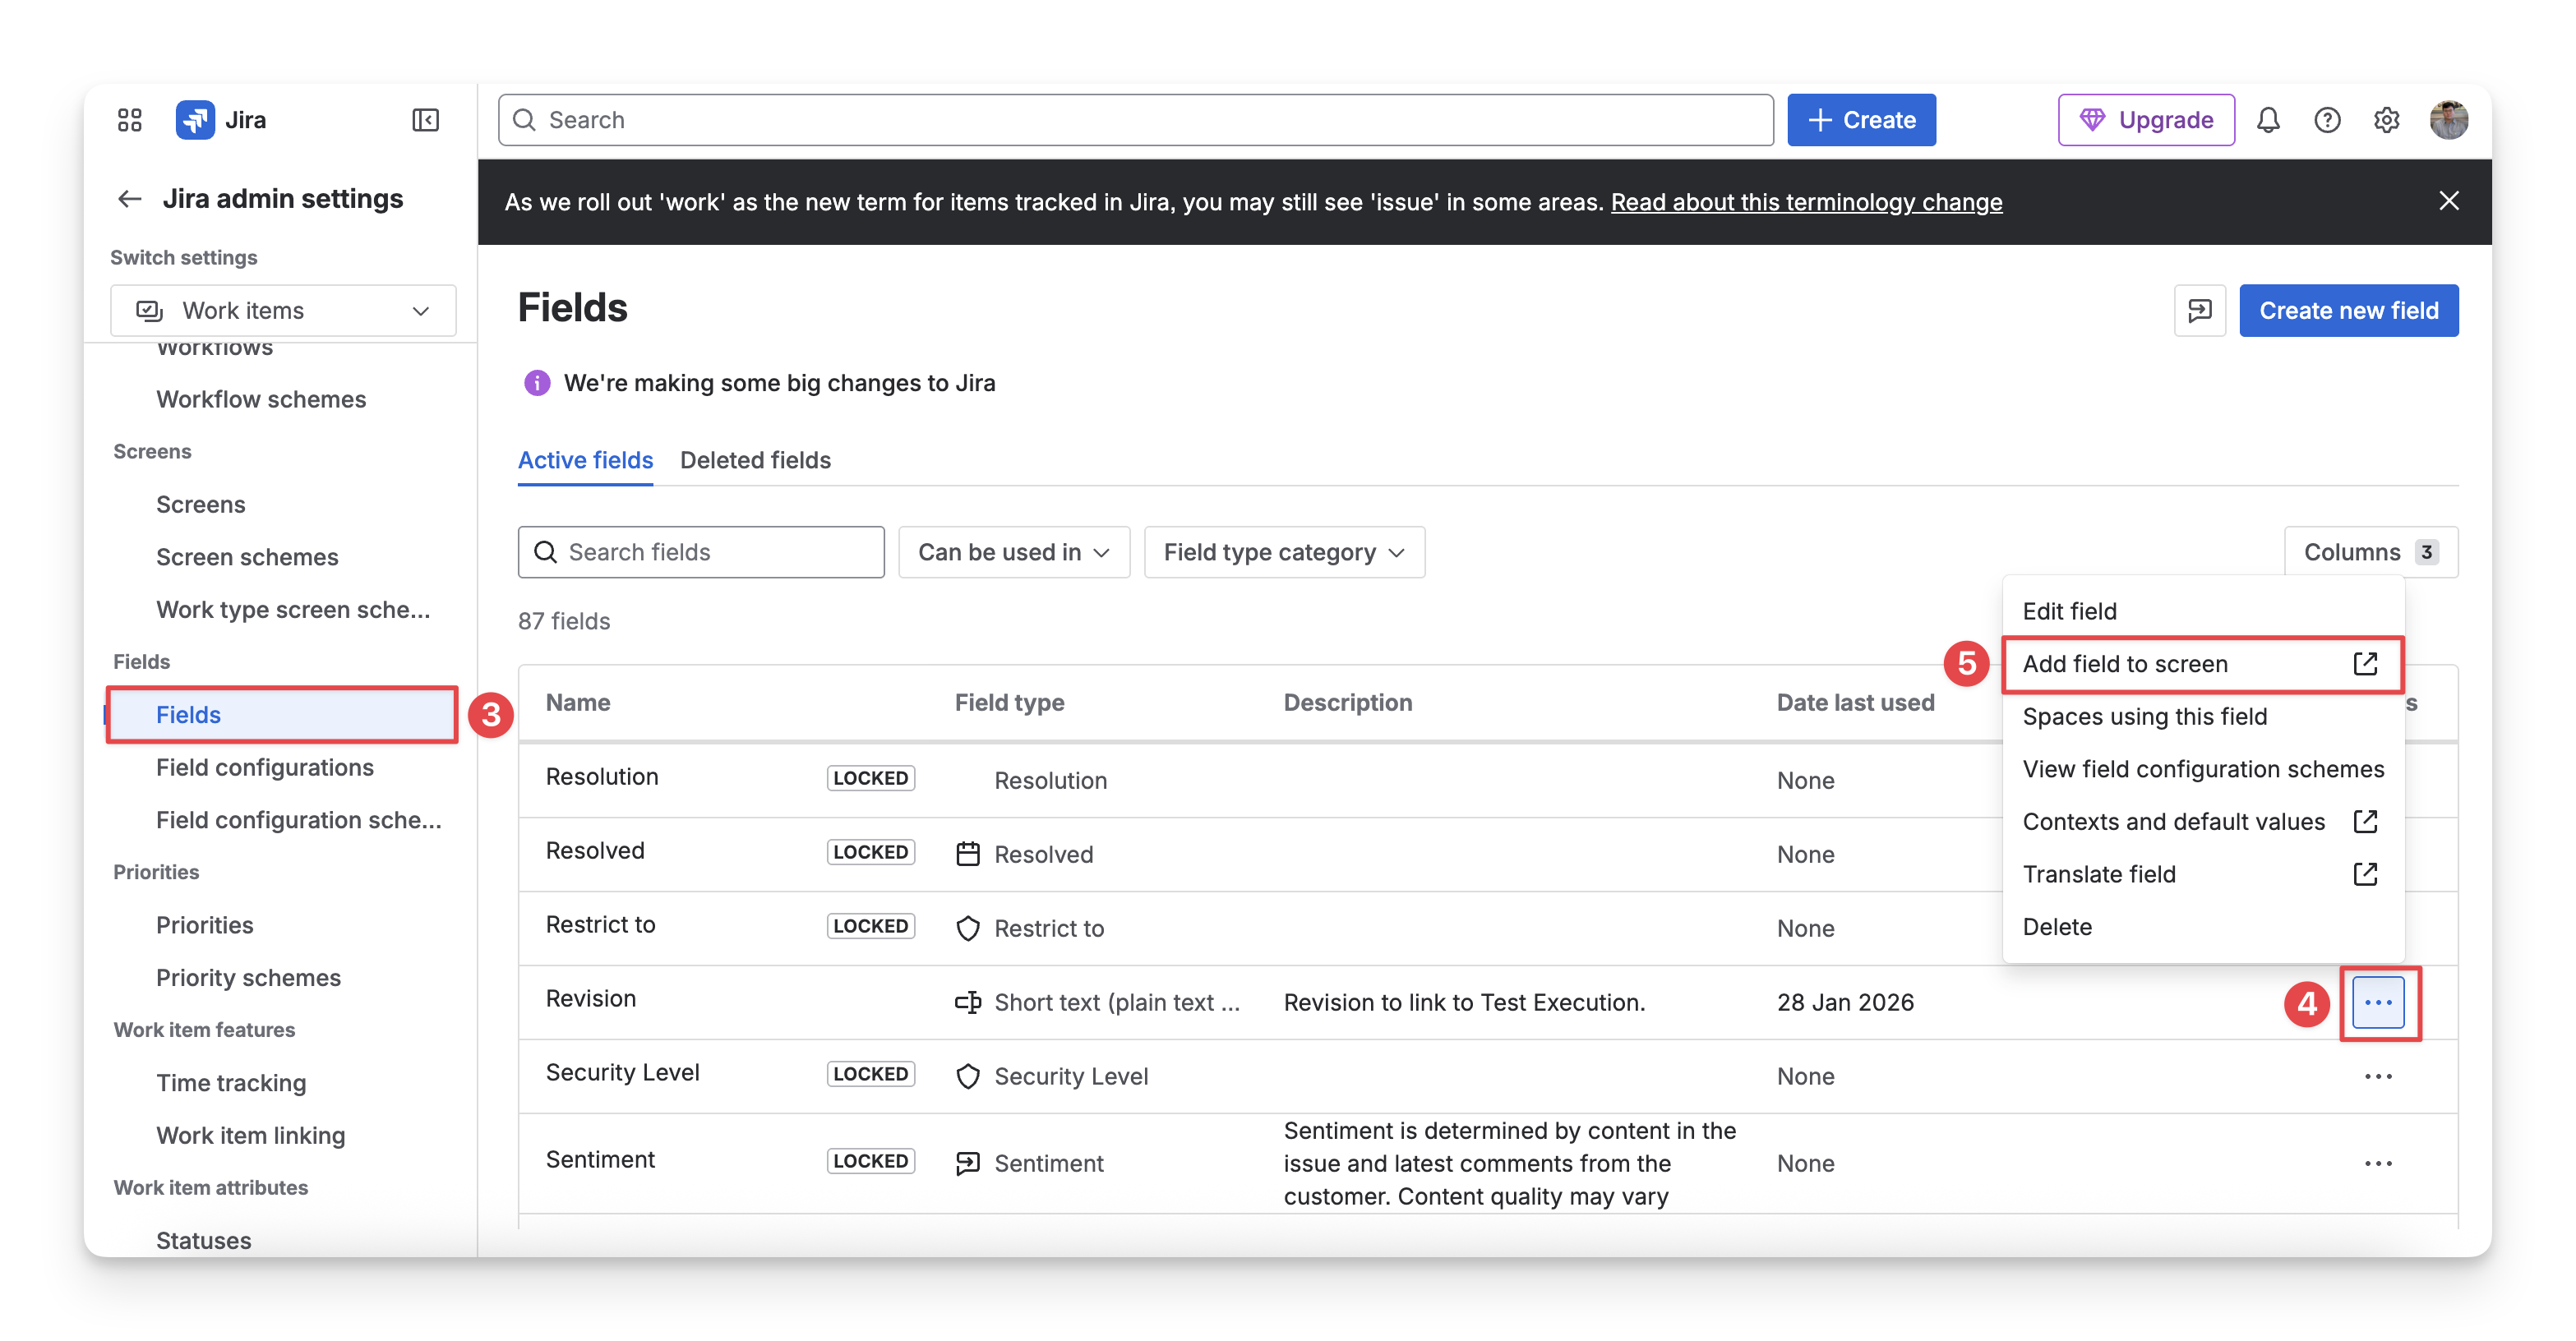
1.7 Revision
The Revision displays the Jira revision that tracks the changes made to the test execution over time.
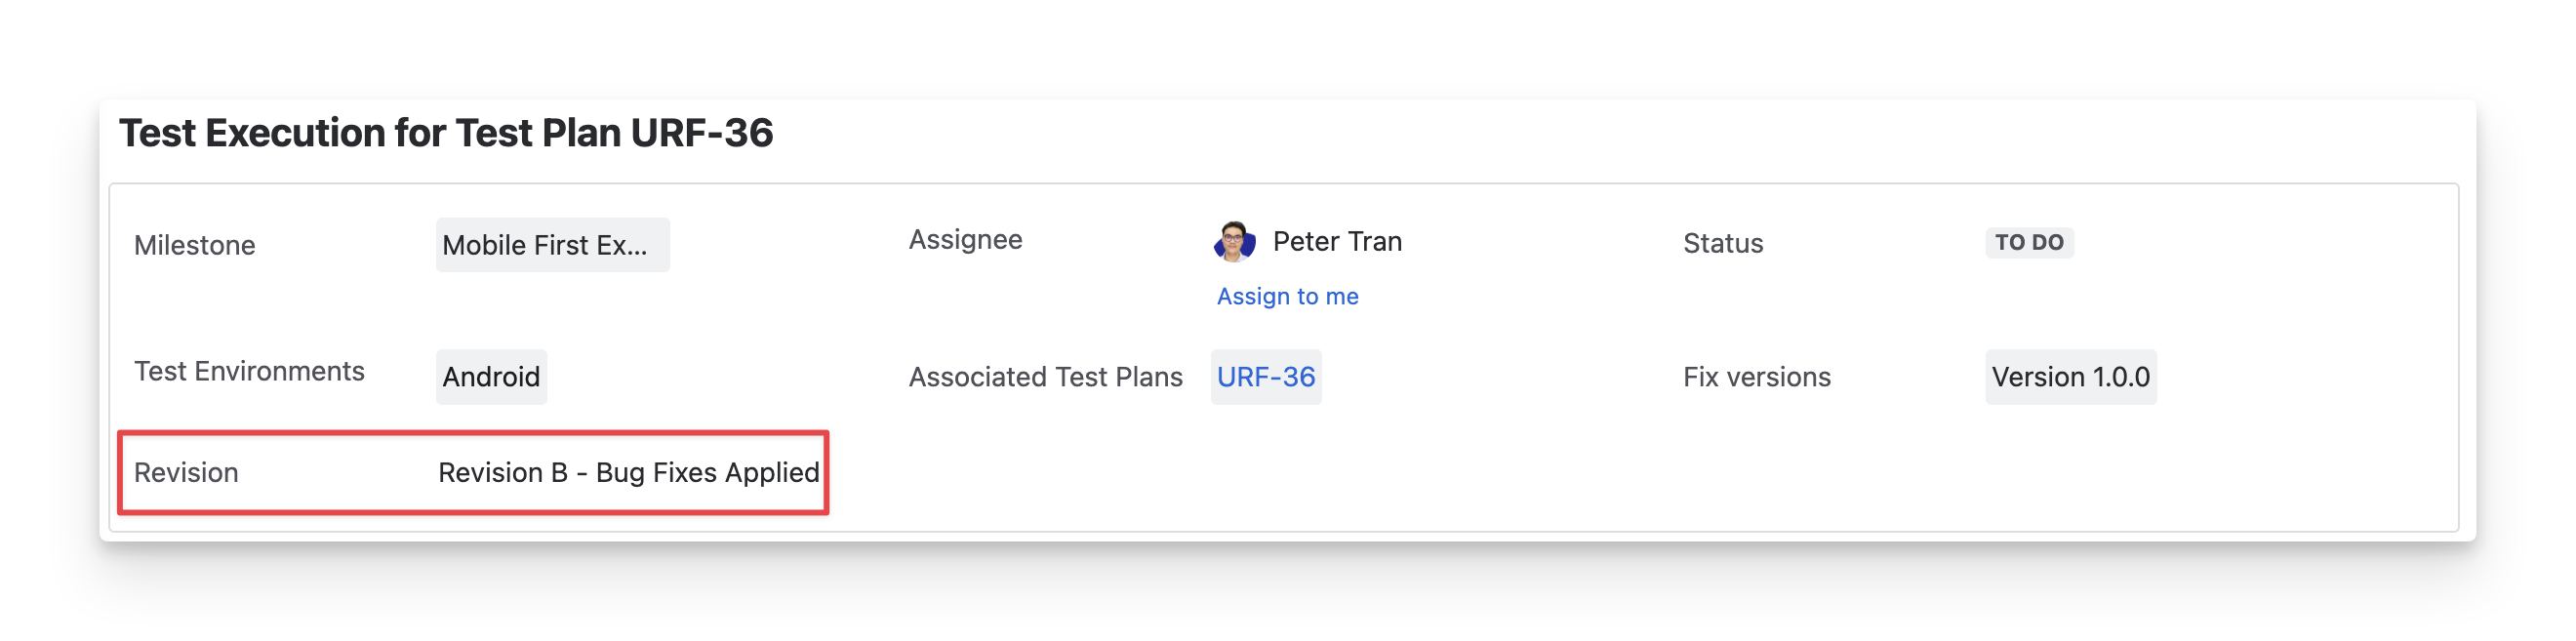
You can click on this area to enter your Jira Revision.
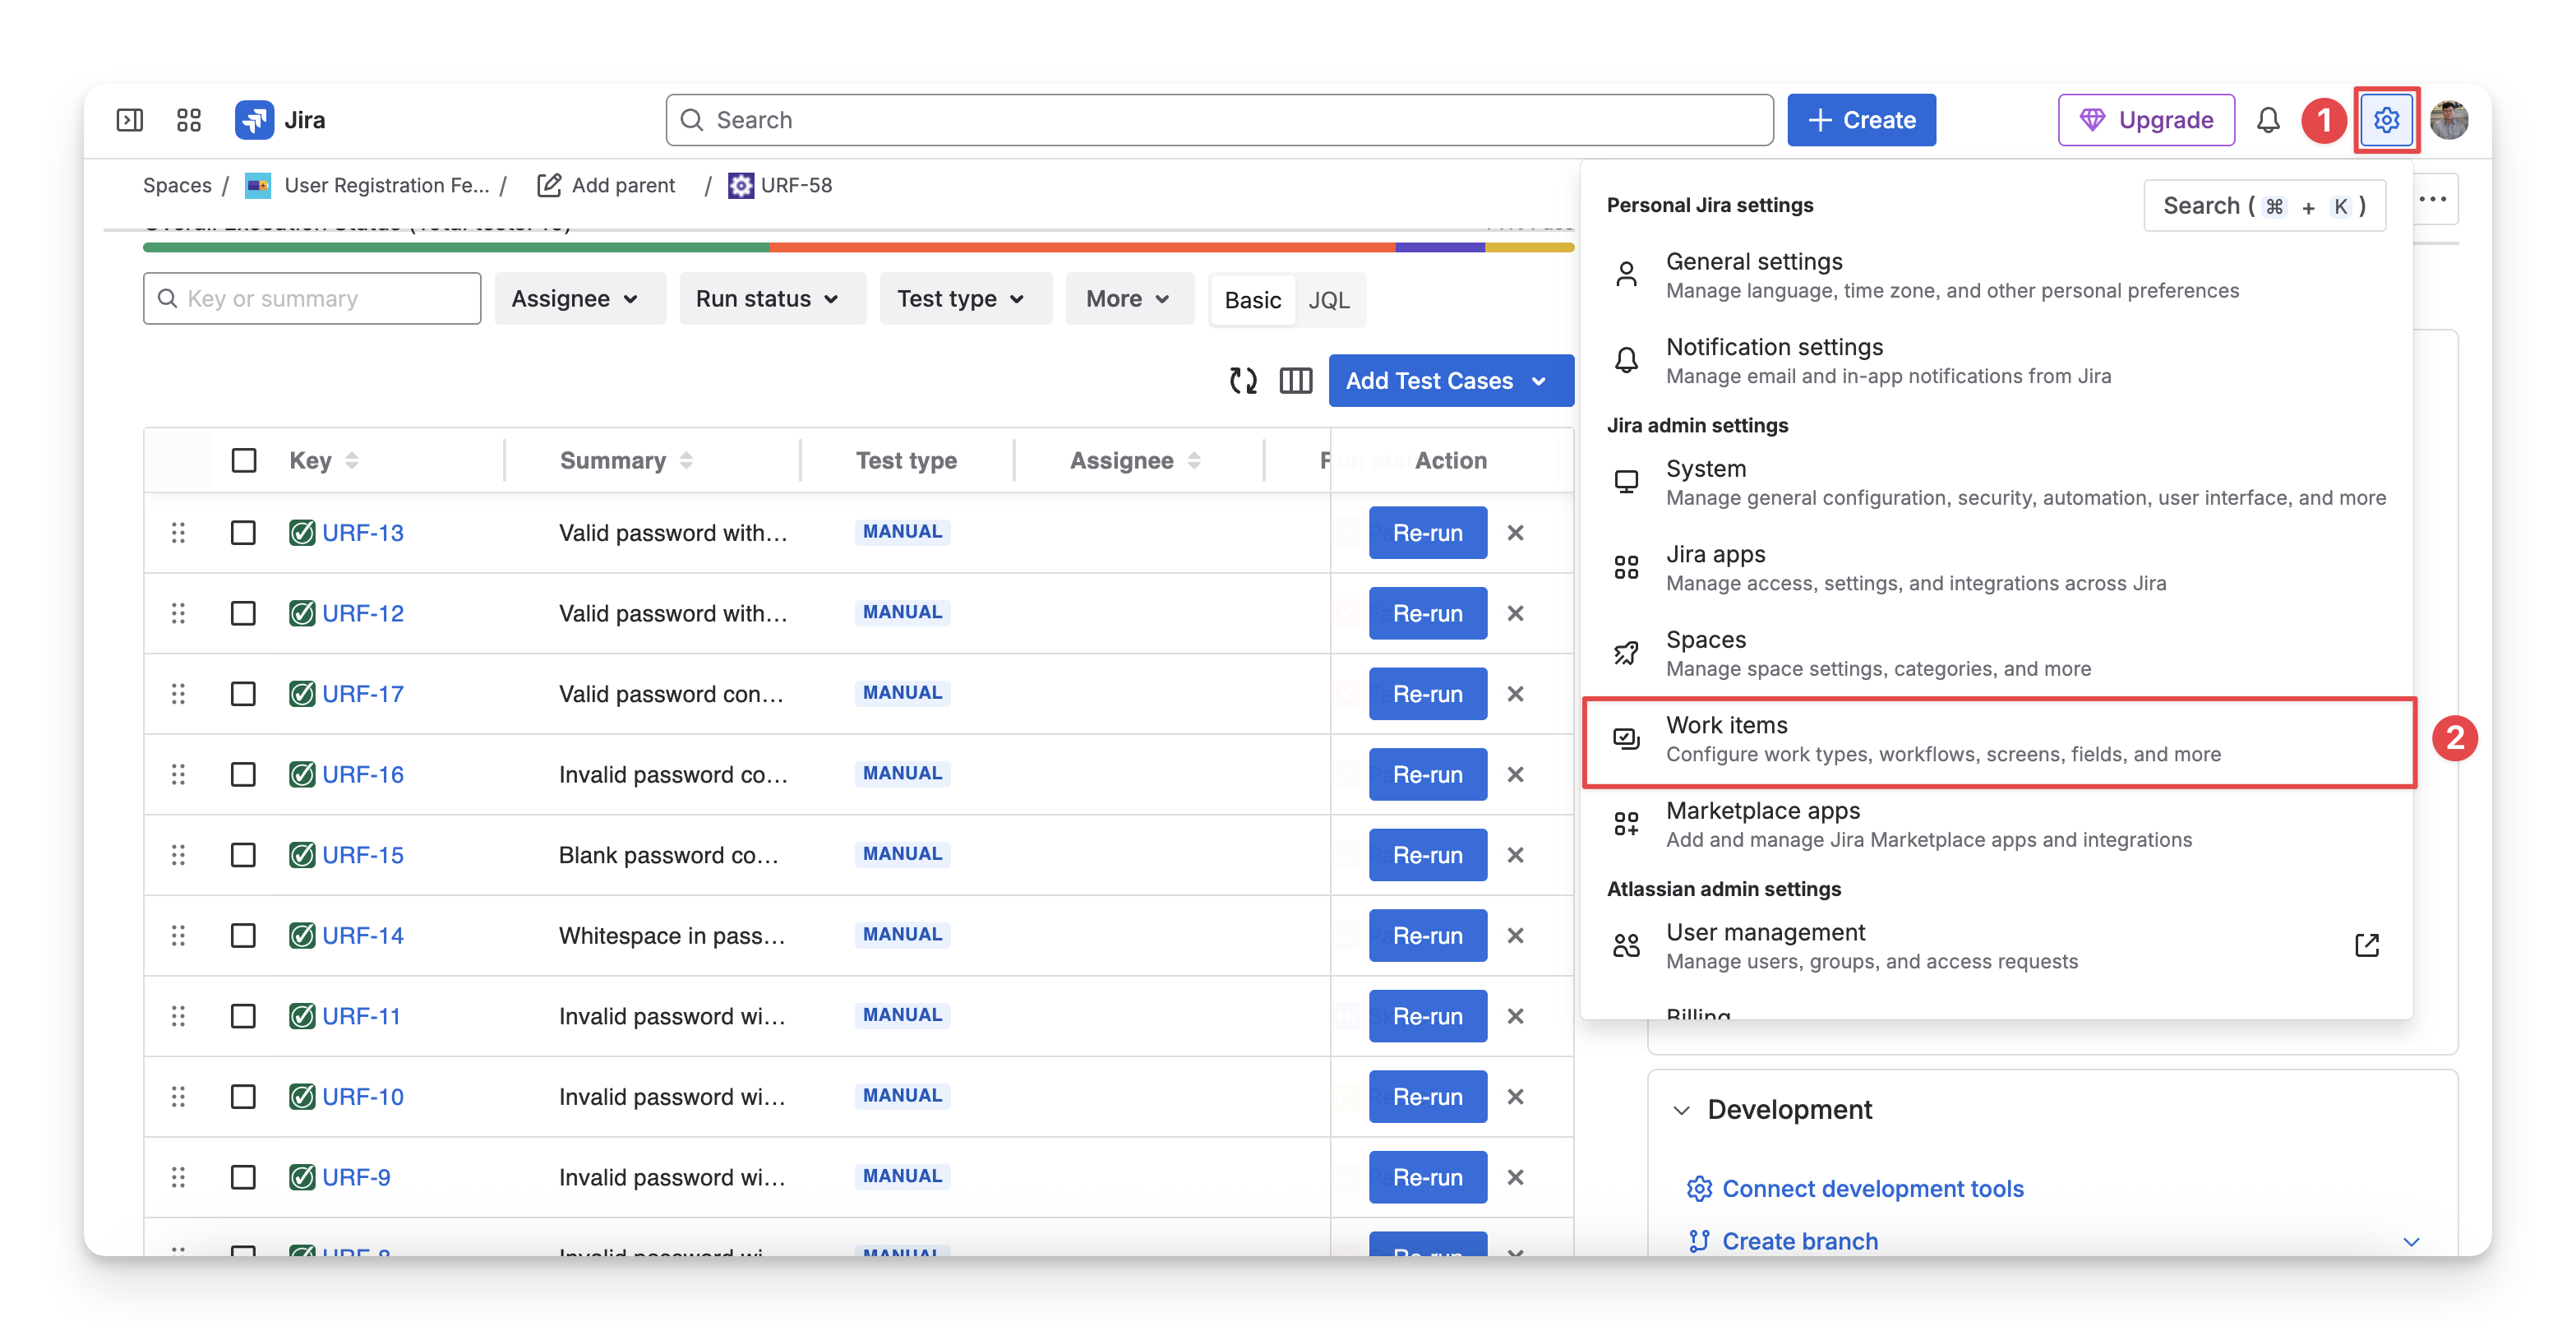
By default, the Revision field is not yet available for your initial use. You need to have some configuration on your first time for each project.
-
Select the Setting (⚙️) icon.
-
Choose the Work items.
-
Navigate to the Fields section → Select Fields.
-
Search for the “Revision” work item. Click on the “
-
Select the “Add field to screen” option.
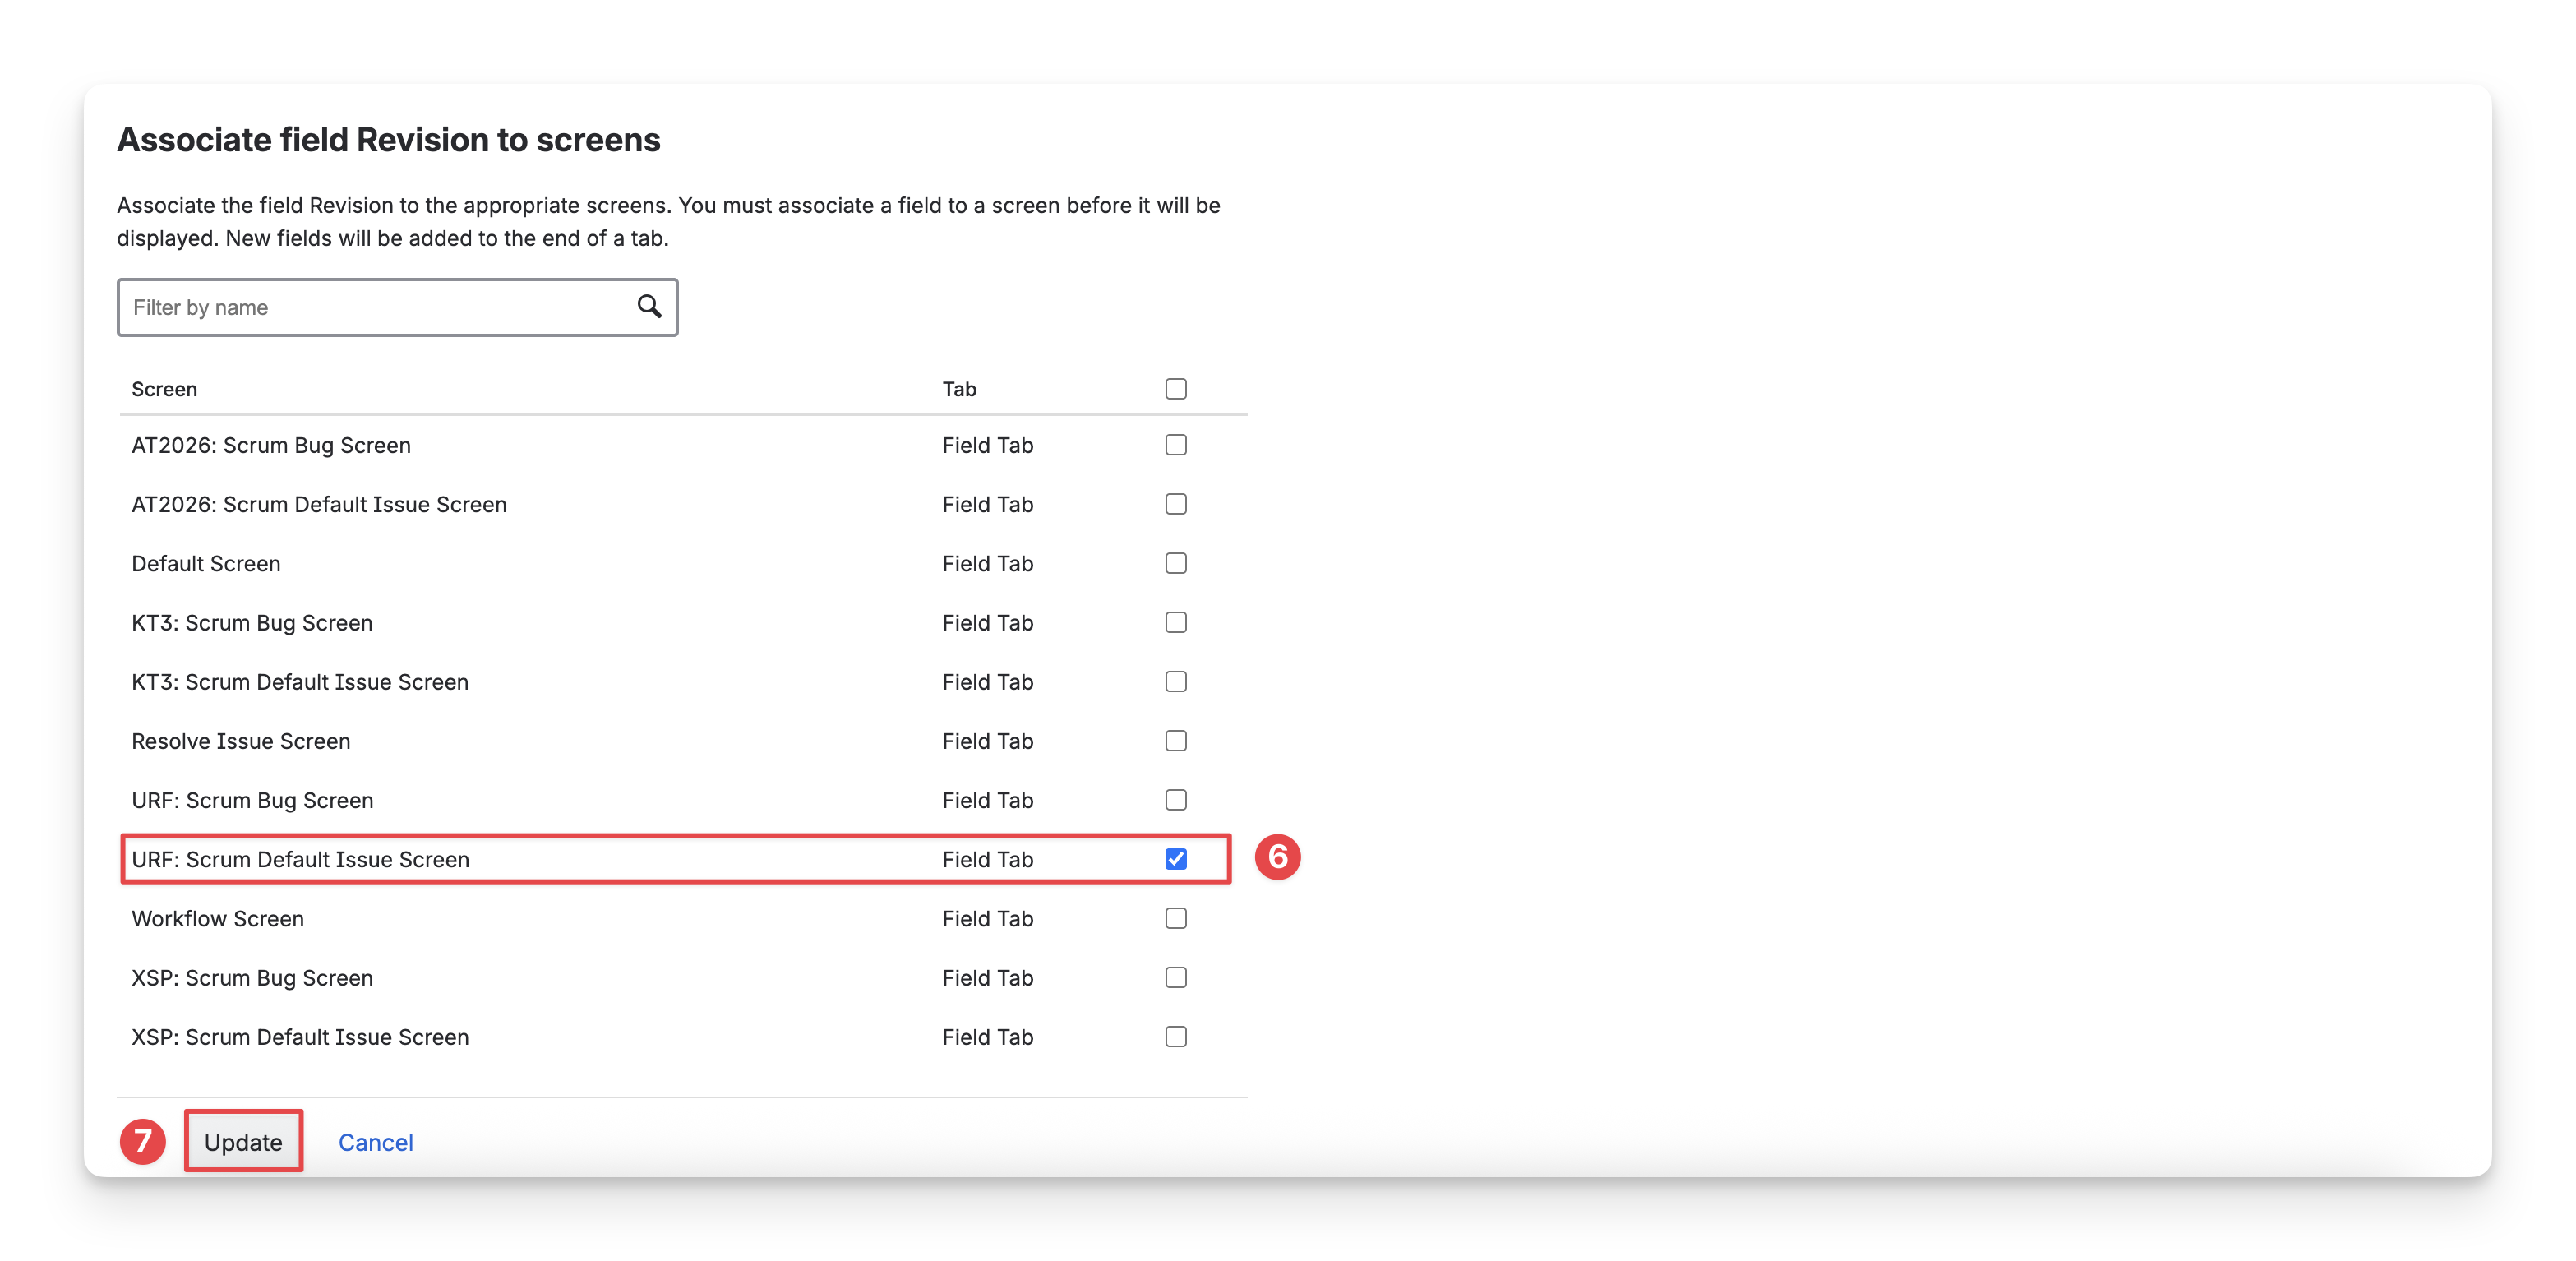
-
You will be redirected to a screen where you can select projects to use the Revision field. Select your projects based on the Jira Key.
-
By default, you should choose the “Default Issue Screen” types.
-
Those “Bug Screen” types are applicable for bug items only.
-
Click on the “Update” button to finish.
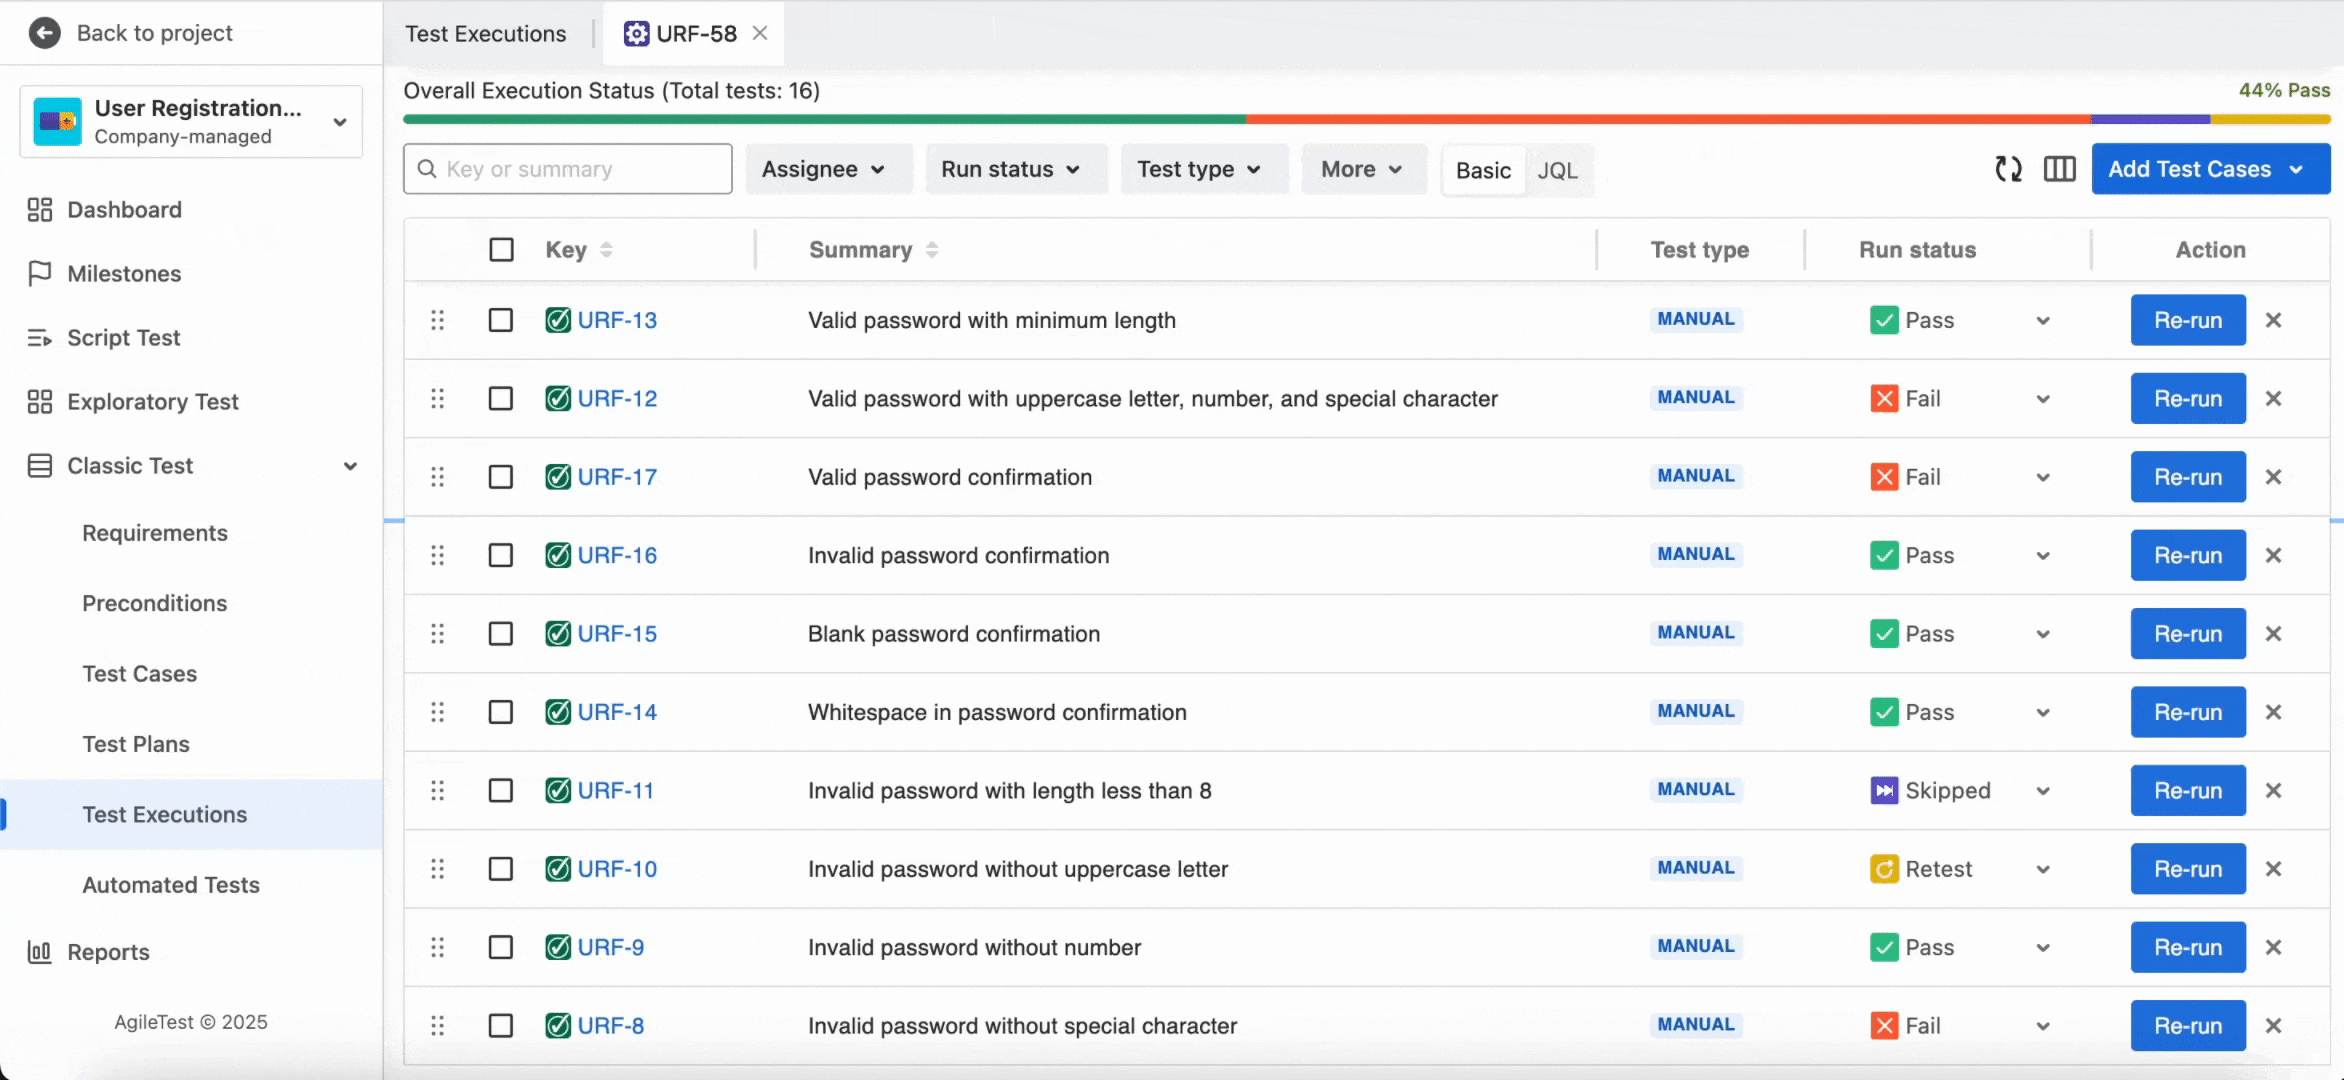
2. Test Execution Status
The Test Execution Status (or Overall Execution Status) is represented by a percentage bar that accumulates all test case statuses during the test execution.
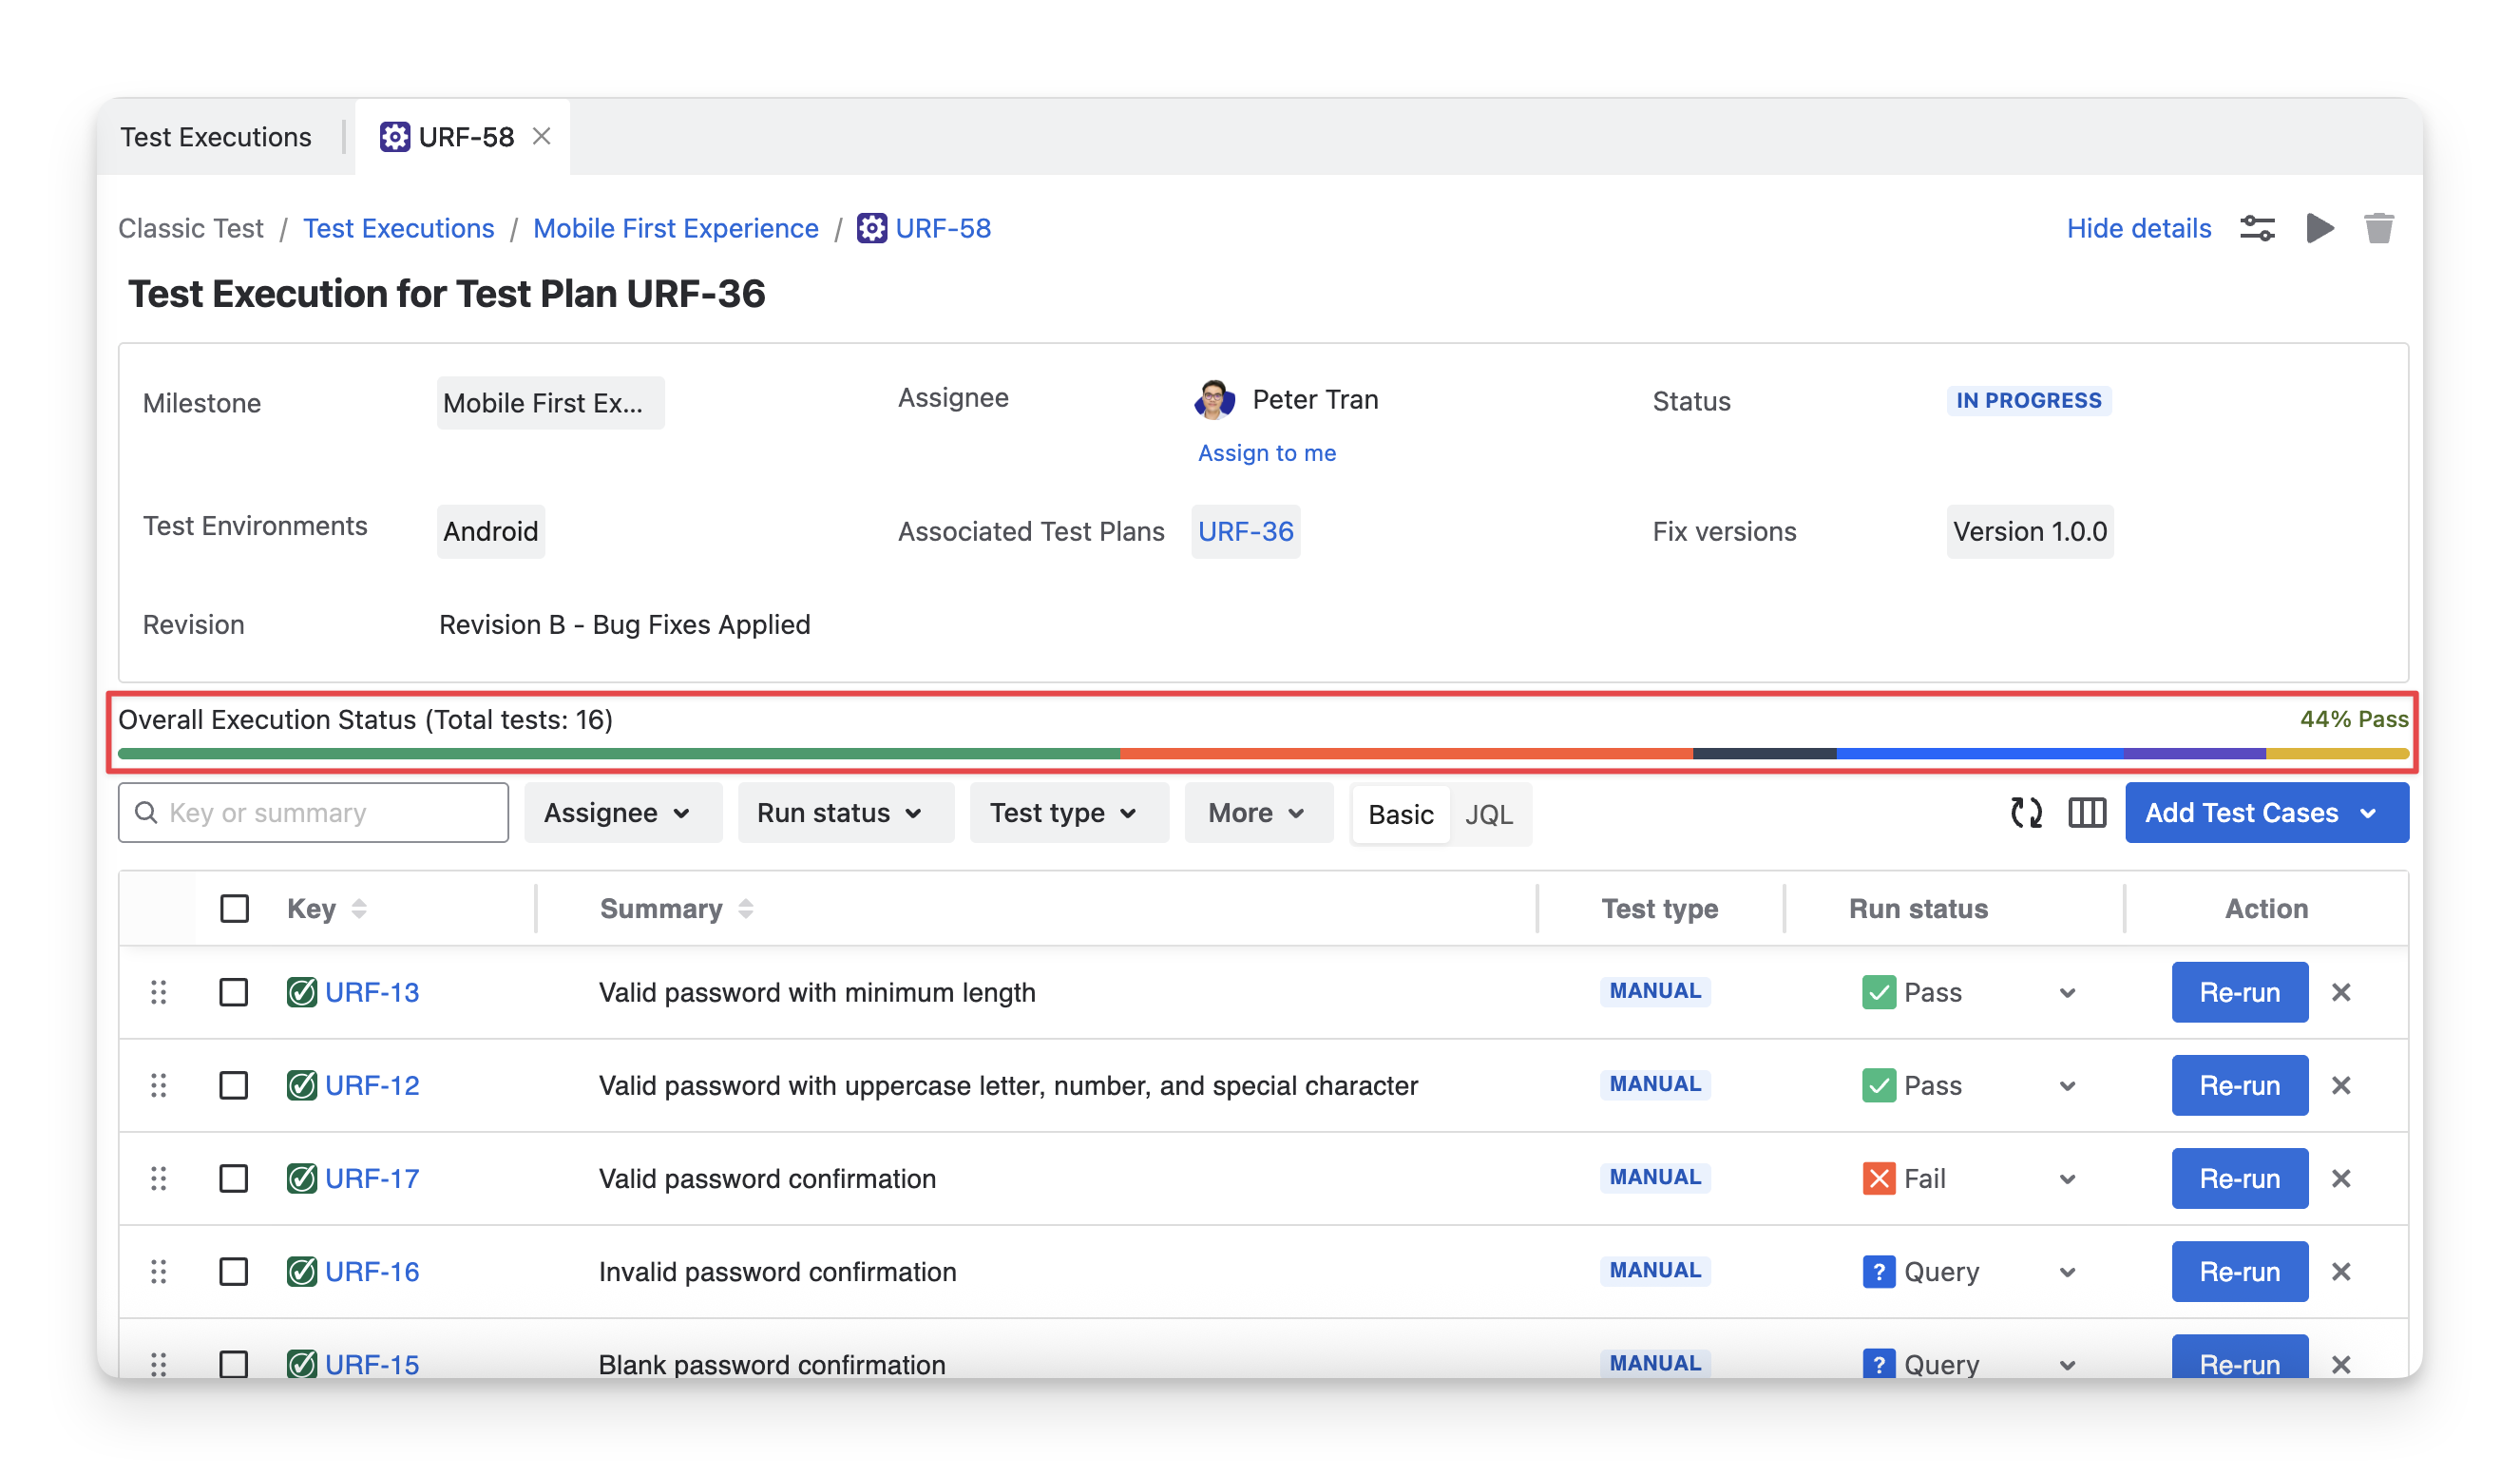
2.1 Test Case Status
Under the Overall Execution Status progress bar, there is a list of test case show you detailed information of each test case, such as its key, summary, … and run results.
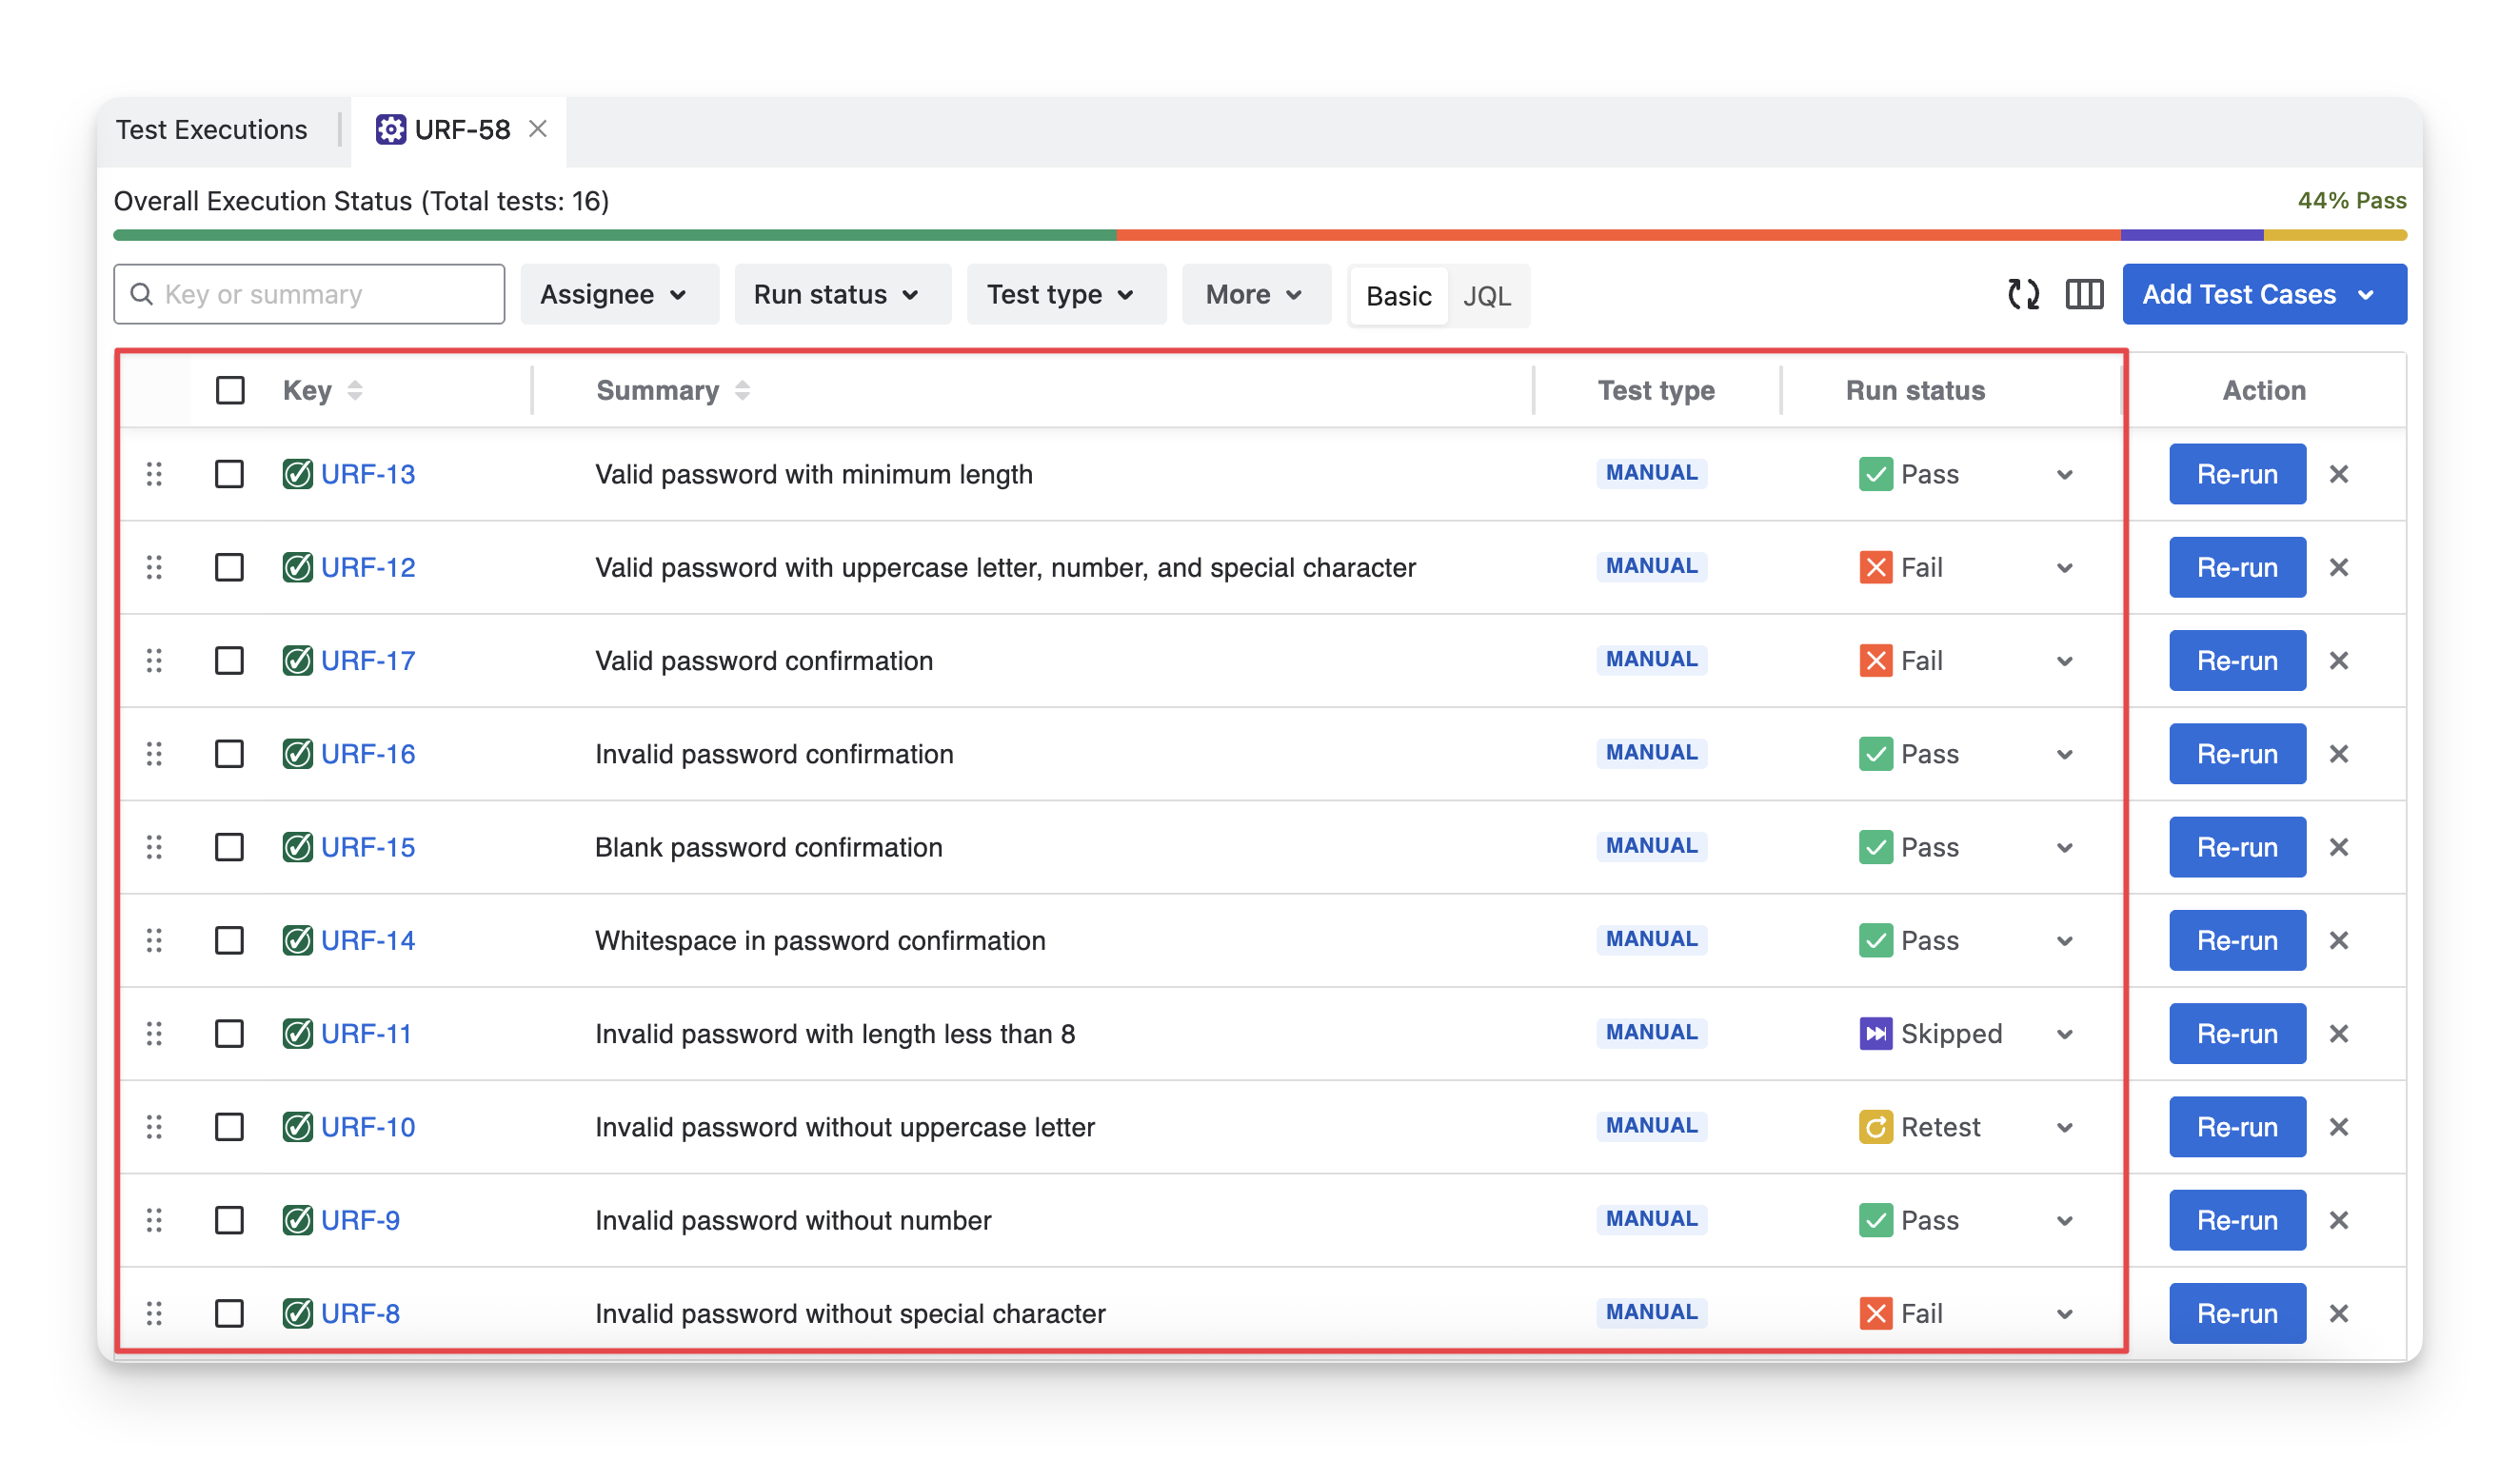
Here, you can view the Run Status of each test case (shortly called Test Case Status). Each test case status means the following:
-
Fail : Test case did not pass the defined checks or expected results. This means the test encountered an issue or bug during execution.
-
pass : Test cases successfully passed all the defined criteria, and the expected results were achieved without any issues.
-
skipped : Test cases were not executed for some reason, typically due to dependencies on other tests, an incomplete setup, or manual intervention.
-
blocked : Test cases could not be executed because of an obstacle or issue preventing it from running. This could include missing prerequisites, dependencies, or an environment issue.
-
query : Test cases that require clarification or additional information before proceeding. It could be a question about the test setup, expected result, or some other uncertainty that needs resolution before execution.
-
todo : Test cases are scheduled to be executed but have not yet been run.
Each test execution has a separate execution status. Therefore, if you use the same set of test cases for multiple executions, the status of each execution will remain independent.
2.2 Manage Test Cases Inside the Test Execution Detail Screen
In this test case list, you can perform these following actions:
2.2.1 Add Test Cases to the Test Execution
To add new test cases inside a test execution, follow these steps:
-
Click on the “Add test case” button.
-
Choose the “Existing Test Cases” option.
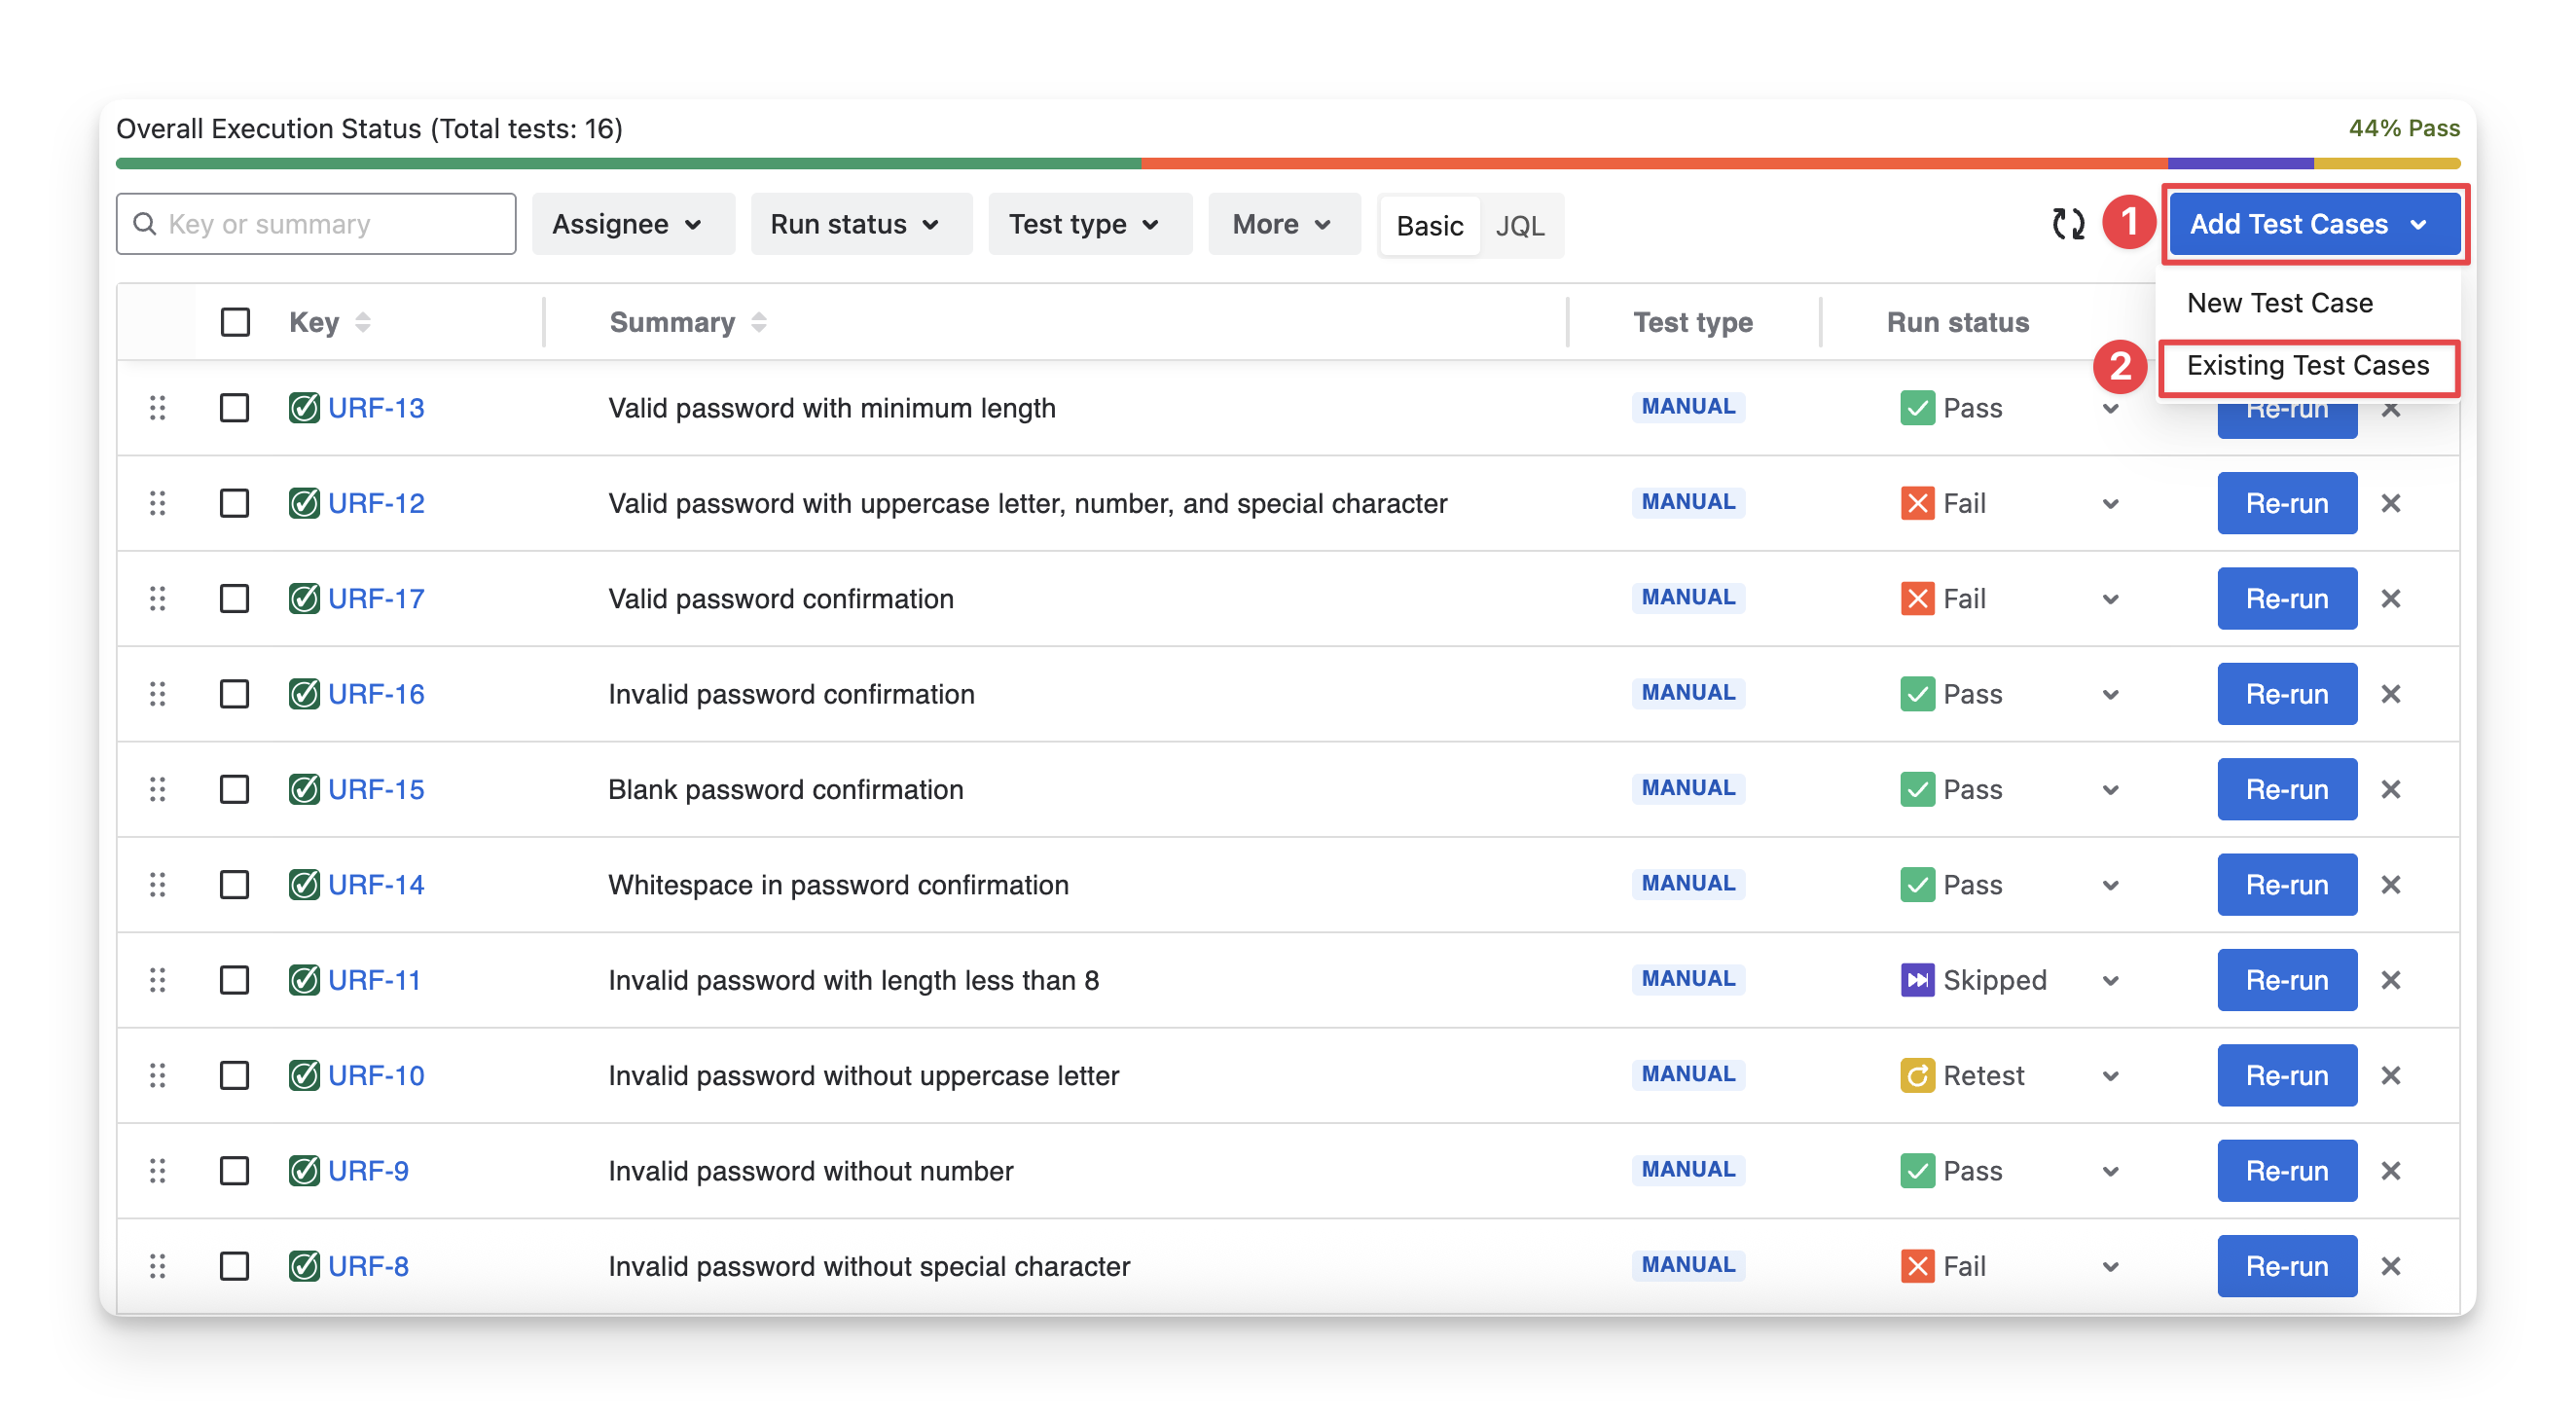
If you choose “New Test Cases” you will manually create a new test case here.
Learn more about creating a test case indirectly in the Test Execution.
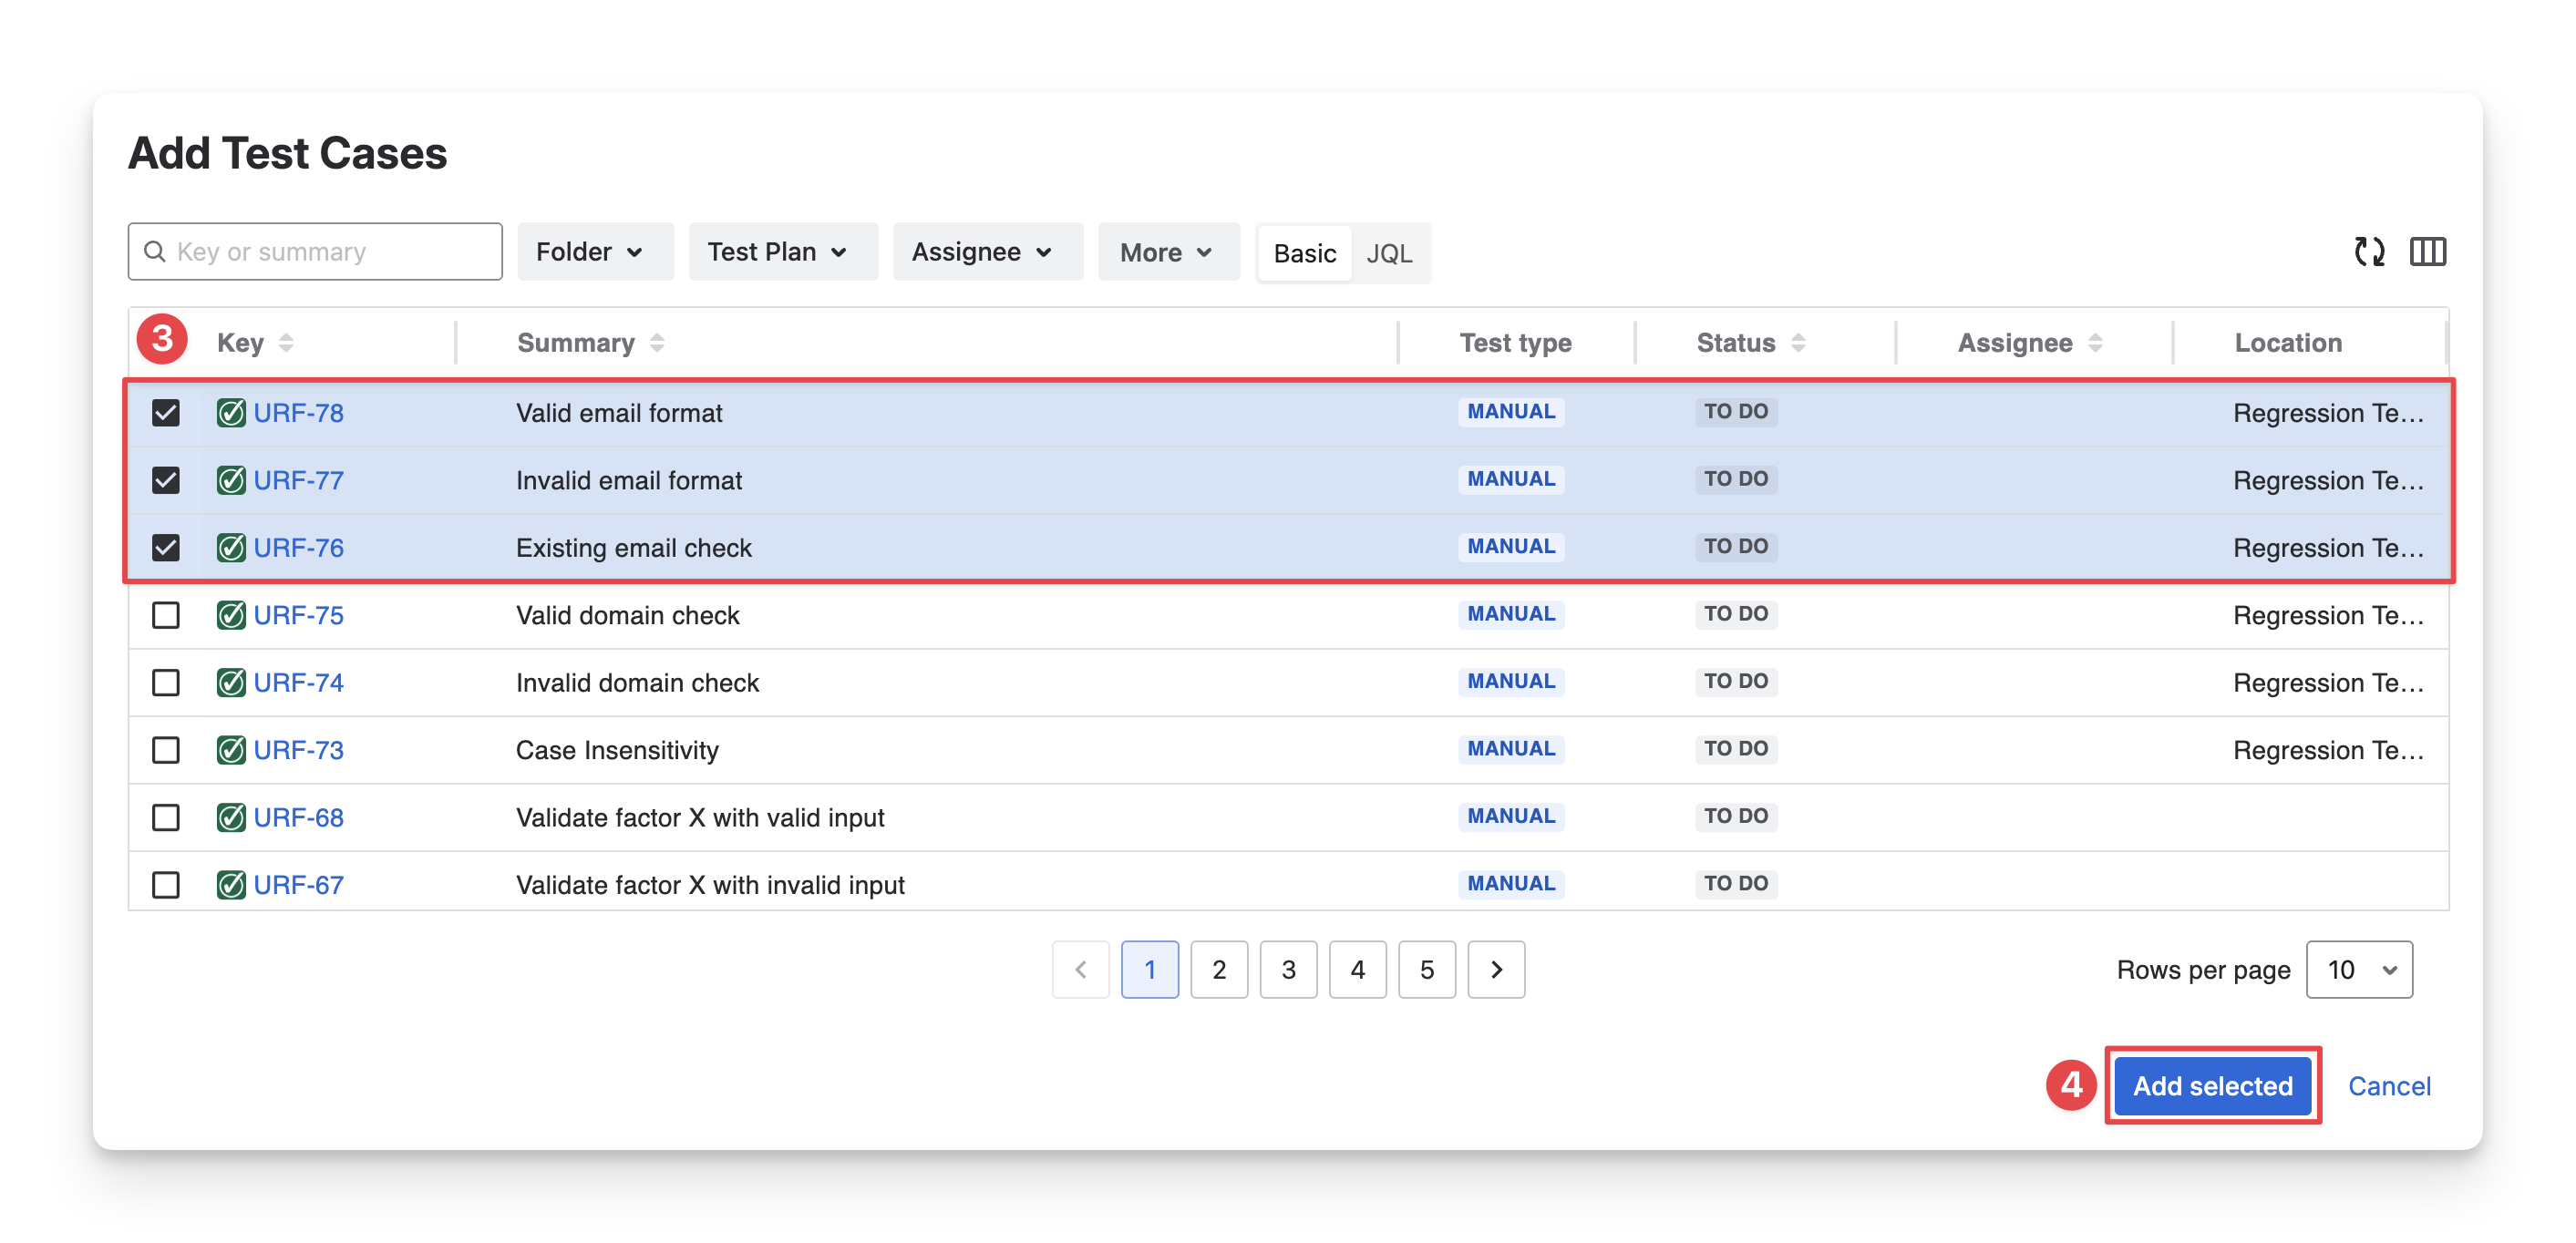
-
Select test cases you want to add to the current test execution. You can search for test cases by name, filter with fields, or use JQL.
-
Click the “Add selected” to complete this step.
2.2.2 Remove Test Cases from the Test Execution
To remove test cases from the current test execution, follow these steps:
-
Multi-select the test cases you want to remove.
-
Choose the “Remove” option in the toolbar.
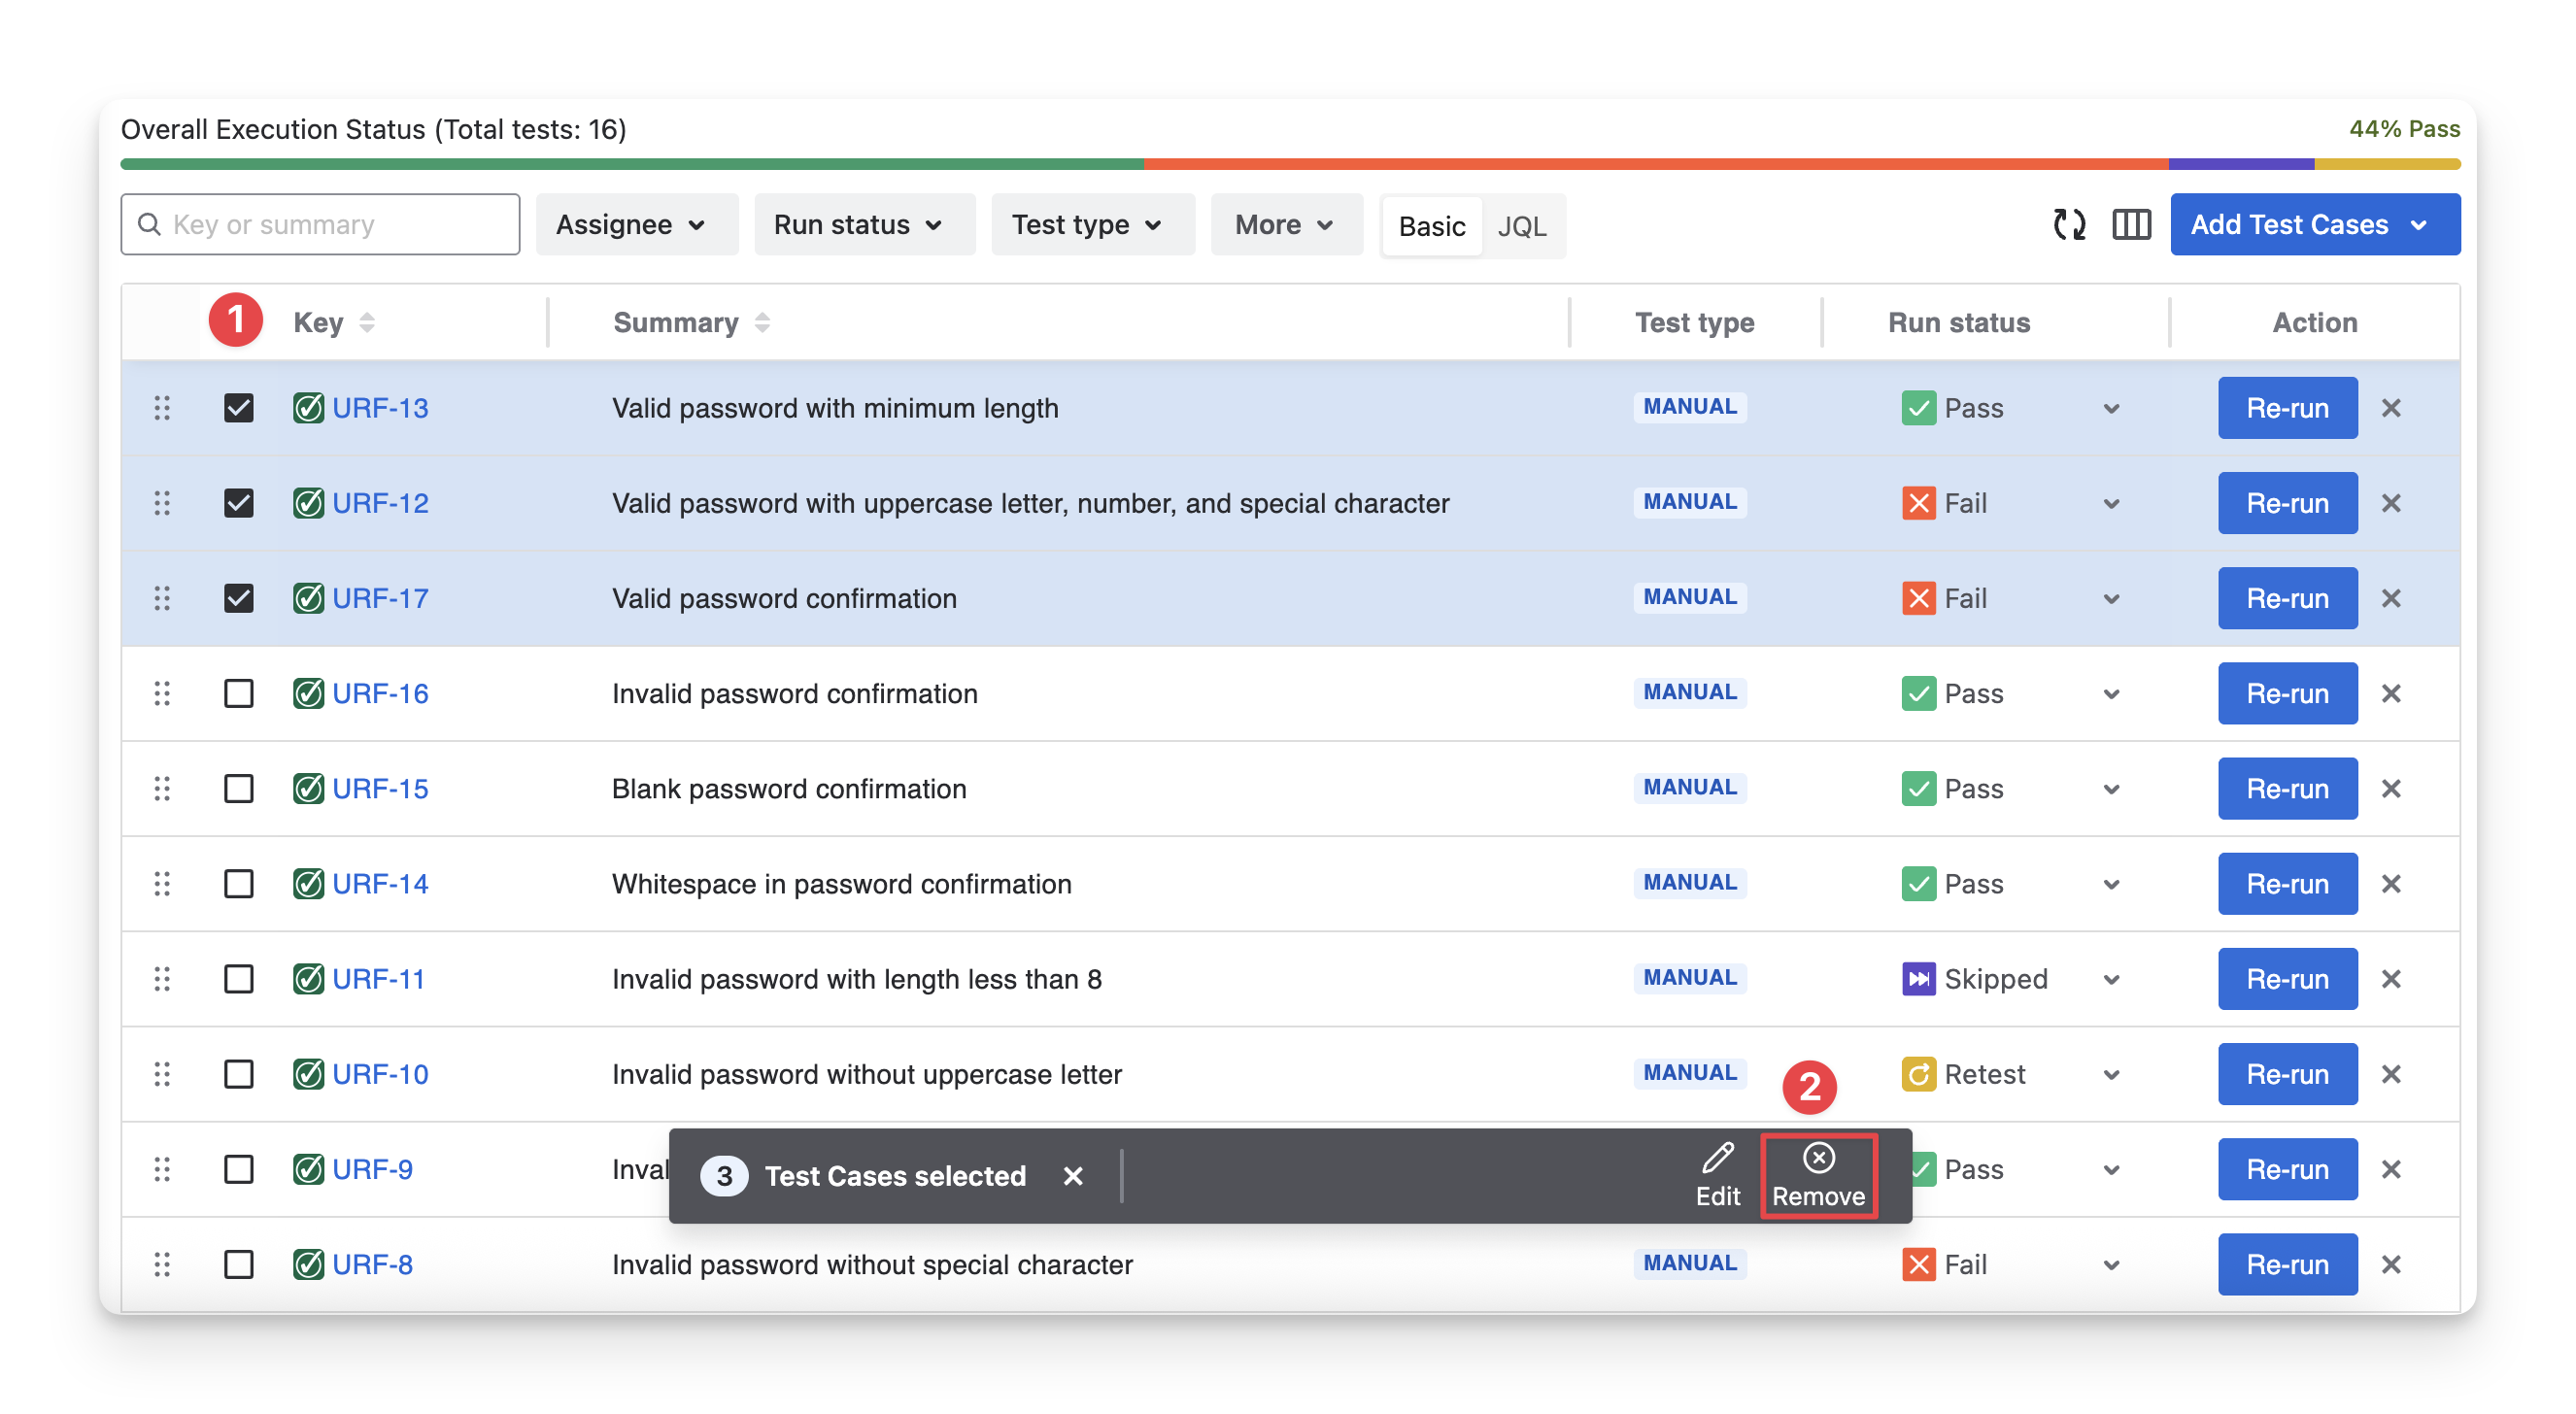
Or you can click the “x” button if you want to remove a single test case only.
2.2.3 Execute Test Cases
Once you hit the “Run/Re-run” button in the Action column, you will be redirected to the Executing screen.
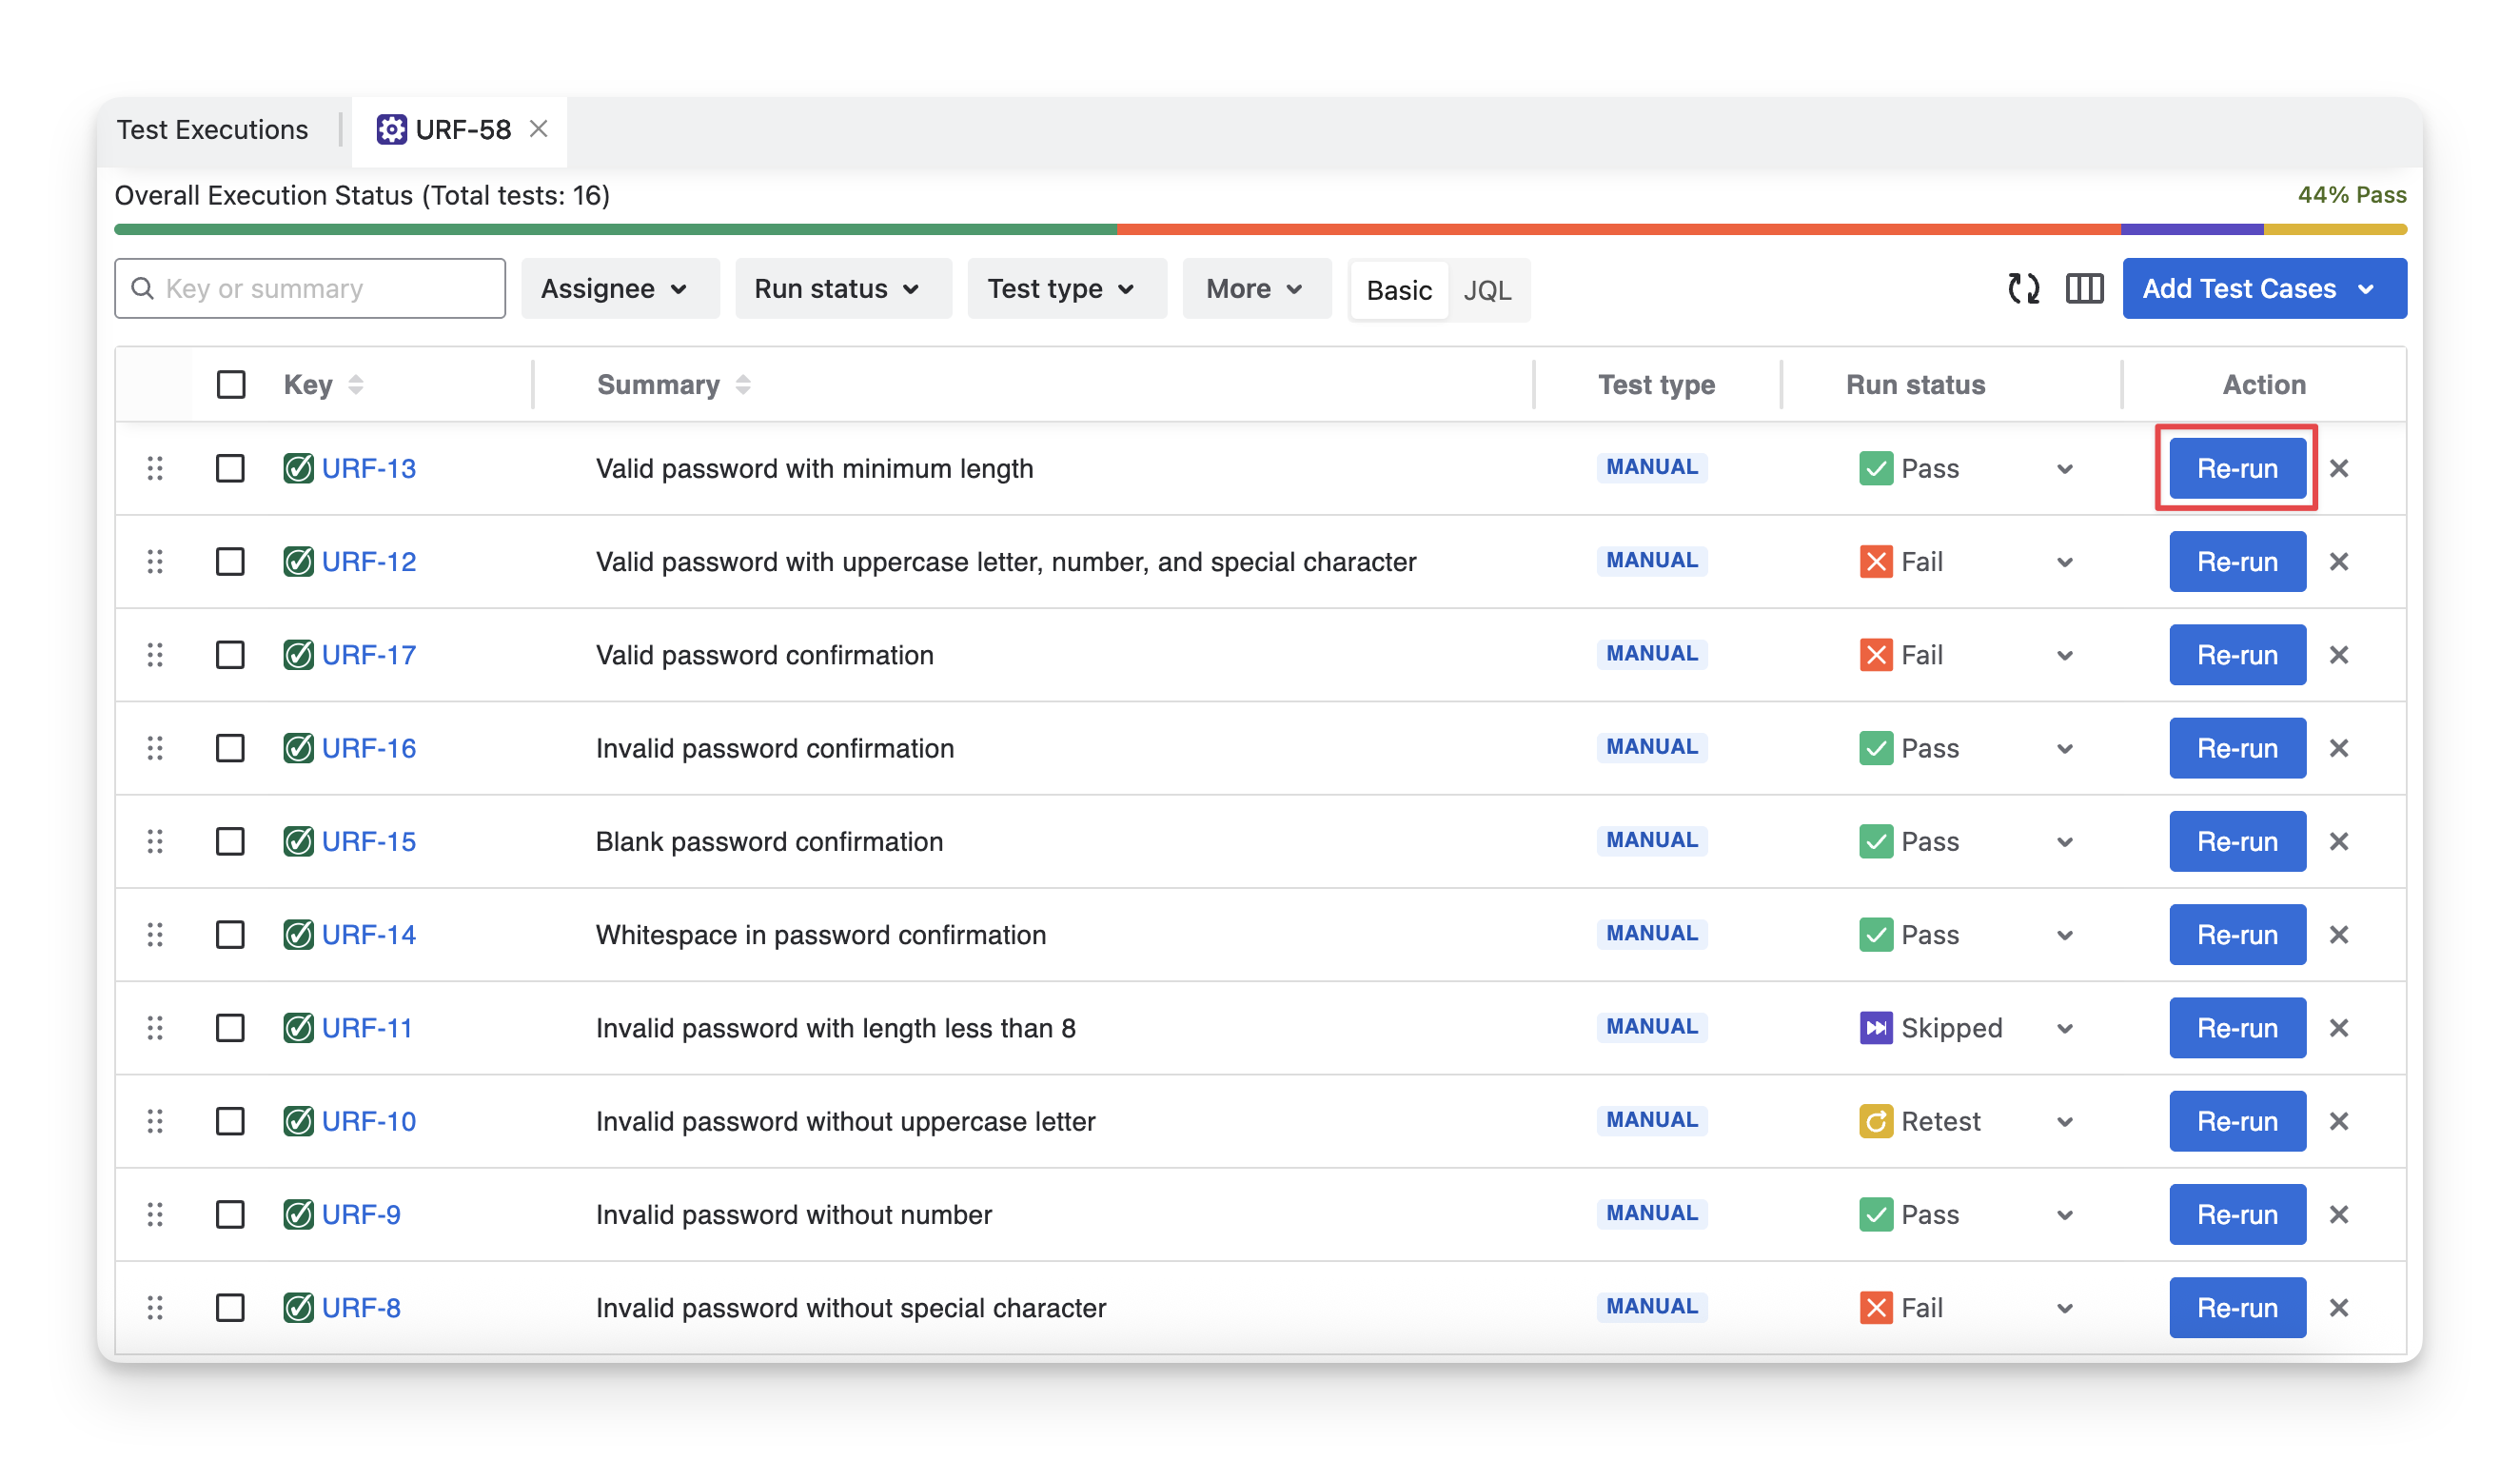
This is where you can record details for your test cases and test steps.
Learn more about Execute Screen AgileTest
How to update the run status of a test case quickly in the Test Execution Detail screen?
To update the status of test cases in the Test Execution Detail screen, click the dropdown in the Run status column of the test case list. You can then change the overall status of a test case to match your preference.
Should you need any assistance or further AgileTest inquiries, contact our 24/7 Support Desk!