
The Logged Time Report helps you review how much time has been logged for tasks, events, and custom tasks across selected members, teams, spaces, and projects during a specific period.
Use this report to understand where time was spent, compare logged hours against capacity, and analyze logged time by period, member, project, or task.
Create a logged time report
-
From the Reports screen, select the Logged time report type.
-
Enter the report details:
-
Name: Enter a report name. The maximum length is 255 characters.
-
Access: Choose whether the report is Public or Private.
-
-
Click Save to create the report and open the report details screen.
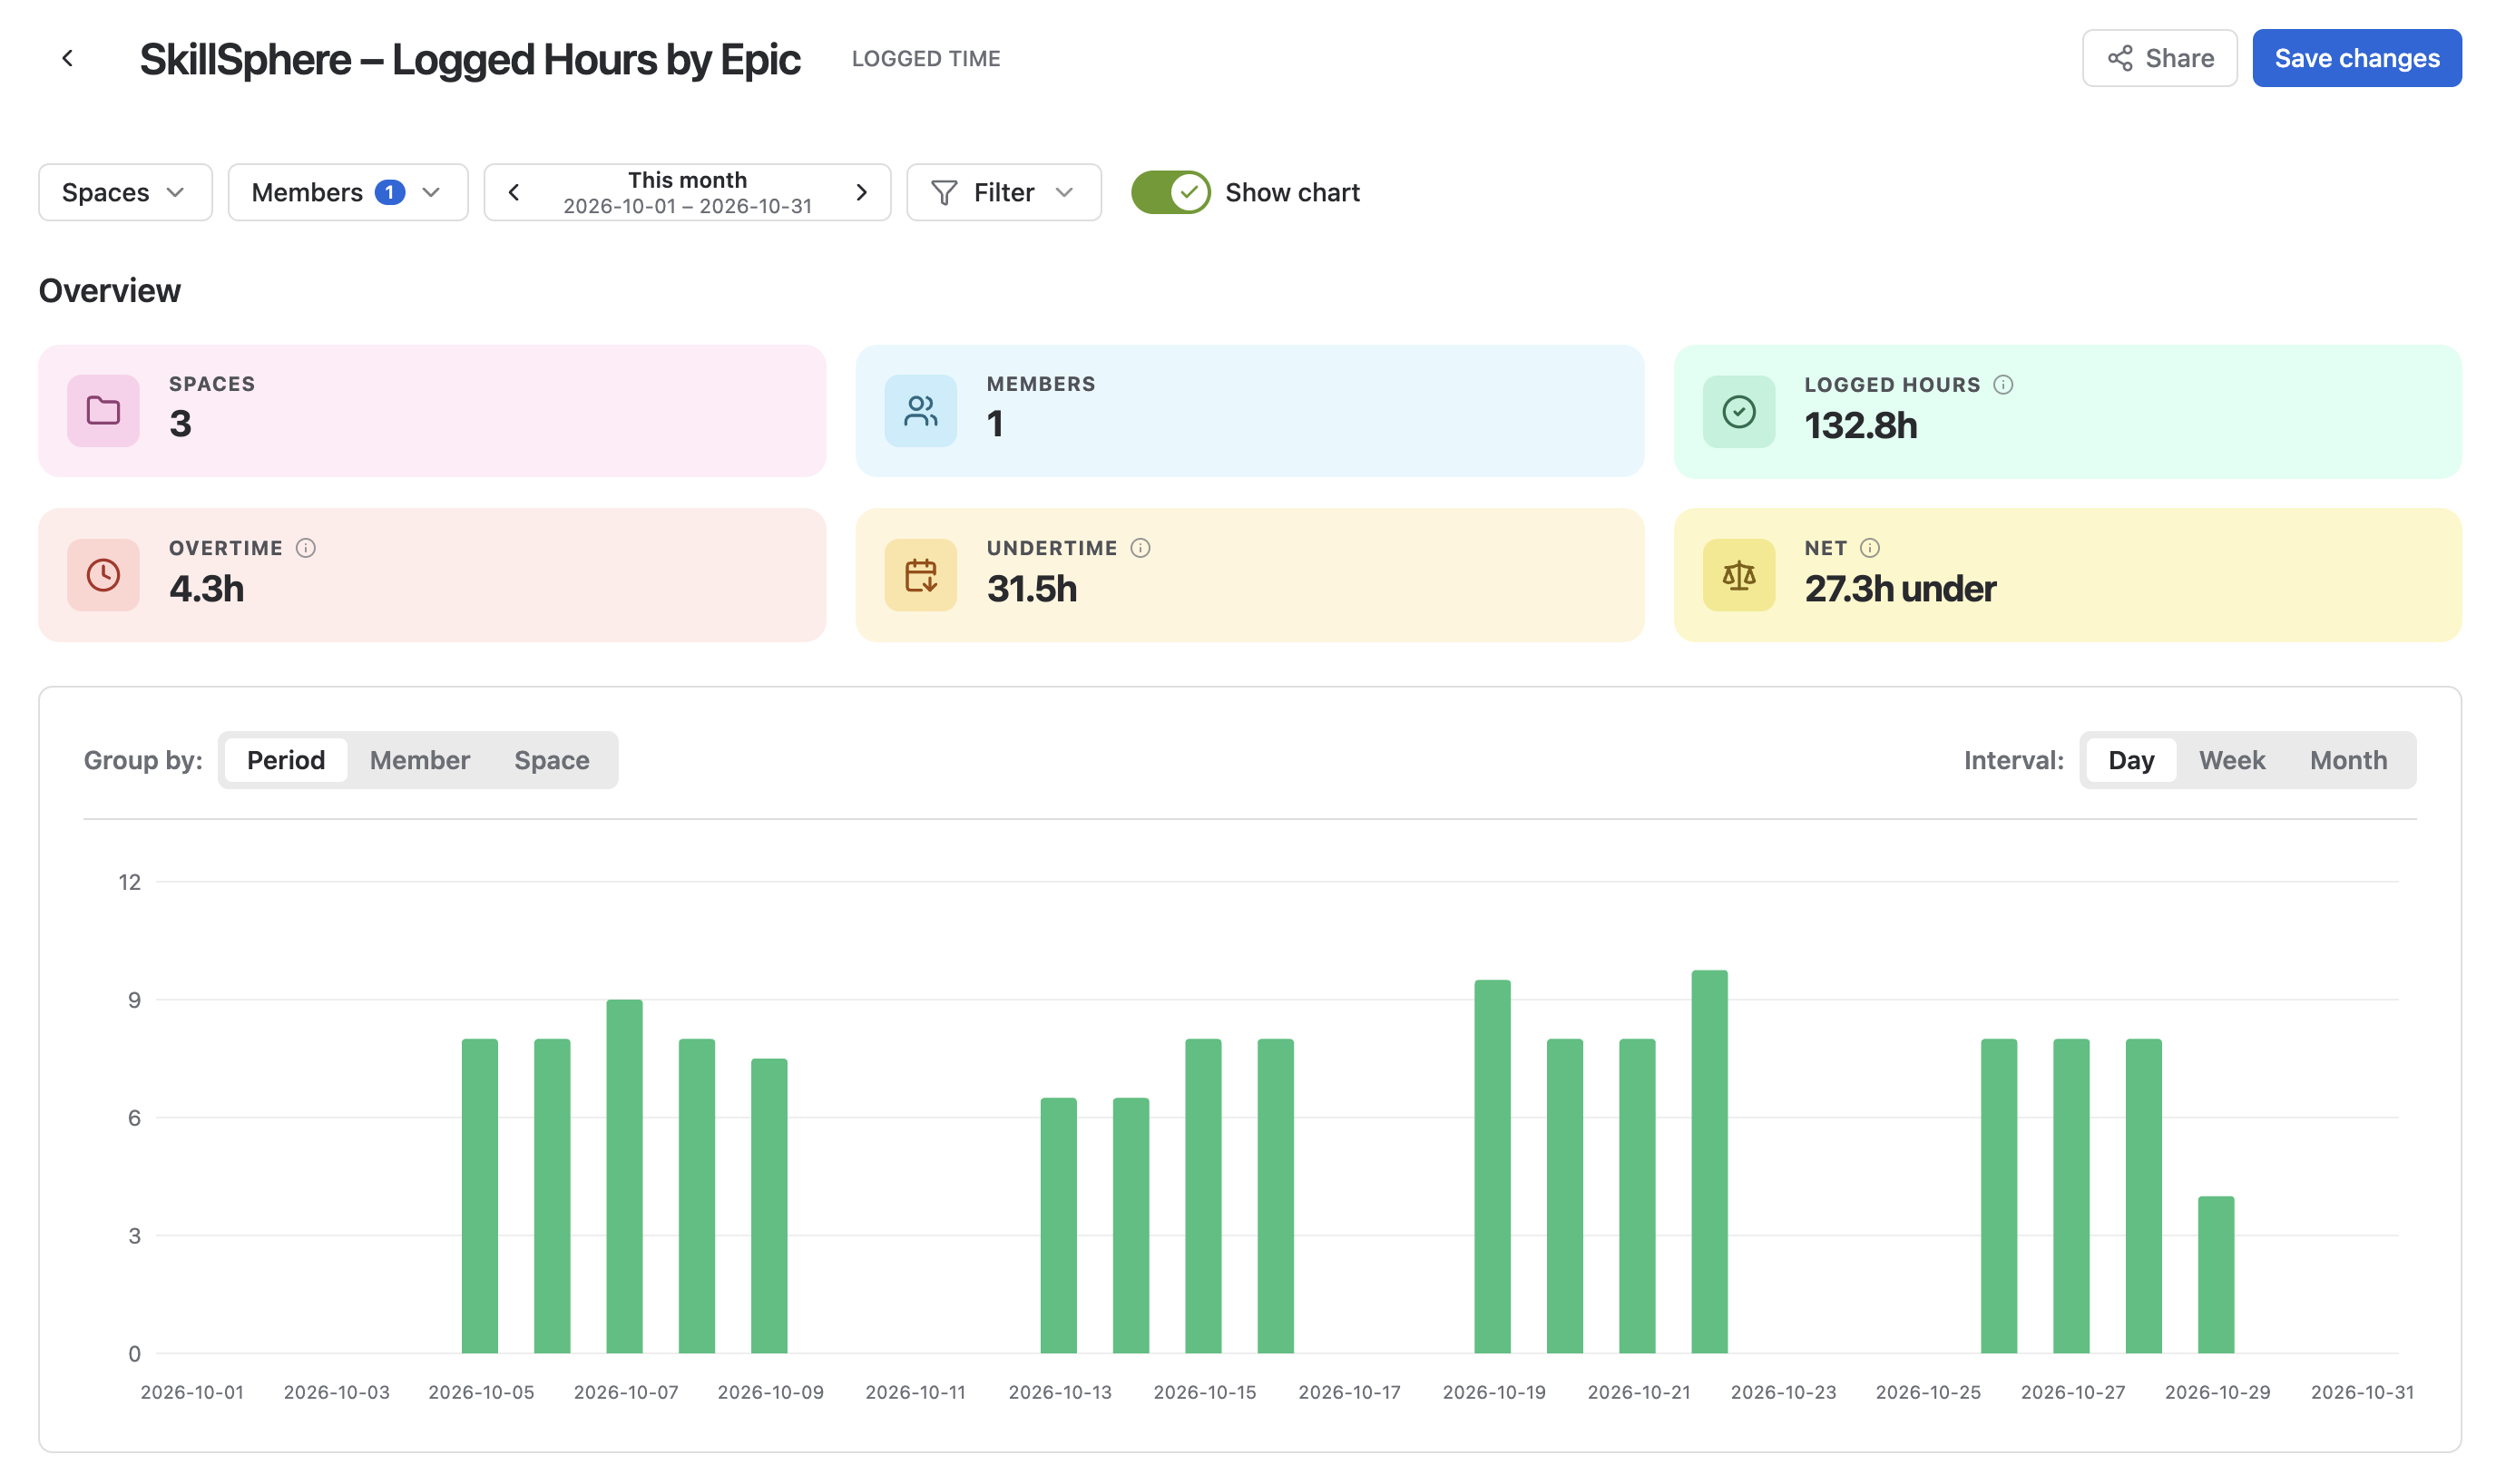
Set report filters
Use filters to define which scheduled time data appears in the report.
|
Filter |
Description |
|---|---|
|
Spaces |
Select one or more spaces to include in the report. |
|
Members or Teams |
Choose the individual members or teams whose scheduled time you want to analyze. |
|
Time Range |
Define the reporting period. Use Dynamic Range for rolling periods, such as This Week or Last 30 Days. Use Fixed Range to select a specific start and end date. |
|
Filters |
Filter the report by additional fields, such as role, skill, sprint, work type, status, or priority. |
|
Show chart |
Turn this on to display a chart above the table report. |
Report overview
The overview summarizes key metrics based on the selected filters.

|
Metric |
Description |
|---|---|
|
Spaces |
The number of projects included in the report. |
|
Members |
The number of members included in the report. |
|
Logged hours |
The total logged hours from tasks, events, and custom tasks. |
|
Overtime |
The total amount of time logged above daily capacity. A period can show both overtime and undertime because these values are calculated by day. |
|
Undertime |
The total shortfall against daily capacity. A period can show both overtime and undertime because these values are calculated by day. |
|
Net |
The difference between capacity and logged time for the full period. Under means hours are still available; over means logged time exceeded capacity. |
Report chart
The report chart displays logged time in a column chart. Use the Group by option to change how the chart is organized.
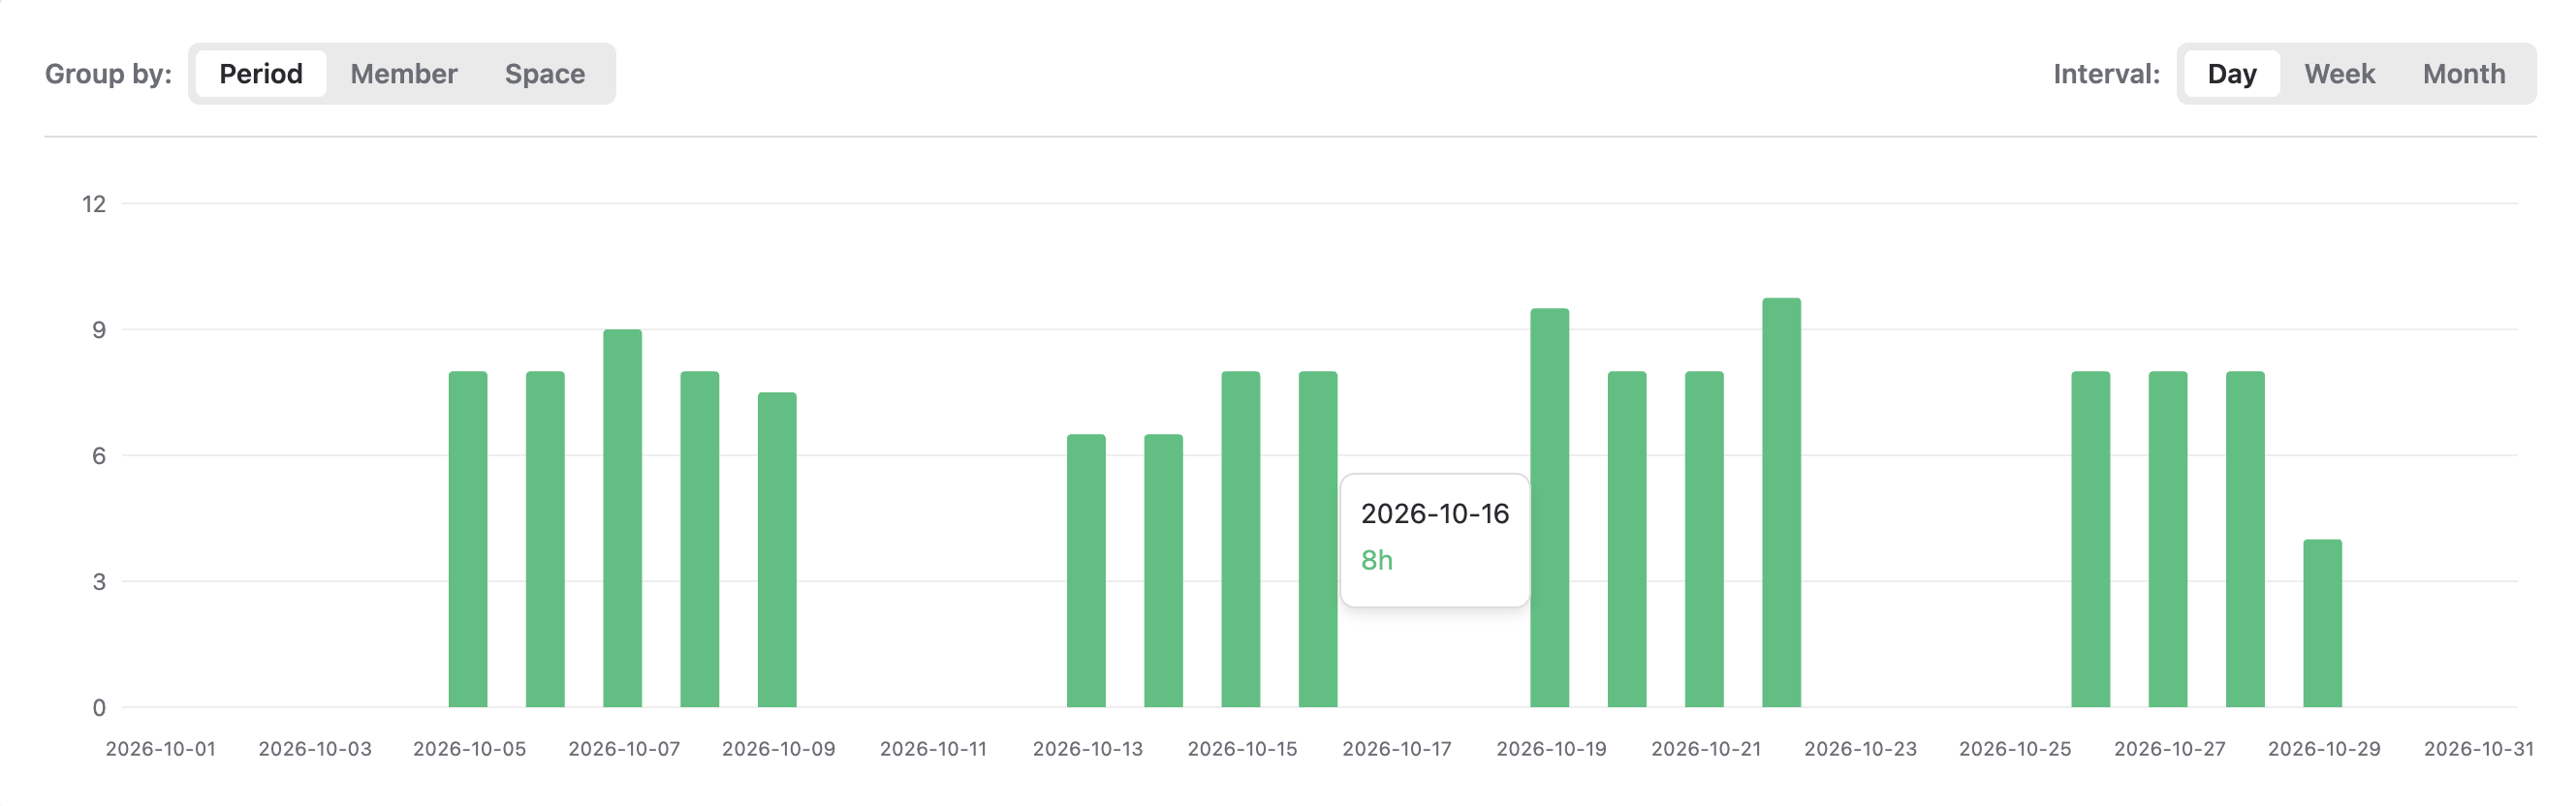
|
Group by option |
Description |
|---|---|
|
Period |
View logged time by day, week, or month. |
|
Member |
View logged time by member. |
|
Space |
View logged time by project. |
You can hide the chart by turning off the Show chart toggle in the filter settings.
Table report
The table report provides a hierarchy view for deeper analysis of logged time. You can group the table by Member, Space, and Task, then expand each group to review the details.
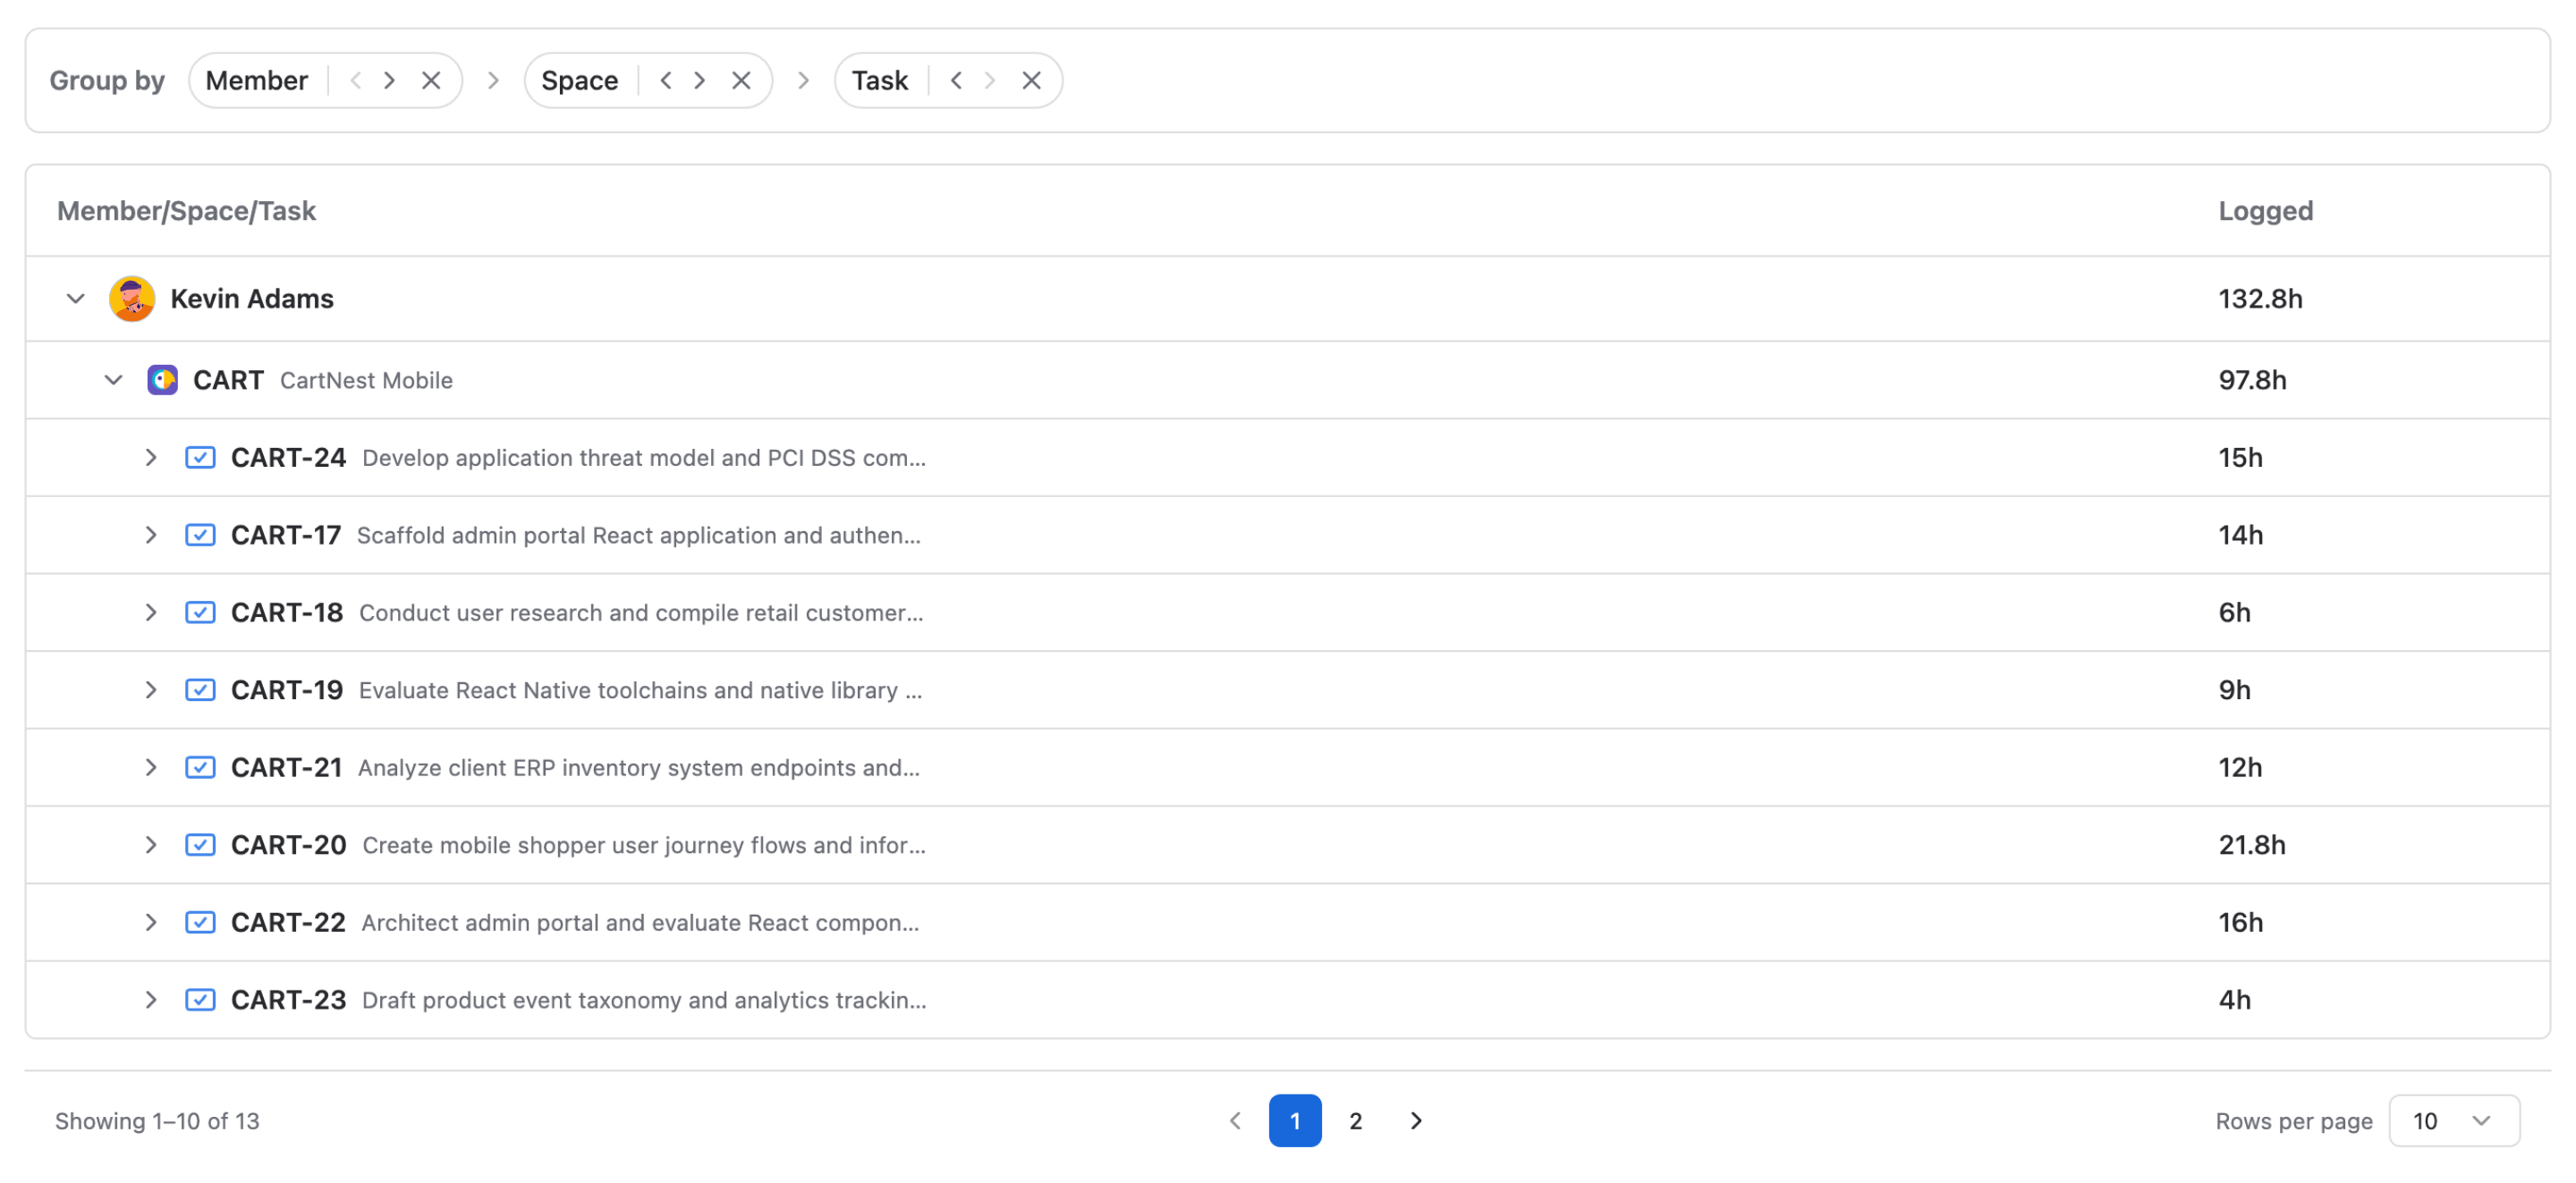
To expand a group, click the down arrow icon next to the group name in the table.
Arrange the hierarchy structure
The grouping order controls the hierarchy of the table. The leftmost group has the highest hierarchy level, and the rightmost group has the lowest hierarchy level.
Use the navigation buttons on each group to change its position:
-
Increase hierarchy: Click the < icon to move the group left.
-
Decrease hierarchy: Click the > icon to move the group right.
Add or remove a grouping aspect
-
To remove a grouping aspect, click the X icon on that aspect.
-
To add a grouping aspect, click Add grouping, then select an option from the dropdown.
If all available groups are already added, the Add grouping button is hidden.
Share your report
Private reports can be shared with specific members or teams.
-
Open the report.
-
Click Share in the upper-right corner.
-
Search for the members or teams you want to add.
-
Select the members or teams, then click Save.
To remove a member or team from the report, open the Share screen and click the trash icon next to that member or team.
Only Private reports can be shared with selected members or teams.
Save report changes
After editing the report, click Save changes to keep your updates.