.png)
Planning and scheduling projects effectively are crucial for meeting deadlines and achieving project goals. TeamBoard ProScheduler provides a comprehensive suite of tools to streamline this process.
Steps in this use case
-
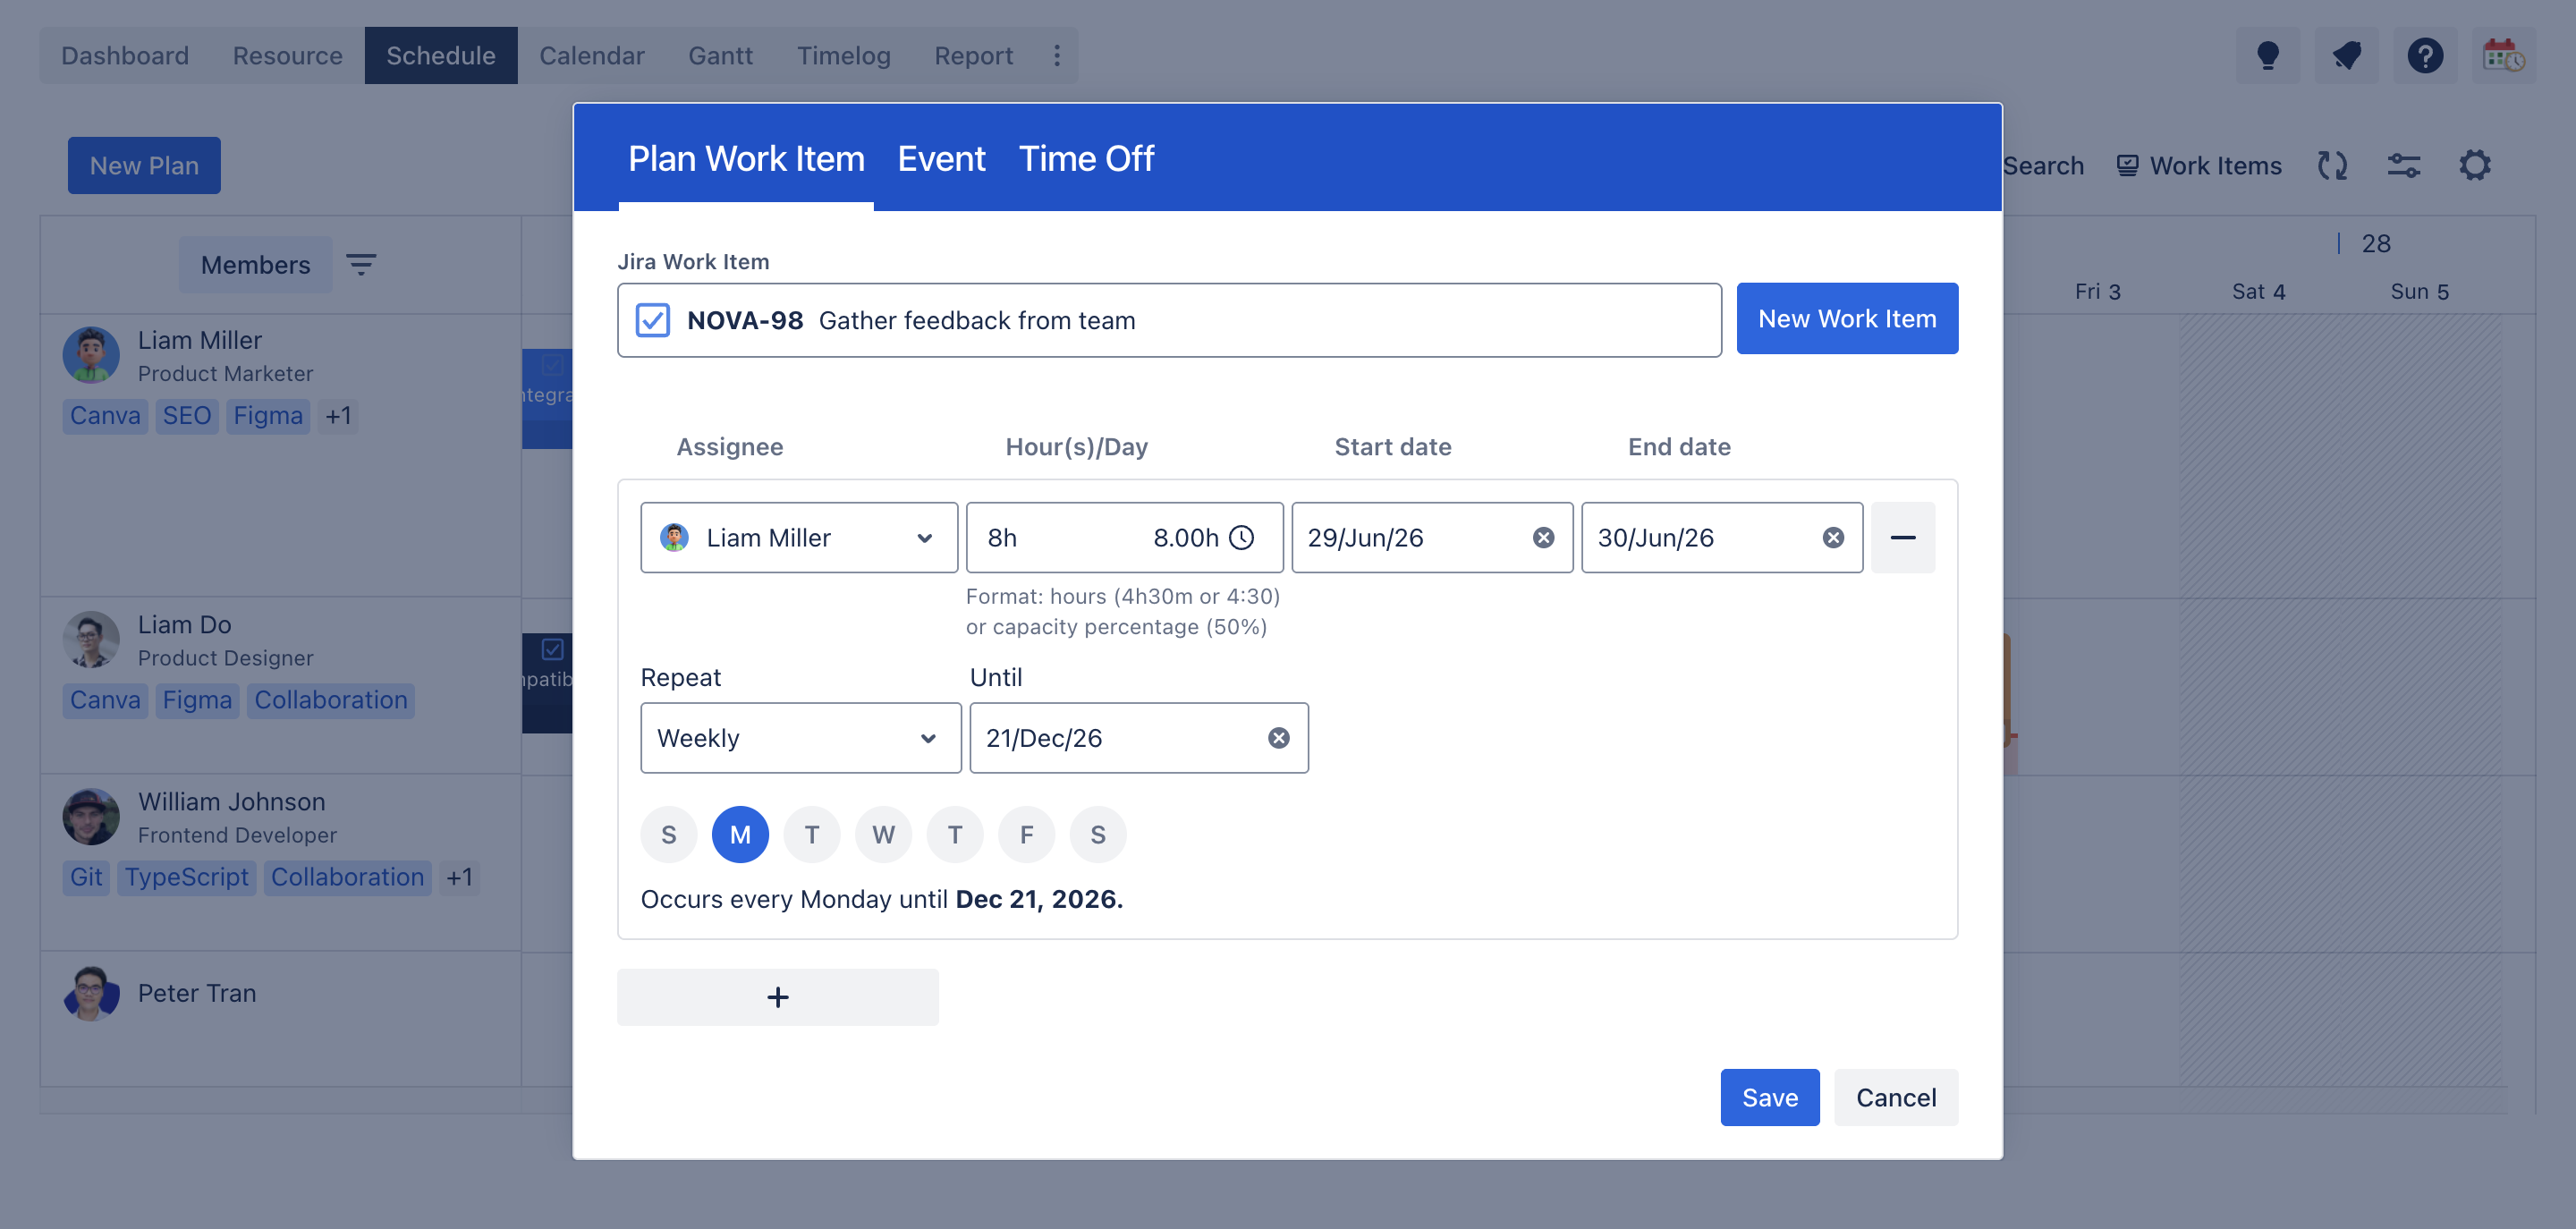
Define project scope and tasks
-
Visual planning in the Schedule board
-
Adjust the project timeline using the Gantt chart
-
Establish dependencies
-
Monitor progress with the Baseline
-
Manage the team’s workload
-
Understand the project timeline with the Calendar view
-
Track report and dashboard
Step-by-Step Guide
Step 1: Define project scope and tasks
Break down tasks: Begin by breaking down your project into manageable tasks. For example, if you’re launching a new product, tasks could include market research, product development, testing, marketing, and launch.
Create tasks in Jira: Create these tasks as issues in Jira. You can use different issue types for various tasks (e.g., Epics for large milestones, Stories for individual tasks) or you can create a task directly on TeamBoard.
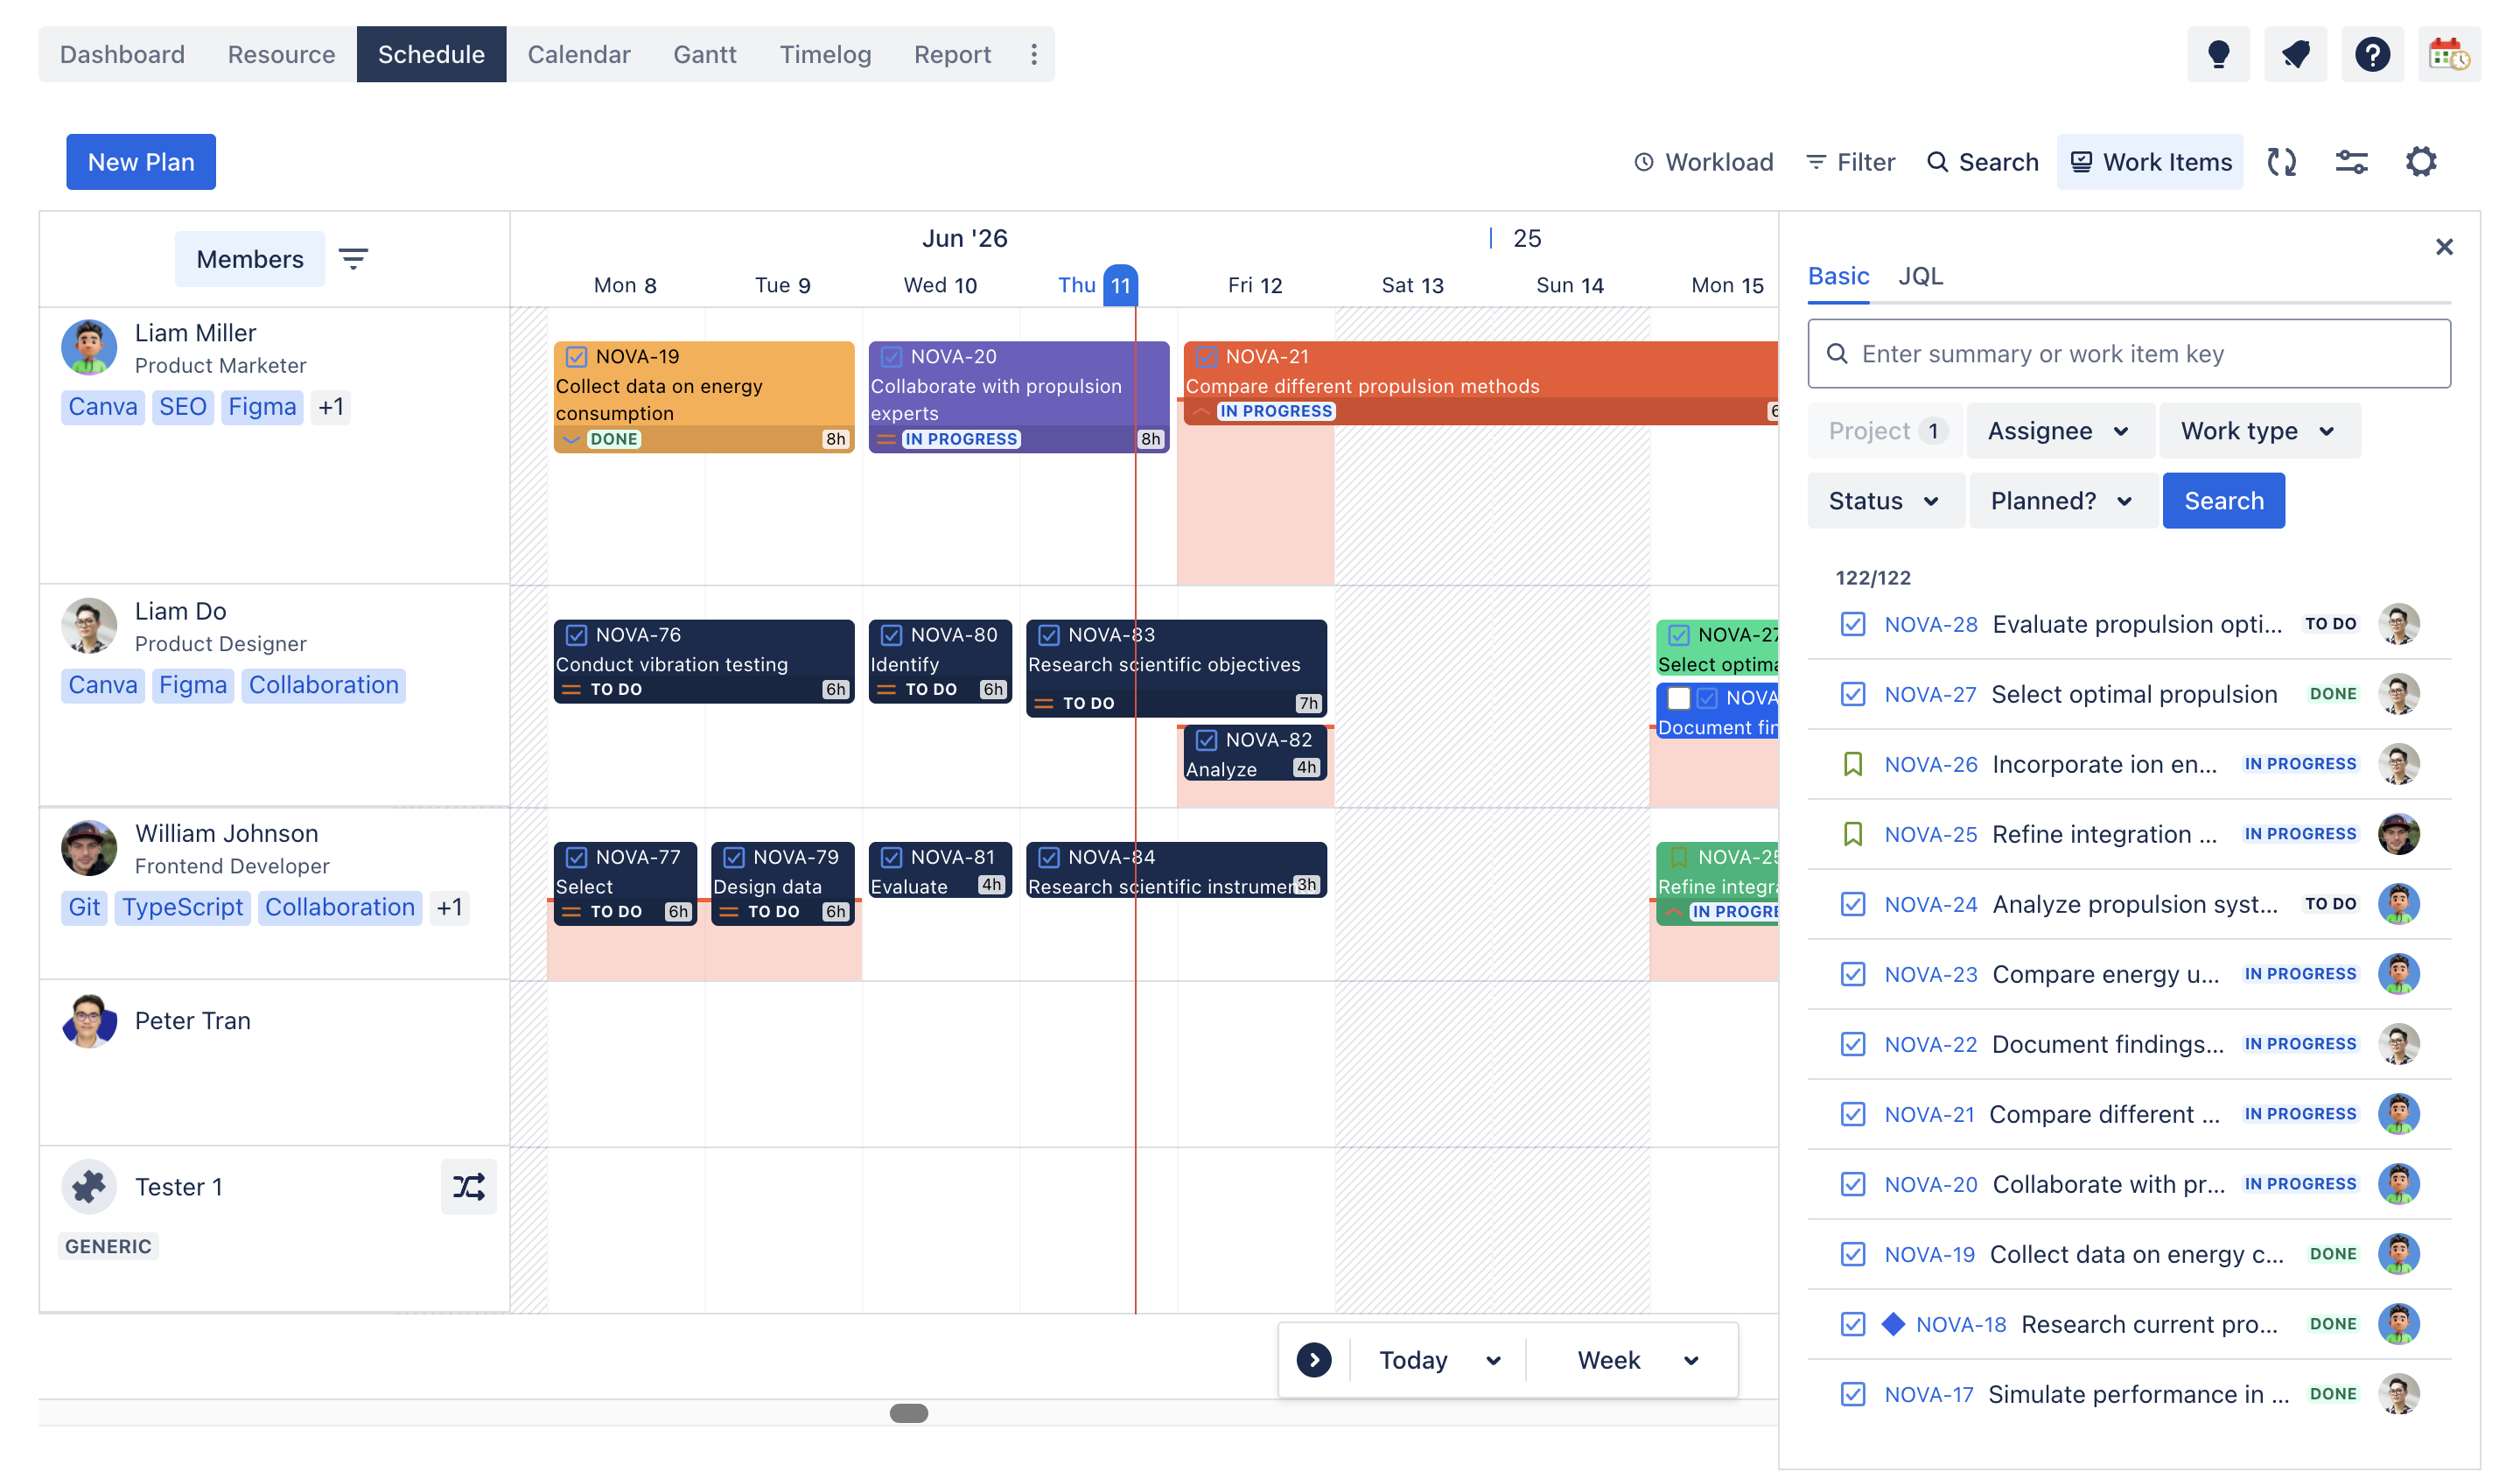
Step 2: Visual planning in the Schedule board
Visual planning: Use the Schedule Board to visually plan and organize tasks. Drag and drop tasks to adjust schedules and see how changes impact the overall timeline.
Resource planning: Allocate resources to tasks directly on the Schedule Board. This feature helps ensure that each team member is optimally utilized without overloading anyone.
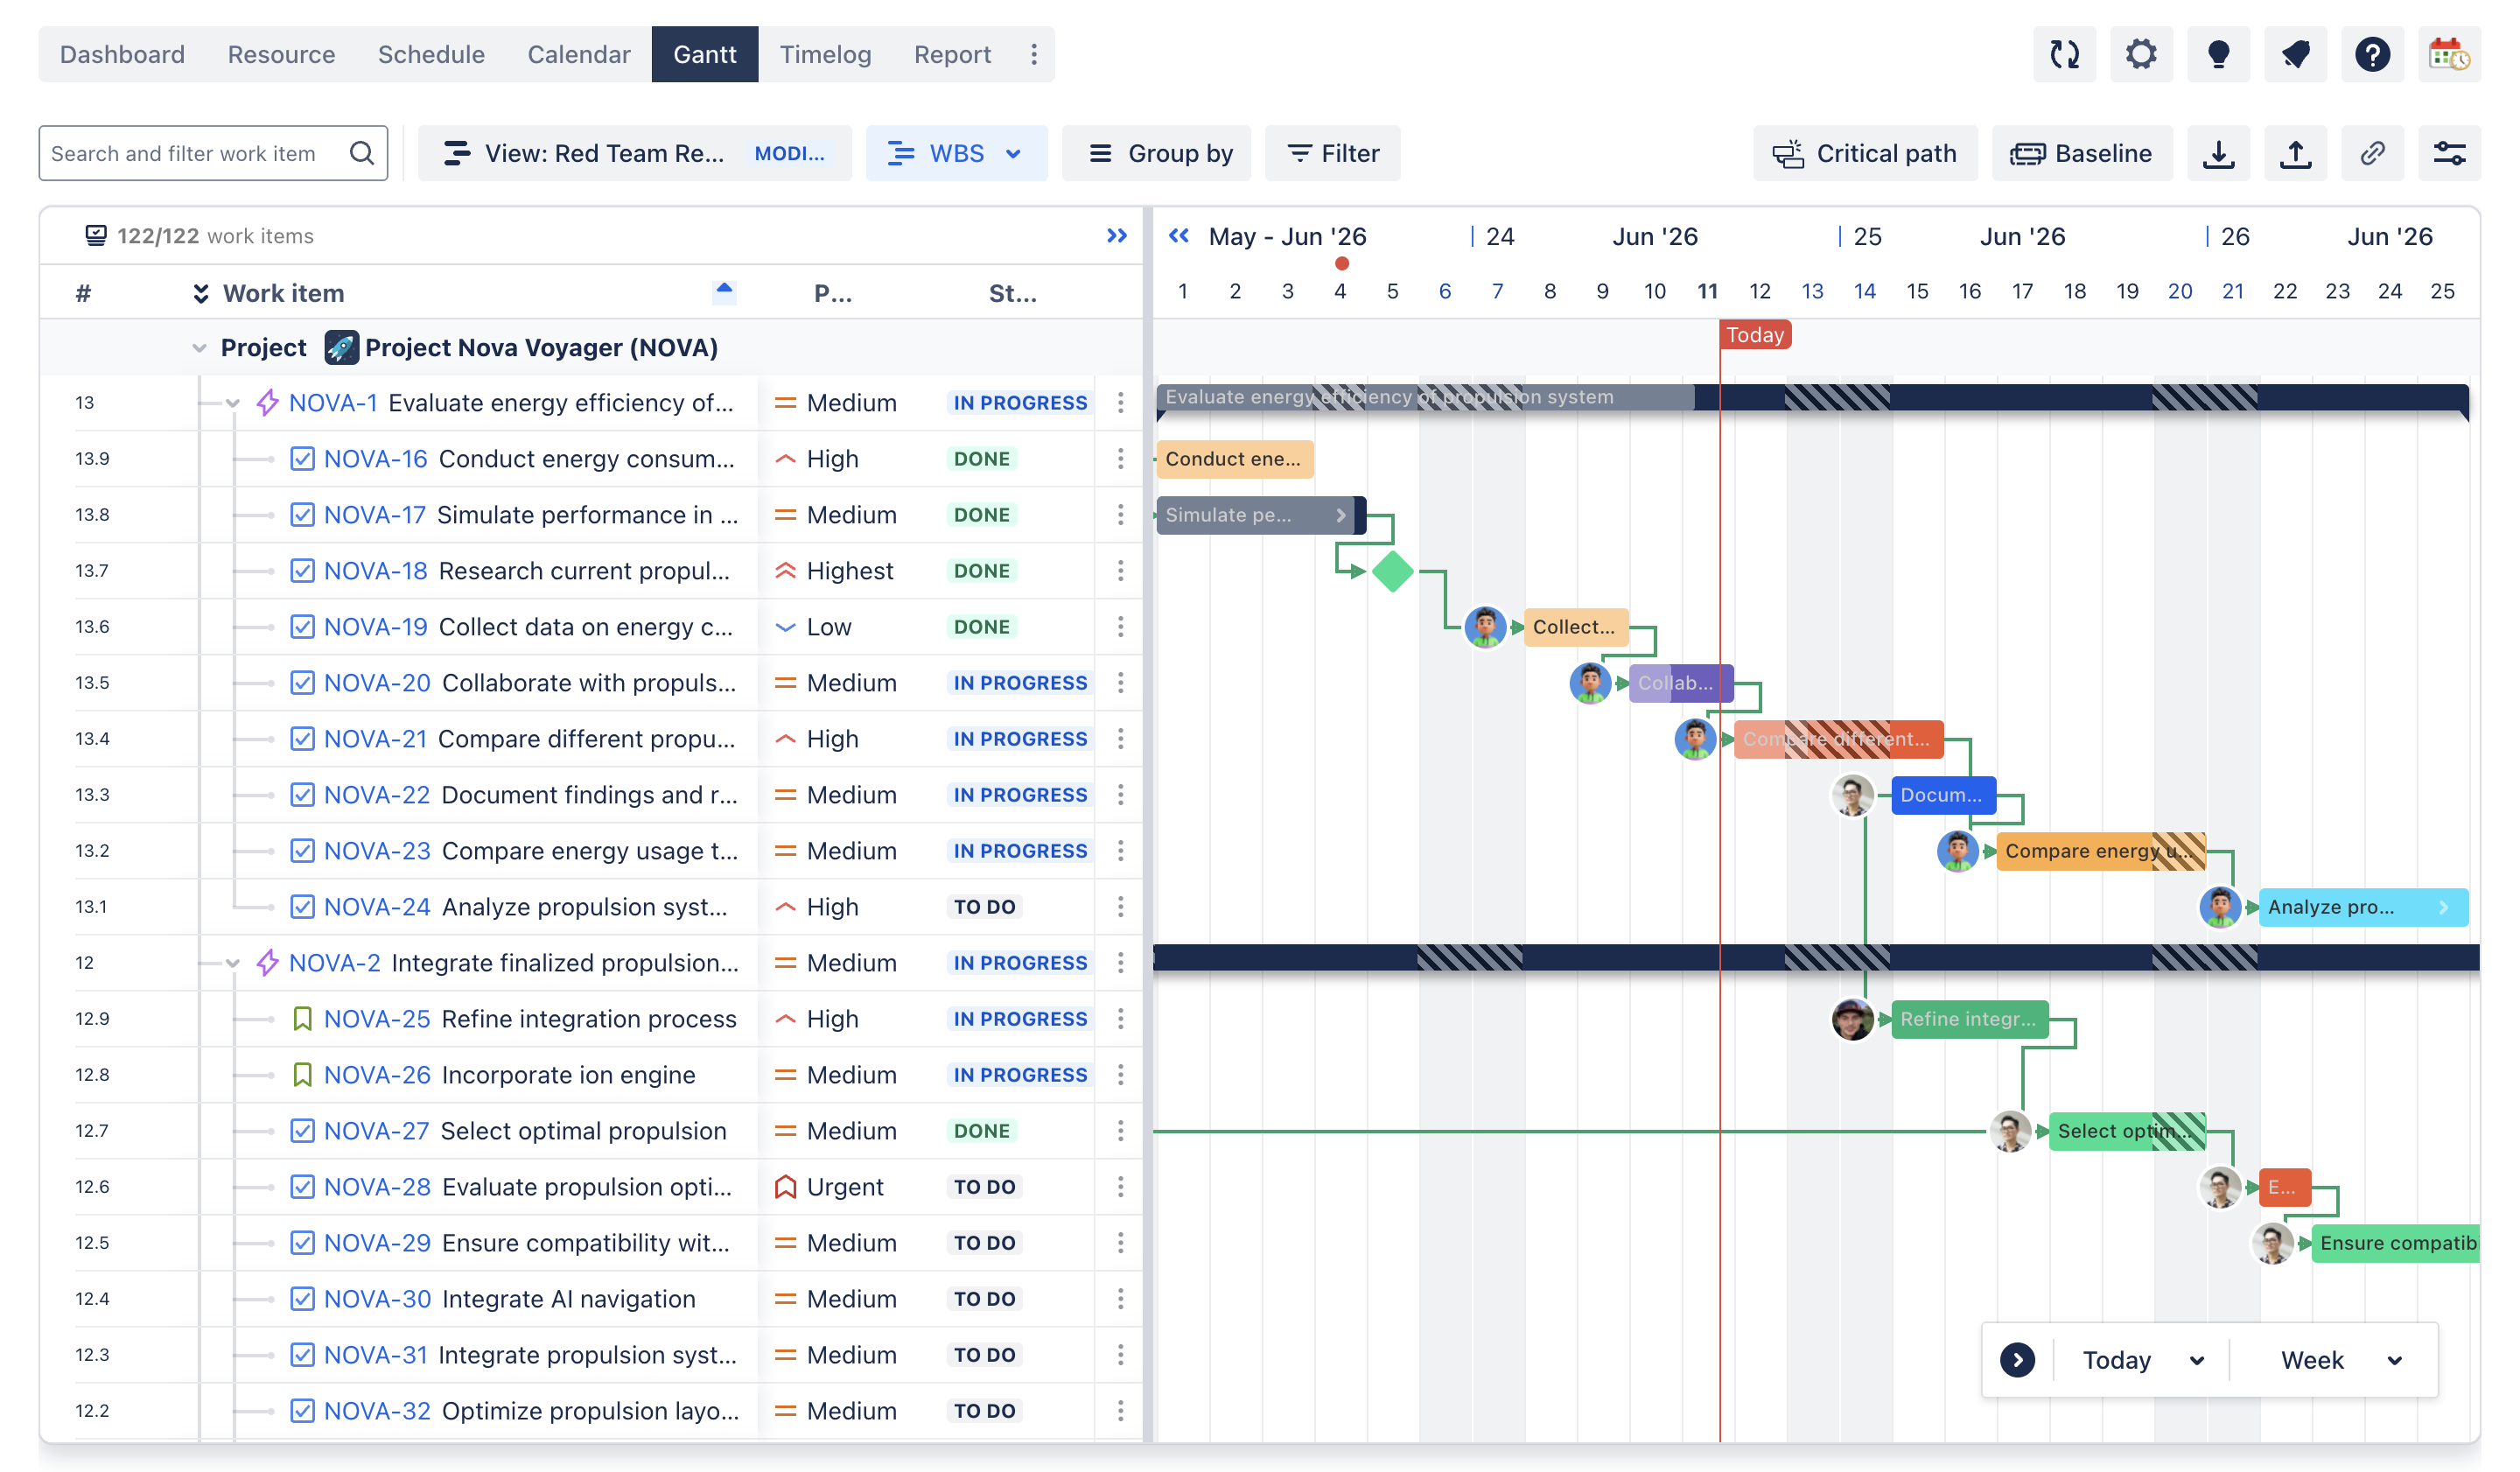
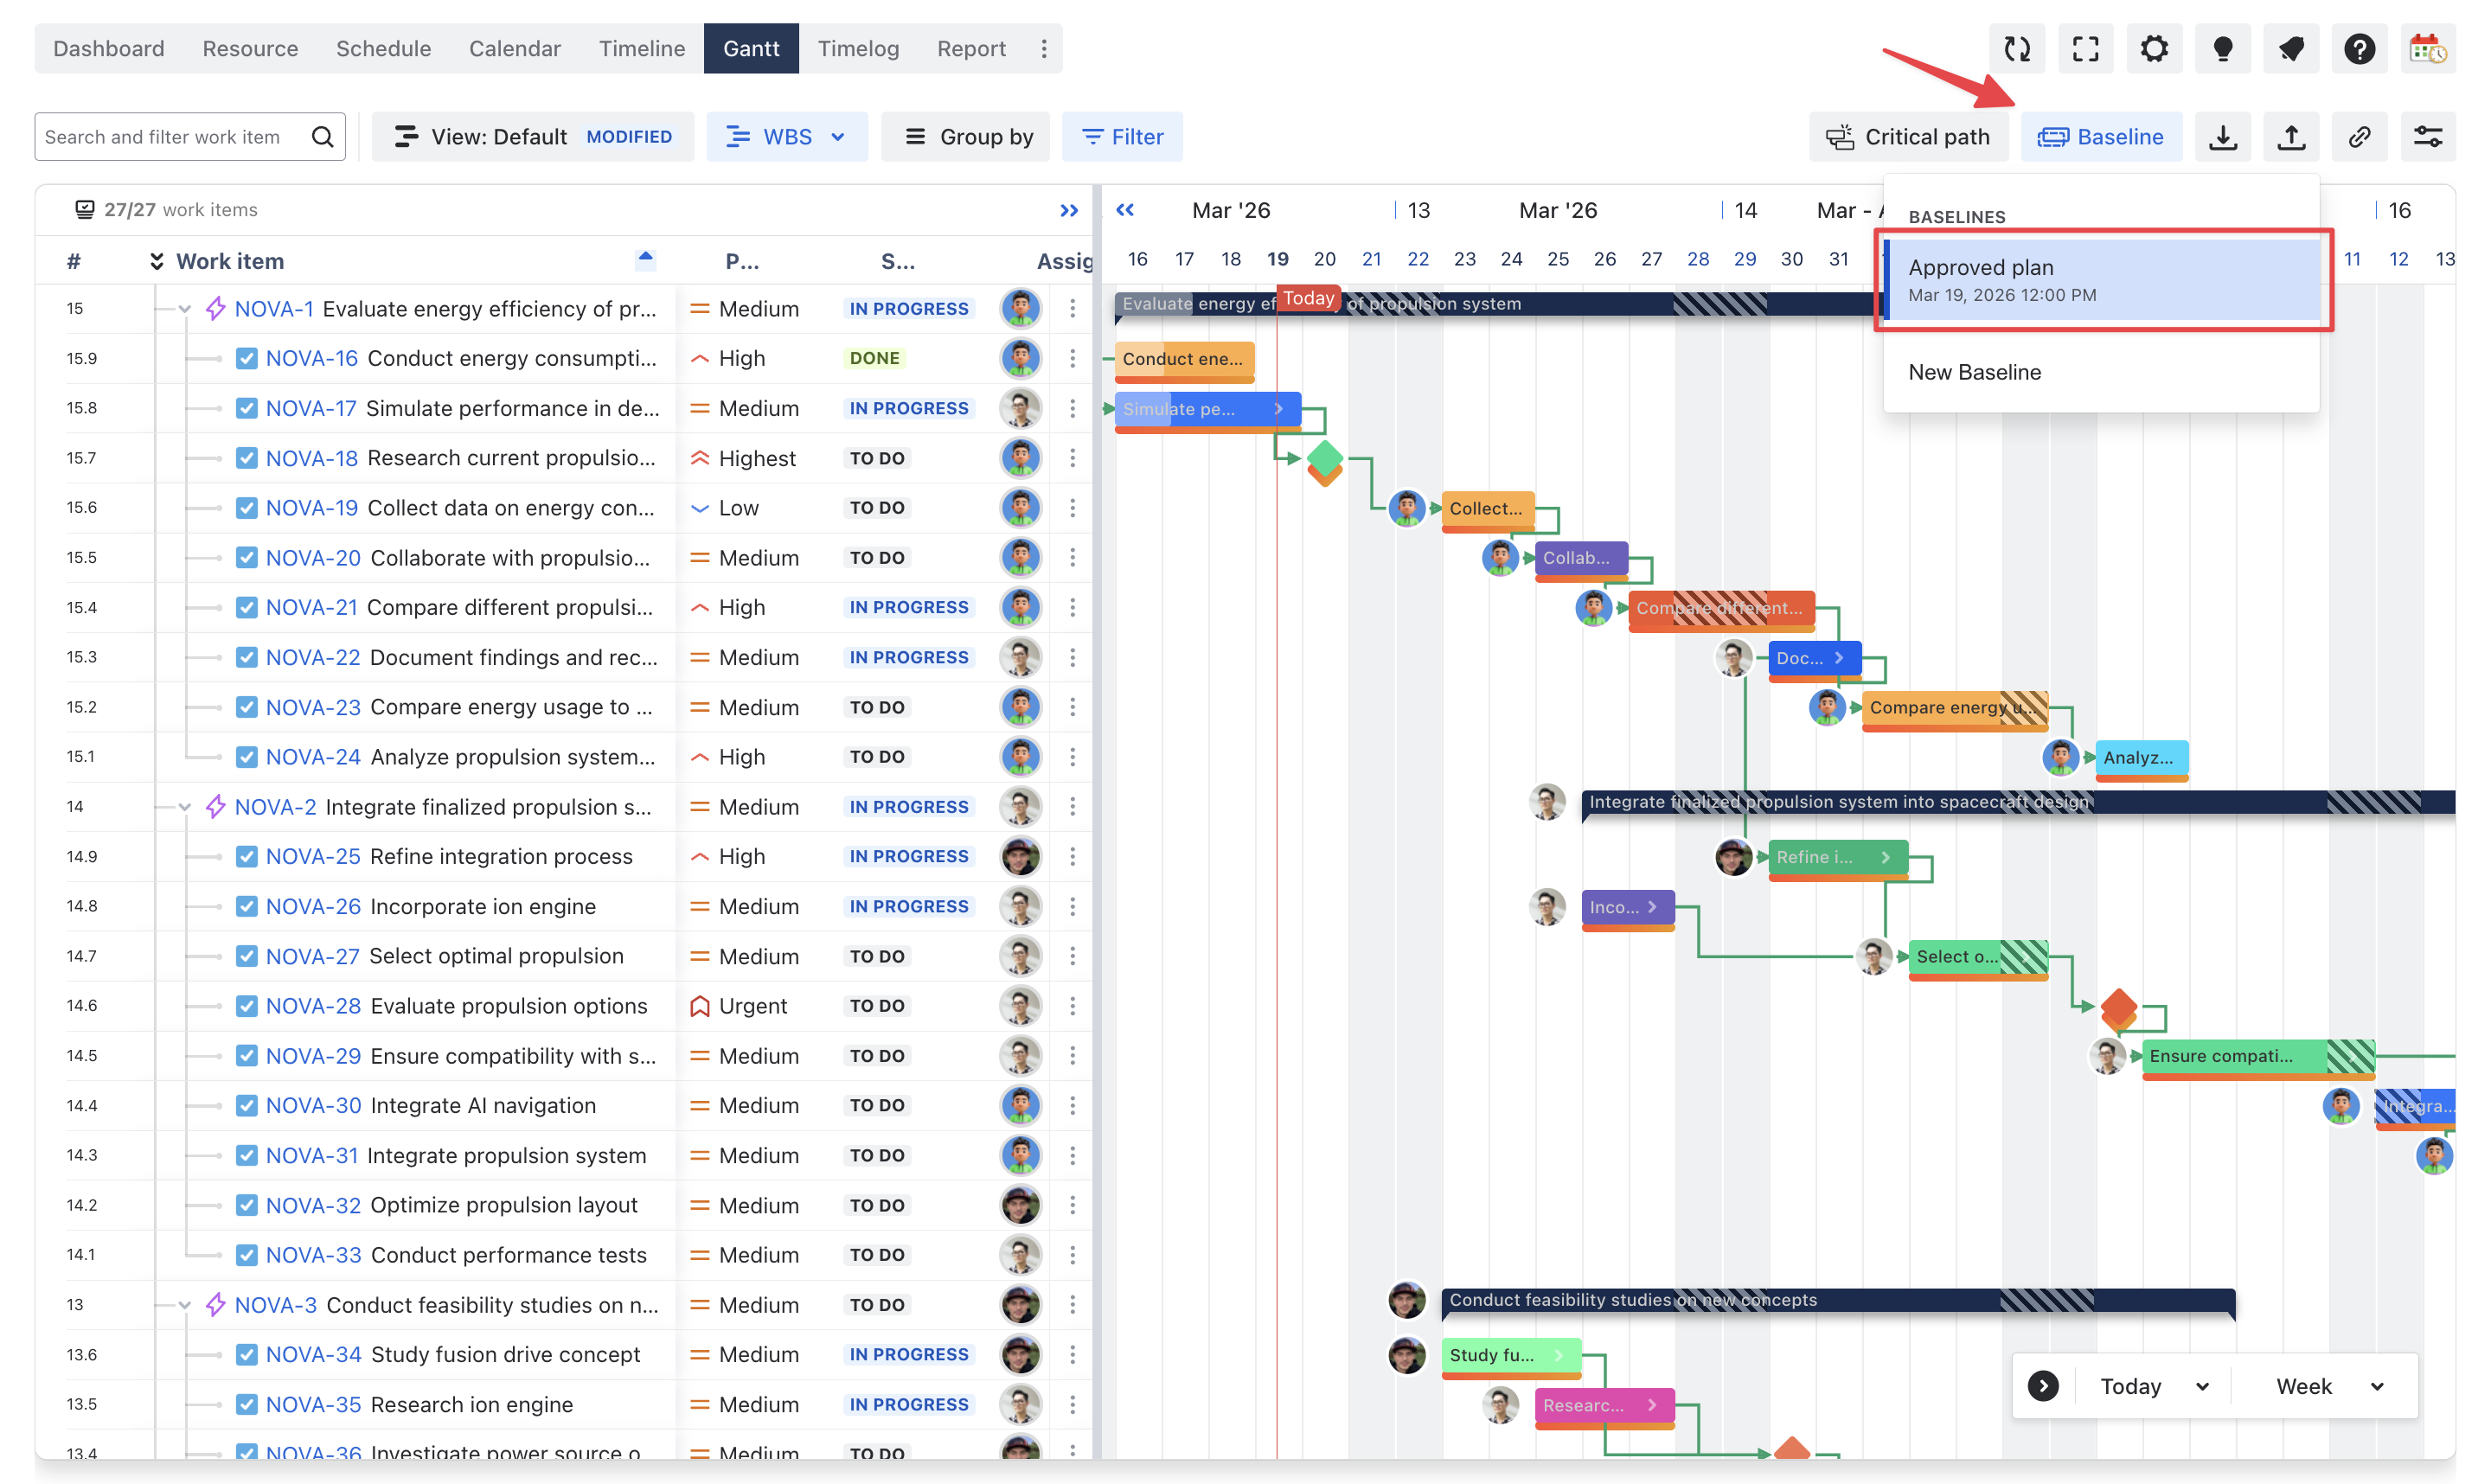
Step 3: Adjust the project timeline using the Gantt chart
Timeline visualization: The Gantt Chart provides a timeline view of your project. You can see the start and end dates of all tasks, dependencies, milestones, baseline, and critical path.
Adjust schedules: Easily adjust task schedules by dragging task bars on the Gantt Chart. For example, if product testing needs more time, you can extend its duration and see the impact on subsequent tasks.
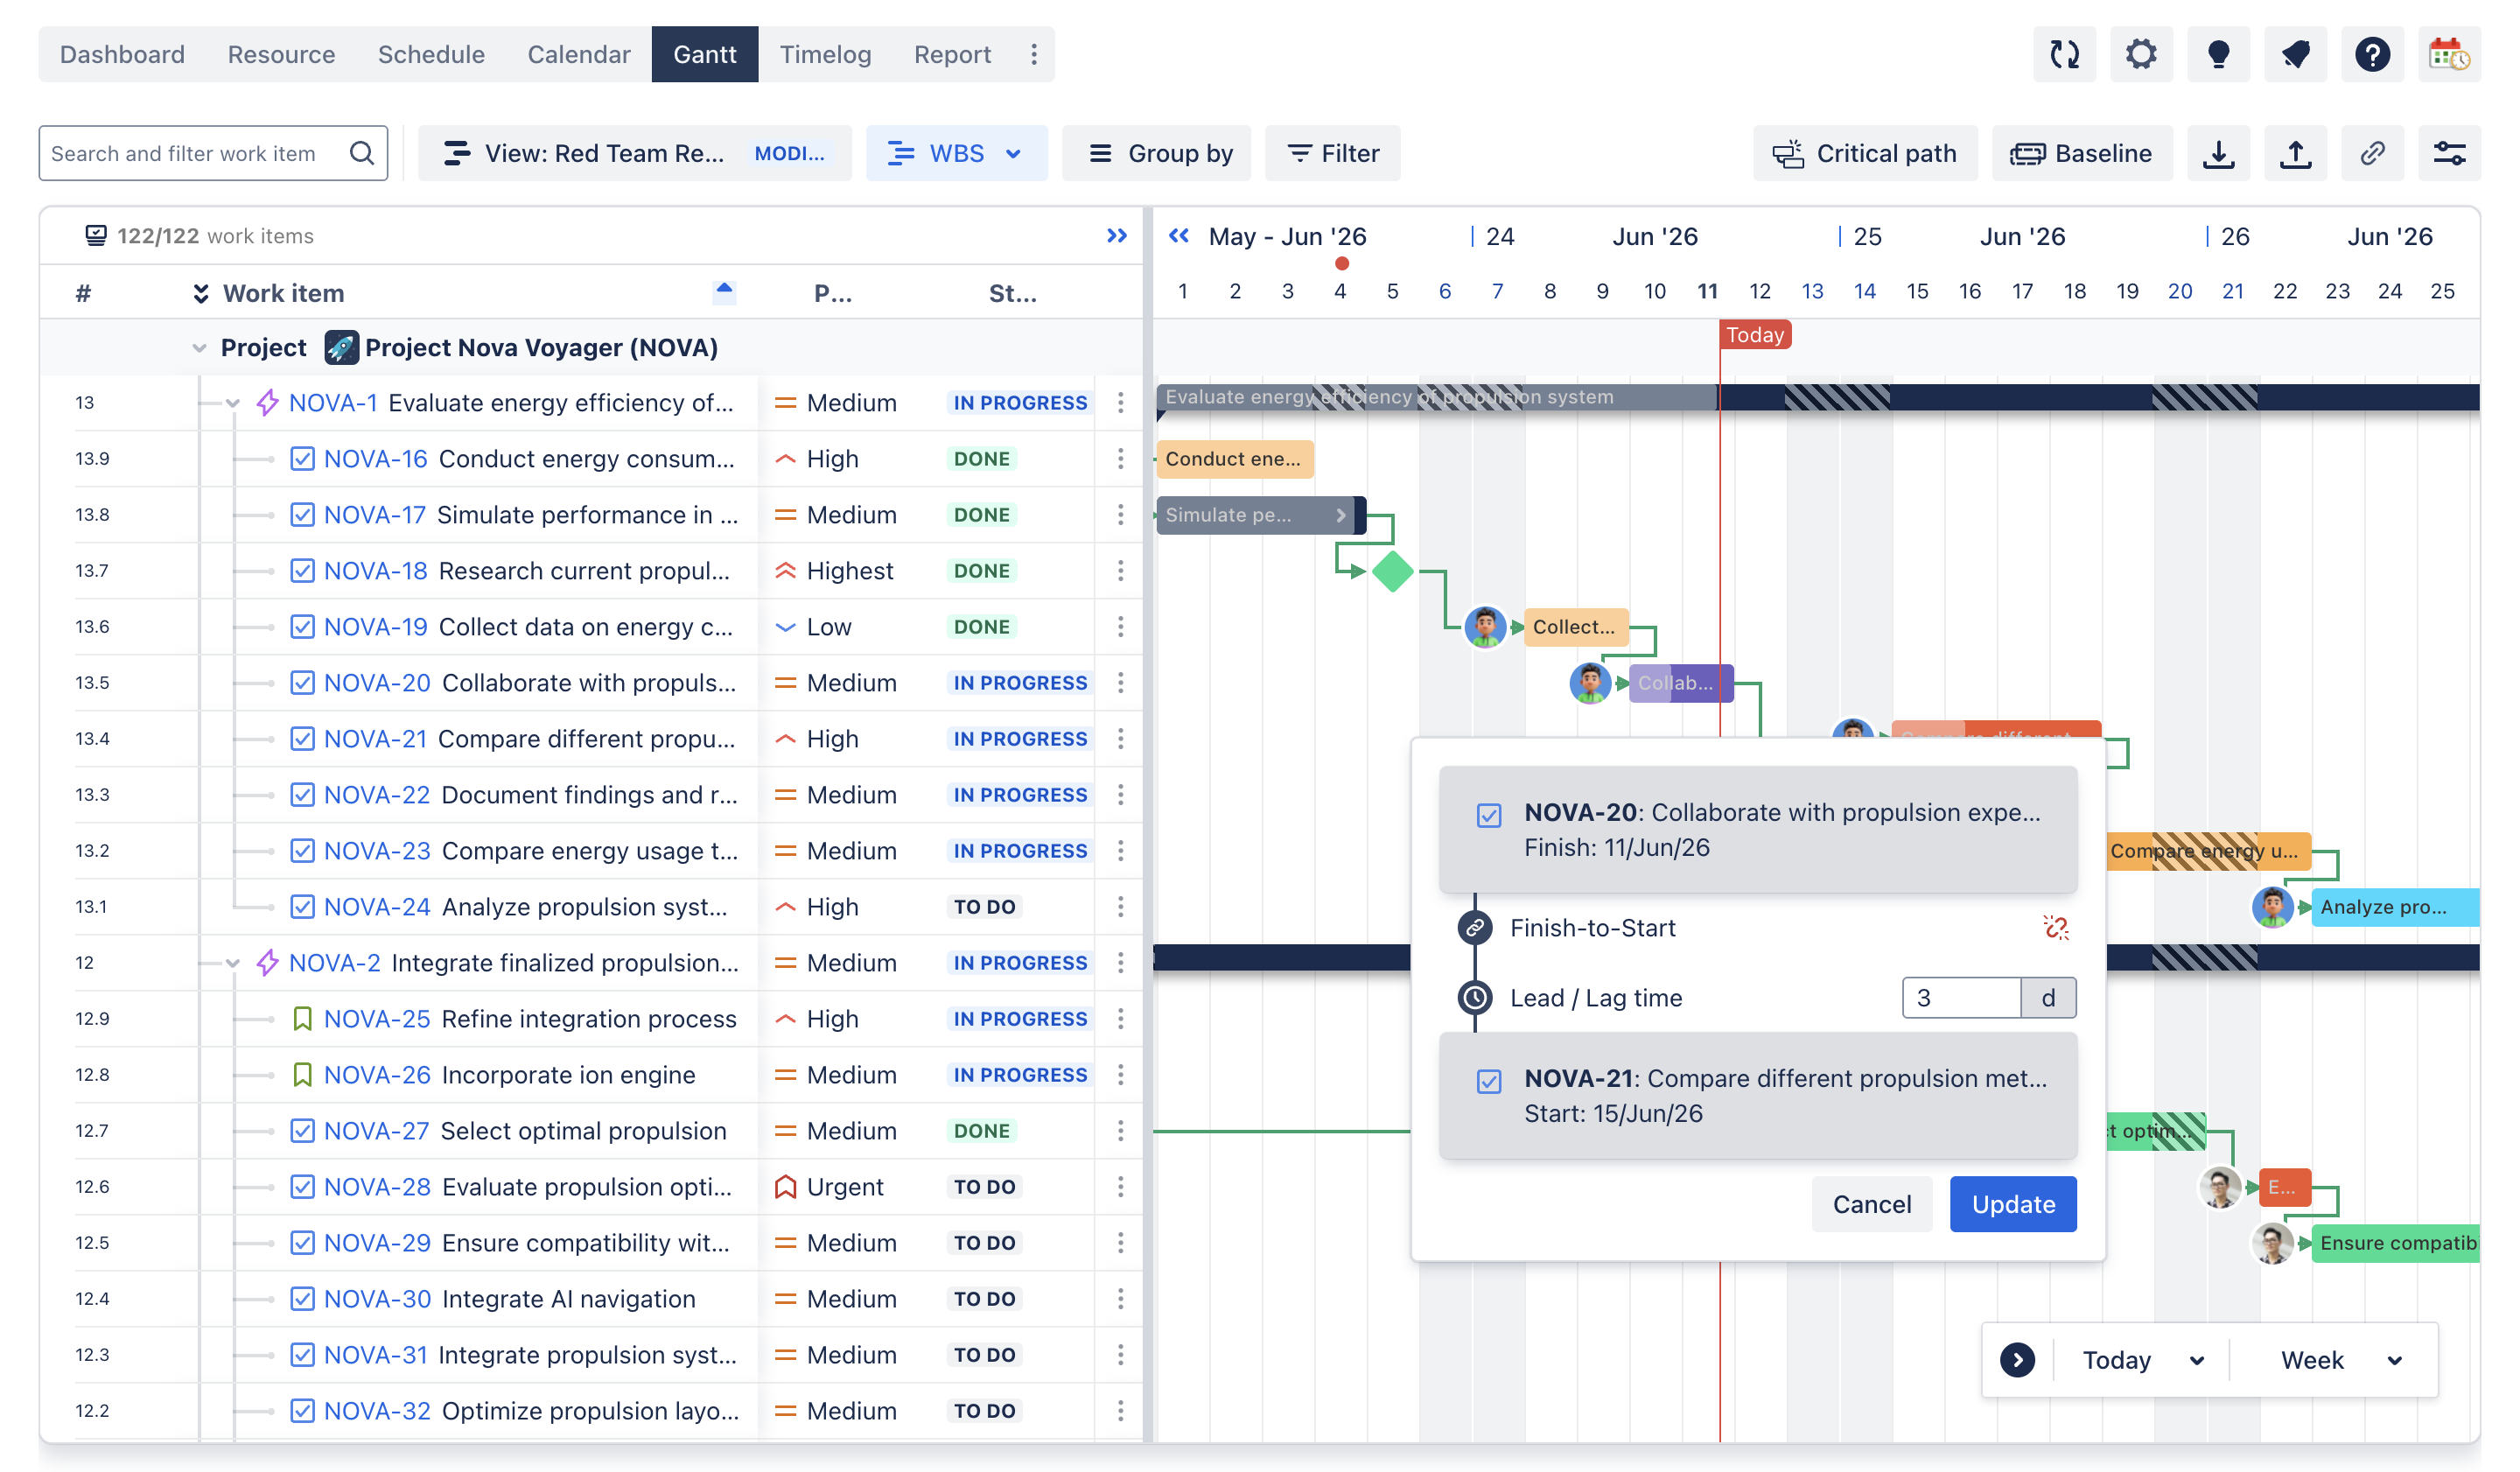
Step 4: Establish dependencies
Link tasks: Establish dependencies between tasks to reflect their sequence. For instance, product testing can only start after product development is complete.
Auto scheduling: With this feature enabled, when dependencies are set, any changes to a task’s schedule automatically propagate to dependent tasks. This ensures your project plan remains coherent and realistic.
Step 5: Monitor progress with the Baseline
Progress monitoring: Track each task's progress in the Gantt Chart. You can see which tasks are on schedule, delayed, or completed.

Baseline comparison: Compare the current progress against the baseline to identify any deviations from the original plan. This helps in making necessary adjustments promptly.
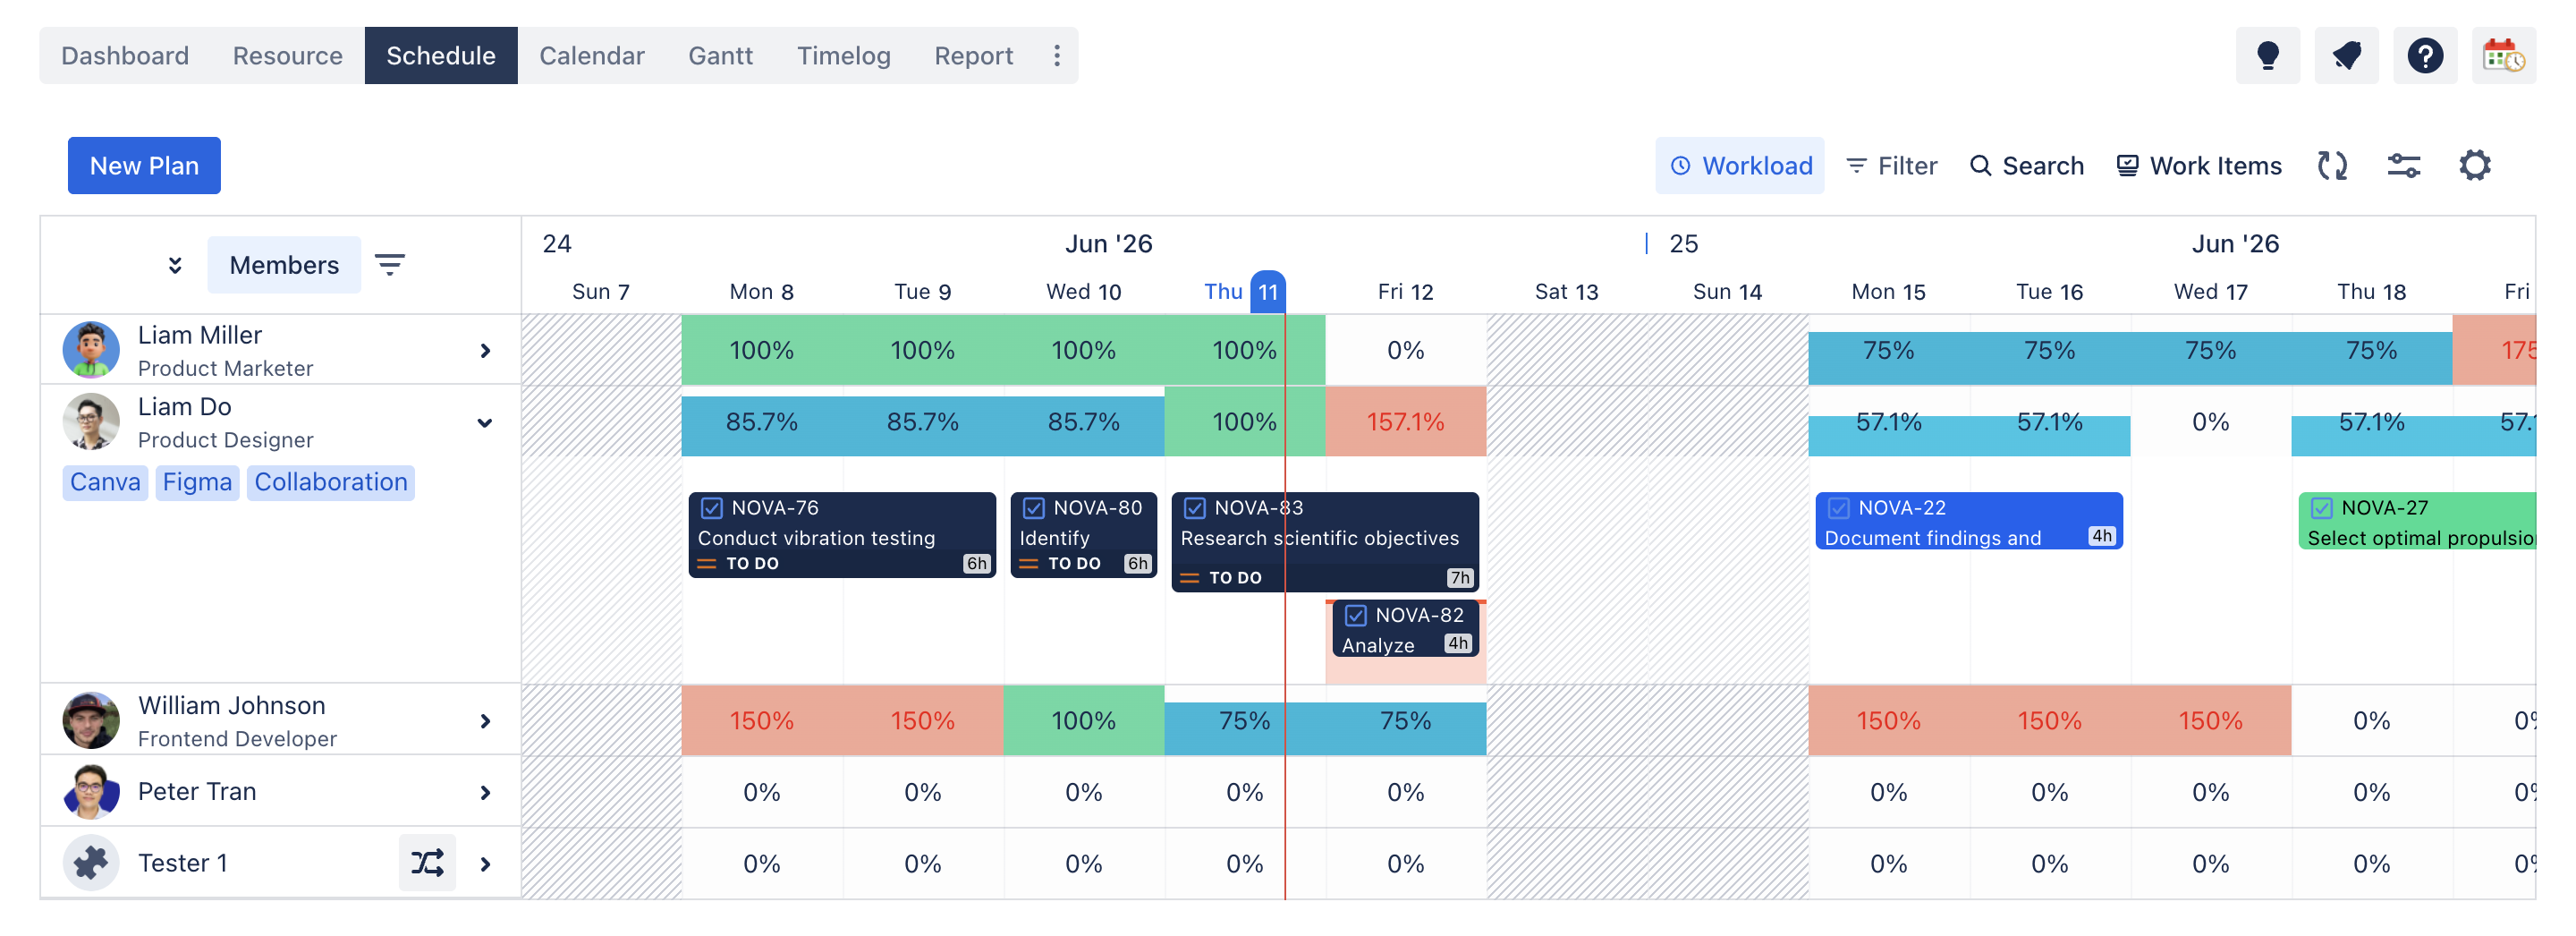
Step 6: Manage the team’s workload
Workload view: Use the workload management features to see the distribution of tasks among team members. Ensure that no one is overburdened and that all resources are utilized efficiently.
Capacity planning: Plan future tasks based on team members’ capacity. For example, if a developer has a high workload in the first month, schedule their tasks for the next phase accordingly.
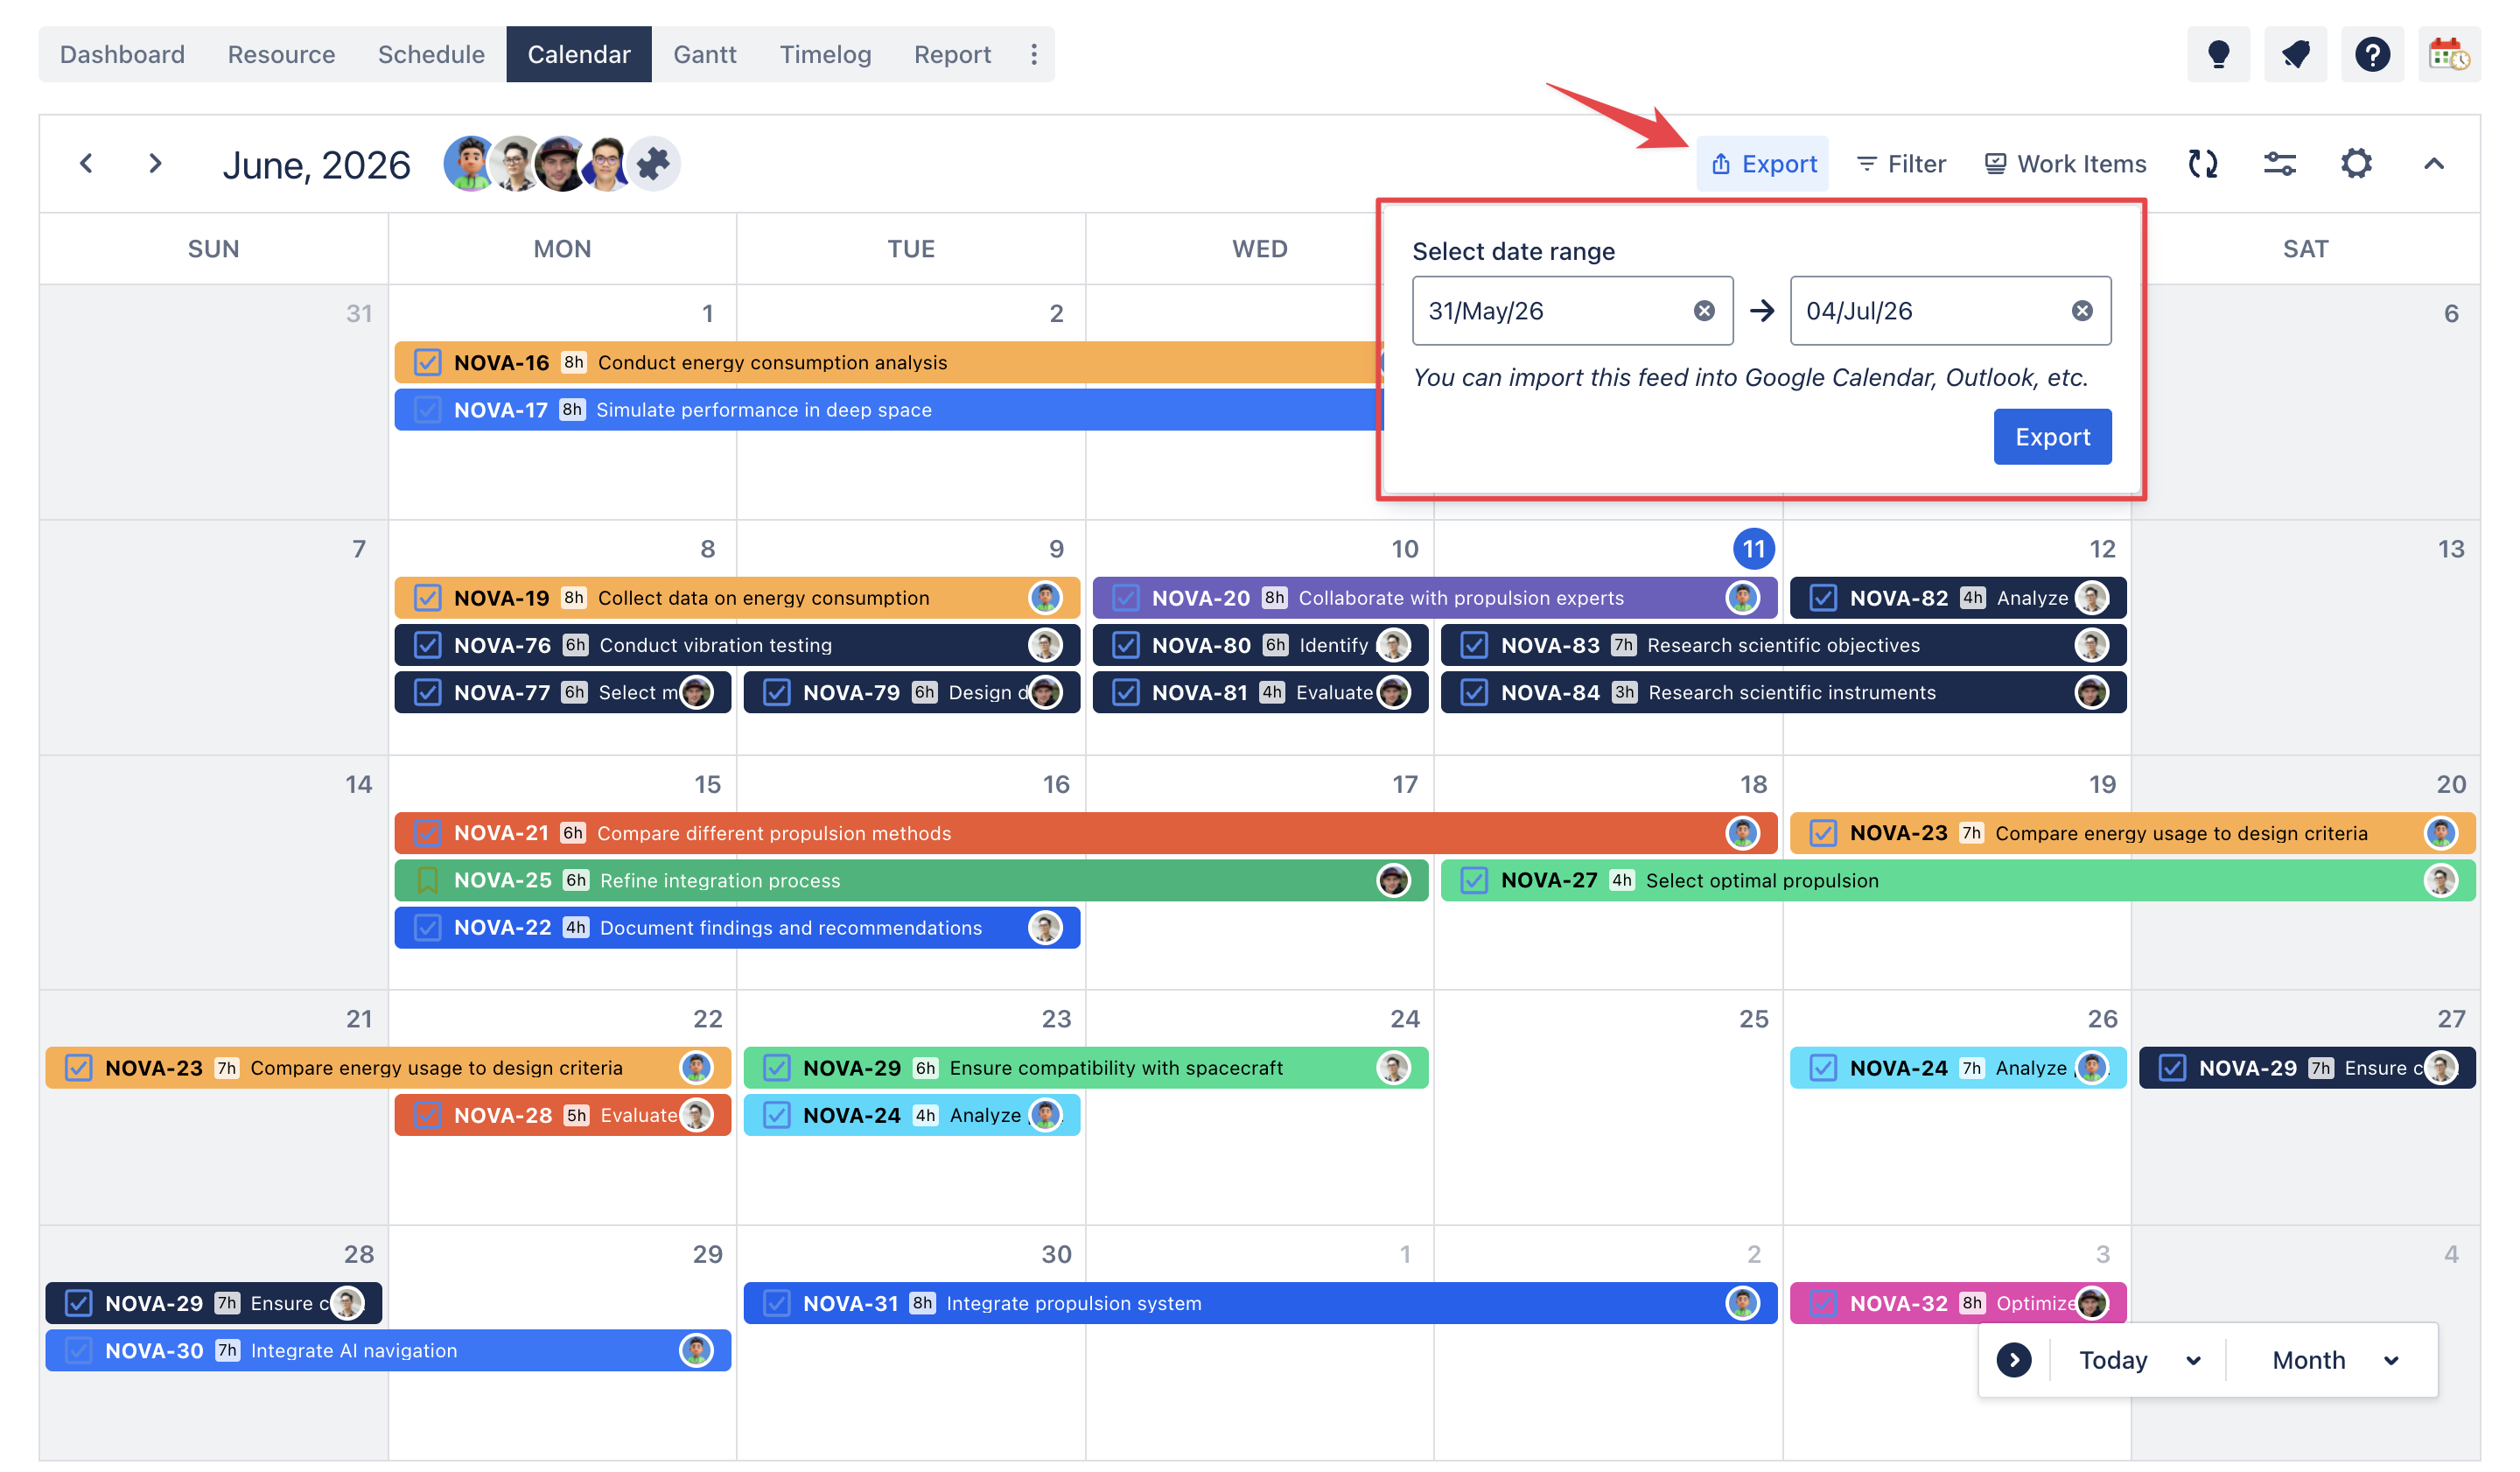
Step 7: Understand the project timeline with the Calendar view
Calendar view: View all tasks and deadlines in a calendar format. This helps in understanding the project timeline at a glance.
ICS export: Export your project schedules to ICS format to integrate with external calendar applications like Google Calendar or Outlook.
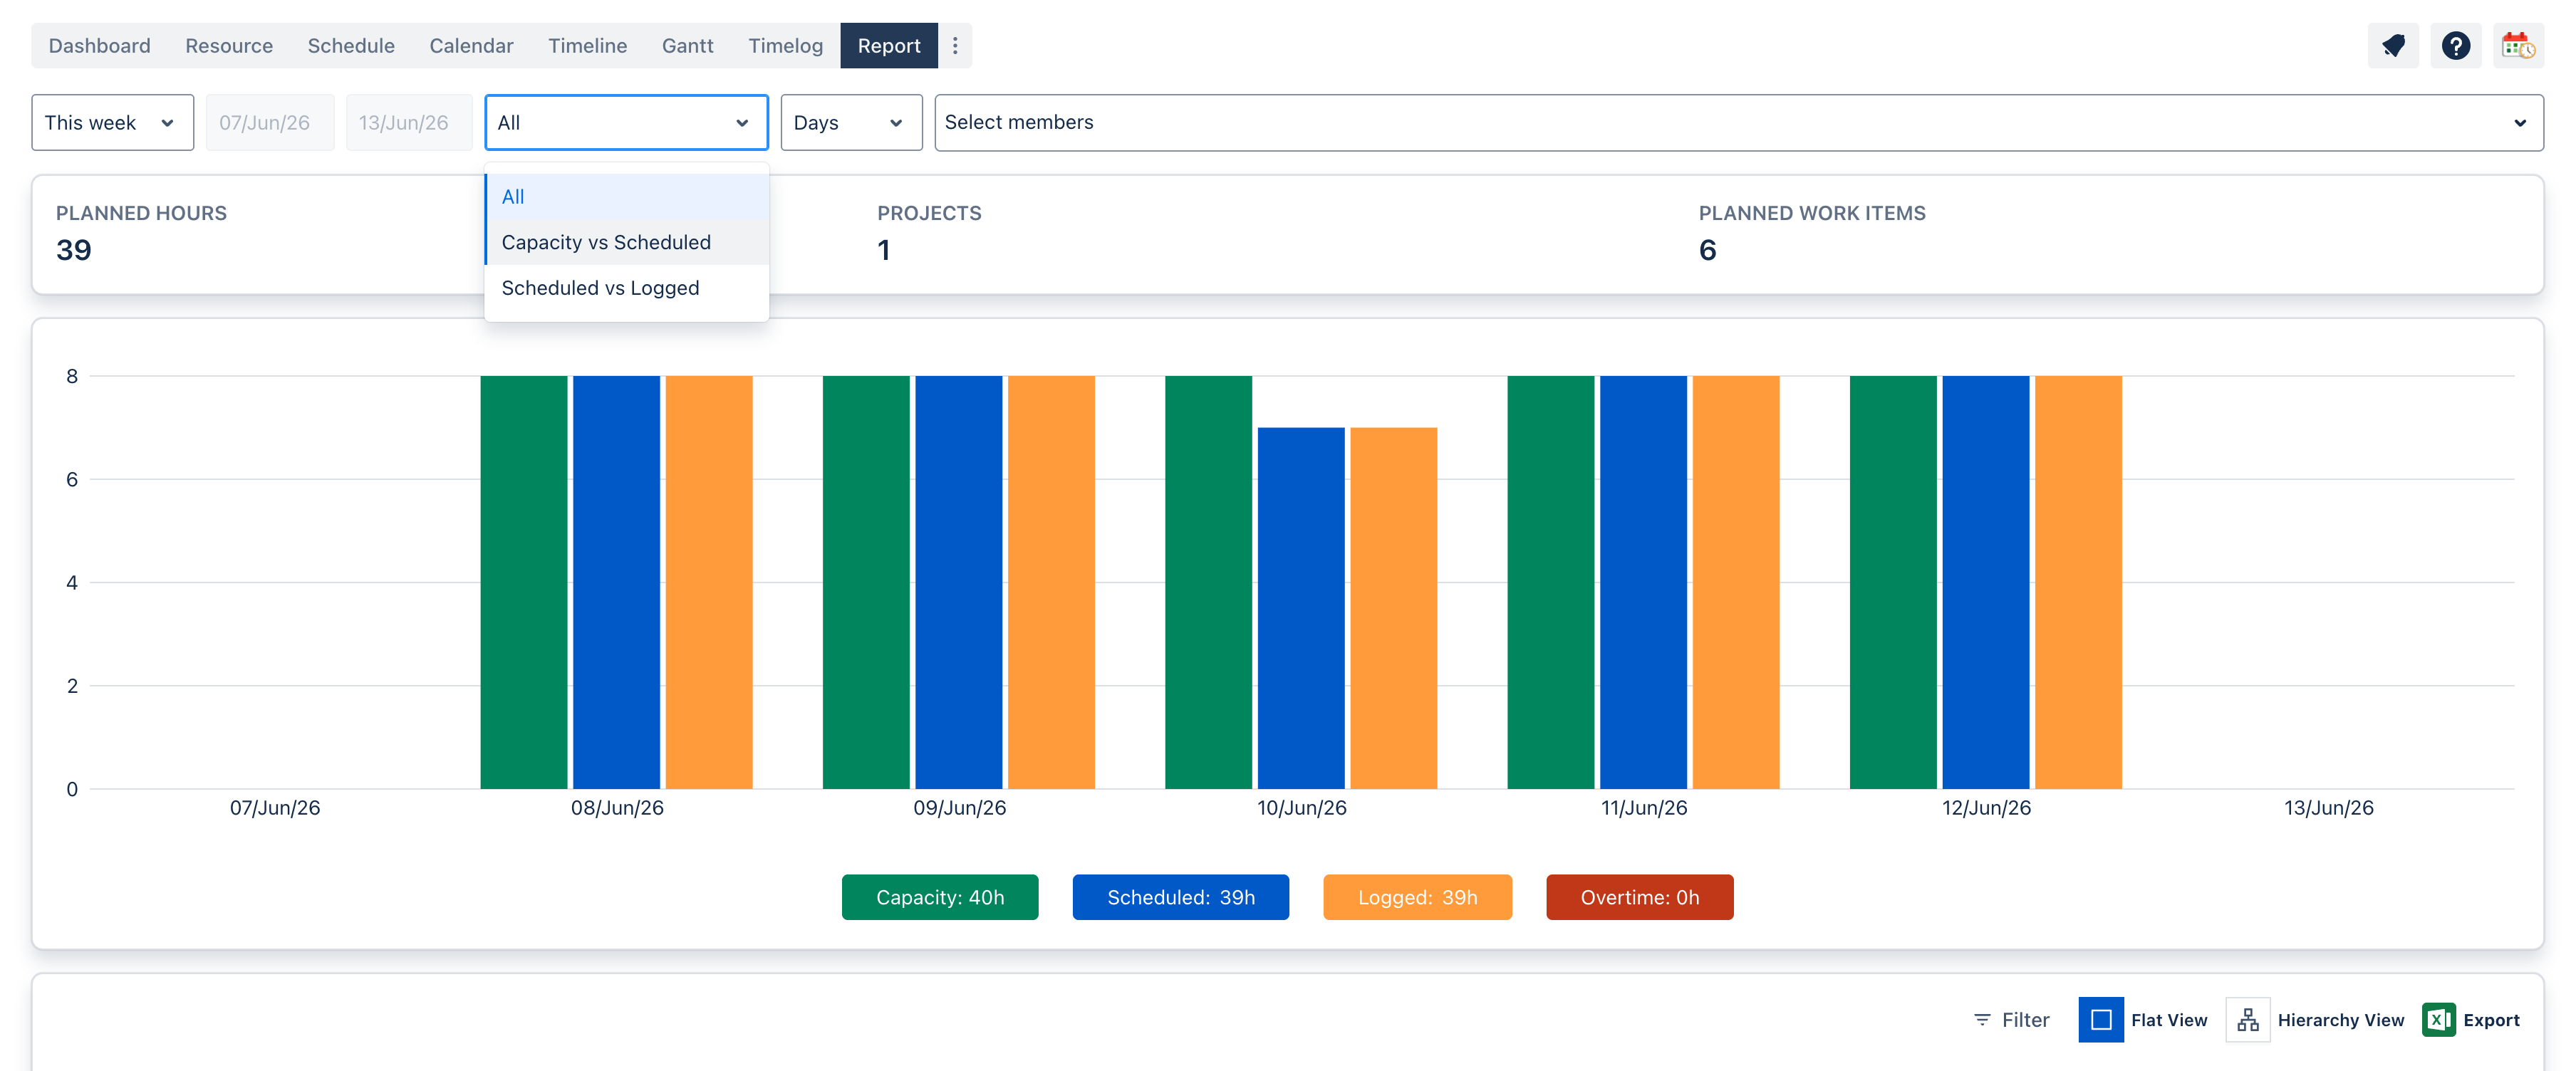
Step 8: Track report and dashboard
Effective reporting and dashboard visualization are essential for tracking project progress, making informed decisions, and ensuring transparency across teams. TeamBoard ProScheduler for Jira offers robust dashboard and reporting features to help you manage and monitor your projects efficiently.
If you have any questions, please feel free to reach out to our support team or schedule a demo call to get personalized assistance.