.png)
To view other members' data in each report type, users must have the appropriate permissions within the Team:
-
General Report – Requires VIEW TEAM SCHEDULE and VIEW TEAM WORKLOG permissions.
-
Scheduled Time Report – Requires VIEW TEAM SCHEDULE permission.
-
Logged Time Report – Requires VIEW TEAM WORKLOG permission.
👉 Learn more in Team Permissions for TimePlanner.
Creating a New Report
Step 1 Open the Reports section from the sidebar.
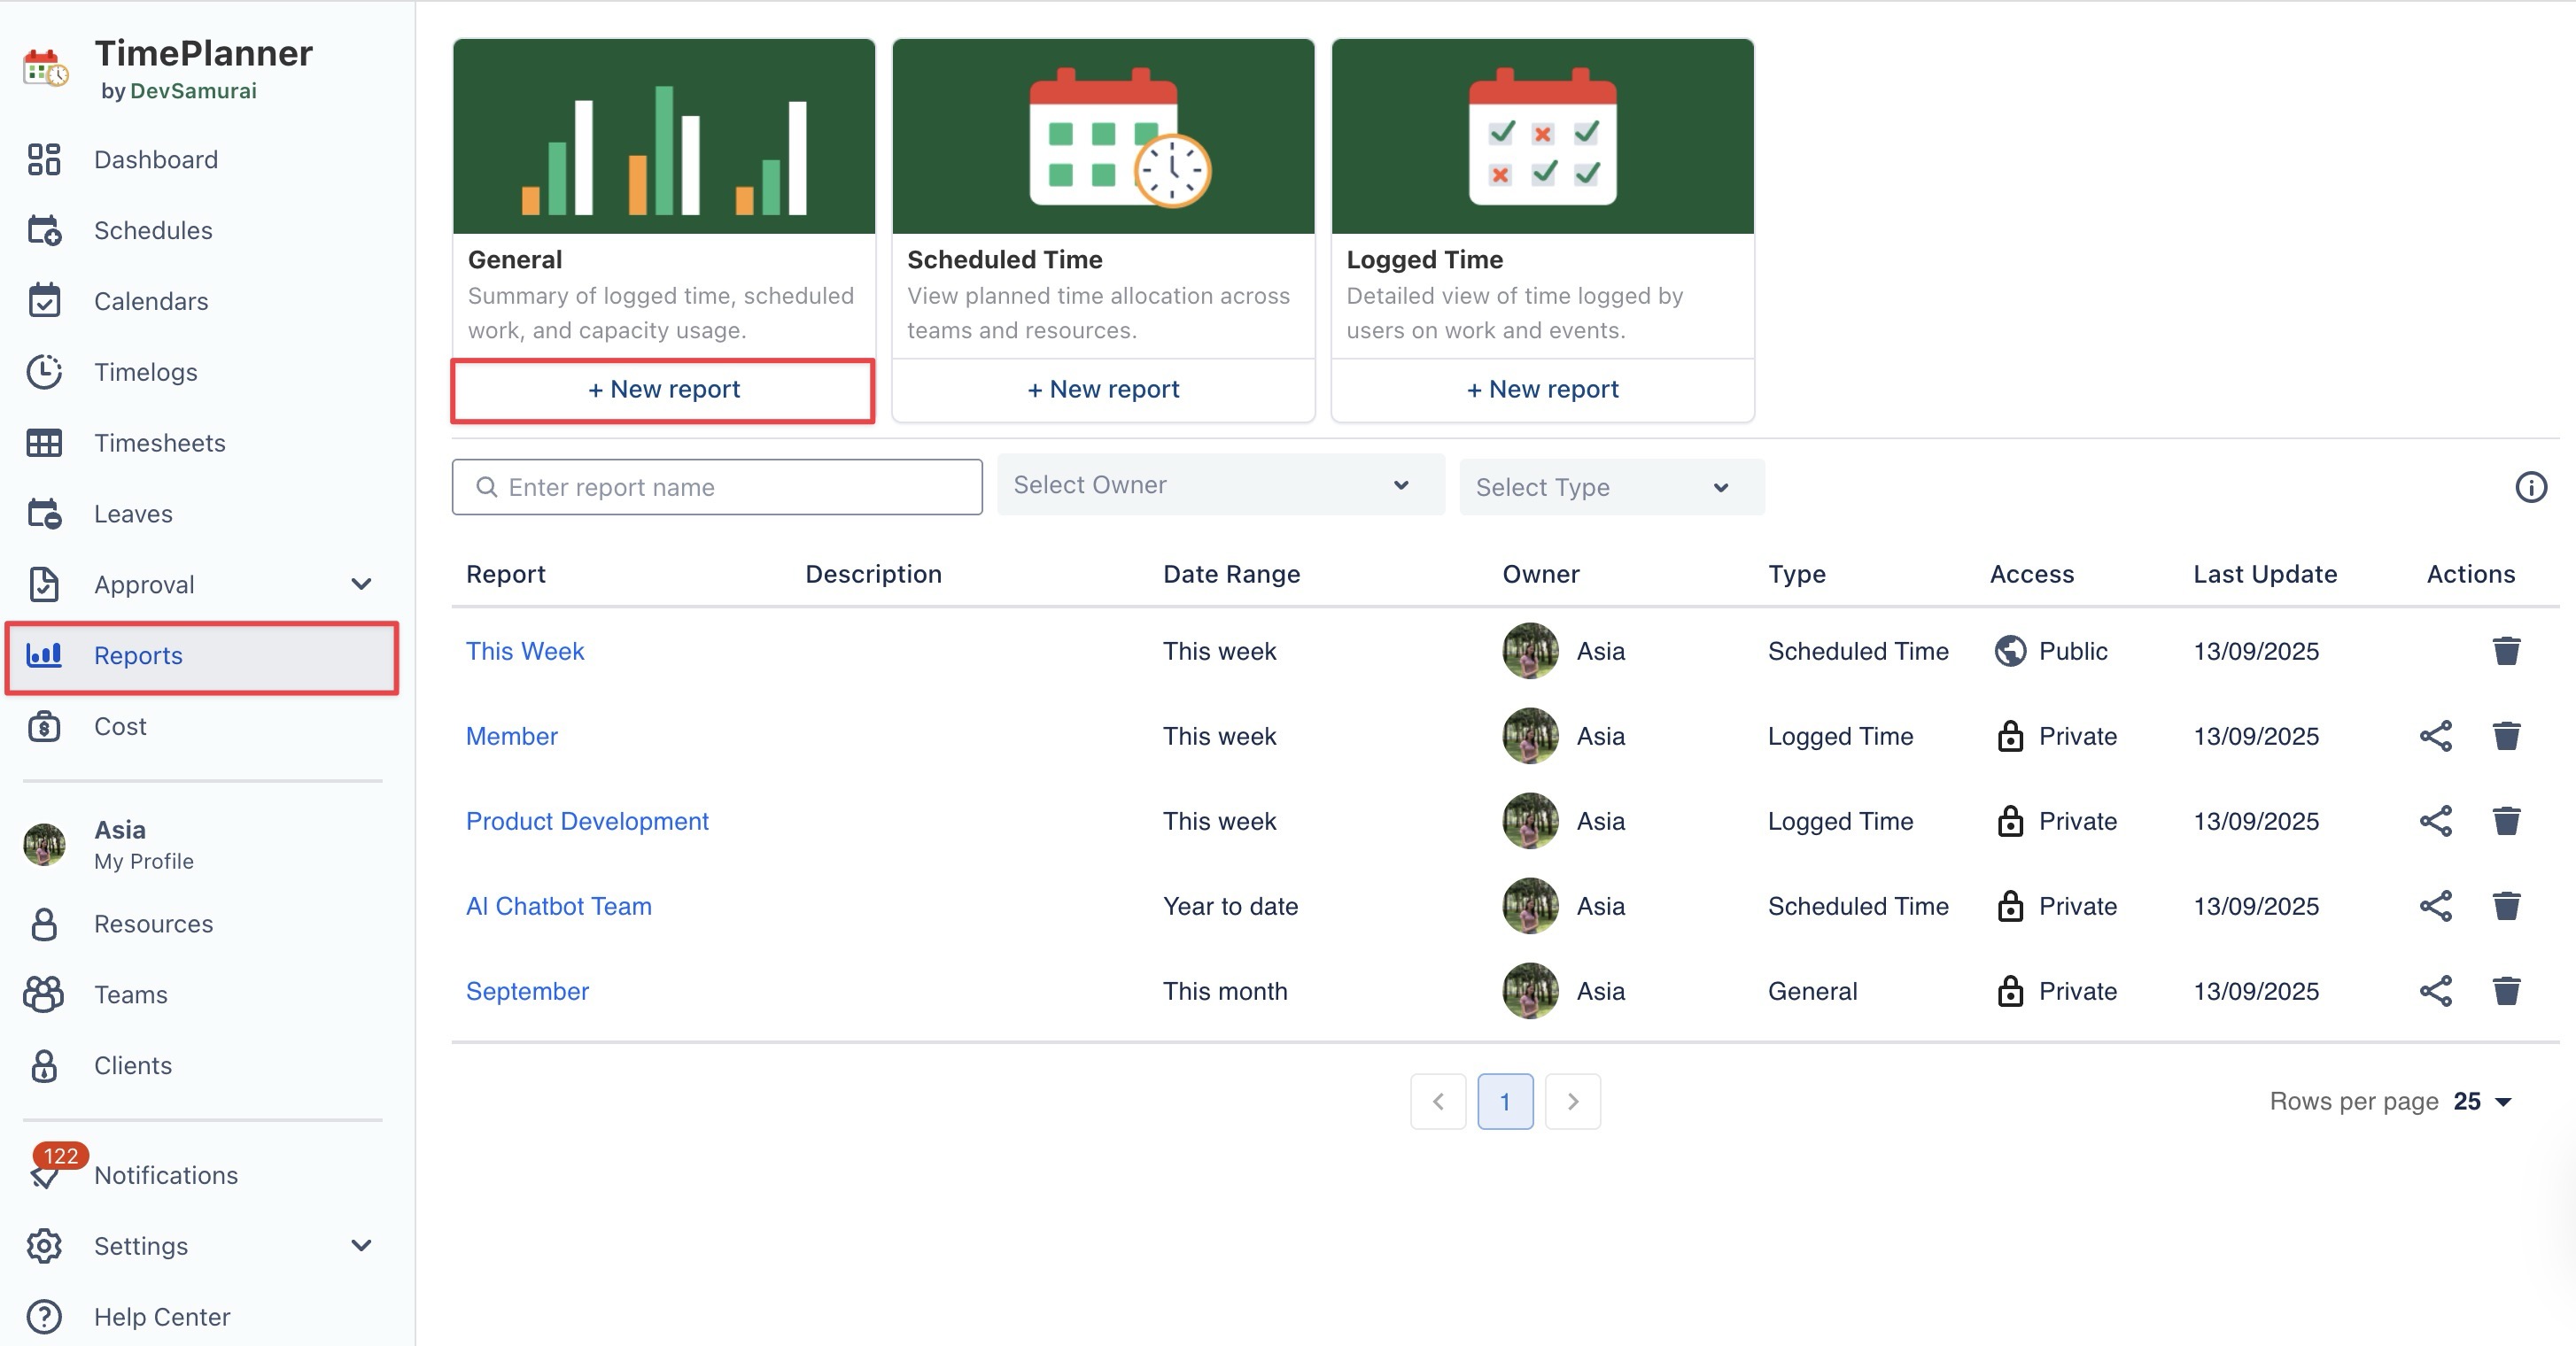
Step 2 Select a report type and click the + New Report button.
-
General: Provides a summary of logged time, scheduled work, and capacity usage.
-
Scheduled Time: Shows how planned time is allocated across resources and projects.
-
Logged Time: Displays detailed records of time logged by users on tasks and events.
Step 3 Follow the detailed instructions for your selected report type: