.png)
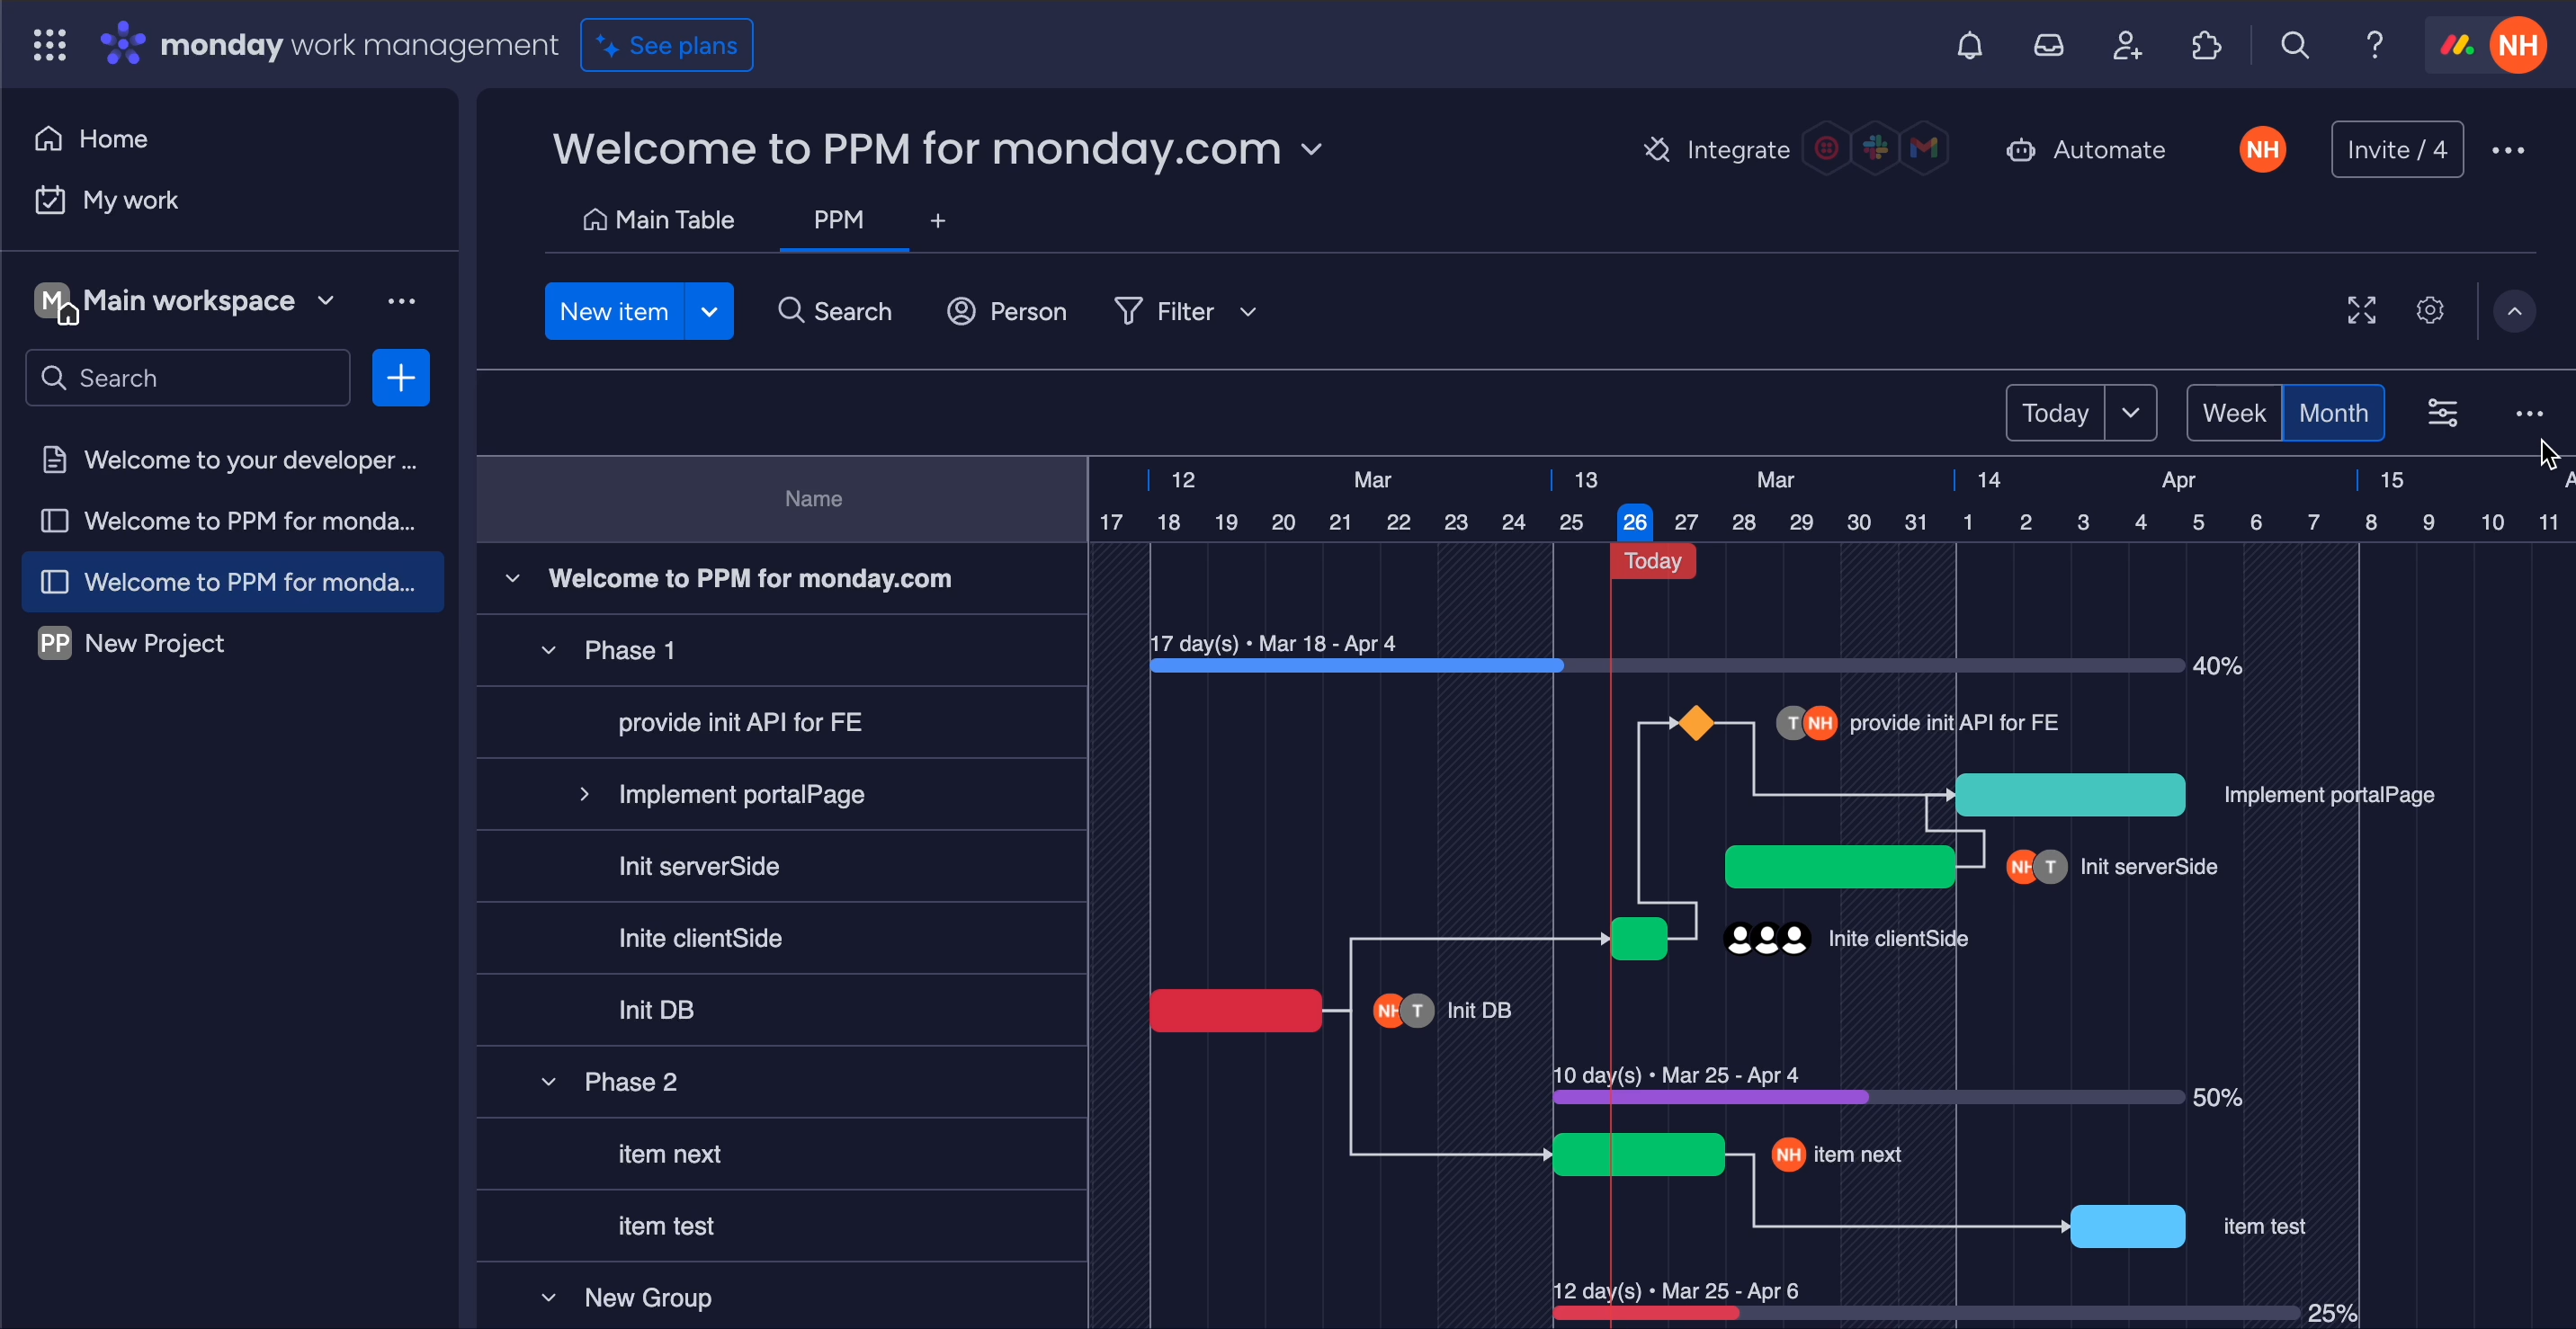
What is Project Portfolio Management (PPM)?
Project Portfolio Management (PPM) is an enhancement for monday.com, offering advanced Gantt charts, workload management, and additional features to optimize both project portfolio and resource management within the platform.
This guide will help you get started quickly and efficiently.
Key Features:
Project Portfolio Management: A comprehensive overview of all your projects & portfolios in one place.
Gantt Chart Integration: Visualize Timelines and Roadmap | Dependency & Auto Scheduling | Baselines | Critical Paths | Milestones.
Workload Management: Resource Allocation | Capacity Planning
Check out the videos in this playlist to see how to use PPM for monday.com:
Getting Started
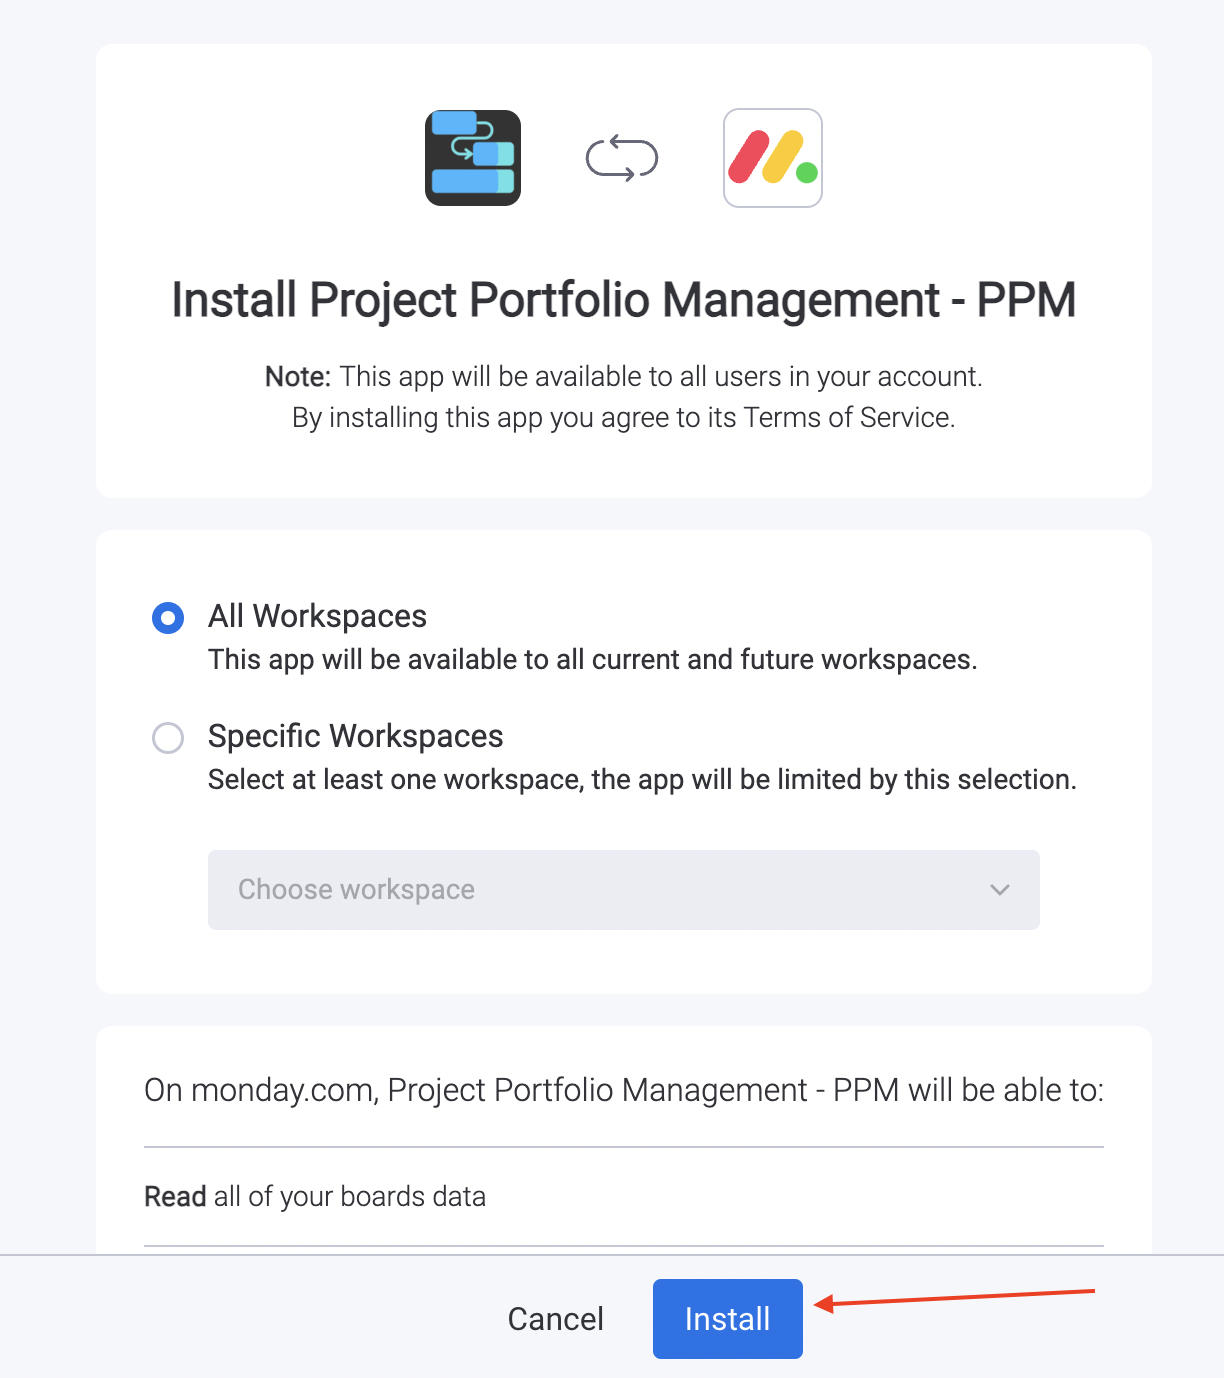
STEP 1: INSTALL THE APP
-
Install the Teamboard App using this URL.
-
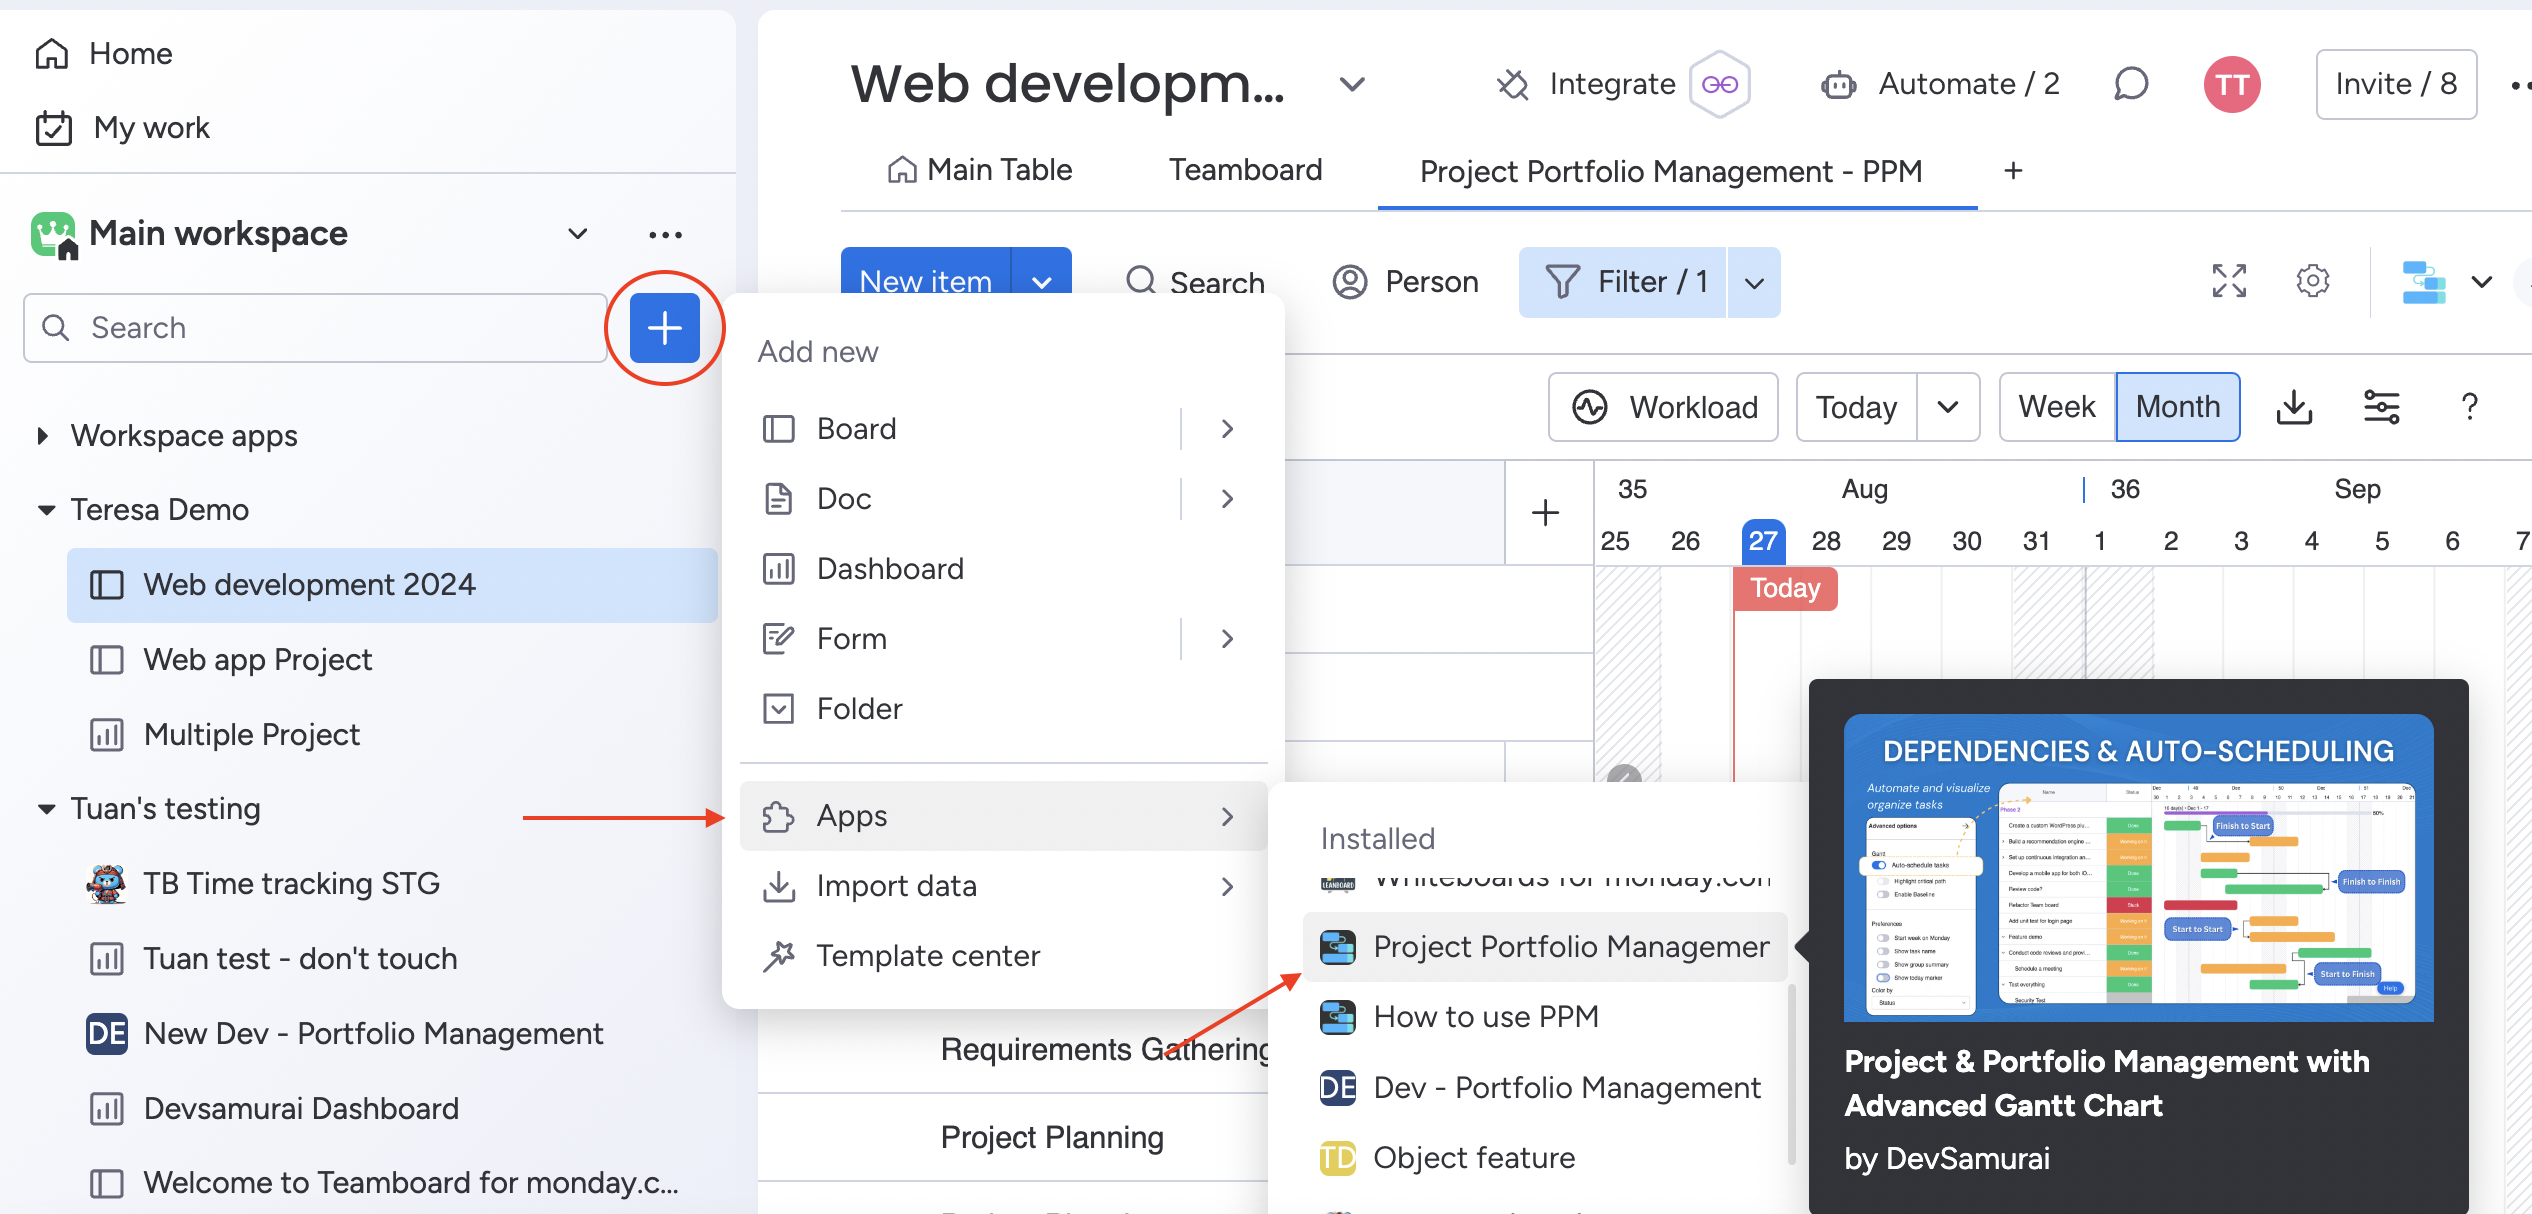
Install the TeamBoard App Directly on Monday Workspace.
-
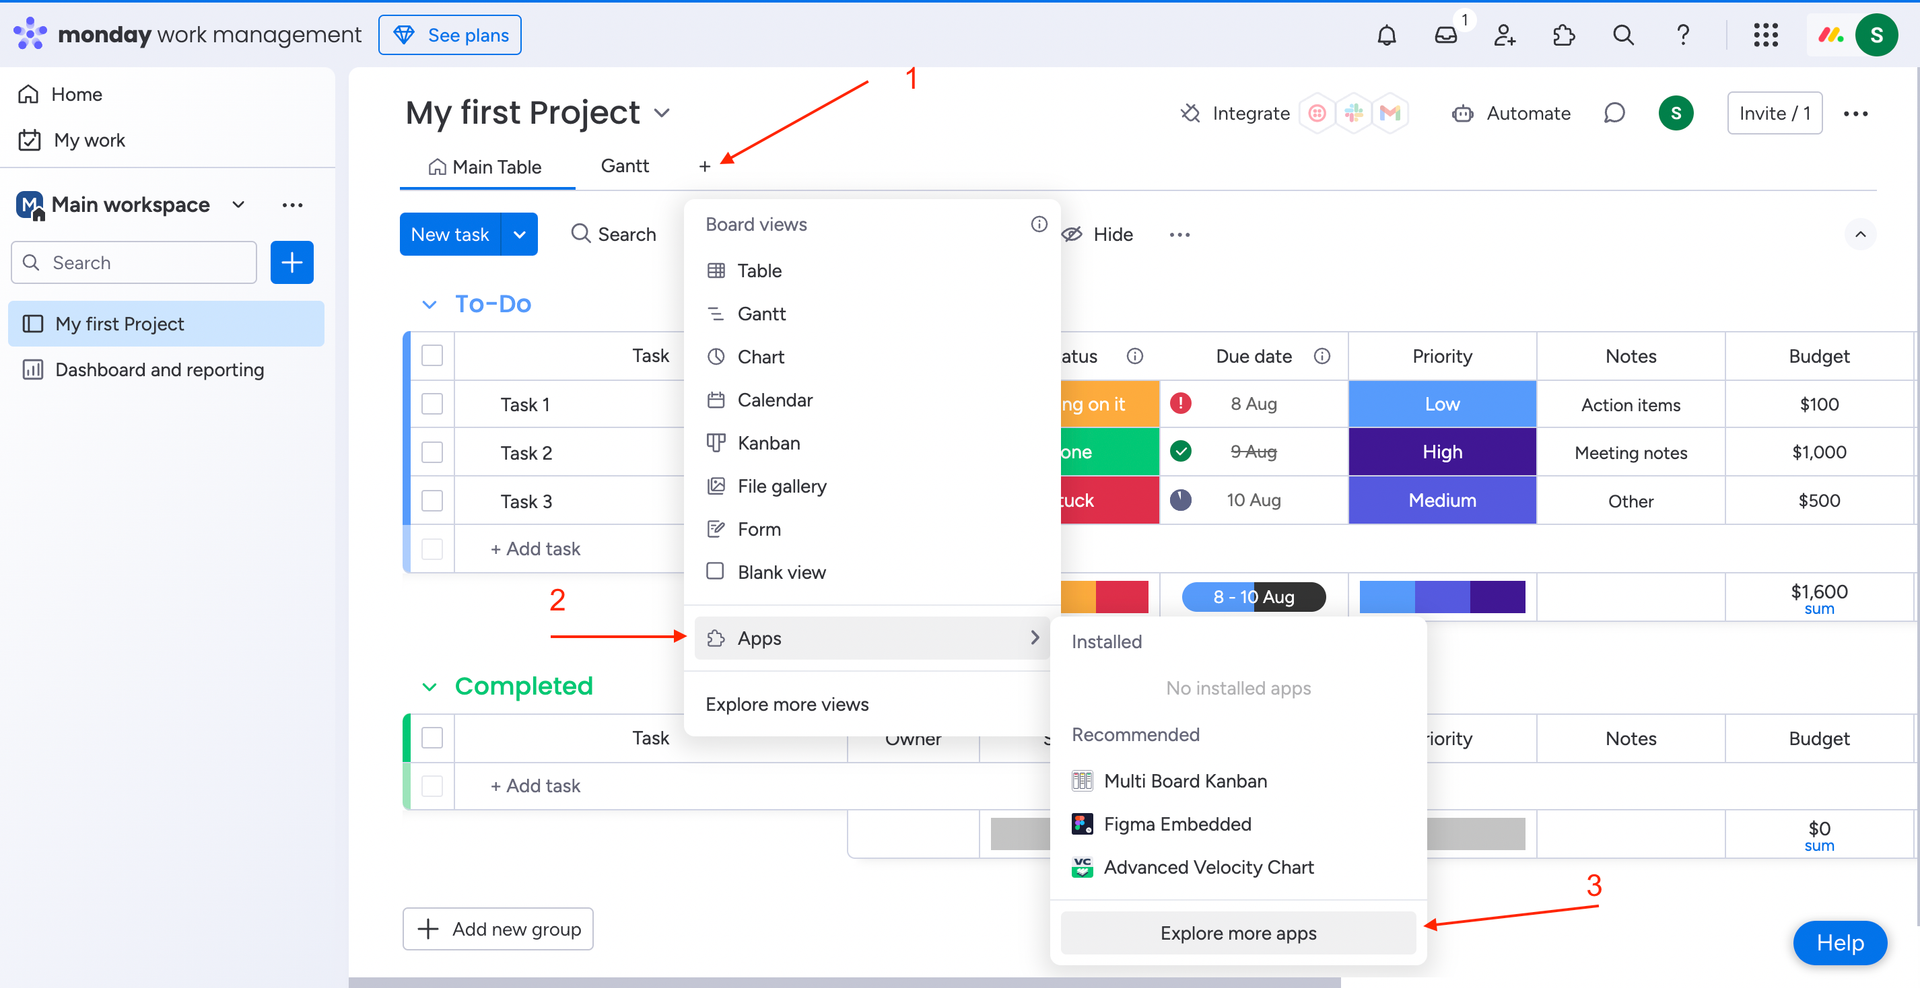
Install the TeamBoard App on the Project Board
LEARN MORE
STEP 2: CREATE A PORTFOLIO BOARD & PROJECT BOARD
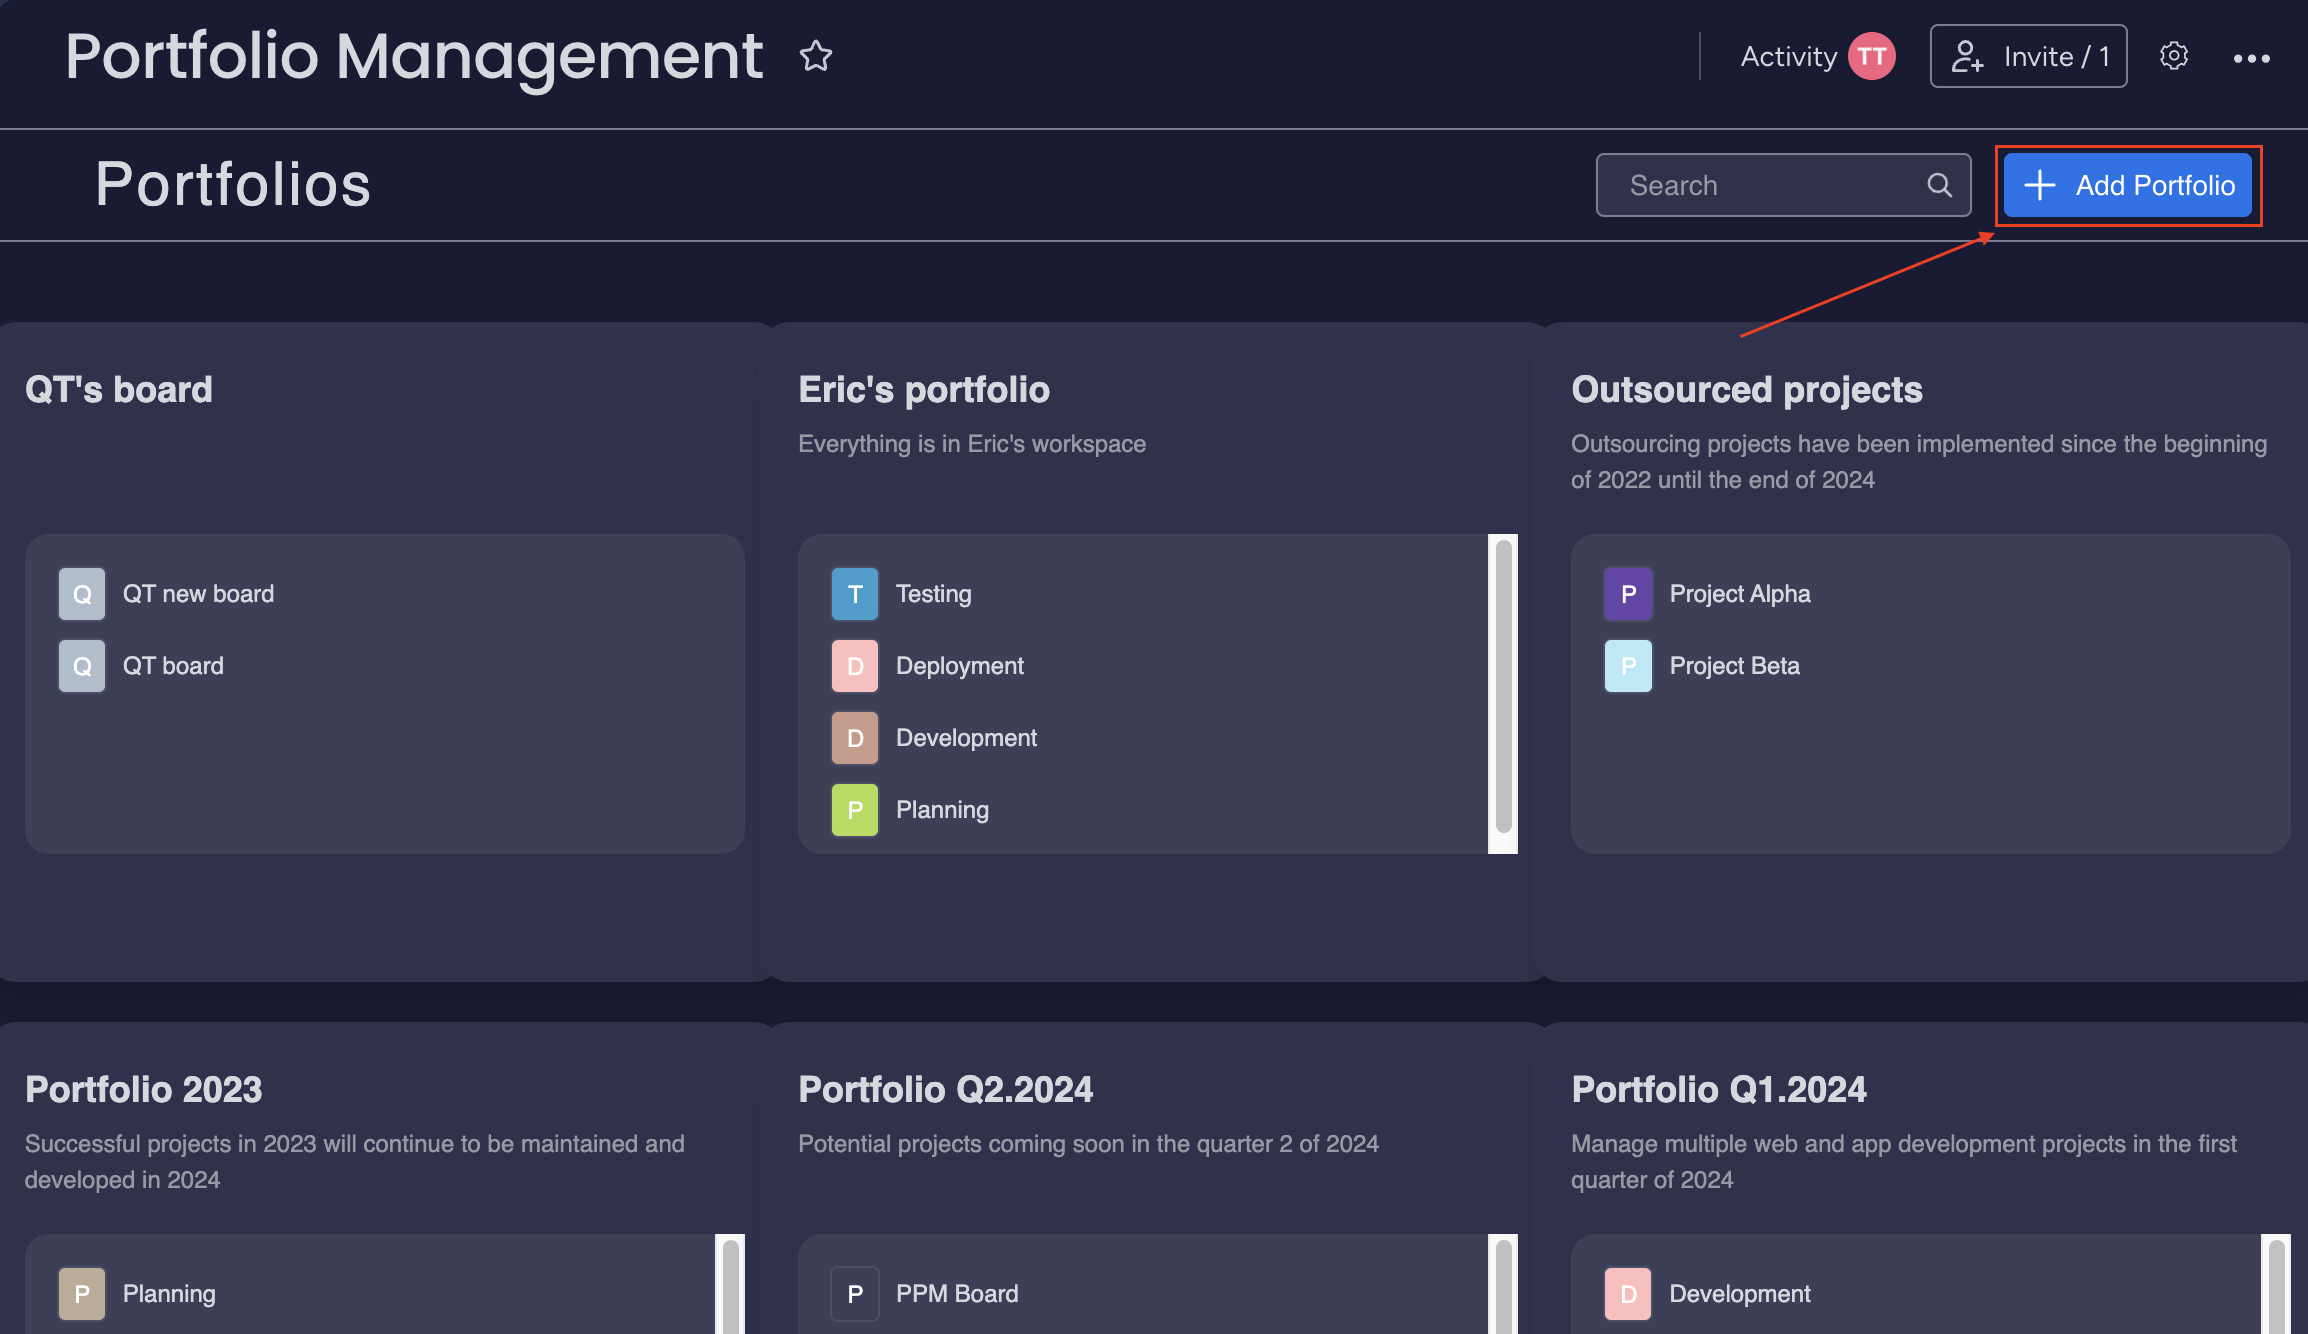
Creating a New Portfolio Board
-
After adding a new PPM to the Monday Workspace
-
Click on the "Add Portfolio" button to initiate the creation of a new portfolio.
-
To manage an existing portfolio, locate and select the portfolio you want to work on.
Creating a New Project Board
-
After adding a new PPM to the Project Board, you can start configuring and using the app for your project.
STEP 3: CONFIGURE THE BOARD
FIELD MAPPING
Field mapping is a crucial step that ensures your data on monday.com is seamlessly synchronized with the PPM app. Once you've configured the field mapping, any tasks you create in PPM will automatically update on monday.com, and any changes made in monday.com will be reflected back in PPM.
-
Go to board setting → Mapping field
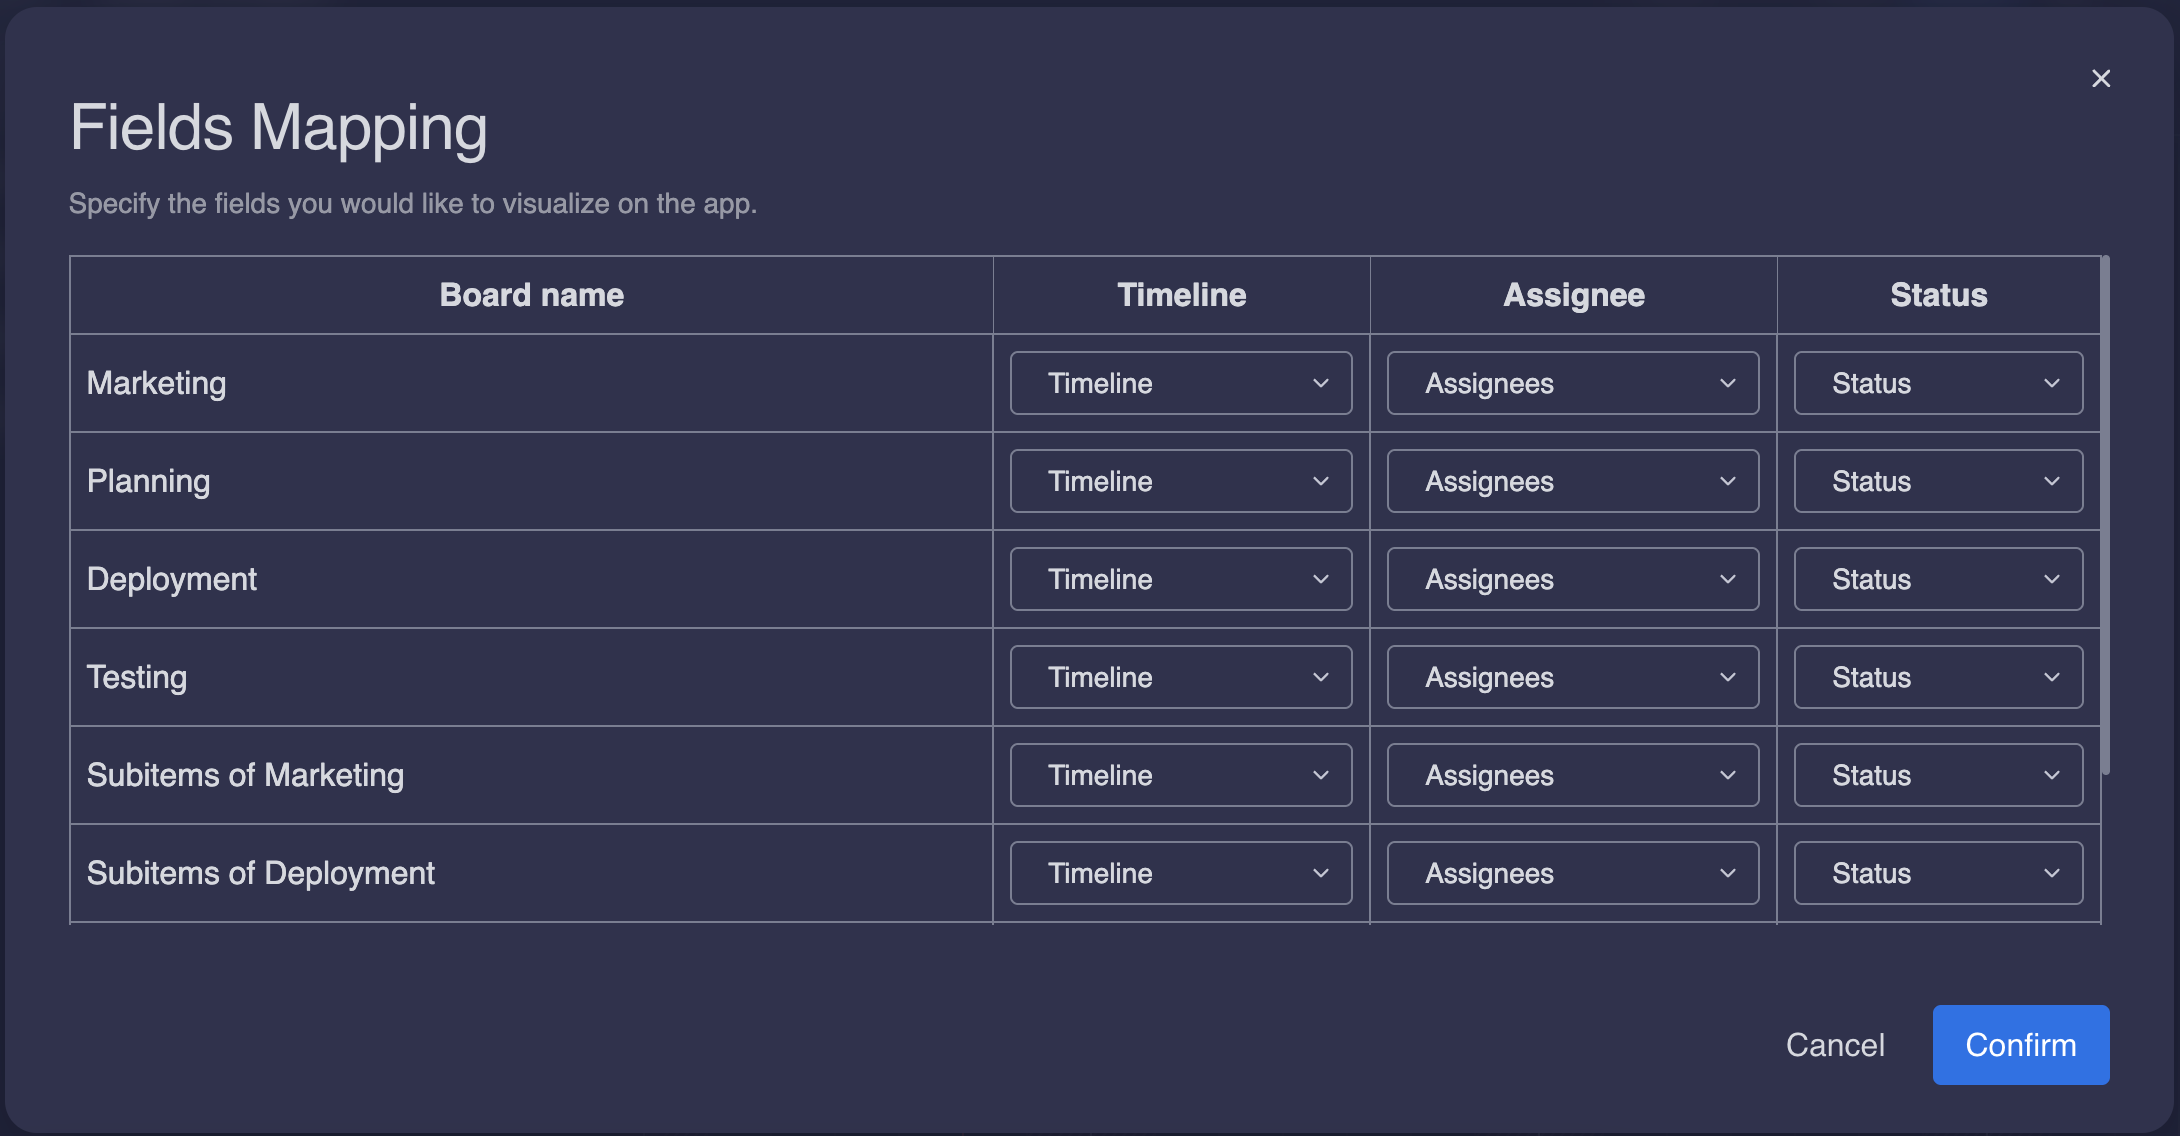
Timeline *: Set the designated date range for each task.
monday Column Type: Timeline
Assignee *: Specify the team members assigned to each task.
monday Column Type: People
Status *: Track the current status of each task
monday Column Type: Status
If you encounter an empty drop-down box, it means there are no columns with the right type available. To address this, you'll need to visit the main table and create the required field.
STEP 4: PLANNING TASKS ON THE ROADMAP
Planning Existing Tasks
-
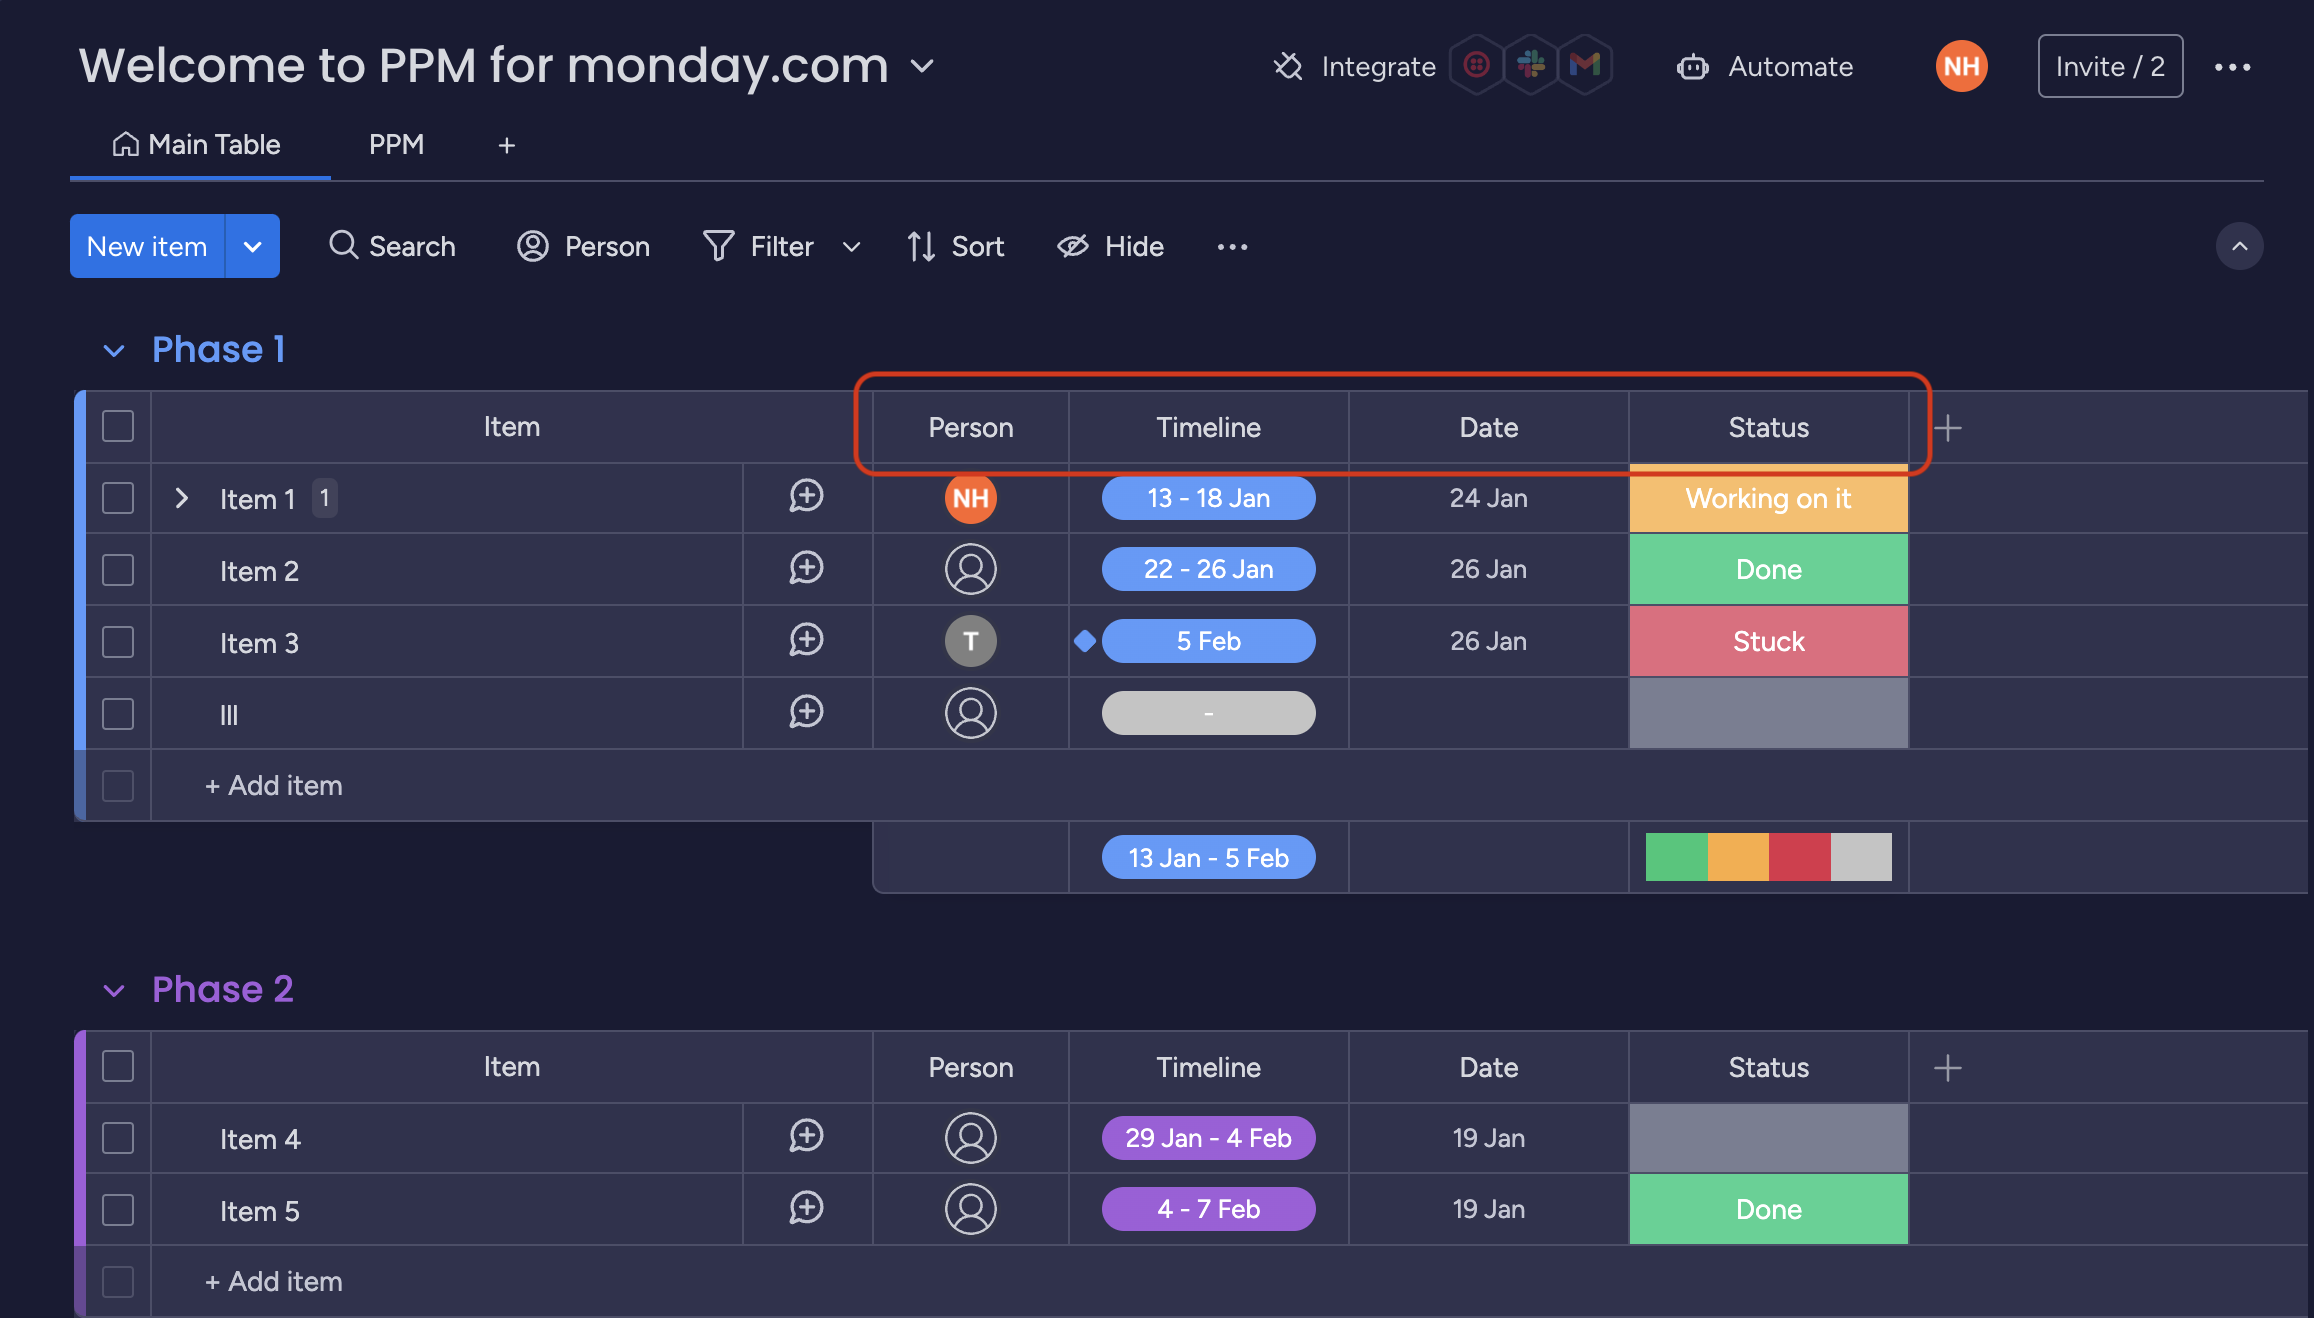
Input Mapped Fields:
-
In your monday.com table, in put the fields mapped to PPM, including Person (Assignee), Timeline and Status.
-
-
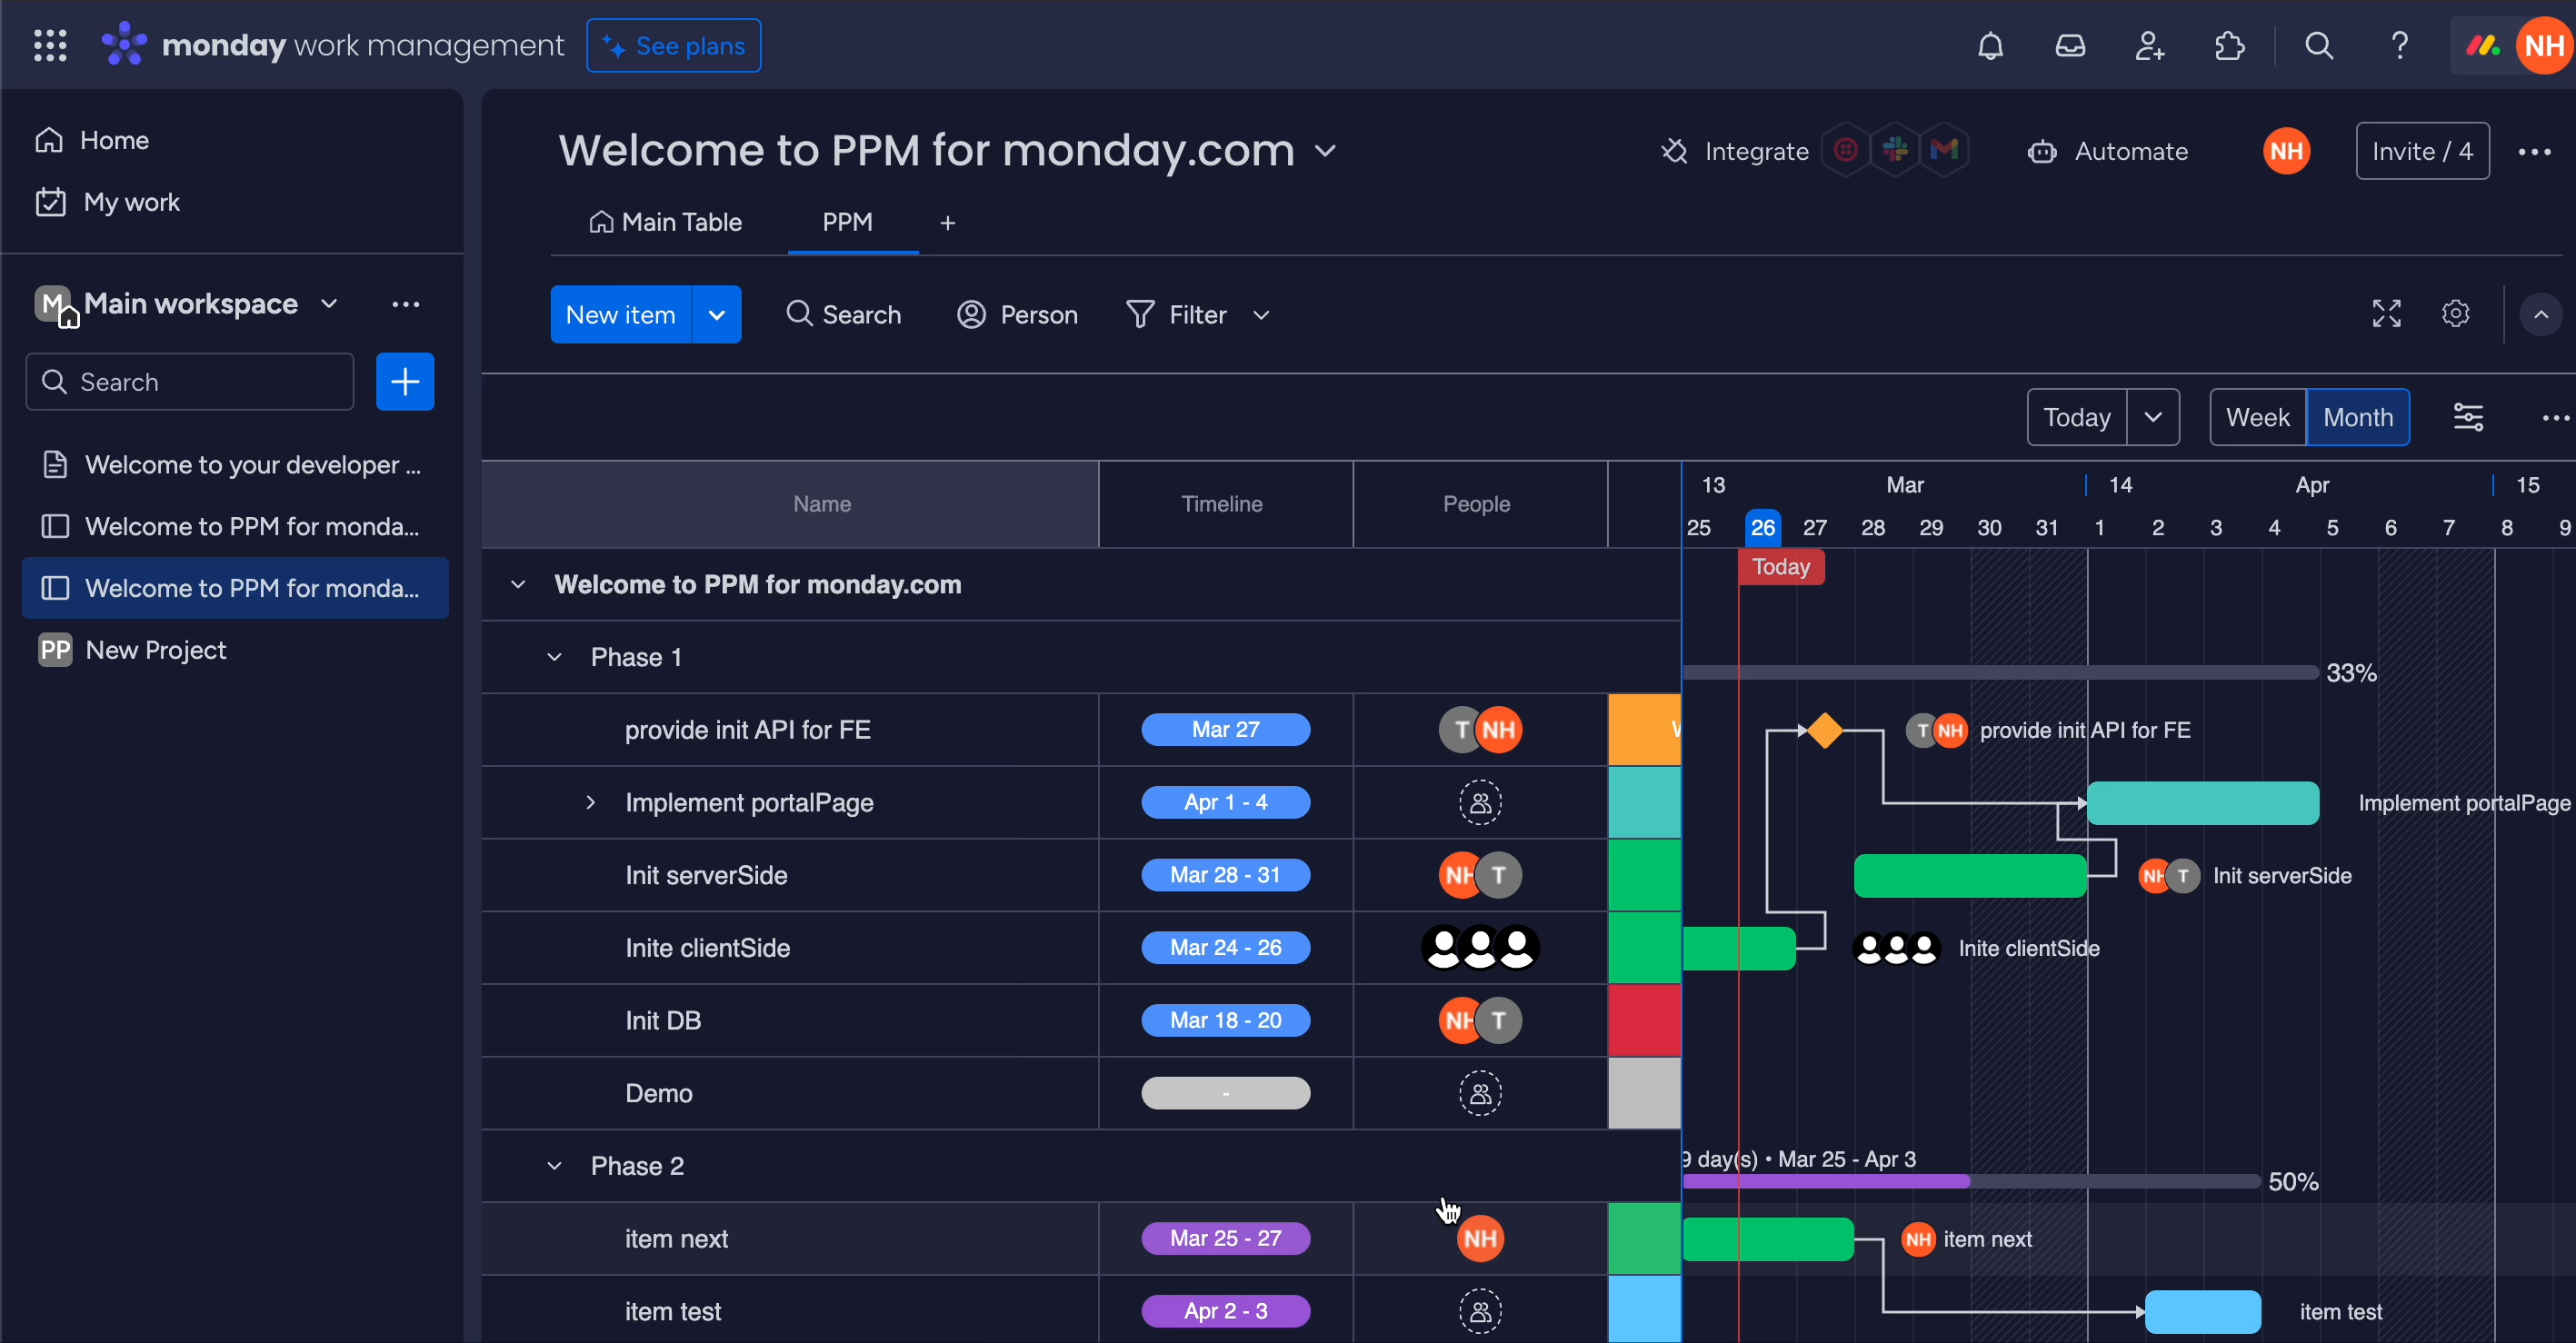
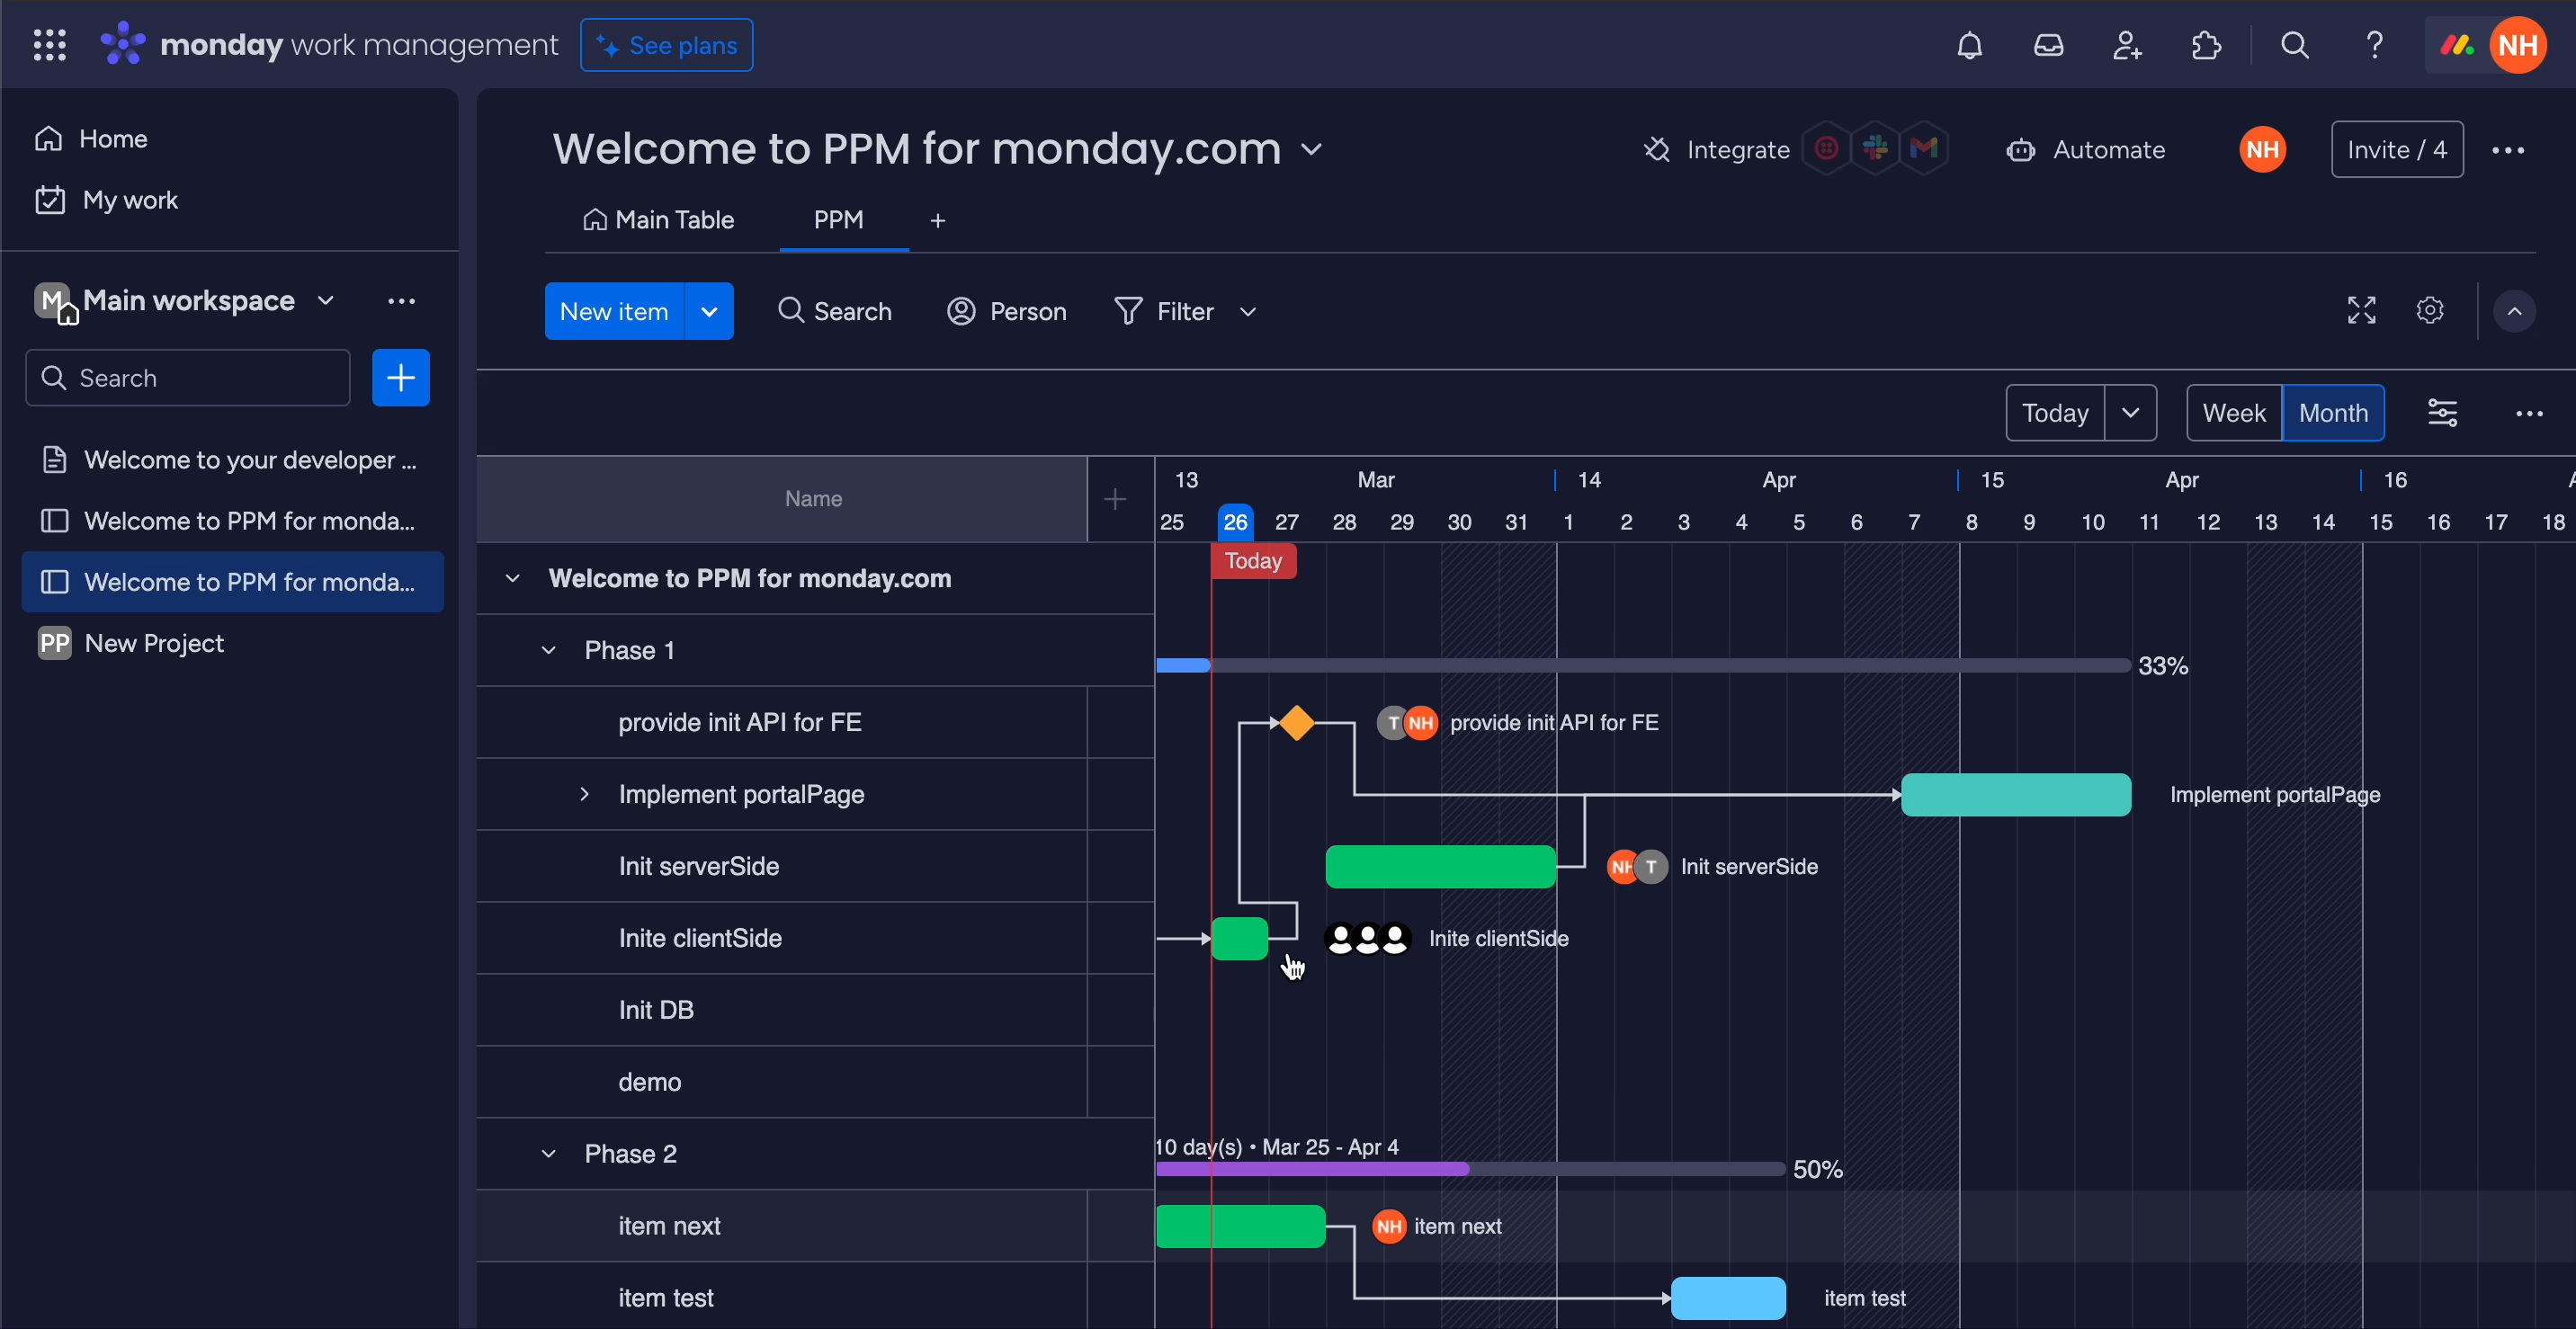
Plan a task using the Item box
-
Use the Item box (or press Ctrl + F as a hotkey) to search for a specific tasks. Then, hover your pointer on the Gantt chart, you’ll see a blurred task, click on it to plan it on your Gantt chart.
-
Creating a New Task
To create a new task in PPM:
-
Click "New Item" to add a new task to your board in PPM.
-
Input Task Details:
-
Fill in the necessary details of the task and complete the PPM fields to plan it effectively.
-
Quick Task Creation
For a more convenient method, locate the board row and click on the add New item button on the right side to create a task on that board.
STEP 5: SET CAPACITY SCHEME
This is the total number of hours an individual or resource is available to work in a day.
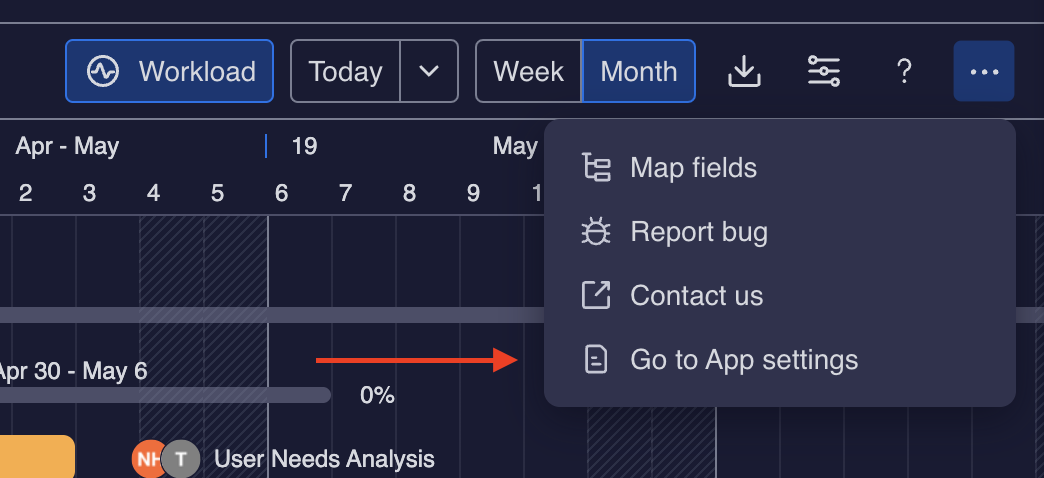
Accessing the App Settings by Clicking on Go to App Settings.
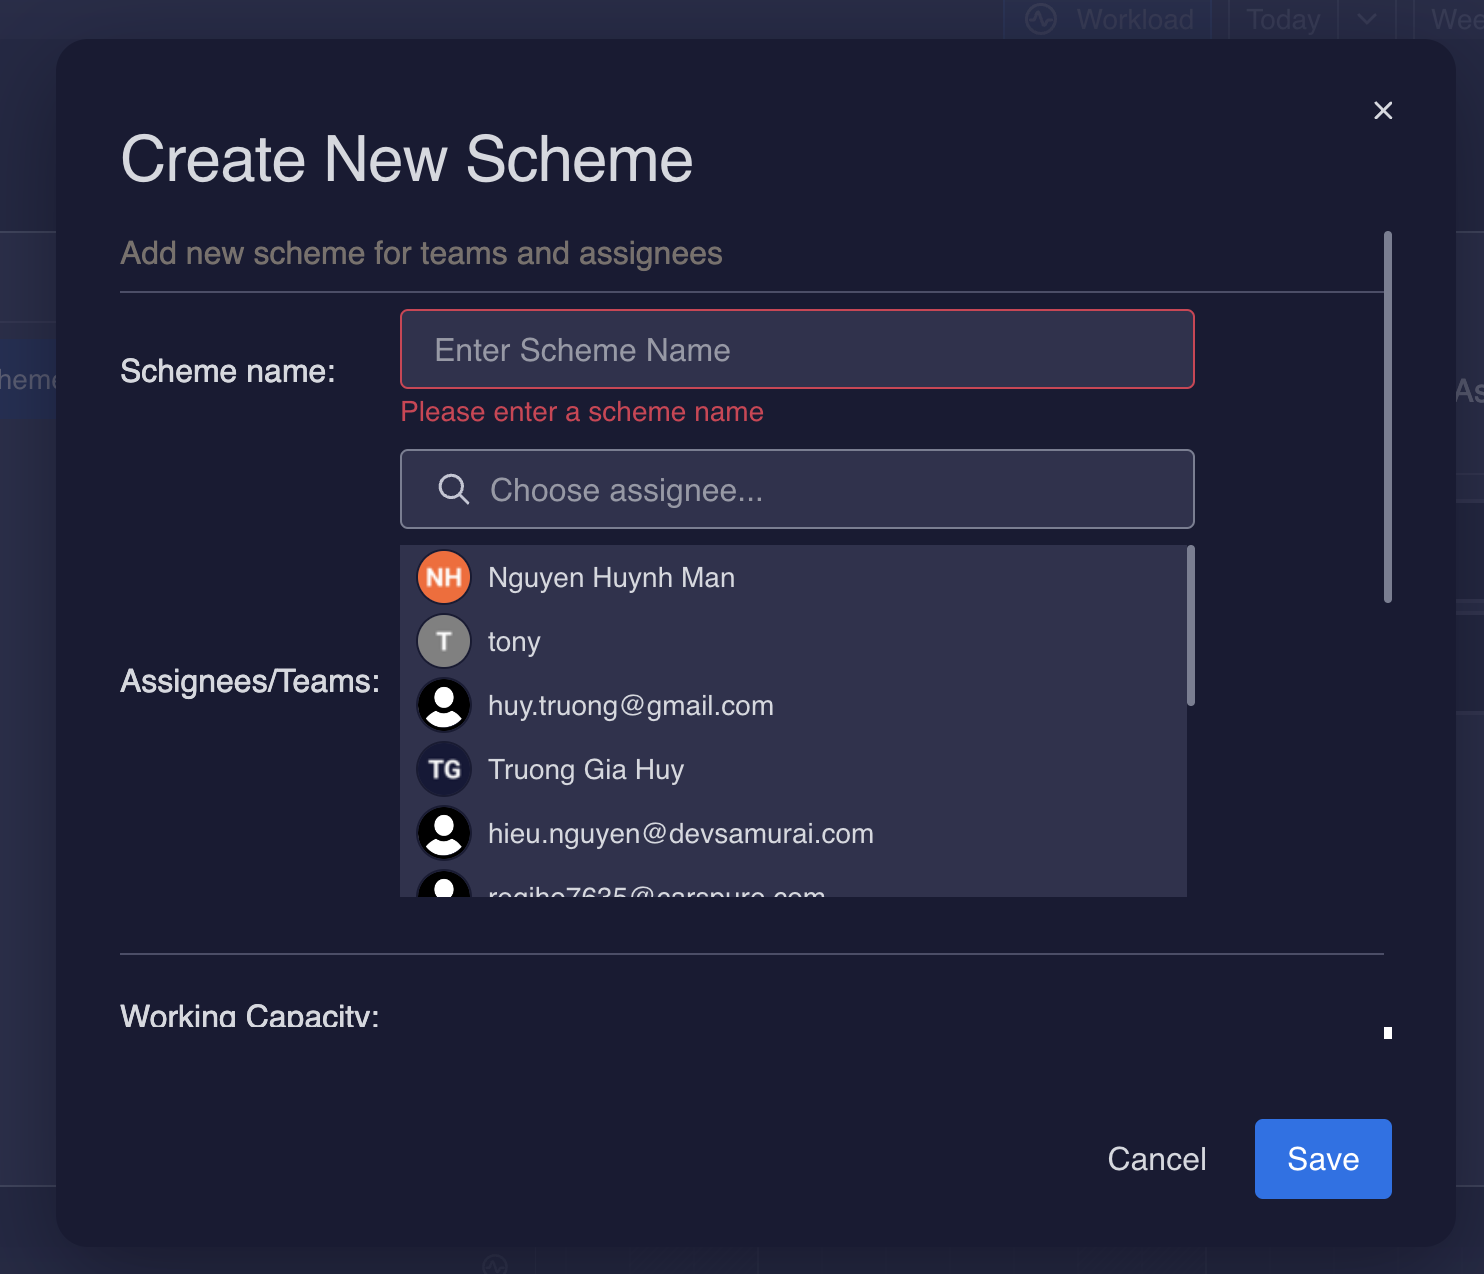
Navigate the Work Capacity Scheme on the Settings column on the left side.
You can also customize your own Work Capacity Scheme for your team by adding New Scheme to your App Settings.
STEP 6: ADD SCHEDULED HOURS
This represents the total number of hours scheduled for tasks or work on a given day.
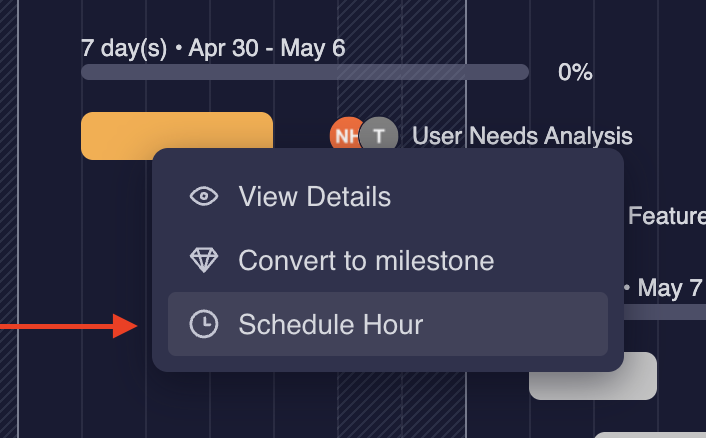
Right-click on any task item and select 'Schedule Hour' to start scheduling your task's workload.
You need to fill in the Total Workload field in order to schedule the workload for your assignee. The Workload per day will then be computed by dividing the Total Workload by the task’s duration
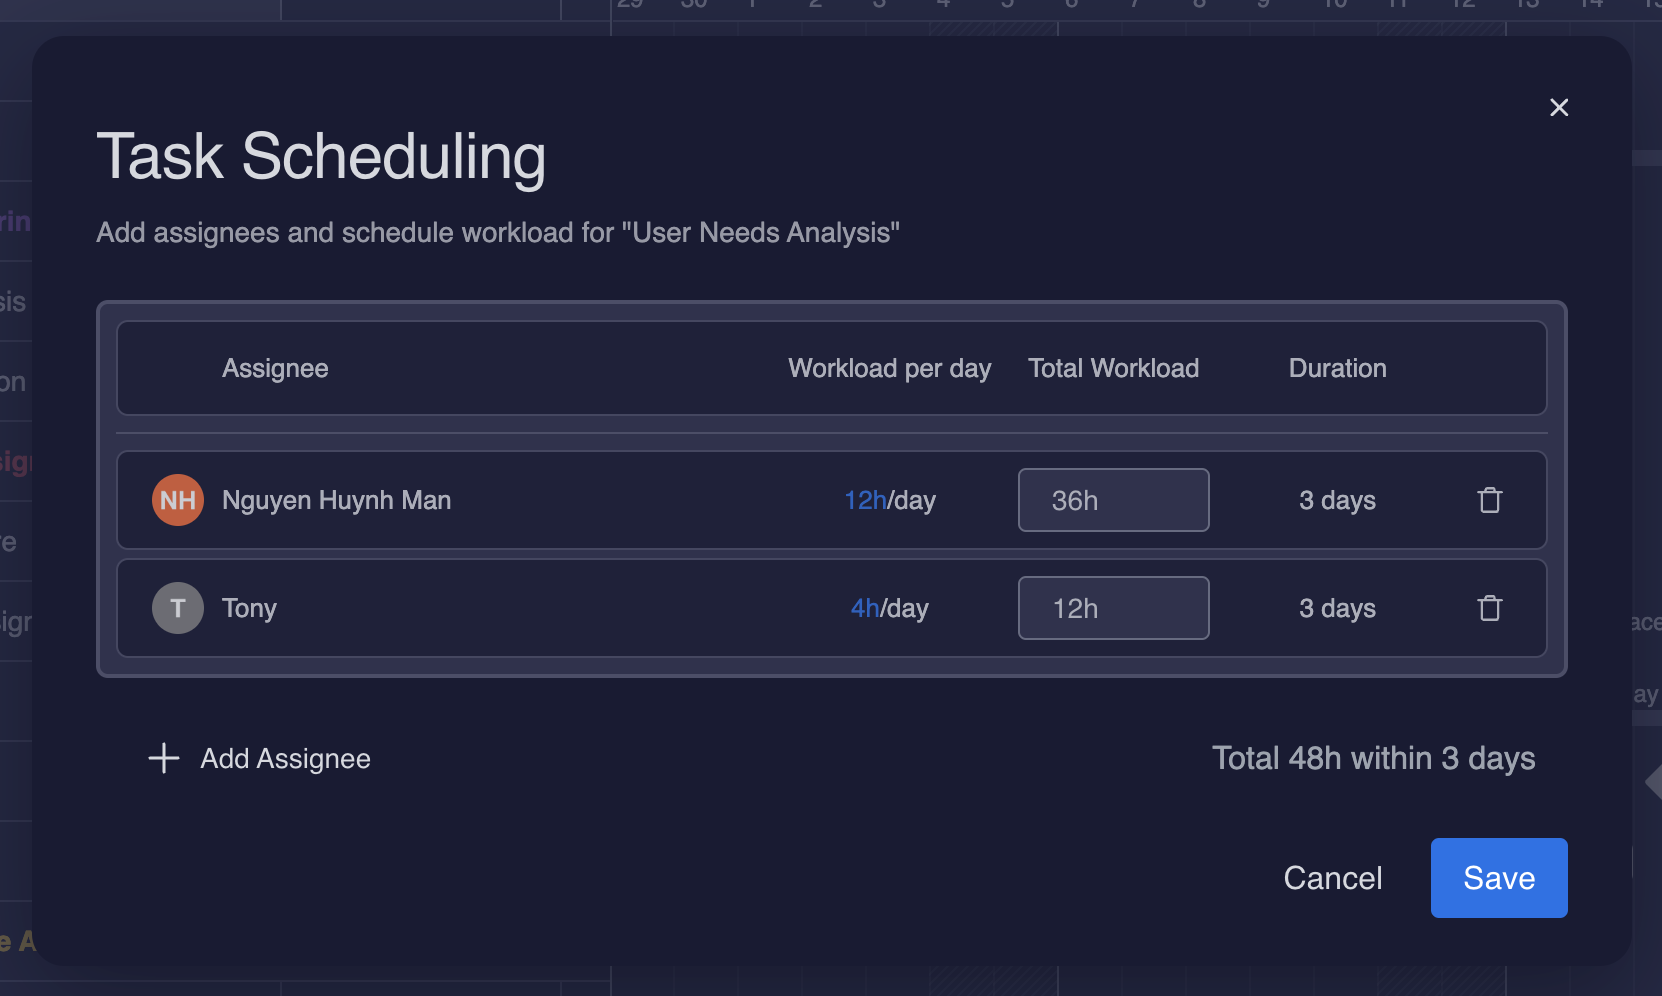
Tip: You add or remove assignee utilizing the Add Assignee button or clicking the trash bin button on each row.
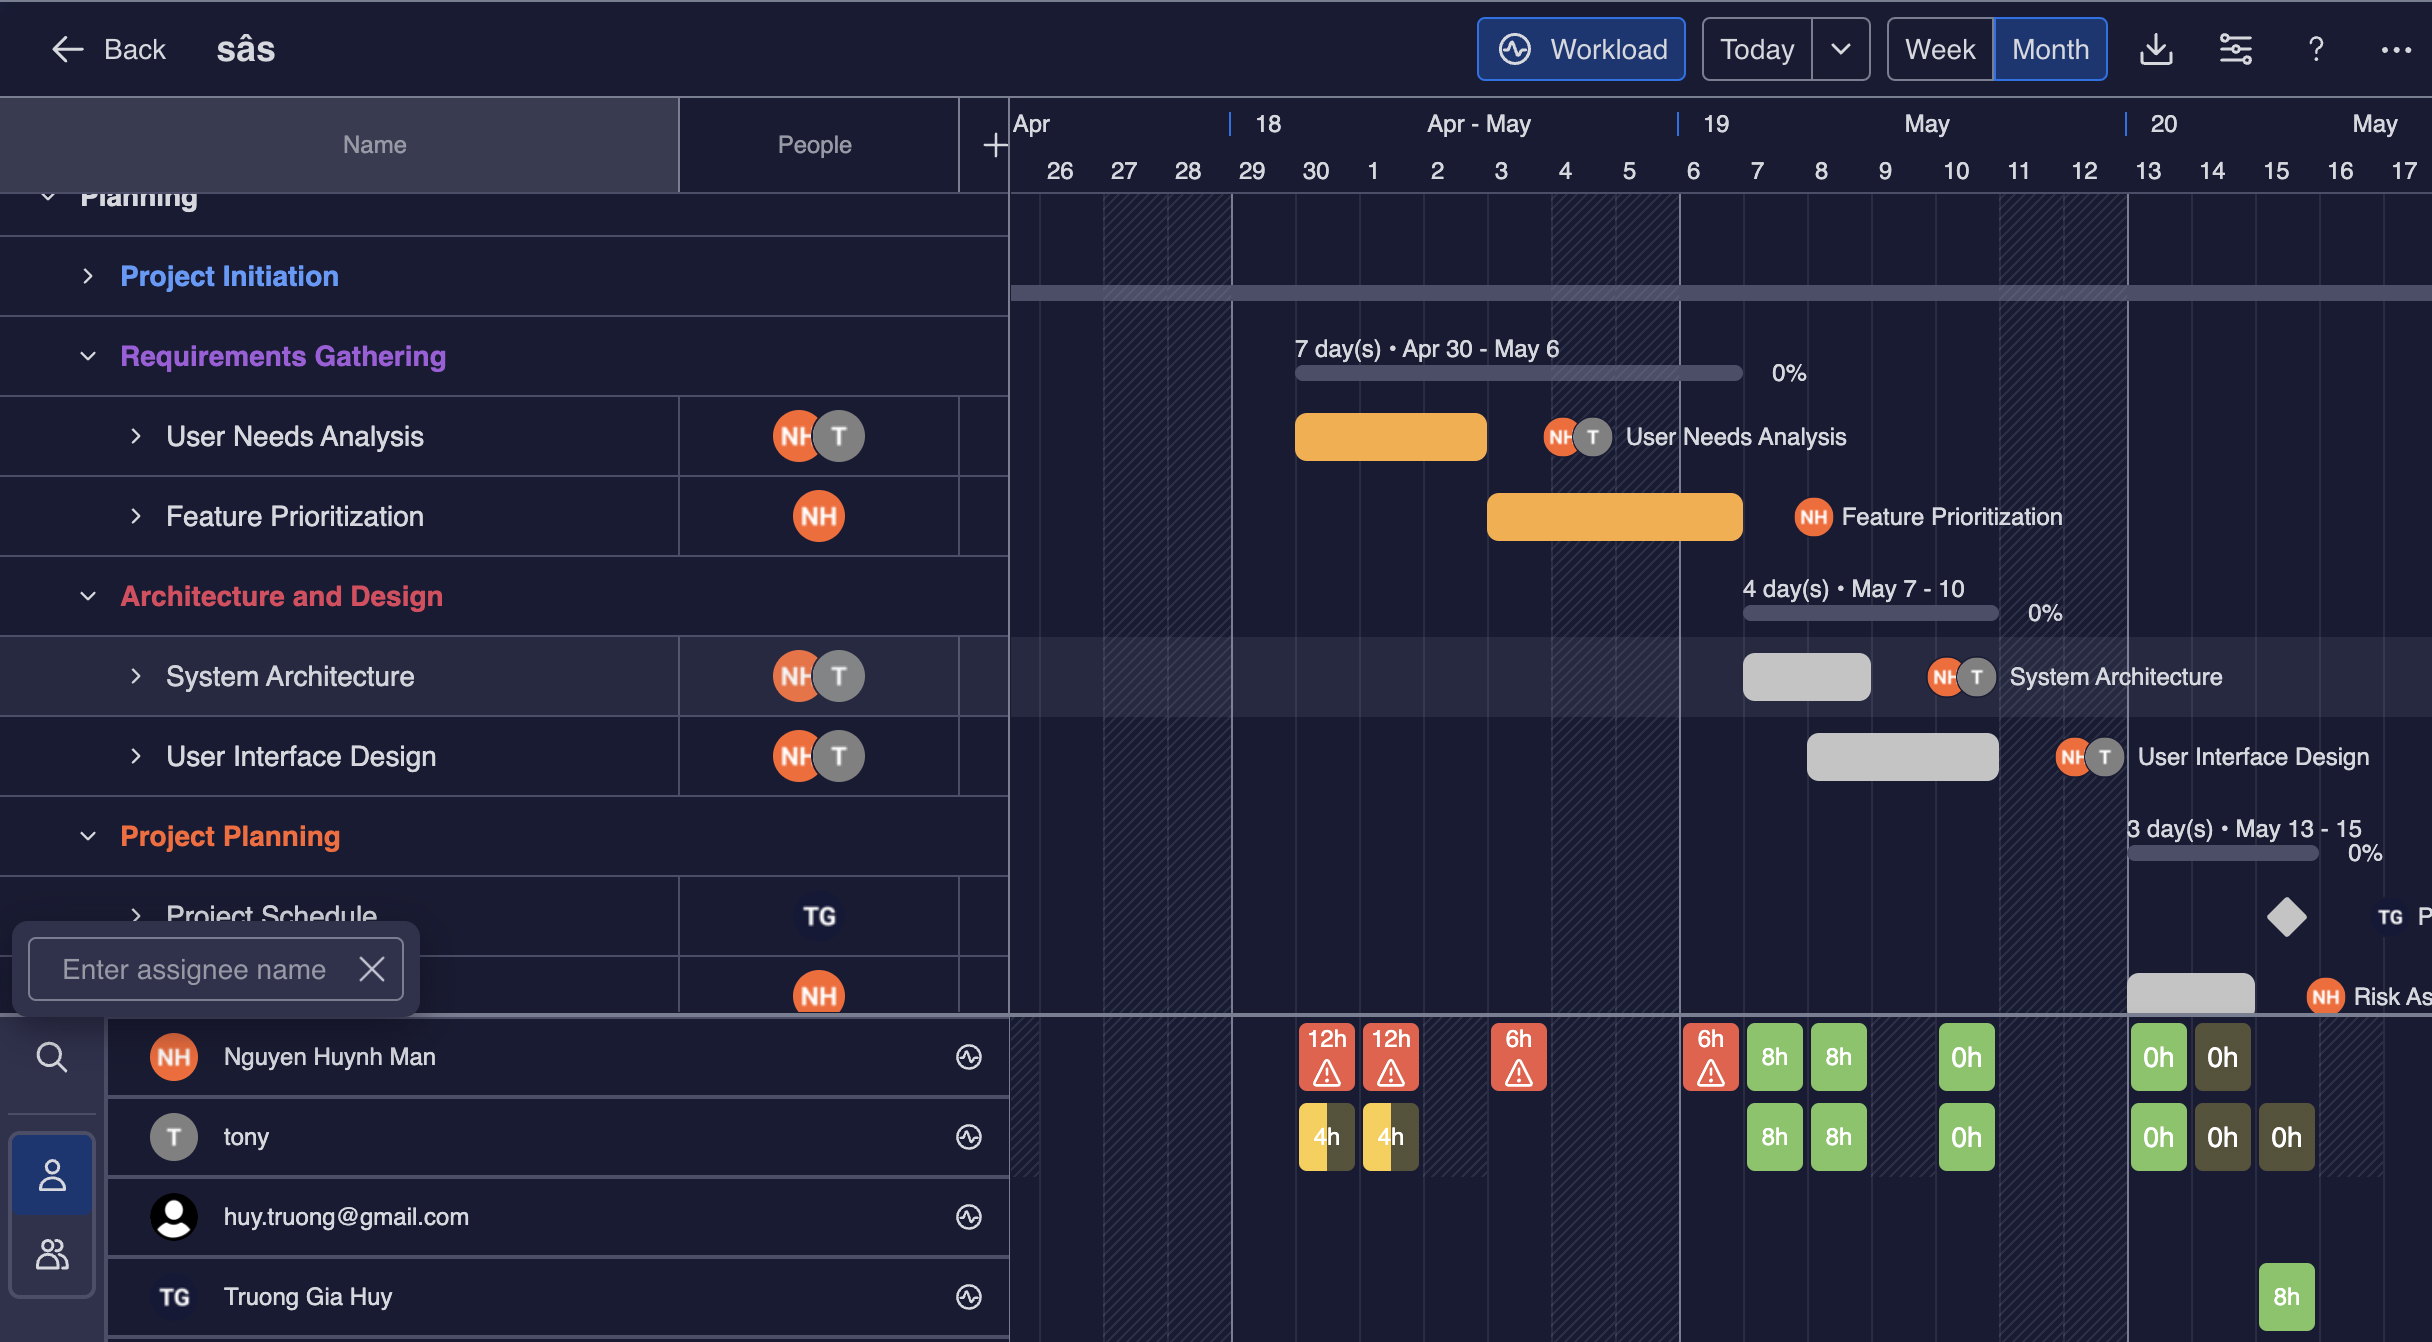
STEP 7: MANAGE RESOURCE WORKLOAD

Activate Workload Panel
-
Click the "Workload" button on the top bar to enable the Workload split panel.

You can switch between users and teams view as you like to view the workload of users or teams.

-
Green Color: Full of workload - Tasks assigned to an individual or team member have a moderate amount of work
-
Red color: Overload - Tasks assigned have a lower volume of work than the individual's or team's capacity.
-
Yellow Color: Under workload - Tasks assigned exceed the capacity of the individual or team
Tip: You can hover on the anchor icon next to avatar each row to expand the row to see the detail plan in workload mode
Tips and Best Practices
-
Use Baselines: Enable multiple baselines to track progress and compare different stages of your project.
-
Avoid Duplication: Instead of creating duplicate projects with the same tasks, consider adding additional columns to your existing board. You can then map these new columns in PPM, keeping your workspace clean and organized while still capturing all necessary details.
-
Plan with Gantt & Workload: Use Gantt charts for detailed project timelines and workload planning to manage team capacity effectively.
-
Auto-Schedule: Enable the Auto-schedule feature to automate task scheduling based on dependencies and deadlines.
-
Color Scheme: Implement a color-coding scheme to differentiate between task types, priorities, or project phases.
-
Show Task Details: Display task names and group summaries directly on your board.
-
Use Templates: Leverage templates for recurring projects or tasks.
For more details:
📖 User Guide | 🤵 Book a Demo | 🙋 FAQs | 🧑🦰 Customer Portal
📺 Watch Demo Video | 🌎 Visit site | 🖥️ Contact Support | 📑 Release Note | 🔐 Trust Center
Elevate Your Project Potential with PPM !