.png)
Components in AssetIT are individual items that make up a larger asset. Examples include hardware components like Hard Disk Drives (HDDs), RAM, processors, or any other parts that are integral to an asset’s functionality.
Navigating the Components Page
On the sidebar, click on the “Components”.
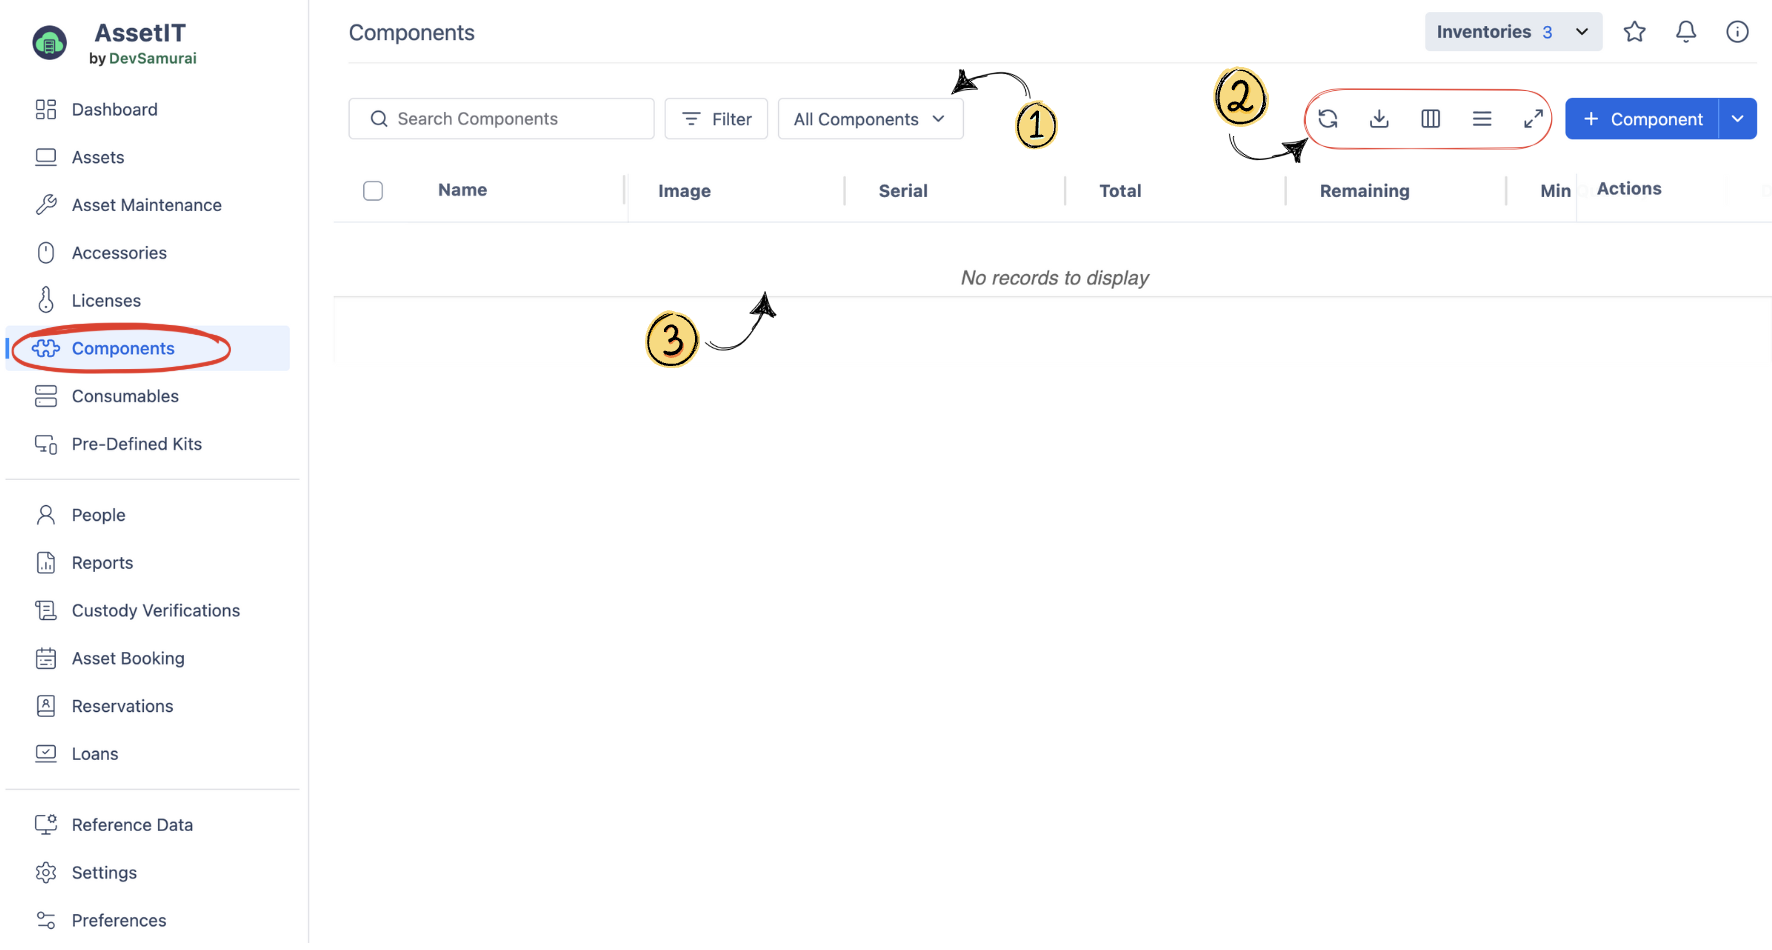
(1) Search and Filter Option: quickly locate and organize components based on specific criteria. You can:
-
Search for a component by name using the search bar.
-
Apply filters to view components that meet certain conditions, such as:
-
All Components – Displays the complete list of components.
-
Reached Min Quantity – Shows components that have reached their minimum stock level.
-
Trash – Displays deleted components that can be restored if needed.
-
(2) Action Toolbar: Contains essential tools for managing the components list. You can:
-

-

-

-

-

(3) List Overview: The main area displays a list of all components currently in the system, giving you a quick overview and easy access to manage these items.
Start adding components to populate the Components list.
Adding Components:
There are 02 ways to create new components: bulk import and manual set up .
1. Manual Set Up
On the top right of the Components page, click on 
-
Fill in the Required Information:
-
Component Name: Enter a descriptive name for the component (e.g., "16GB RAM Module").
-
Category: Select the appropriate category for the component. If not listed, type the desired data in the field, then press Enter or Tab to add a new manufacturer if needed, such as "Memory," "Storage," etc.
-
Quantity: Specify the total quantity of this component available.
-
-
Additional Fields (Optional):
-
Serial, Department, Depreciation, Inventory, Suppliers, etc: Use these fields to add further details about the component.
-
Min Quantity: Set a minimum quantity level to trigger alerts when the stock is low, ensuring you can reorder before running out.
-
Notes: Add any additional information that may be useful.
-
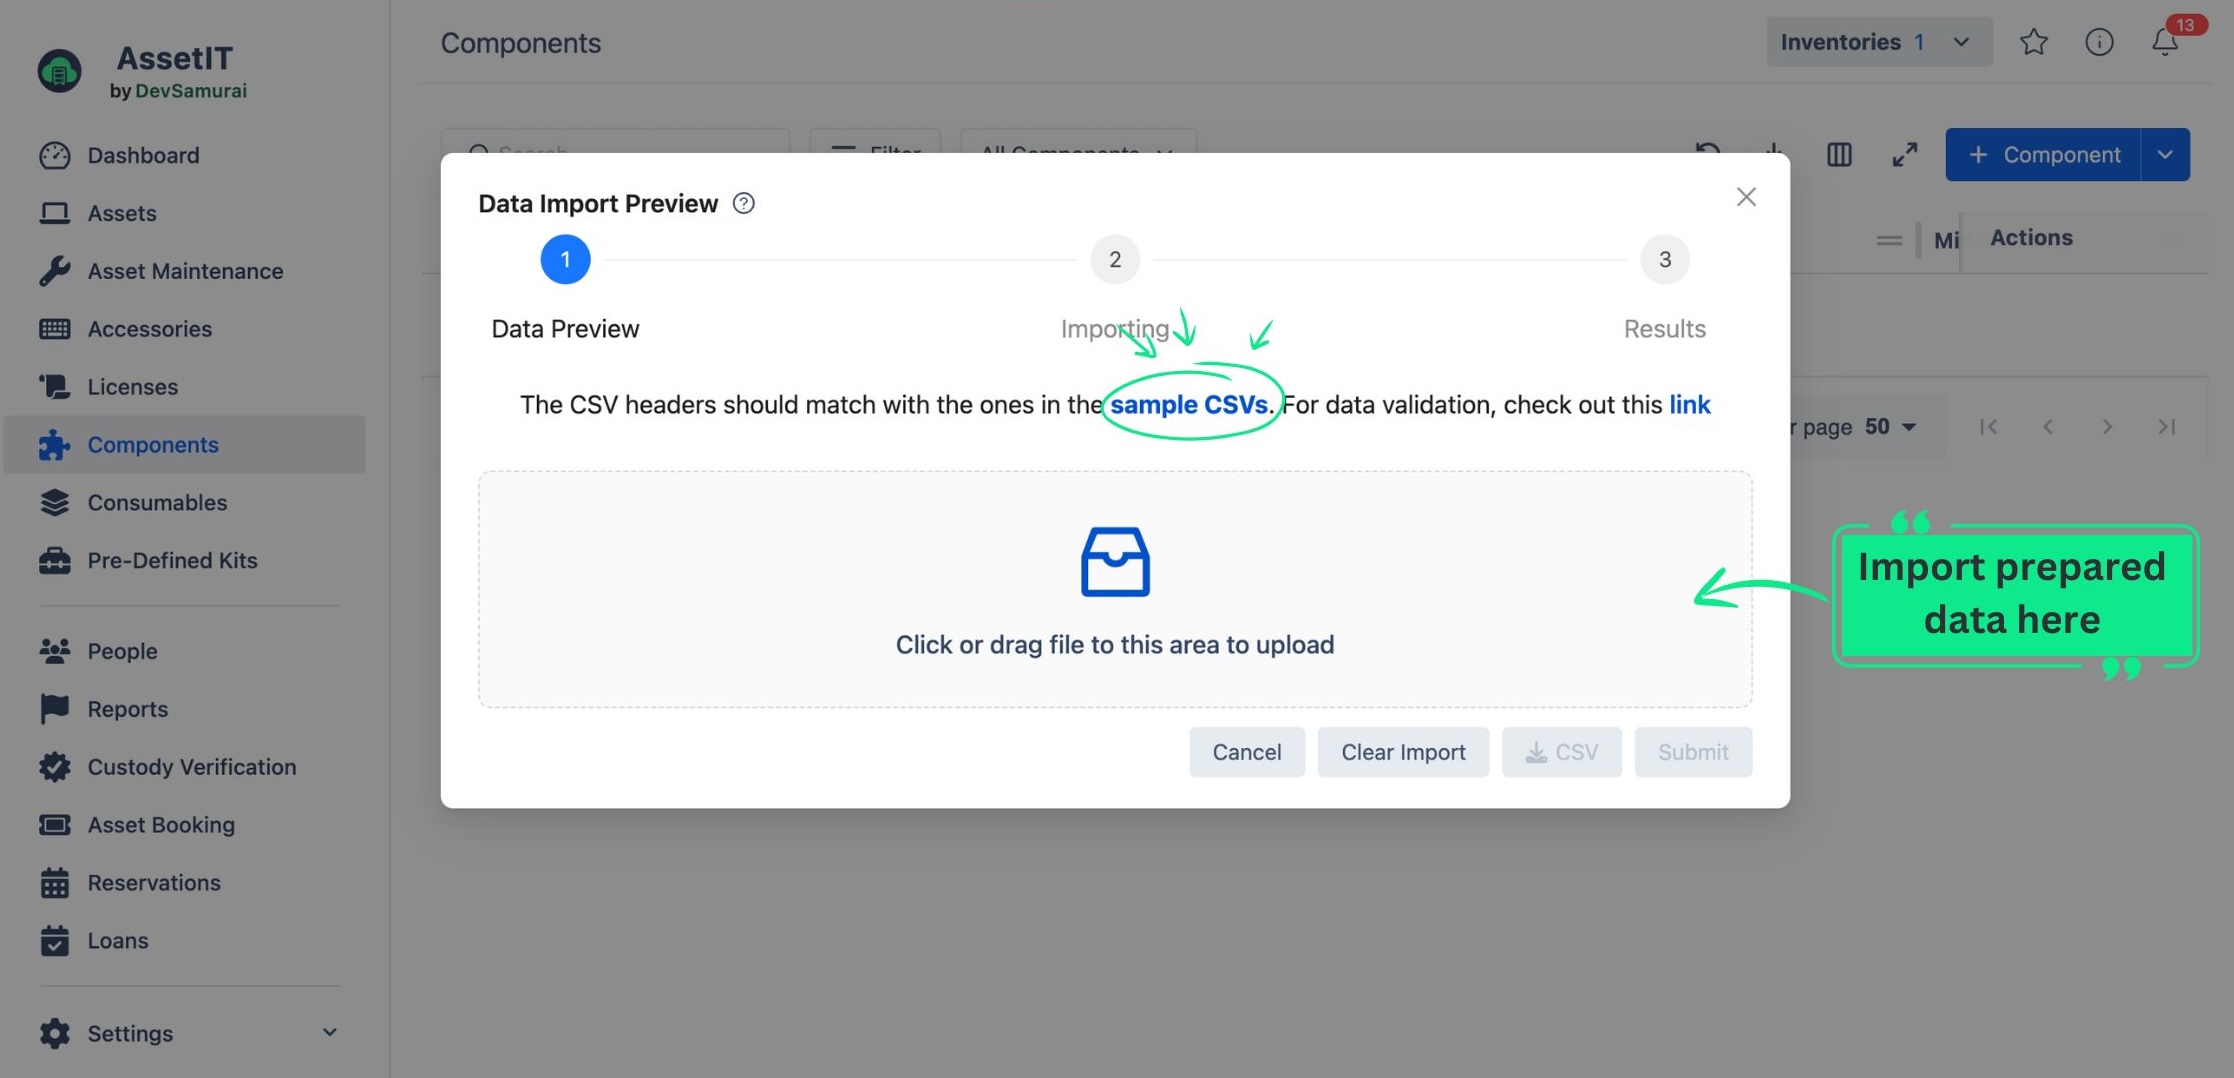
2. Bulk Import
-
On the top right of the Components page, click on the dropdown of


-
You will see a table that instructs you to use the sample CSV file for data preparation.
-
Once you finish preparing your data, import it into the app. You will then be taken to the Data Preview stage.
-
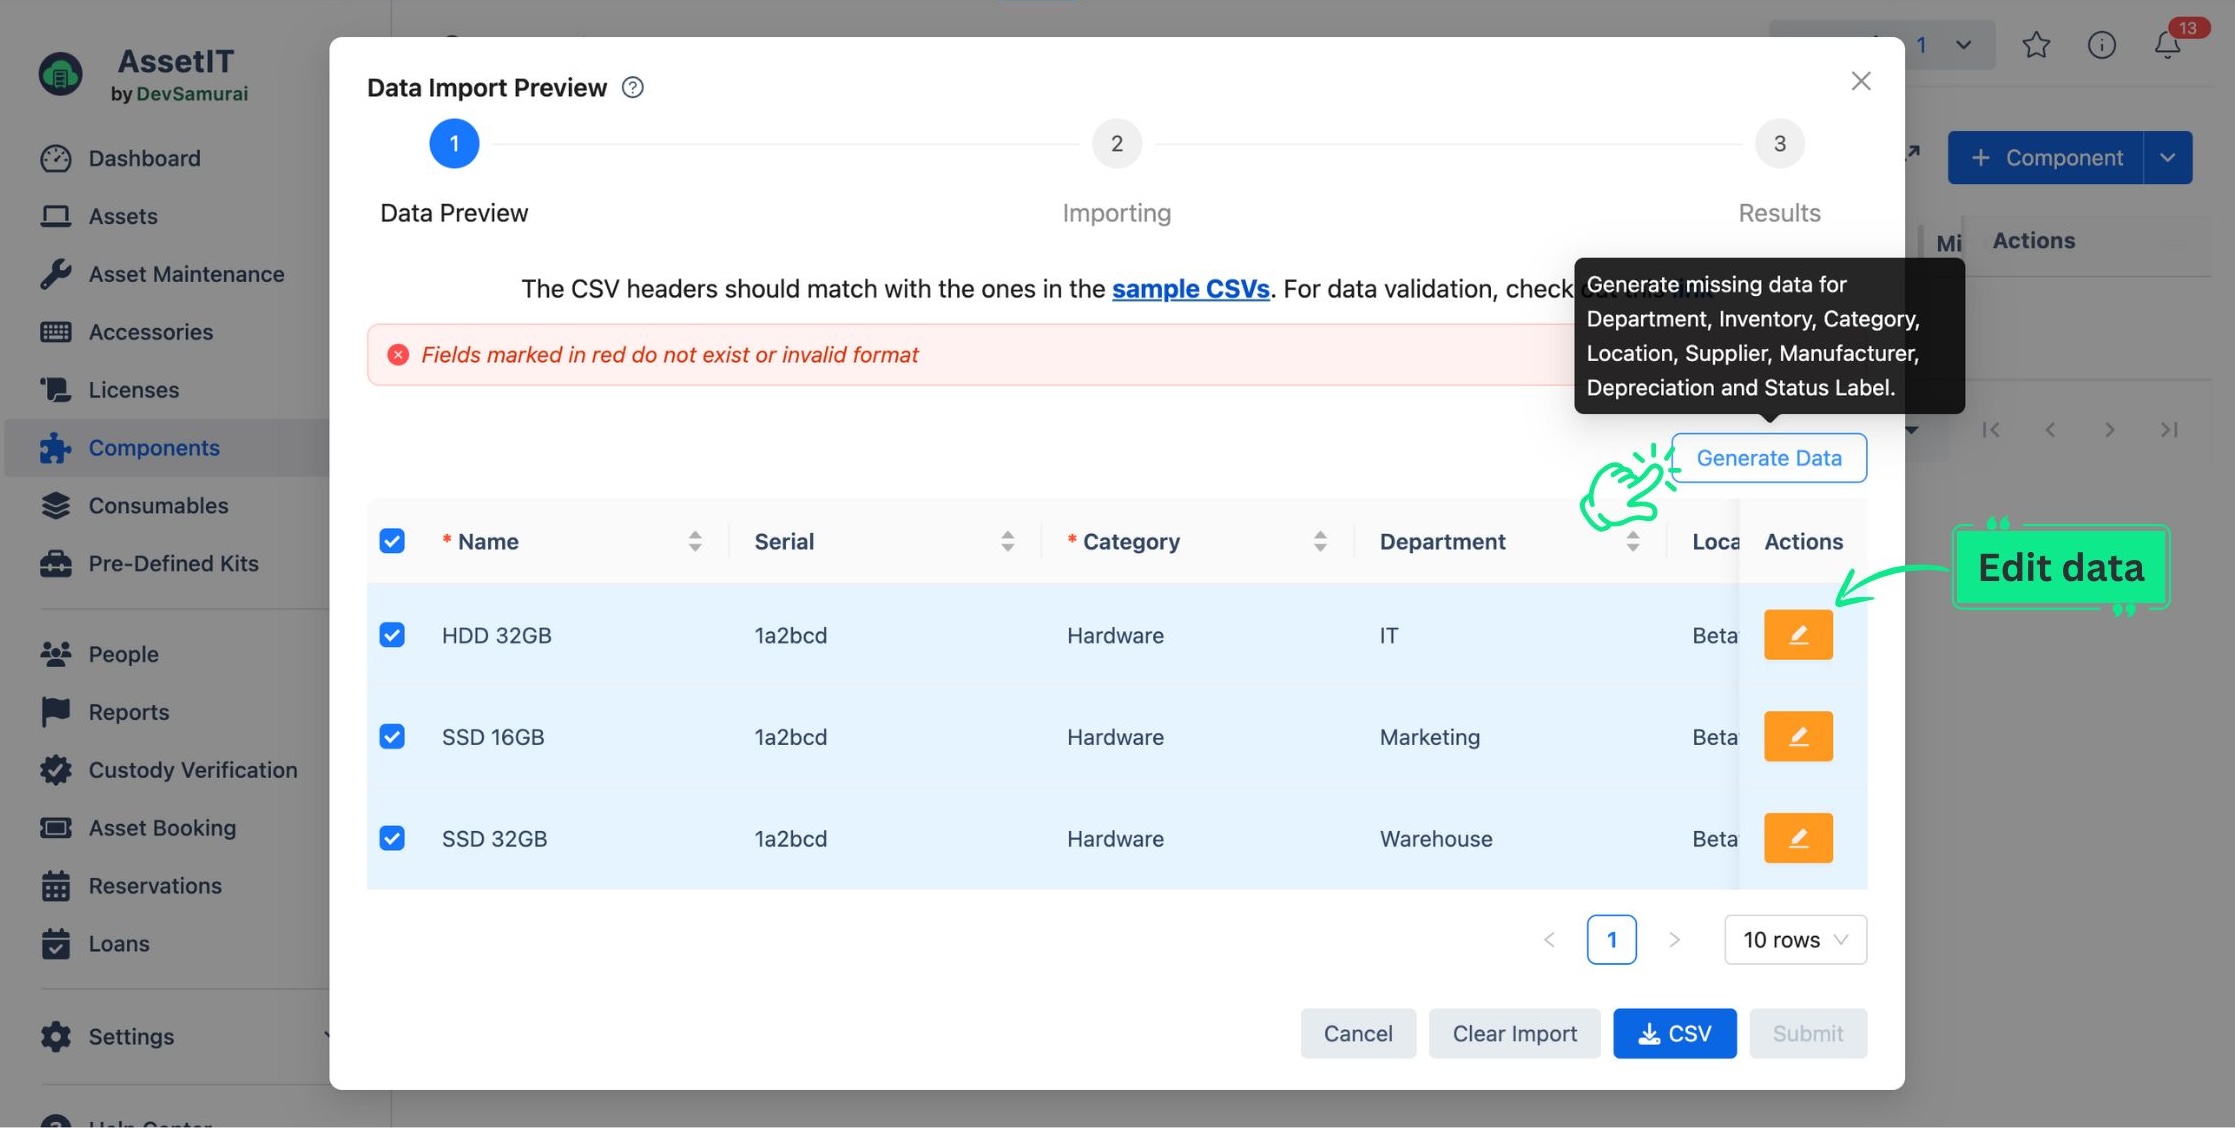
In the Data Preview stage, the app will highlight any fields with errors, allowing you to make adjustments directly.
-
To modify data information, click on the Edit button.
-
To automatically generate missing data for Department , Inventory , Category , Location , Supplier , Manufacturer , and Depreciation , click on the “Generate Data” button.
-
You can also download the most recently modified data into a CSV file for further customization by clicking the ![]()
-
Click on Submit to finish importing your components.
-
You should now see a list of your components on the Components page.
FAQs:
Need help? Submit your concerns at our Support Desk. Our support team will be in touch right away!