.png)
What Are Licenses? In AssetIT, licenses refer to legal permissions granted to an individual or organization to use specific software or intangible assets. They typically outline the terms under which the software can be used, such as the number of users or installations allowed, the duration of usage, and any restrictions or conditions set by the software vendor.
In AssetIT, licenses can be:
-
Assigned to a User: Allocate a software license directly to an individual to track usage and ensure compliance.
-
Linked to an Asset: Attach a license to a specific device or asset for efficient device-based license management.
Navigating the Licenses Page
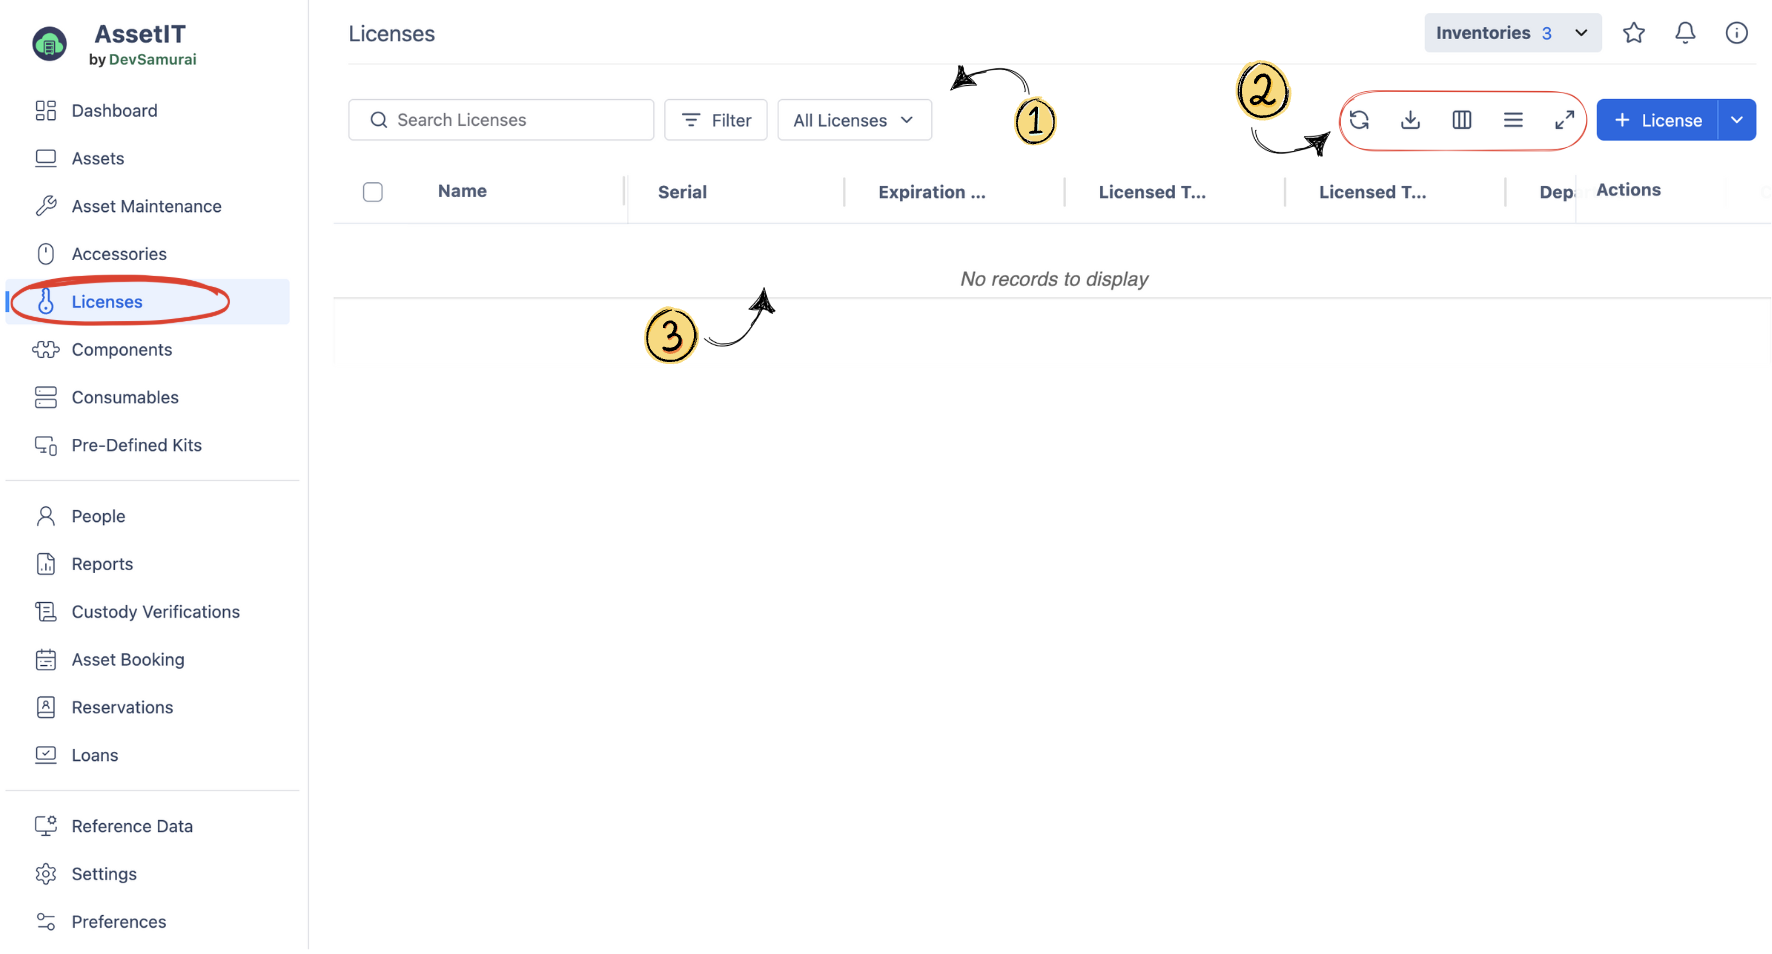
On the sidebar, click on the “Licenses”.
-
(1) Search and Filter Option: quickly locate and organize licenses based on specific criteria. You can:
-
Search for a license by name using the search bar.
-
Apply filters to view licenses that meet certain conditions, such as:
-
All Licenses – Displays the complete list of licenses.
-
Trash – Displays deleted licenses that can be restored if needed.
-
(2) Action Toolbar: Contains essential tools for managing the license list. You can:
-

-

-

-

-

(3) List Overview: The main area displays a list of all licenses currently in the system, giving you a quick overview and easy access to manage these items.
-
Start adding licenses to populate the Licenses list.
Adding Licenses:
There are 02 ways to create new licenses: bulk import and manual set up .
1. Manual Set Up
On the top right of the Licenses page, click on 
-
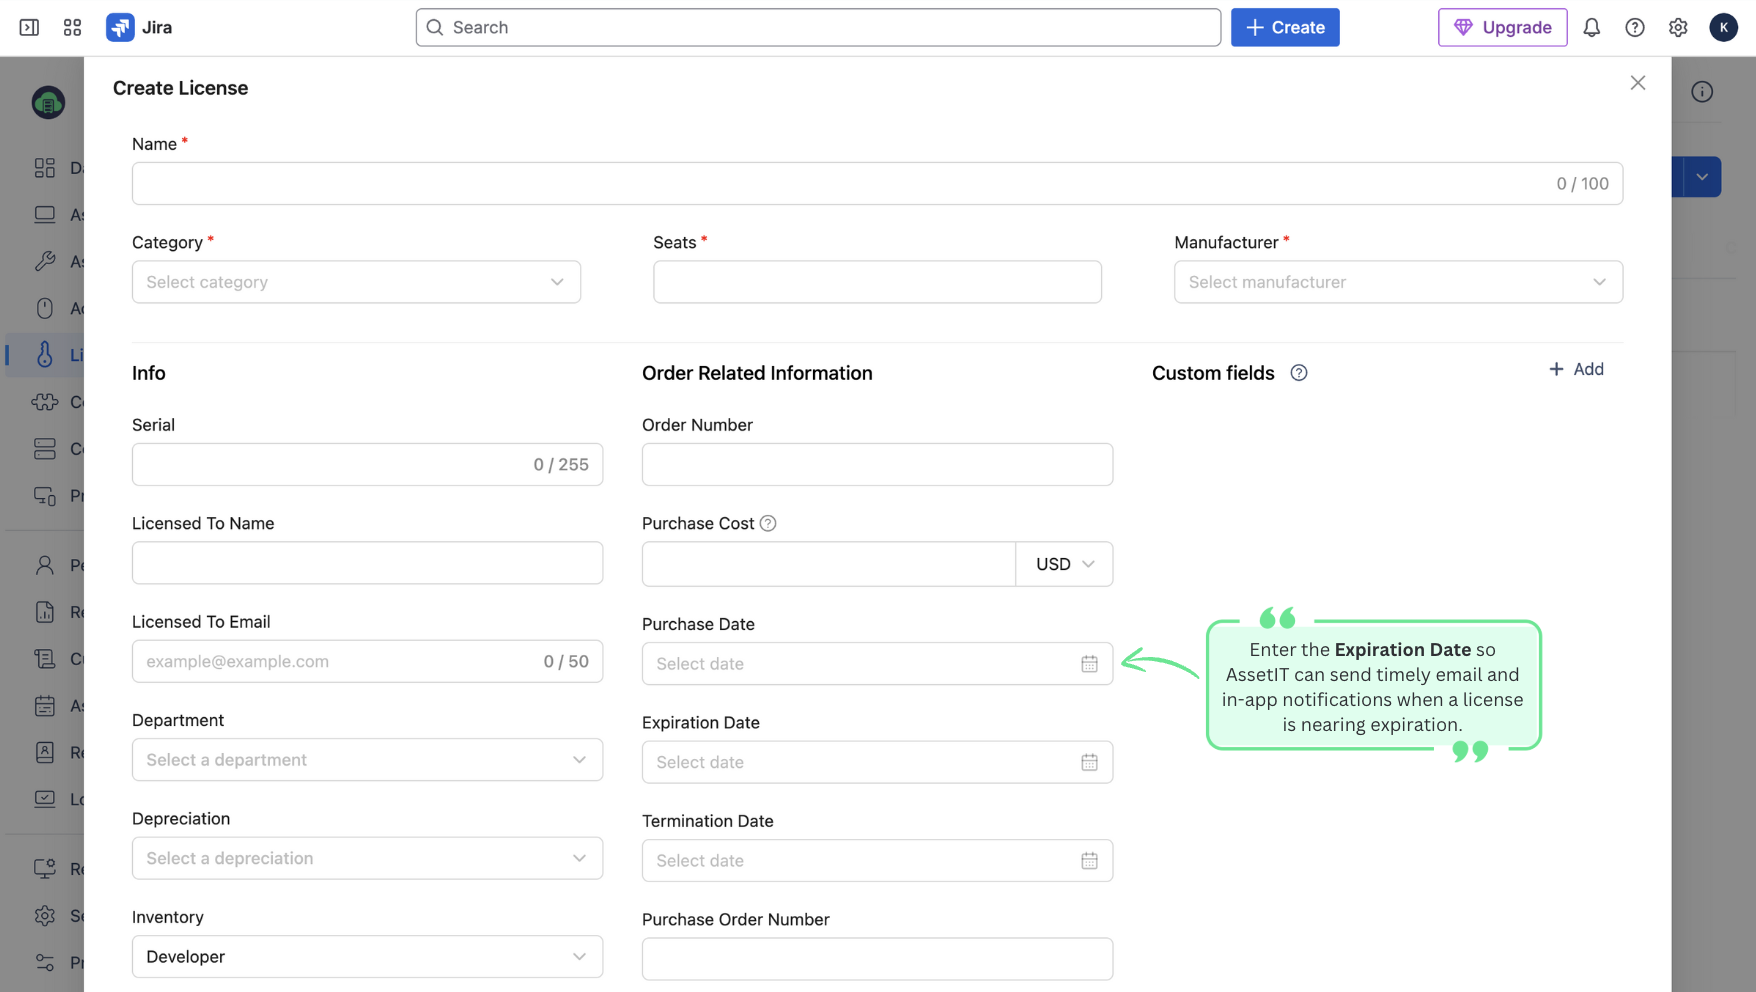
Fill Out the Required Fields:
-
Software Name: Enter the name of the software associated with the license.
-
Category: Select the appropriate category for the license. Or, type the desired data in the field, then press Enter or Tab add a new category if needed.
-
Seats: Specify the number of seats or installations allowed by the license.
-
Manufacturer: Choose the software manufacturer. If not listed, type the desired data in the field, then press Enter or Tab to add a new manufacturer if needed.
-
-
Optional Fields:
-
Serial, Department, Depreciation, Inventory, Suppliers, etc: Use these fields to add further details about the license.
-
Reassignable: Check this box if the license can be reassigned to another user.
-
-
Order Related Information:
-
Order Number: Enter the unique order number for tracking purposes.
-
Purchase Cost: Specify the cost of the license, using up to two decimal places.
-
Purchase Date: Select the date the license was purchased.
-
Expiration Date: Choose the date the license will expire. This is crucial for receiving notifications.
-
Termination Date: If applicable, enter the date the license agreement ends.
-
Purchase Order Number: Input the purchase order number related to this license for reference.
-
-
After filling in all the necessary details, click the "Save" button to create the new license in AssetIT.
2. Bulk Import
-
On the top right of the Licenses page, click on the dropdown of
-
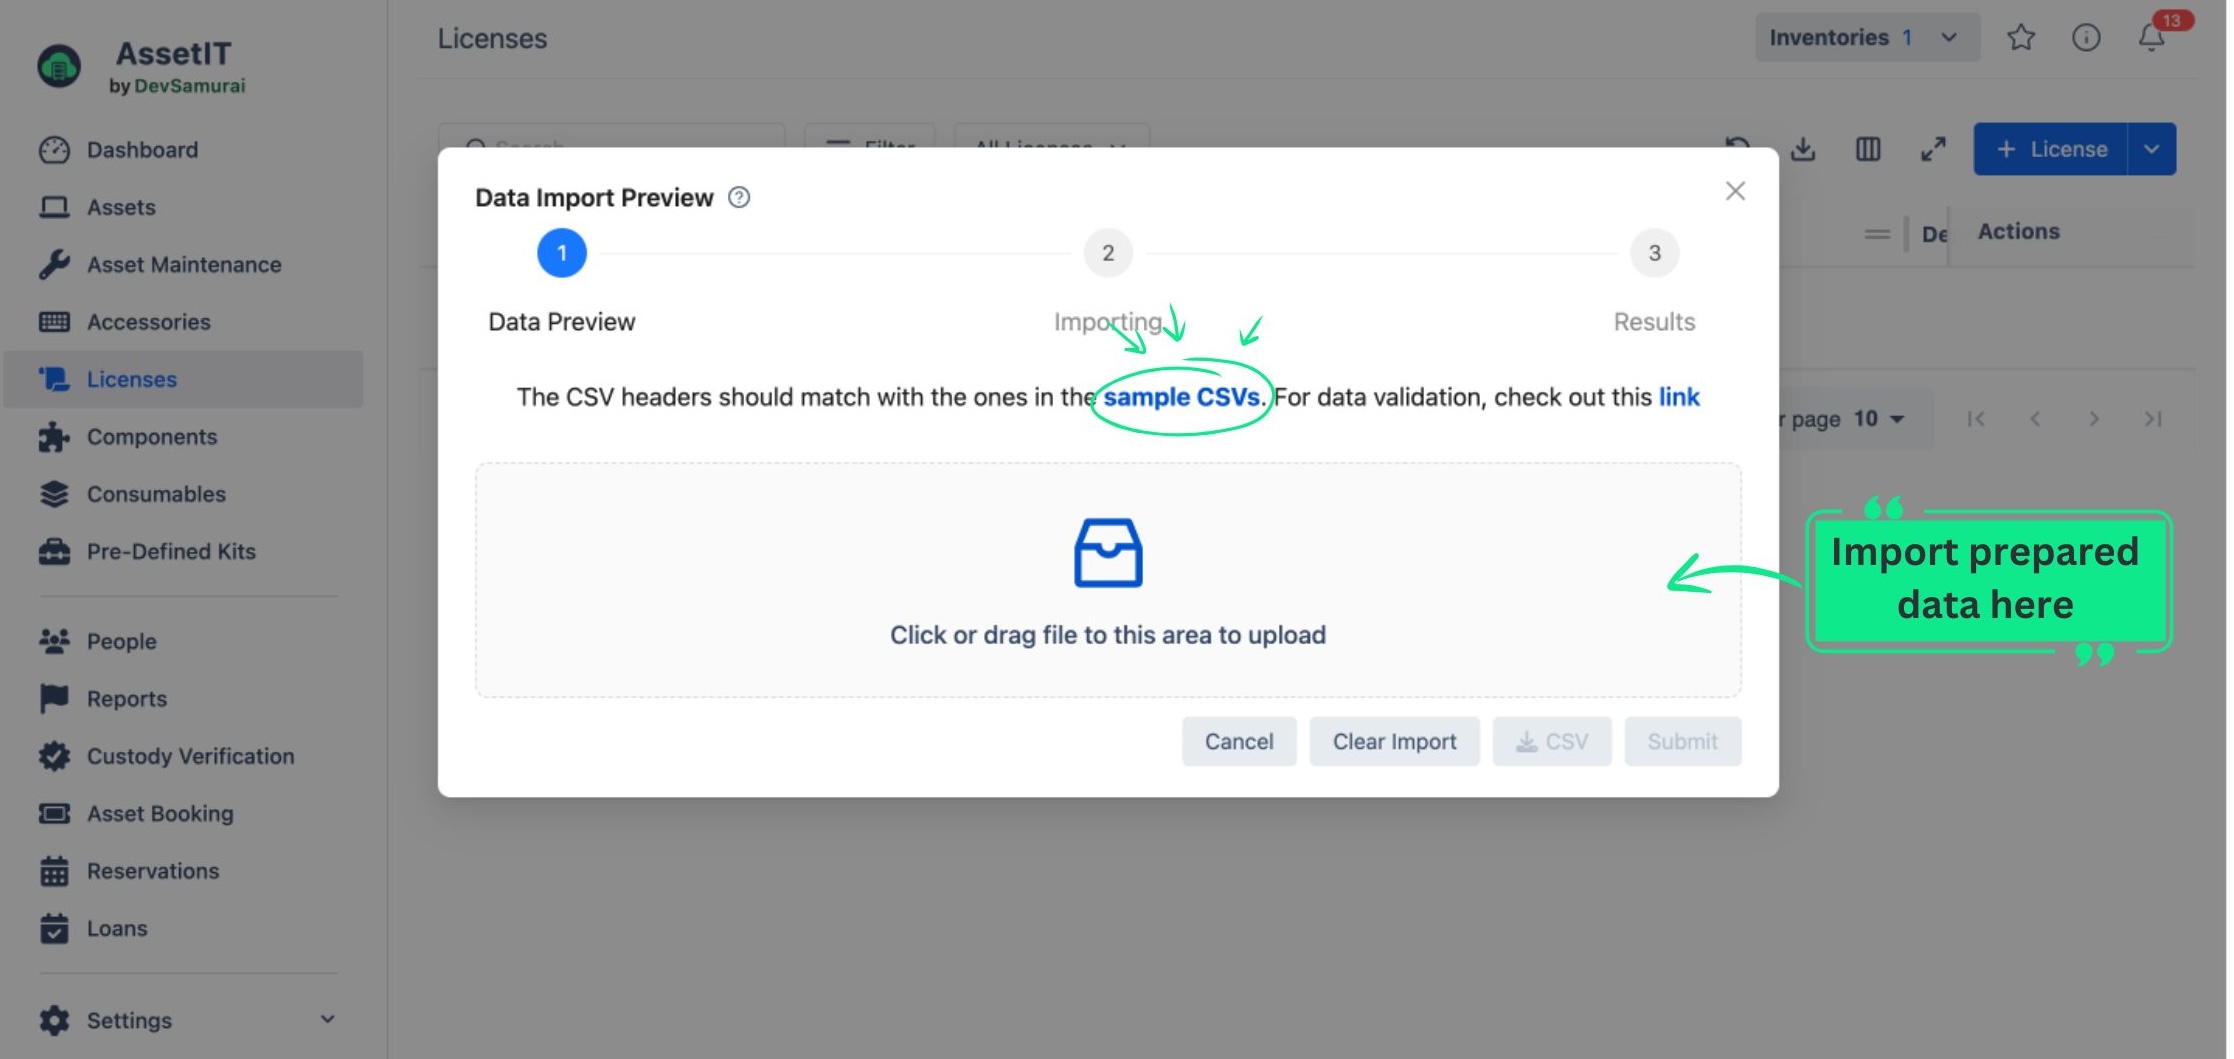
You will see a table that instructs you to use the sample CSV file for data preparation.
-
Once you finish preparing your data, import it into the app. You will then be taken to the Data Preview stage.
-
In the Data Preview stage, the app will highlight any fields with errors, allowing you to make adjustments directly.
-
To modify data information, click on the Edit button.
-
To automatically generate missing data for Department , Inventory , Category , Location , Supplier , Manufacturer , and depreciation , click on the “Generate Data” button.
-
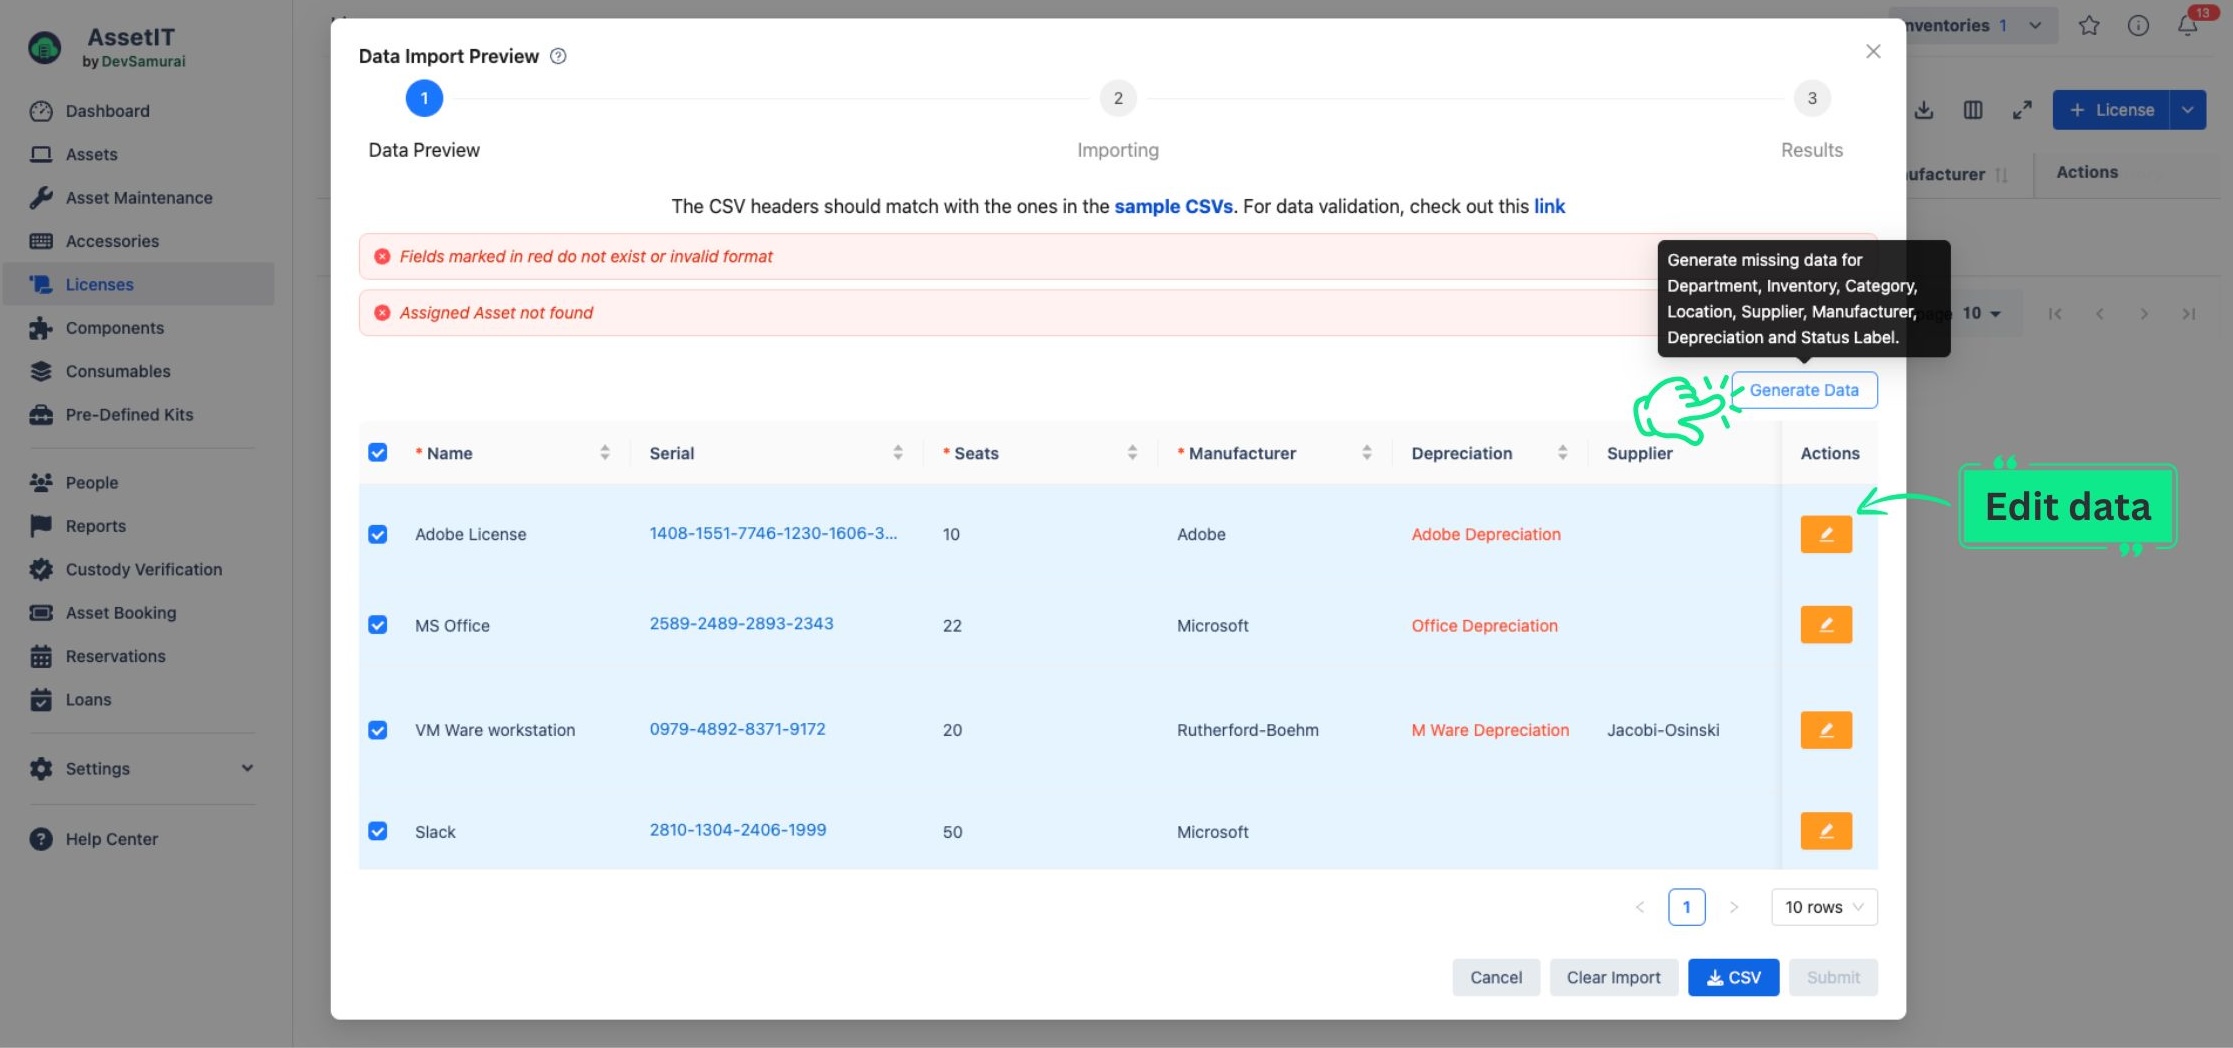
You can also download the most recently modified data into a CSV file for further customization by clicking the 
-
Click on Submit to finish importing your licenses.
-
You should now see a list of your licenses on the Licenses page.
FAQs:
Need help? Submit your concerns at our Support Desk. Our support team will be in touch right away!