.png)
For MacOS
User-Initiated Enrollment (URL Method) - For Existing/BYOD Macs
-
Access URL: Open Safari and go to your organization’s specific enrollment URL https://devsamurainfr.jamfcloud.com/enroll
-
Sign In: Use your organizational credentials (or a Jamf Pro account) to log in.
-
Download Profile: Click to download the Configuration Profile.
-
Install Profile:
-
Go to System Settings/Preferences > Profiles (or Privacy & Security on newer macOS).
-
Double-click the downloaded profile and follow the prompts to install it, entering admin credentials if asked.
-
-
Verification: The device is now managed, and you might see the Self Service app appear.
For iOS
Step1: Login to Jamf: https://devsamurainfr.jamfcloud.com/
-
⚠️ Make sure your account is allowed to enroll devices
-
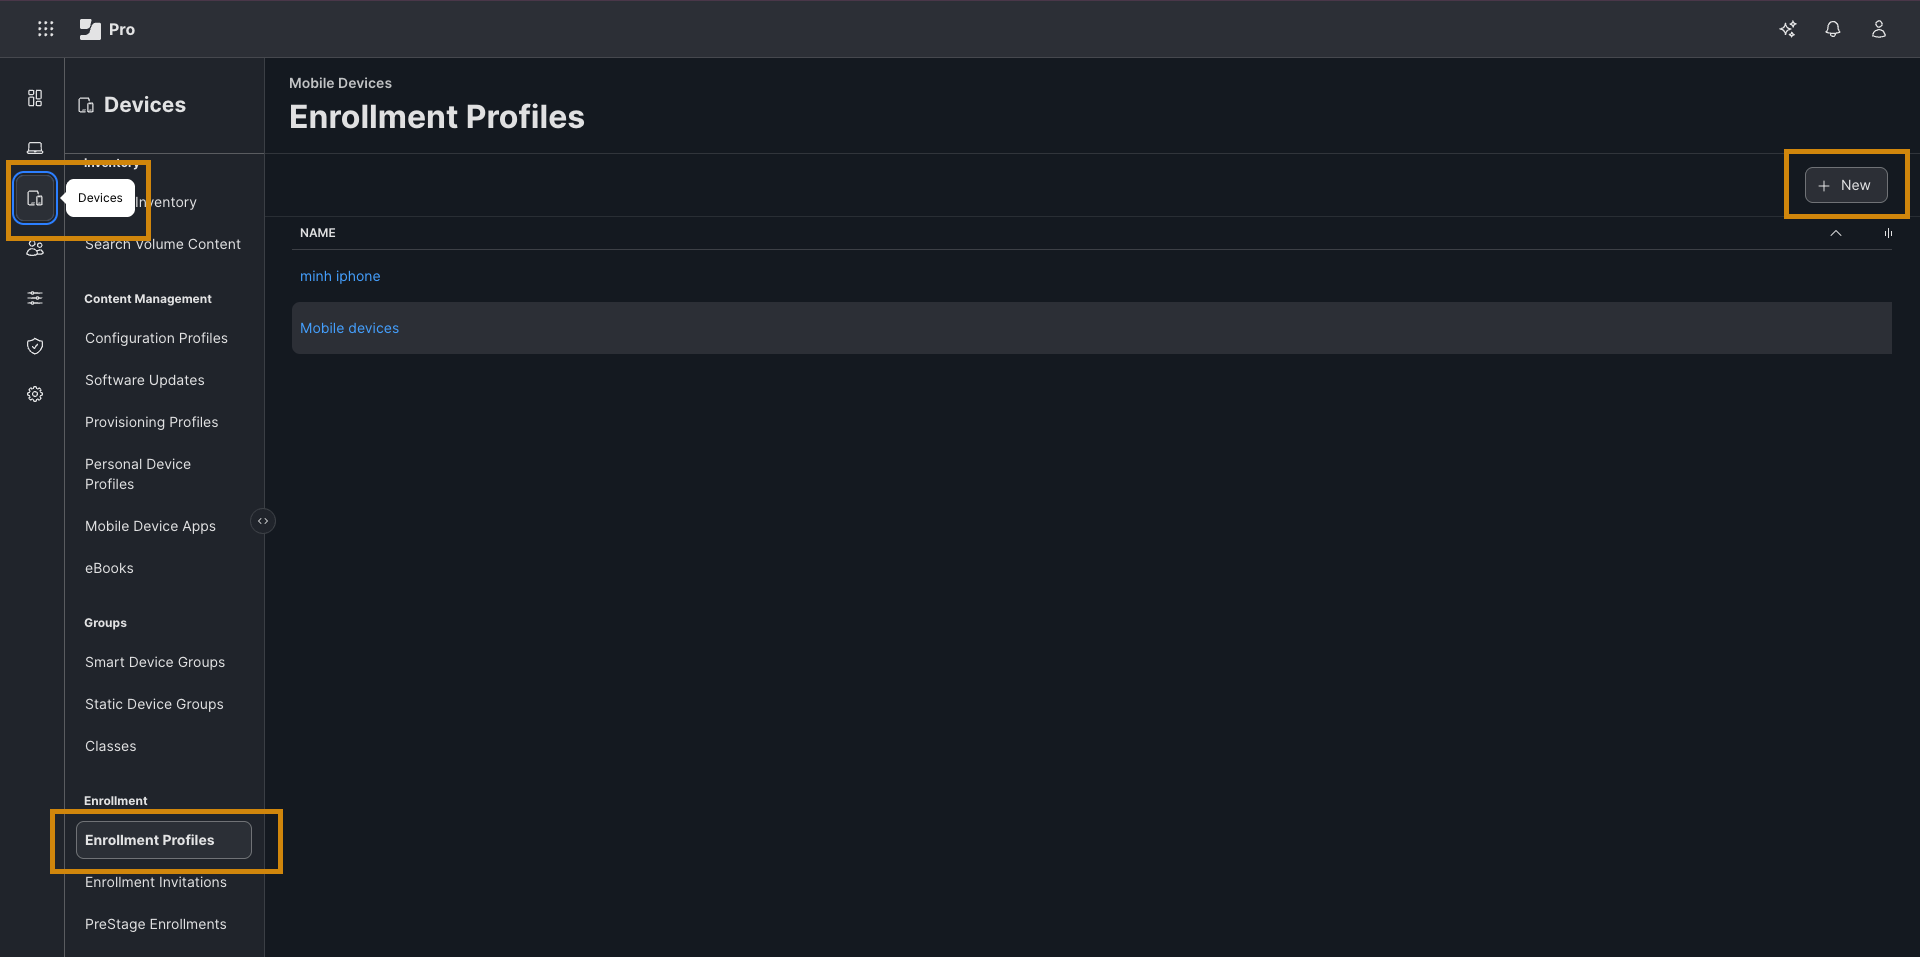
On the left sidebar, go to Devices → Click Enrollment Profiles → Click New
-
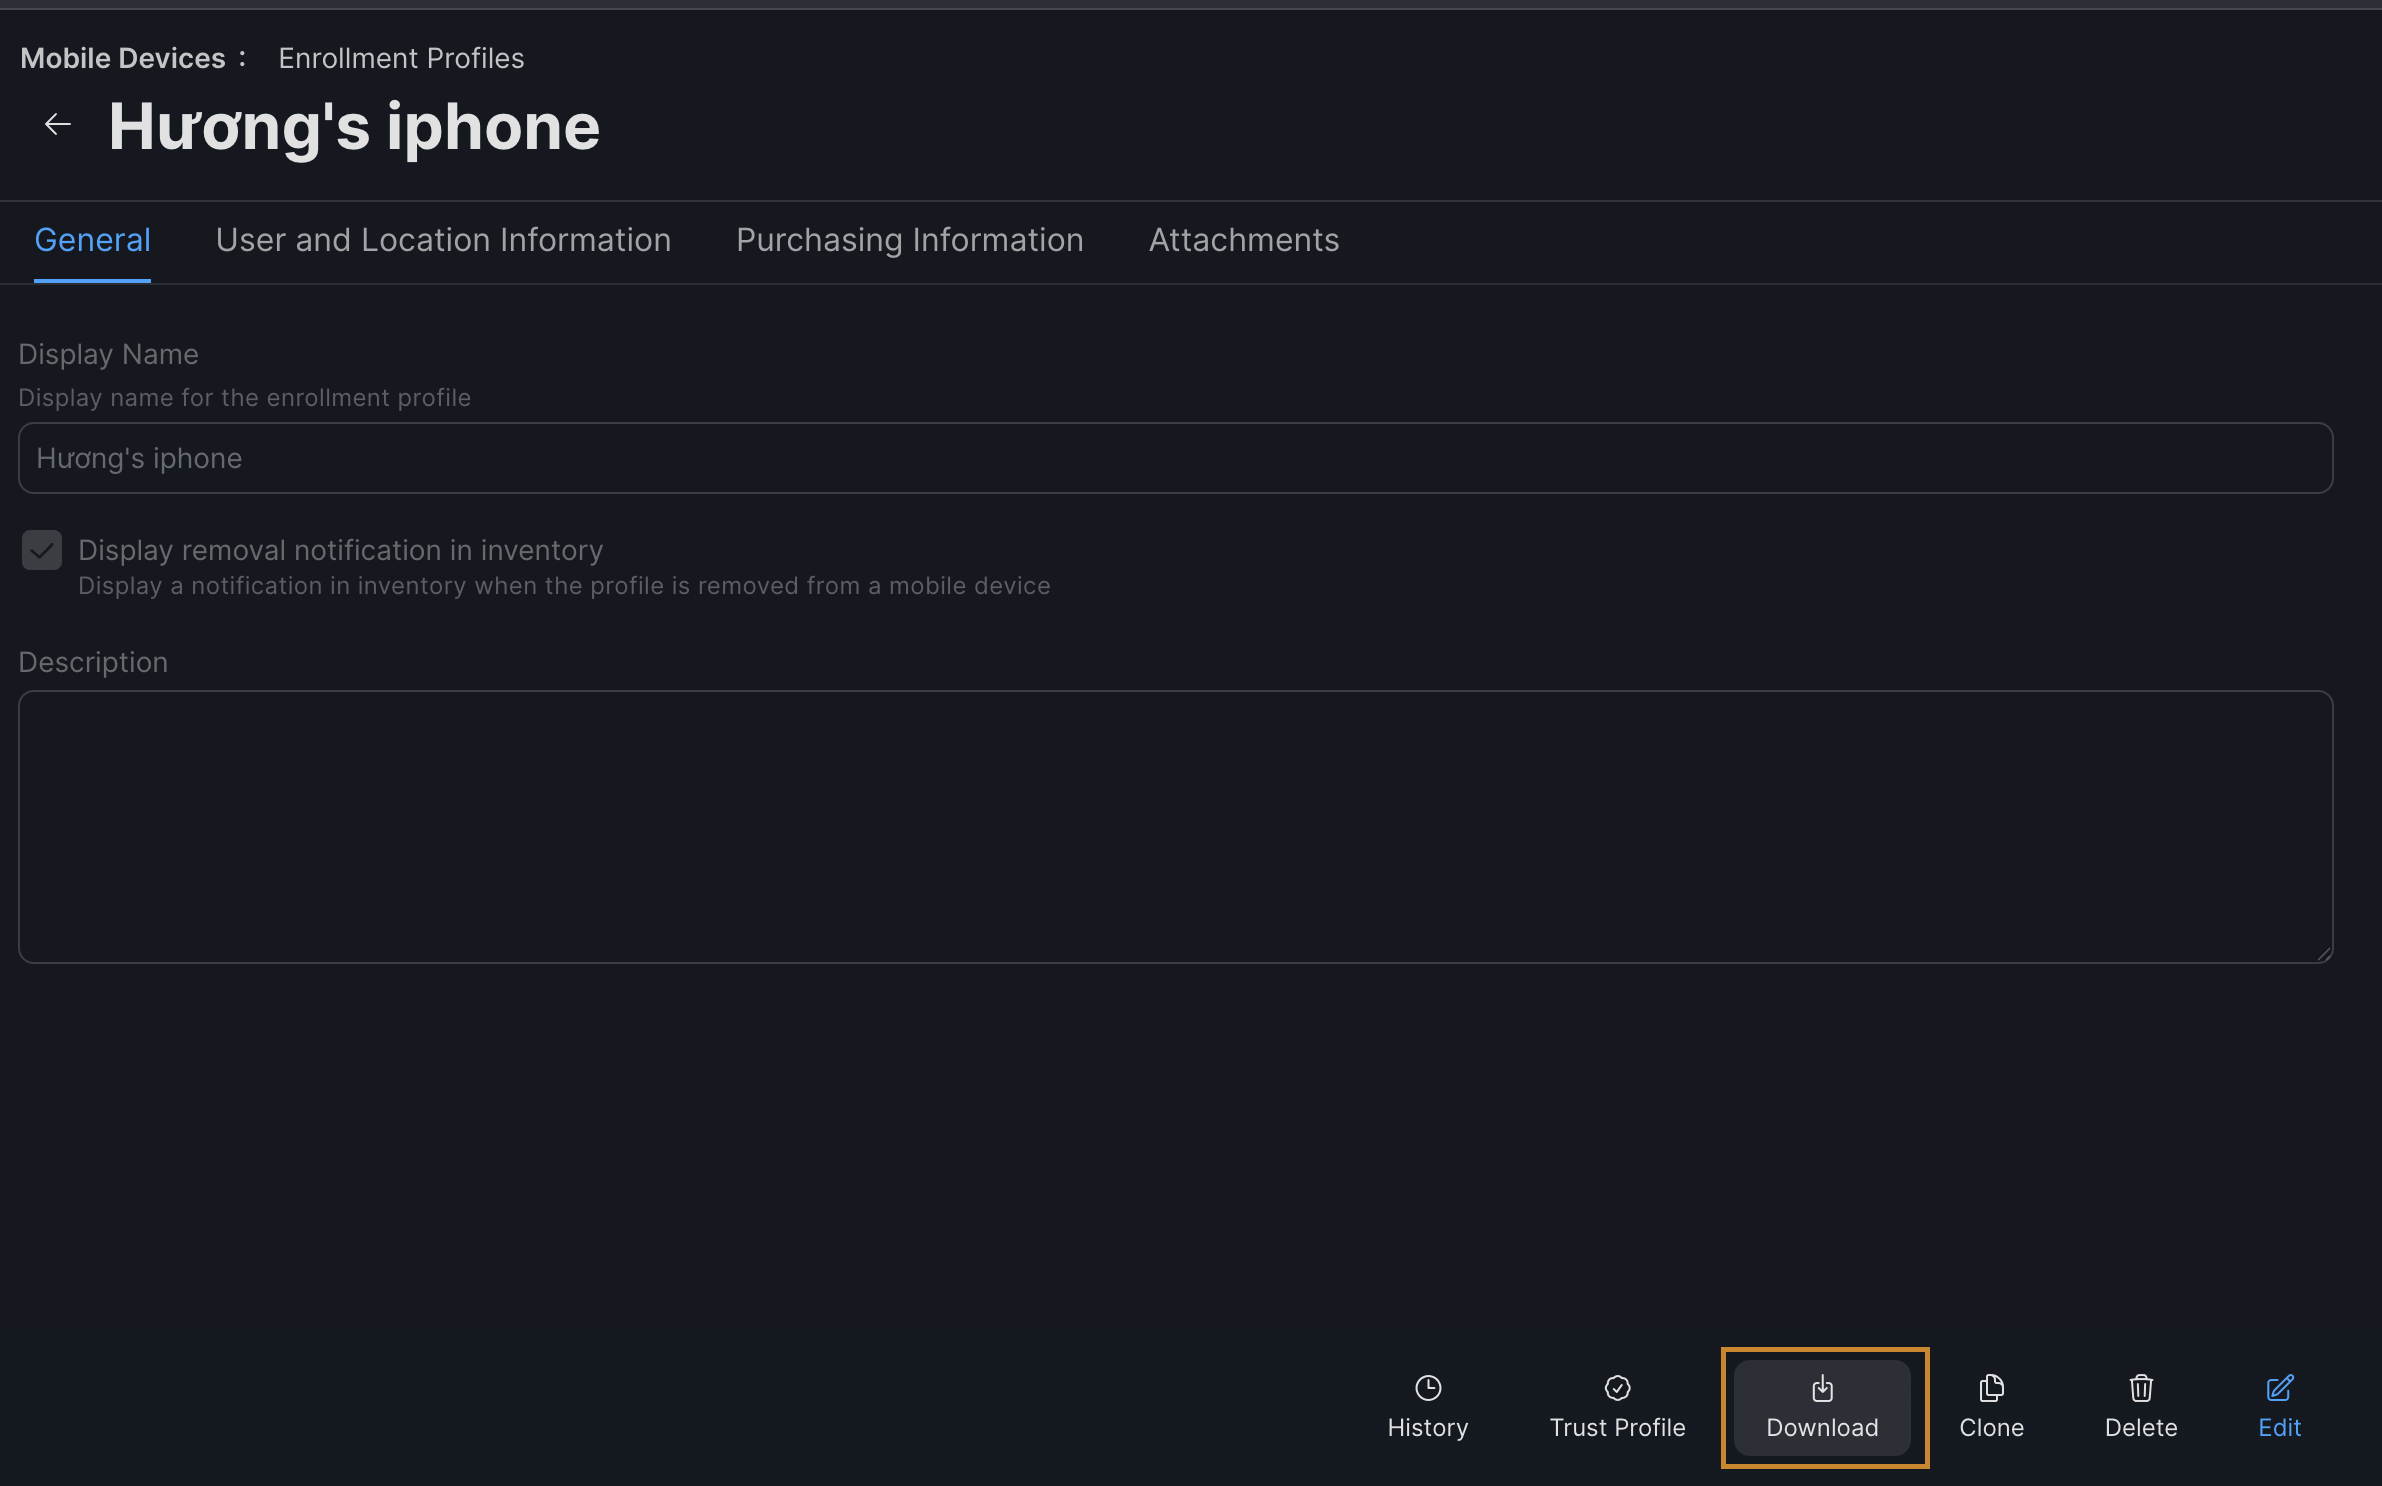
Fill in the information and Save → Download the
.mobileconfigfile
Step 2: Download Apple Configurator on your Mac: https://apps.apple.com/vn/app/apple-configurator/id1037126344?mt=12
⚠️ Connect your iPhone with Mac via USB
-
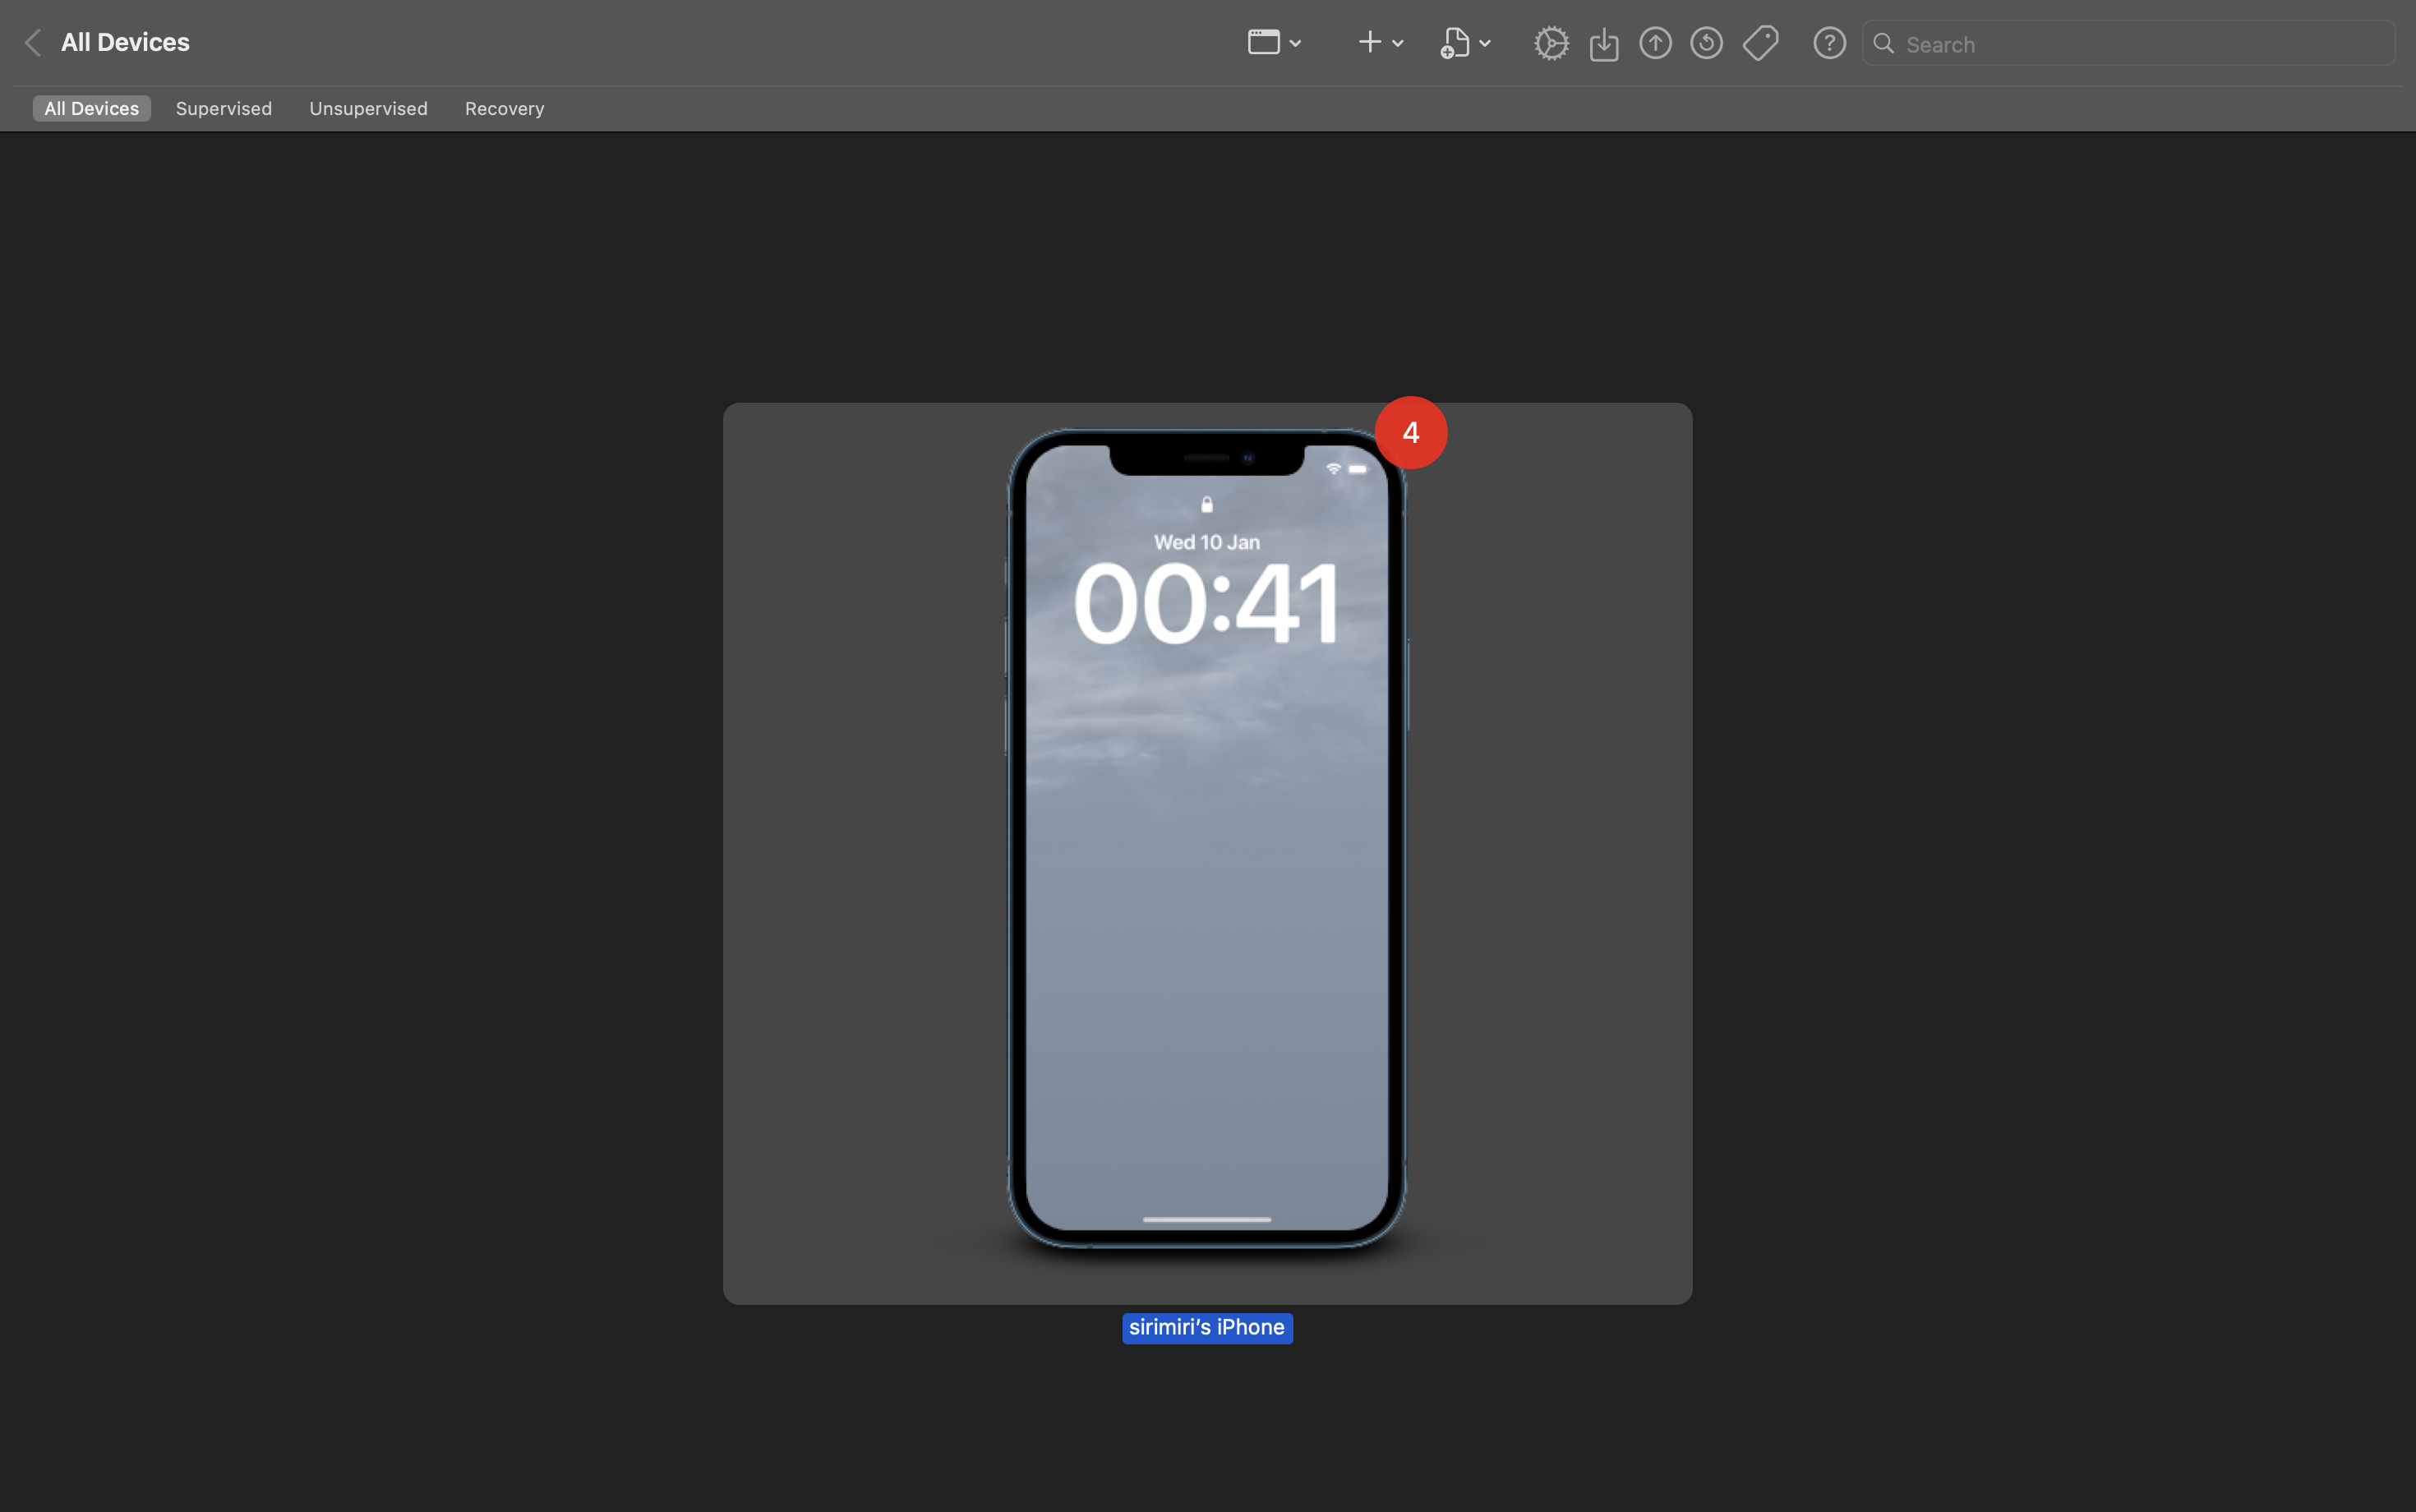
Open Apple Configurator
-
Double-click your iPhone to open device details.
-
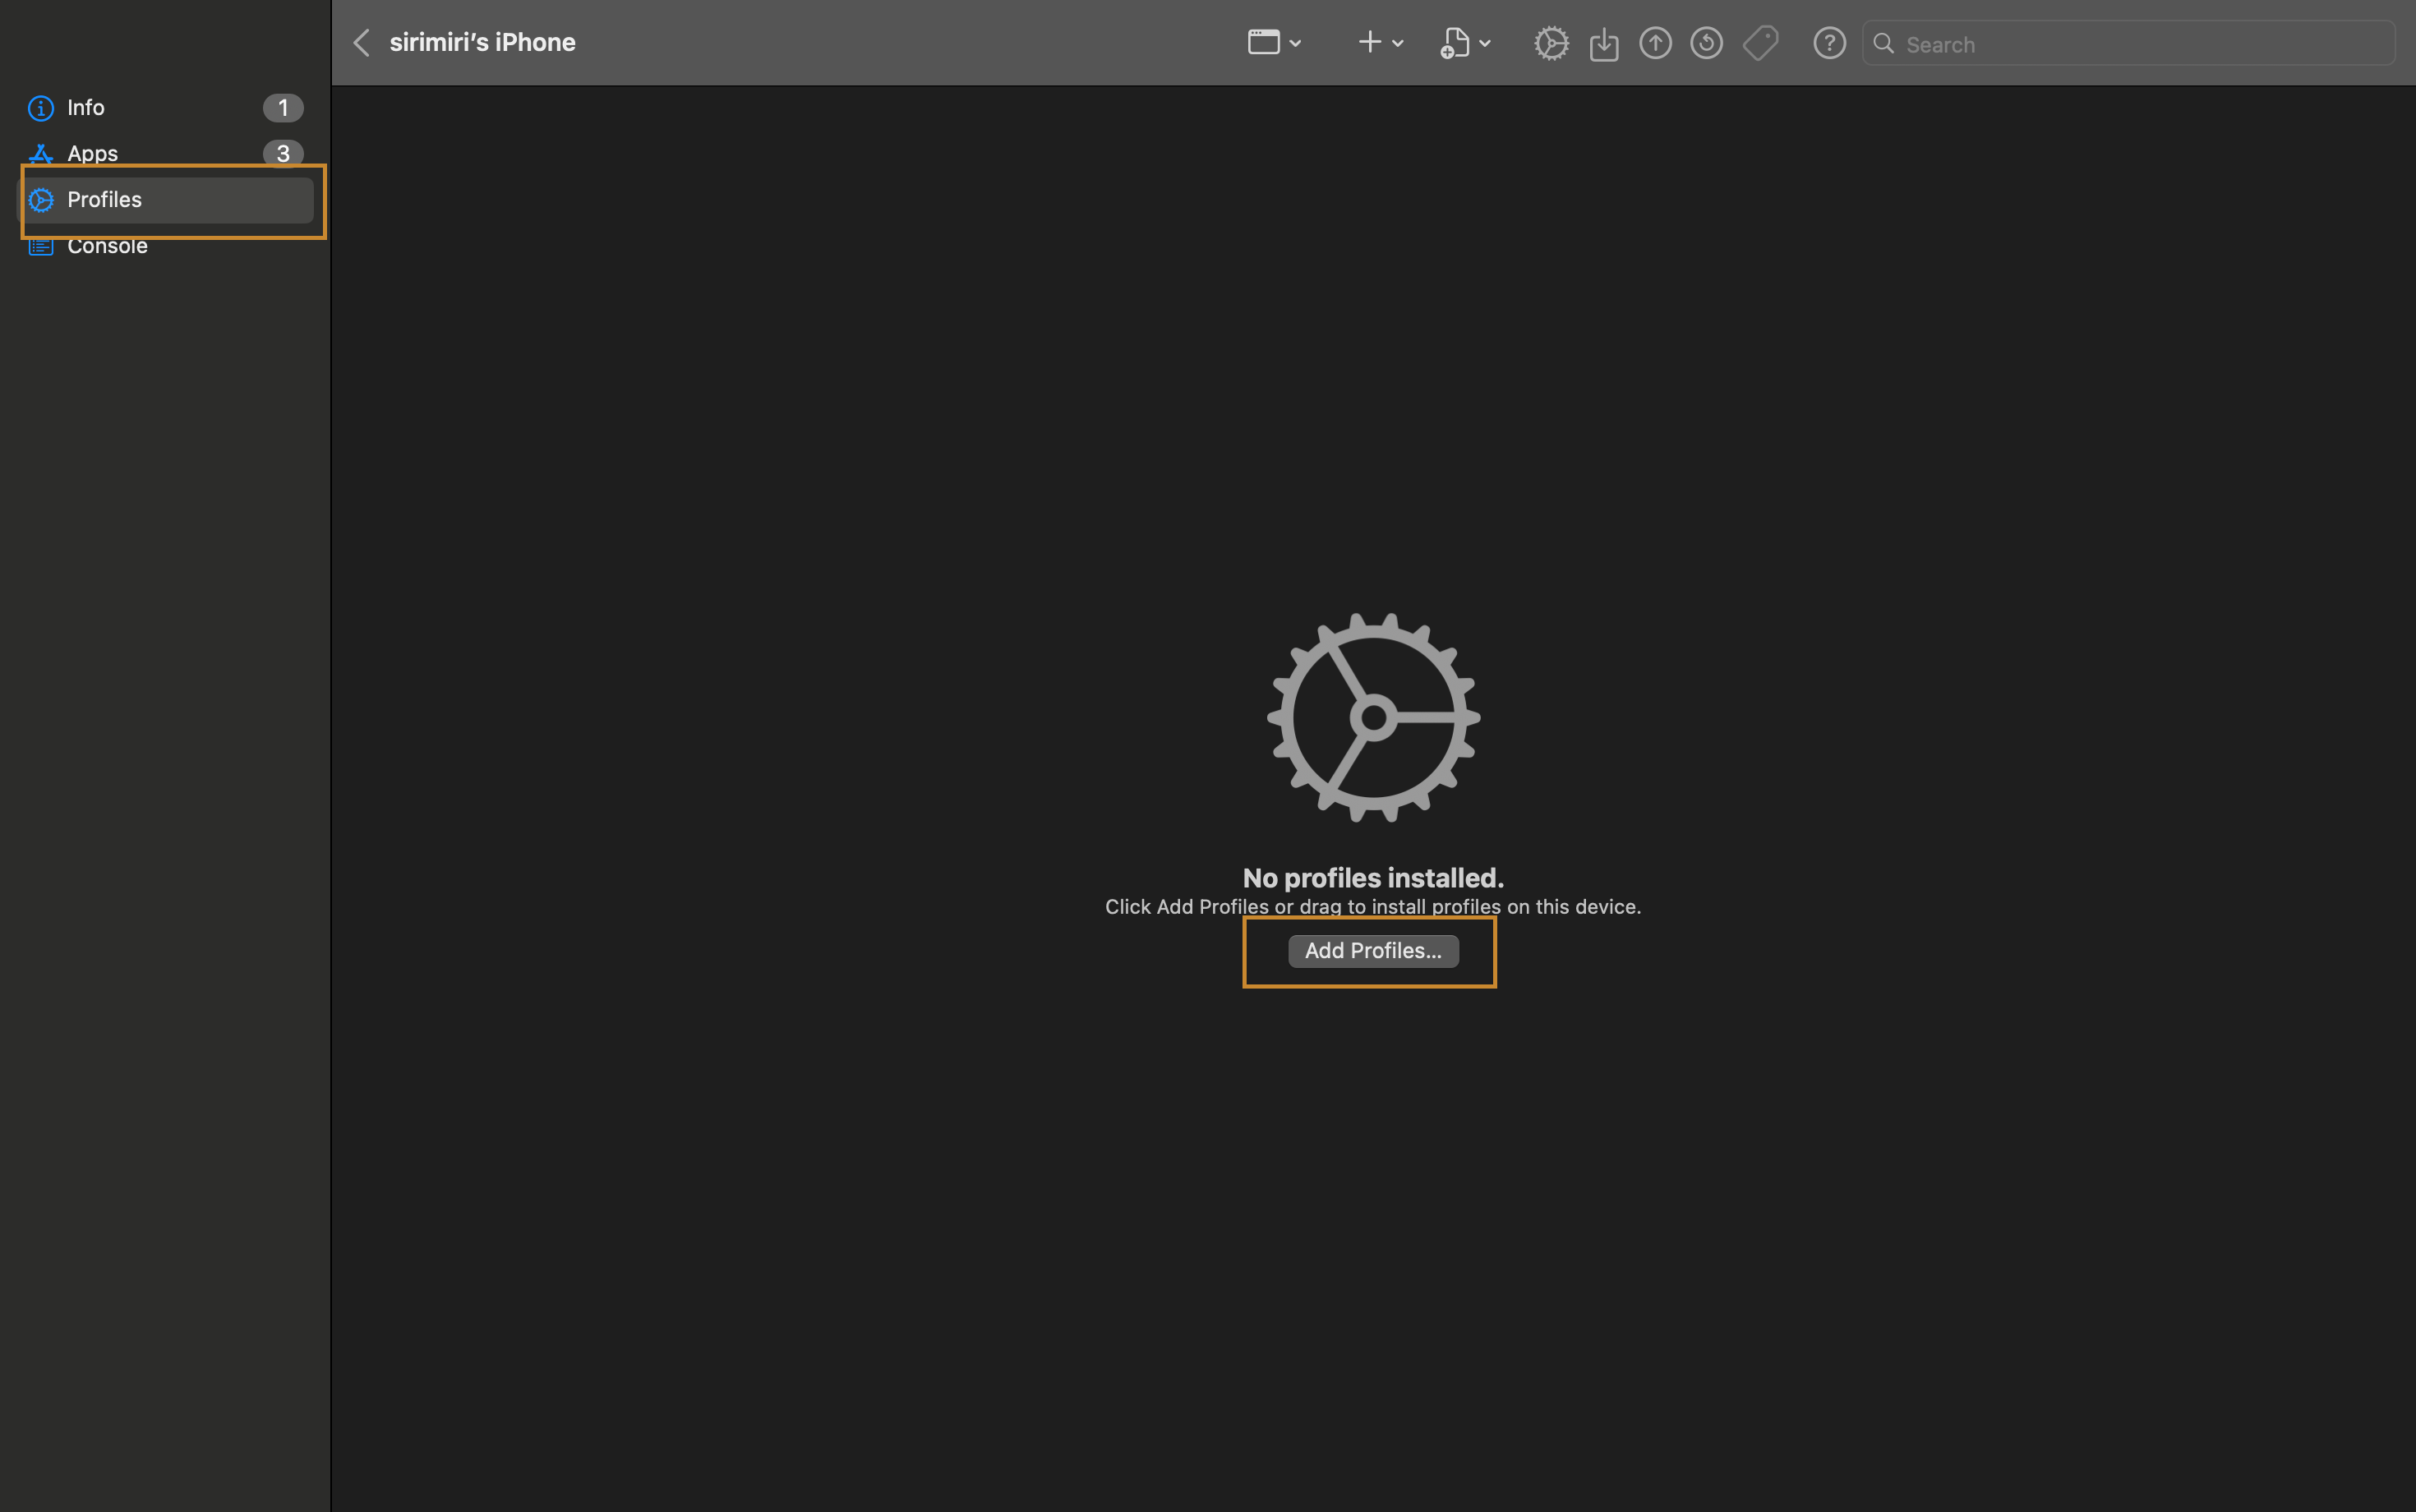
In the left sidebar, select Profiles.
-
Click Add Profiles.
-
Choose the
.mobileconfigfile downloaded from Jamf.
Step 3: Install Profile on Your iPhone
-
On your iPhone, open Settings.
-
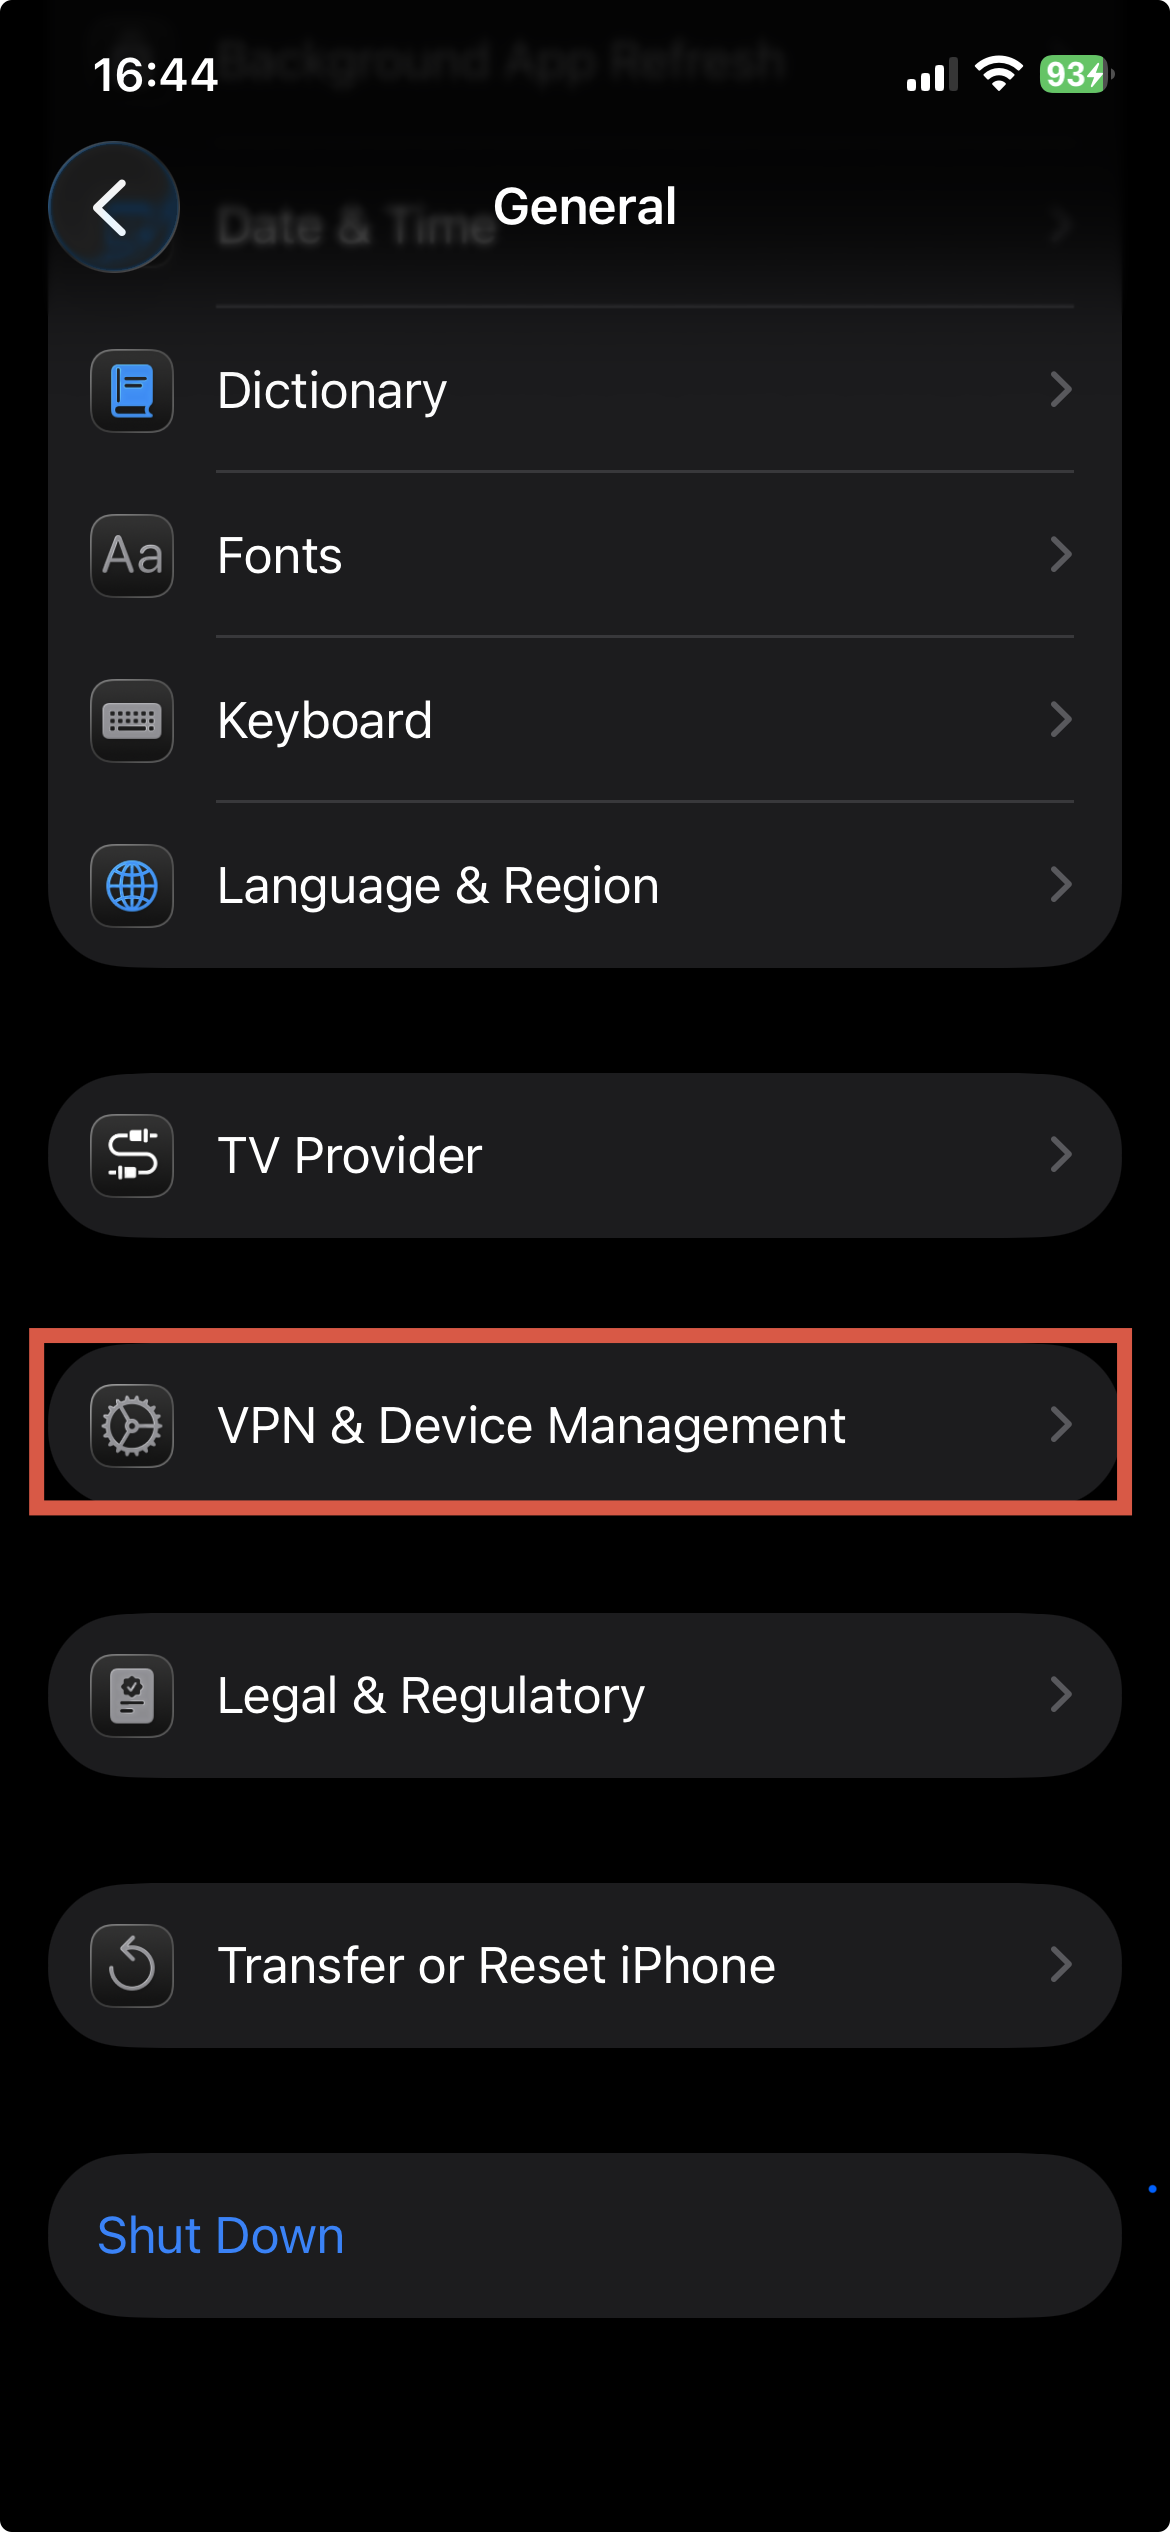
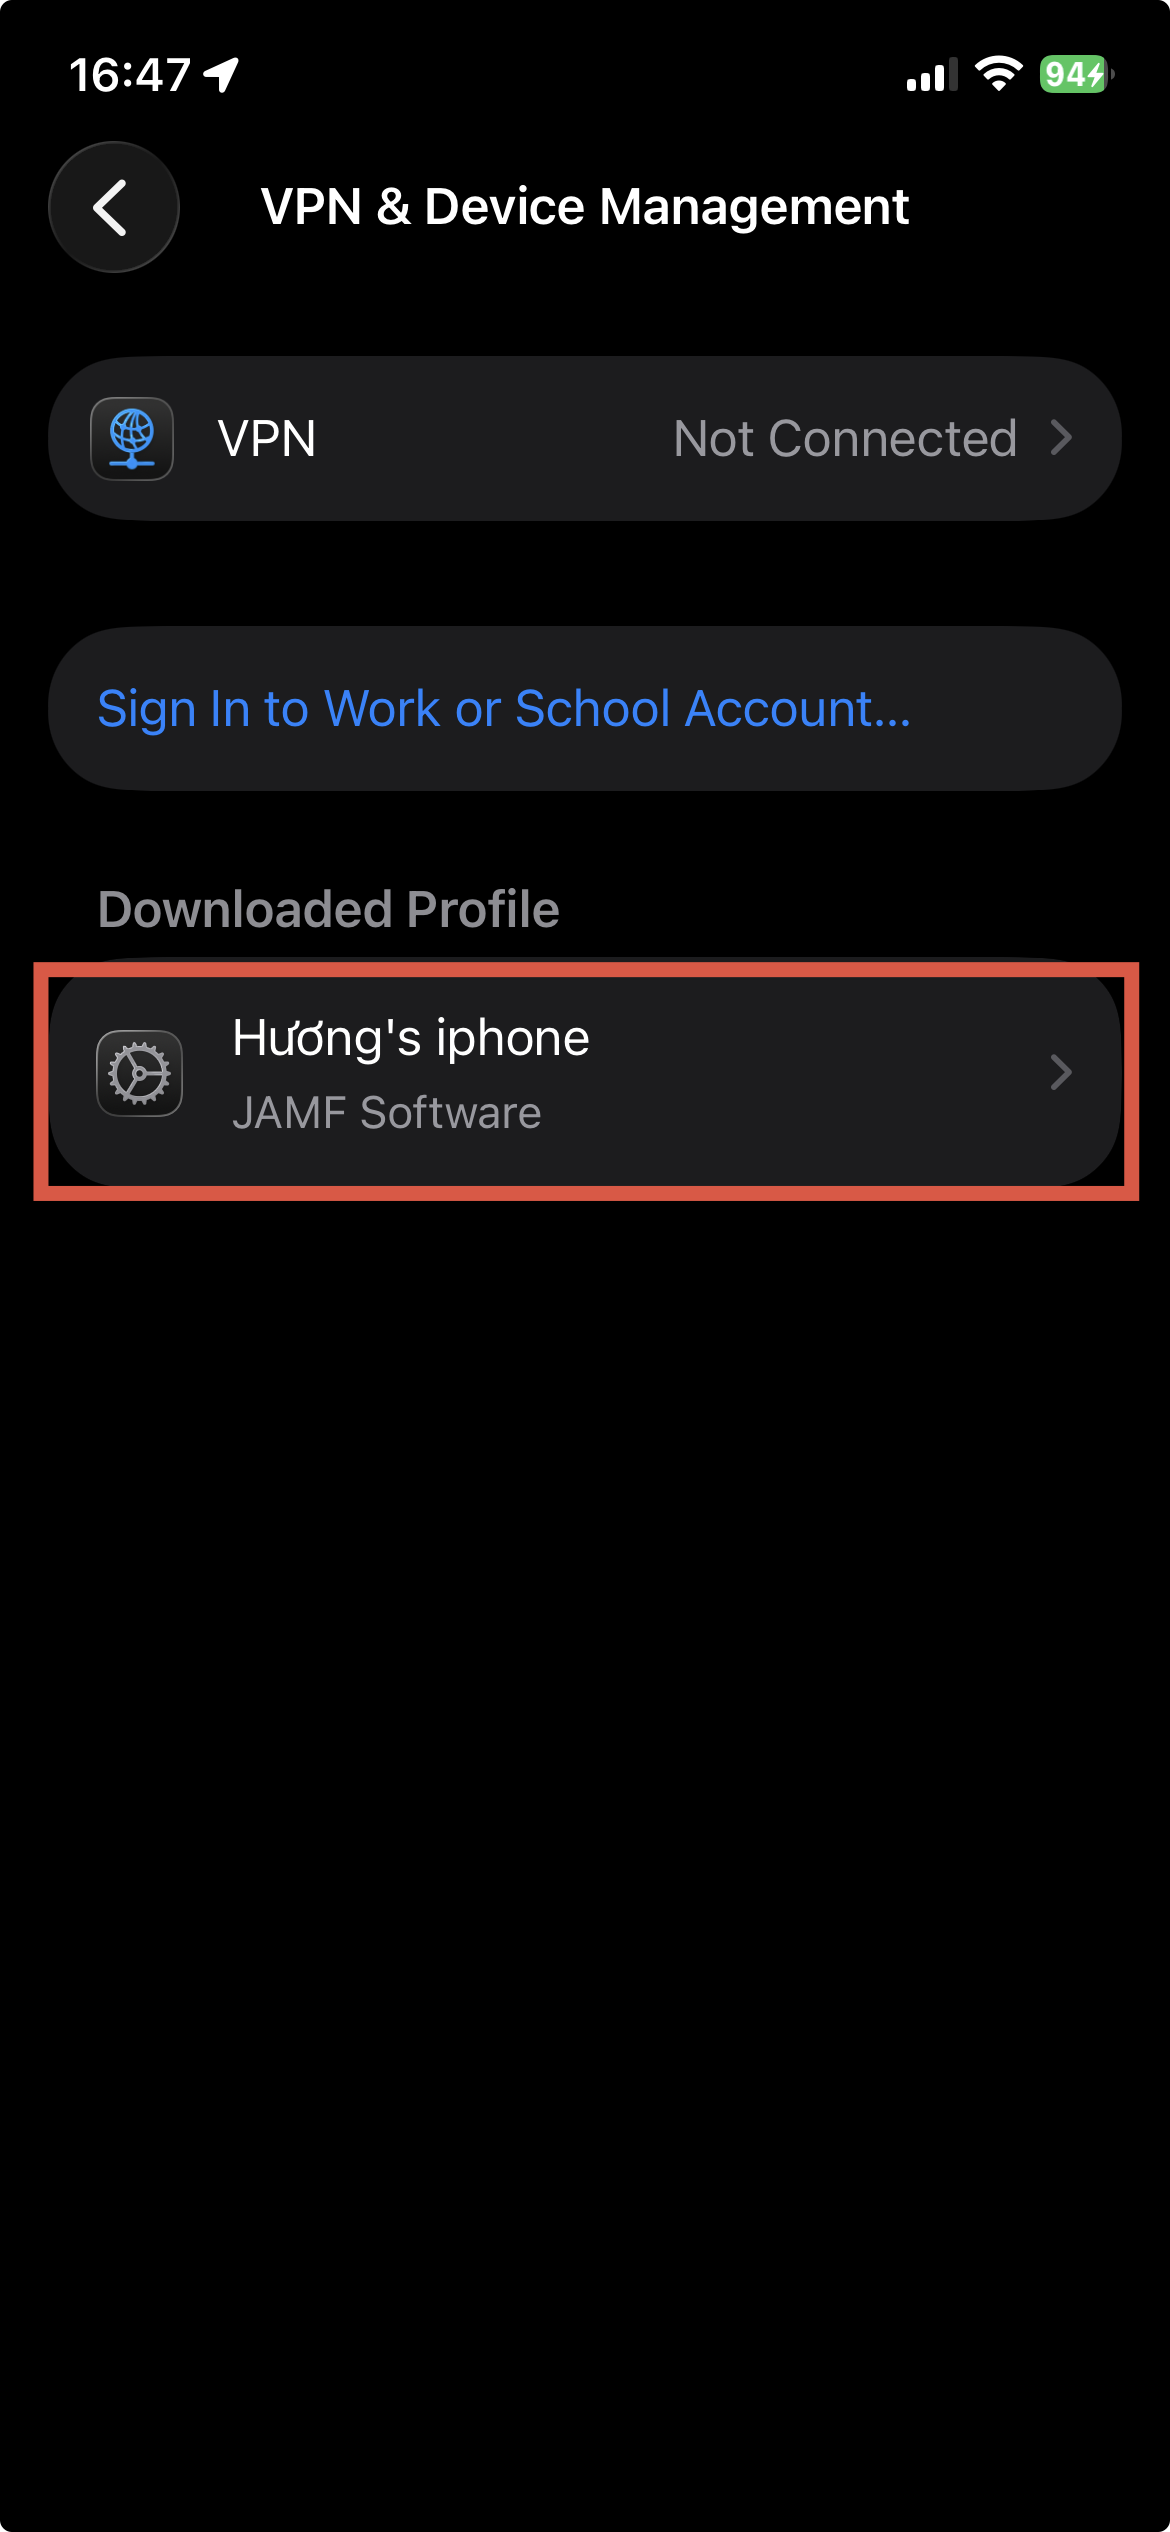
Go to General → VPN & Device Management.
-
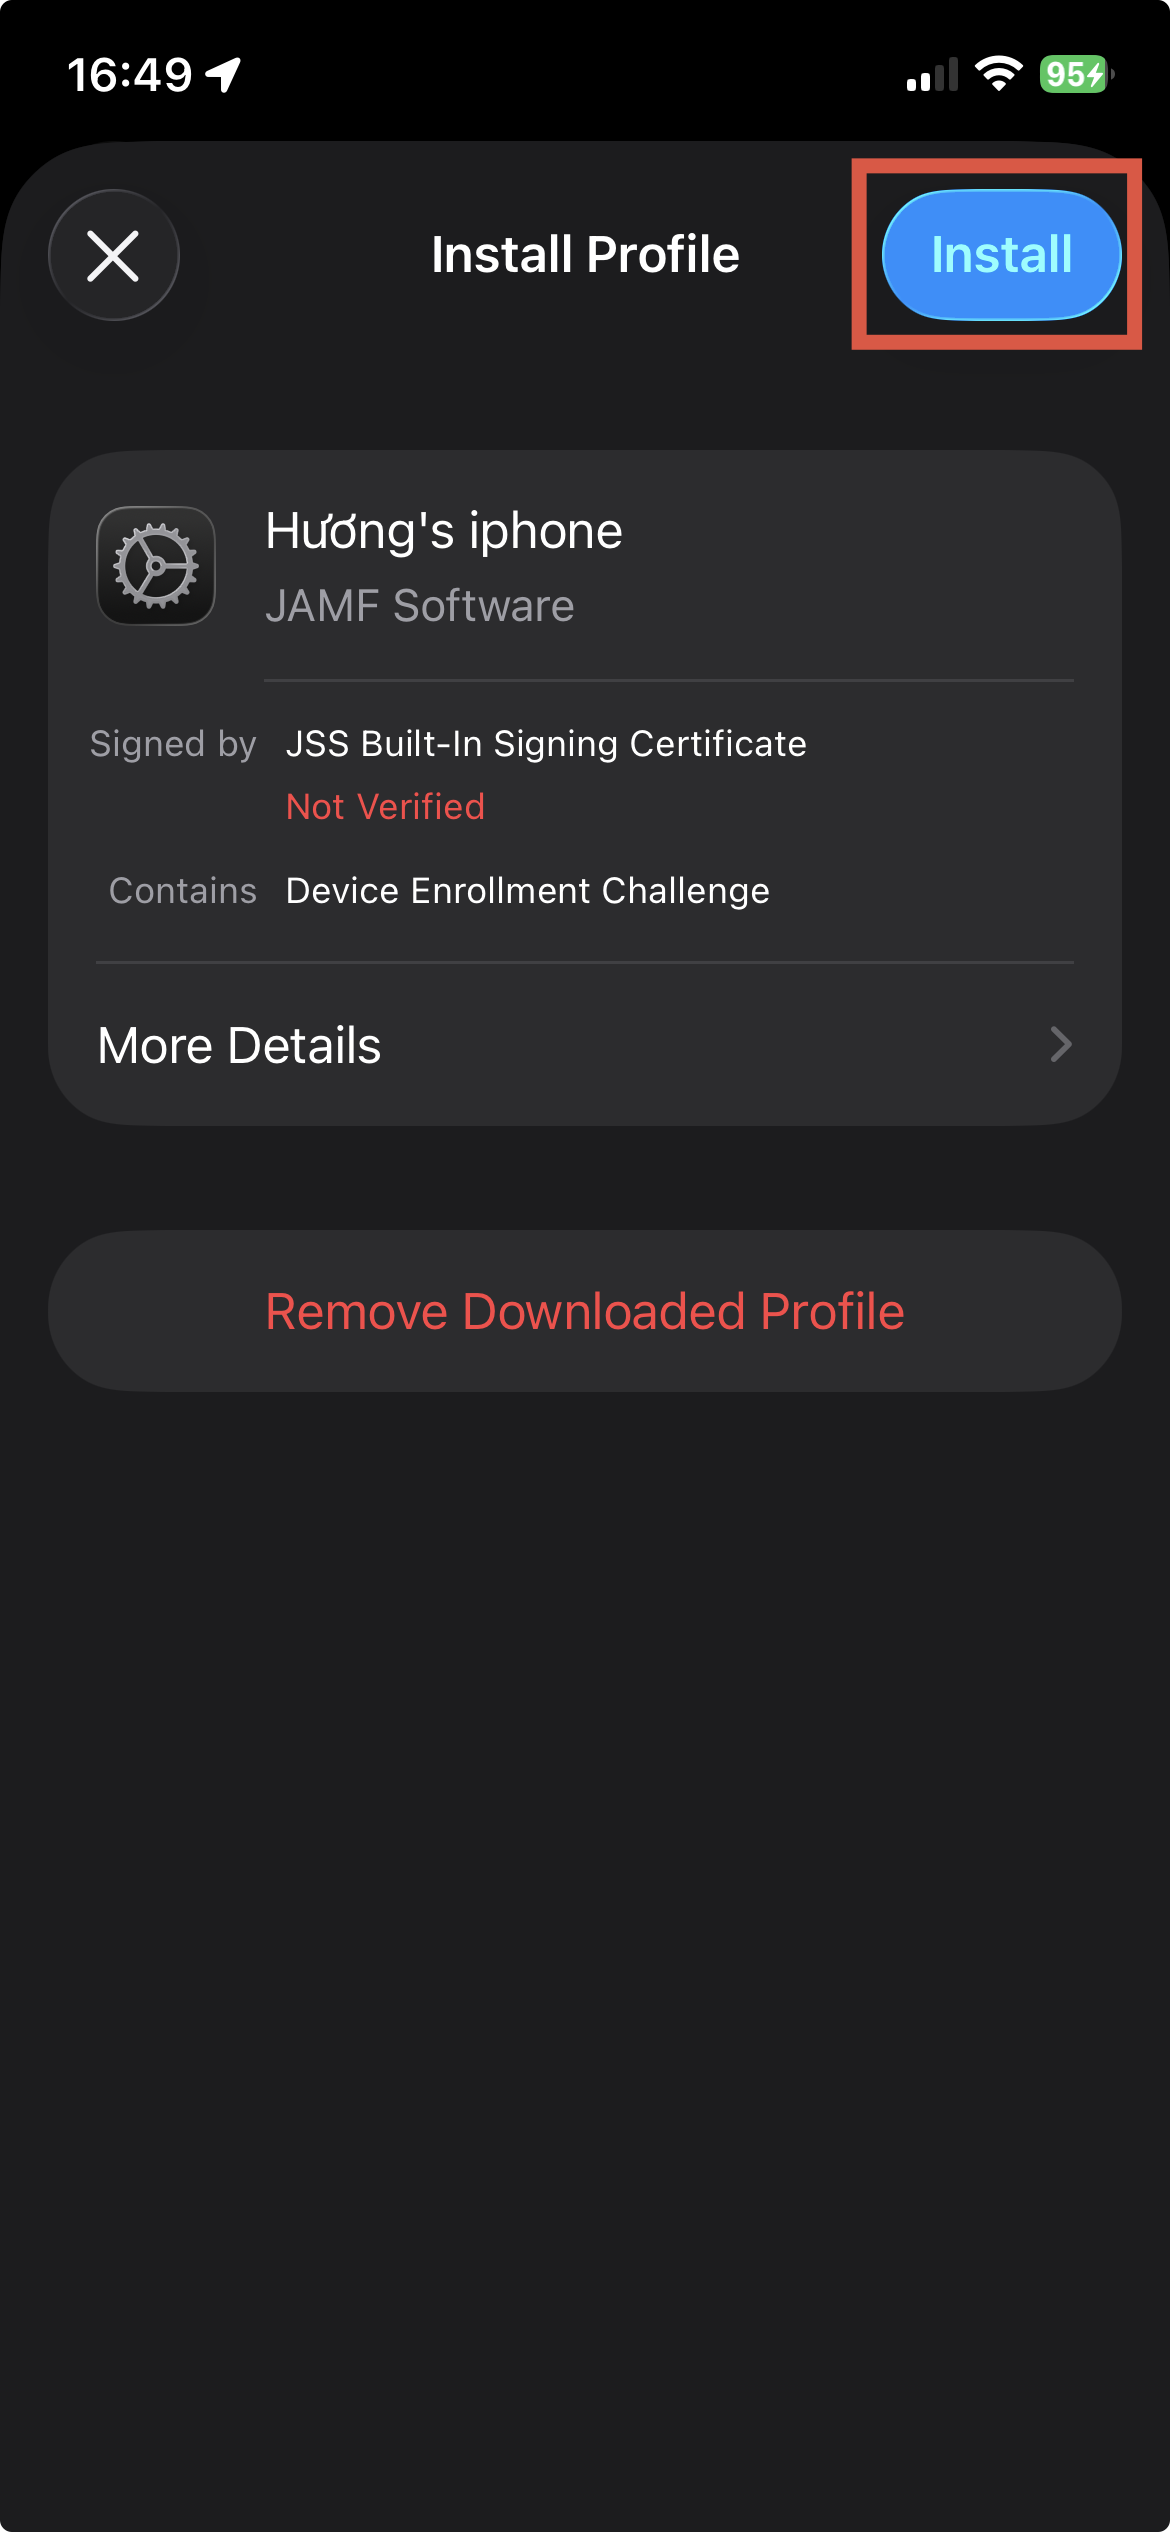
Tap Profile & Install and follow the on-screen instructions.
-
Check Jamf Dashboard to confirm the device appears.
-
Verify that the iPhone shows as Enrolled
🎉 Done! Your device is successfully enrolled in Jamf