
The Work item table is the spreadsheet-style panel beside the Gantt timeline. It helps you review Jira work items, edit details inline, and organize the fields you need for planning.
The work item table supports a custom work breakdown structure (WBS) for planning; rearranging that structure does not change Jira’s native work item hierarchy.
By default, all Jira work items will be automatically included in the Gantt chart according to the Jira projects you add when creating a new Gantt.
You can add or remove Jira projects to include or exclude work items from the Gantt chart.
Add a new work item
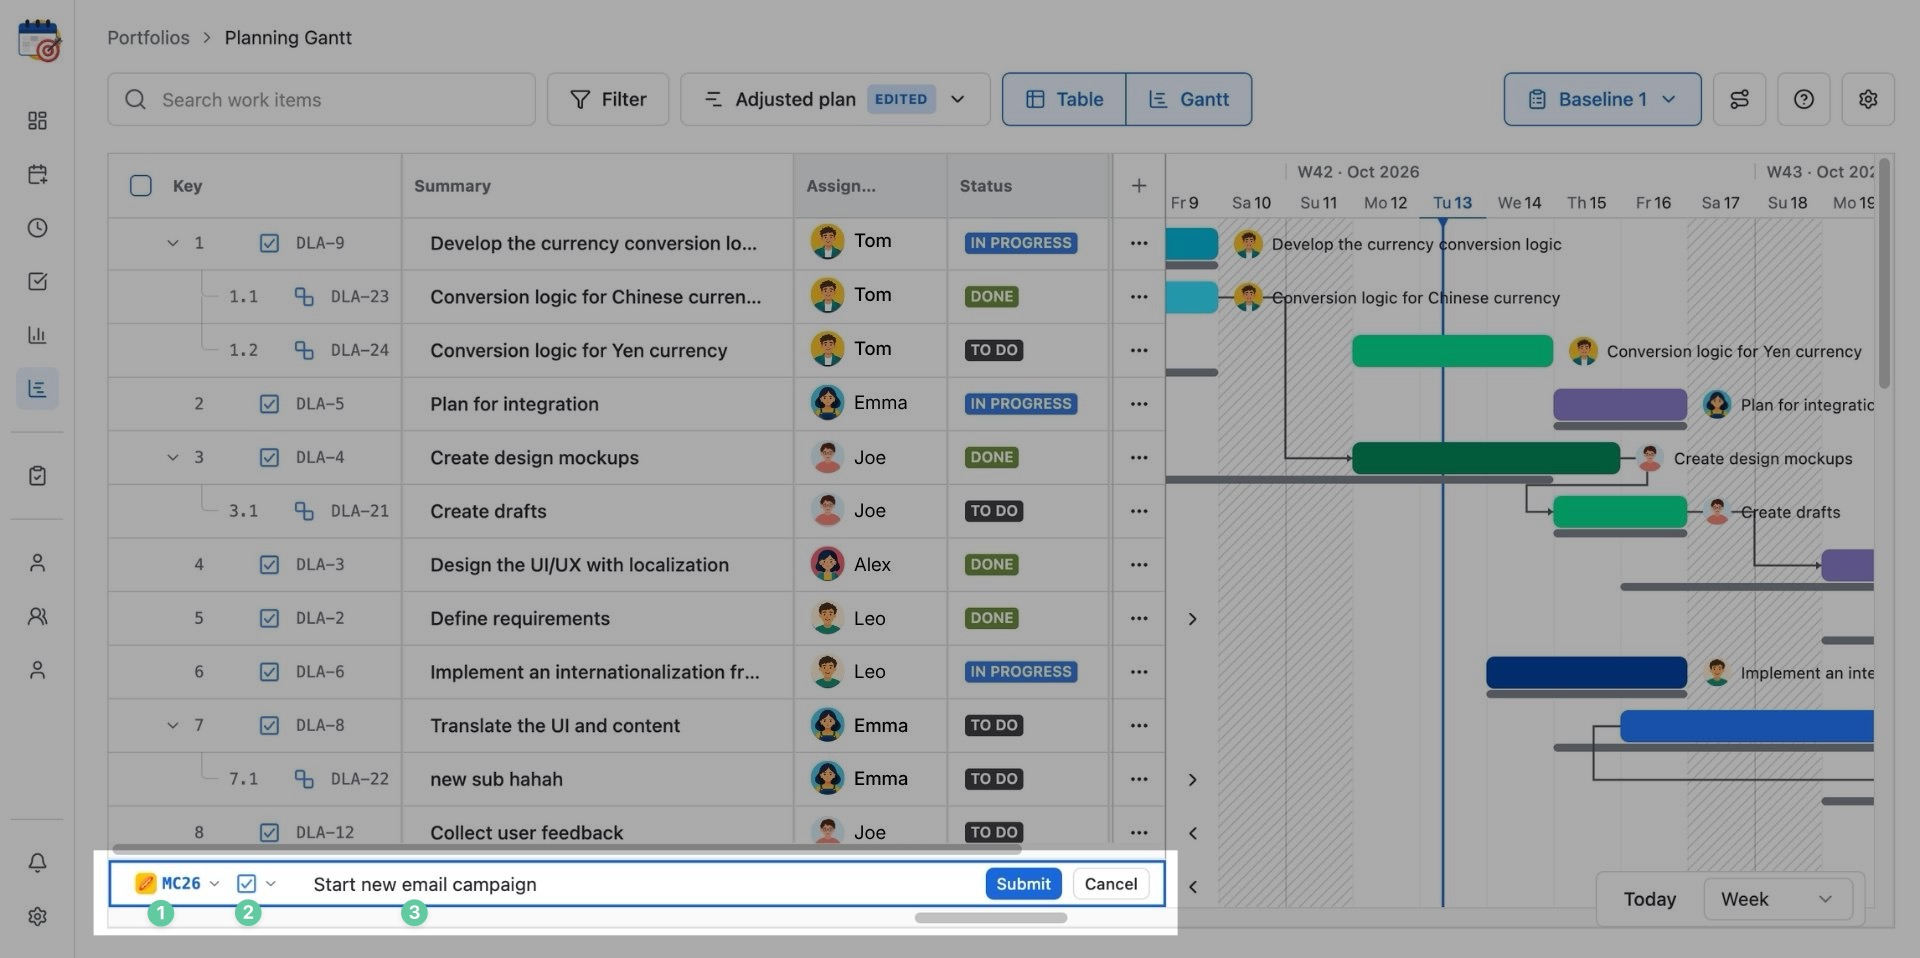
Create a new work item in your Jira project directly from PlanCore’s Gantt chart.
-
Choose which project you want to create a new work item for.
-
Select the work item type. You can choose Task, Epic, Story, Bug, or other work item types depending on you porjects.
-
Fill in the Summary for the work item.
-
Click Submit.
Organize the task order
Drag and drop work items in the table to reorder them. Use this structure to group related work without changing their parent-child relationships in Jira.
Edit work item details inline
-
Hover over the cell you want to update and click its value.
-
Enter a value or choose an option in the text box, dropdown, or date picker, depending on the field.
-
Finish the edit to apply the change. Some Jira fields may be unavailable for inline editing or require specific Jira configuration.
Search work items in the table
Quickly locate tasks or Jira work items by using the Search feature.
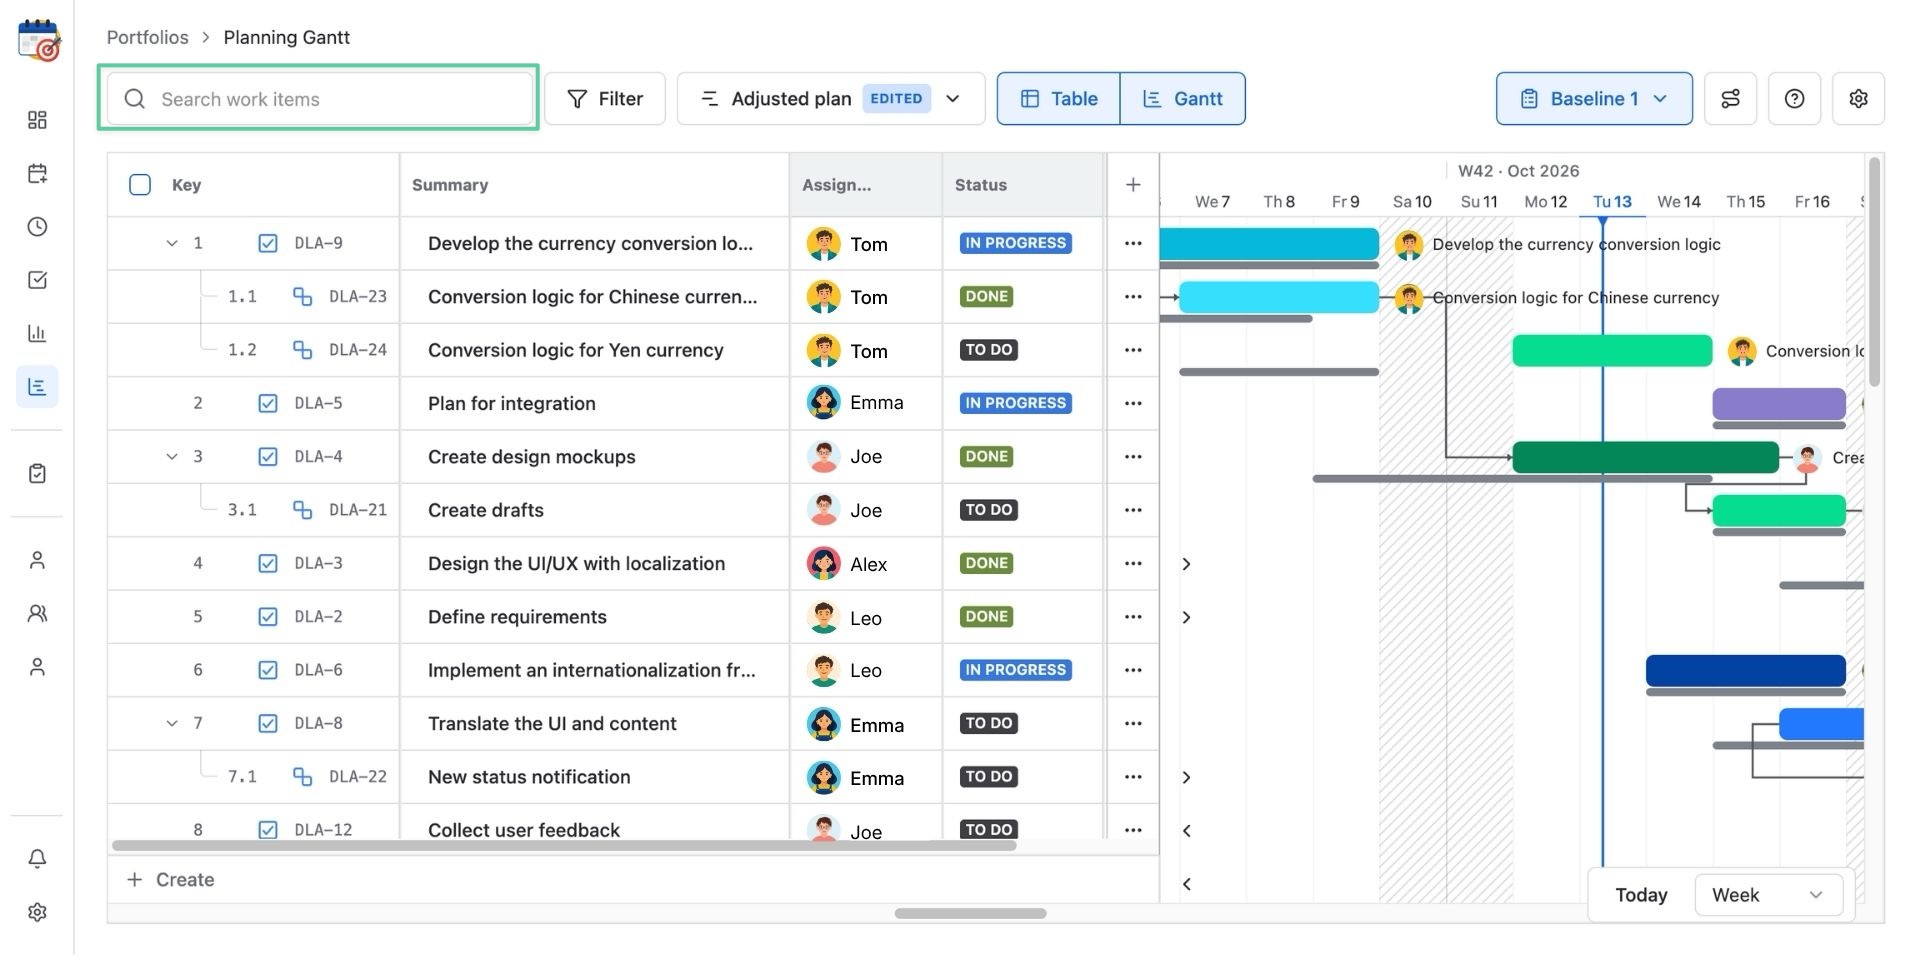
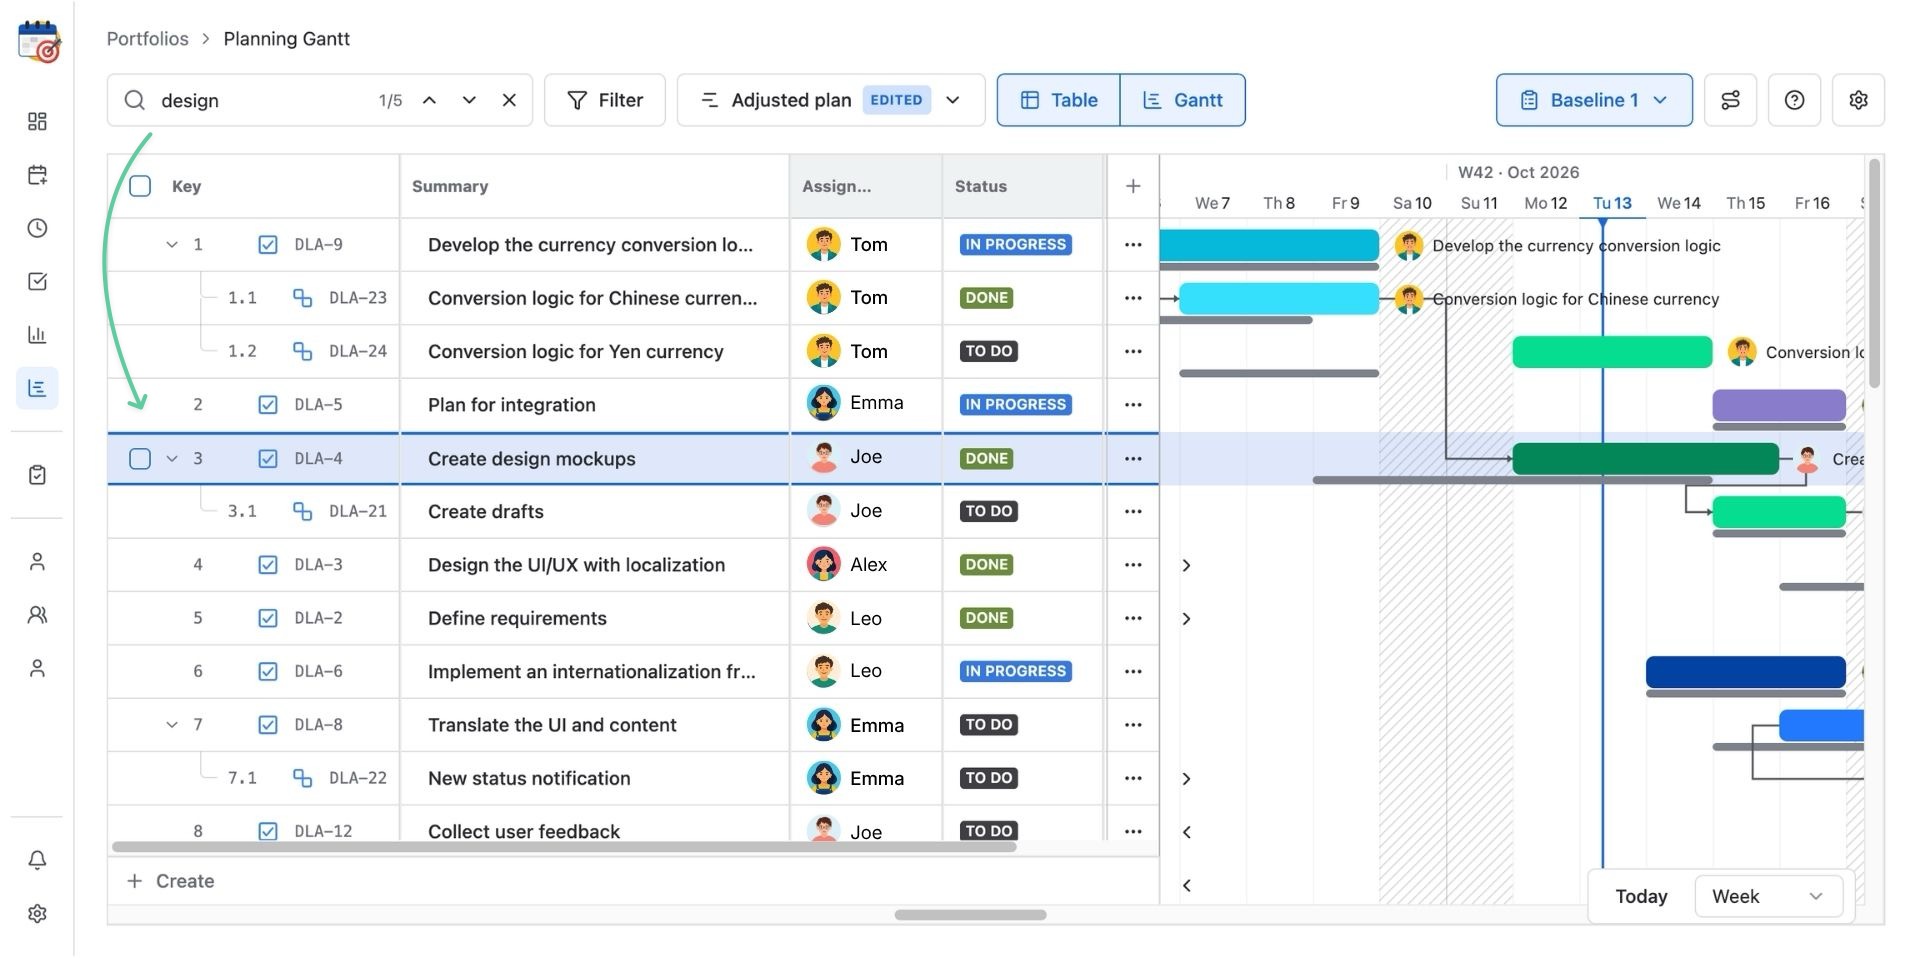
To utilize the Search feature, use either the Jira work item key or the Summary.
TIP
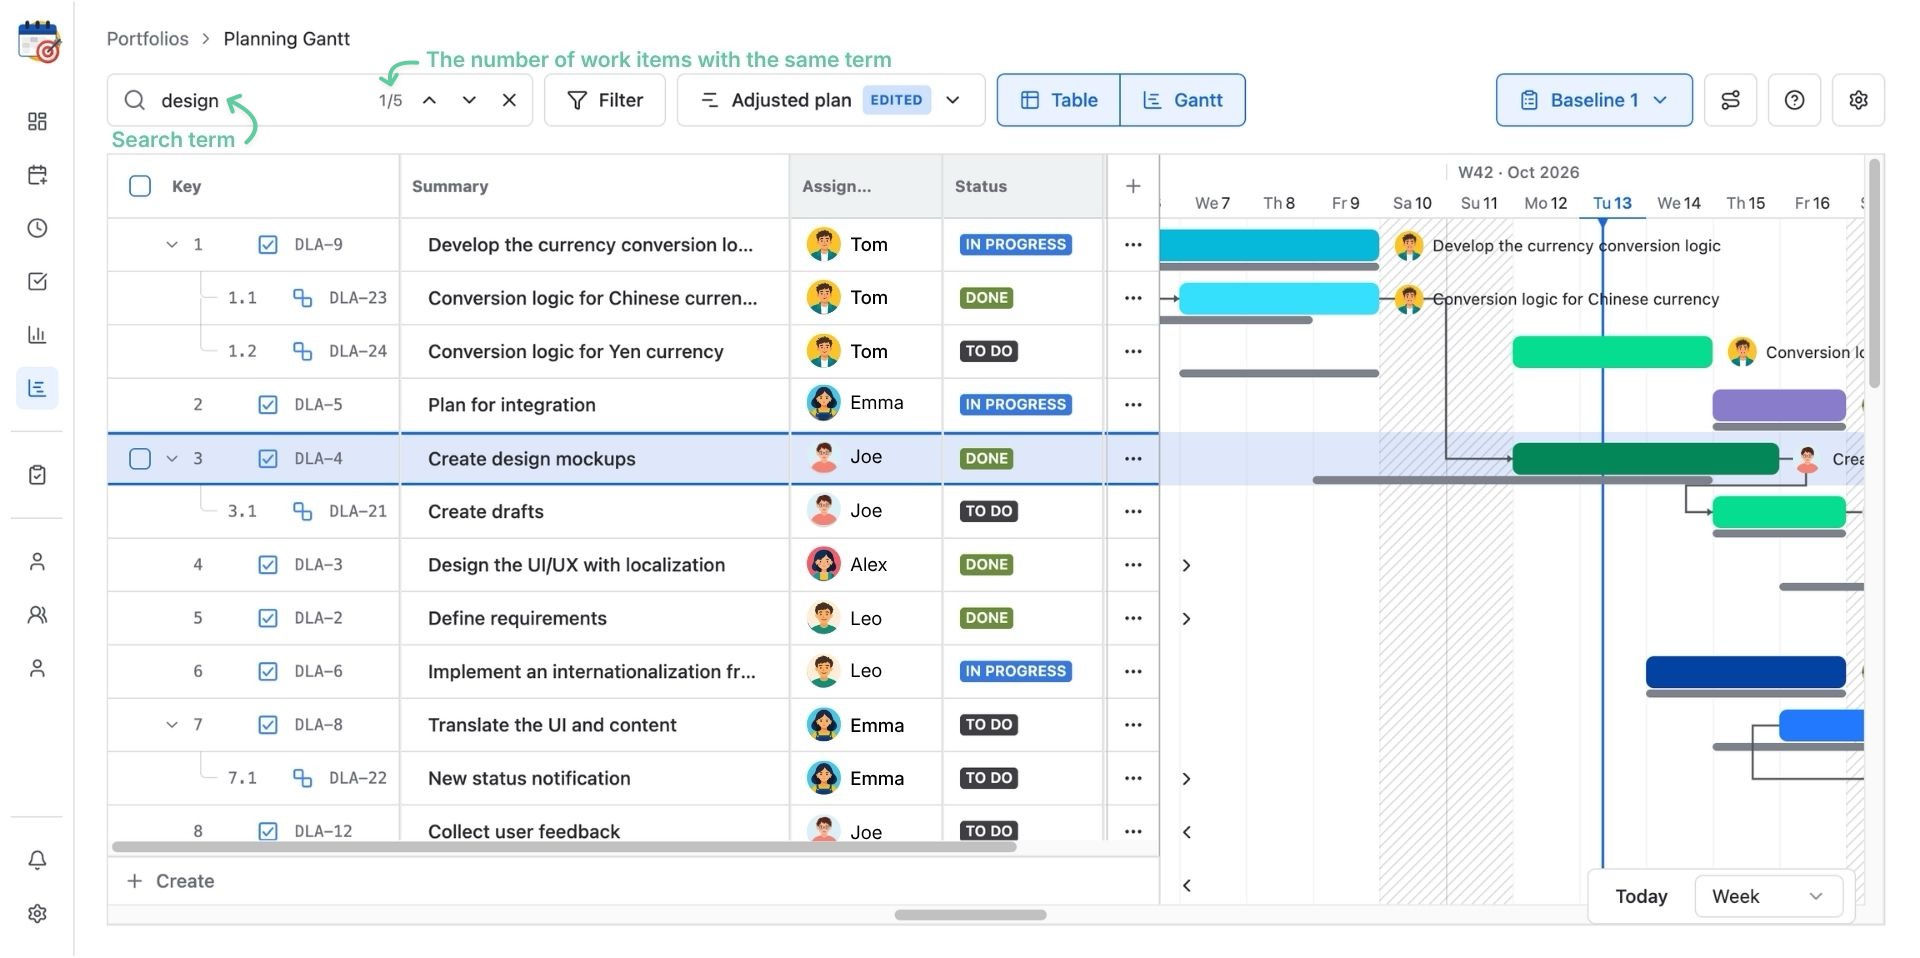
When using the project key or summary to search for specific tasks, all the work items with the same search term will be highlighted.
Filter work items
PlanCore supports Filter to refine and narrow down data fields and quickly locate relevant Jira work items.
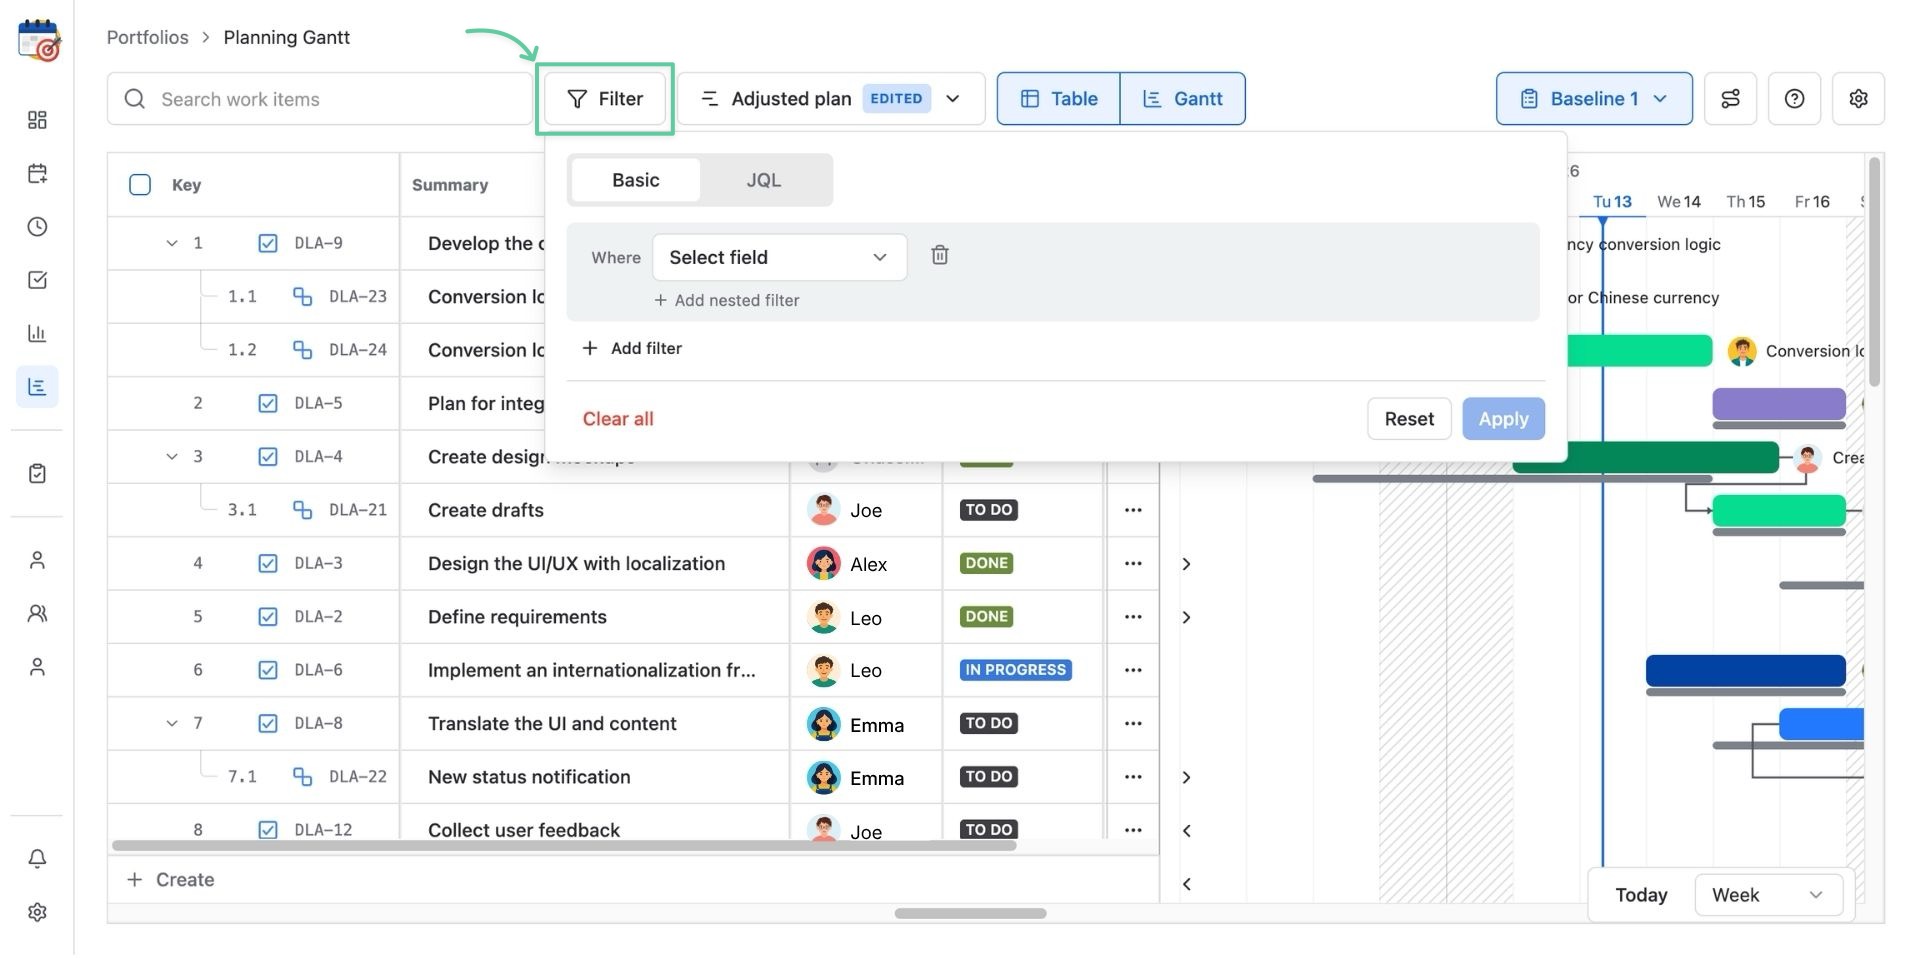
Currently, you can use either Basic or JQL to filter work items in the table. For example, you can fill in the JQL filter box with assignee=… AND priority=… to filter Jira issues from a specific member with a certain level of priority.
Keep in Mind
JQL filters require valid syntax to avoid errors. For more details, please visit Atlassian’s JQL fields and JQL keywords to use this function properly.
Here is an example of using the Basic filter:
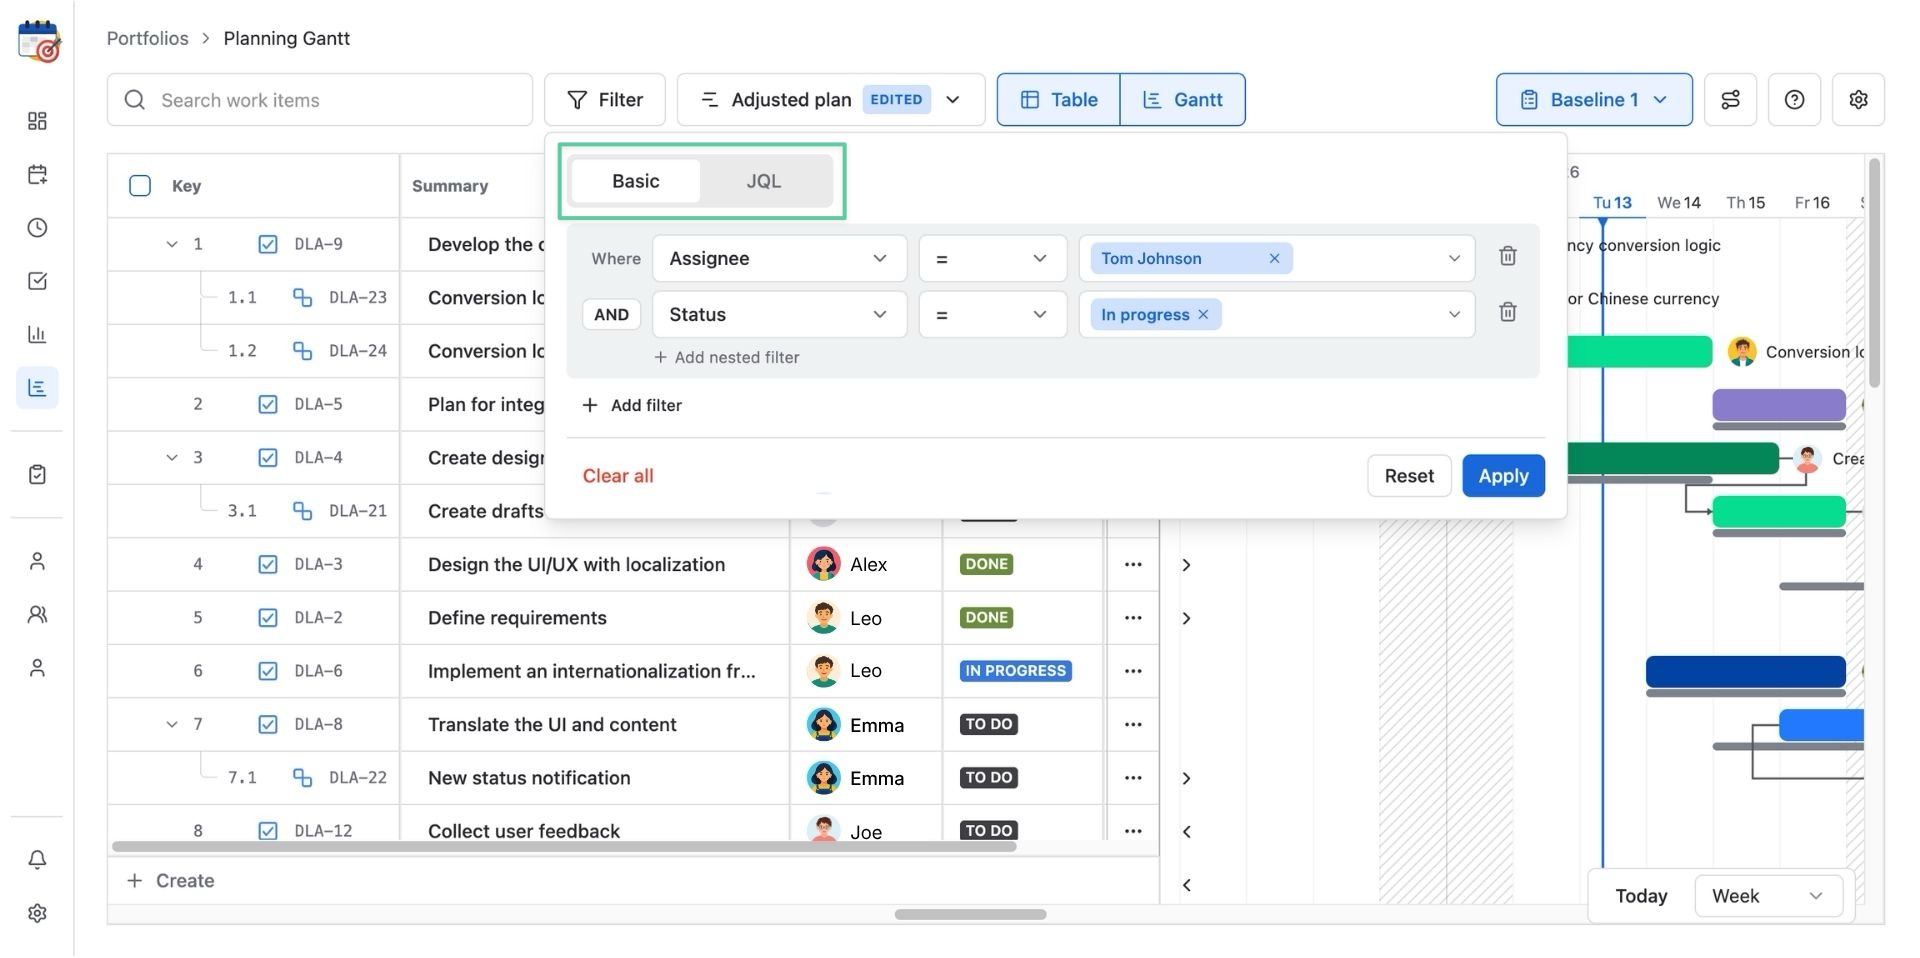
You can switch between AND and OR conditions for a different filtering result.
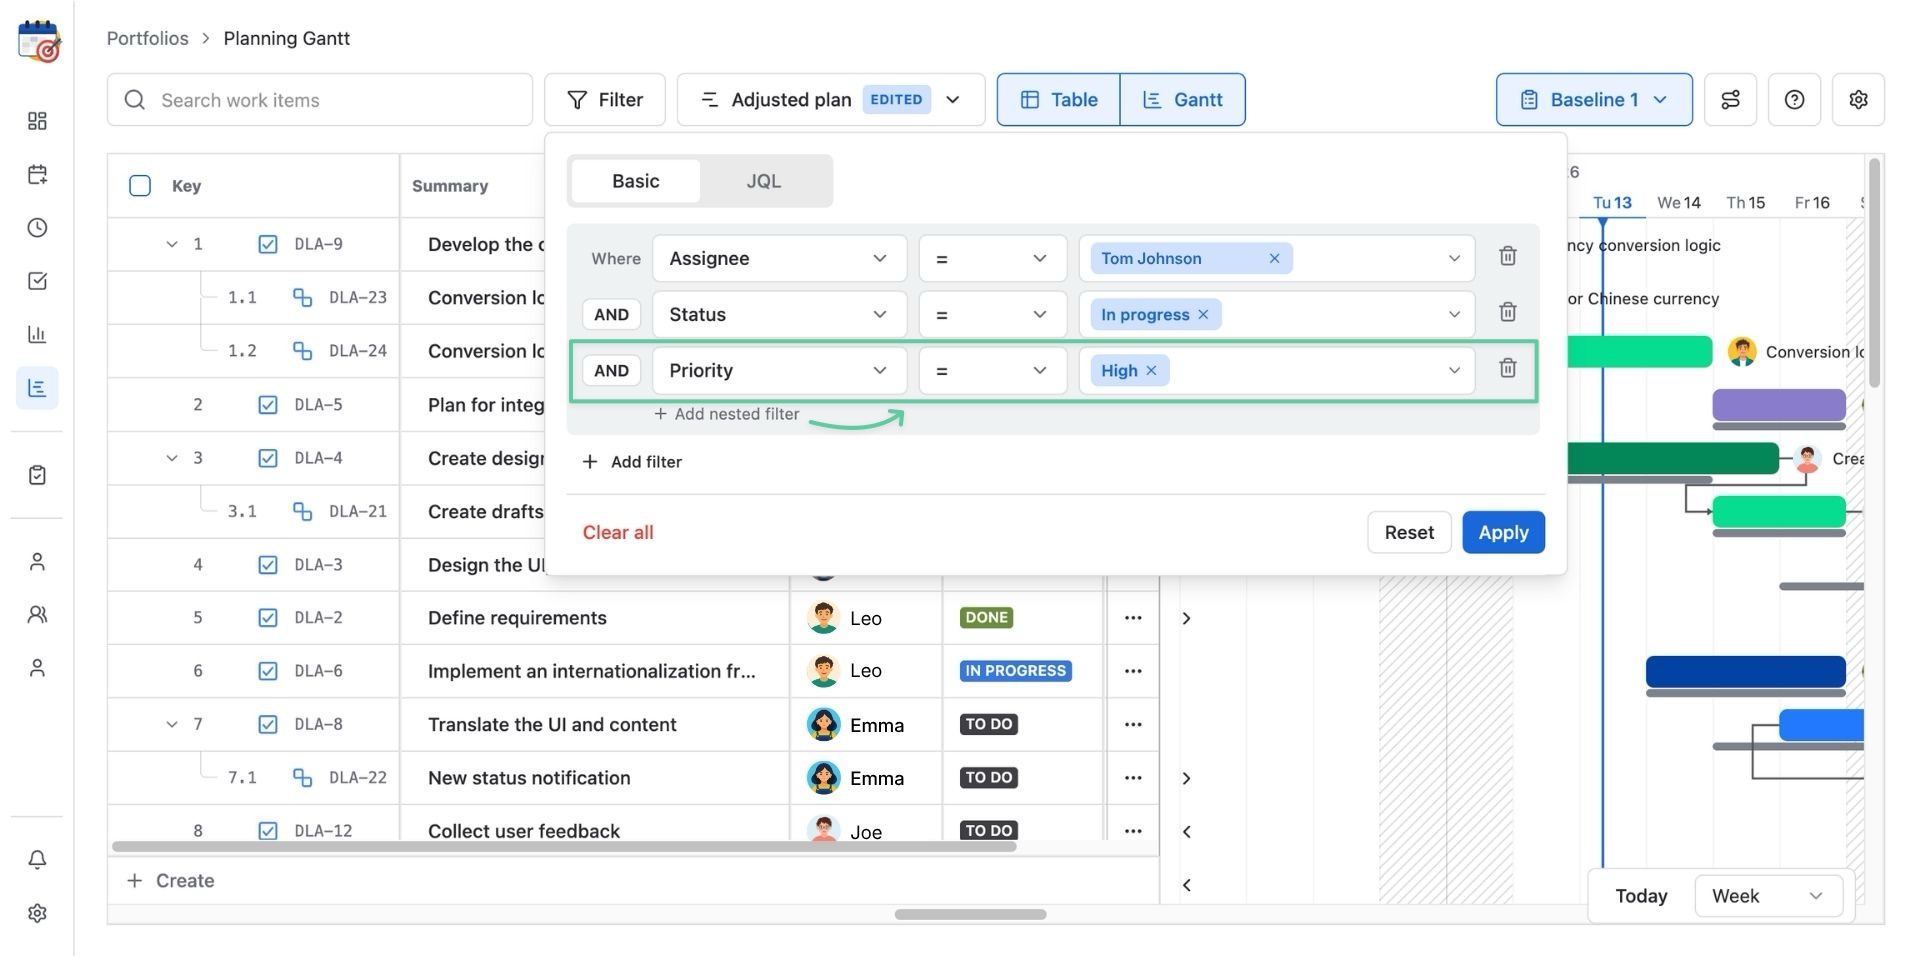
To add more rules in the Filter condition, click + Add nested filter → click Apply.
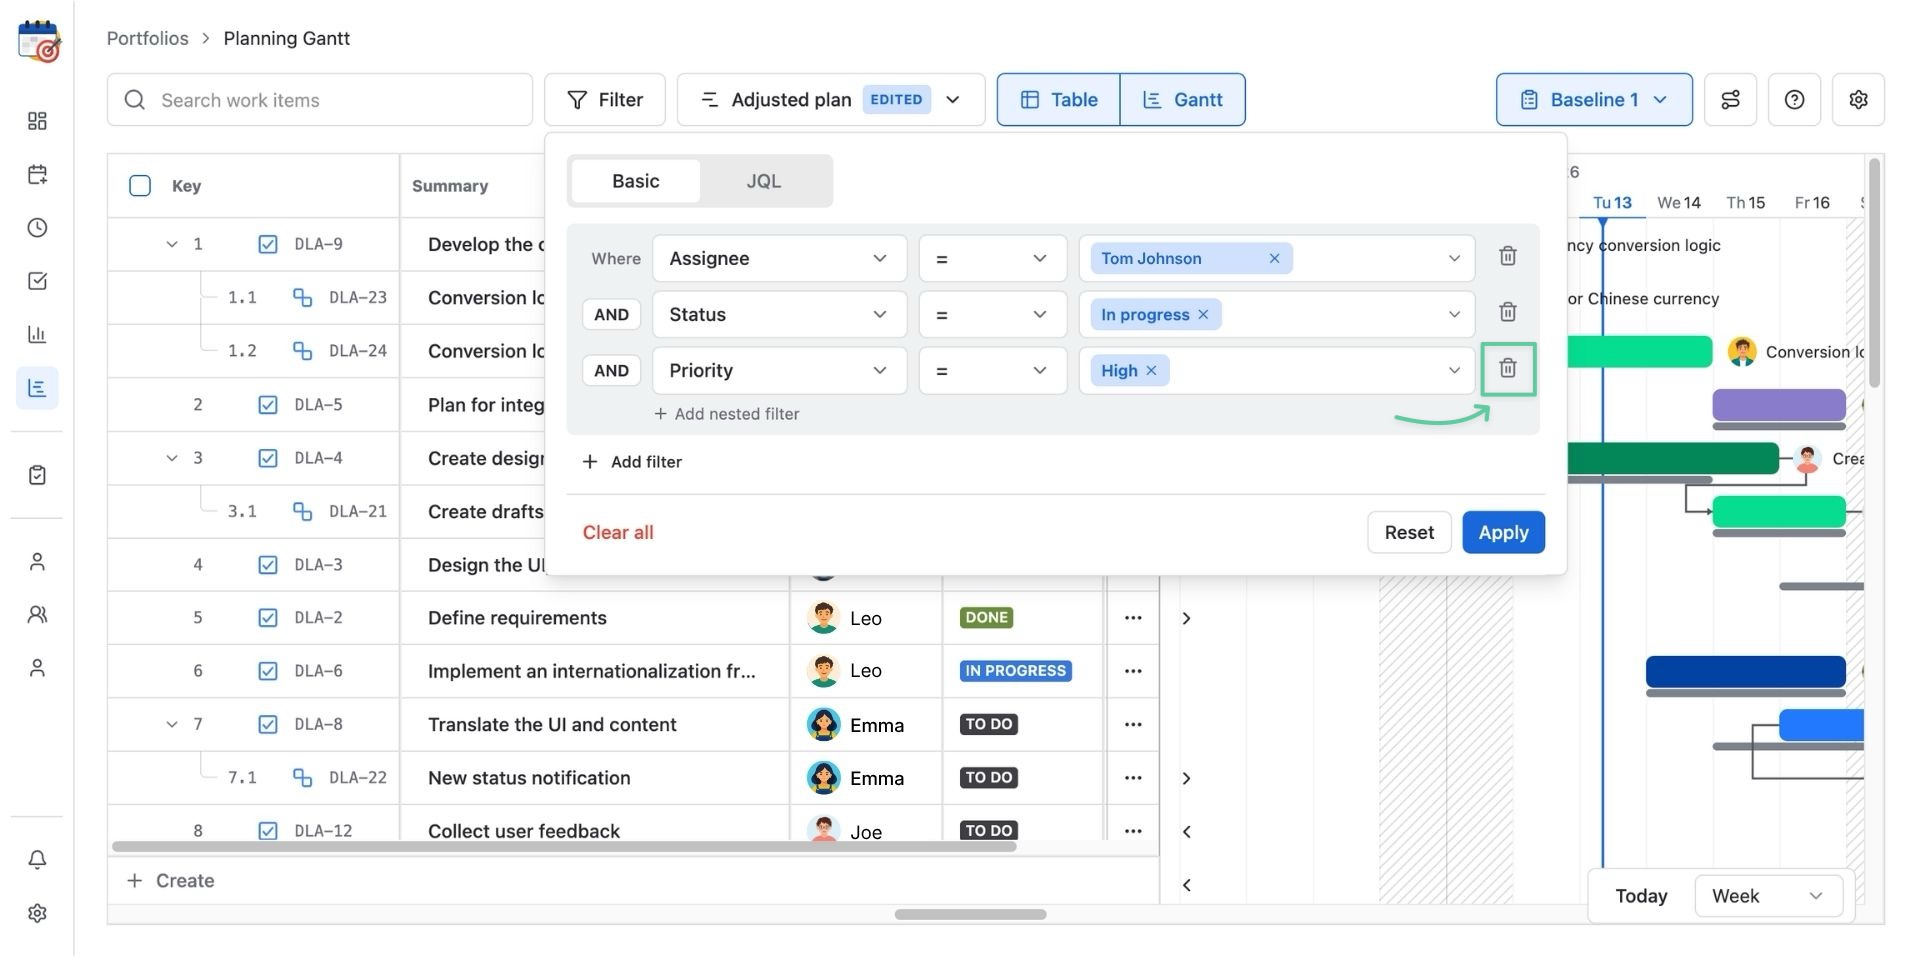
To remove a condition in the Filter, click the Delete icon.
To add more filter rules, click + Add filter → click Apply.
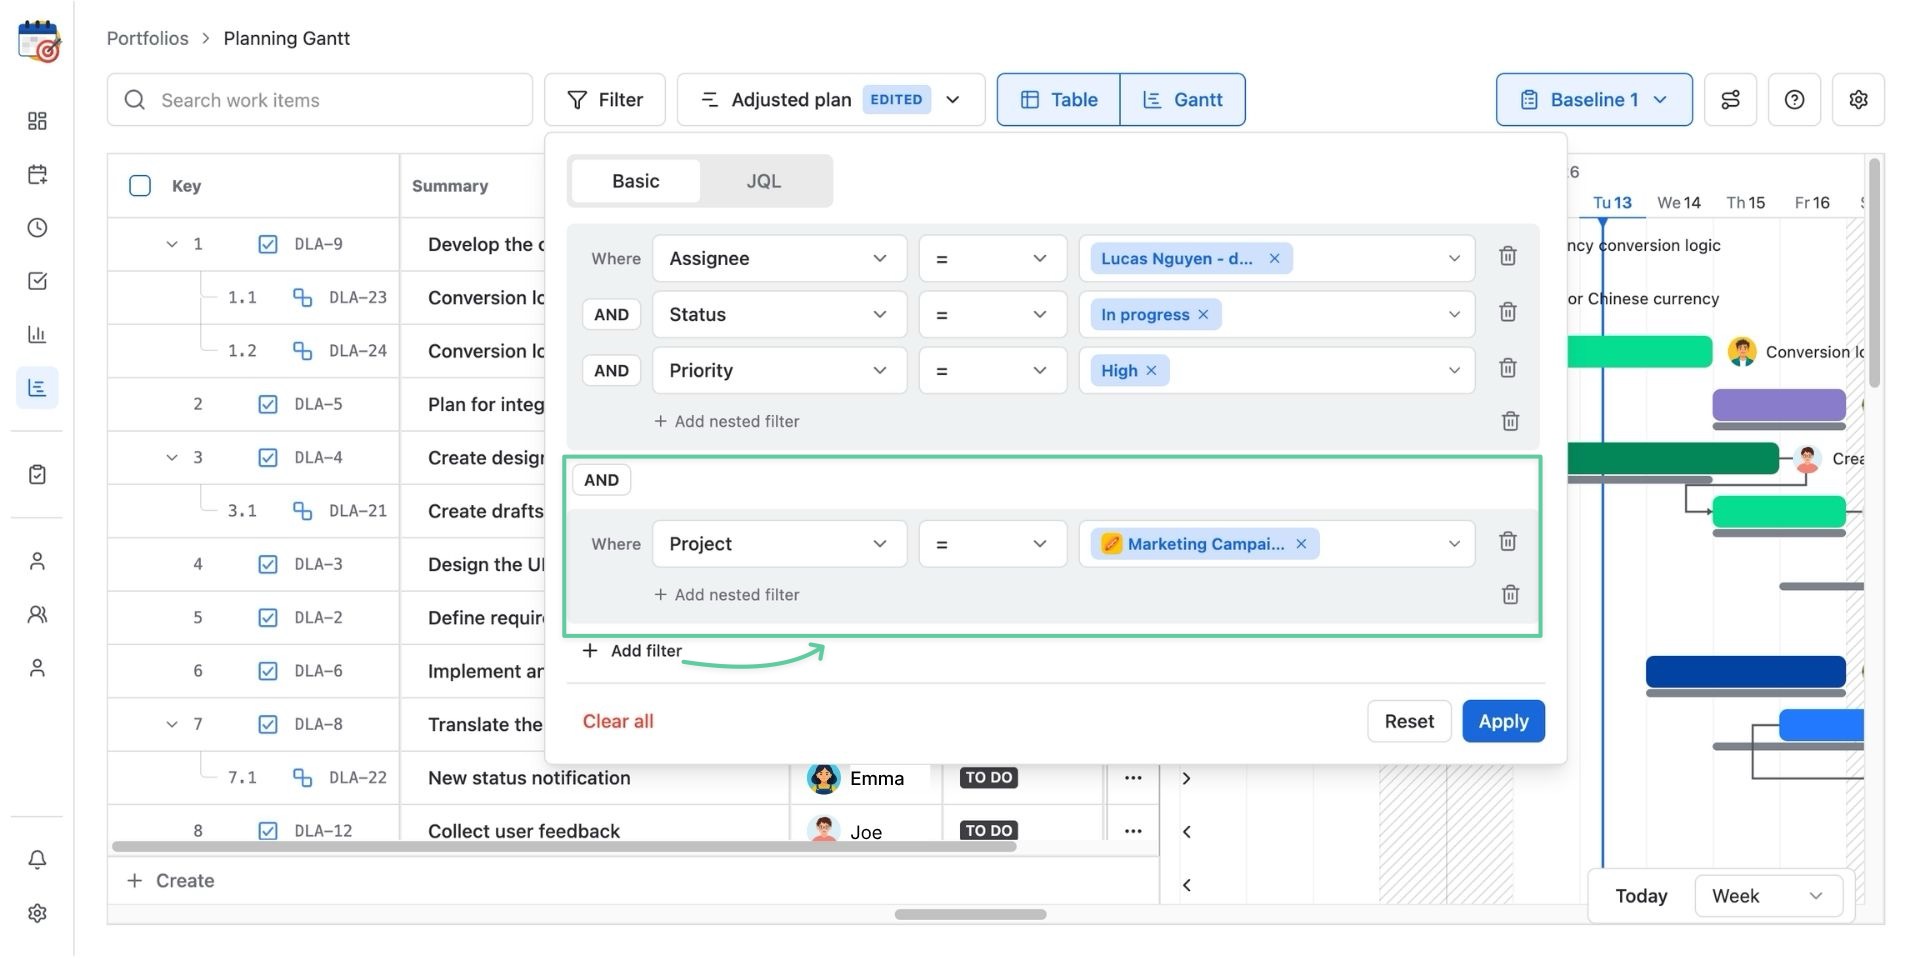
You can also switch between AND and OR conditions for additional filters.
Manage saved views
In PlanCore, you can make adjustments freely to the Gantt chart and save it as your preference for a quick view.
By default, the Gantt chart shows as a Basic view for every user.
After making any adjustment to the current view, it will show an EDITED status next to the view title.
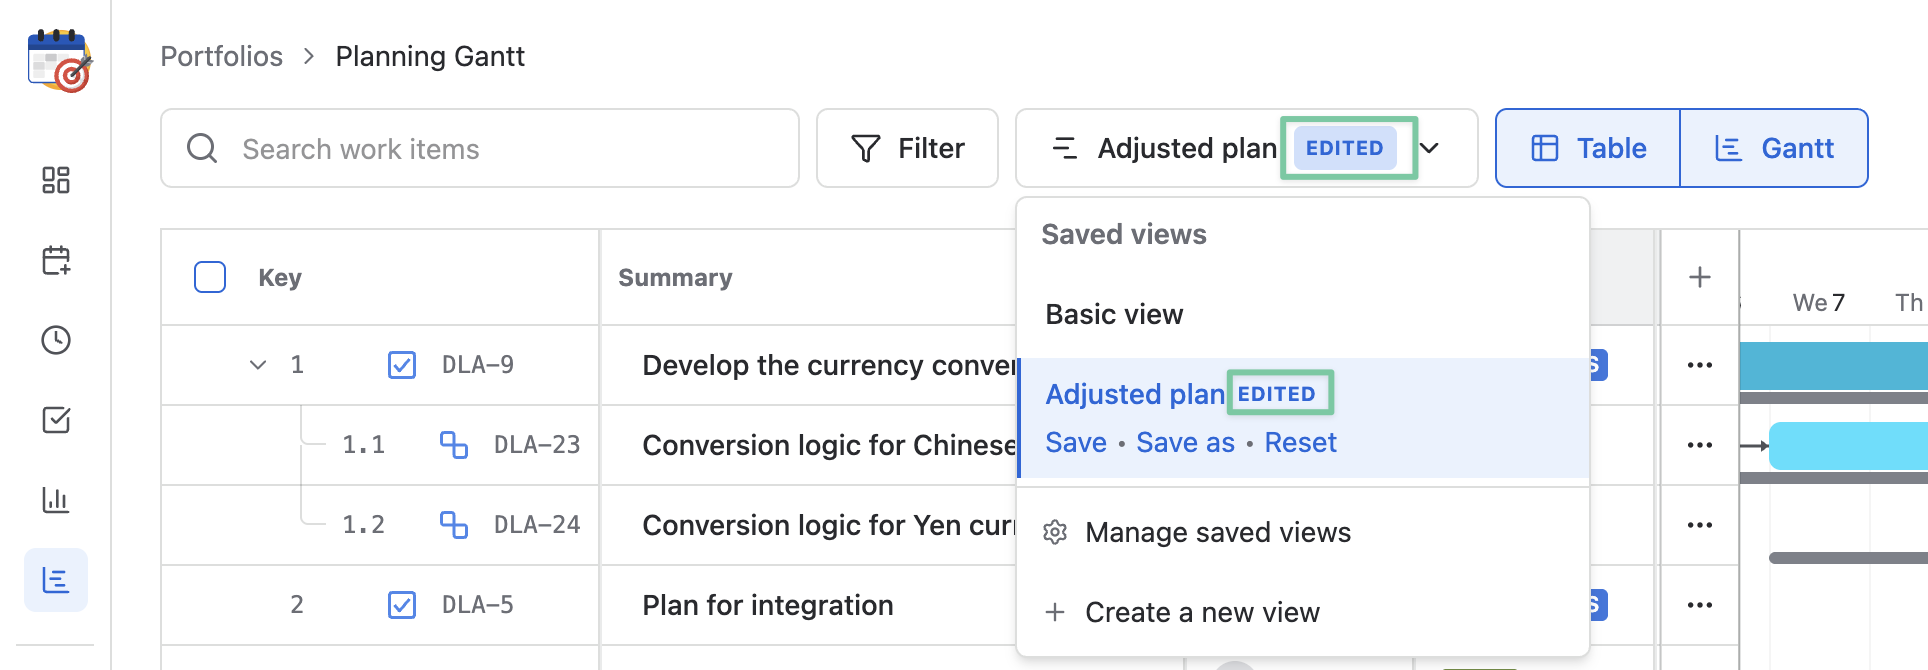
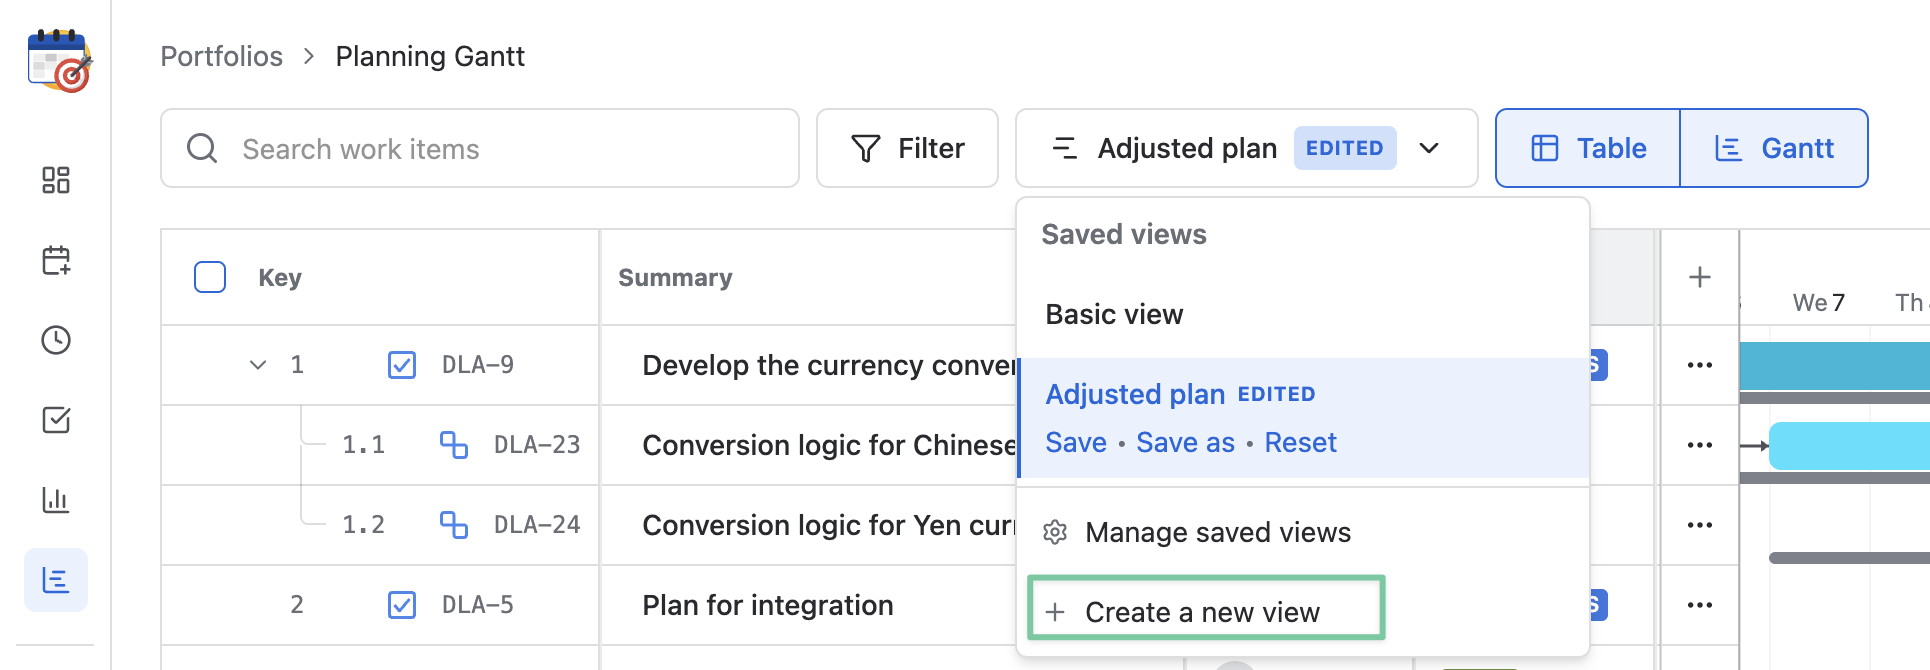
To create a new view from your current one, click Saved views and choose + Create a new view.
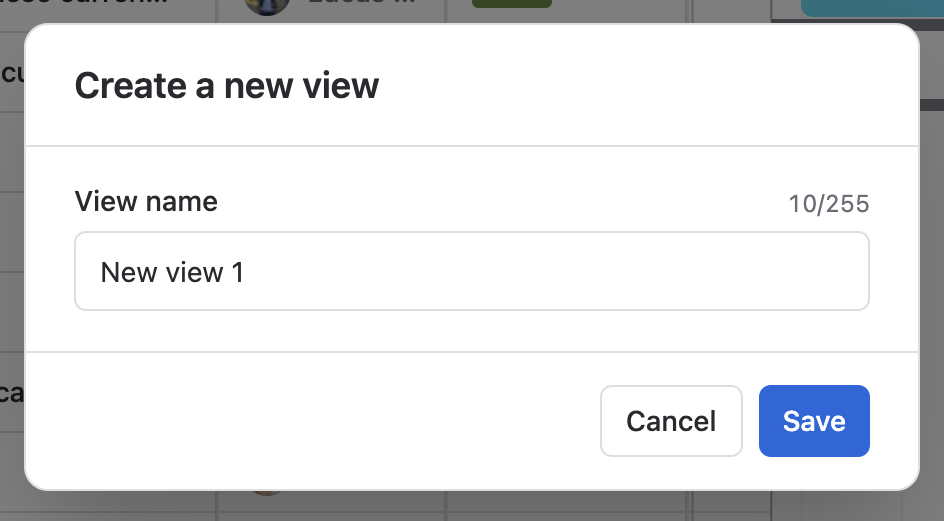
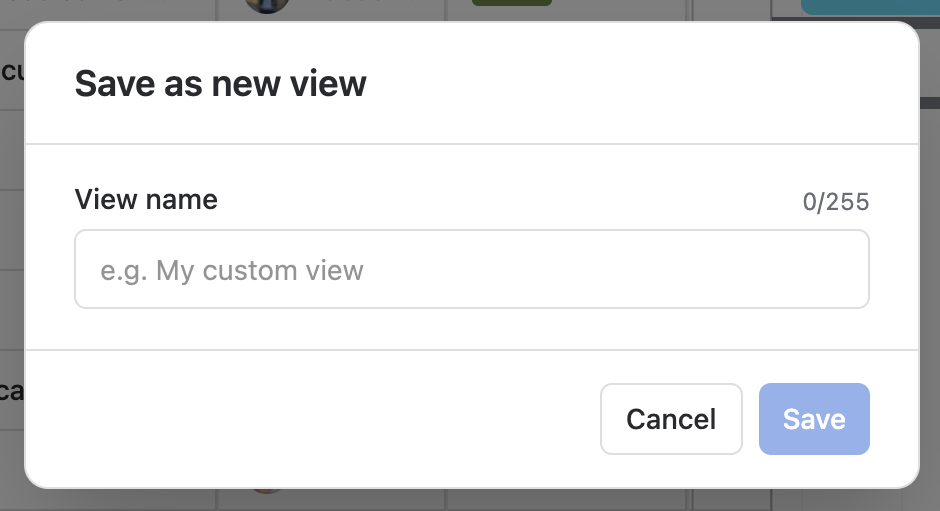
Then, fill in a new name for this view.
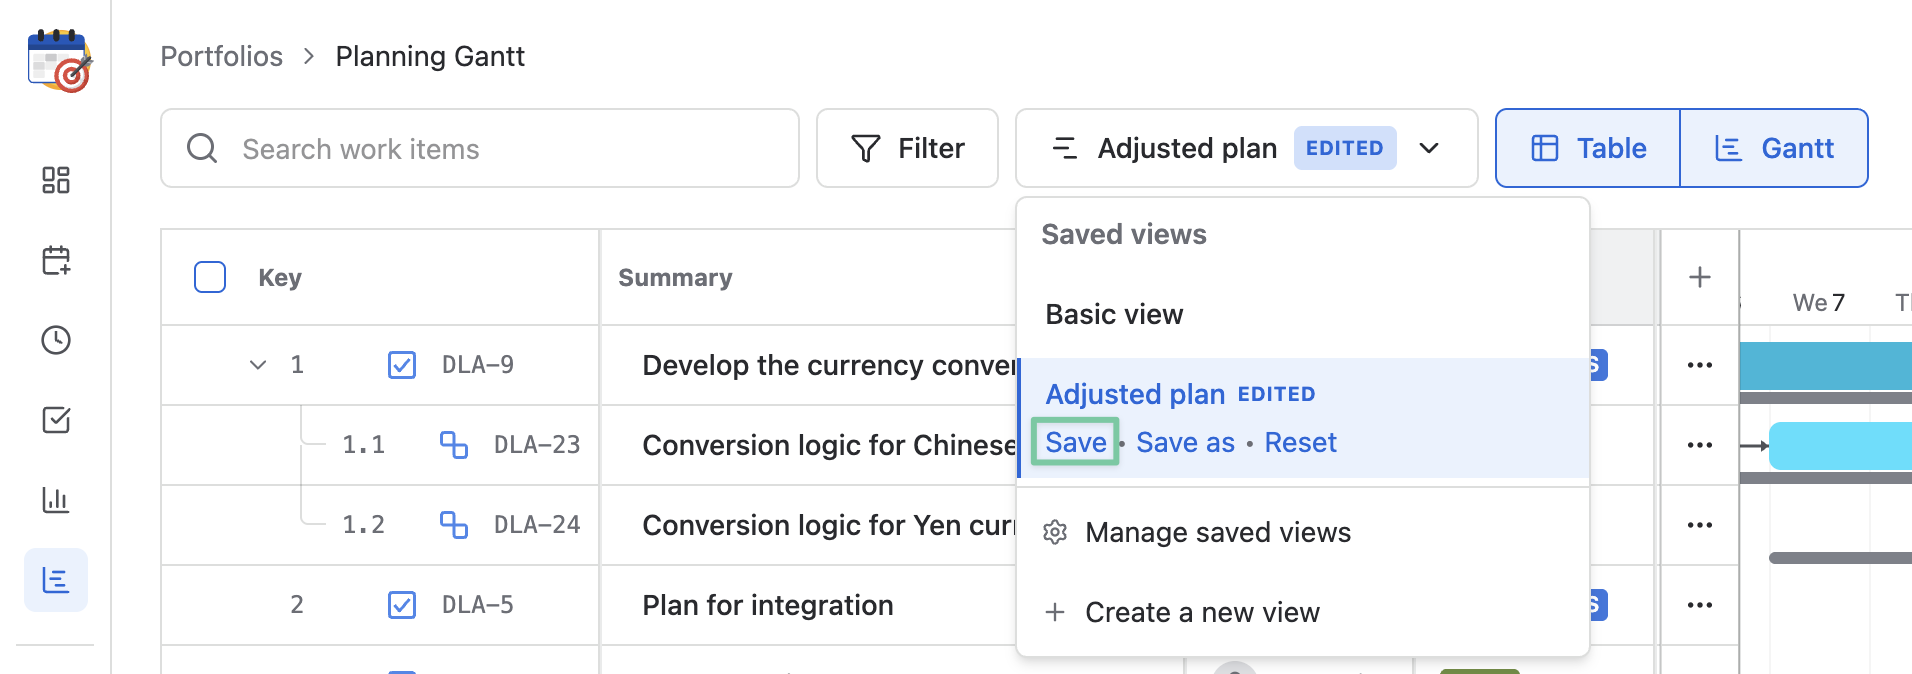
When making adjustments to a saved view, you can save those changes to the current view by choosing Save in the Saved view box.
You can also create a new saved view from those changes by choosing Save as.
To undo all the changes made to a saved view, you can choose Reset to return the view to its original state.
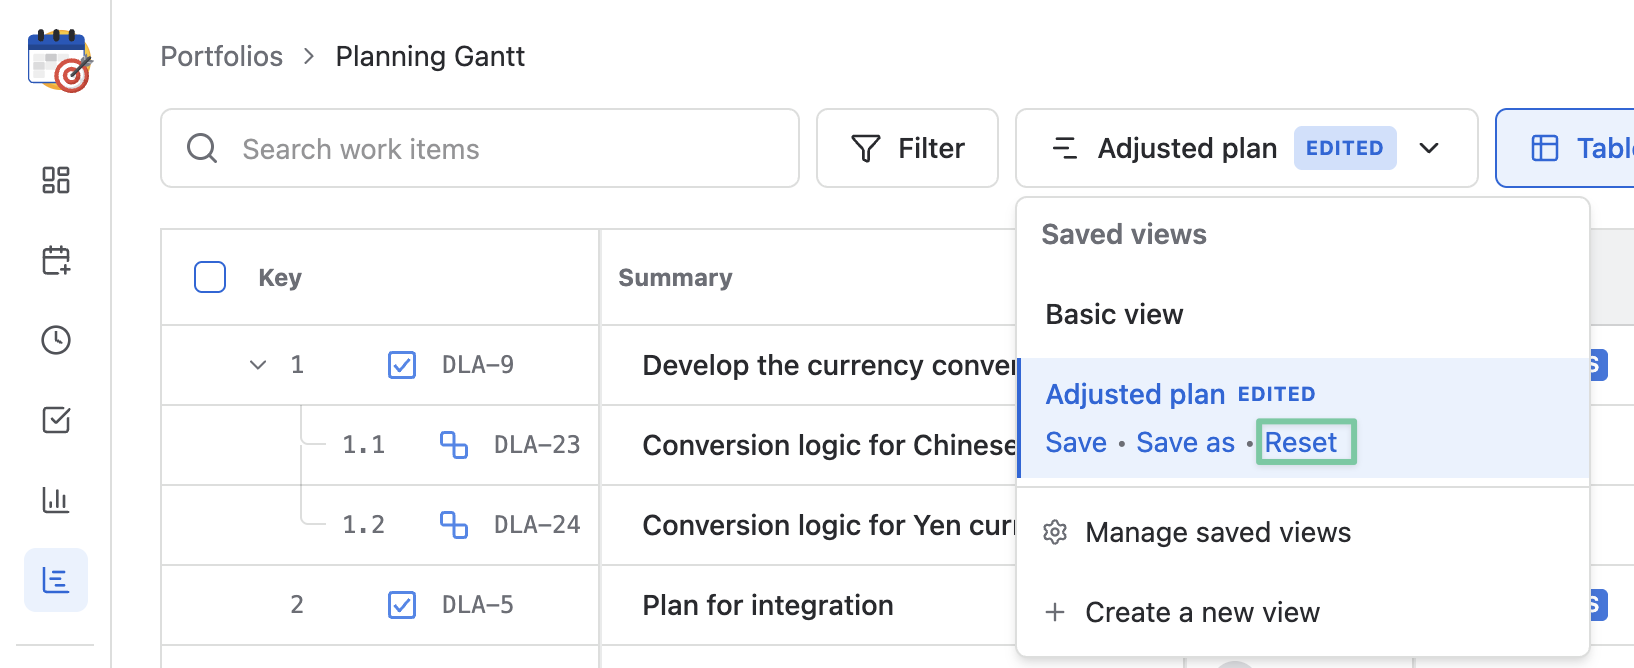
Table / Gantt toggle
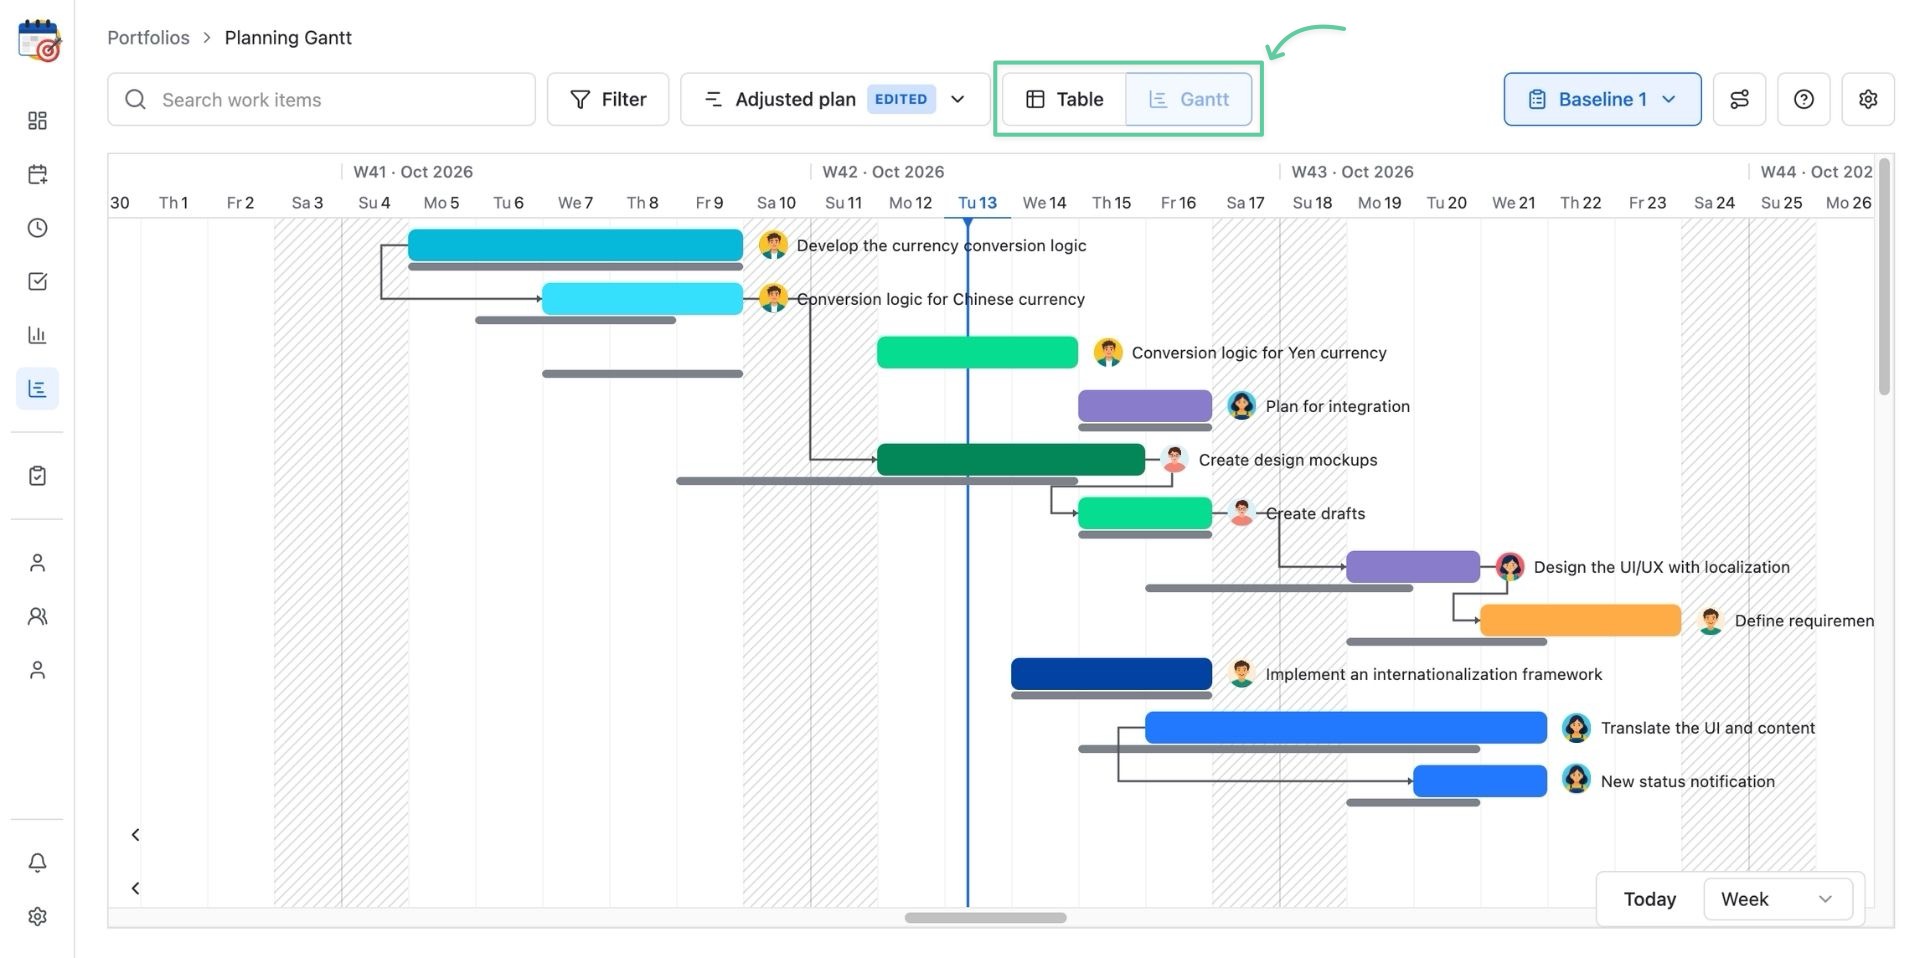
PlanCore supports both the Table and Gantt views at the same time, or choosing either view to visualize your planned projects.
At least one view MUST be enabled.
Customize columns
-
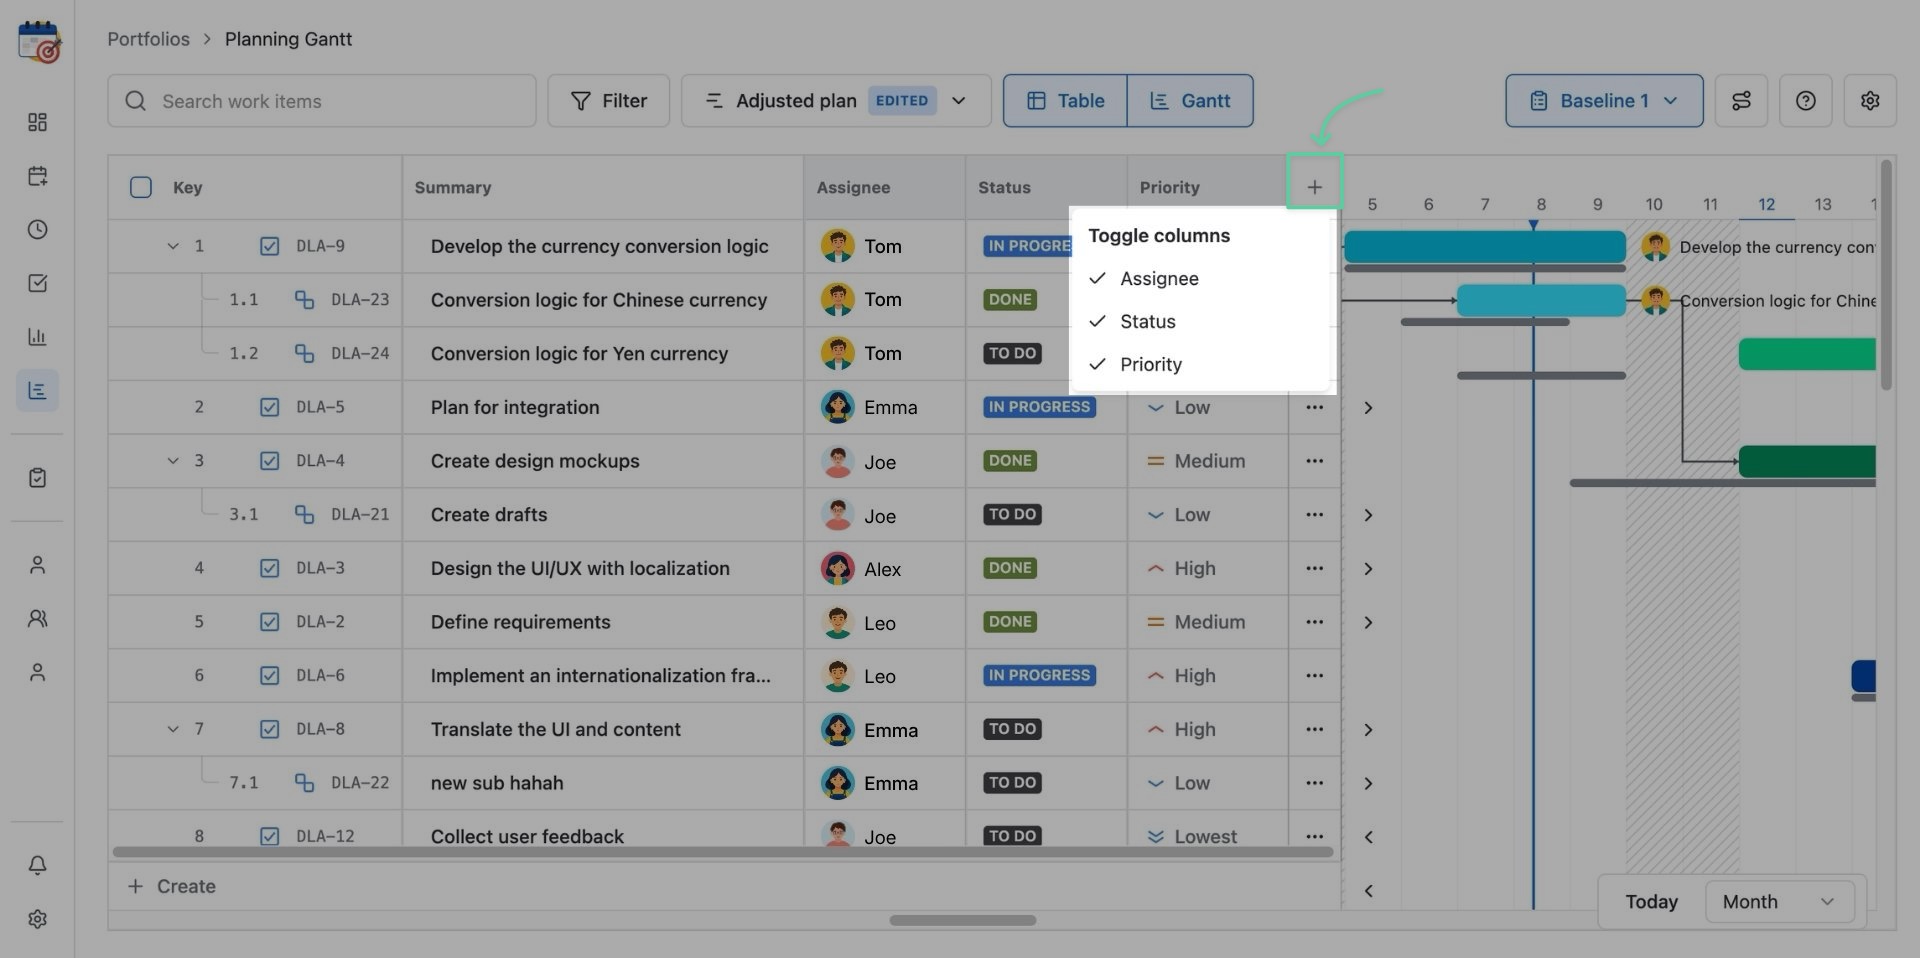
Toggle columns: Click the + on the right edge of the table to open the toggle options. You can enable or disable columns including Assignee, Status, and Priority.
-
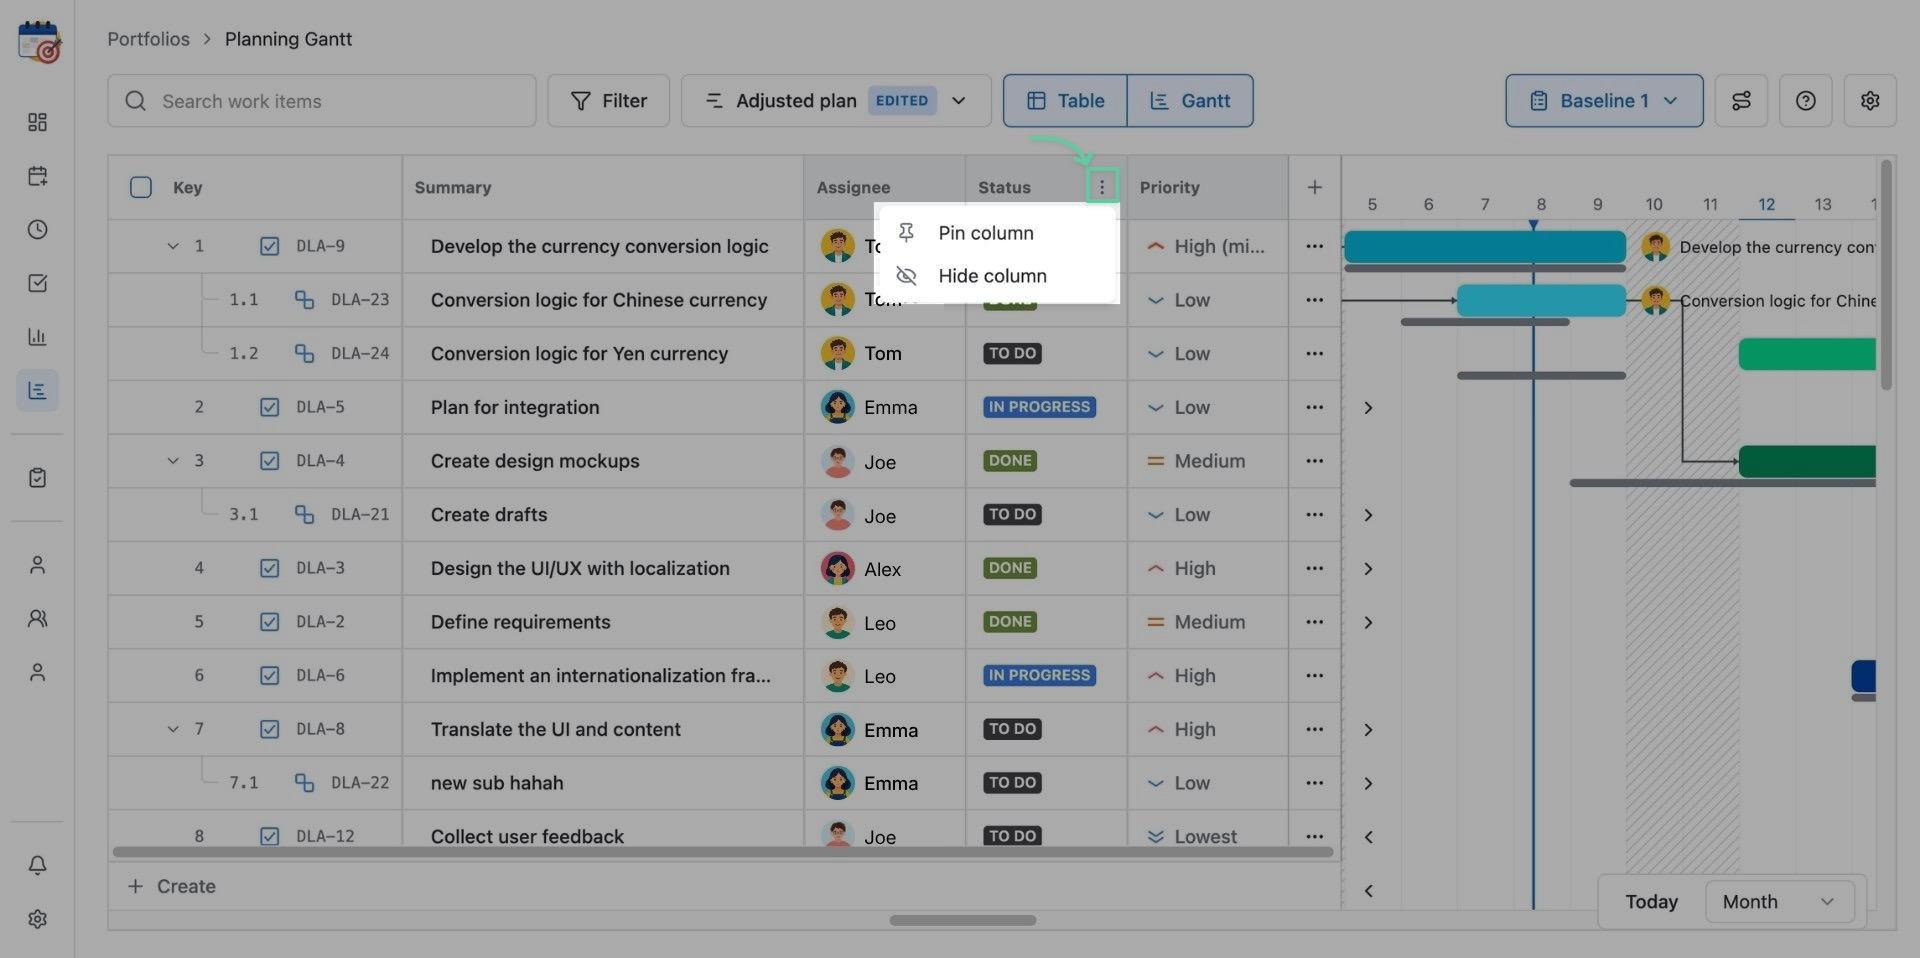
Remove a column: Hover over the header column, click the three-dot symbol, and select Hide column.
-
Resize or reorder: Drag a column border to change its width, or drag its header to a new position.
-
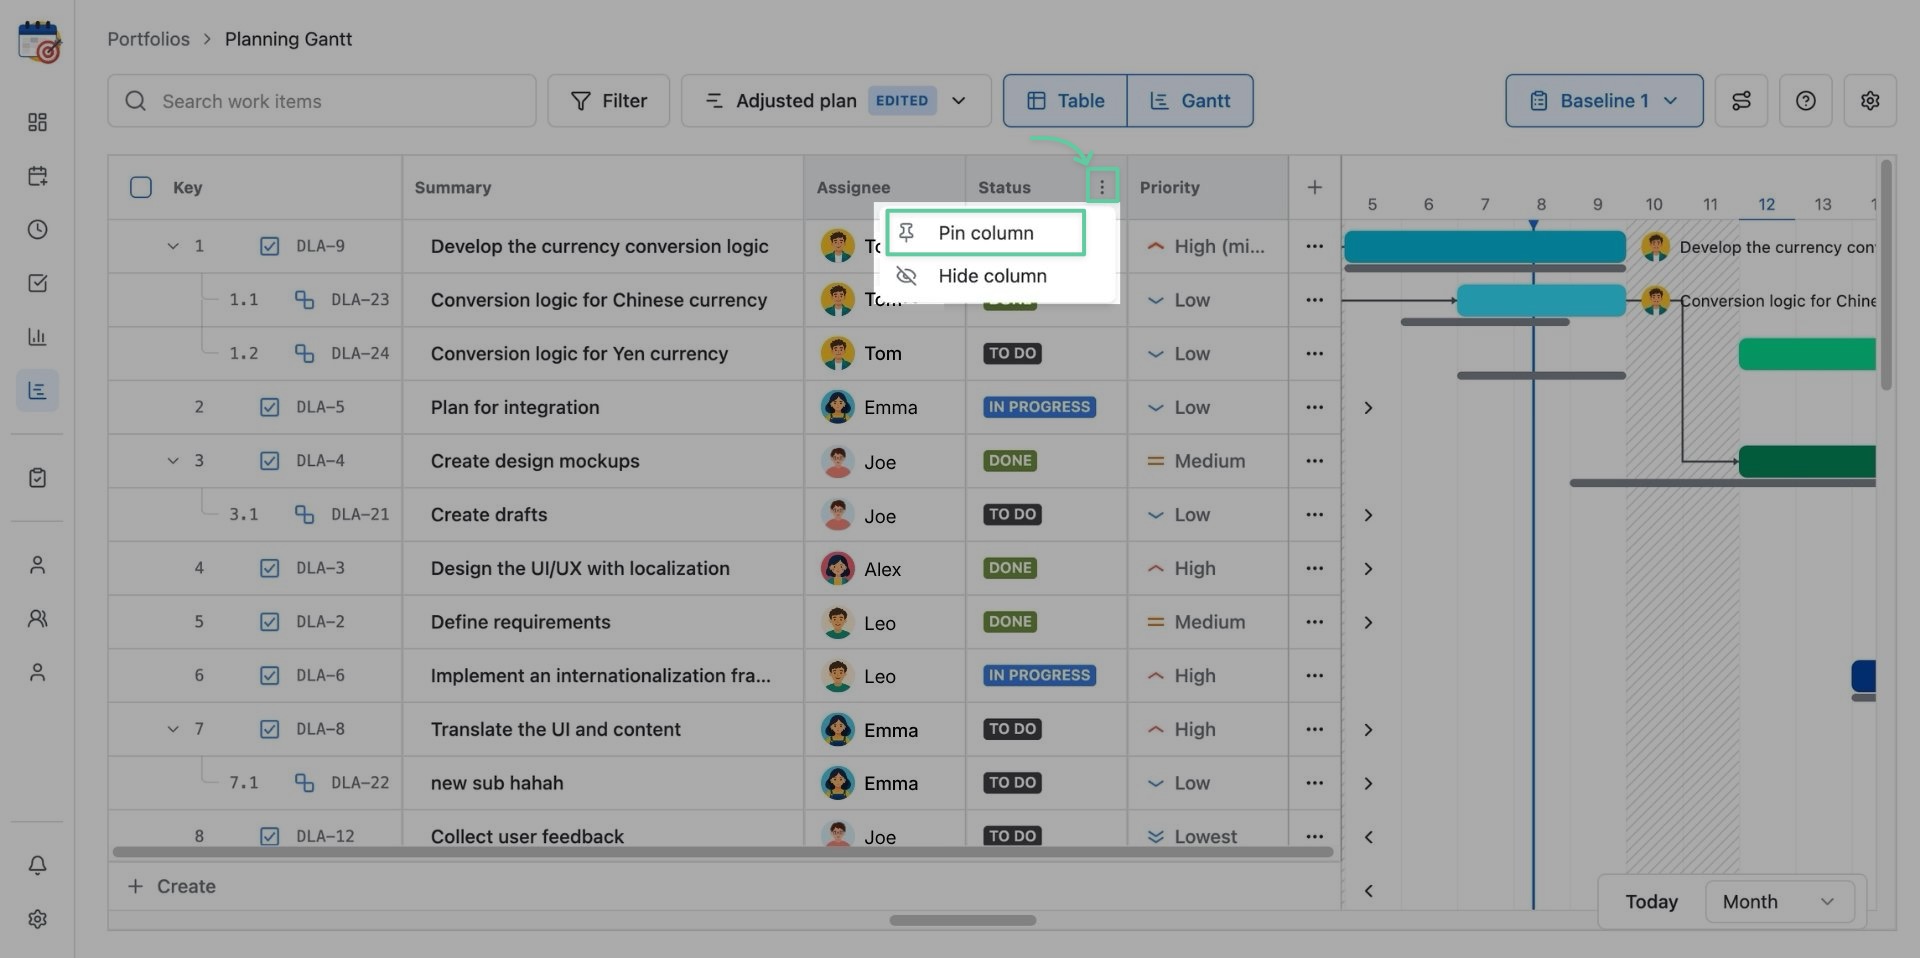
Pin or unpin: Hover over the header column, click the three-dot symbol, and select Pin column to keep it visible on the left while scrolling, or unpin it to return it to the scrolling area.
Expand and sort the table
To sort, hover over a column header and click its sort arrow. Click again to switch between ascending and descending order.
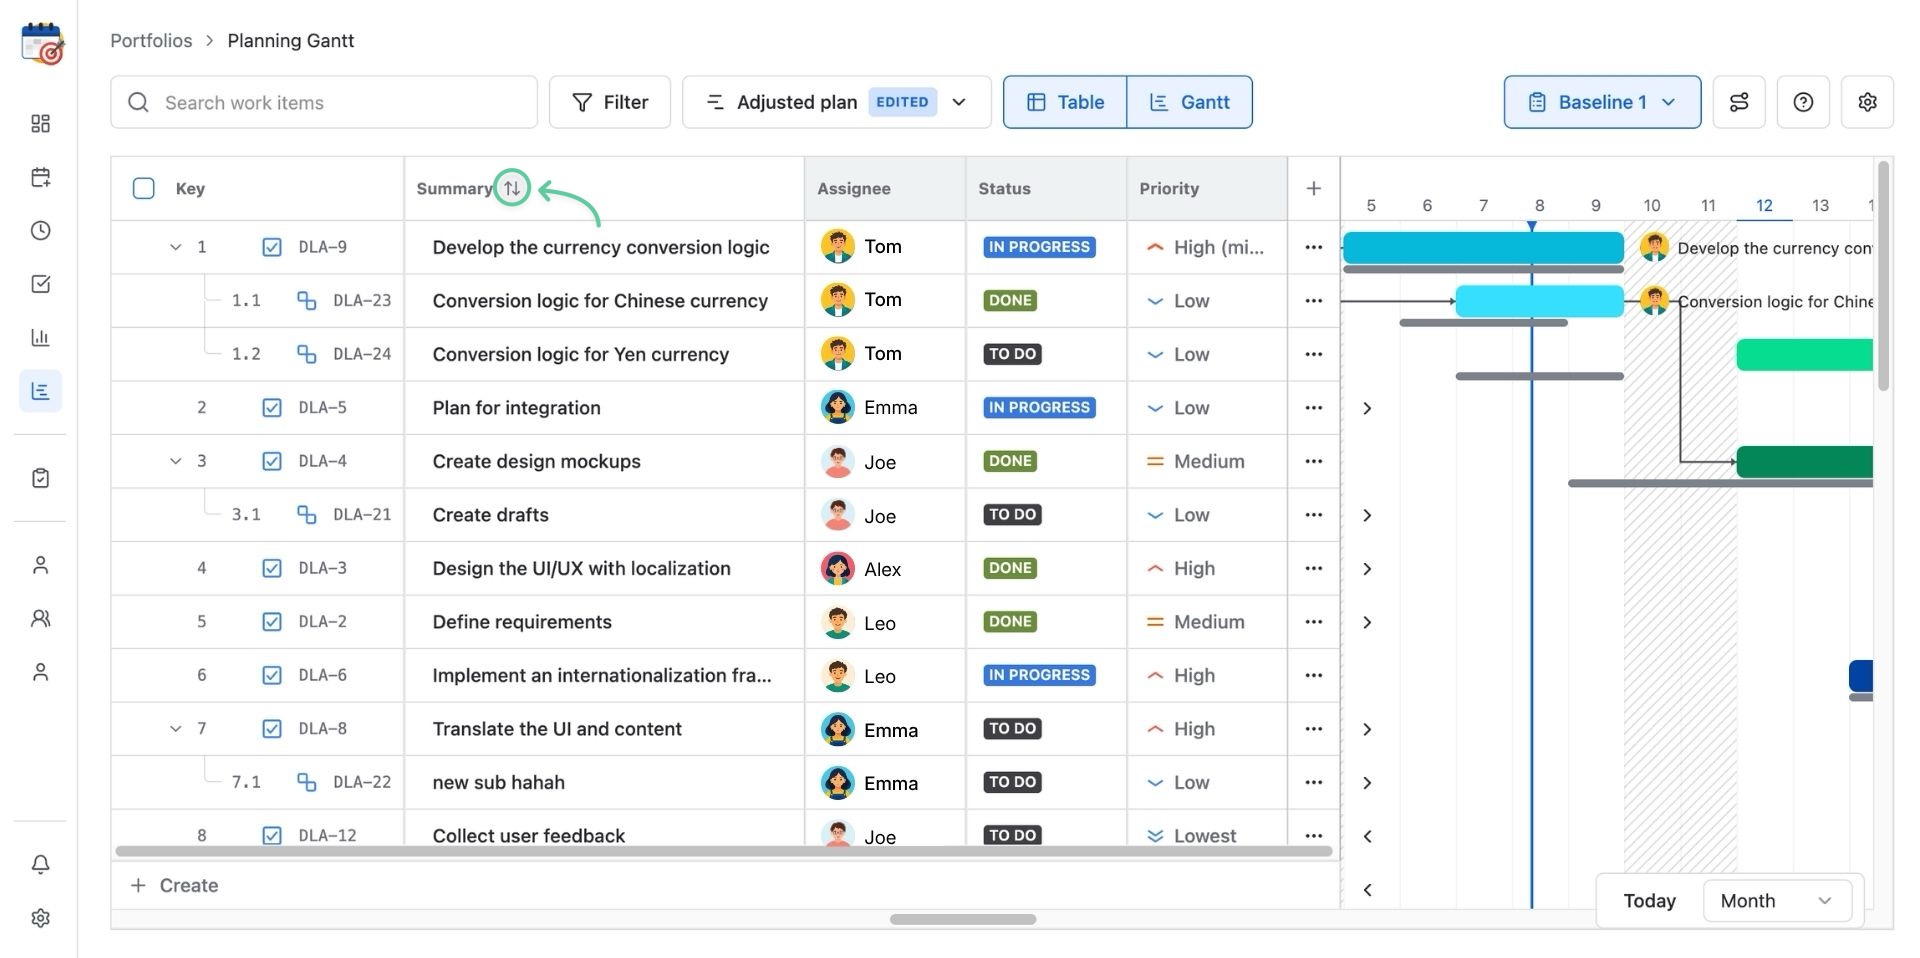
Sorting temporarily changes only your view; it does not rearrange the board for other users.