
Use events to block time for meetings, training, company activities, or any non-work-item activity that should appear on one or more schedules.
When to use events: Create an event when you need to reserve time for a person or team without linking the schedule entry to a Jira work item.
Create an event
Step 1. Select the event timeframe
From a member row on the schedule board, click a blank date cell or click and drag across multiple dates to open the Planning dialog.
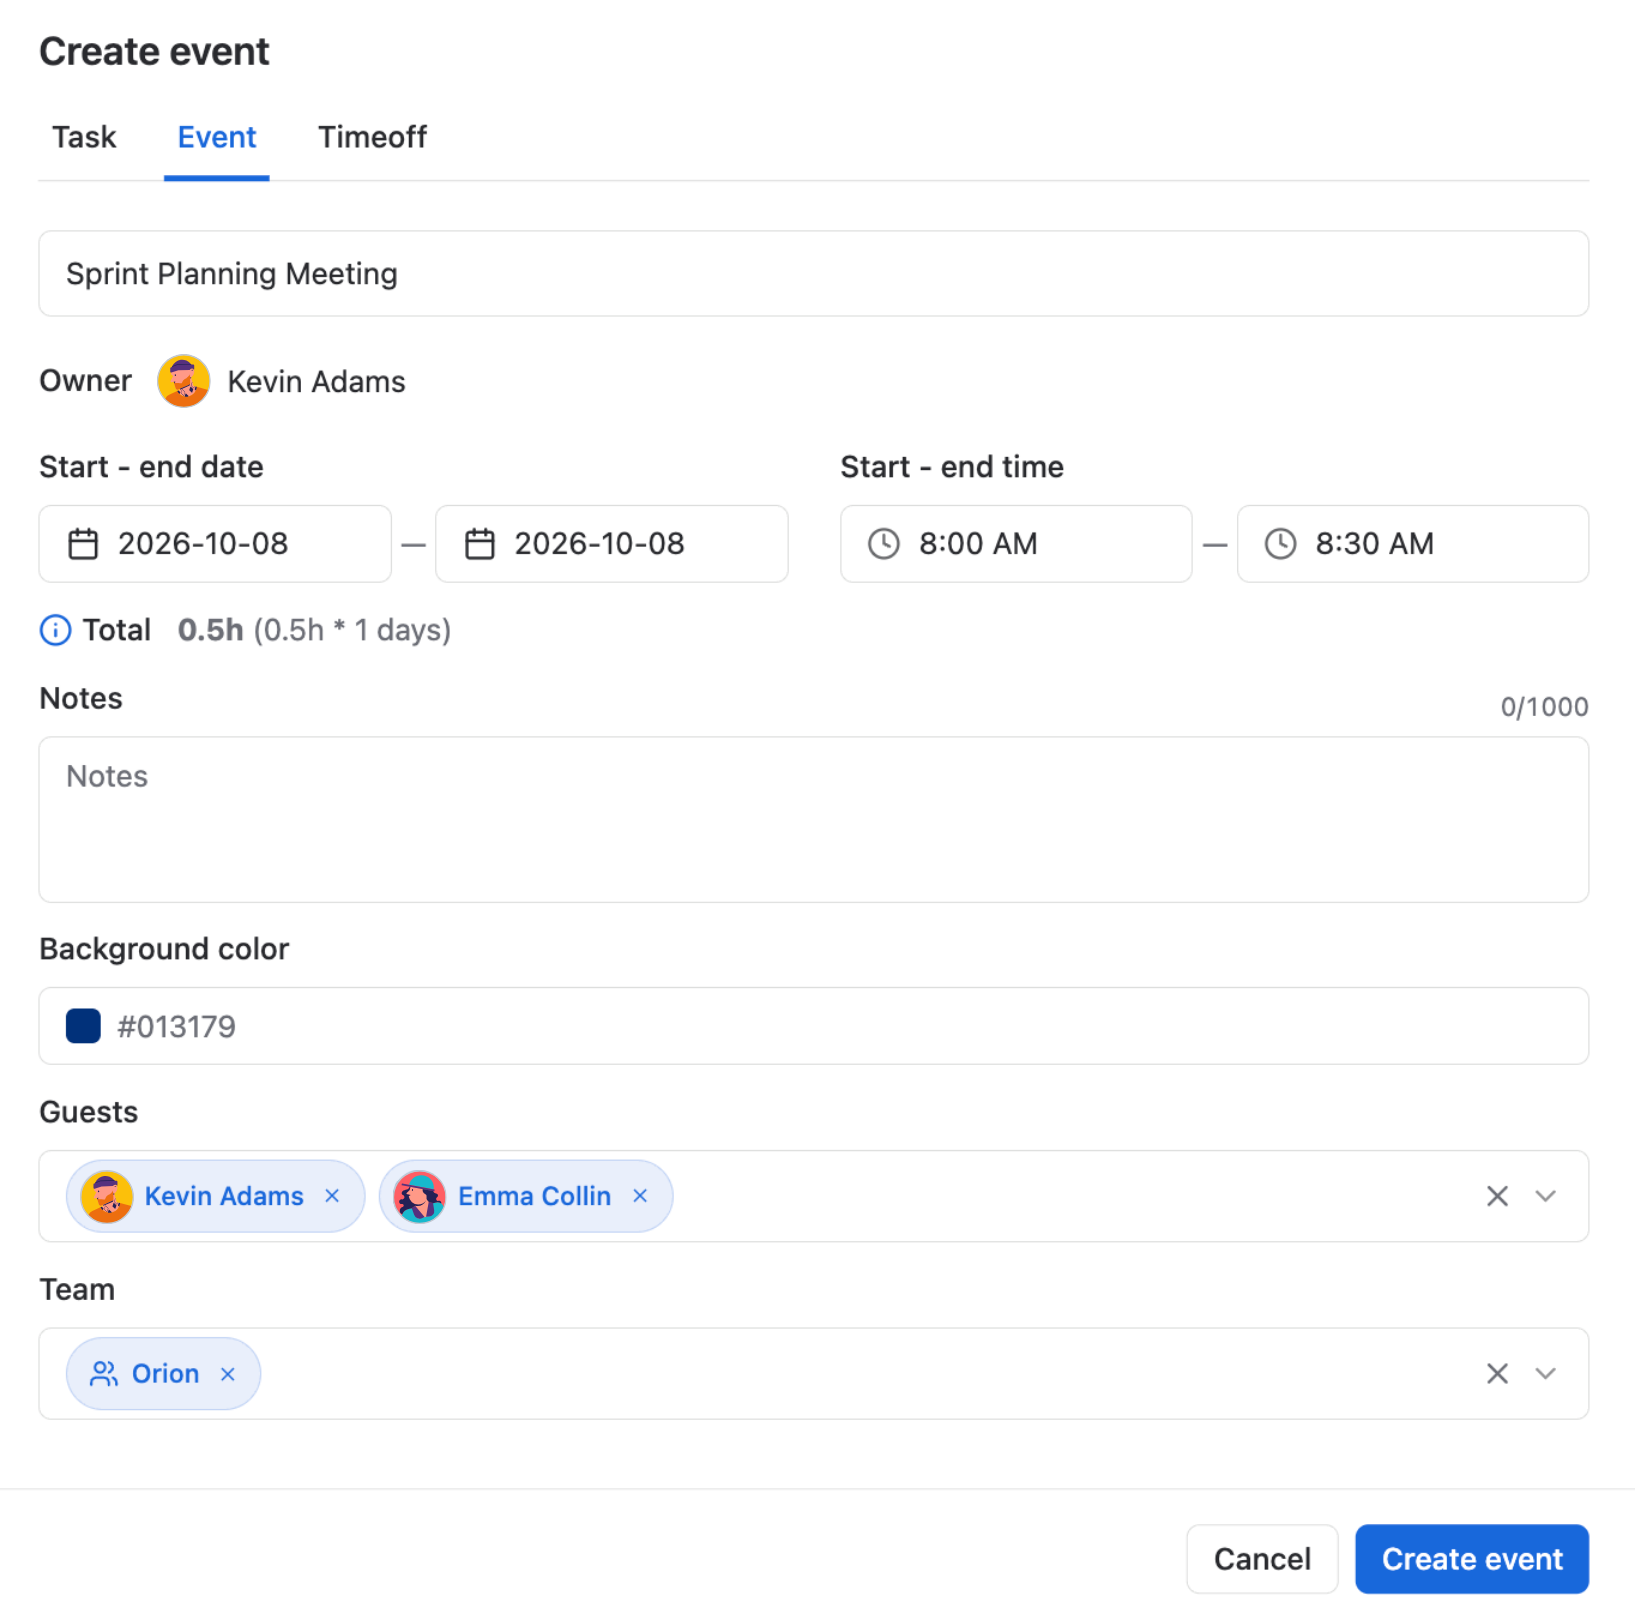
In the dialog, switch to the Event tab.
Step 2. Enter event details
Complete the event information before saving:
|
Field |
Description |
|---|---|
|
Event name |
Required. Enter a clear name that participants can recognize on the schedule board. |
|
Owner |
The person responsible for creating or managing the event. |
|
Event dates |
Select the start and end dates for the event. |
|
Event time |
Select the start and end time for the event. |
|
Notes |
Add optional context. |
|
Color |
Choose a color to make the event easier to identify on the schedule board. |
|
Individual guests |
Add specific people who should have the event added to their schedules. |
|
Team |
Add members from an existing PlanCore team. |
Click Create event to save the event and add it to the schedule board.
View event details
Click an event on the schedule board to open its details in the right sidebar.
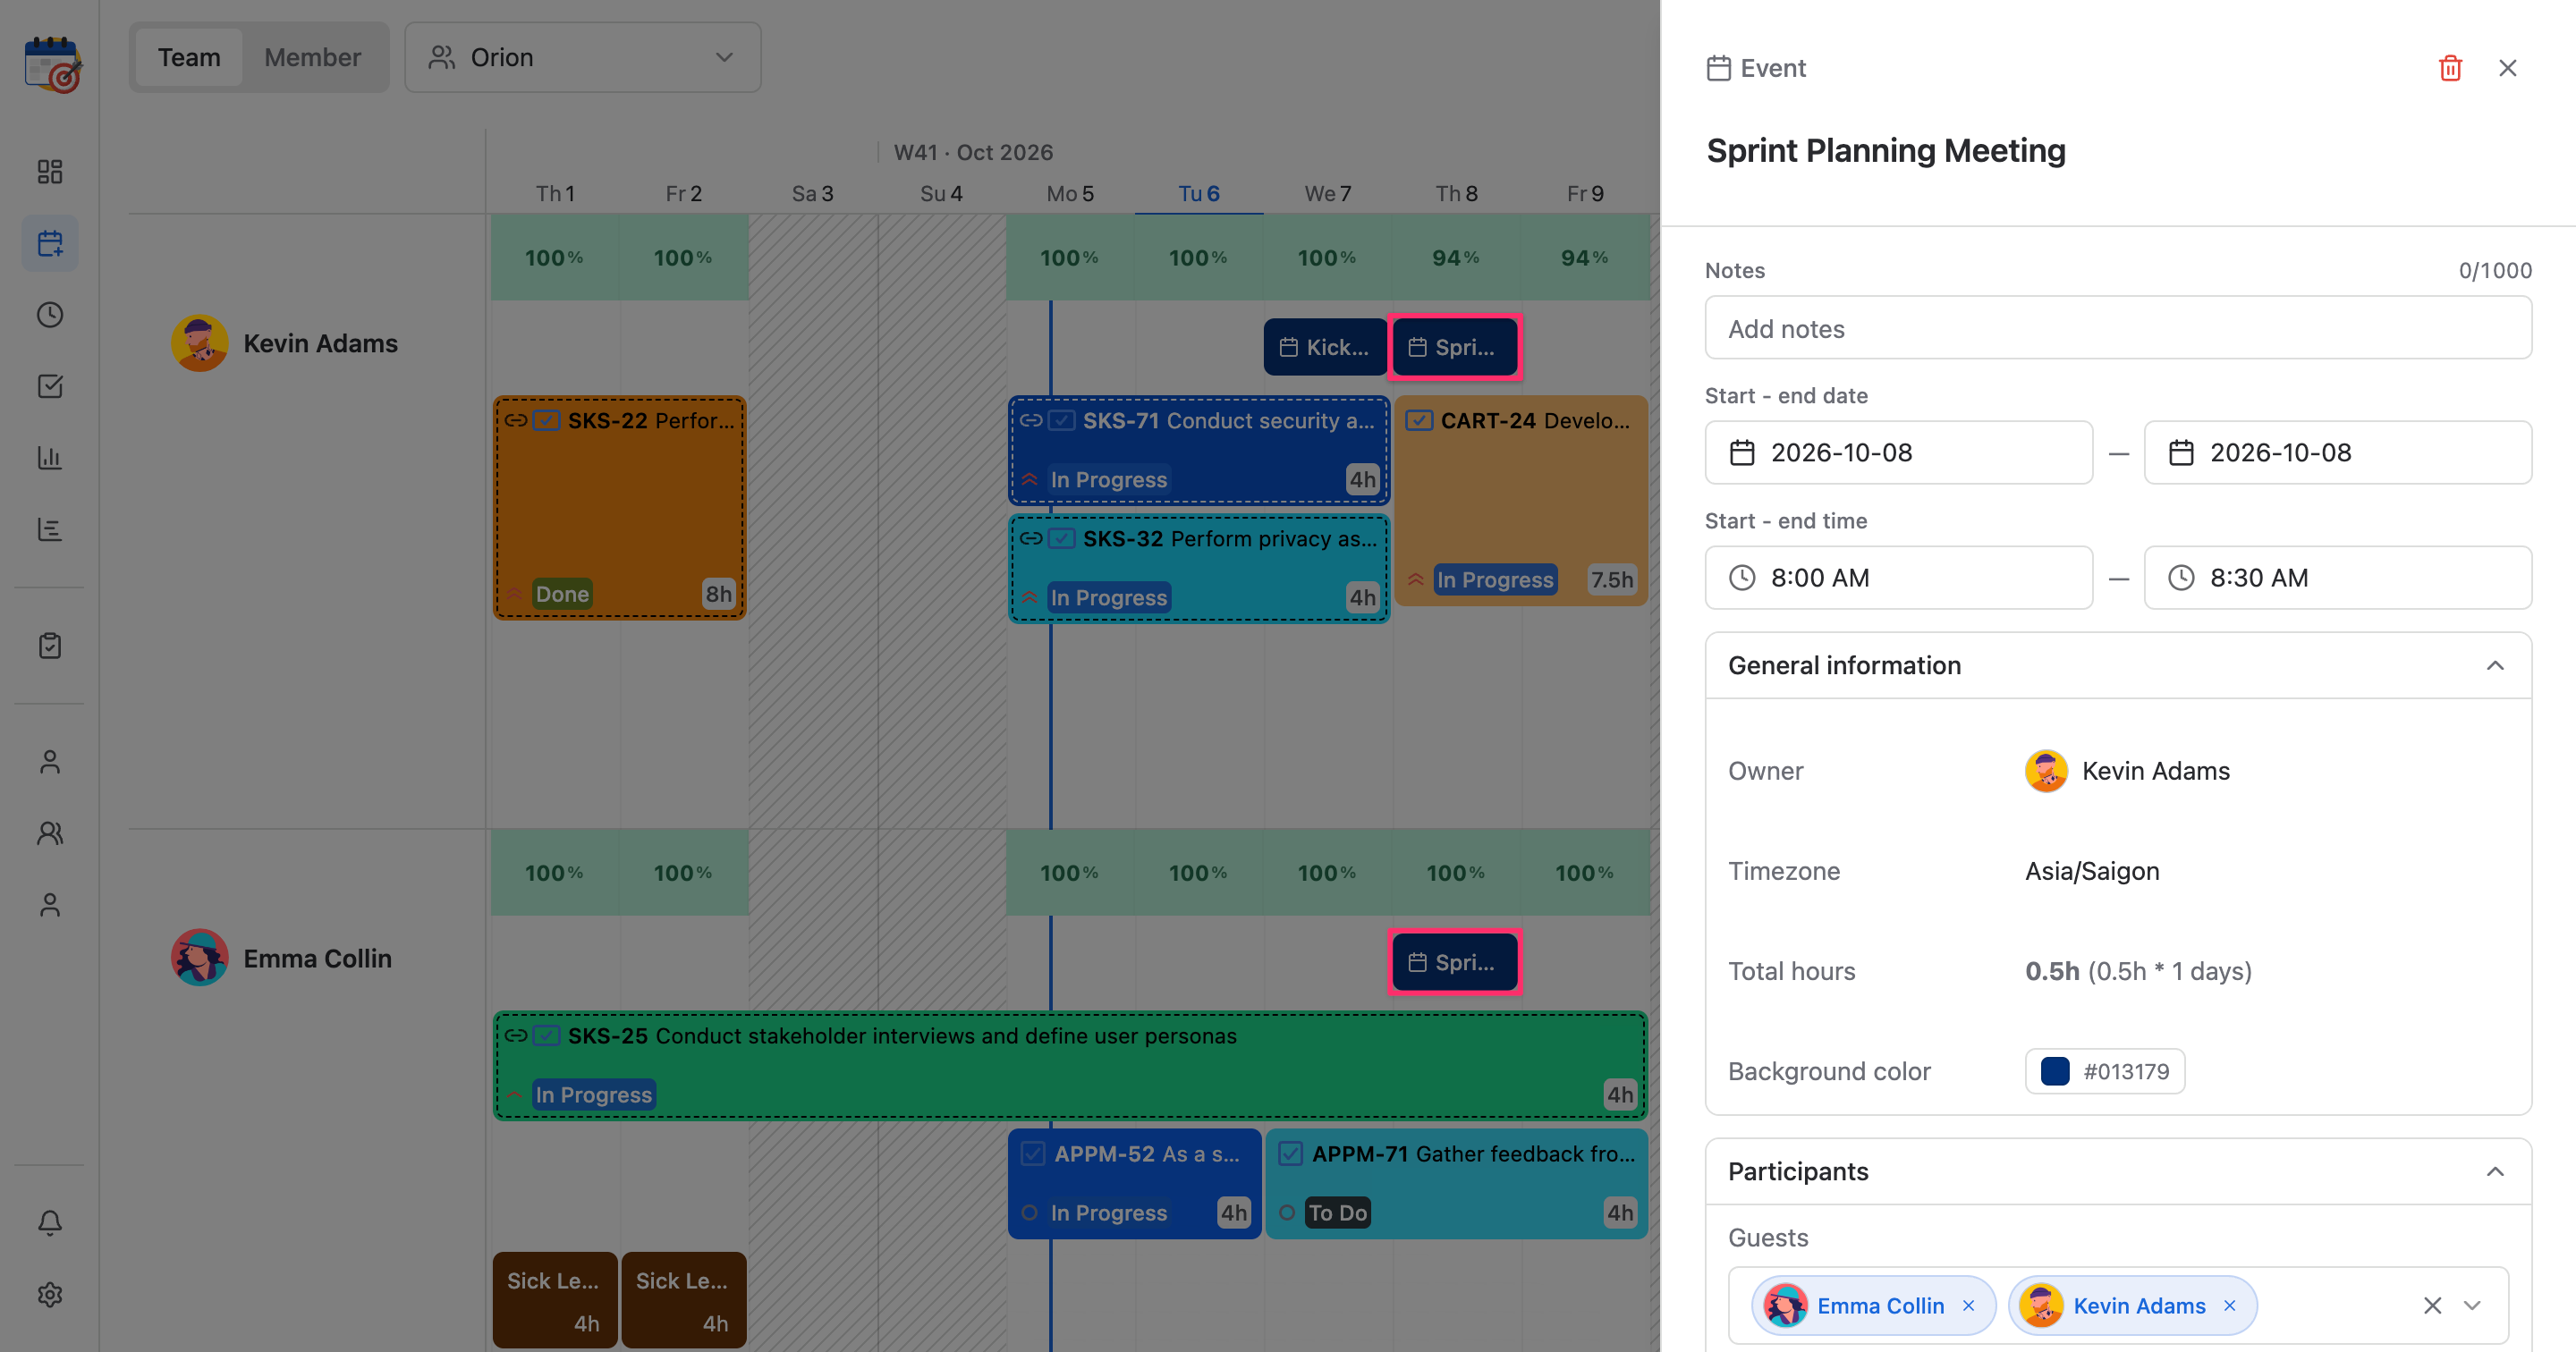
Events appear on top of the scheduled task plan. The sidebar shows:
-
Notes added to the event.
-
Event date and time, including the selected start and end values.
-
General information, such as owner, timezone, total hours, and color.
-
Participants, including individual guests and selected teams.
All participants included in the event will see the event on their own schedule.
Delete an event
To remove an event from the schedule board, open the event details sidebar and click the Trash icon in the top-right corner.
Note: Deleting an event removes it from the schedule of all participants. Confirm that the event is no longer needed before deleting it.