
Use the schedule board to create, find, and plan Jira work items for team members across specific dates. This page explains how to open the planning dialog, choose or create a work item, configure schedule details, and manage the plan after it is added to the board.
Use this page when you want to:
-
Plan work for a team member directly on the board.
-
Create a new Jira work item while planning.
-
Find an existing Jira work item using basic filters or JQL.
-
Configure schedule hours, dates, recurrence, color, and billable status.
-
View, update, or remove an existing plan.
Before you begin
-
Make sure you are viewing the schedule board for the correct team, member, and timeframe.
-
Check that you have permission to create or plan work items for the selected project and member.
-
If you want schedule dates to sync with Jira fields, configure Date mapping before planning. Otherwise, the schedule is stored only in PlanCore.
How to plan work items
Step 1: Select a timeframe on the board
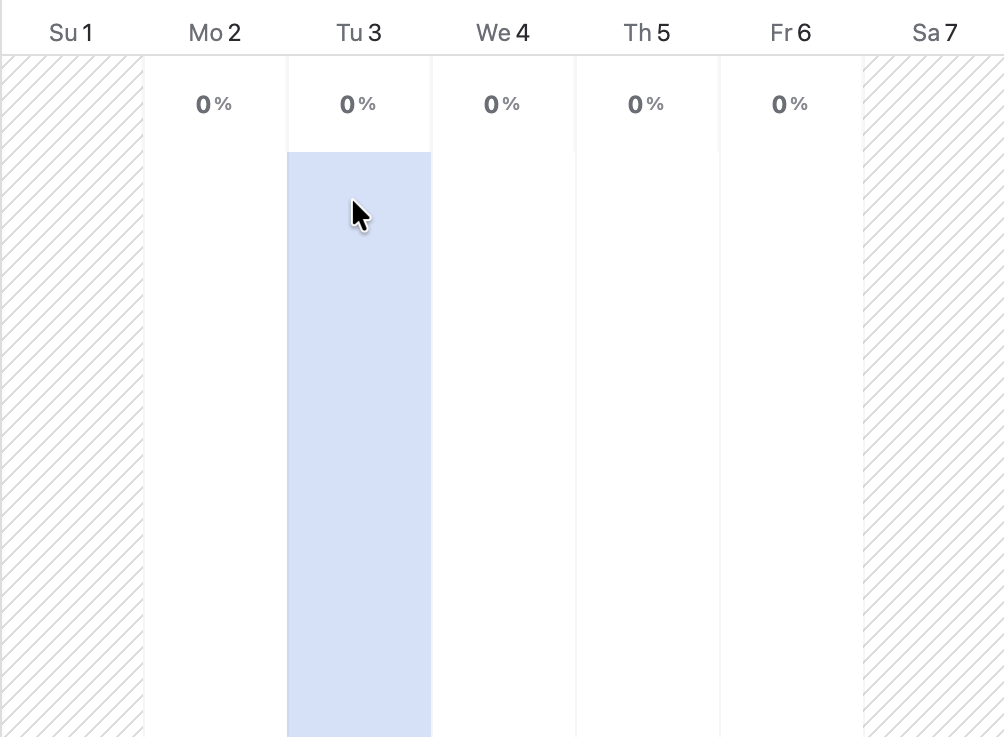
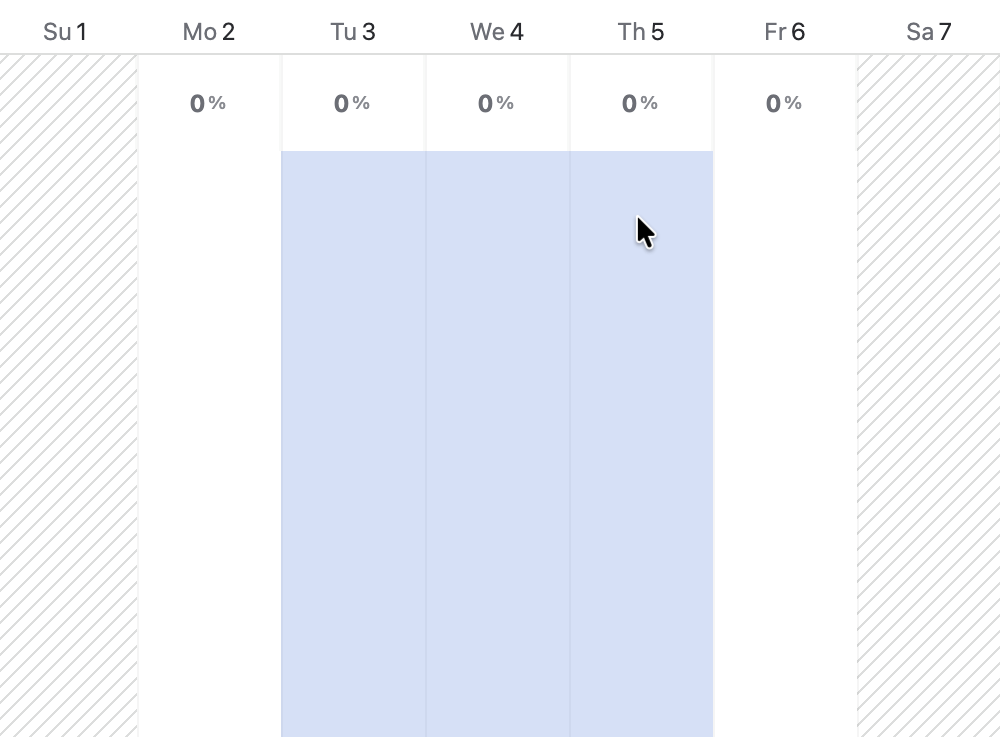
From a member row, click a blank date cell to plan work for a single day, or click and drag across multiple date cells to plan work across a date range. This opens the Planning dialog.
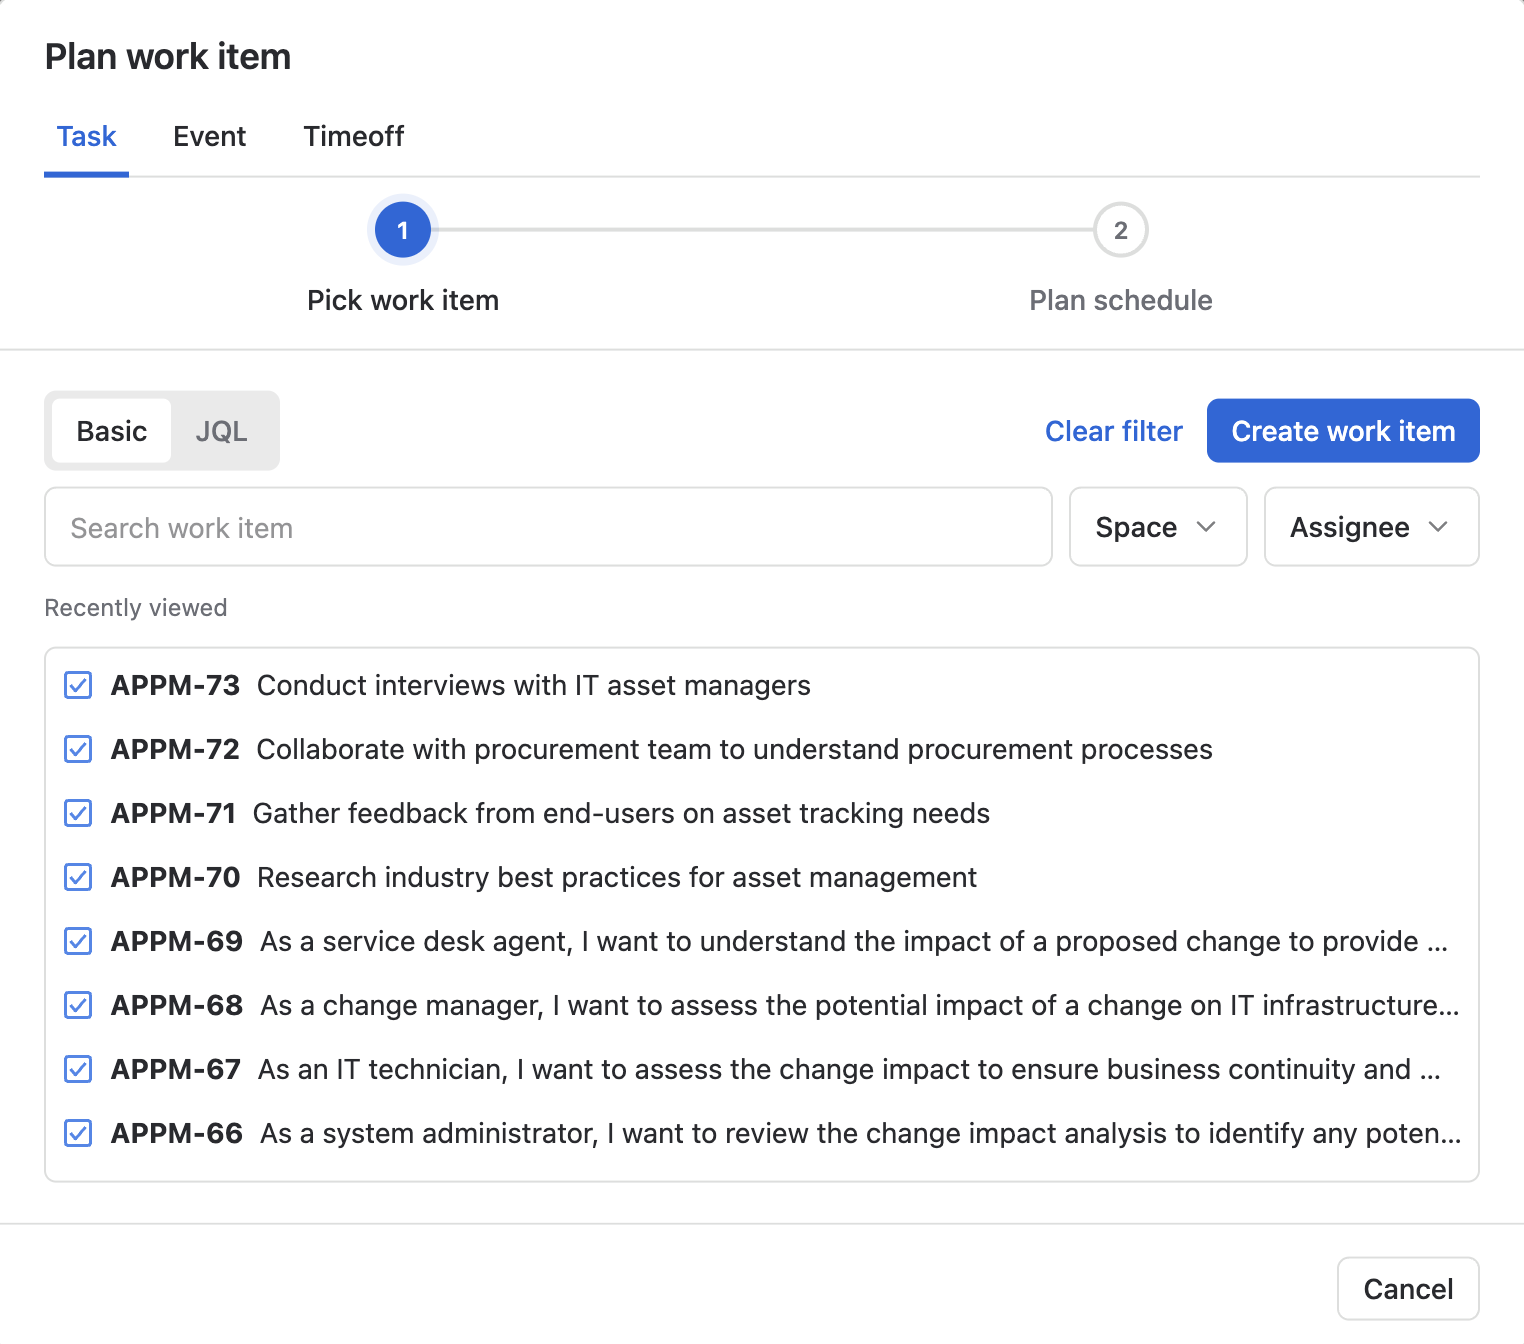
In the Planning dialog, make sure you are on the Task tab.
Tip: Dragging across multiple dates automatically fills the start and end dates in the planning form, helping you plan longer assignments faster.
Step 2: Choose a work item
You can either create a new Jira work item or select an existing work item from the available filters.
Create a new work item
-
Click Create work item to open the Jira work item creation screen.
-
Select the relevant Space and Work type.
-
Fill in the required and optional work item details, such as Status, Summary, and Parent. Fields marked with a red asterisk (*) are required.
-
Click Create to create the work item and return to planning.
Pick an existing work item
Use the available filters to search for and select an existing Jira work item.
Basic filter
The basic filter helps you narrow down work items across your Jira instance using simple search criteria:
-
Search work items: Enter a work item key or summary. PlanCore searches indexed work items across your Jira instance.
-
Filter by Space: Select one or more spaces to narrow the results.
-
Filter by Assignee: Select one or more assignees to focus the results on specific people.
You can combine search, space, and assignee filters to produce more accurate results.
JQL filter
Use JQL when you need a more advanced or specific search. For example, you can search by project, status, assignee, priority, labels, or other Jira fields.
Learn more about JQL: Use advanced search with Jira Query Language (JQL)
After finding the correct work item, select it to continue configuring the plan.
Step 3: Configure the work item schedule
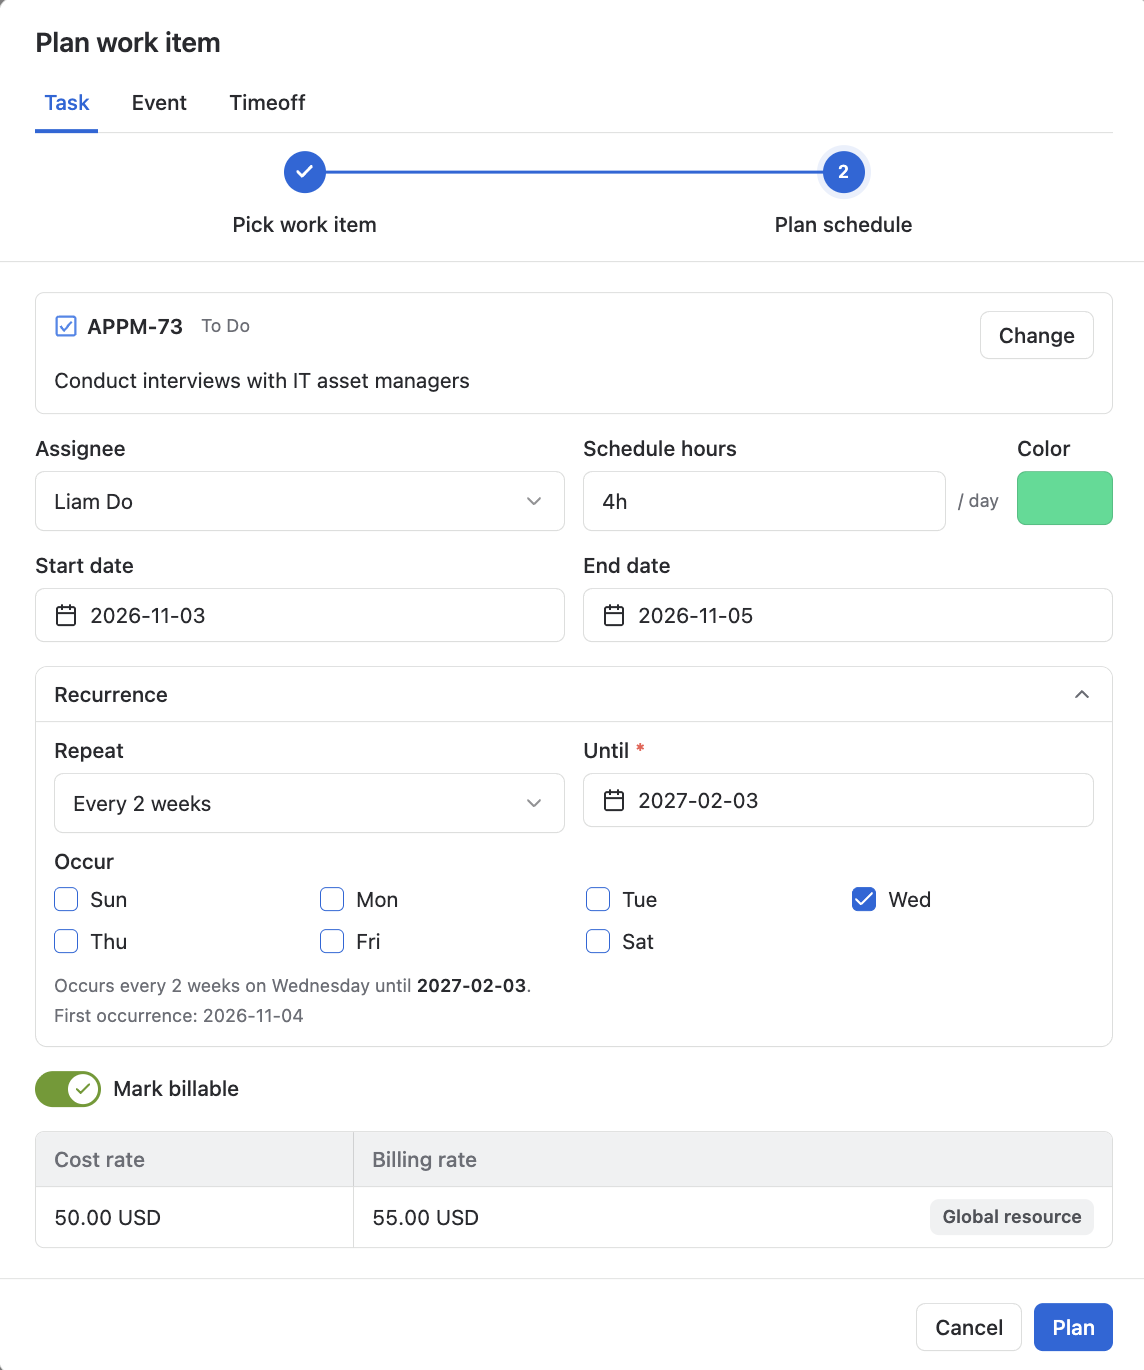
After selecting or creating a work item, complete the schedule details before adding it to the board.
|
Field |
Description |
|---|---|
|
Assignee |
The team member who will be assigned to the planned work. This is usually the member row you selected on the board, but you can adjust it if needed. |
|
Schedule hours |
The number of hours planned per day for the selected work item. |
|
Color |
The display color of the plan on the schedule board. Use colors to visually group work by project, priority, team, or work type. |
|
Start date / End date |
The date range for the planned work. These dates may be prefilled if you selected or dragged across dates on the board. |
|
Recurrence |
Choose whether the plan repeats. Options include No repeat, Daily, Weekly, Every 2 weeks, Monthly, Quarterly, or Yearly. Recurrence is only available when Date mapping is turned off for the project. |
|
Billable (Rate and cost details only visible to Admins) |
Mark the plan as billable when the scheduled work should be included in billing or cost tracking. Configure rates and costs in Rate and cost before using this option. |
Click Plan to add the work item schedule to the board.
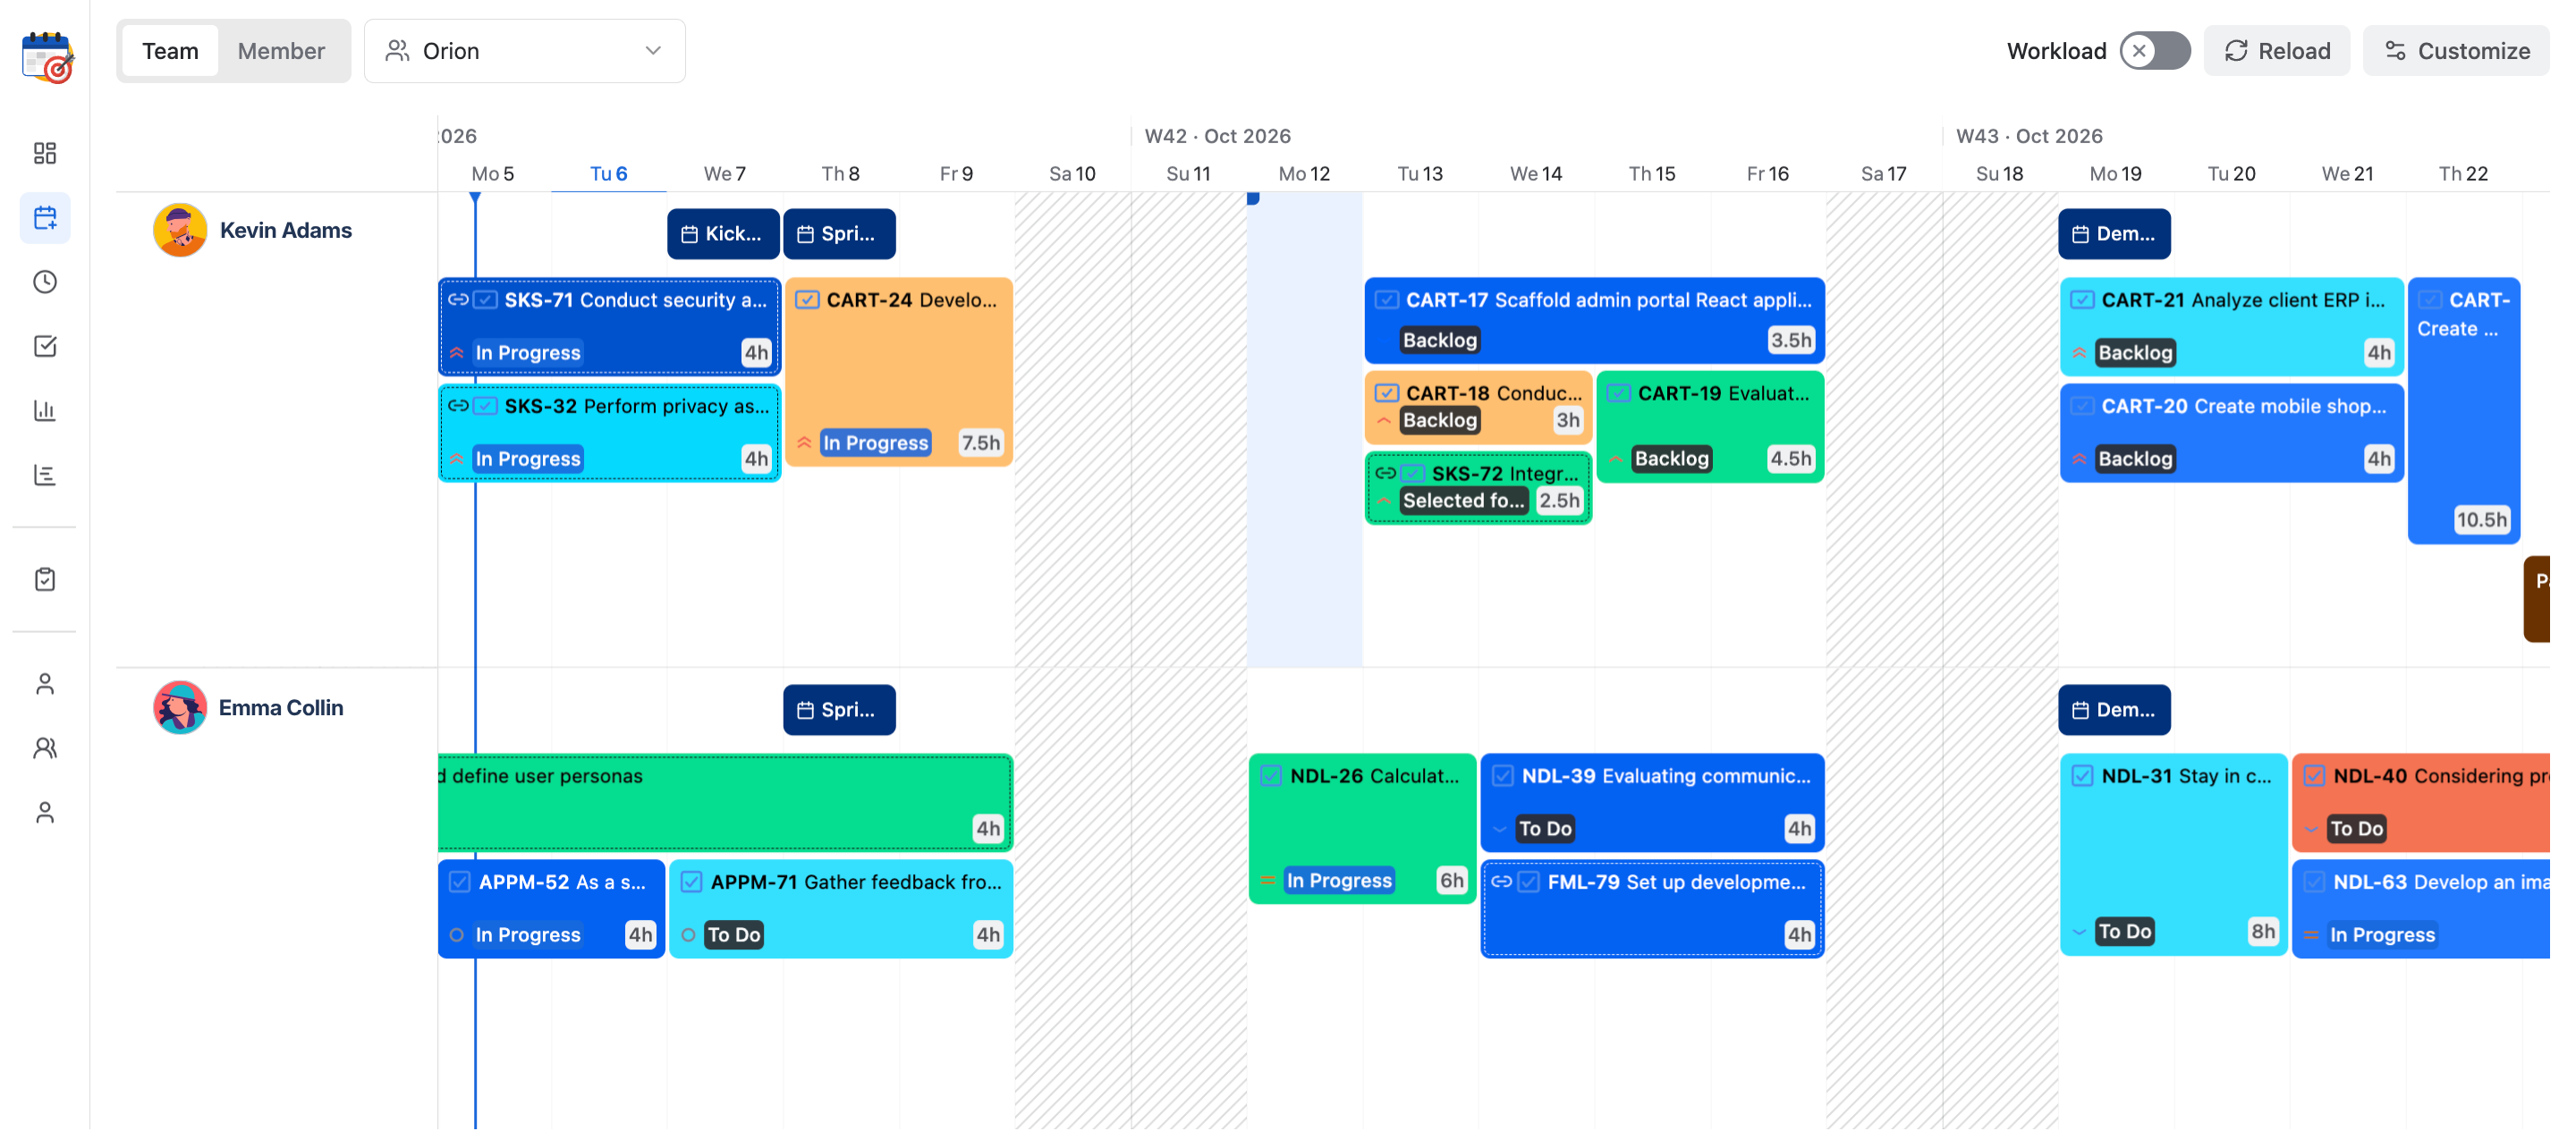
Note: By default, if Date mapping is not configured, PlanCore stores schedule details inside the app only. The planning details will not be written back to Jira fields and may not appear on the Jira work item outside PlanCore.
Date mapping
Date mapping connects PlanCore schedule details with available Jira fields so planned dates can be displayed consistently across the schedule board and related Jira work item fields.
When Date mapping is enabled, the recurrence feature is not available.
Learn more about Date mapping
After Date mapping is set up correctly, project plan details appear on the board for every relevant member.

Plans using Date mapping display a link icon before the work item key, and the dashed line around the schedule makes them easier to identify on the board.
View and edit plan details
To view an existing plan, click the plan on the board to open its details in the right sidebar. You can also right-click the plan and select Show details.
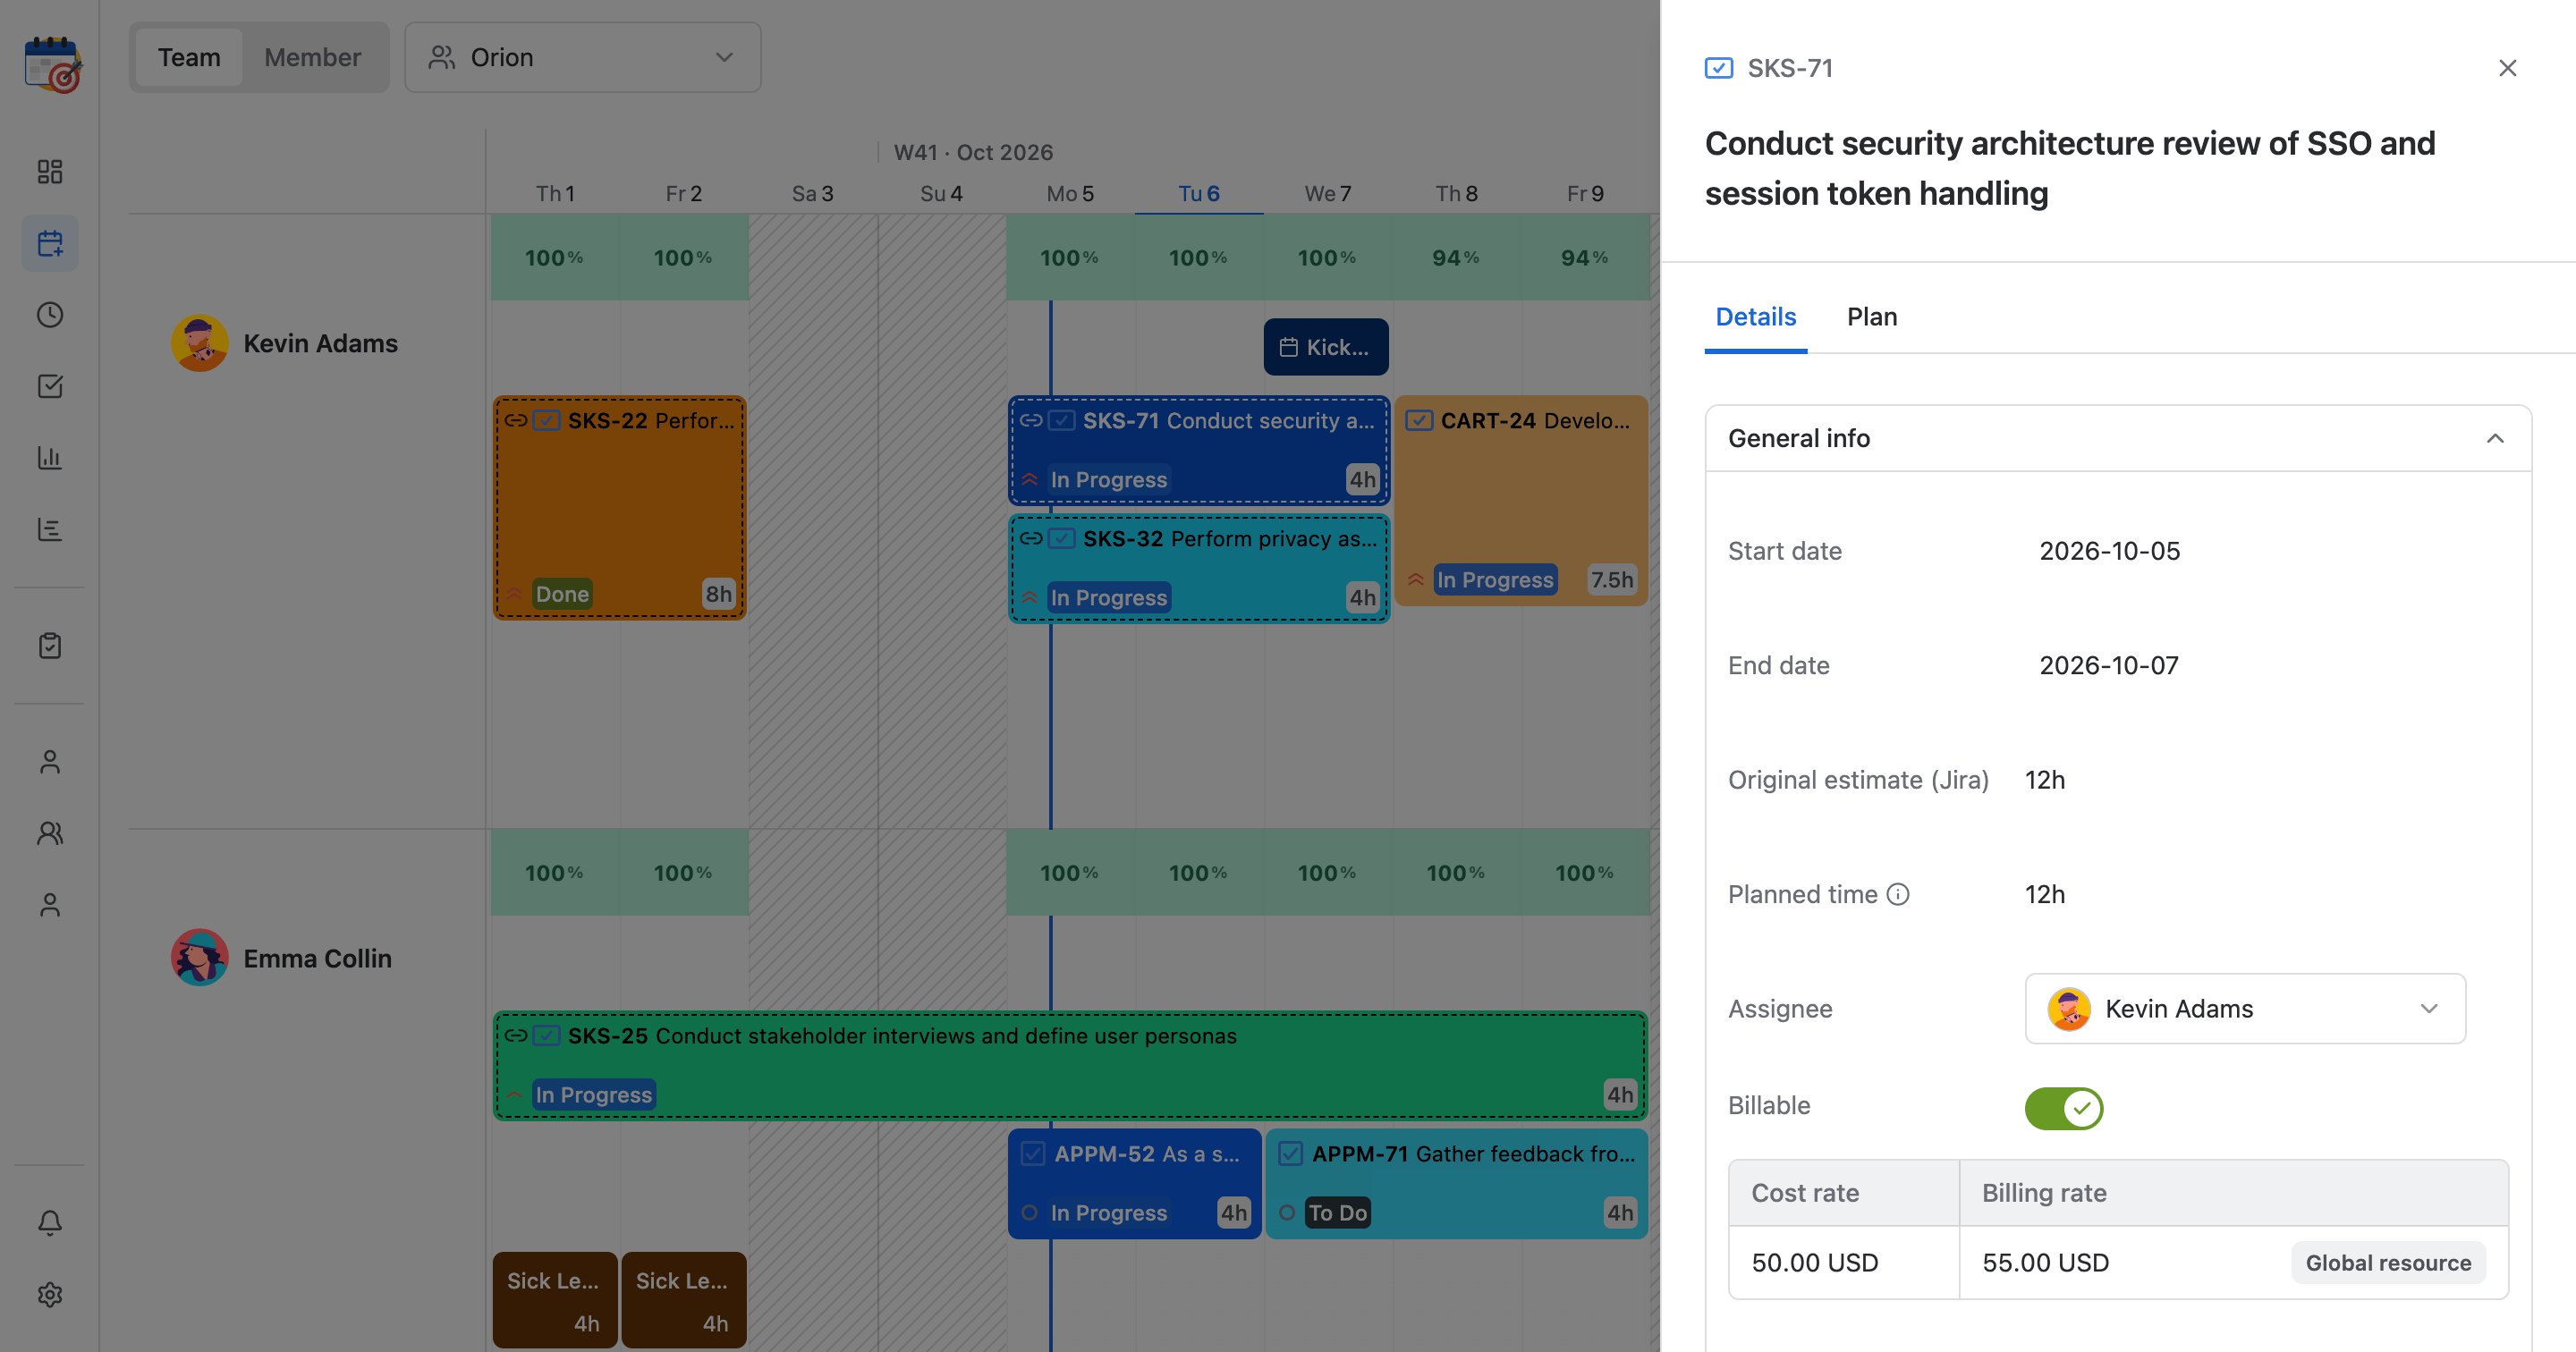
The details sidebar includes two main tabs:
Details tab
-
View or edit general plan information.
-
View related Jira work item fields.
Plan color can also be changed by right-clicking the plan on the board and selecting Change color.
Plan tab
-
View and edit schedule information.
-
Review or update recurrence settings, when recurrence is available.
Tip: To get the latest plan details across the instance, click the Reload button in the PlanCore navigation bar.
Remove a plan
To remove a plan from the board, right-click the plan and select Remove. When the confirmation dialog appears, click Delete.
Important: Removing a plan deletes the schedule from the board. If the plan is connected through Date mapping, the mapped Jira fields (Start/End date) will also be cleared on that work item.