.png)
ConfluPlan supports 3 different fields to synchronize with Jira: Start date, Due date, and Progress fields.
By default, the Progress field (shown as a percentage number) is not available. Users are required to create a custom field and map it in their Jira spaces.
How to create a custom field
Only the Jira admins can access and create new custom fields for your Jira instance.
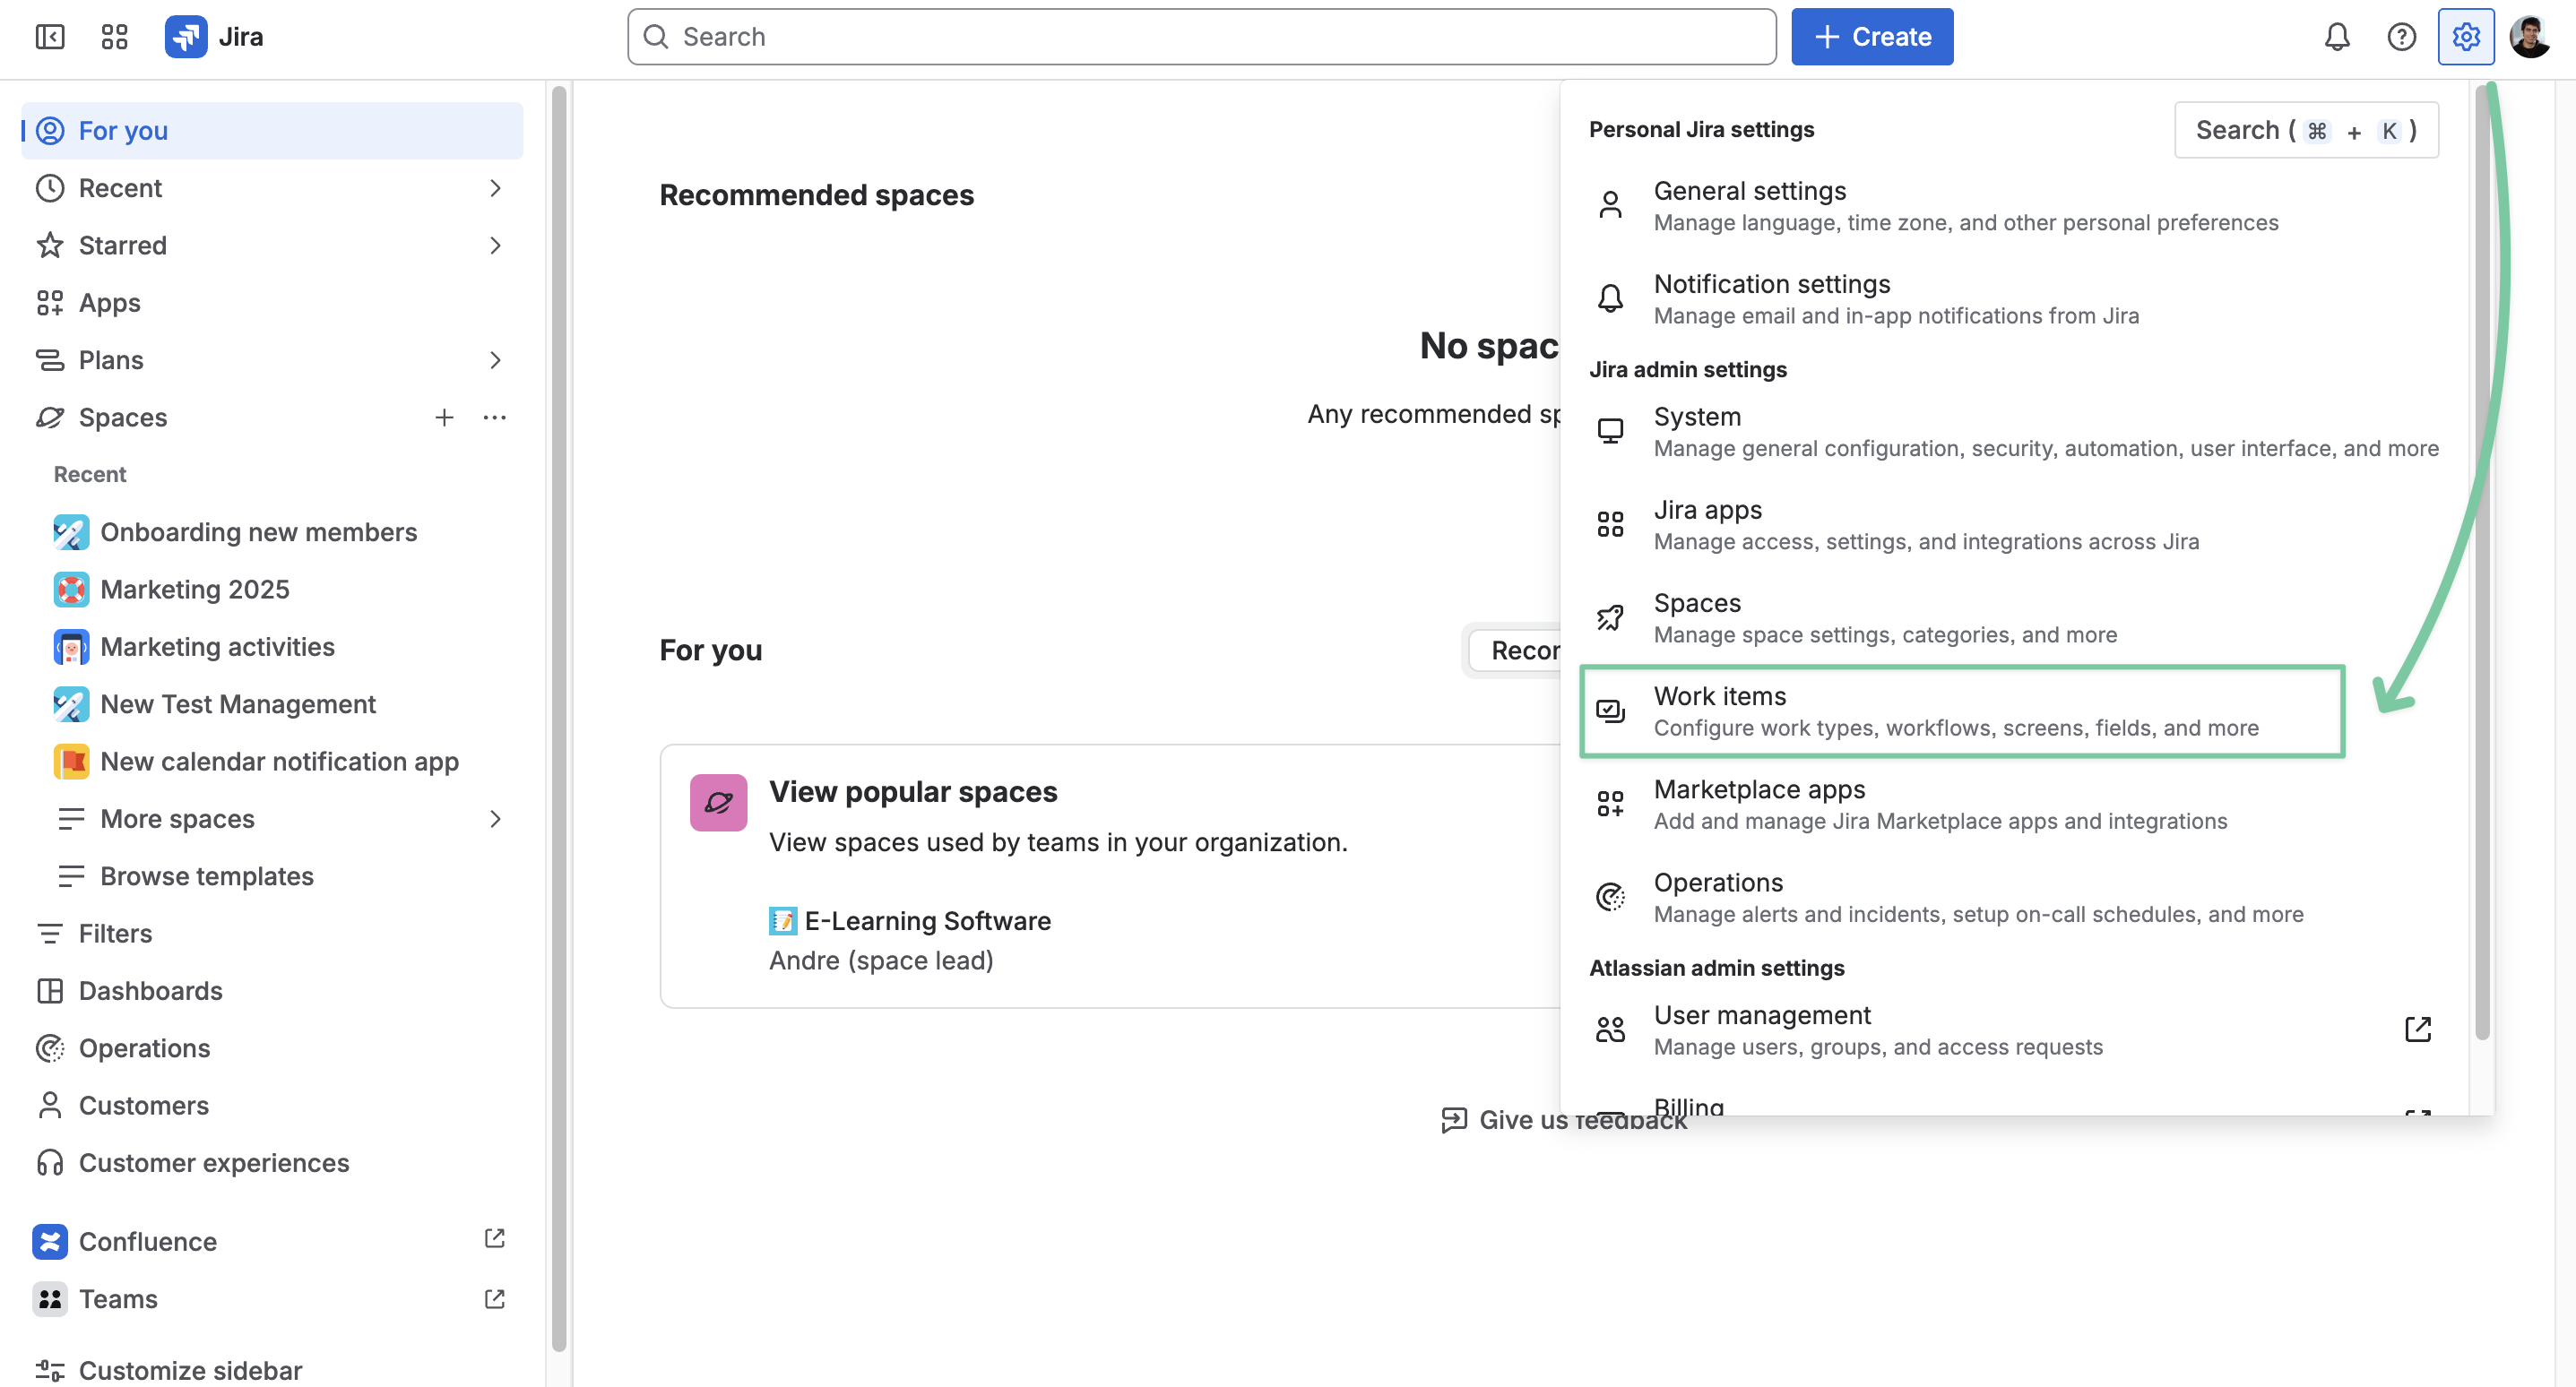
From your dashboard, locate the ⚙️ icon next to your profile and choose Work items.
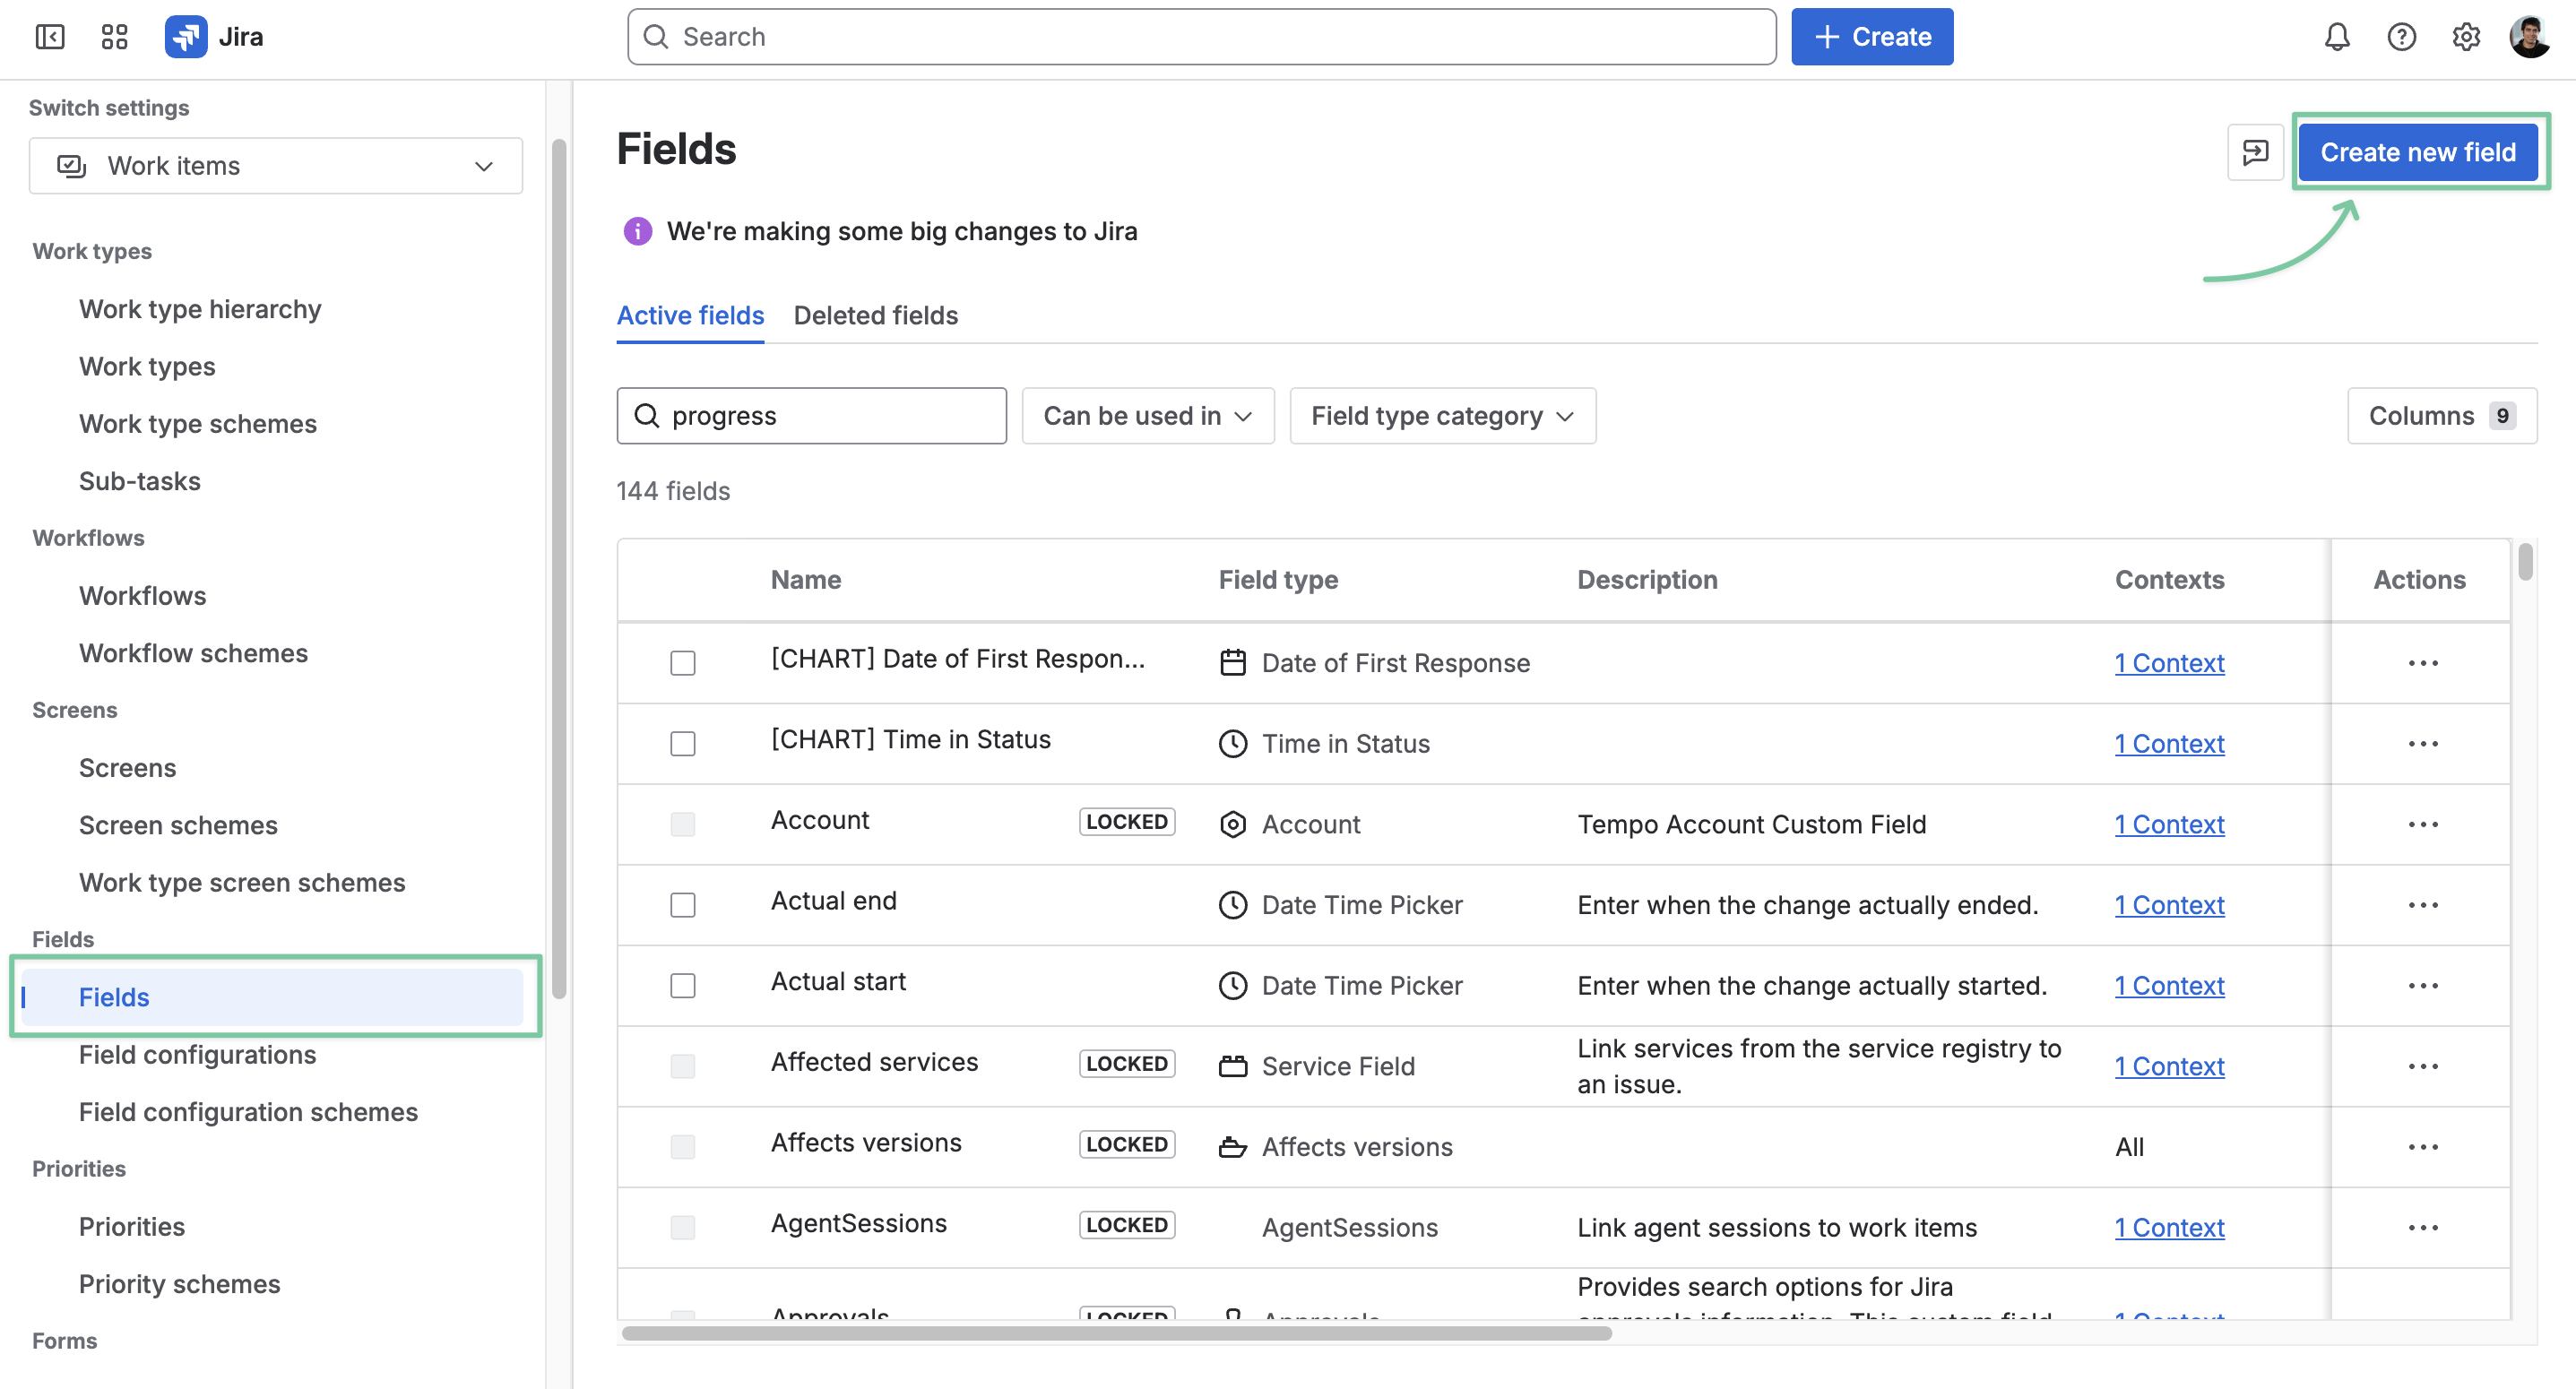
In the Jira admin settings page, locate Fields from the left-side menu, then click Create new field.
In the Create field column, select the field type as Number Field, name it (for example, Progression Percent), and choose its format as # Number.
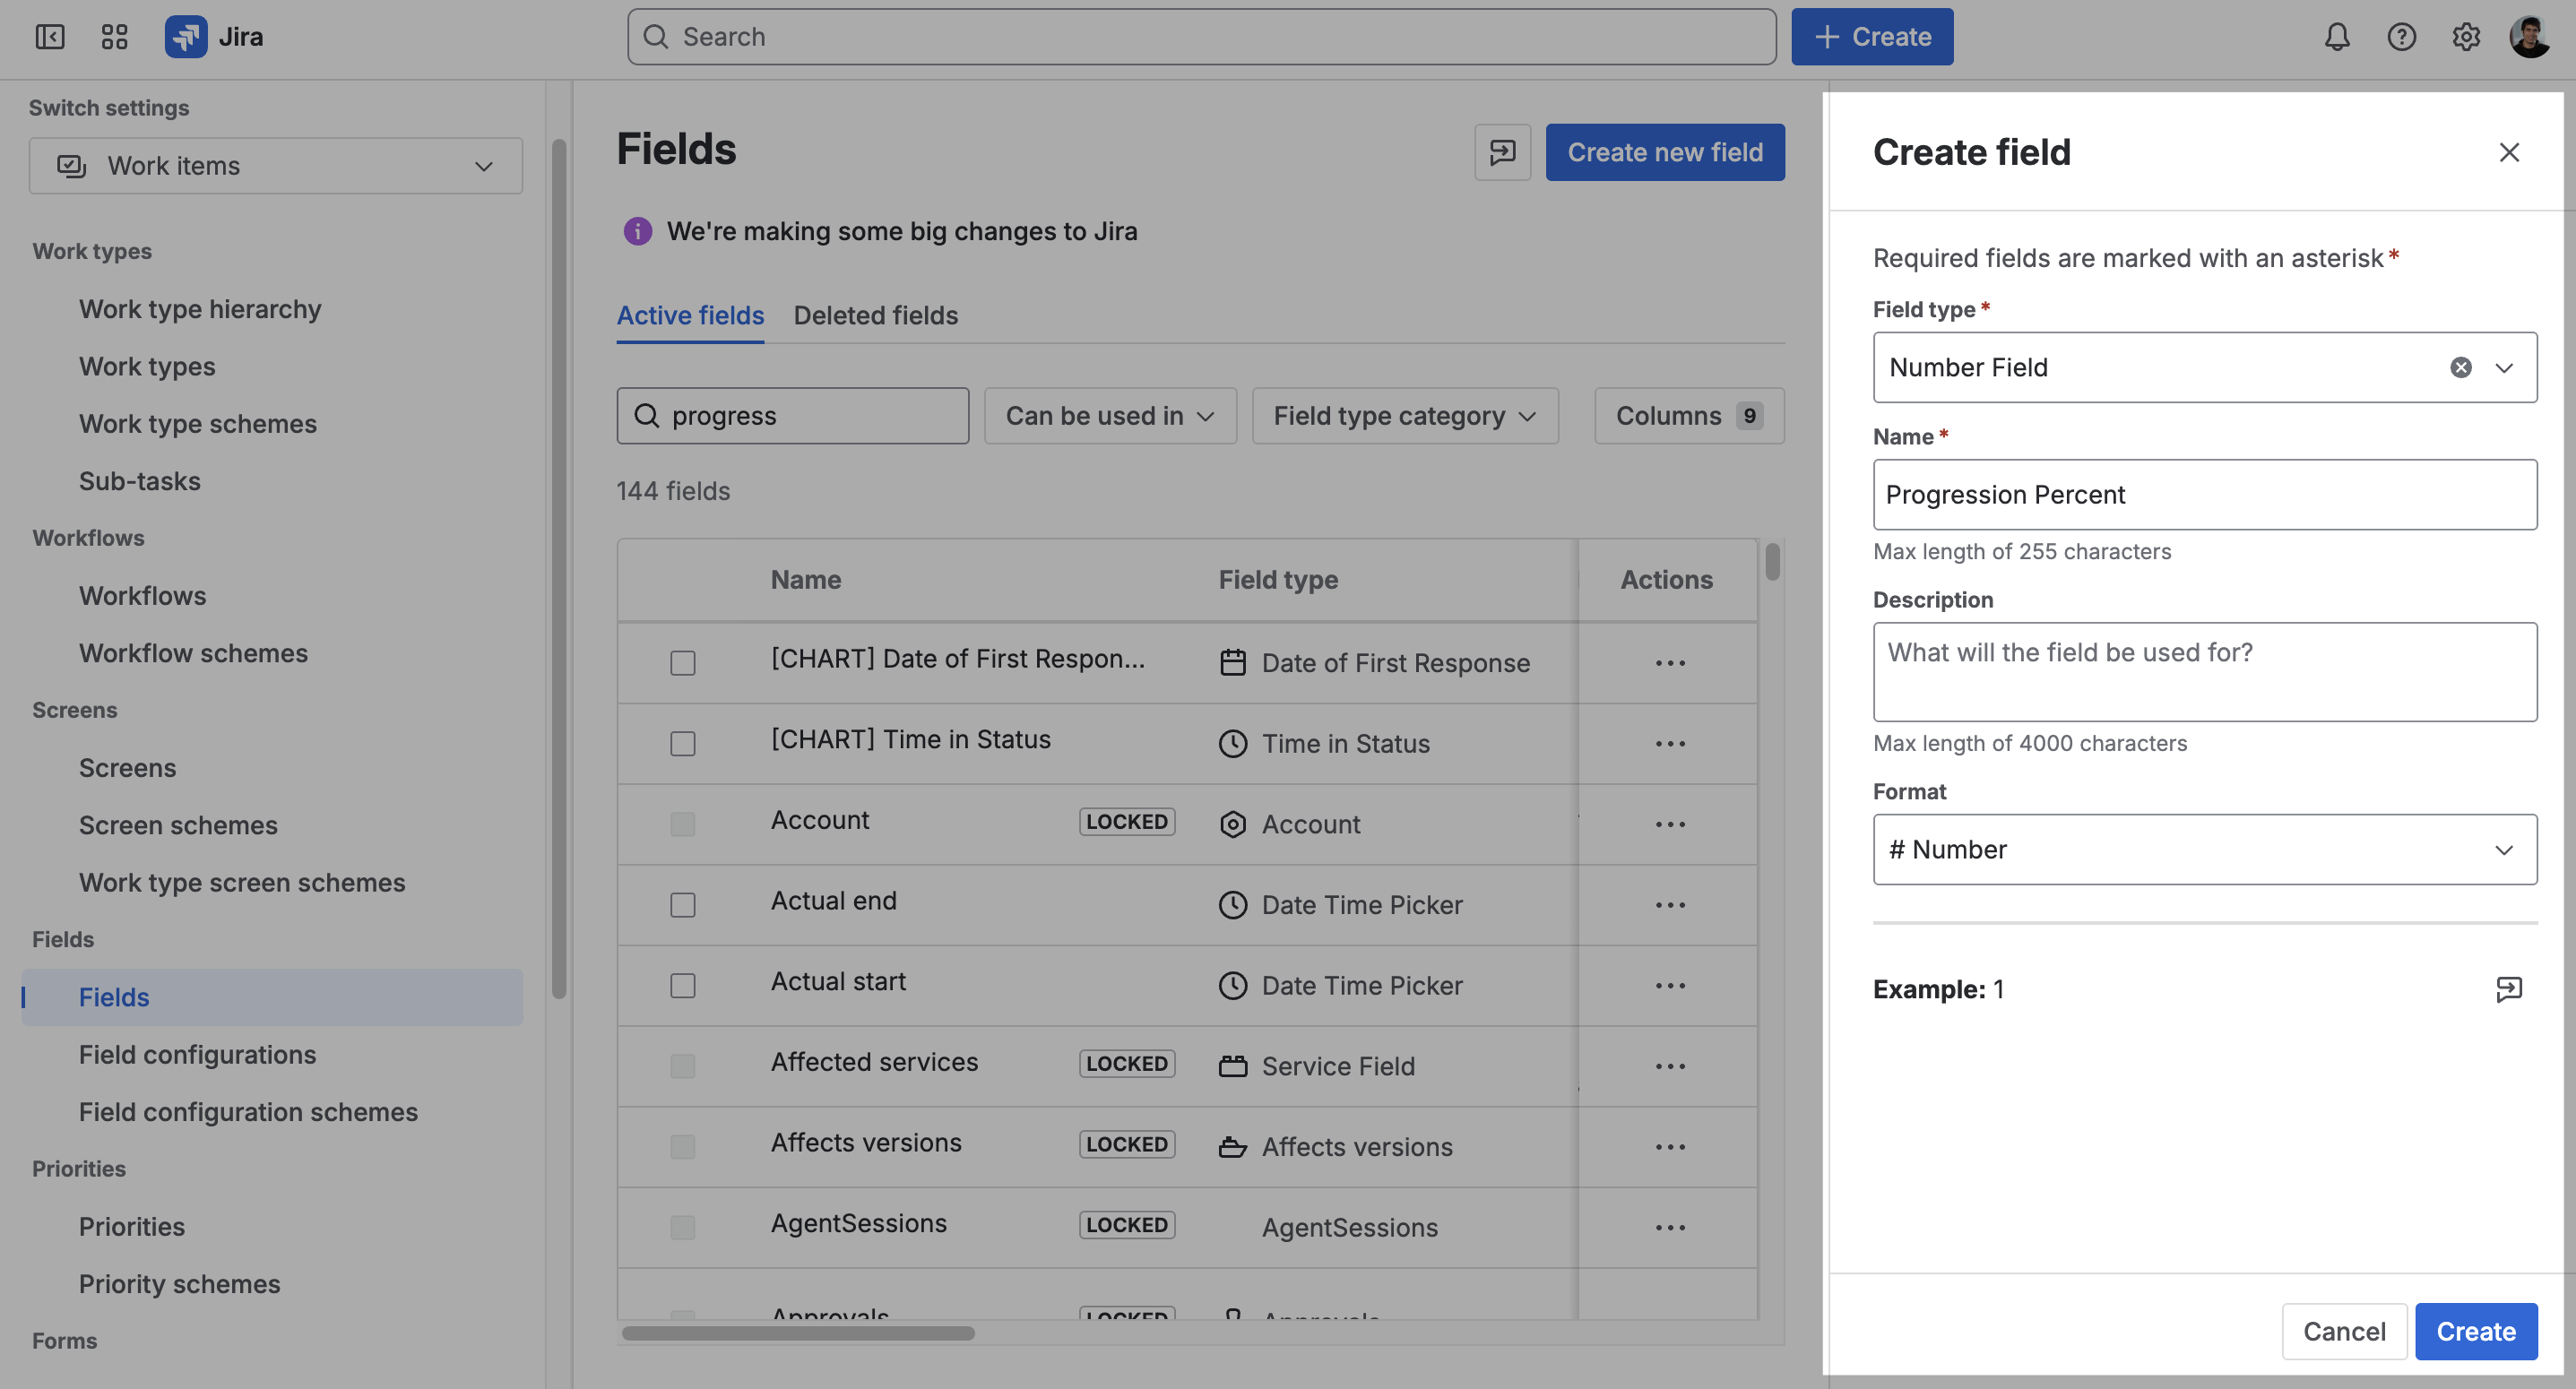
Once done, click Create.
After creating a new field, you will need to add it to Screens so you can use it in your Jira spaces.
Adding fields to Jira Screens
When adding a field to Screens, you are required to do it for 2 Jira space types: Company-managed and Team-managed.
1. For Company-managed Space
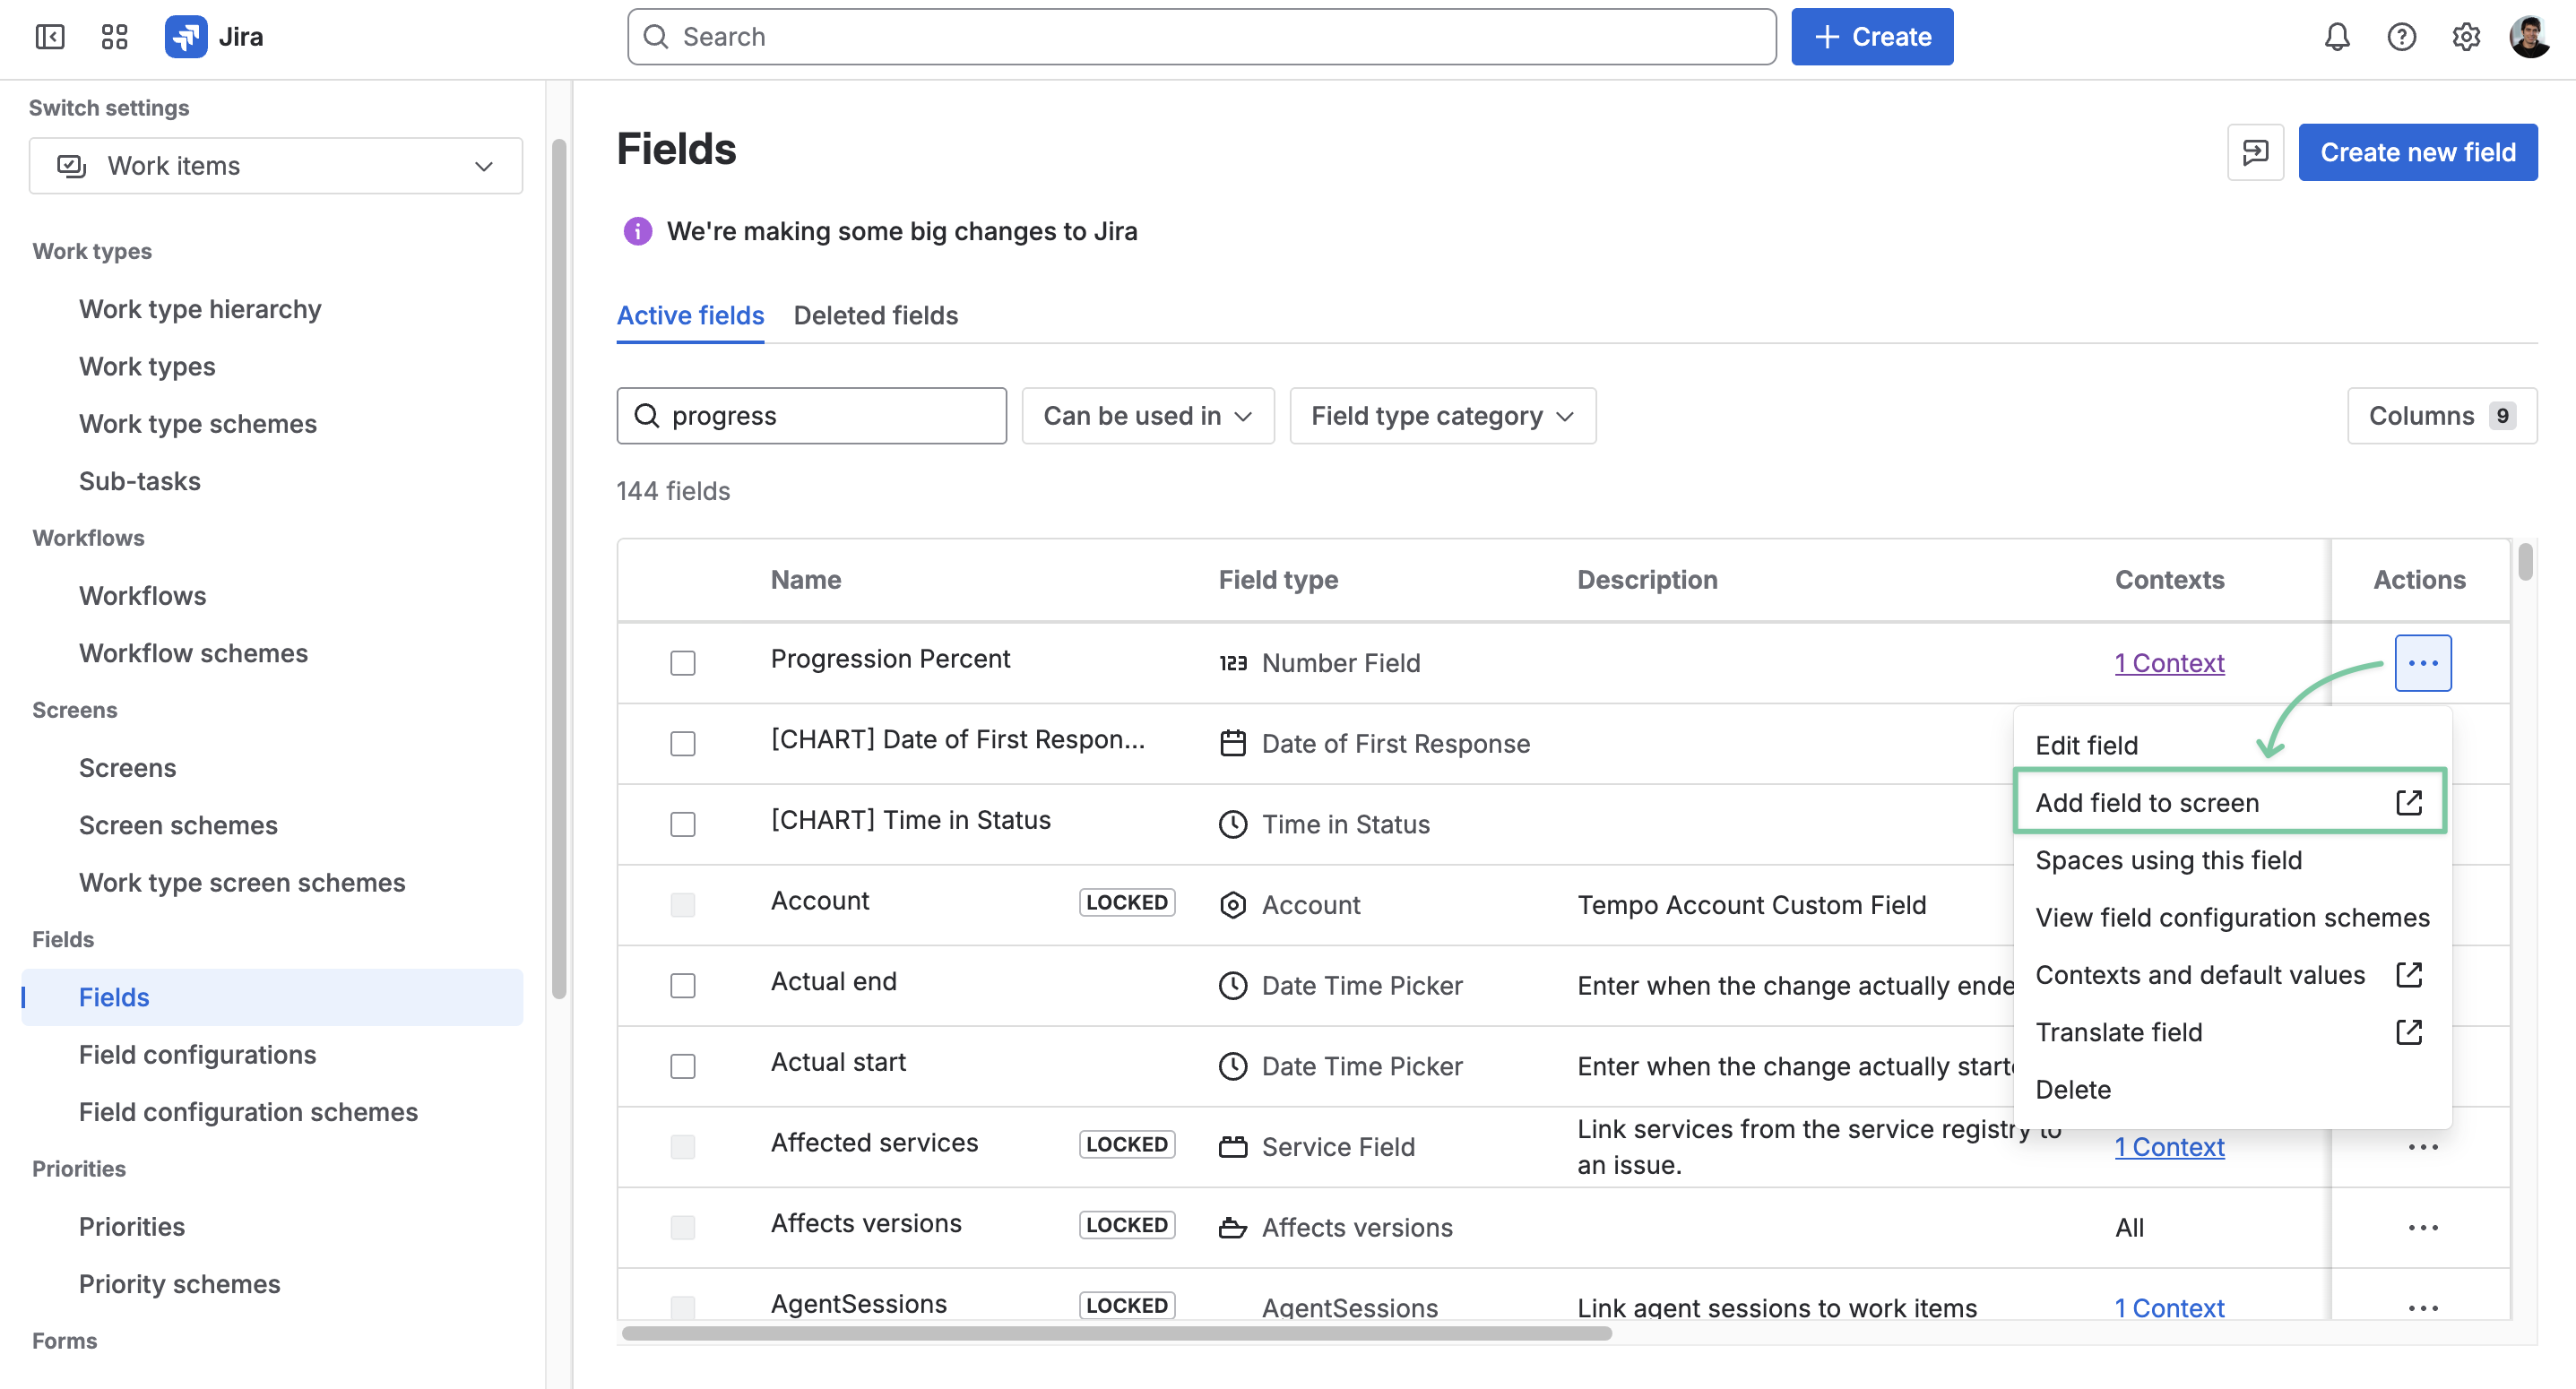
Right after creating a new field (or a specific field that you want to add in the settings: Settings -> Work items → Fields), click the ··· symbol at the end of each field for more actions and select Add field to screen.
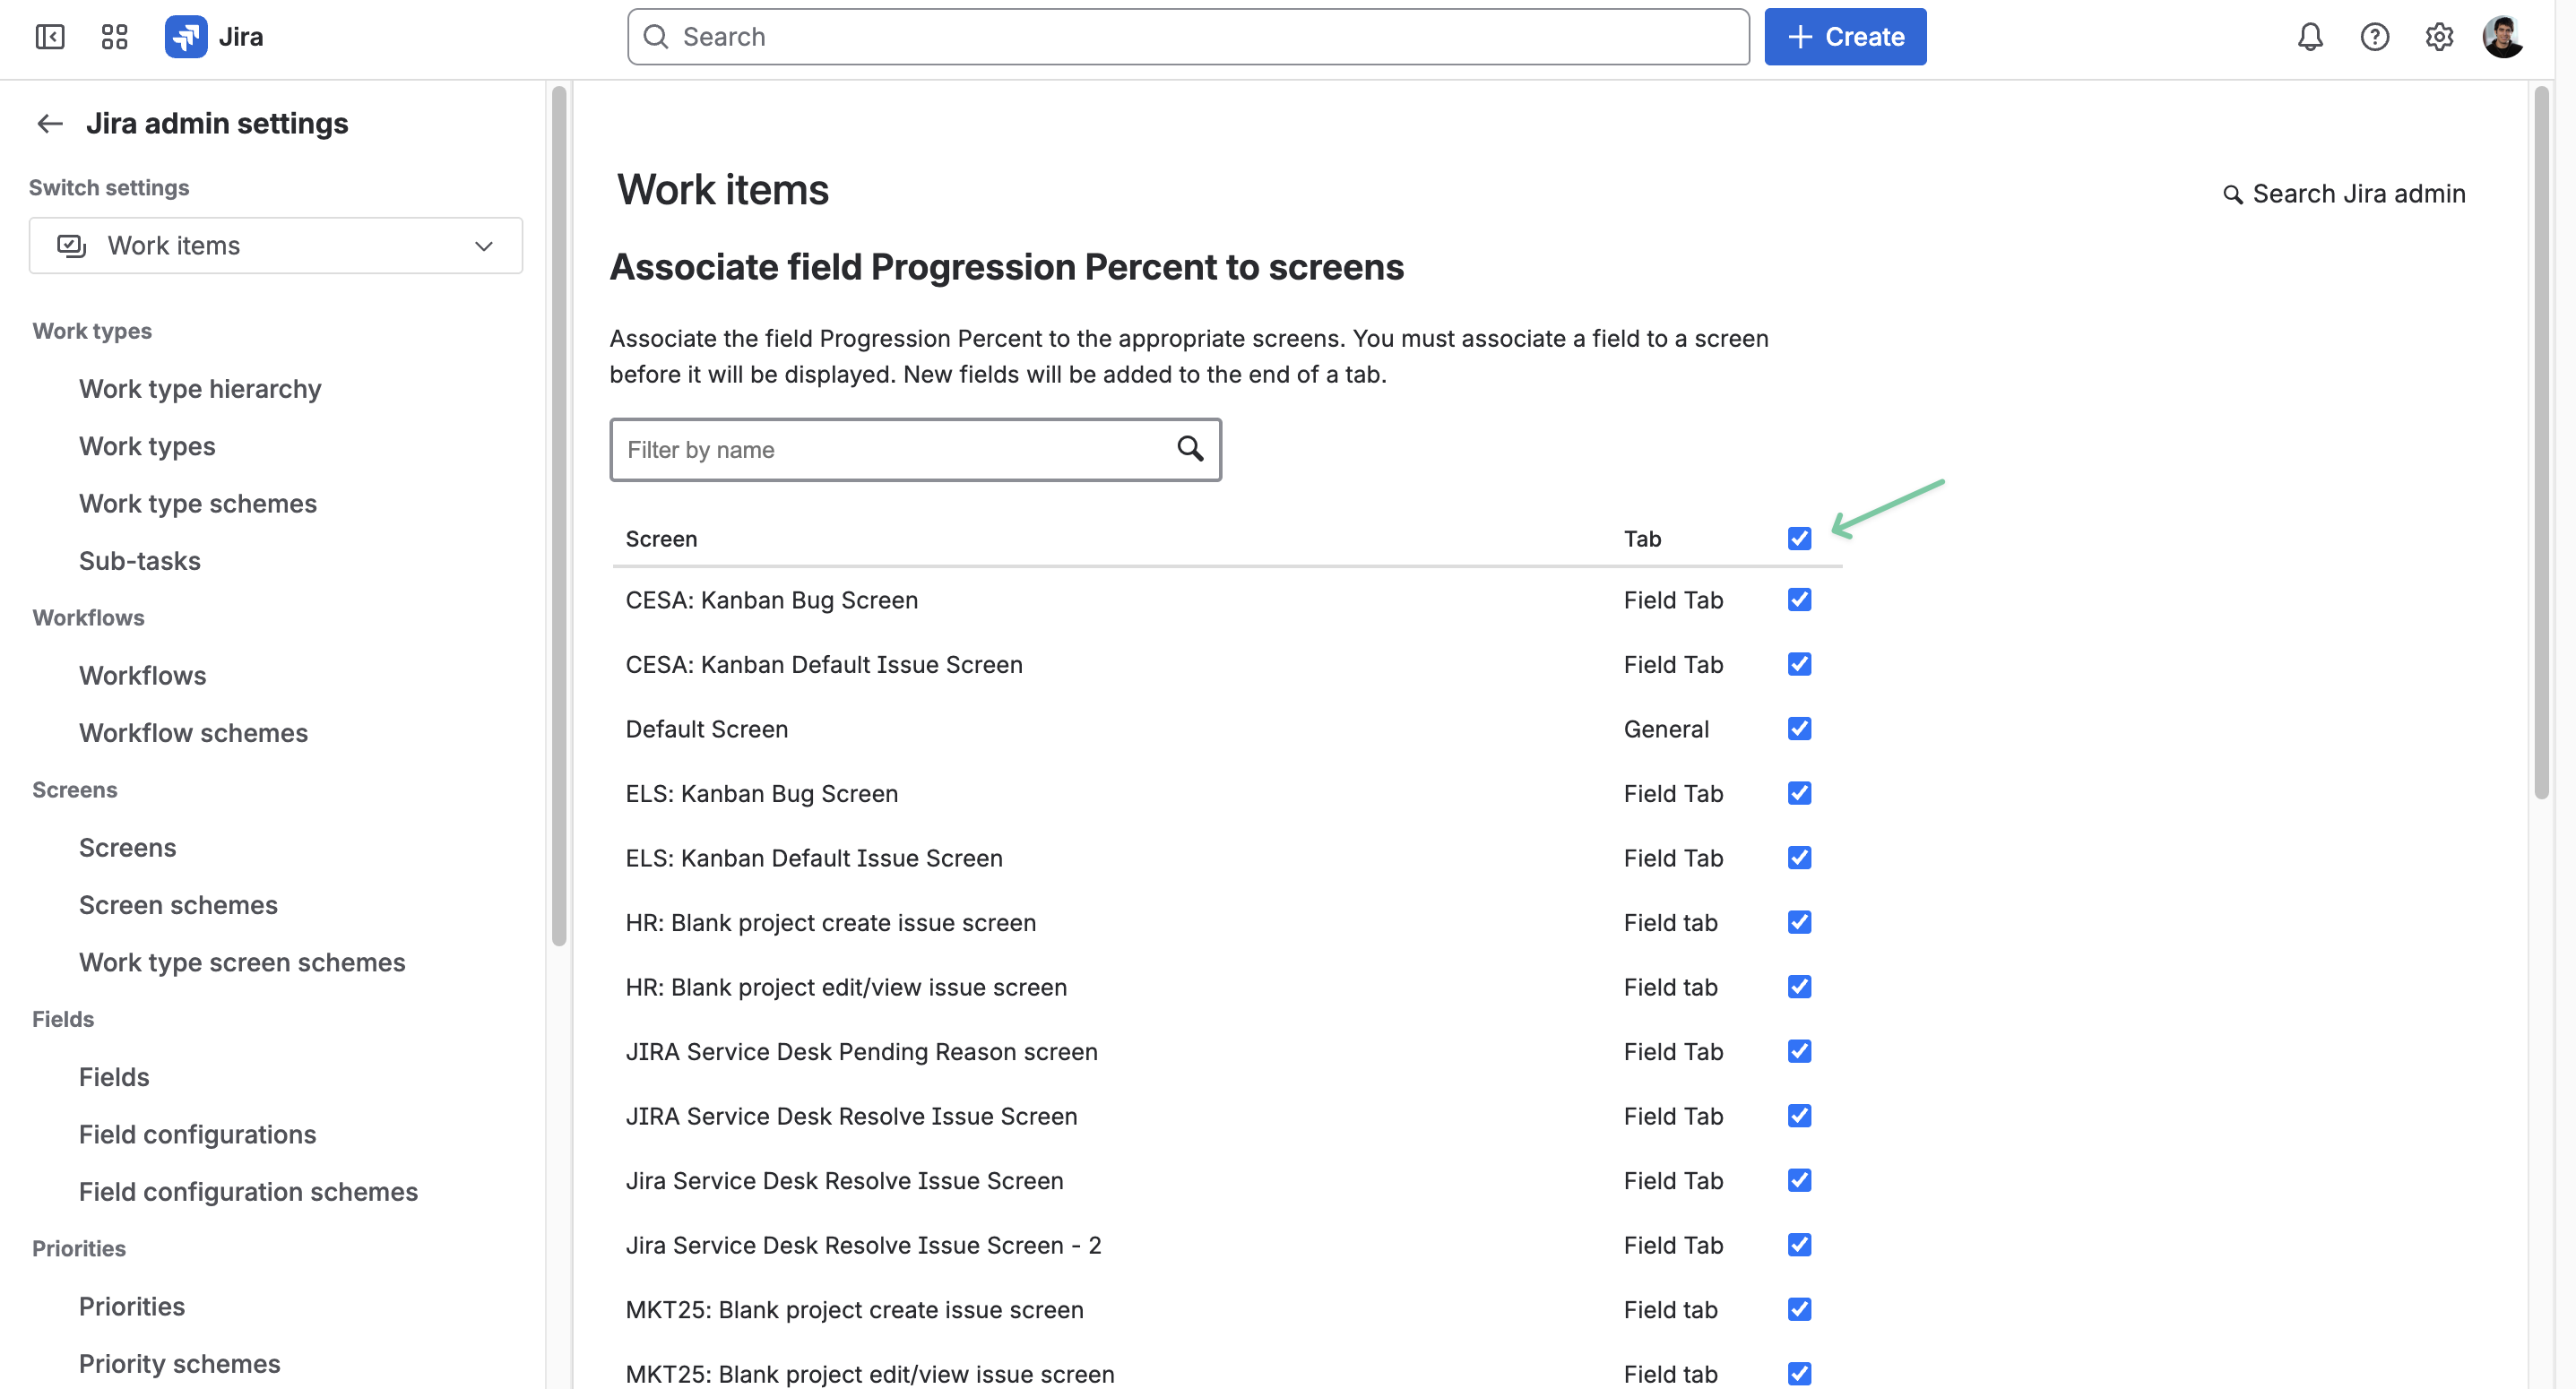
After being directed to the Work items page, you can choose to add this field to all available spaces in your Jira instance (recommended) by checking the first box. Or, you can also select to add it to only specific screens by checking individual boxes.
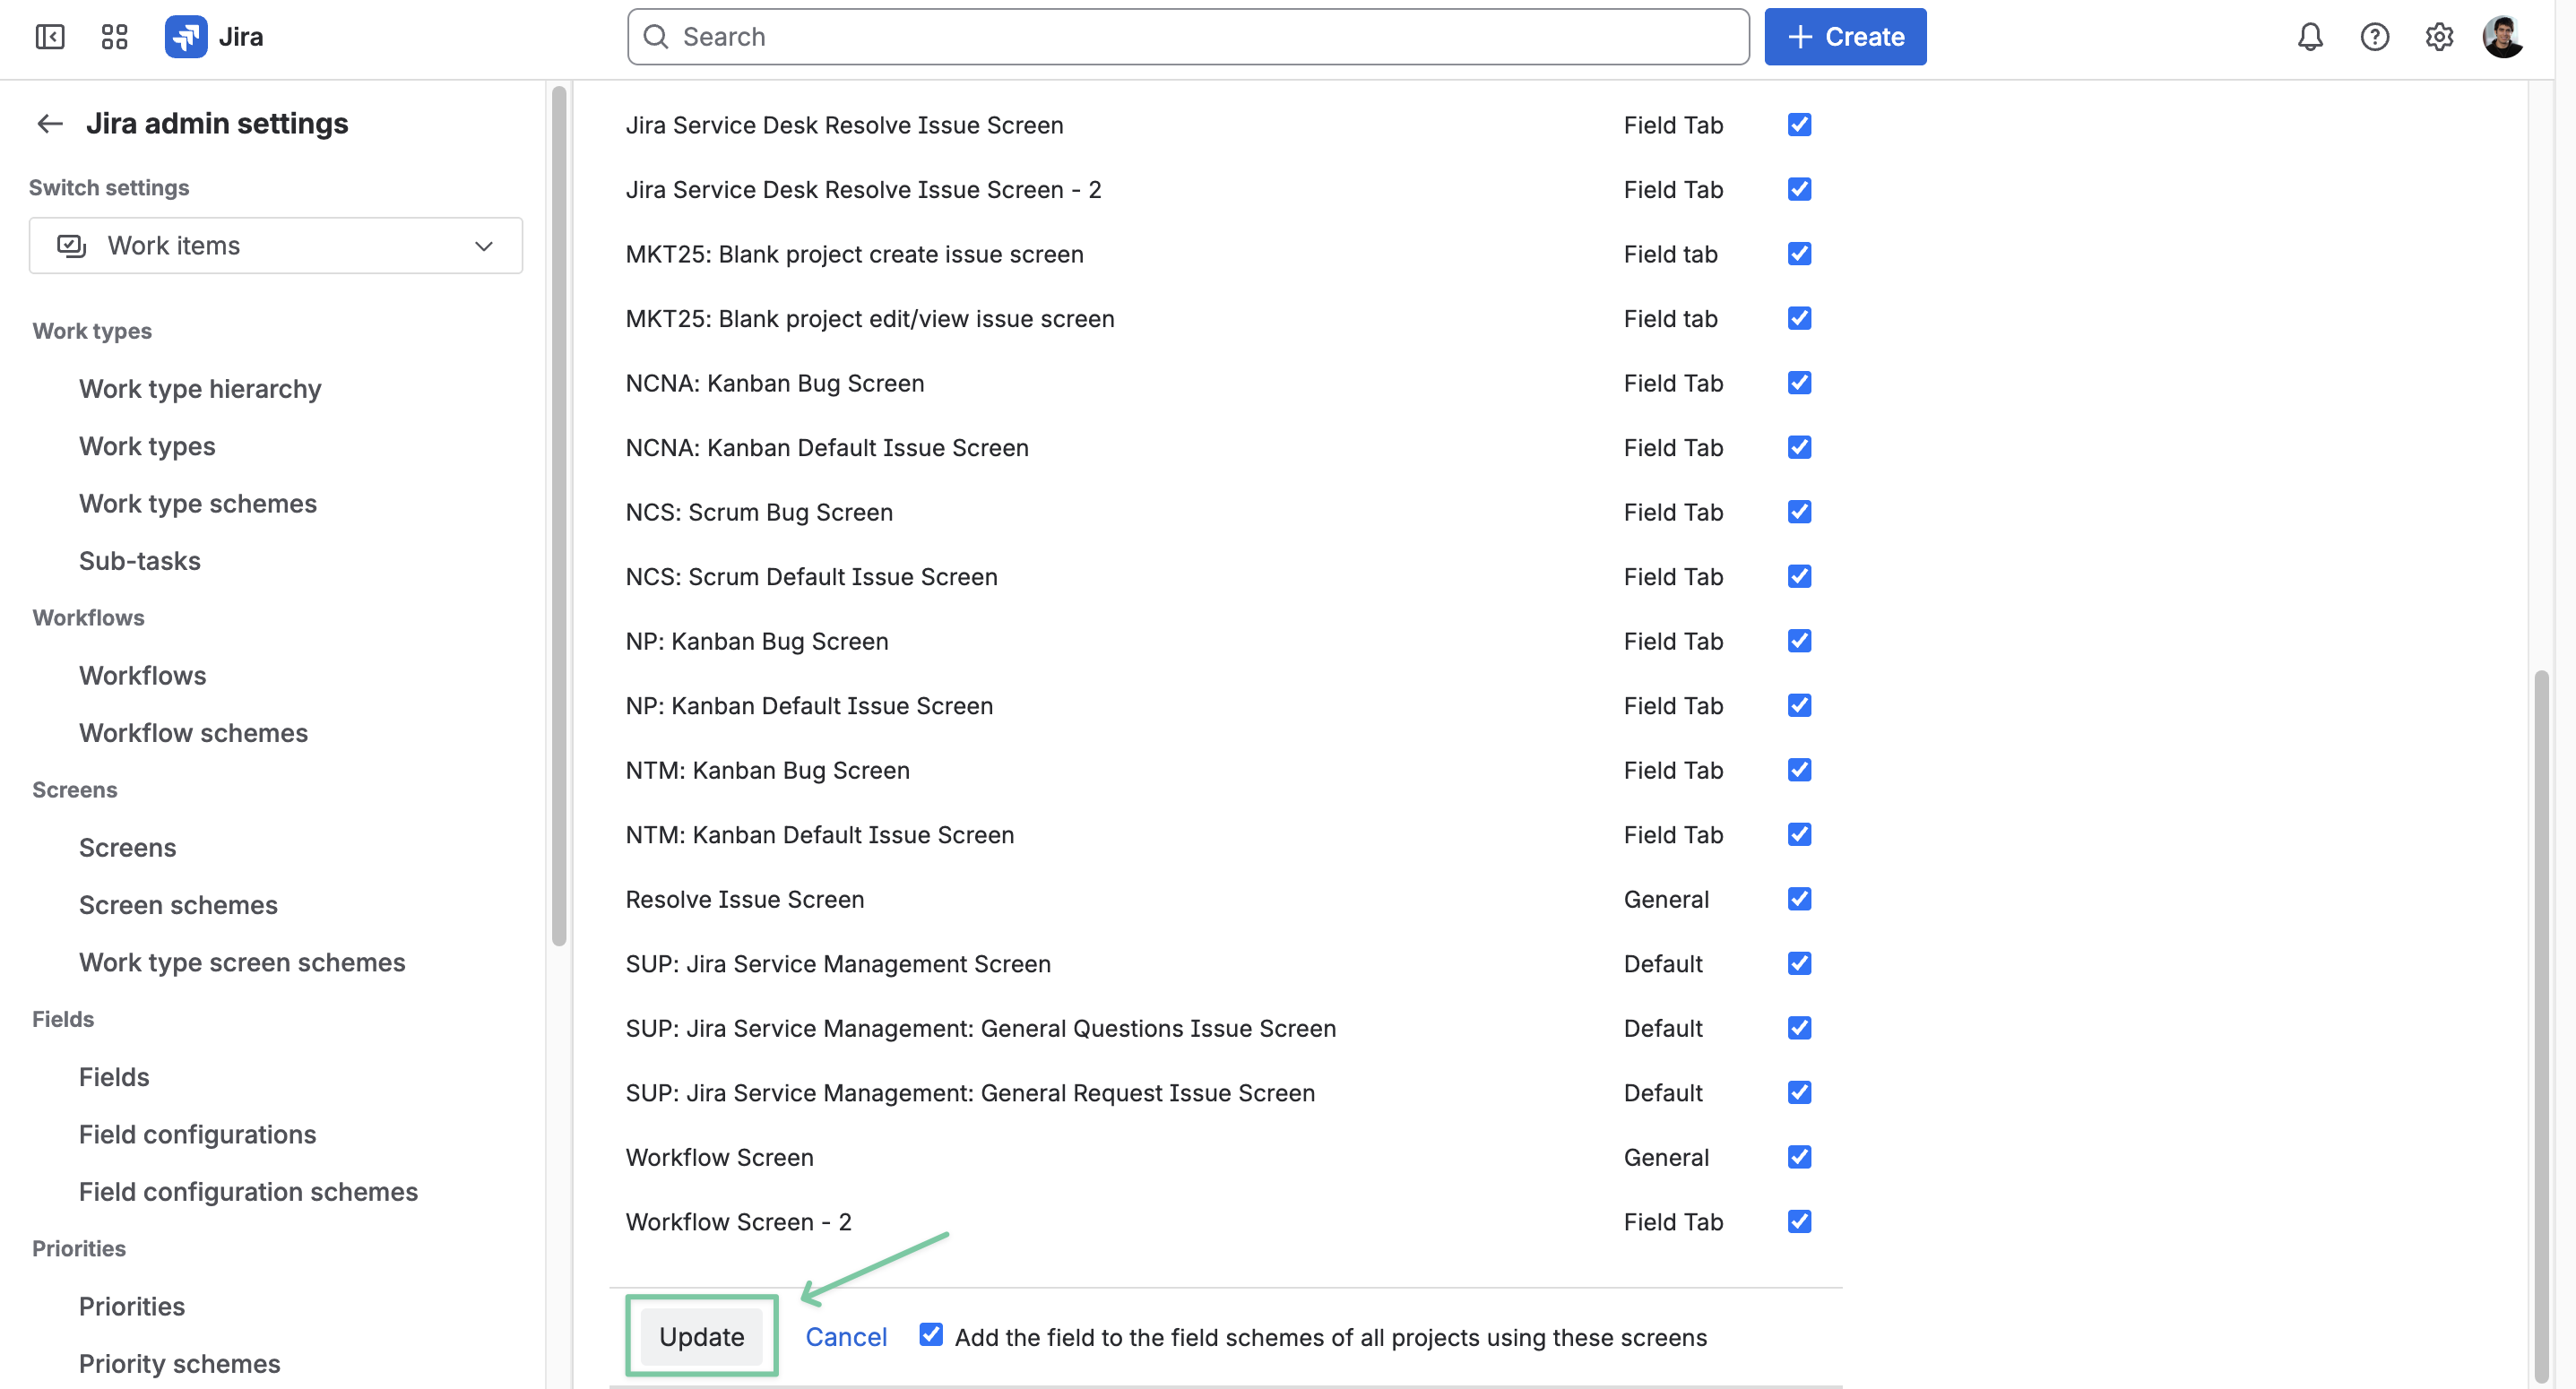
Once done, scroll down to the end of the page and click Update.
TIP
You can double-check to see if this field has been added to your Company-managed space.
-
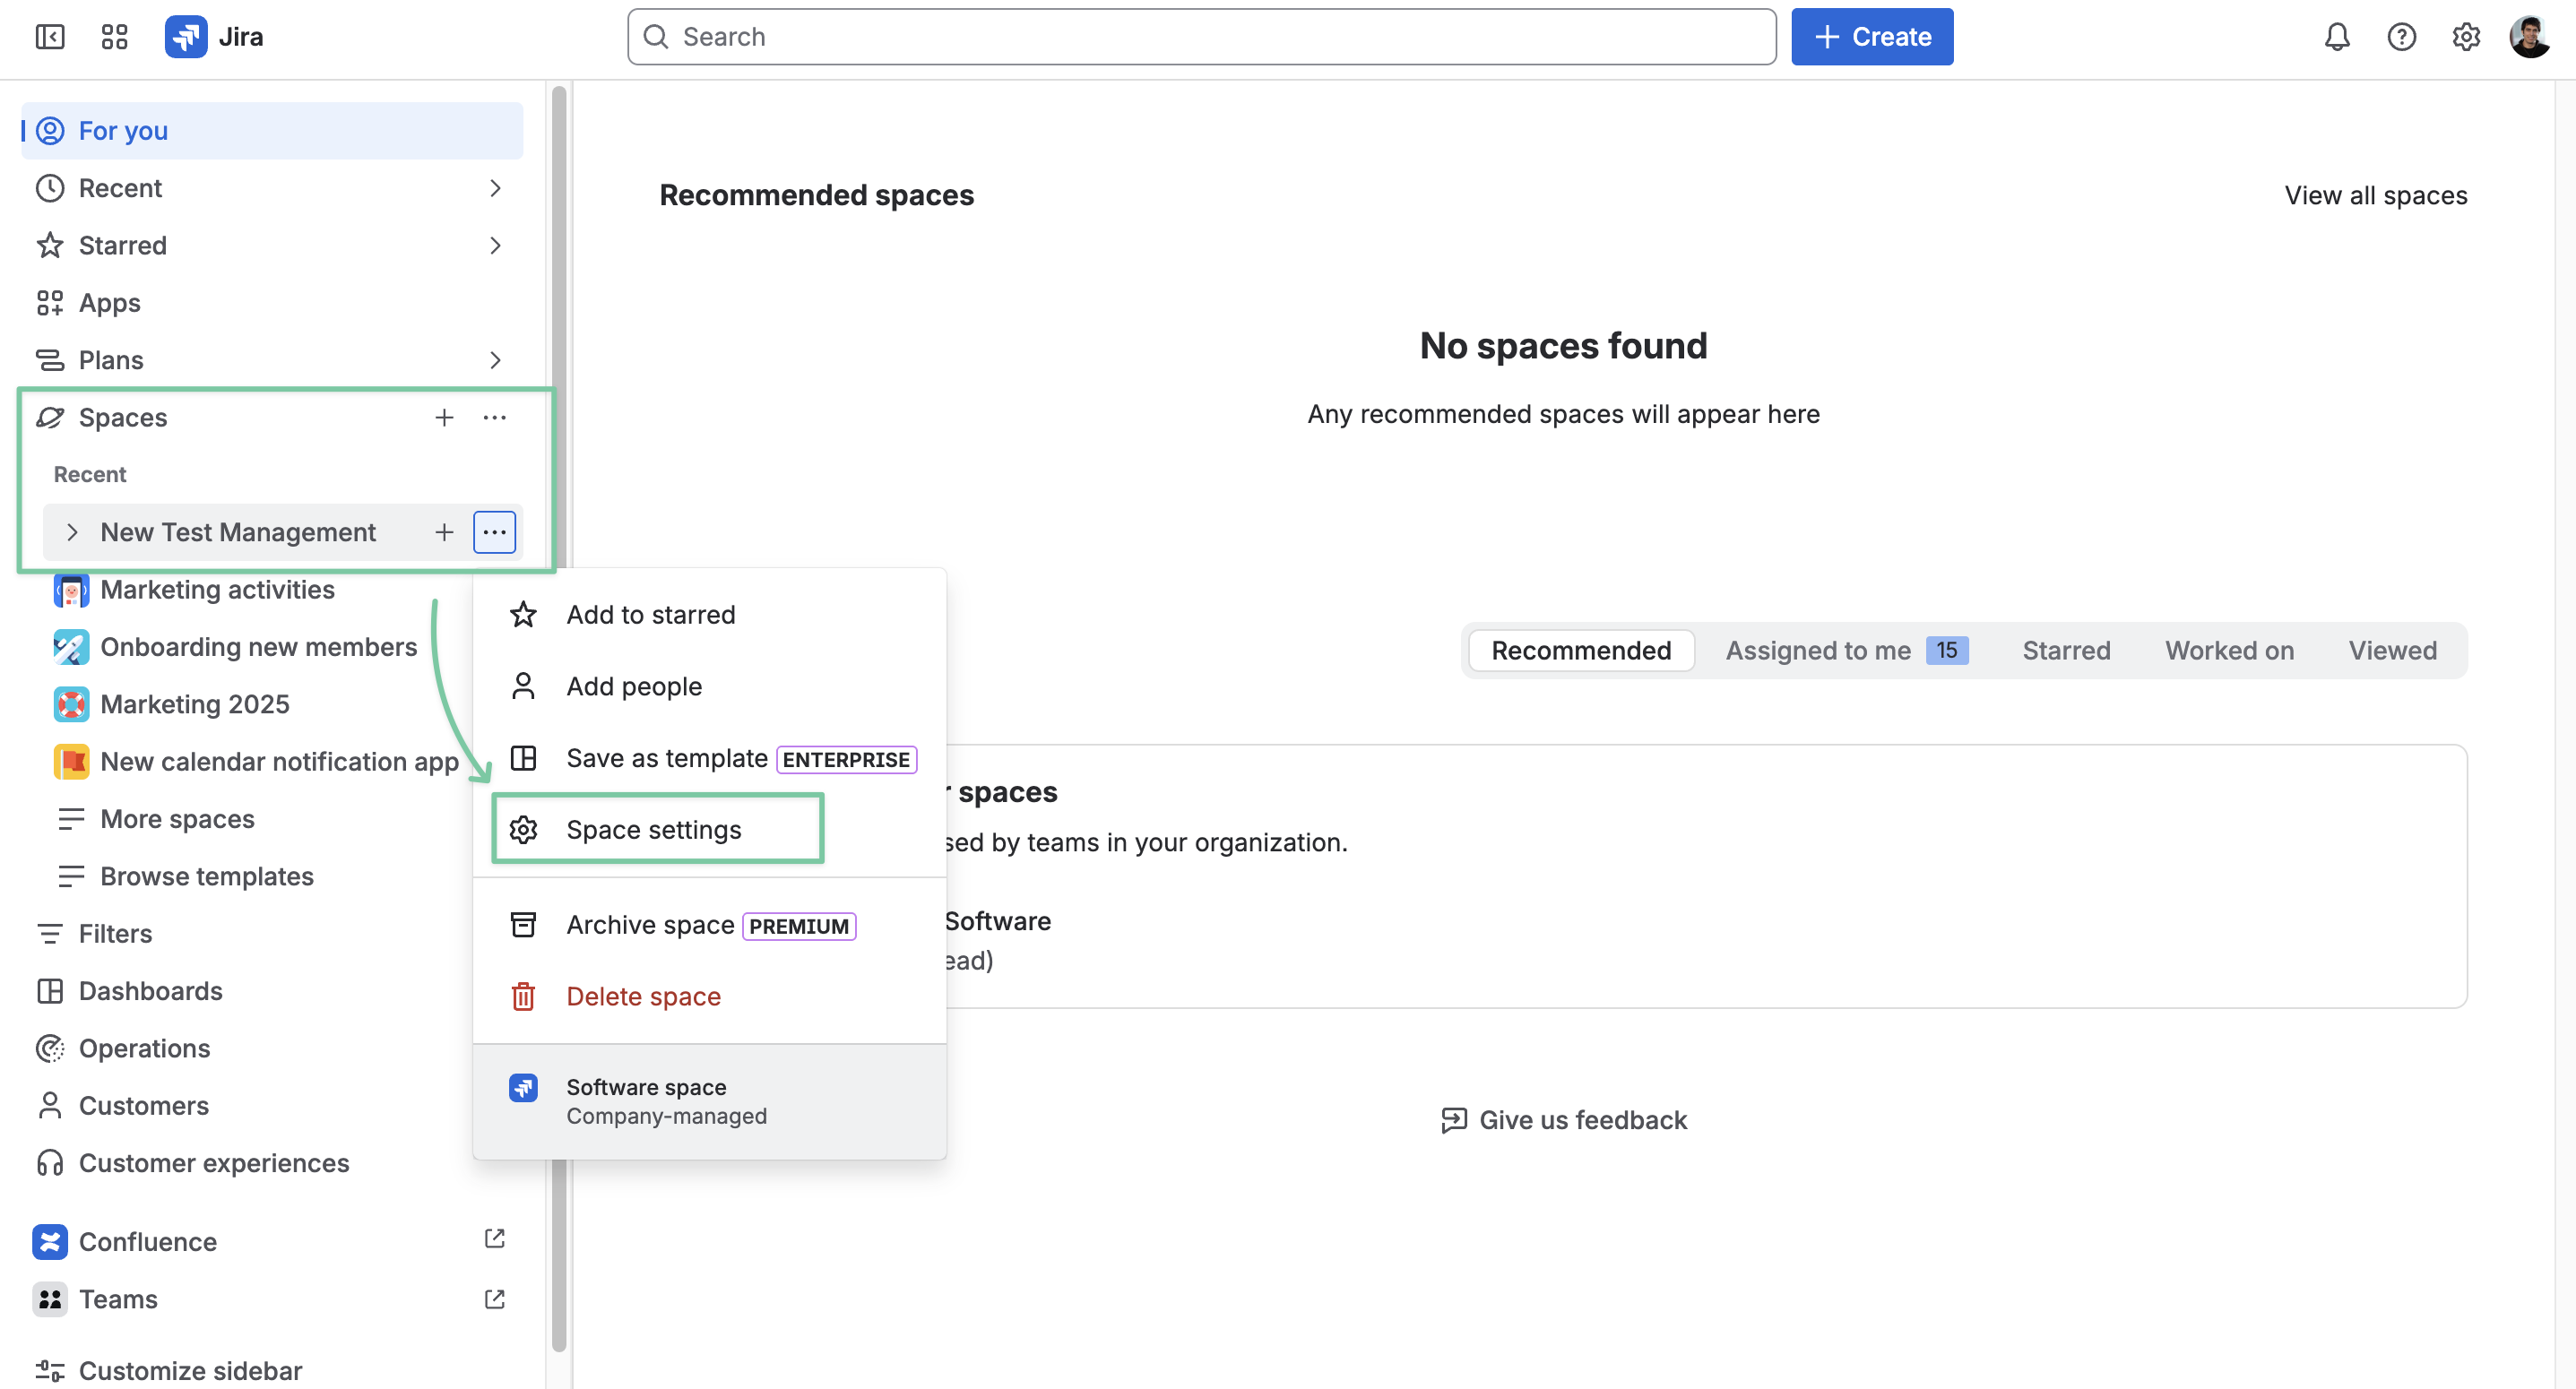
From the spaces dropdown menu on the left column, locate your Company-managed space and click ··· for more actions.
-
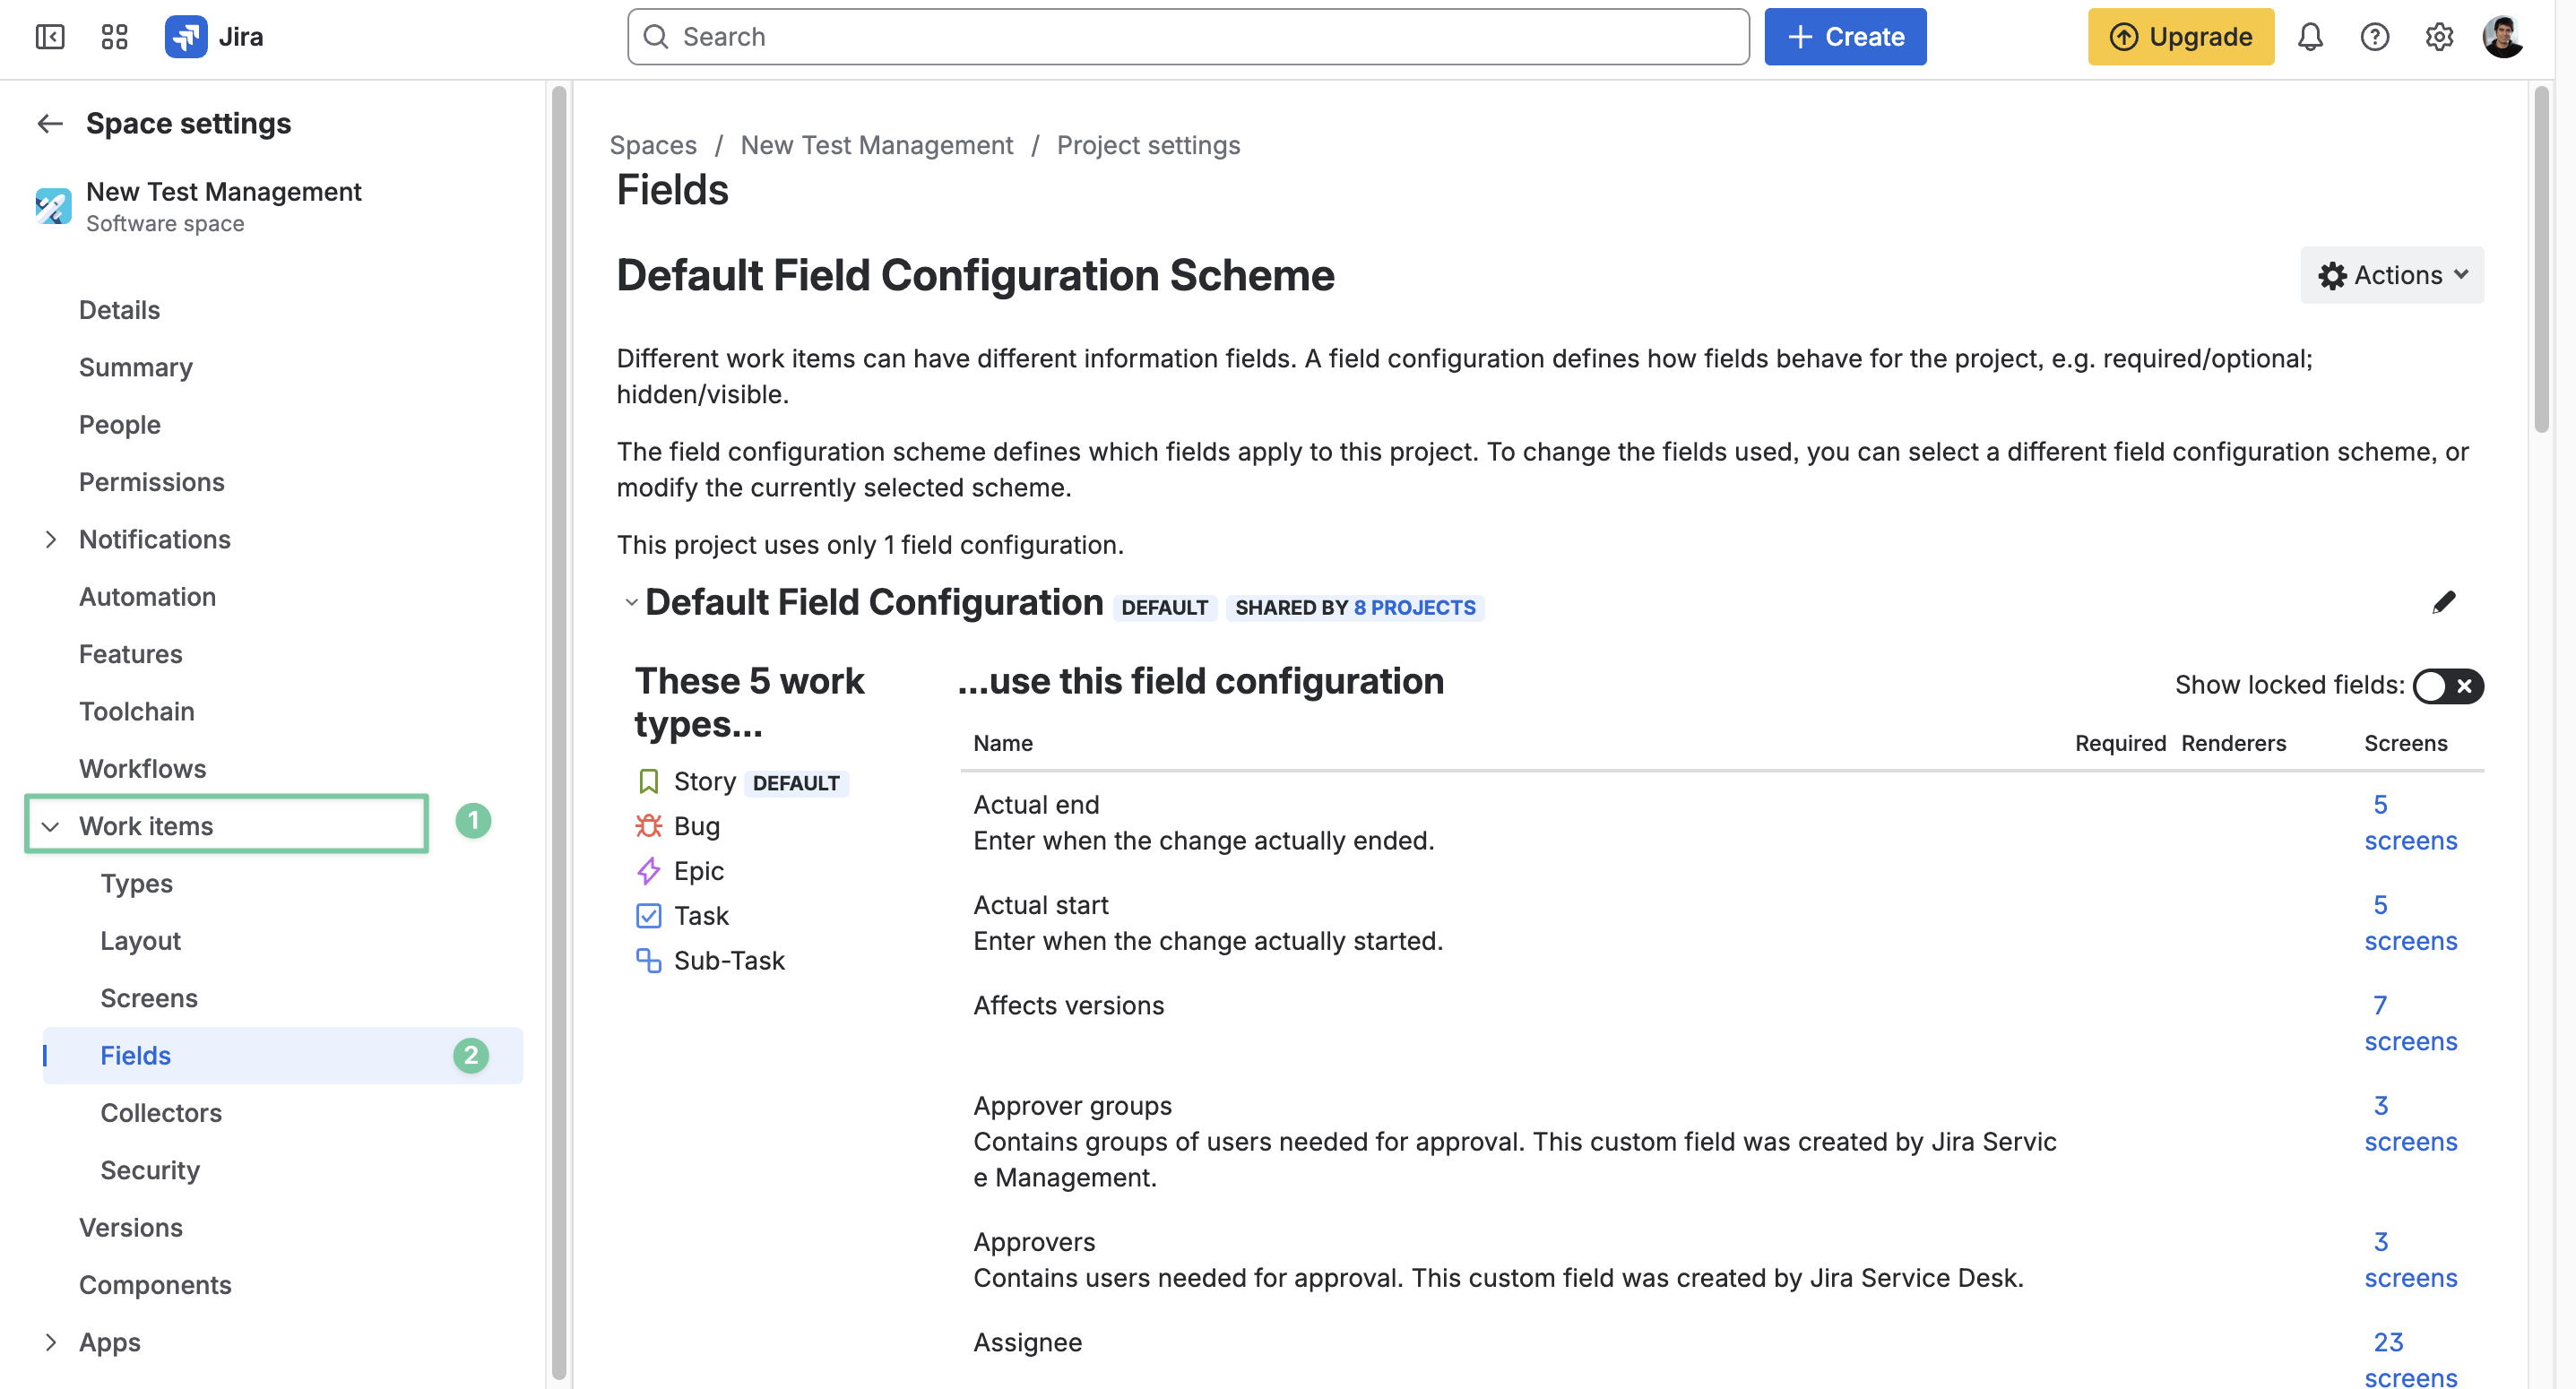
Click Space settings, then choose Work items and select Fields.
-
Then, scroll down, and you should find the field that you have just added.
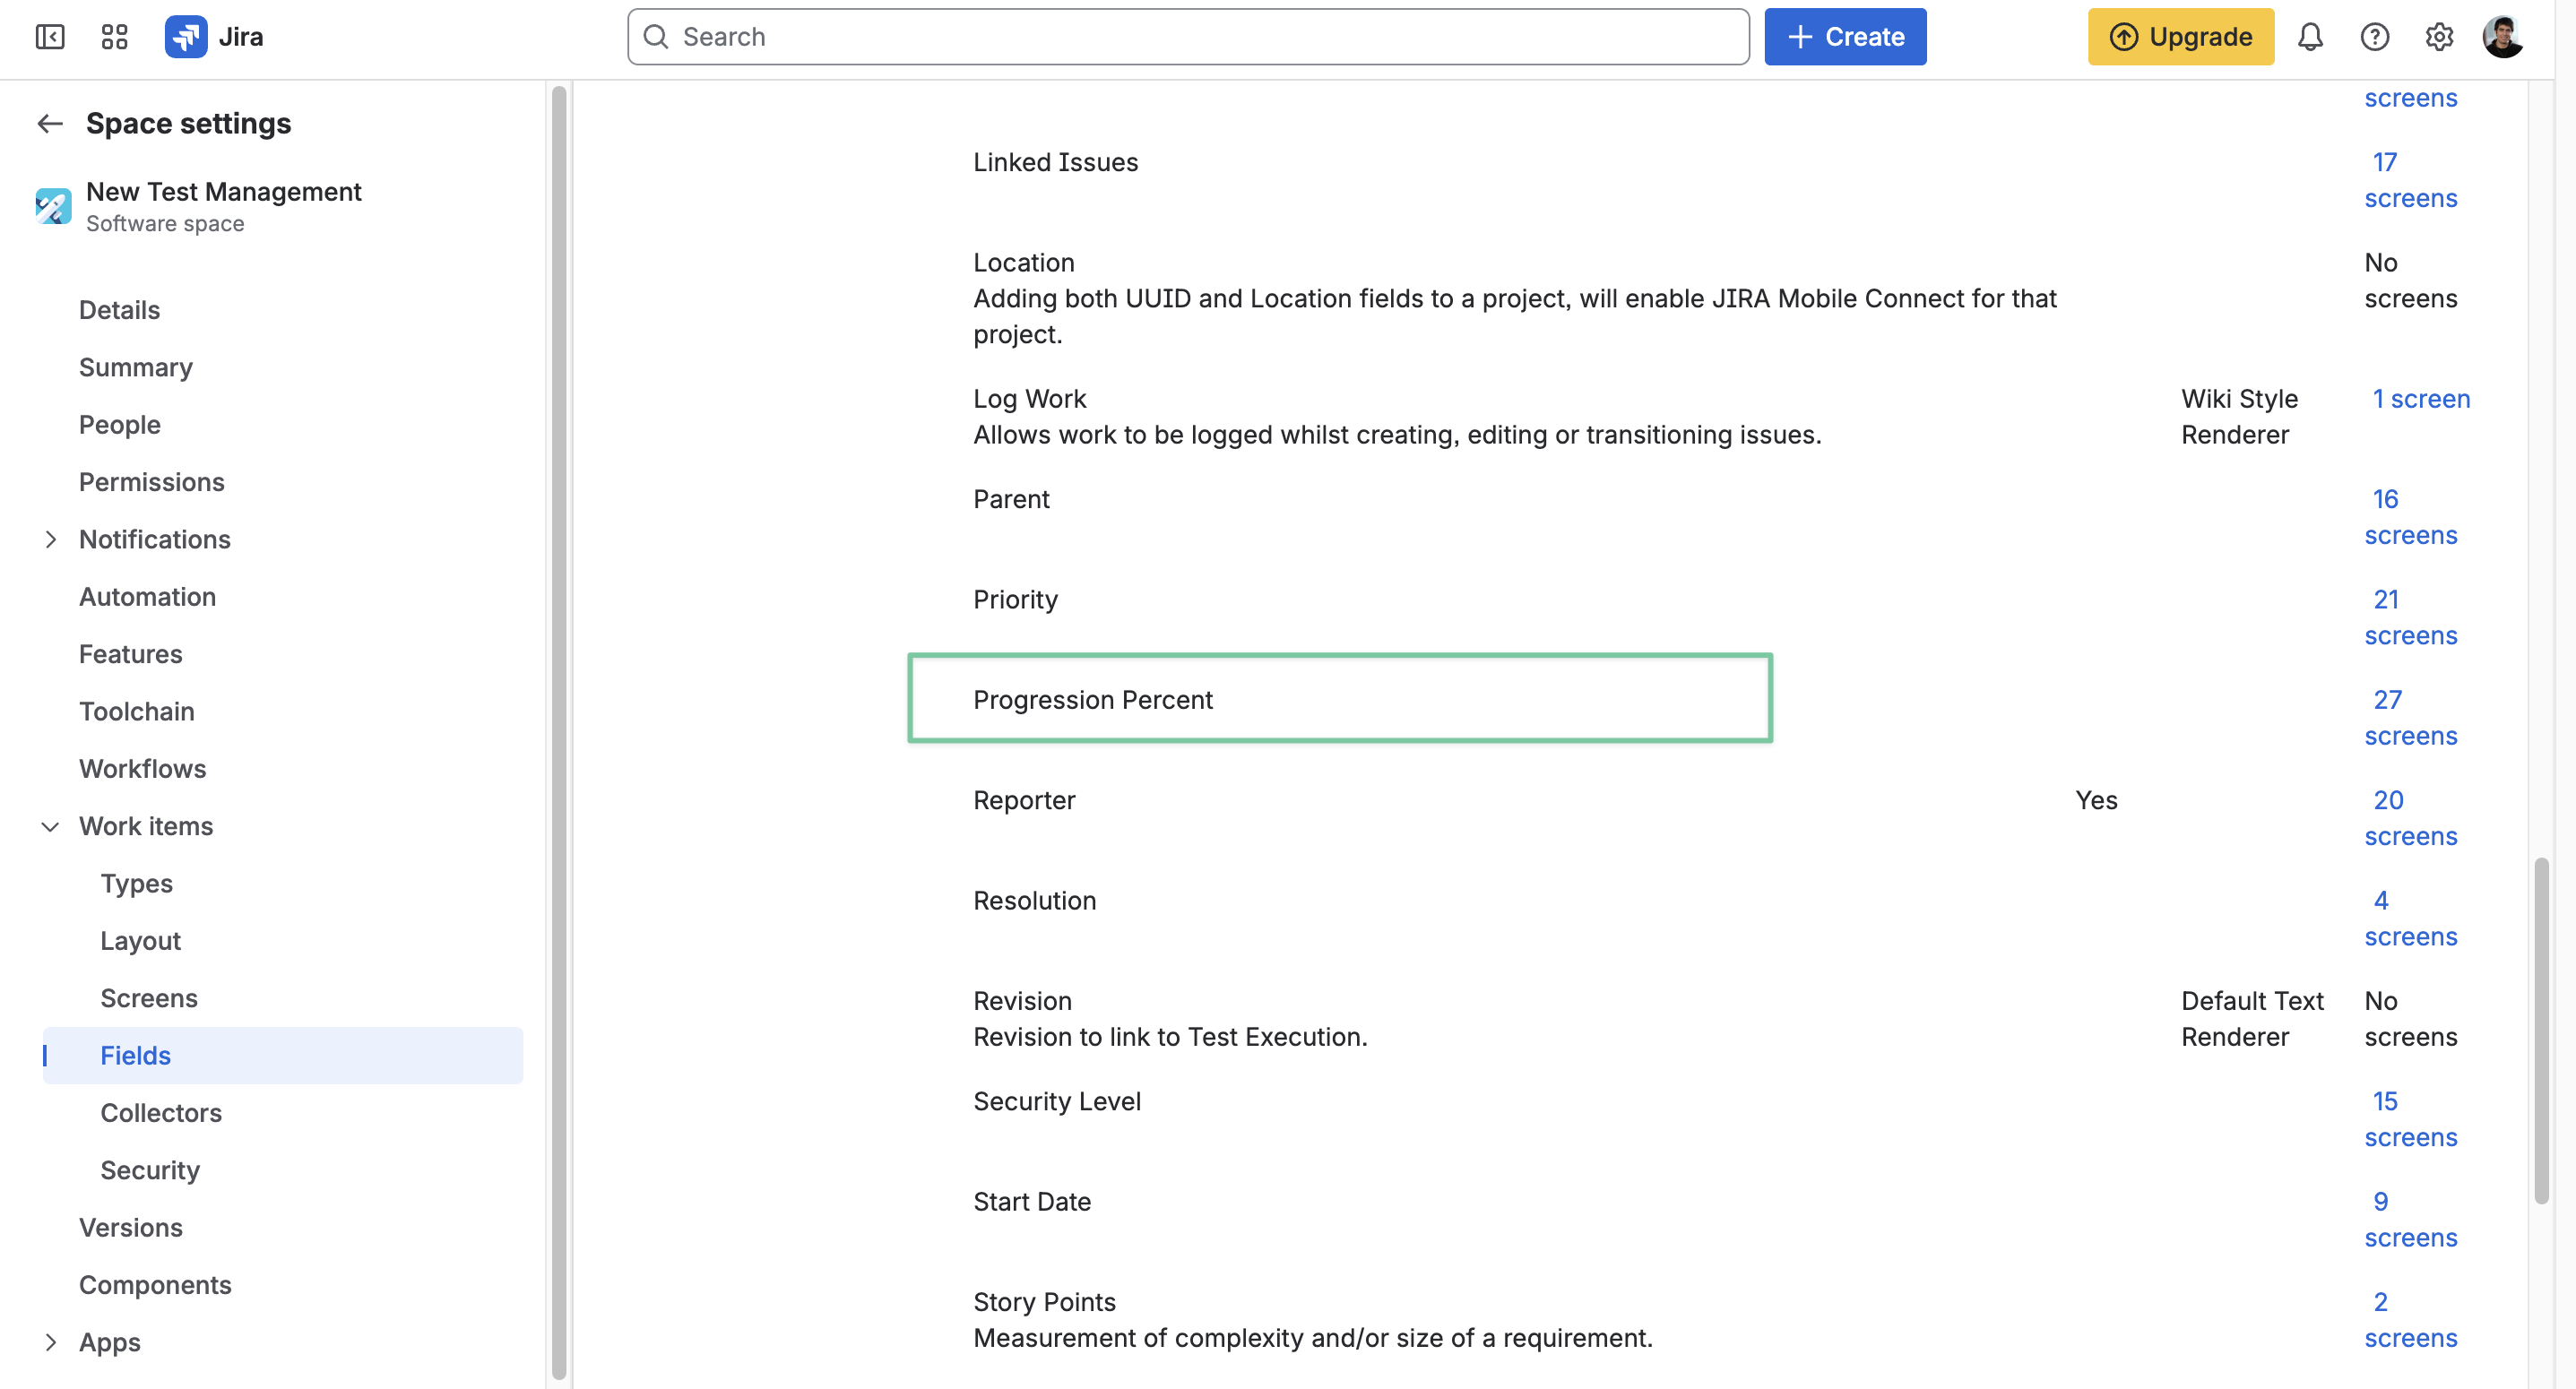
2. For Team-managed Space
To add a field to Team-managed spaces, it requires one additional step for each space in your Jira instance.
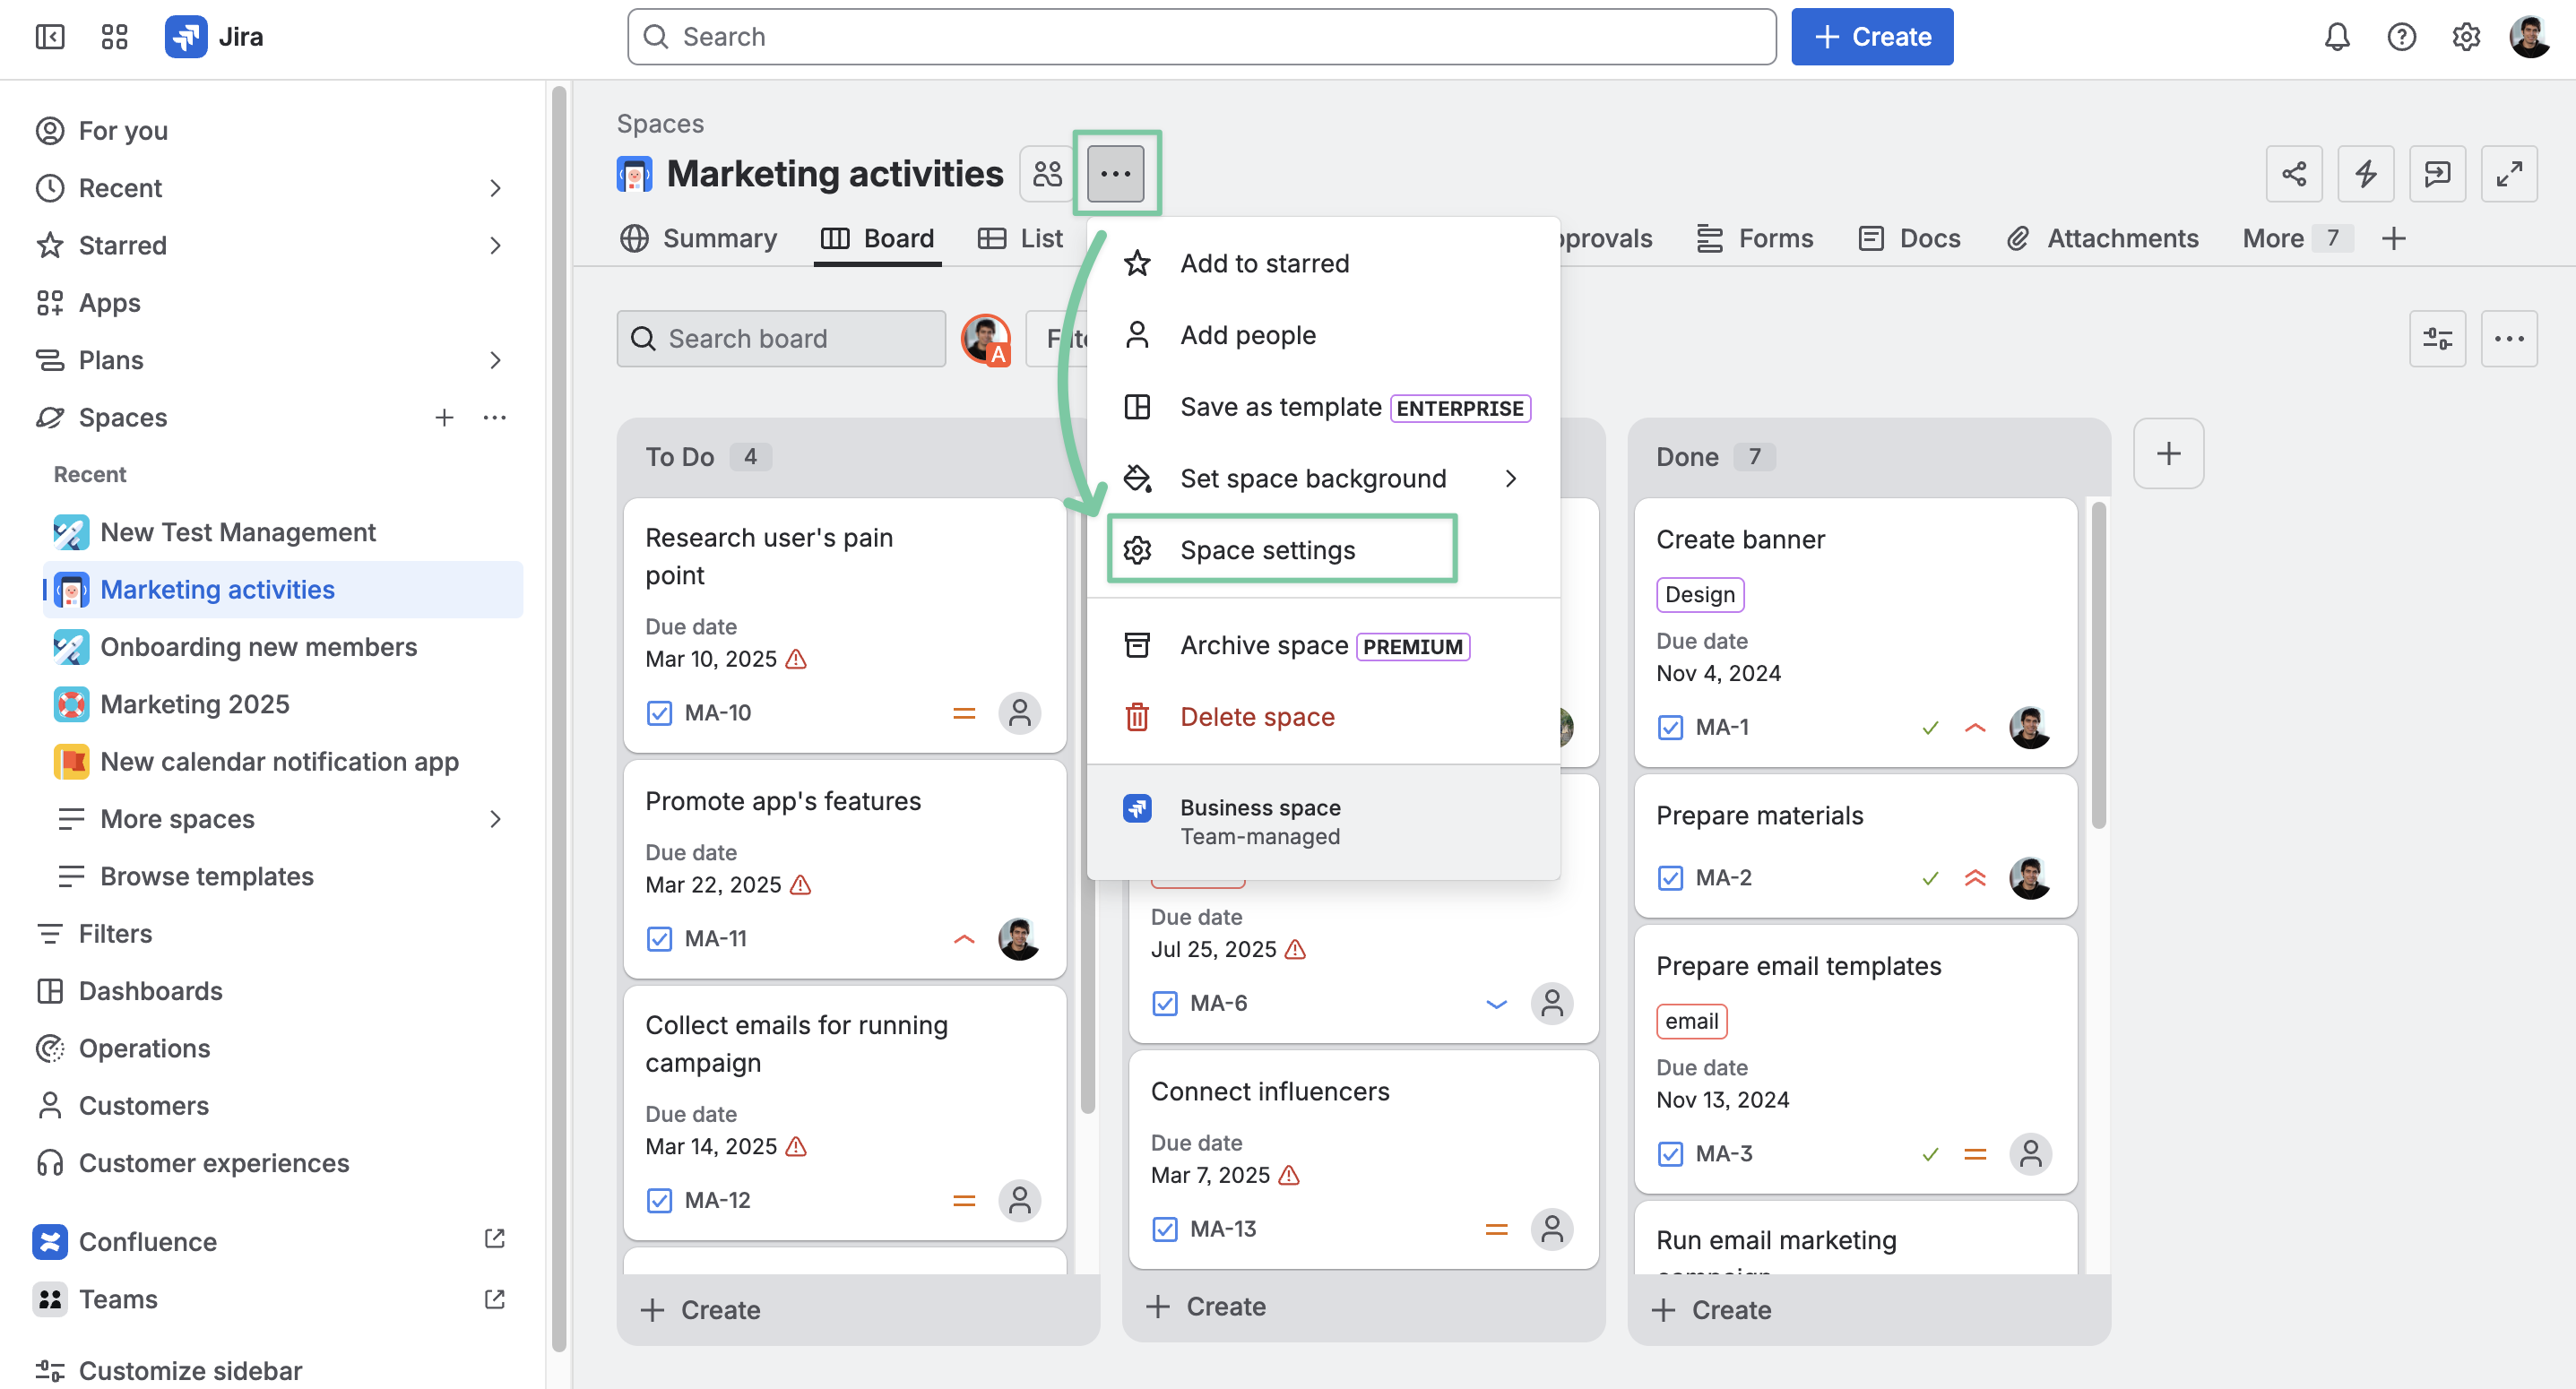
In your Team-managed space name on the header, click ··· for more actions and choose Space settings.
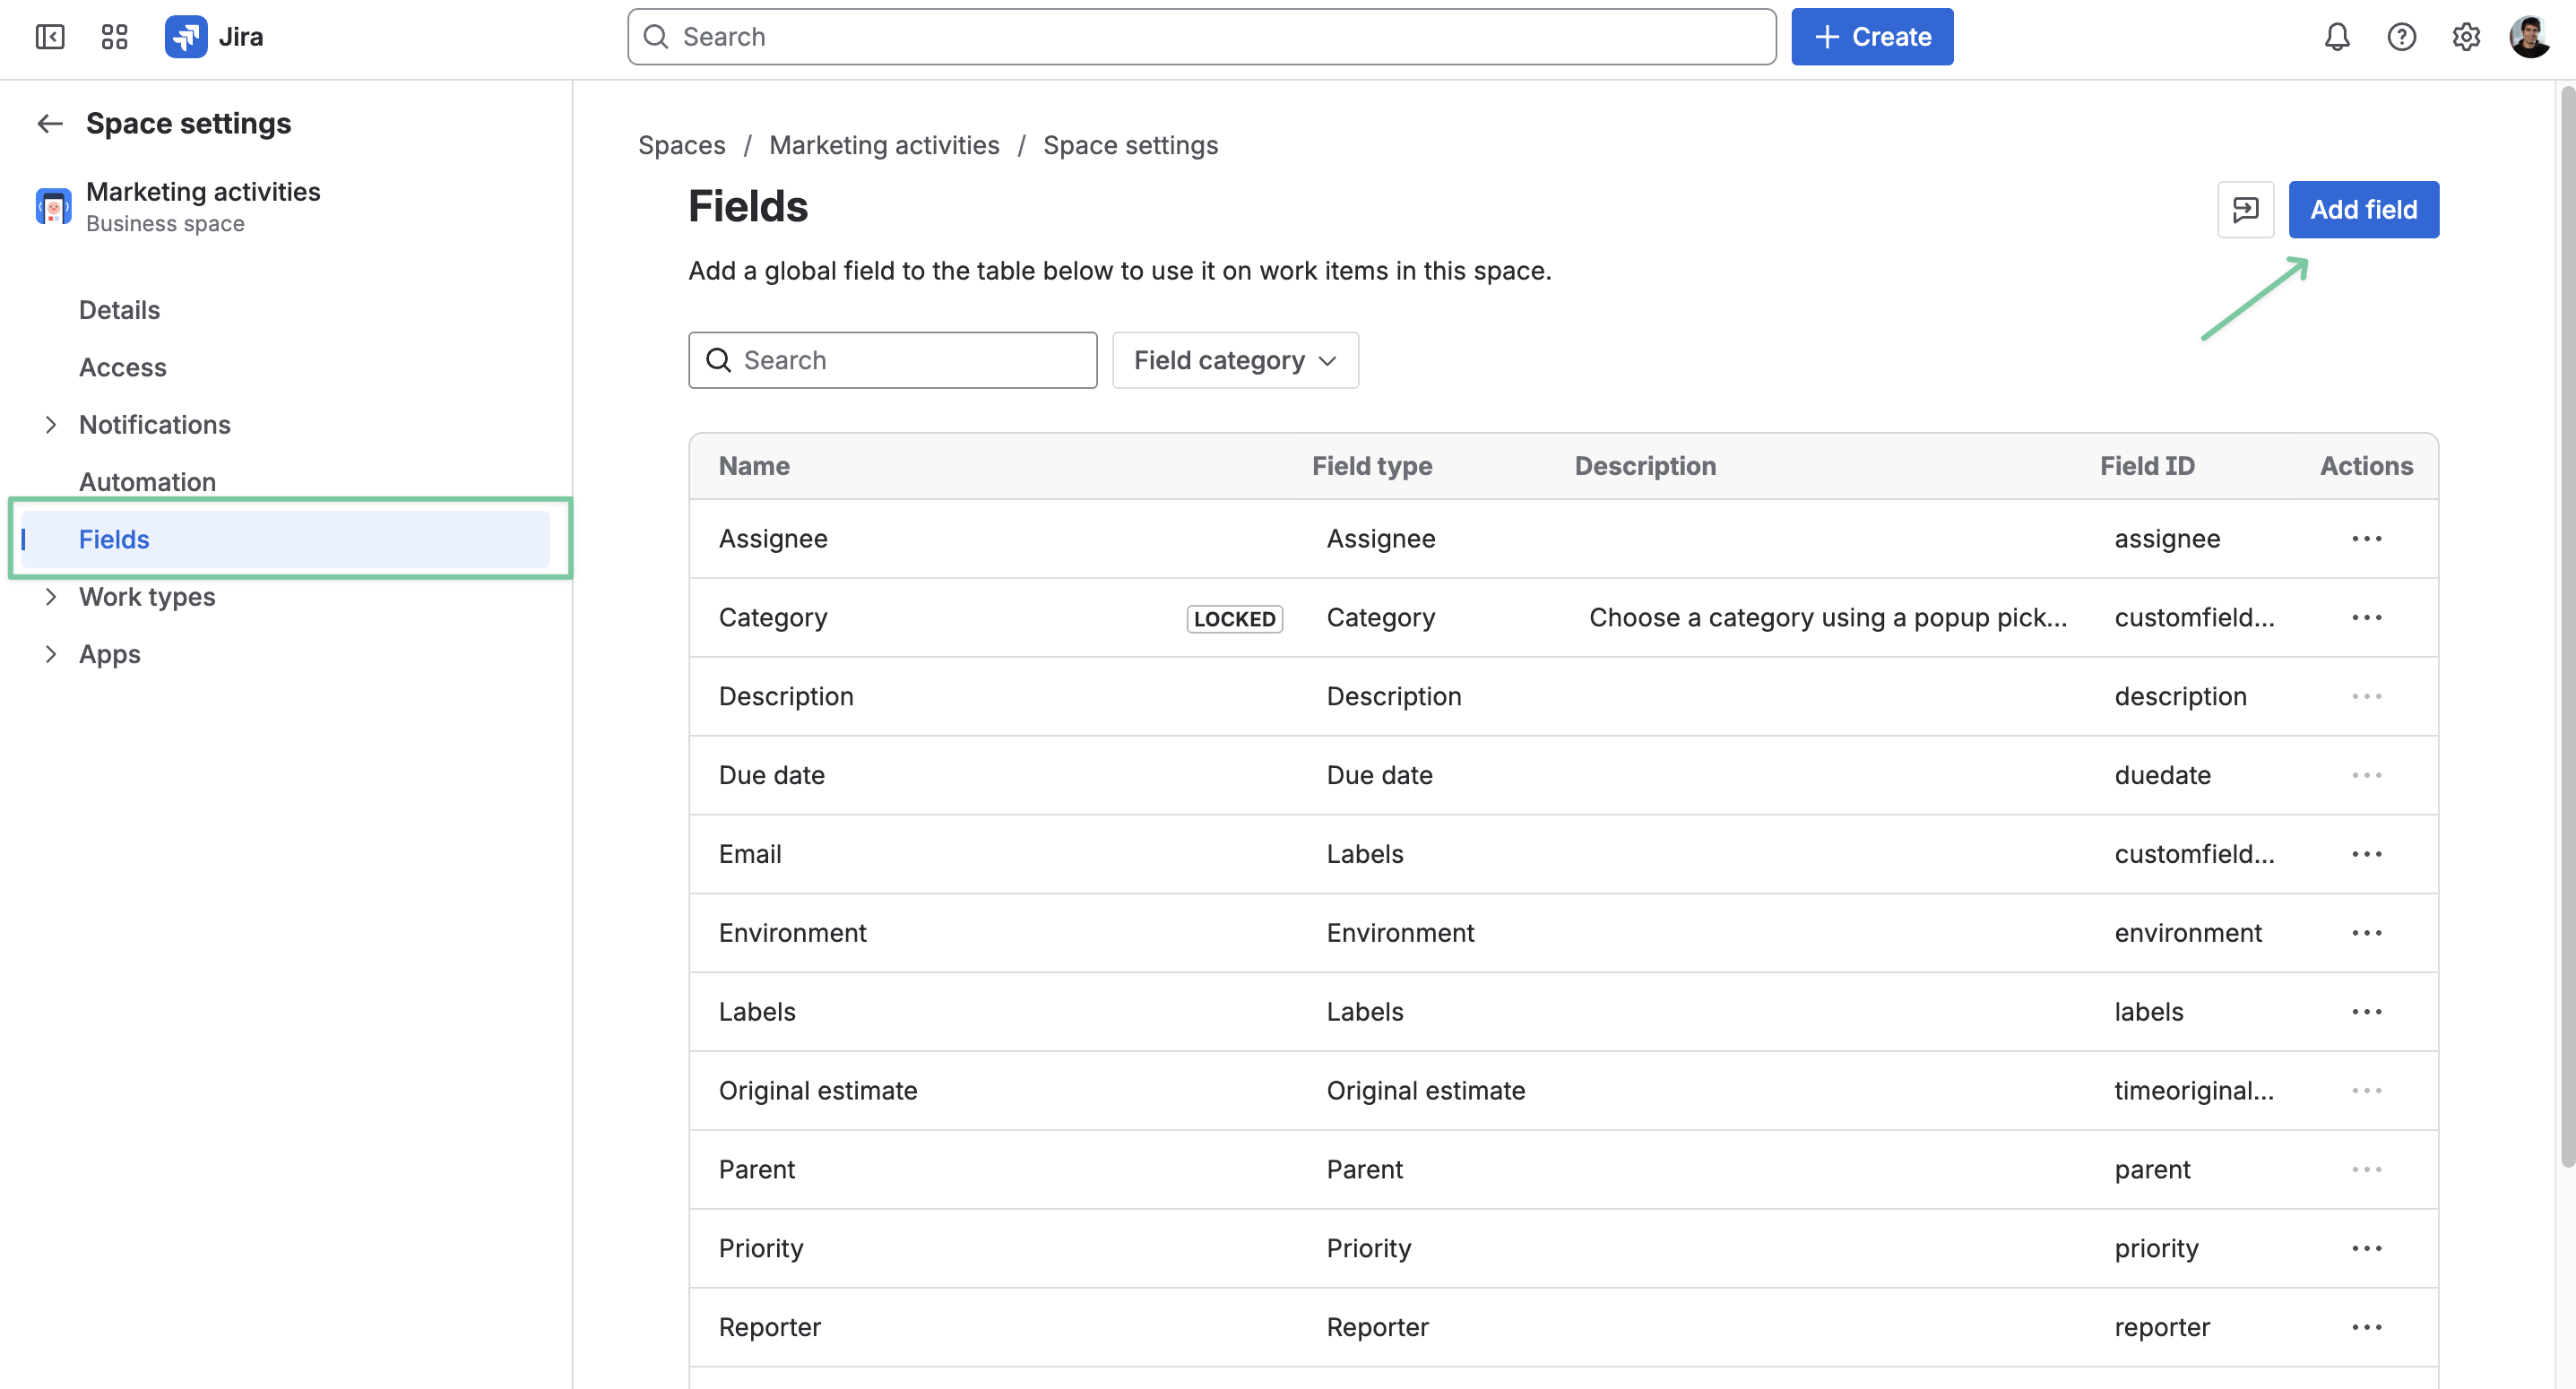
Locate Fields in the left-side menu and click Add field.
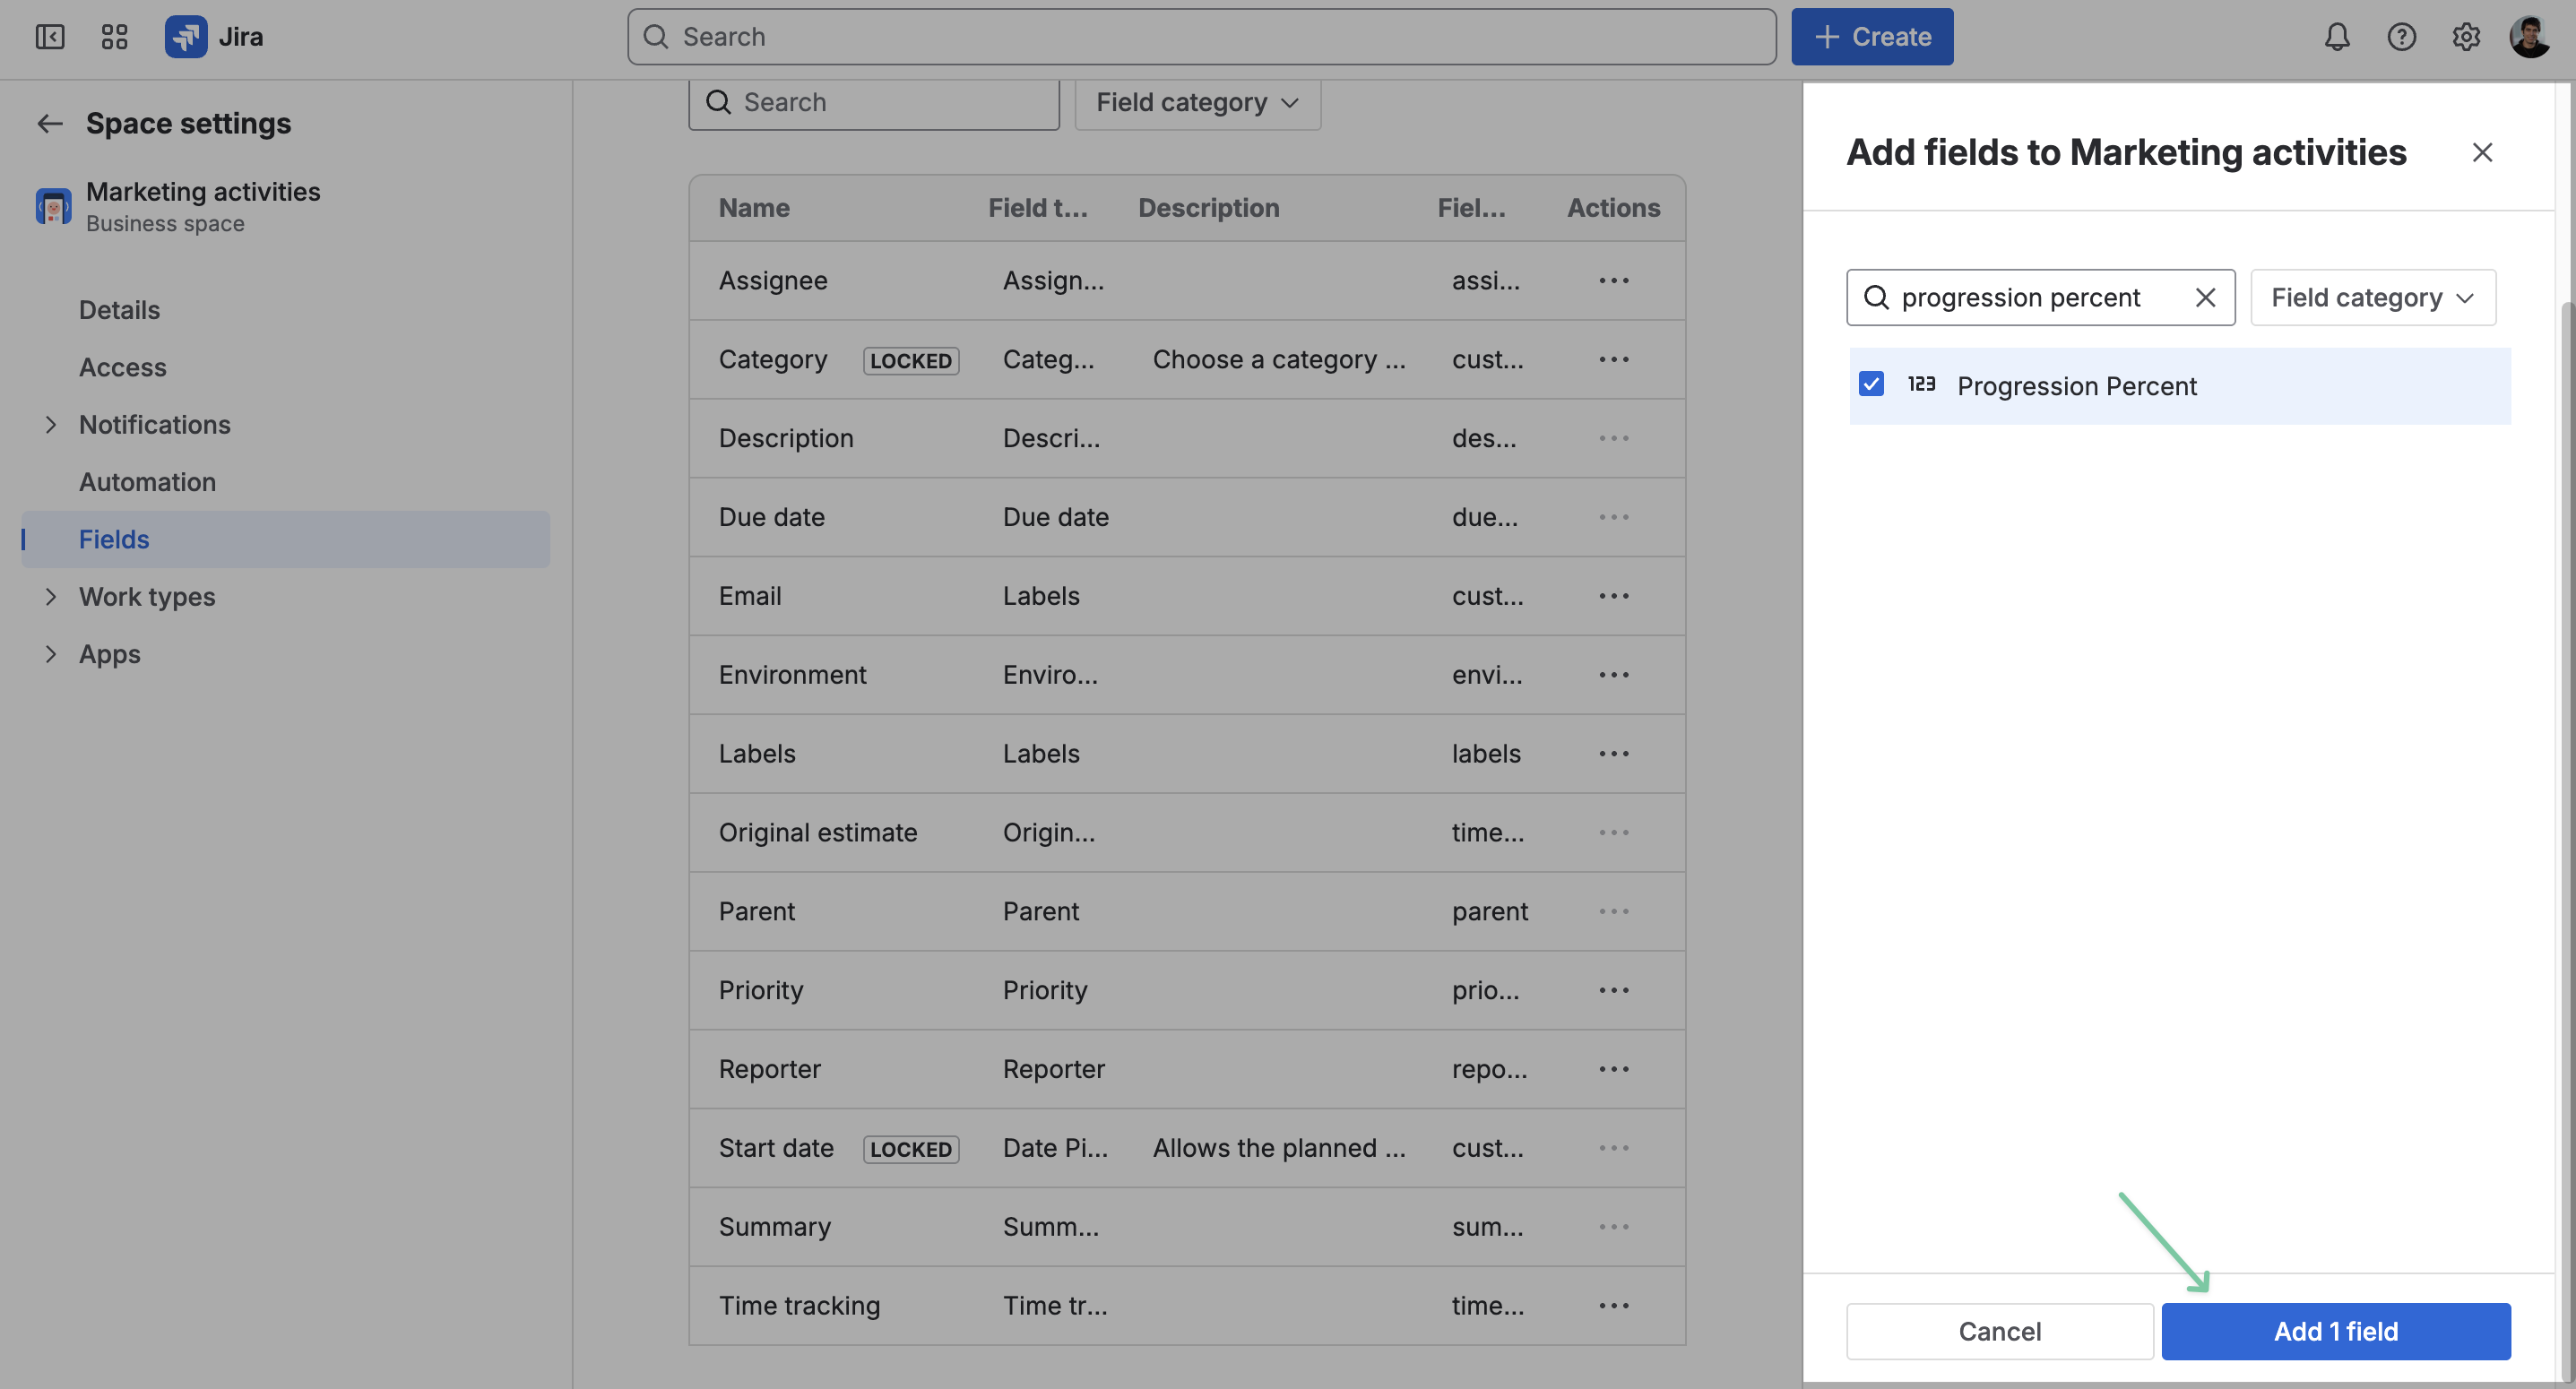
From the right column, find the field you want, check the box, and click Add field.
Then, go to Work types, select the item types you work with, and drag and drop the field you just added.
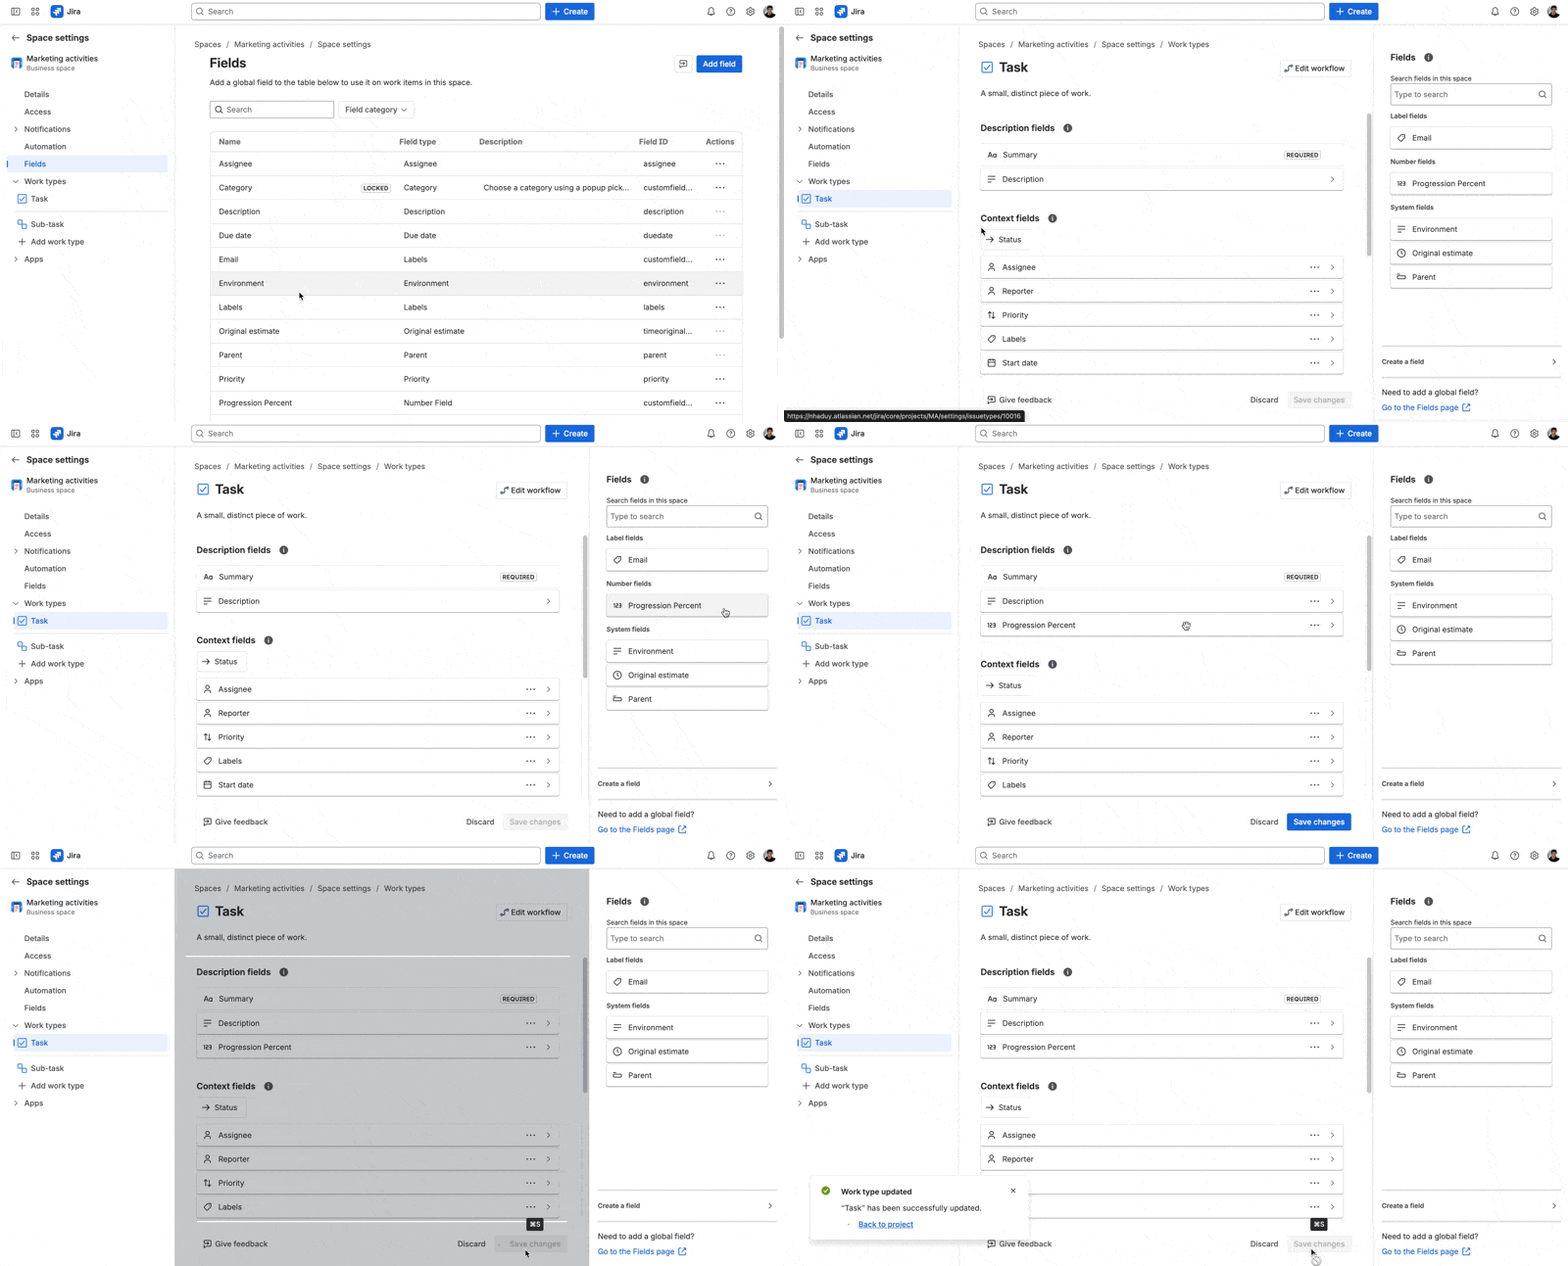
Once done, click Save changes.
You will need to repeat this step for every work type you use in your Team-managed space.