.png)
The Integration Import workflow guides you through importing asset data from an external source into AssetIT. The process is divided into seven sequential stages, allowing you to review, map, and confirm data before it is synchronized.
Once started, you must complete each stage in order to proceed to the next one.
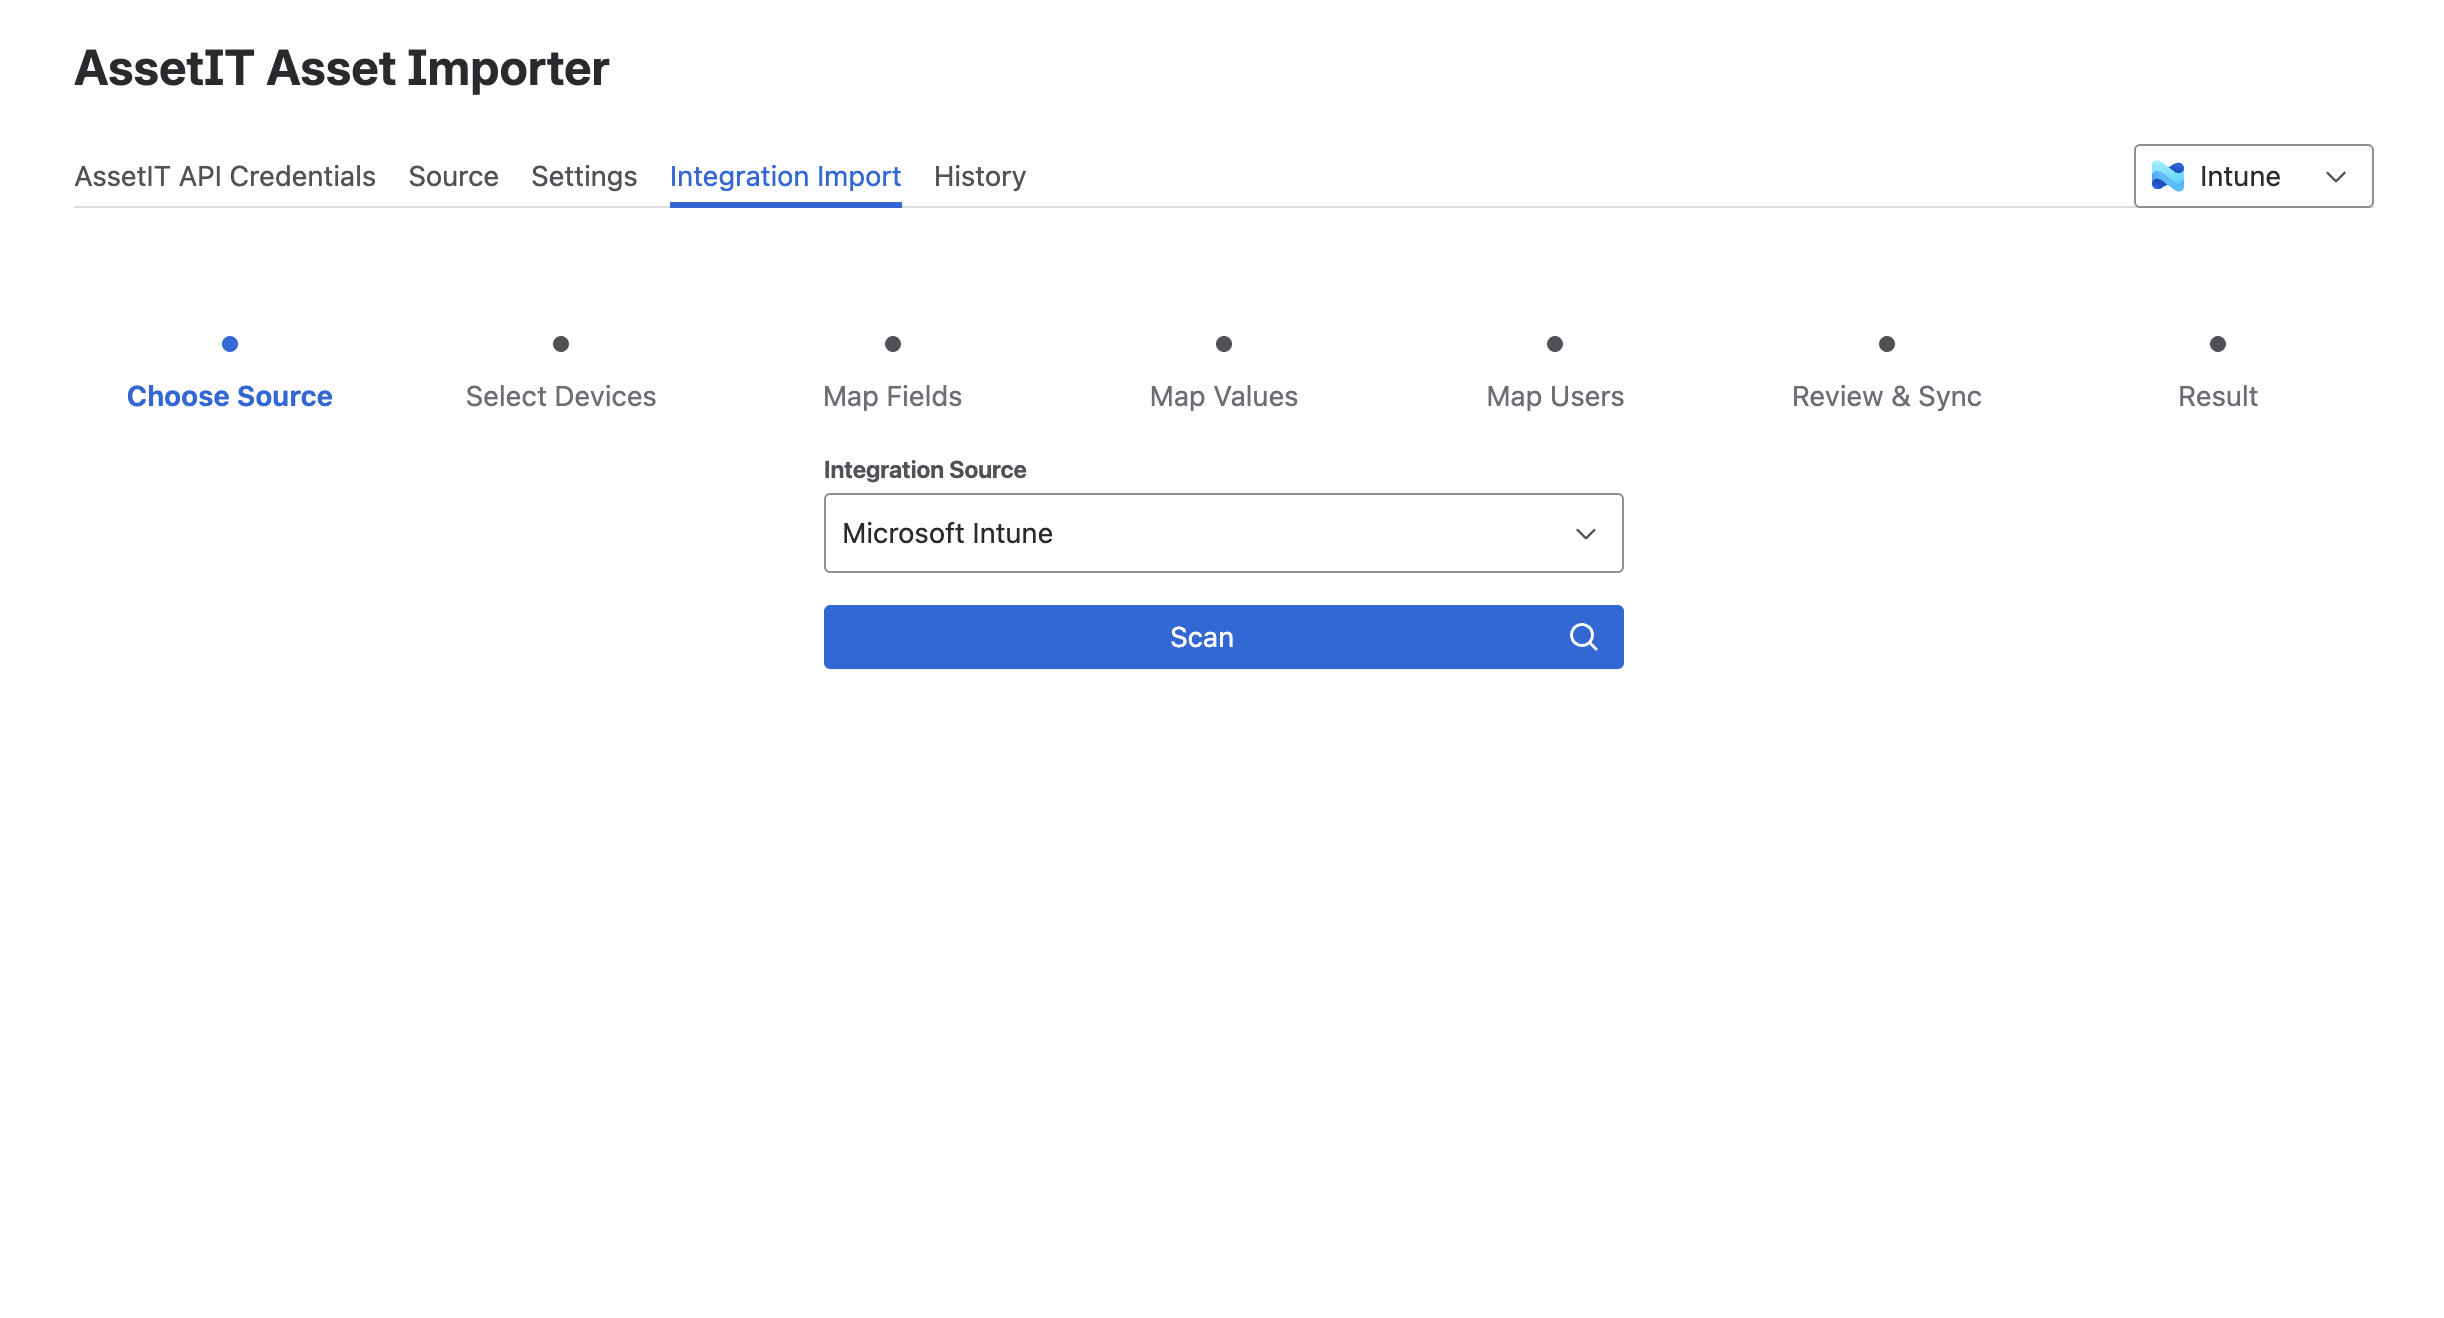
Stage 1: Choose Integration Source
In this step, you choose the external system to import data from and scan it for available assets.
-
Open the Integration Import tab.
-
Under Integration Source, select the data source you want to import from, whether it is from Jamf or from Microsoft Intune.
-
Click Scan.
Asset Importer connects to the selected source and retrieves a list of available device records. These records will be used in the following steps to determine which assets are imported into AssetIT.
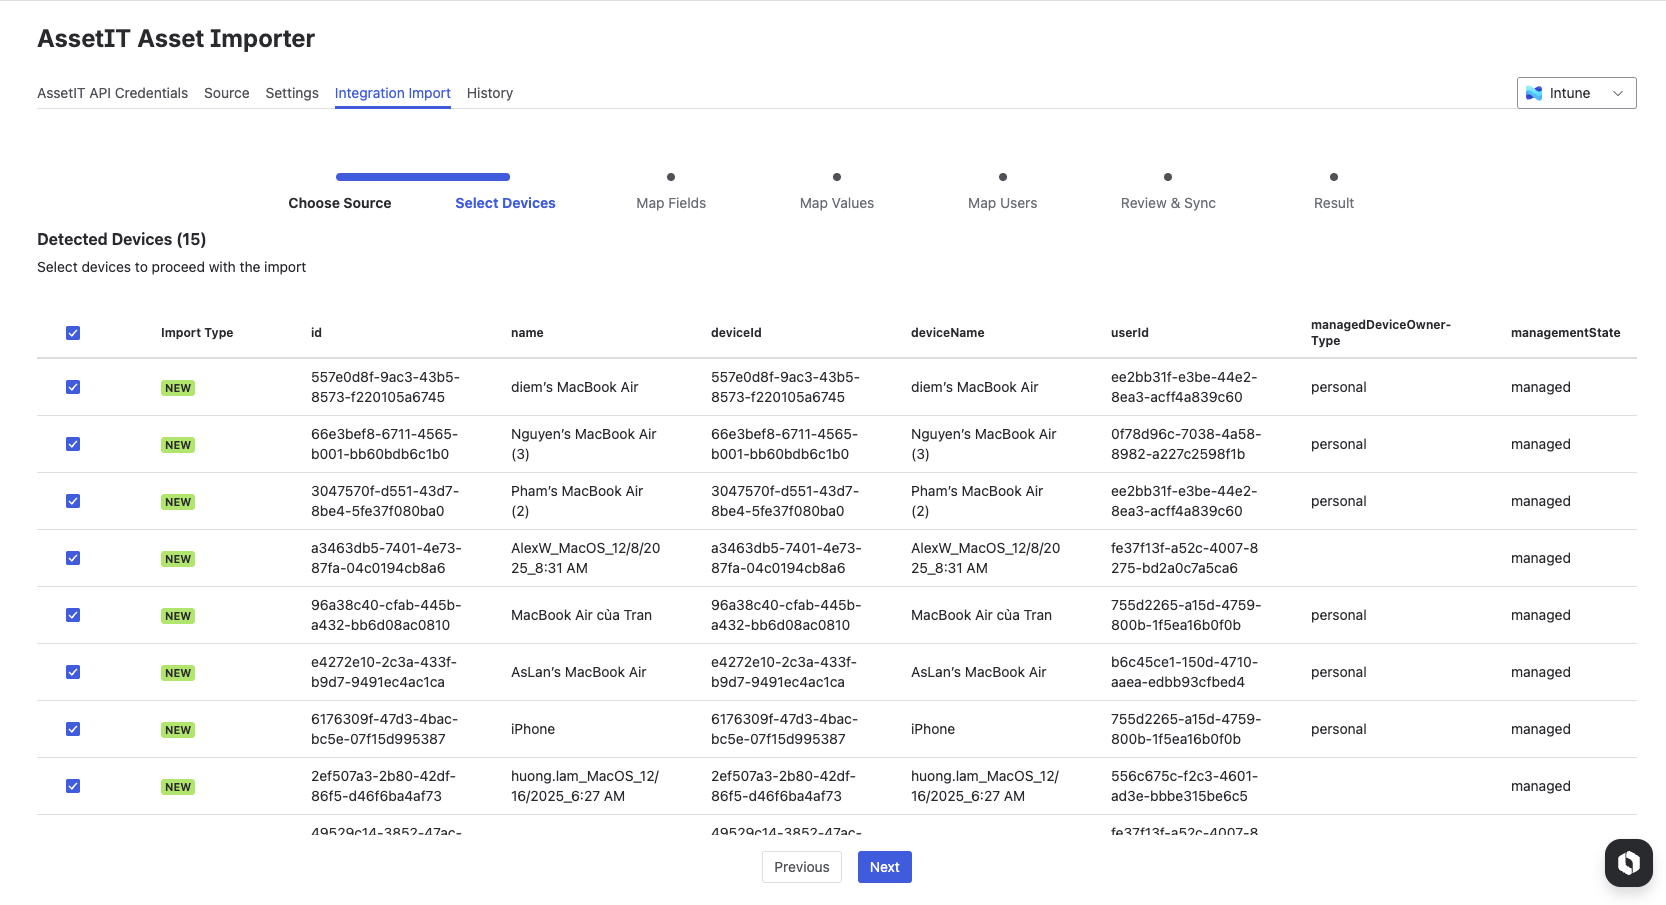
Stage 2: Select Devices
After the scan completes, Asset Importer displays a list of detected devices.
-
Review the list of scanned assets.
-
Select the assets you want to include in the import by checking the corresponding boxes.
-
Review the Status column to understand how each asset will be handled during import.
-
Click Next to proceed to the next stage.
Import Types:
-
NEW : The device does not exist in AssetIT and will be created as a new asset.
-
CLONED : The device already exists in AssetIT. Because the import setting is configured to always create new assets, a new asset will be created using the existing one as a base.
-
SYNC : The device exists in AssetIT and will be updated with the latest information from the source.
The import type shown here is determined by the settings you configured earlier at the Data Settings tab.
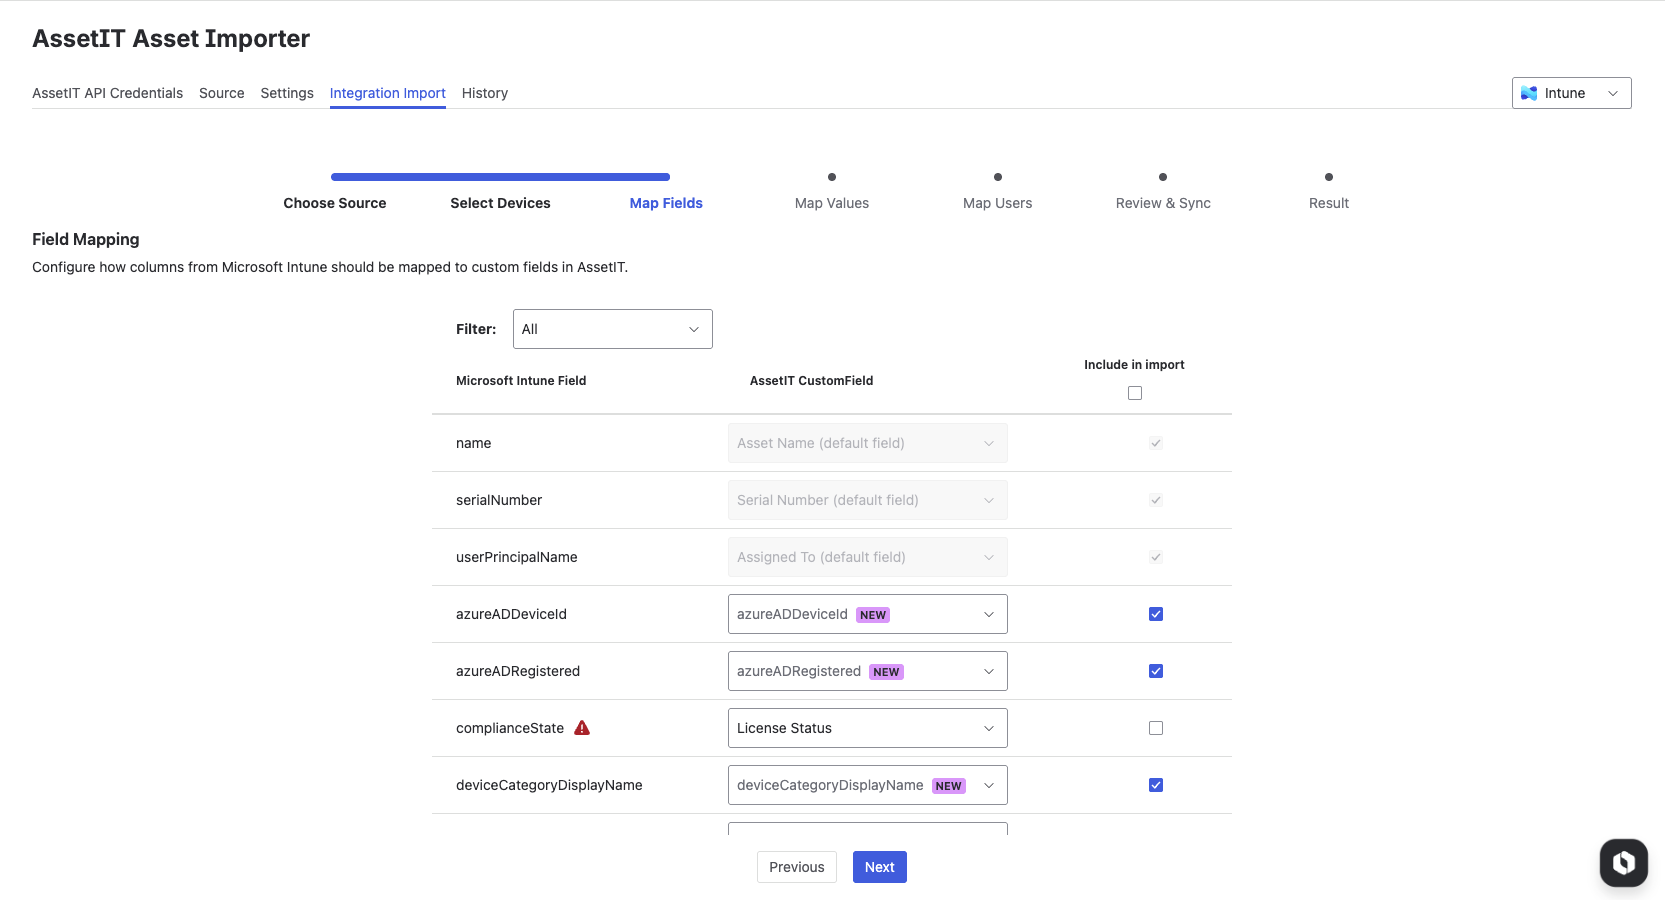
Stage 3: Map Fields
This step allows you to map fields from the source system to the fields in AssetIT.
-
Review the list of available fields from the source system.
-
Select the matching AssetIT custom field for each field. If no matching field exists, the app creates new custom text fields automatically.
-
Enable the checkbox to include the field in the import.
-
Click Next to proceed to the next stage.
Important notes:
-
Name, Serial Number, and User Principal Name are mandatory fields and are selected by default. These fields cannot be unmapped.
-
Only AssetIT custom fields with compatible field types can be mapped.
If a selected AssetIT field has a different field type than the source field, a warning icon is displayed. You can proceed only after resolving the required field mappings.
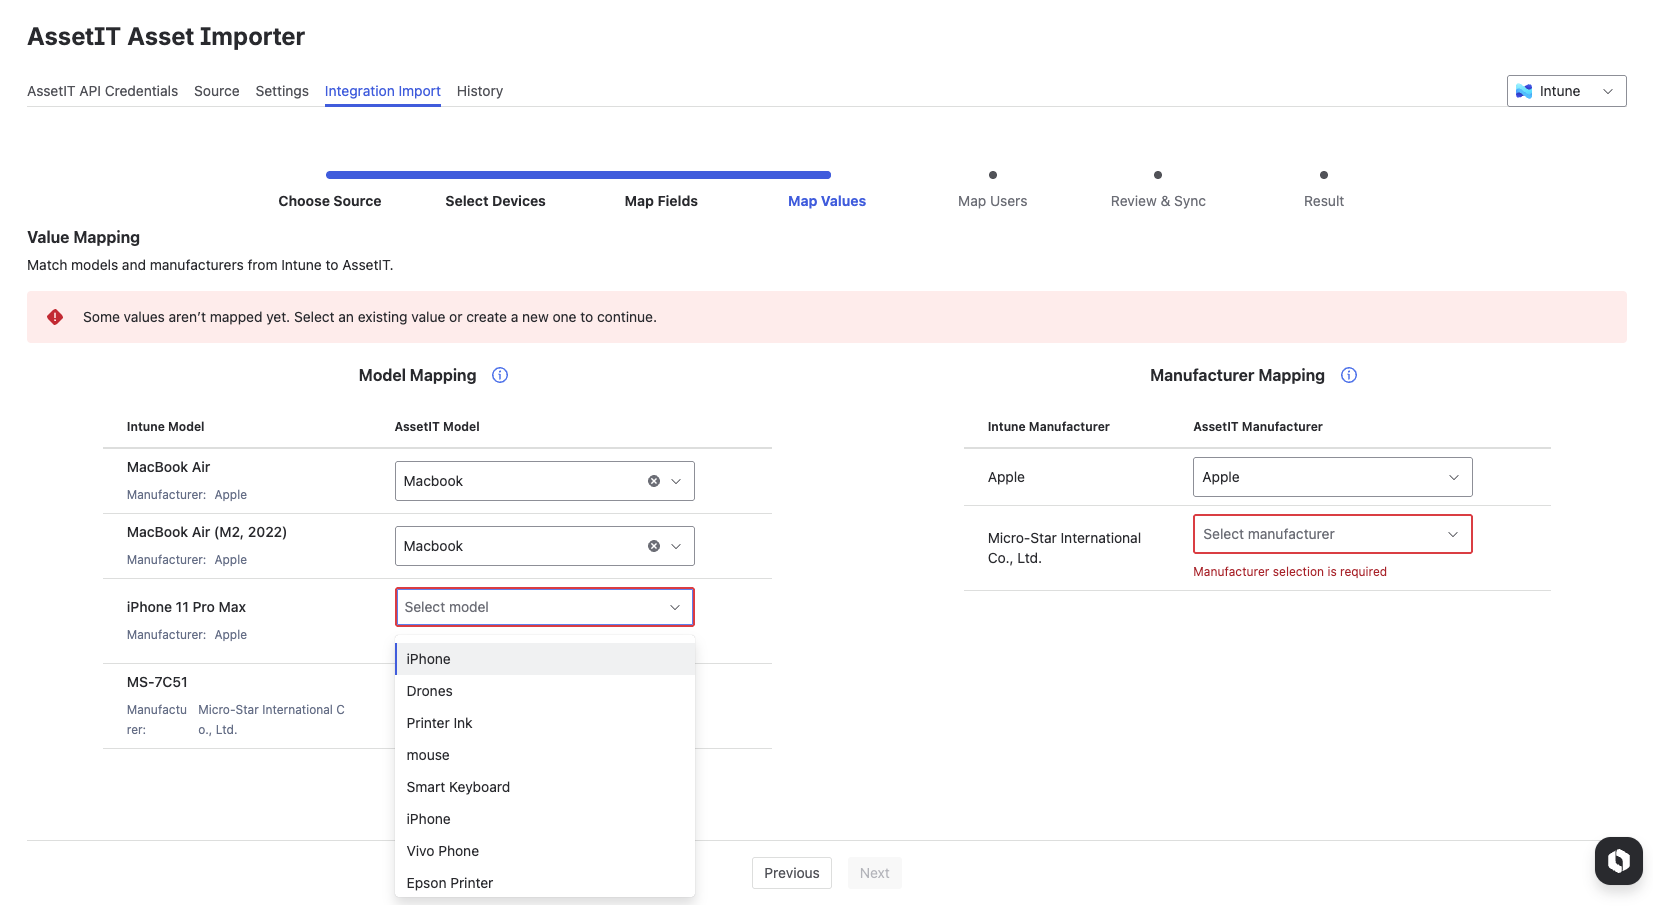
Stage 4: Map Values
In this step, you align specific field values between the source system and AssetIT, focusing on core data, including Asset Model and Manufacturer.
Notes for Jamf integration:
Jamf does not provide manufacturer information in the data. As a result, when you map the asset model, the manufacturer will be automatically assigned based on the model (since asset models are linked to manufacturers in AssetIT).
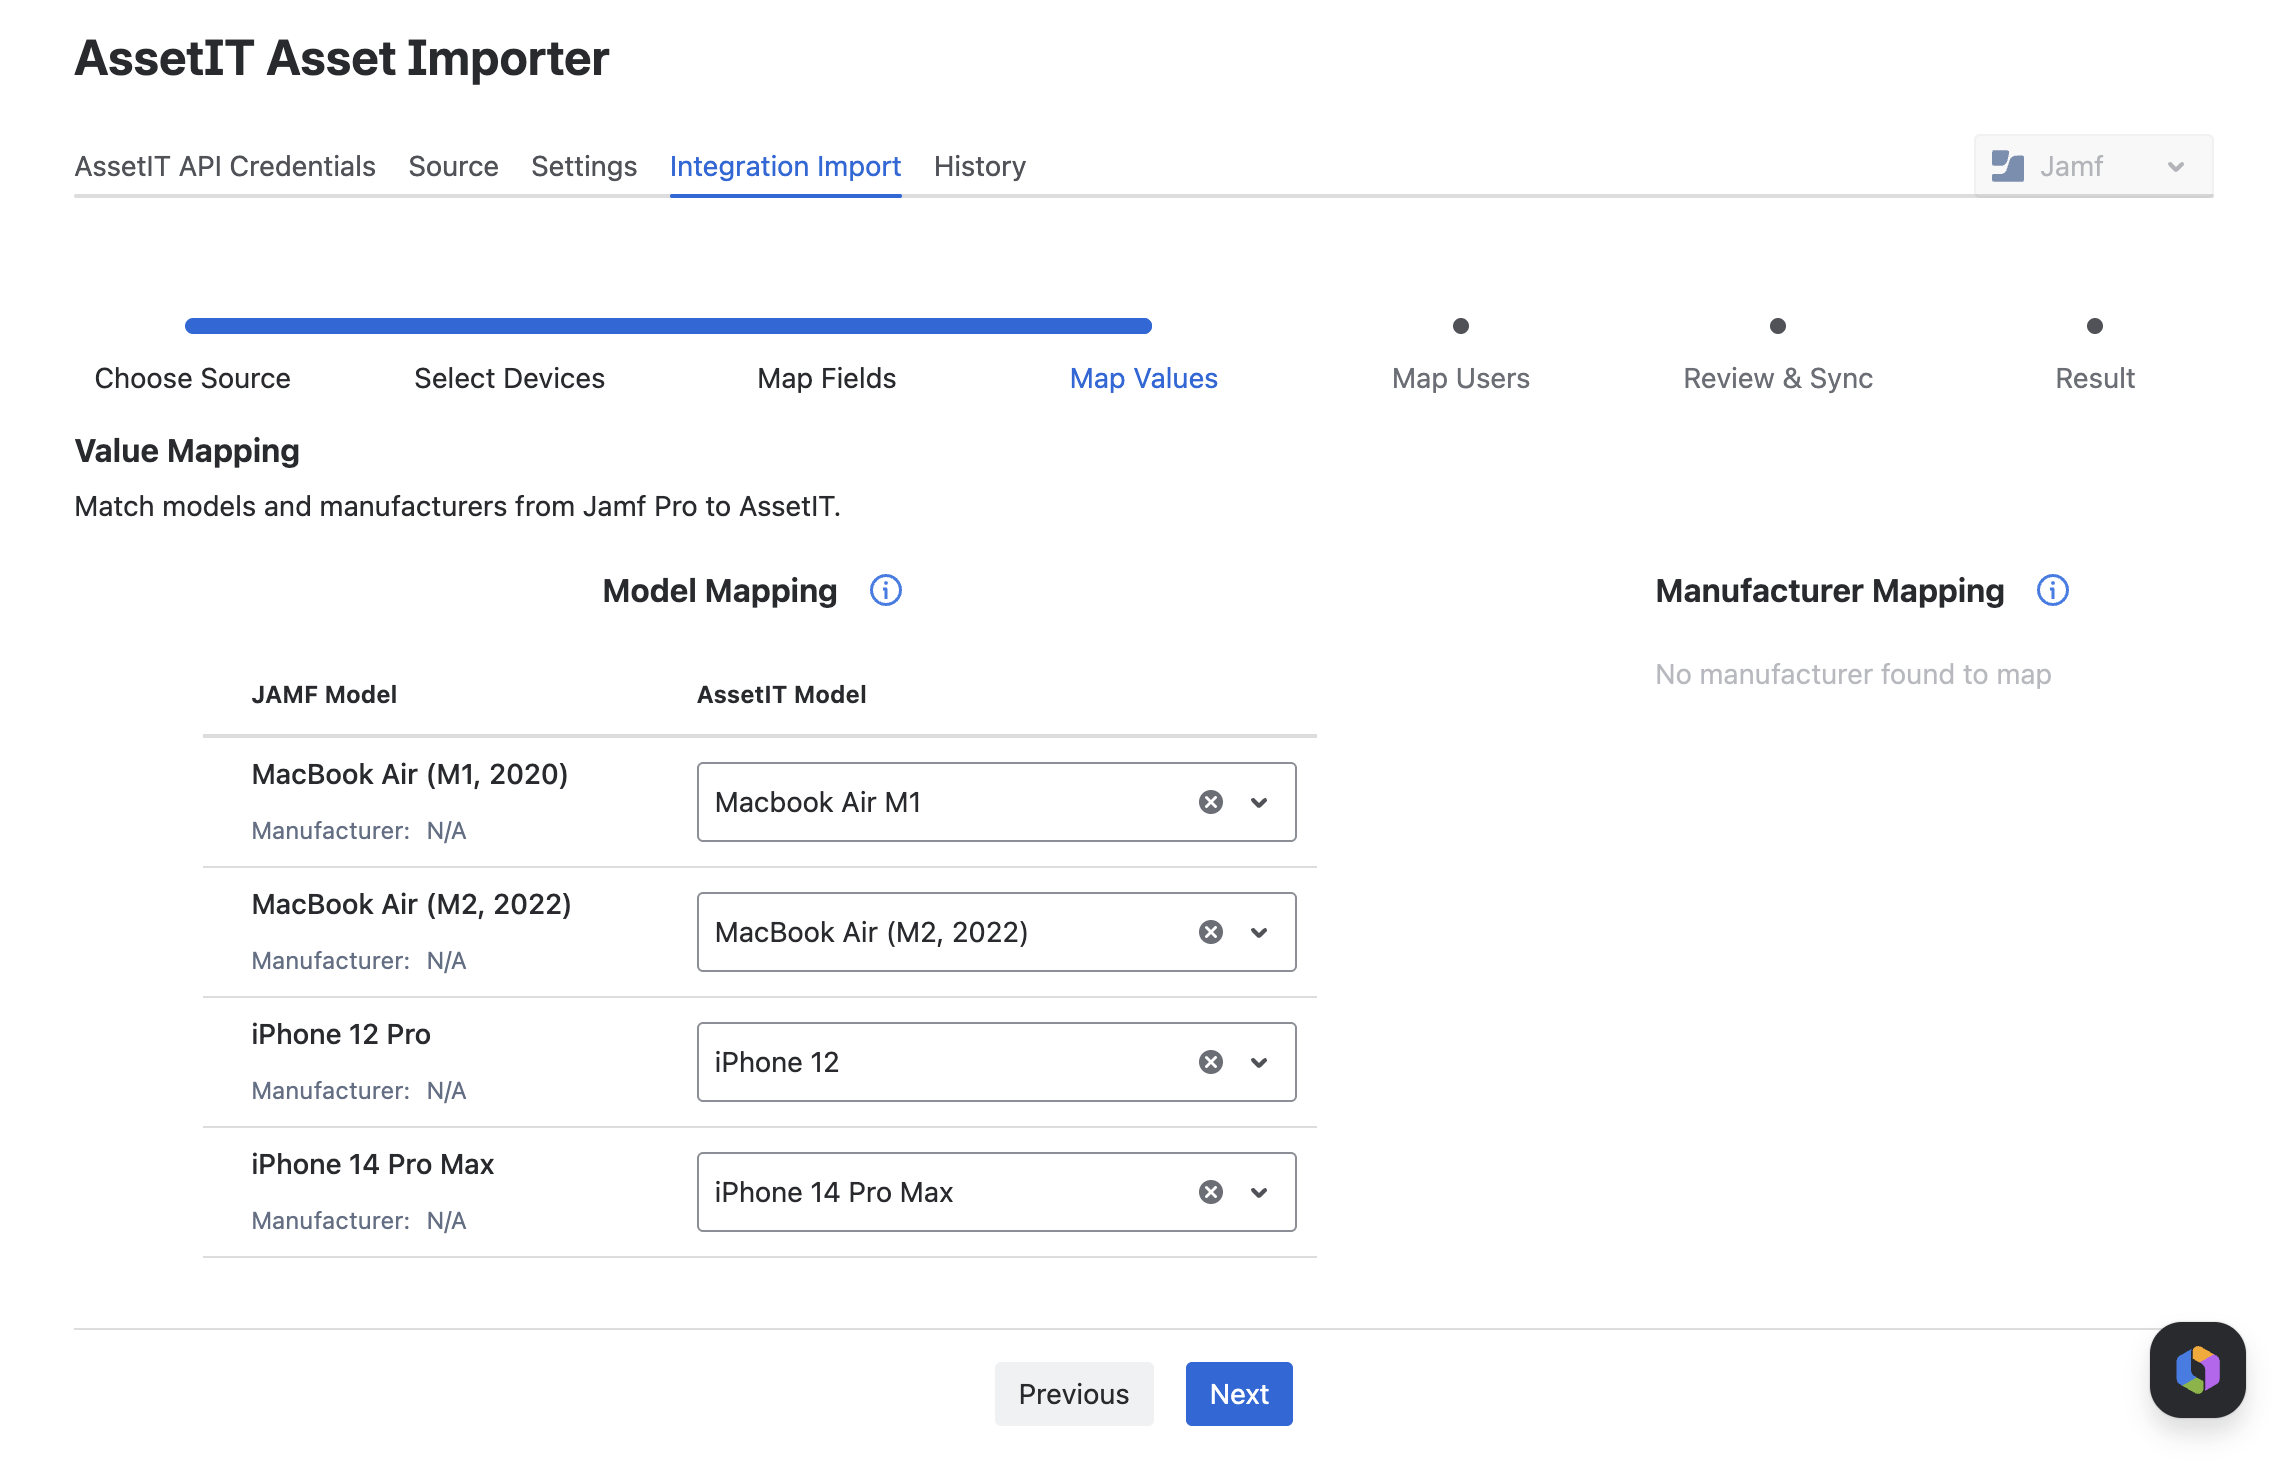
To map Asset Models and Manufacturers from external systems to AssetIT, follow these steps:
-
Review the detected models and manufacturers from the source system.
-
Map each source value to an existing value in AssetIT. All models and manufacturers must be mapped before continuing.
-
Click Next to proceed to the next stage.
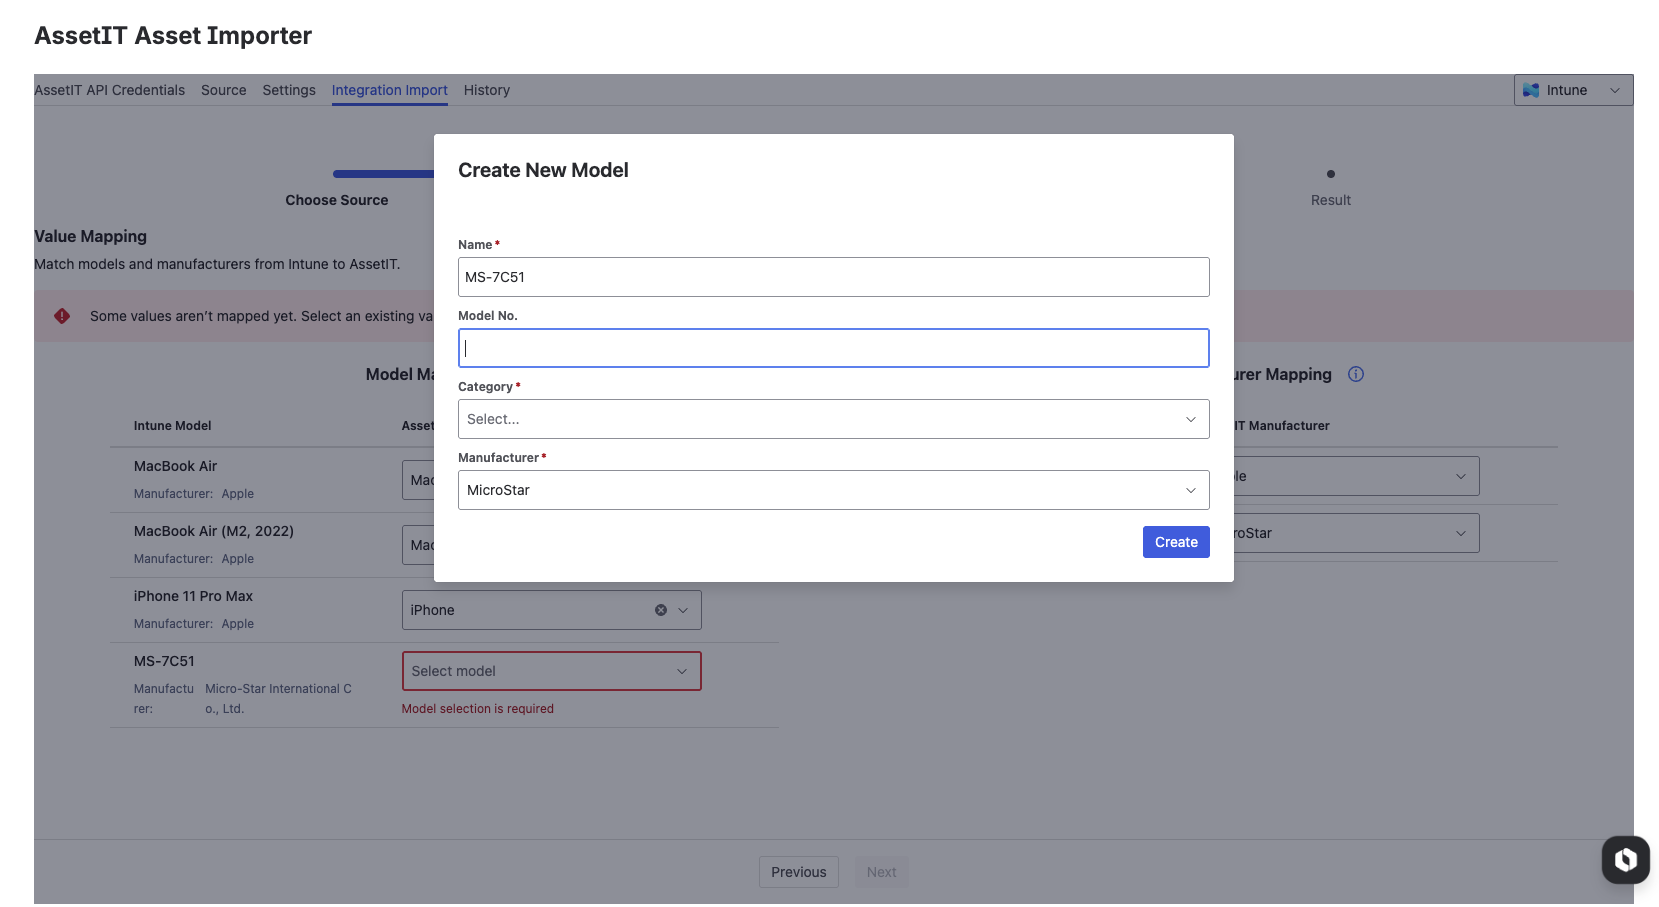
Create New Values
If a required model or manufacturer is missing in AssetIT, you can create it directly in the field by typing the desired name.

Then, provide the required information (if any) and save it.
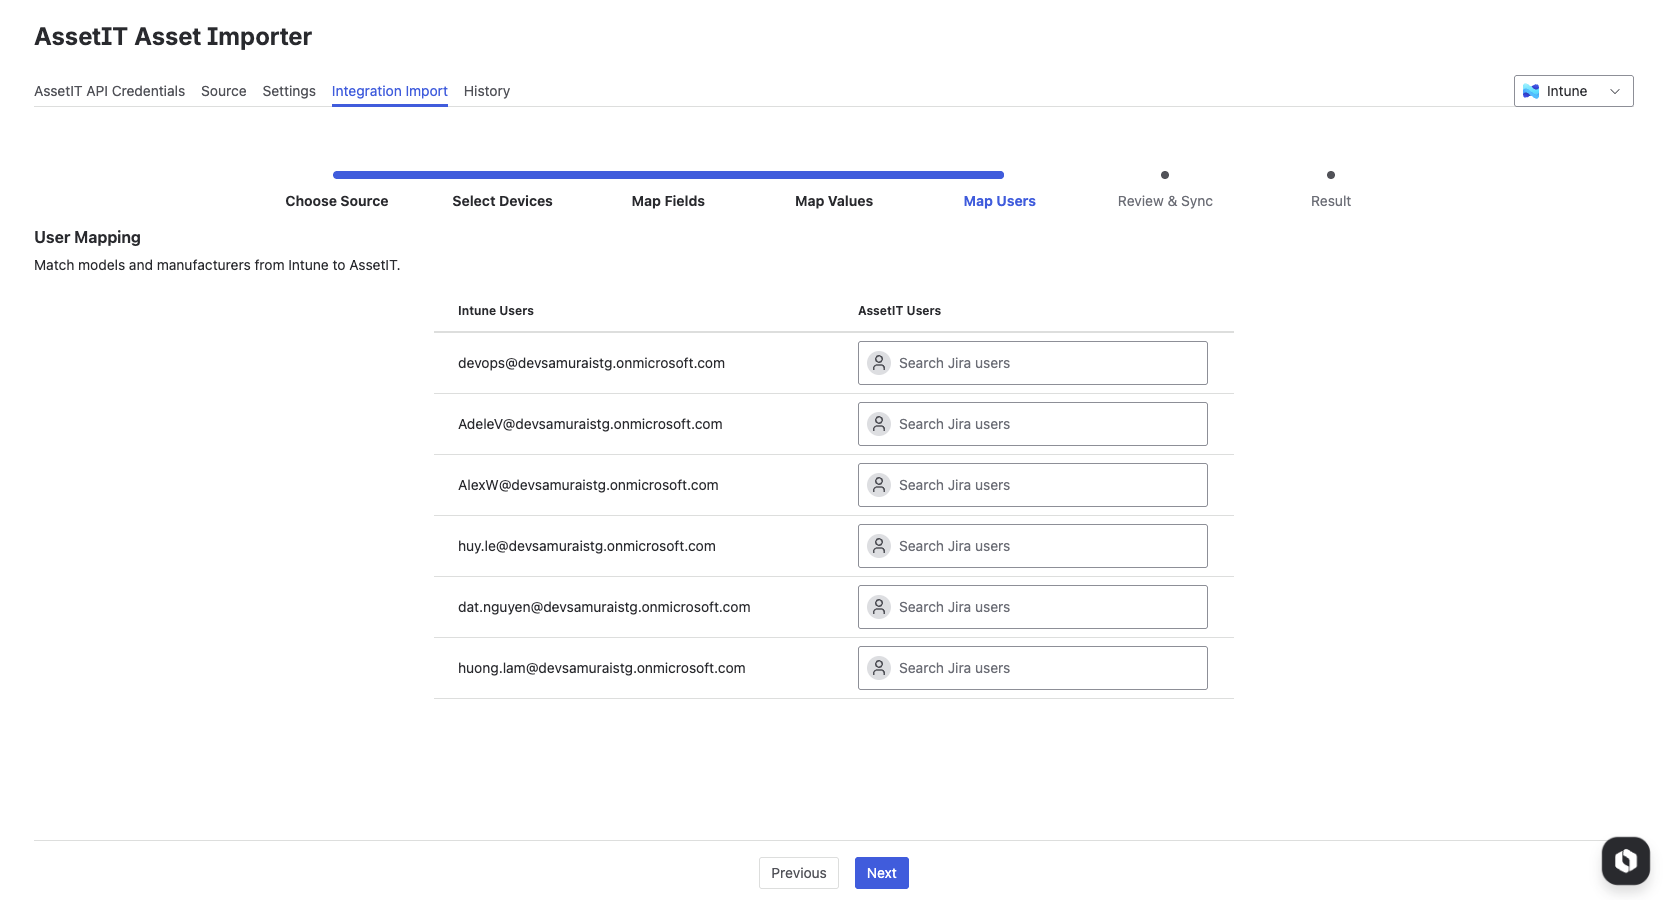
Stage 5: Map Users
This step aligns user associations between the source system and AssetIT.
-
Review the list of users detected from the source system.
-
Map each source user to an existing AssetIT user. User associations are used to assign assets correctly in AssetIT.
-
Click Next to proceed to the next stage.
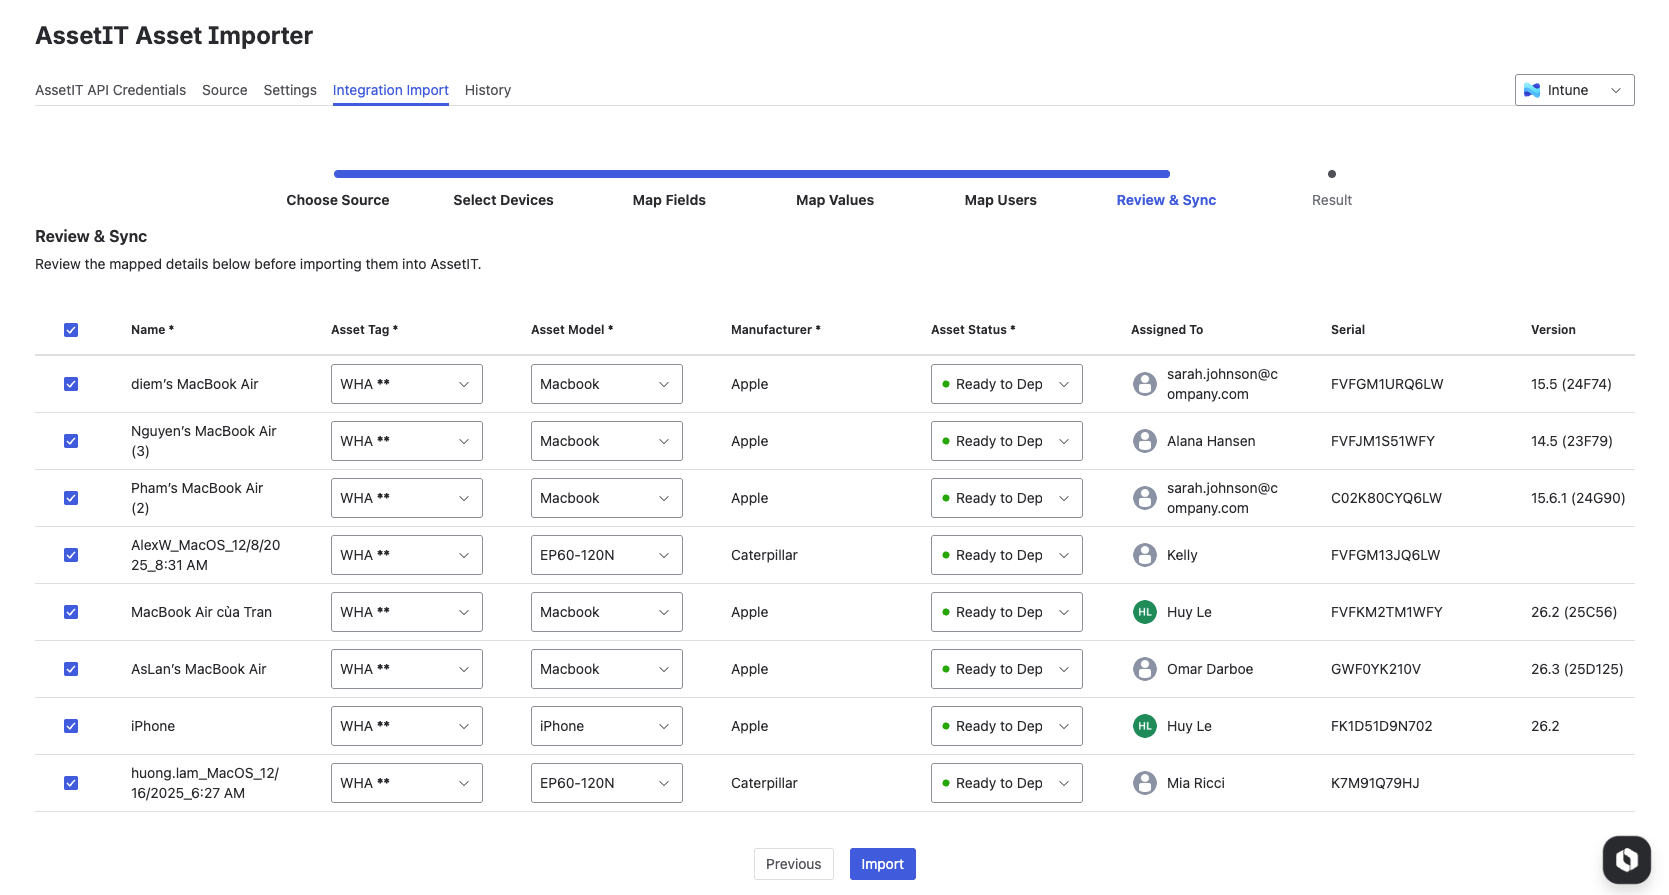
Stage 6: Review & Sync Assets
Before importing, AssetIT Asset Importer displays a final review screen.
-
Review all selected assets and their mapped fields.
-
Confirm asset details and make any final adjustments if needed.
-
Once confirmed, click Import to start synchronizing data into AssetIT.
All selected assets and updates will be applied based on the configuration defined in the previous steps.
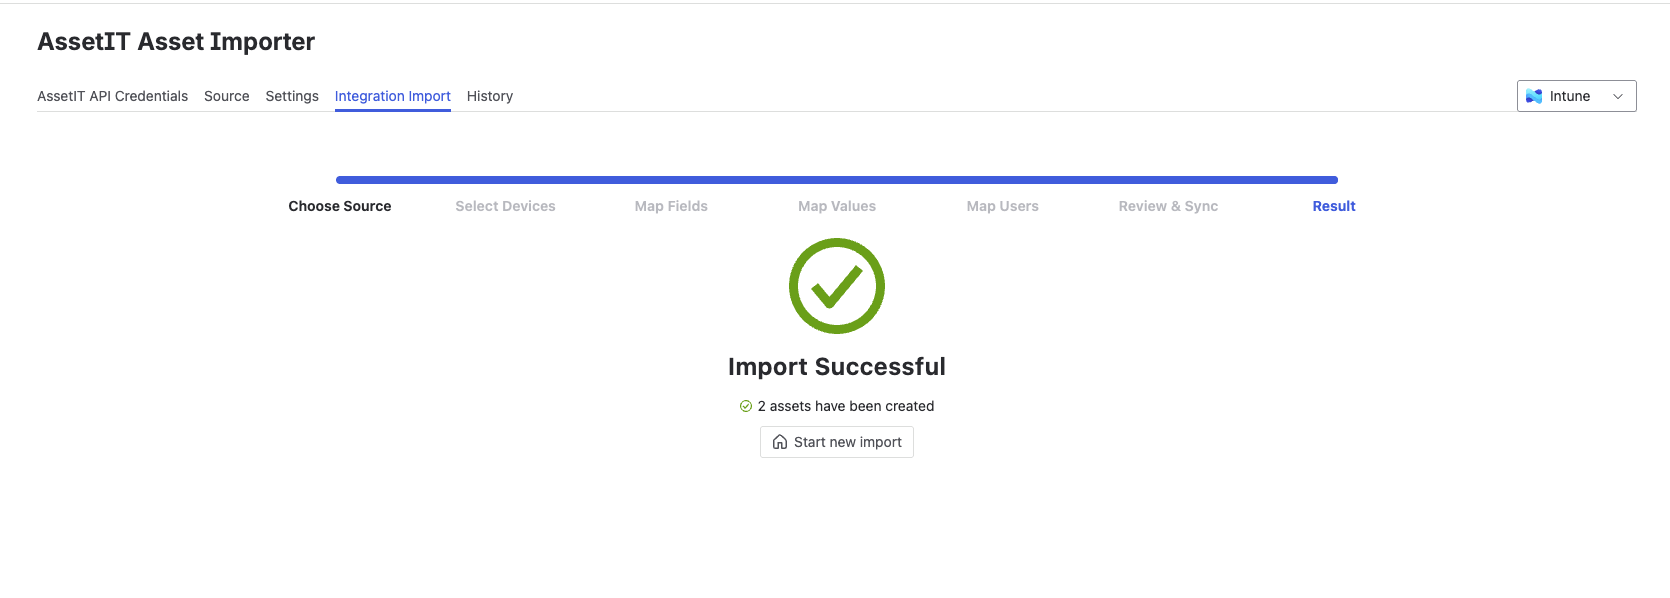
Stage 7: Result
After the import completes, the Result stage displays the outcome of the operation. This step confirms that the integration import process has finished.