
Only users with Jira Admin or App Admin roles can access and manage Date Mapping in PlanCore.
What is Date Mapping?
Date Mapping in PlanCore lets you automatically sync a task’s start and end dates between Jira and PlanCore. When dates are planned or updated in either system, the mapped fields stay aligned so teams can manage project timelines consistently across Jira and PlanCore.
How it works:
-
Plan in PlanCore: When you set the start and end dates in PlanCore, they are automatically synced to the corresponding Jira date fields.
-
Plan in Jira: When you set the start date or end date in Jira, those changes are reflected in PlanCore.
PlanCore supports mapping for Jira fields with the field types Date Picker or Date & Time Picker.
What are Date Fields in Jira?
In Jira, Date Fields and Date & Time Fields are used to track dates related to issues and tasks. Jira date fields can vary depending on the project or issue type and may be customized by users. As long as the fields use a supported type, either Date Picker or Date & Time Picker, they can be mapped to PlanCore.
-
Date Picker: Captures only the date, such as Due Date or Start Date. It does not include a time component and is typically used for scheduling.
-
Date Time Picker: Captures both the date and time, such as Actual Start or Actual End. This is useful when scheduling requires hour-and-minute precision.
What are Date Fields in PlanCore?
In PlanCore, the primary date fields used for scheduling and tracking task timelines are:
-
Start Date: The date when the task is planned to begin.
-
End Date: The date when the task is planned to be completed.
Before you proceed
-
Mapping Date Fields may limit advanced planning features.
When Jira date fields are mapped, PlanCore follows Jira’s field specifications. As a result, some advanced planning options may not be supported, including:
-
Planning one task for multiple assignees
-
Assigning the same task multiple times
-
Creating recurring tasks
-
-
Ensure Jira field availability.
Before mapping Jira date fields to PlanCore, make sure the Jira fields you want to use, such as Start Date or End Date, are already available for the relevant Jira project and issue type.
How to Map Jira Date Fields in PlanCore
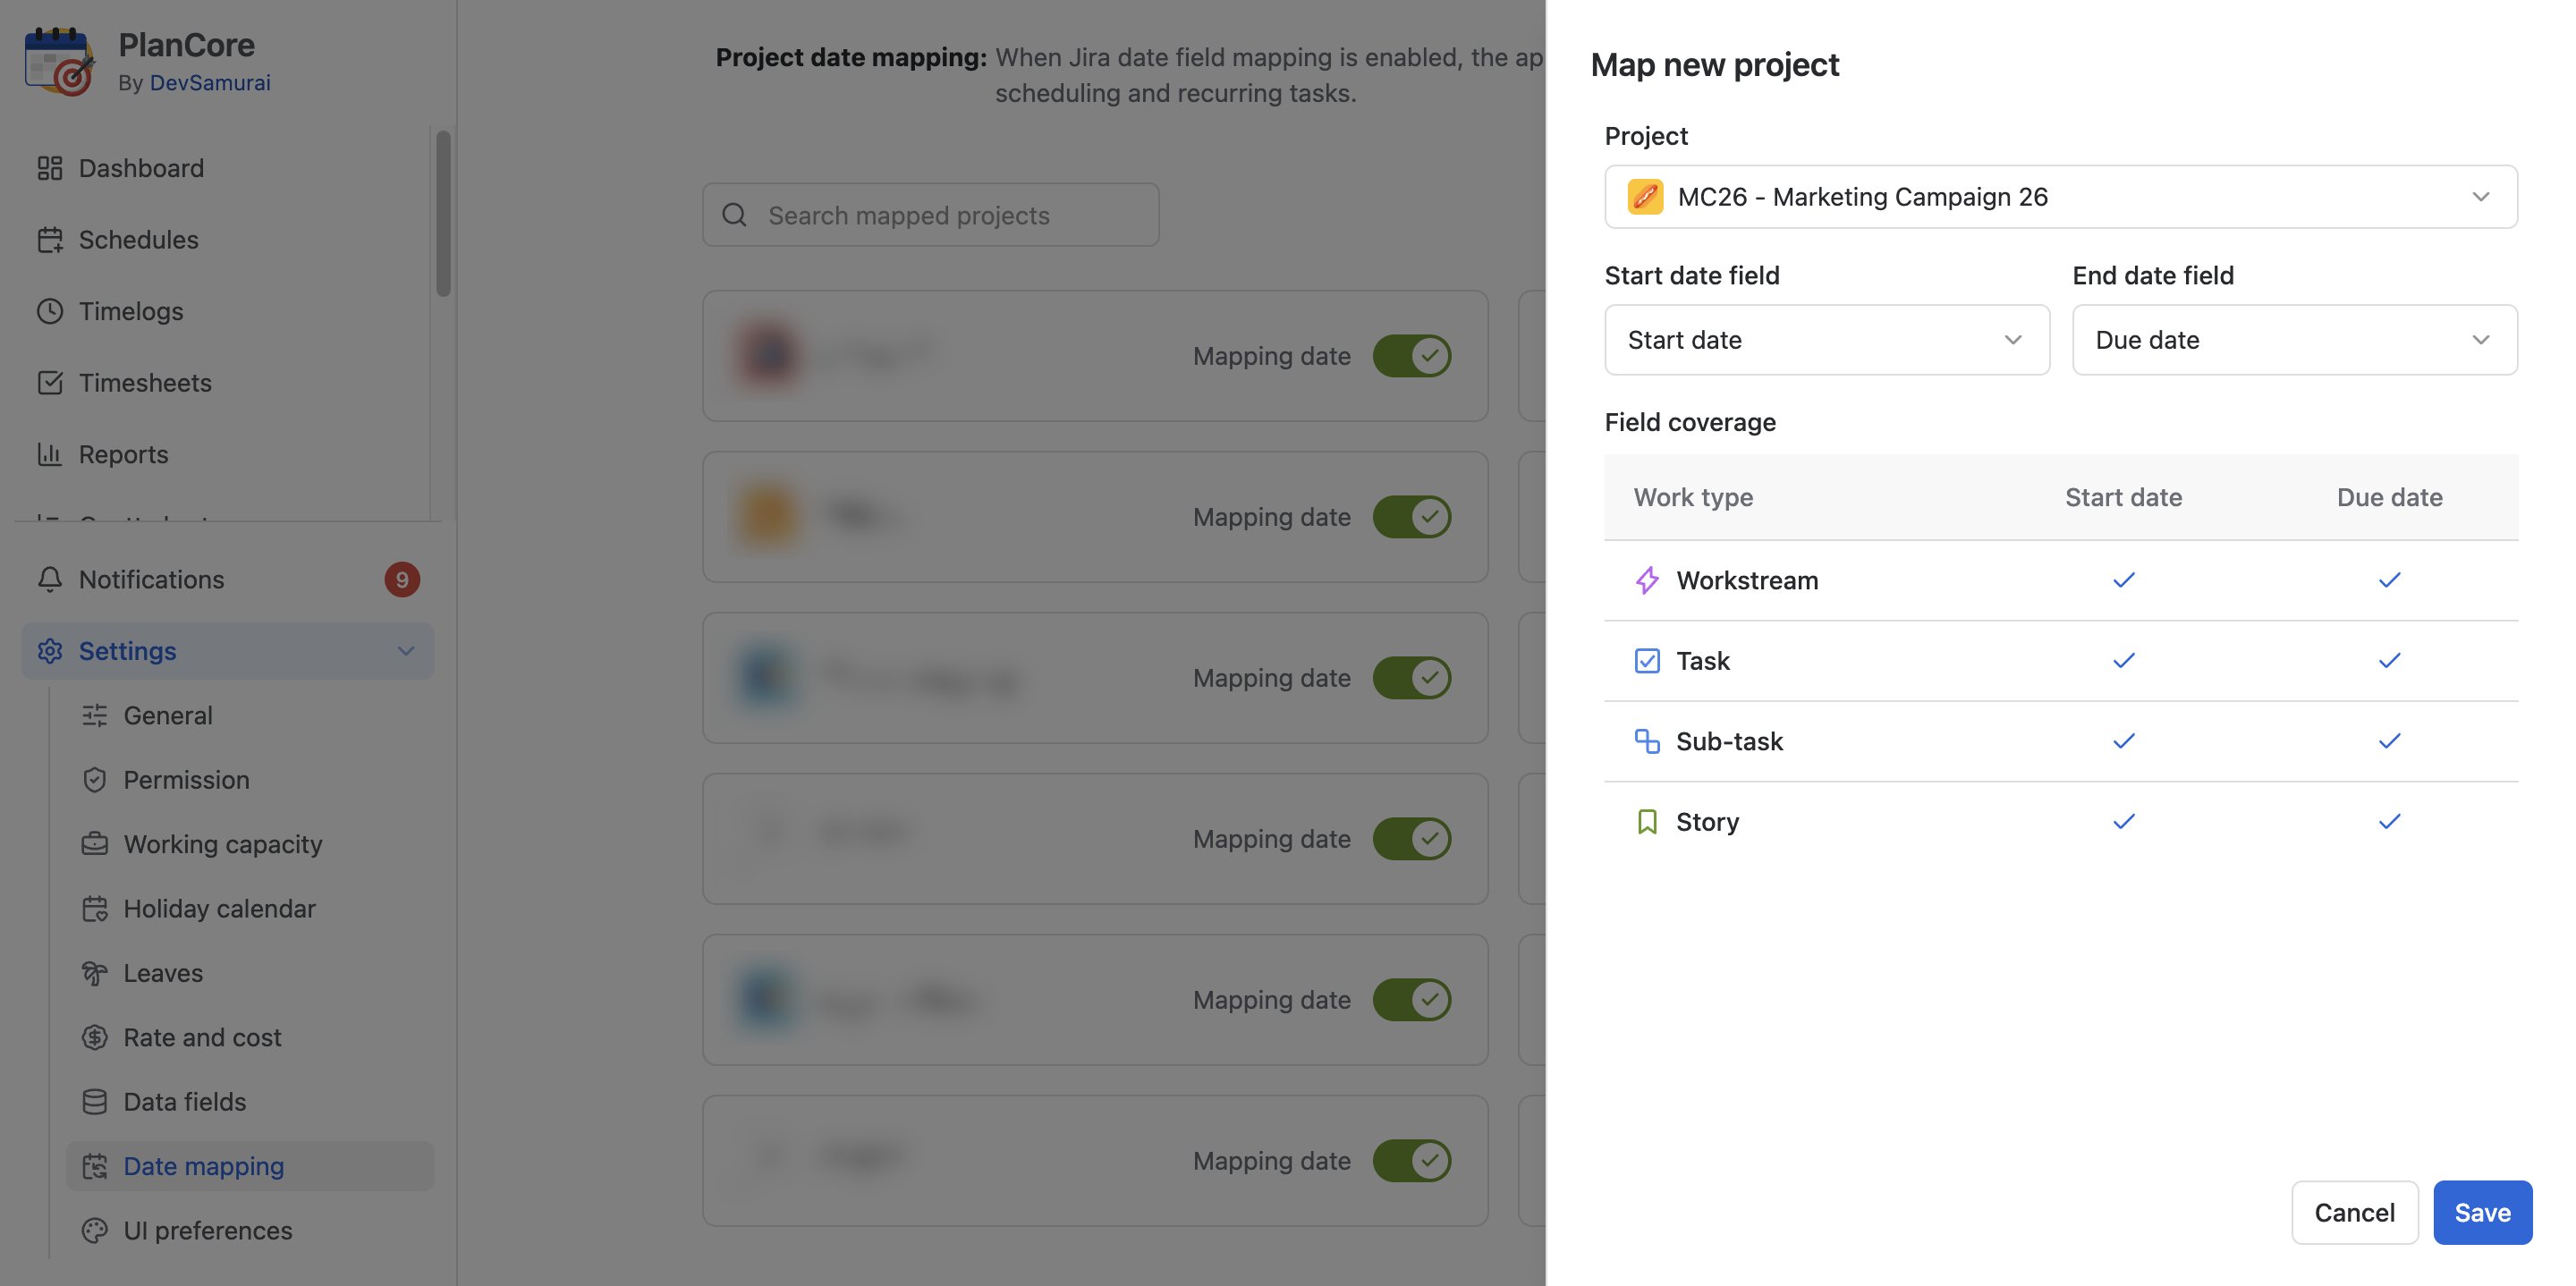
To start mapping Jira date fields, go to Settings in the left-side menu, then open Date mapping.
-
Add a Jira project and enable date mapping.
Use the project selector to open the dropdown list of available Jira projects, then choose the project you want to configure.
-
Choose Jira date fields.
Select the Jira date fields that should be mapped to the Start Date and End Date fields in PlanCore.
-
Review field availability warnings.
If a red cross (❌) appears next to a field, the selected field does not exist for that issue type in your project configuration. PlanCore cannot map to Jira fields that are not available for the selected issue type.
To resolve this, reconfigure your Jira project so the required date fields are available for the issue type, then return to Date Mapping and select the fields again.
-
Finish mapping.
There are two ways to complete the mapping:
-
Click Save to save the field mapping configuration without migrating existing data. Use this option when you want to map Jira fields for future tasks without transferring current PlanCore date data to Jira. After saving, previously planned tasks in the project will be reset and aligned with the newly mapped dates.
-
Turn on Apply date mapping to existing planned tasks, then save the field mapping to migrate existing Start Date and End Date values from PlanCore to Jira. This is a one-way process, so confirm your data and back it up if needed before proceeding.
-
Turn On or Off Jira Date Field Mapping in PlanCore
After date mapping is configured for a project, you can activate or deactivate the mapping feature at any time from the Date Mapping settings.
-
Open Settings and go to Date mapping.
-
Find the Jira project you want to update.
-
Use the mapping toggle to turn the feature on or off.
-
Click Save to apply the settings.
Note: When date mapping is turned off, PlanCore and Jira will no longer synchronize the mapped start and end date fields for that project until the mapping is enabled again.