.png)
To integrate Jamf with AssetIT Asset Importer, you must first register a role and client in your Jamf Pro environment to obtain the Client ID and Client Secret. After generating these credentials, you can enter them into the AssetIT Asset Importer and complete the integration.
1. Create Client ID and Client Secret in Jamf
Follow these steps to generate the Client ID and Client Secret in your Jamf Pro environment:
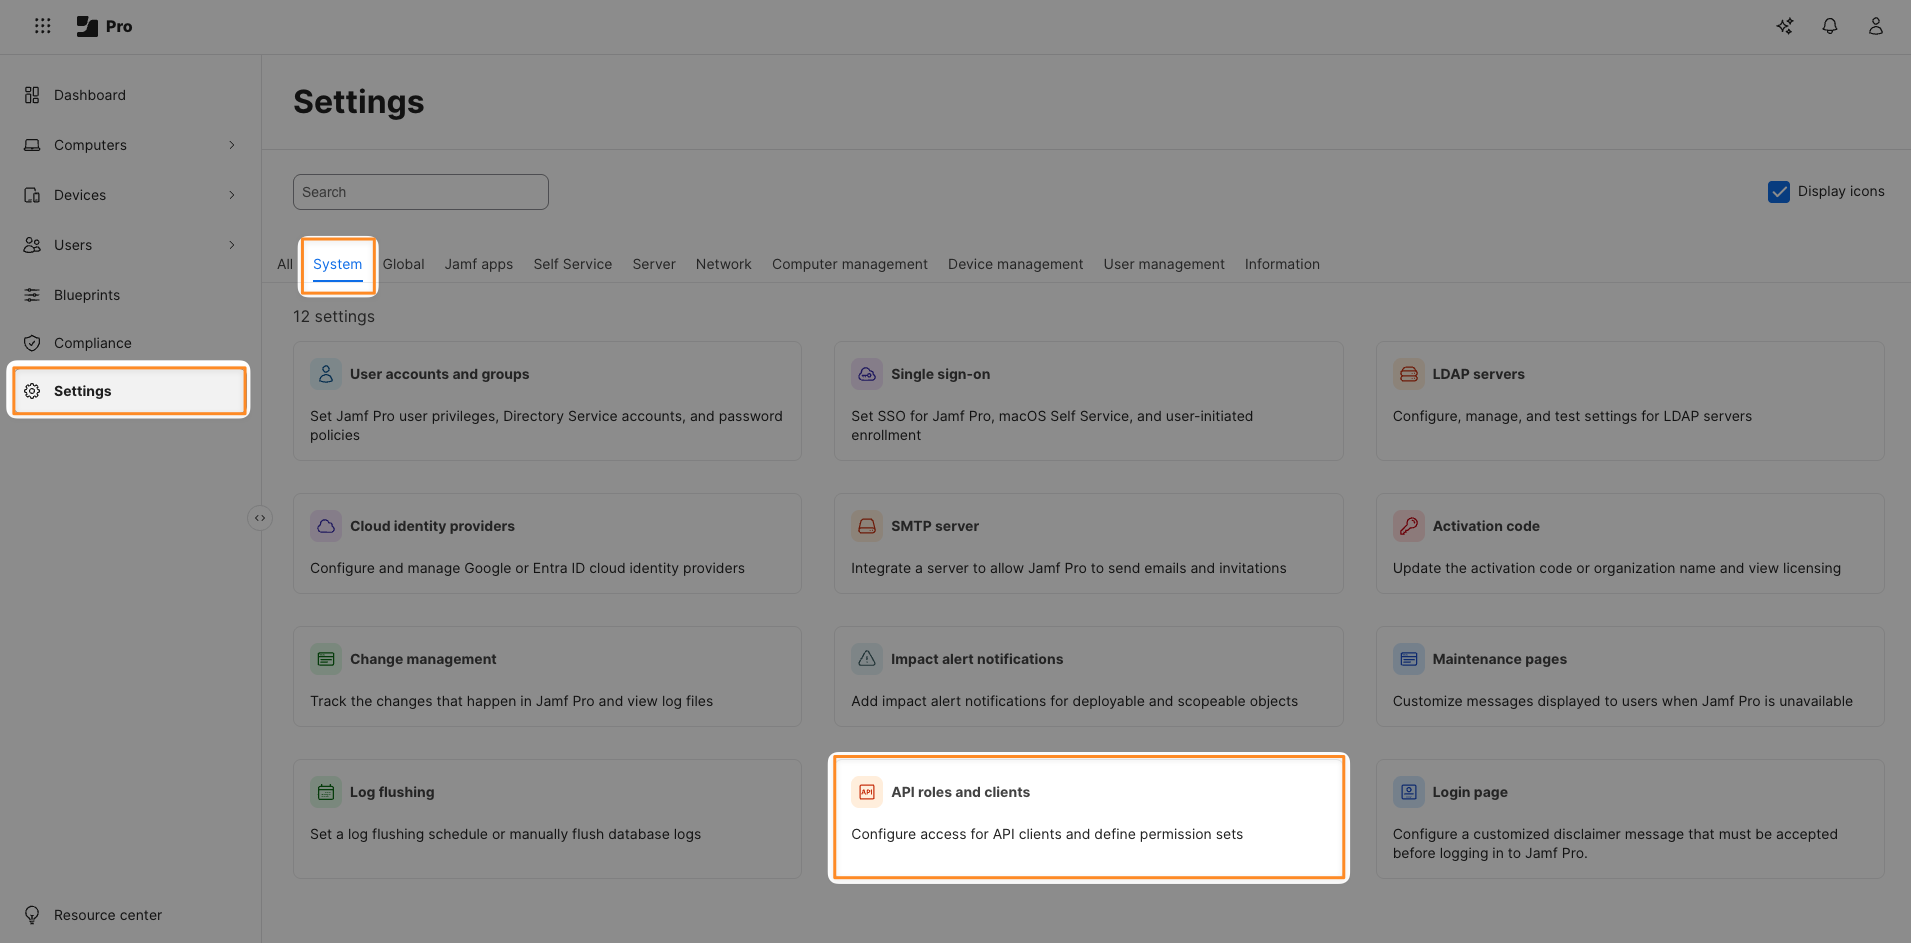
1.1. Create API Roles
-
Log in to your Jamf Pro instance.
-
In the sidebar, click Settings > Systems > look for API Roles and Clients.
-
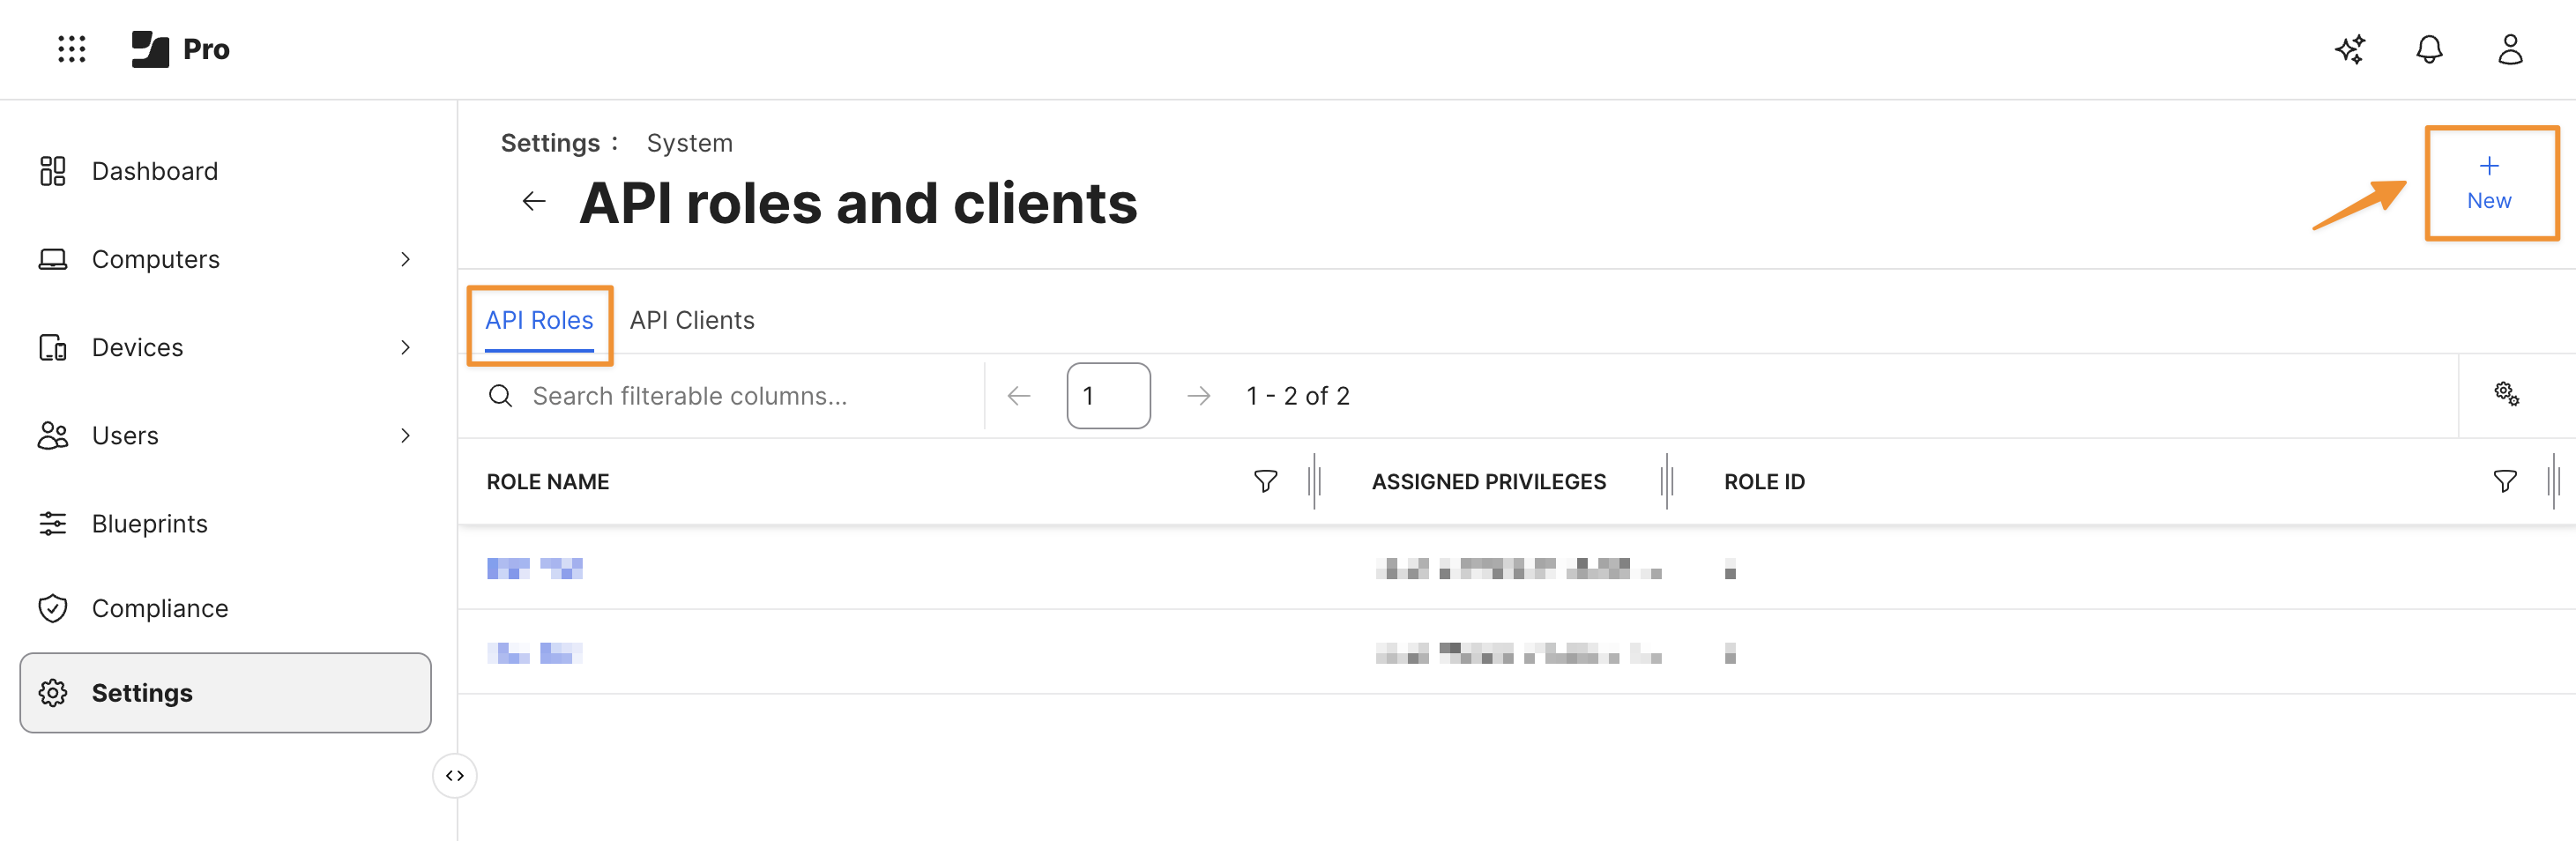
In the API Roles and Clients setup screen, locate the API Roles tab > Click New to create a new API role.
-
Fill in the required information:
-
Display Name: Enter a name for the role (e.g., Jamf Asset Importer for AssetIT).
-
Privileges: Select
Read Mobile DevicesandRead Computers.
-
-
Click Save at the bottom right to save the new API role.

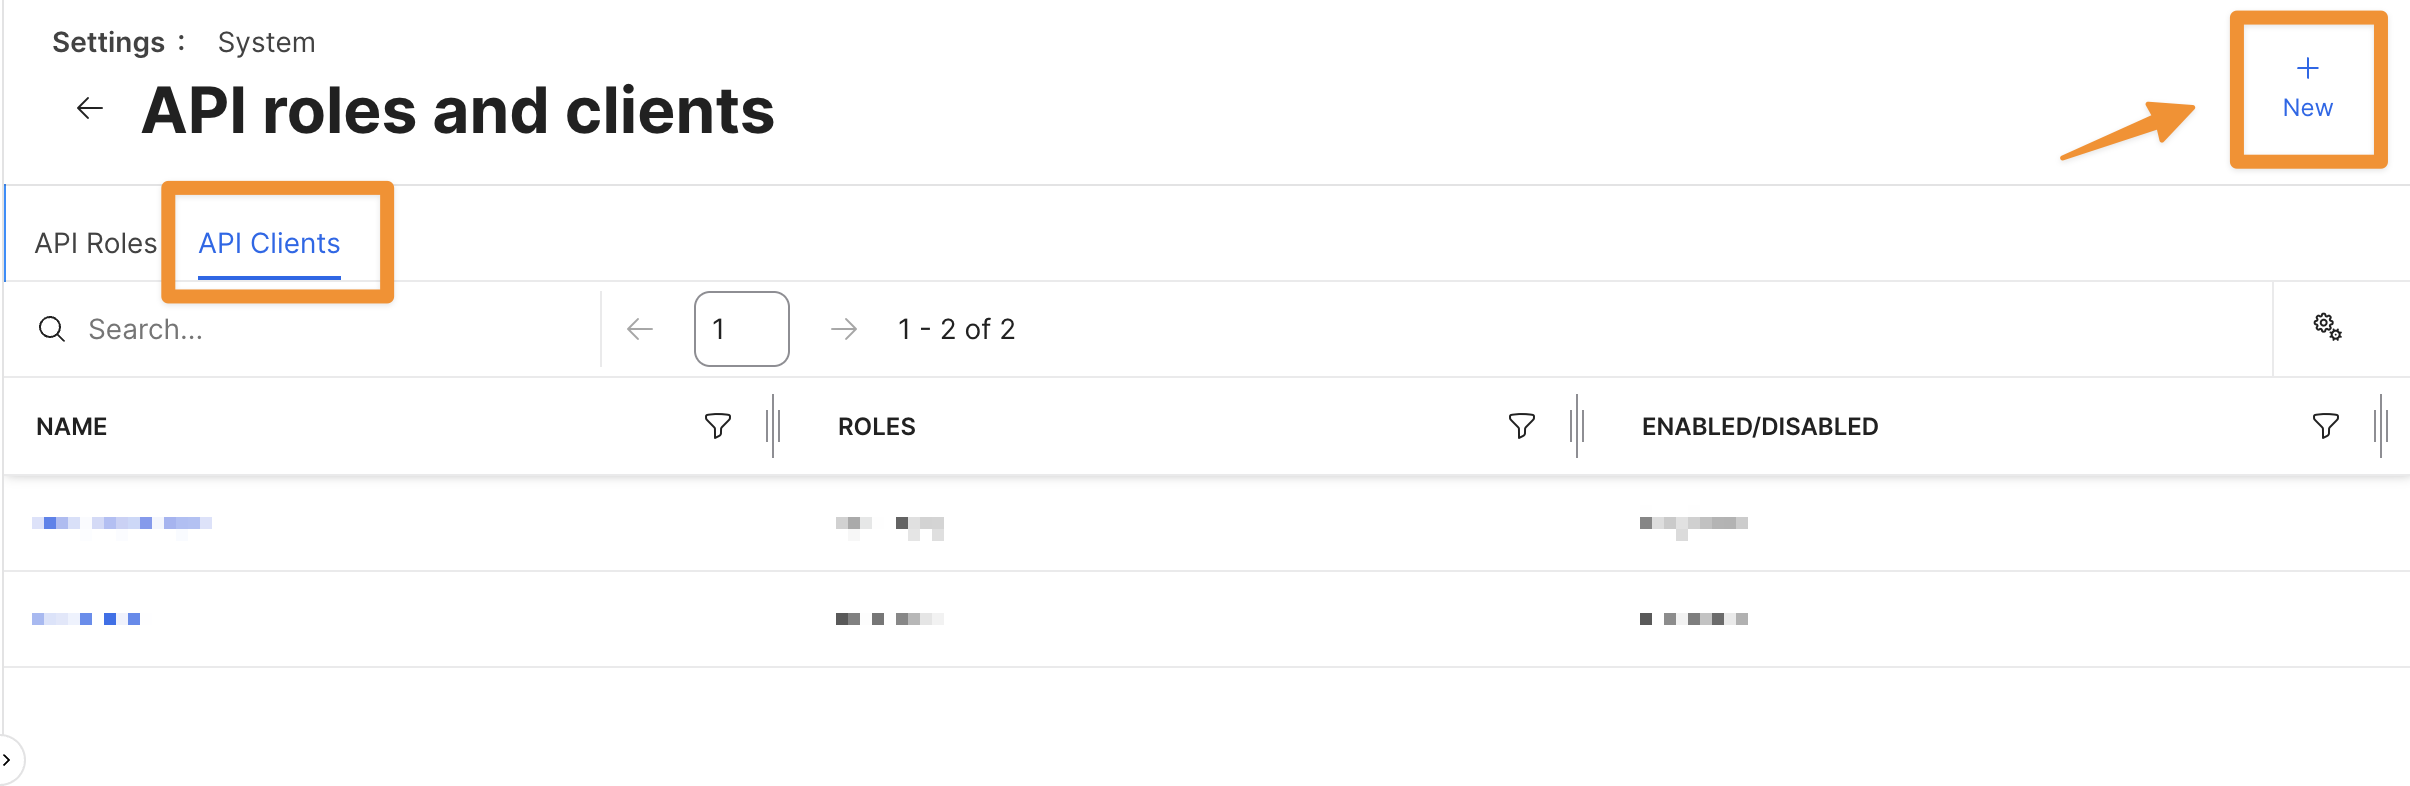
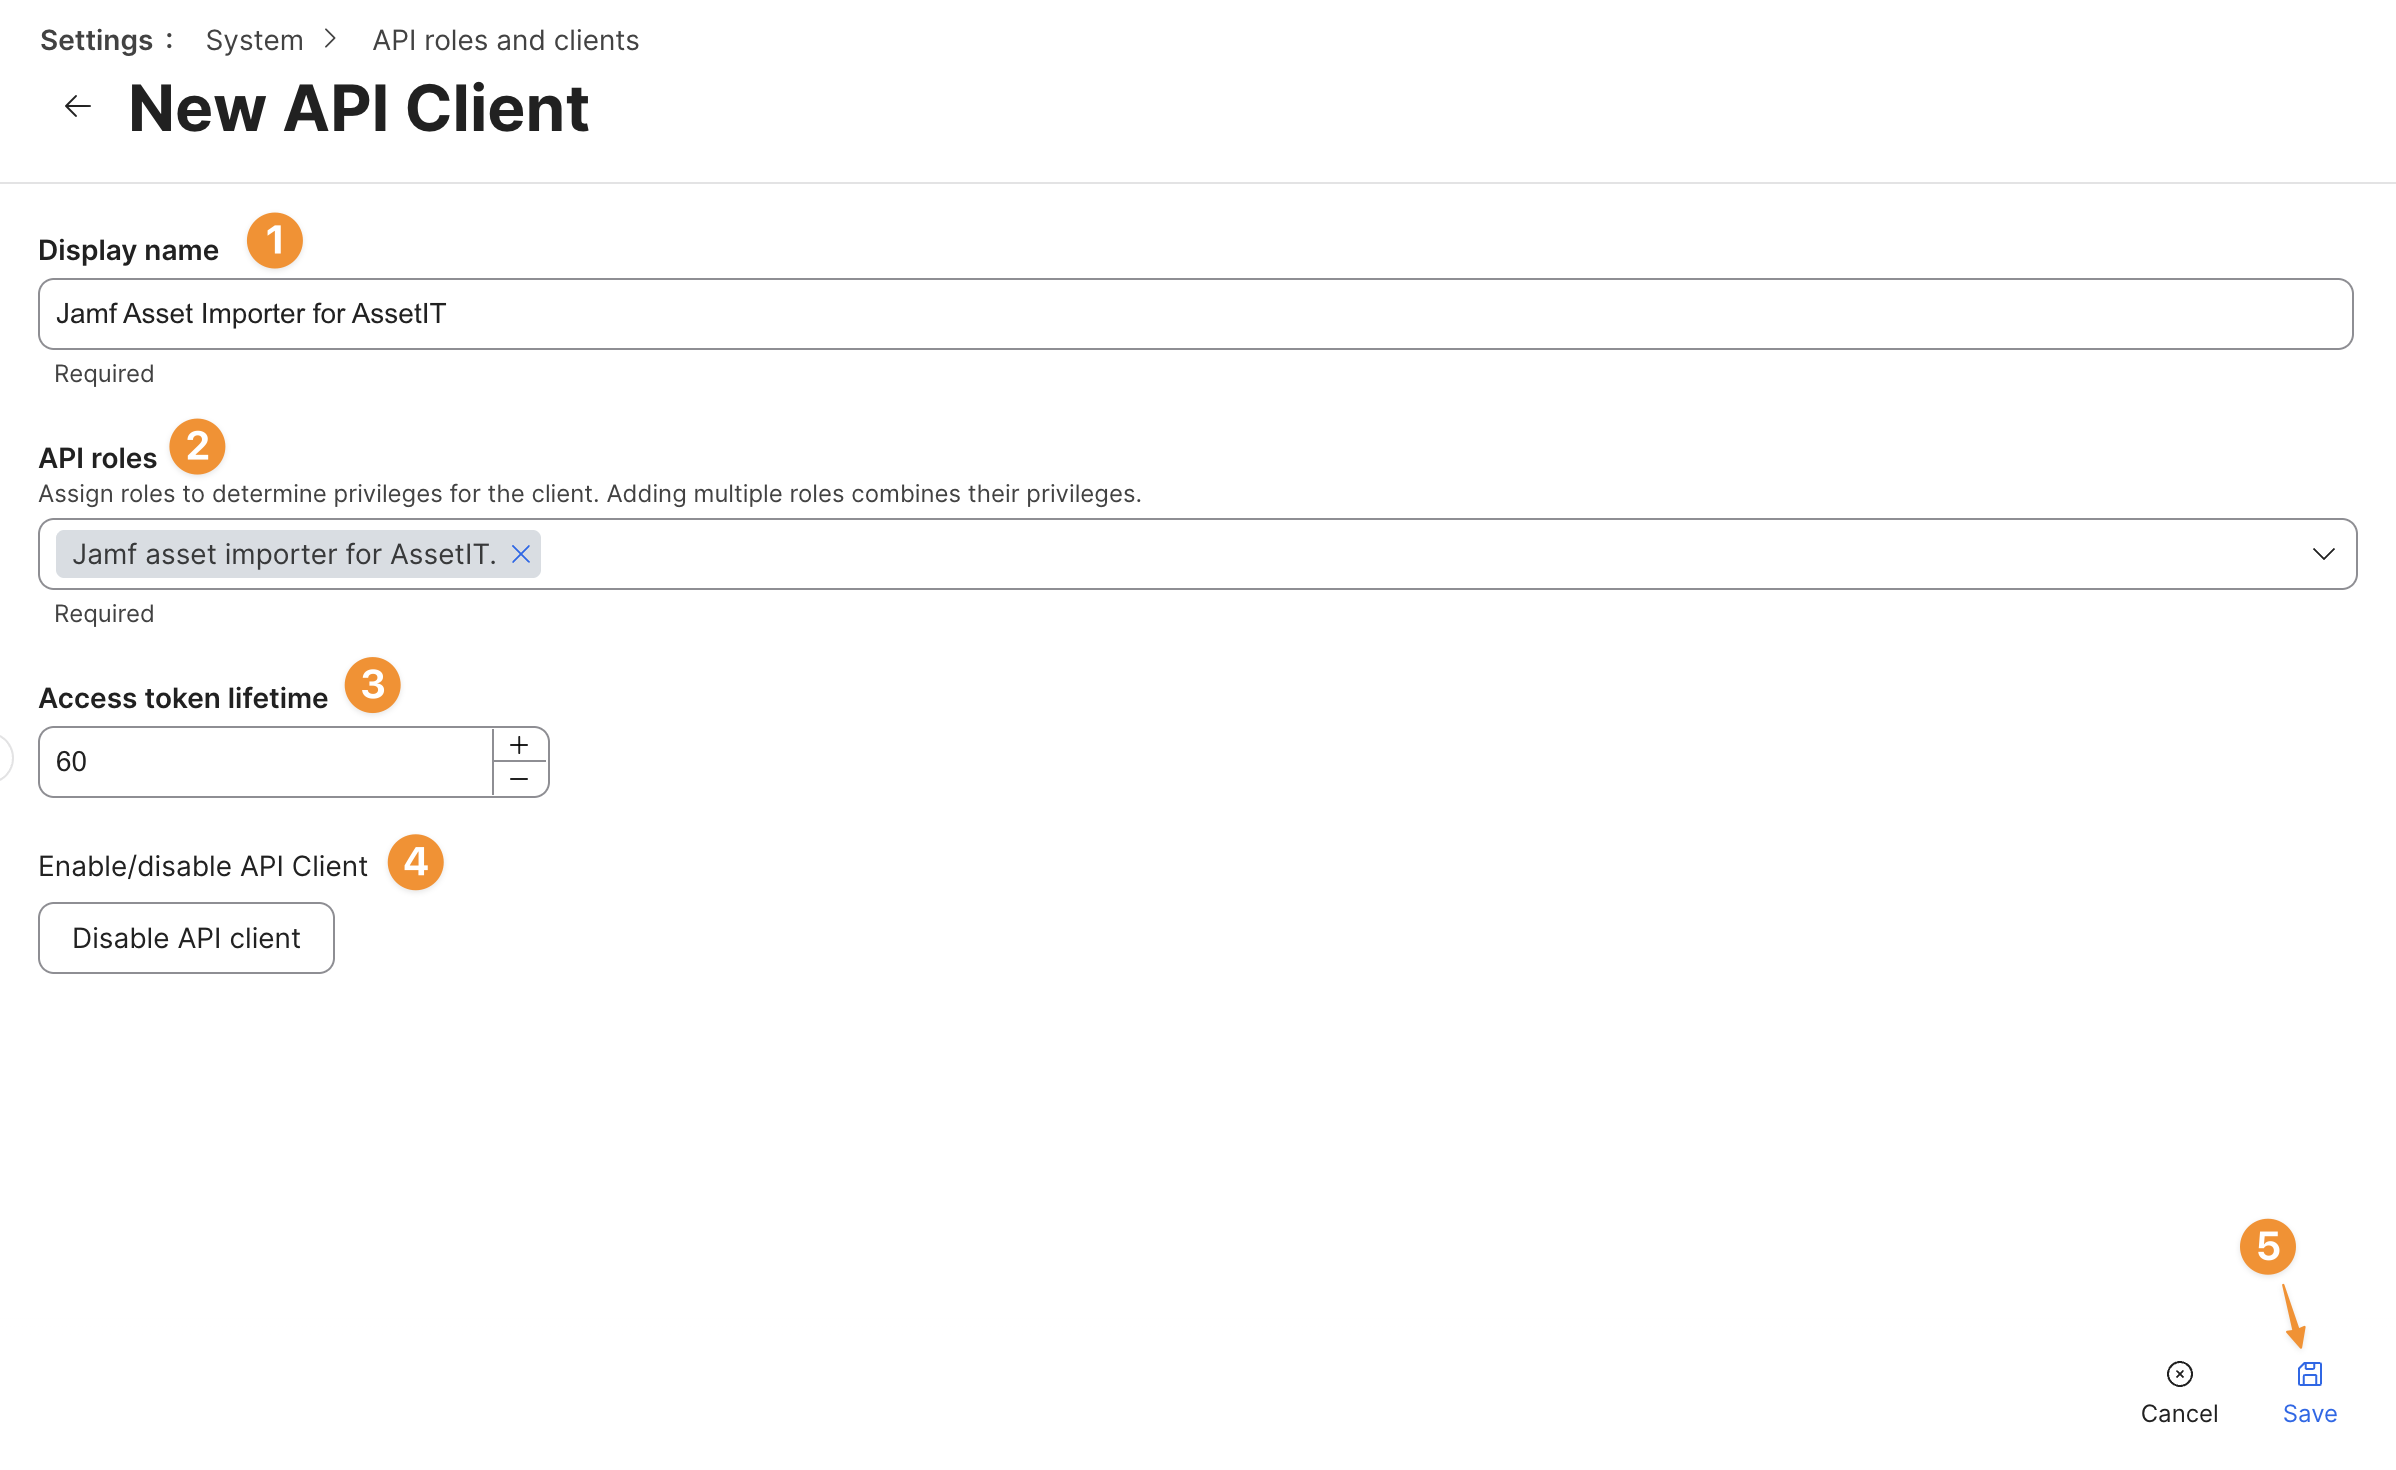
1.2. Create API Clients
Once the API role is created with the appropriate privileges, follow these steps to create the API client:
-
Navigate back to the API Roles and Clients screen. This time, click on the API Clients tab and click the New button to create a new API Client.
-
Fill in the information:
-
Set the Display Name for the API Client (e.g., Jamf Asset Importer for AssetIT).
-
Select the role you created earlier with the Read Mobile Devices and Read Computers privileges.
-
Configure the Access Token Lifetime in seconds (set the expiration time for the token).
-
Click Enable API Client.
-
Click Save to finish creating the API Client.
-
1.3. Generate Client Secret
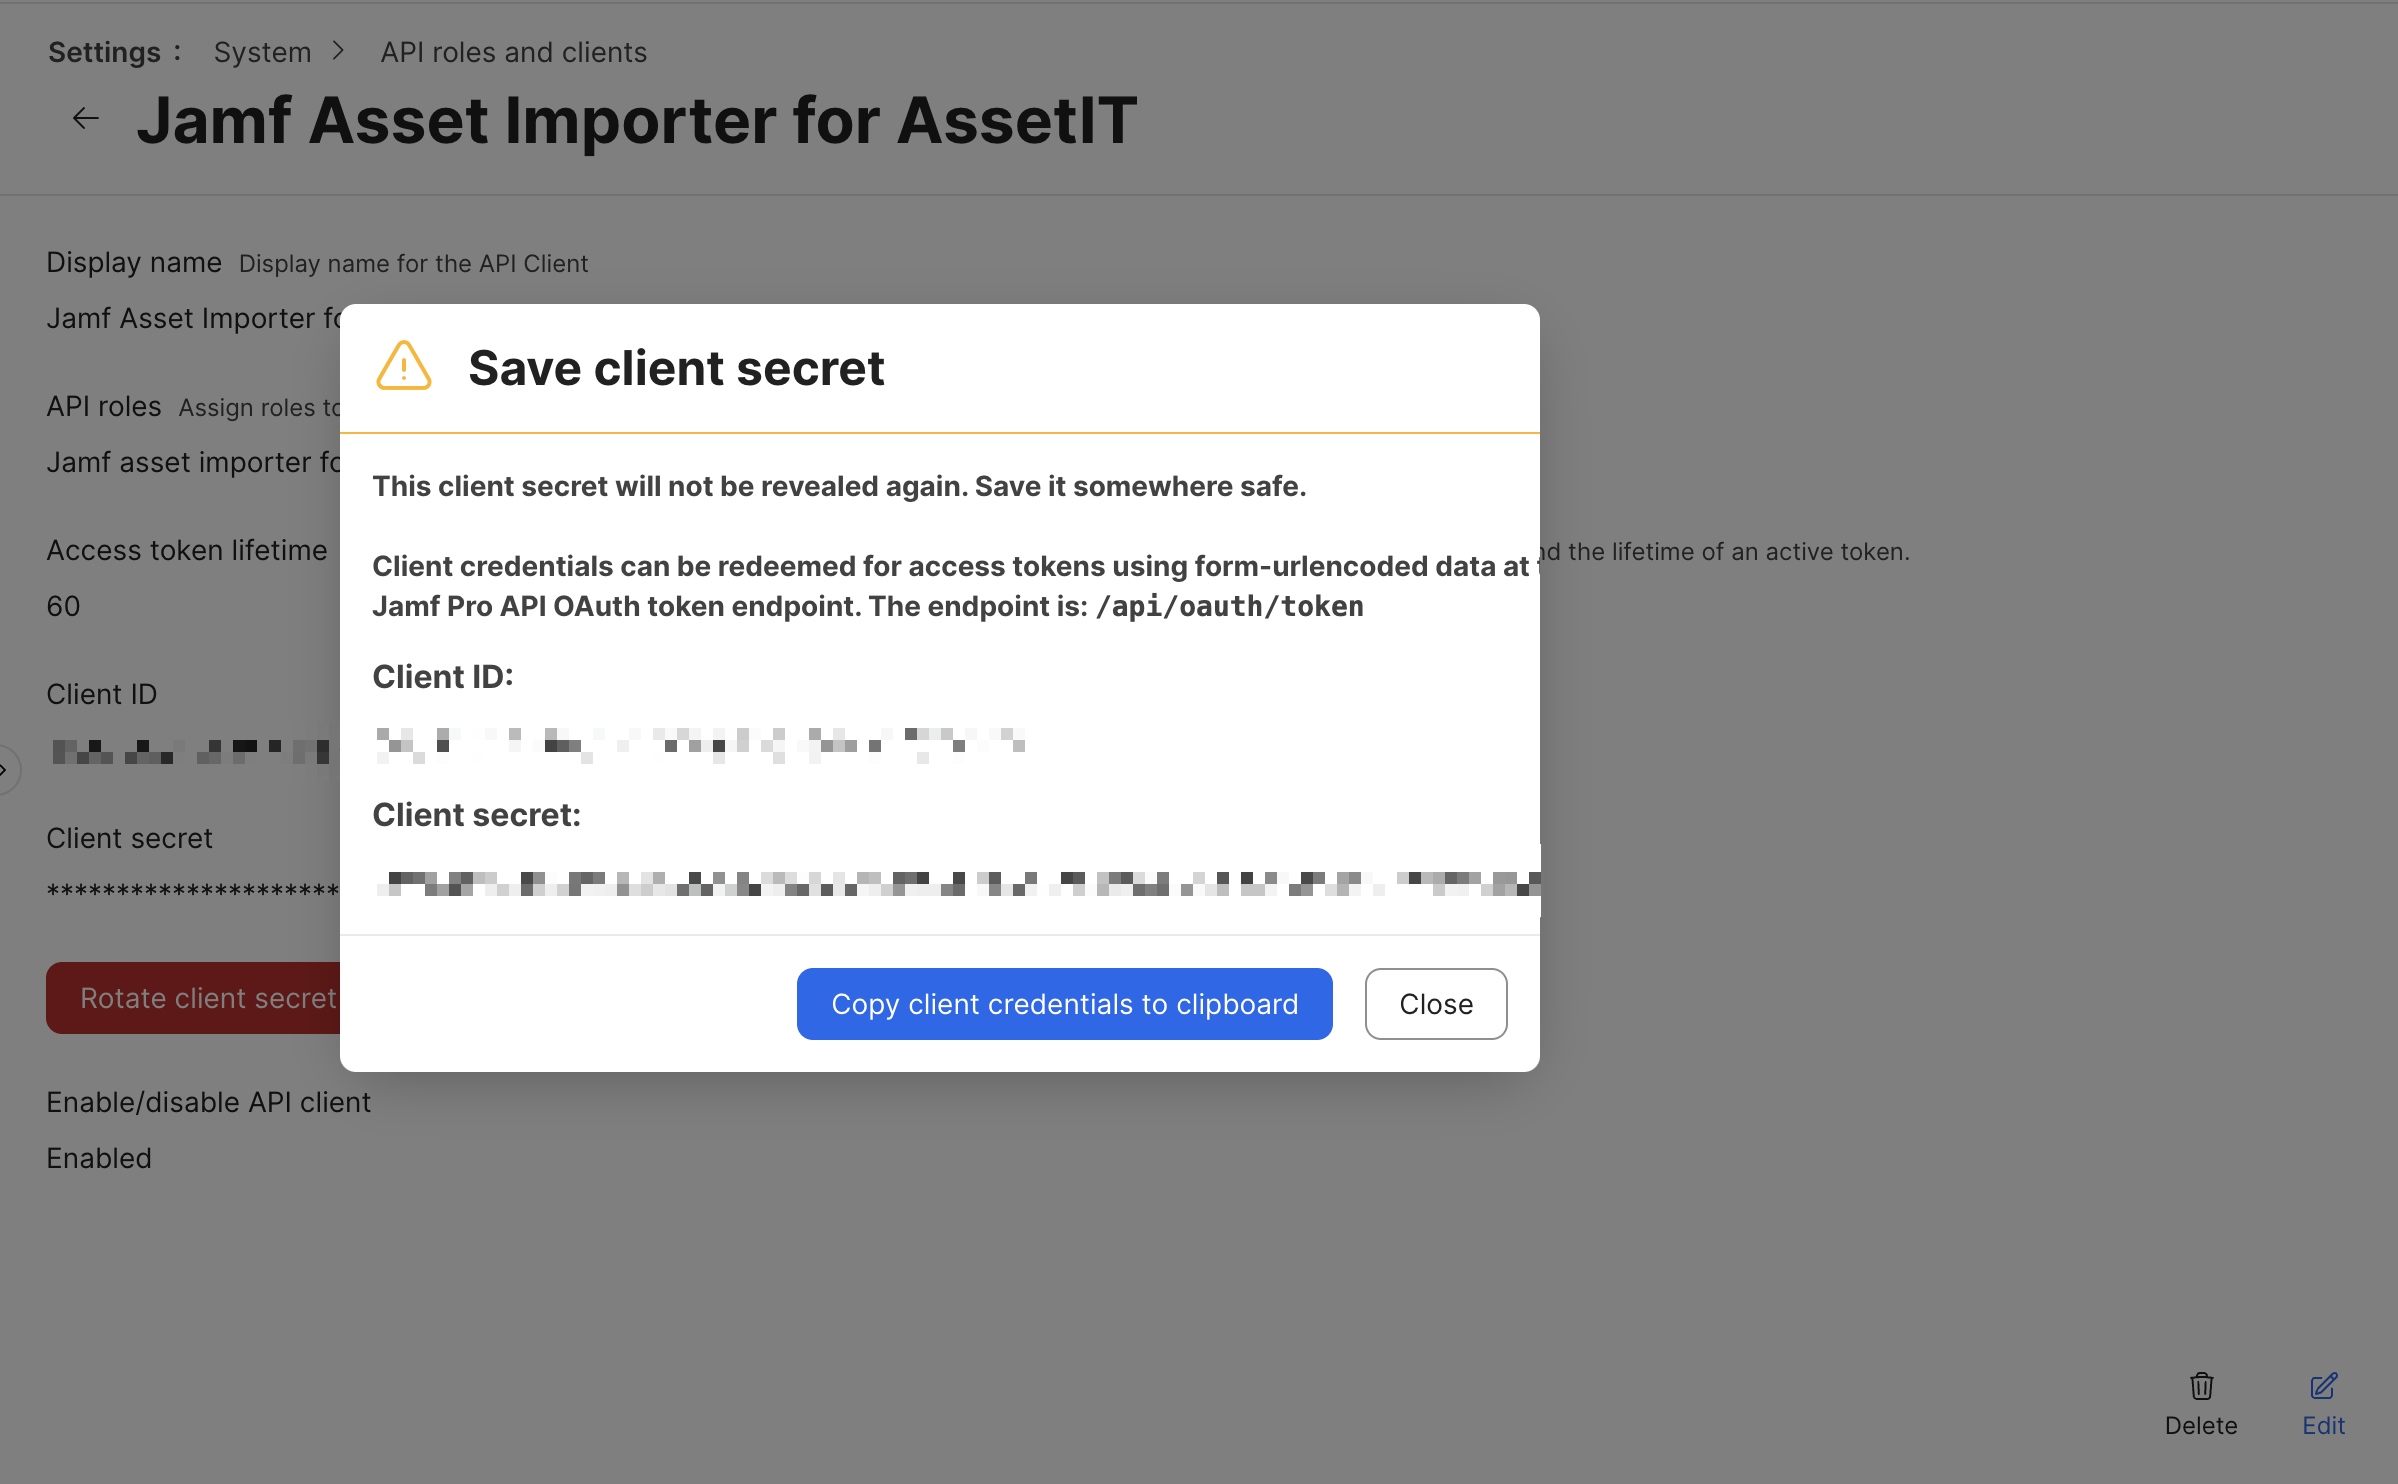
After creating the API client, generate the Client Secret.
-
On the API Clients screen, locate the client you just created.
-
Click Generate Client Secret to create the secret for this client.
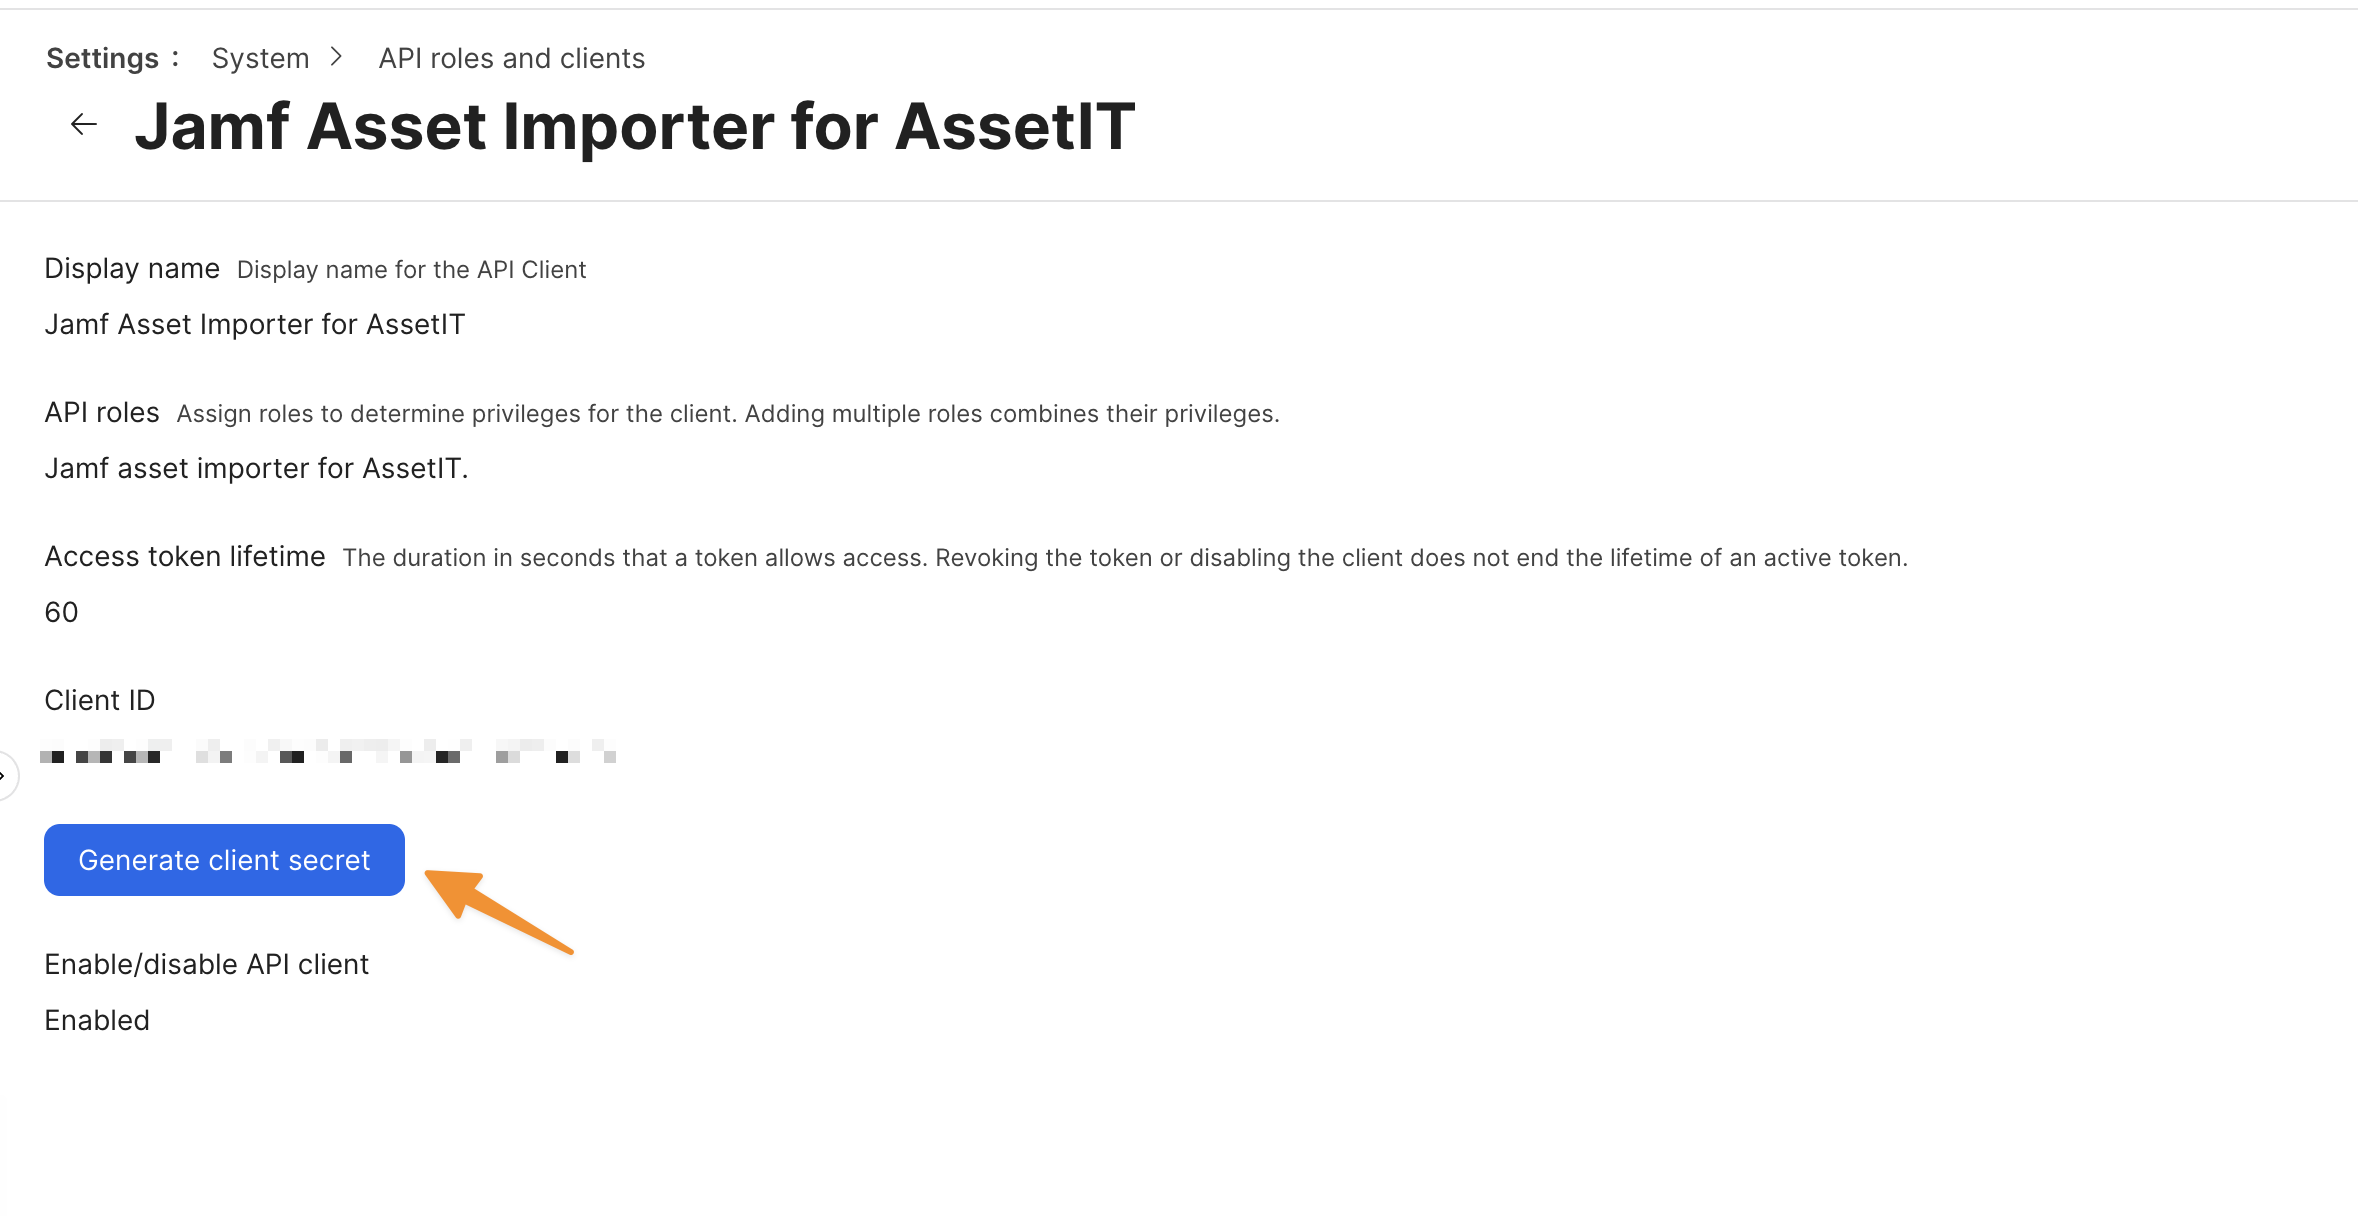
-
Copy the generated Client Secret and store it securely, as you will need it for the integration.
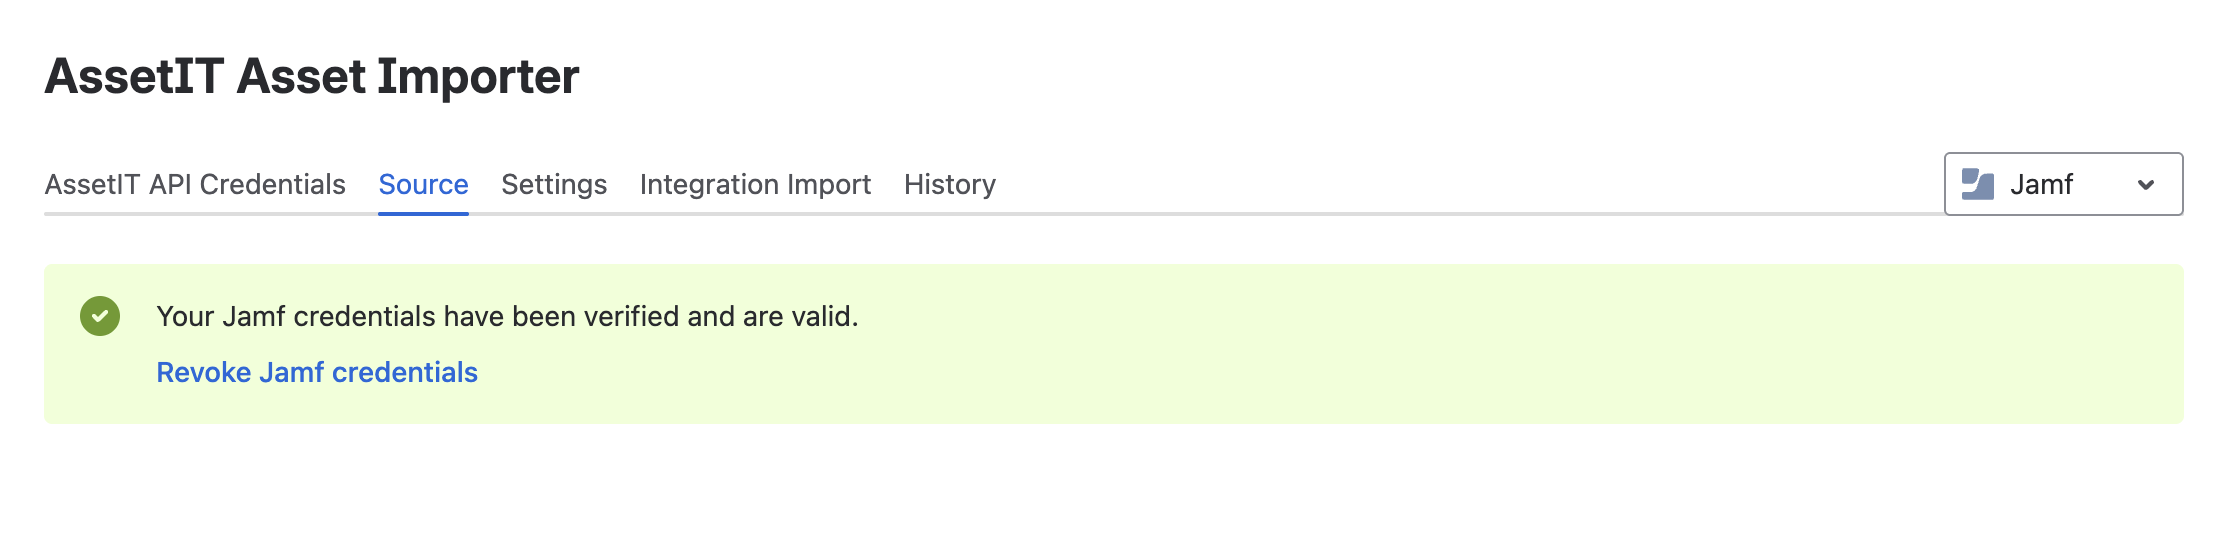
2. Enter the Client ID and Secret to AssetIT Asset Importer
Once you have the Client ID and Client Secret, proceed to the following steps:
-
Open AssetIT Asset Importer.
-
Navigate to the Source tab, select the Jamf as the data sources and enter the following details:
-
Your Jamf Pro URL (e.g.,
example.jamfcloud.com). -
Client ID (generated in Jamf).
-
Client Secret (generated in Jamf).
-
-
Click Save & Check Connection to verify the connection.
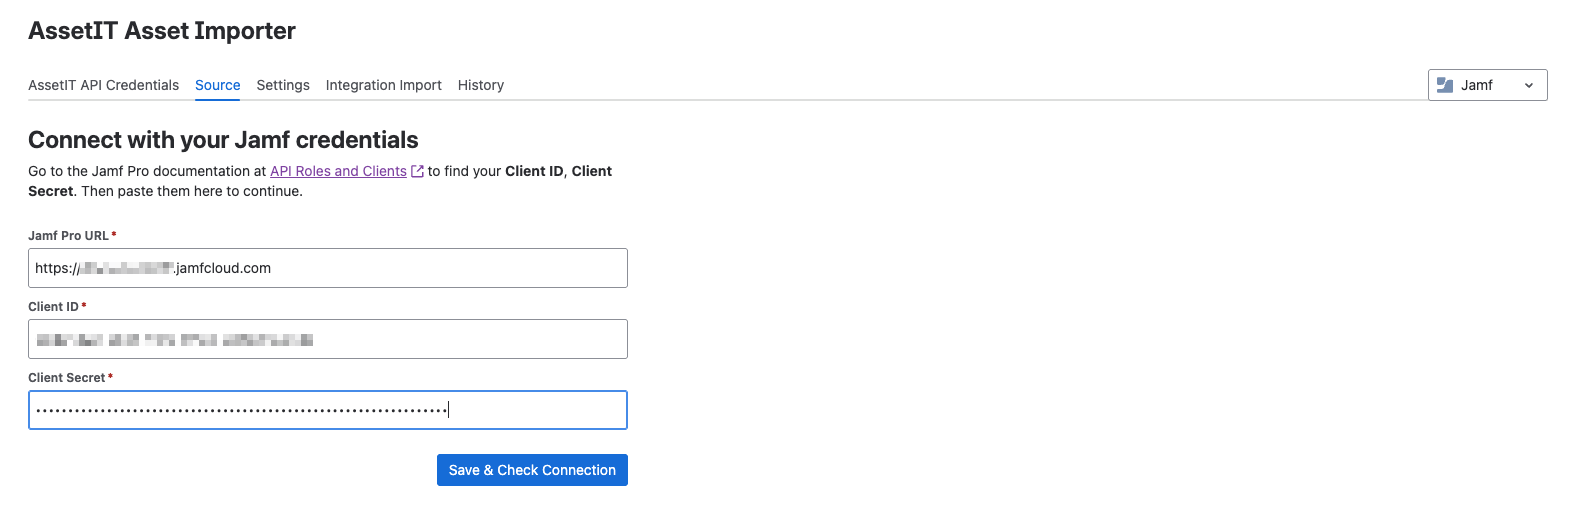
Once the connection is established, the status will update to Connected, confirming that AssetIT Asset Importer is successfully integrated with your Jamf Pro instance.