.png)
Welcome to TeamBoard - Resource Management and Time Tracking Tool for monday.com!
What is TeamBoard for monday.com?
TeamBoard for monday.com is a powerful tool that enhances your resource management, time tracking, and team collaboration capabilities on monday.com. Available on all monday.com products: monday work management, monday CRM, monday dev, monday service.
This guide will help you get started quickly and efficiently.
Key Features
-
Resource Management: Resouce Scheduling | Workload Management | Working Capacity & Holiday Calendar | Recurring Tasks | Calendar View.
-
Time Tracking: Time Log | Timesheets Approval Workflow.
-
Dashboard & Reports
Check out the videos in this playlist to see how to use TeamBoard for monday.com:
Getting Started for Admins, Resource Managers, Project Managers,…
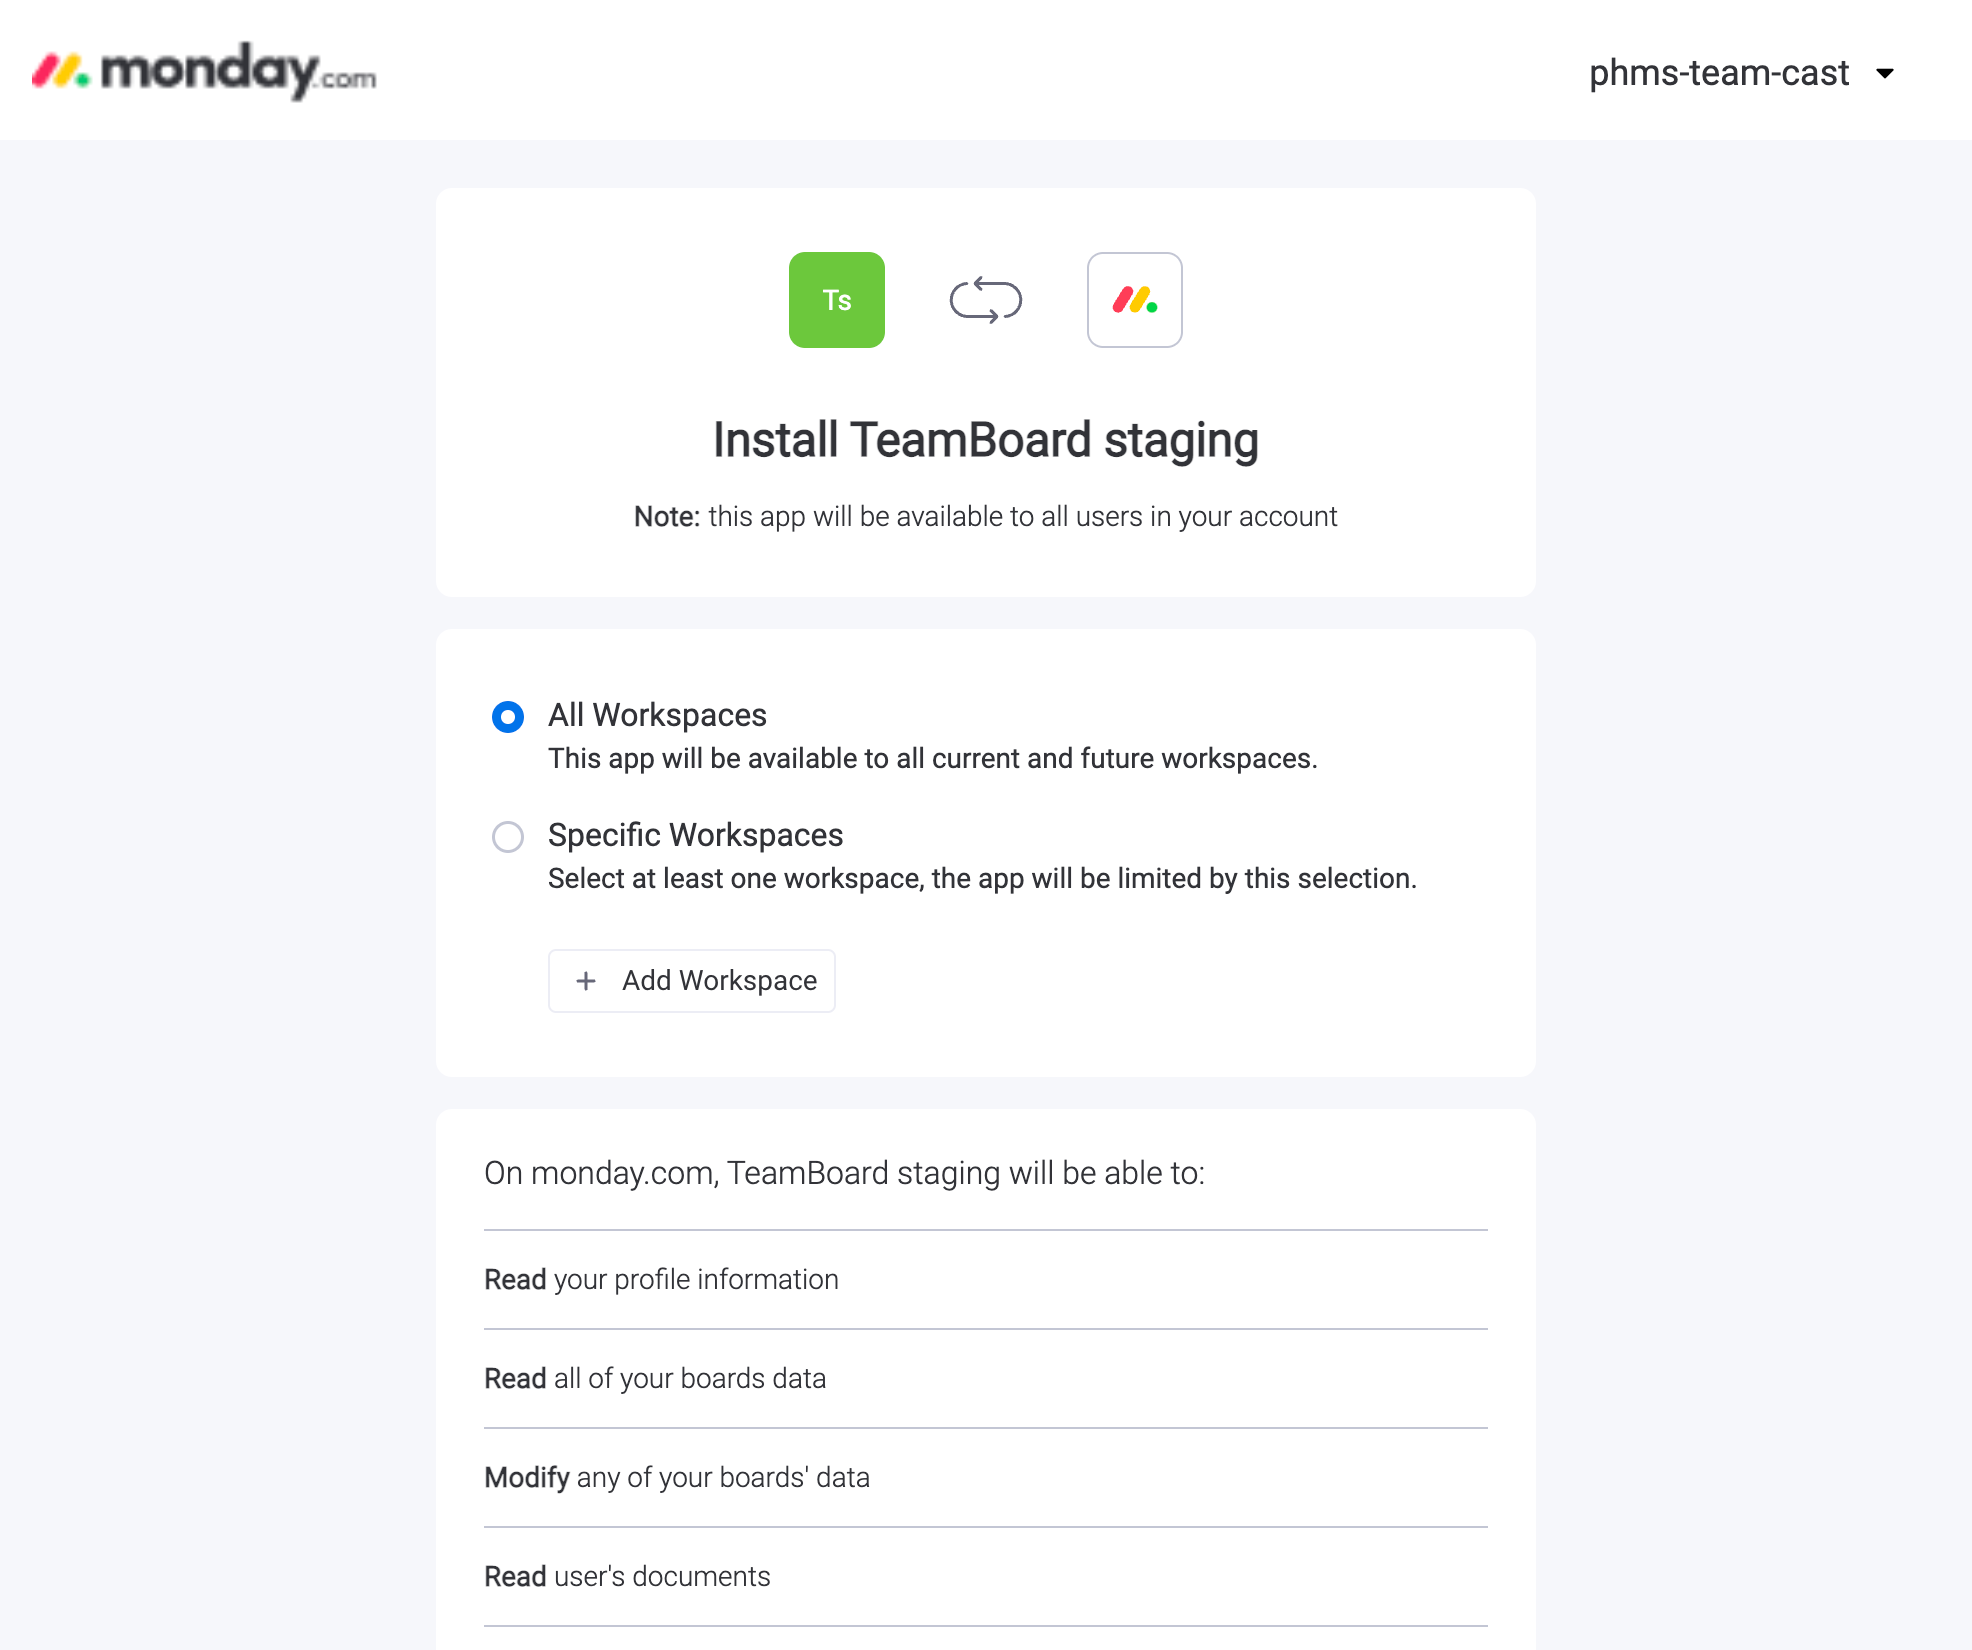
STEP 1: INSTALL THE TEAMBOARD APP
-
Install the Teamboard App using this URL
-
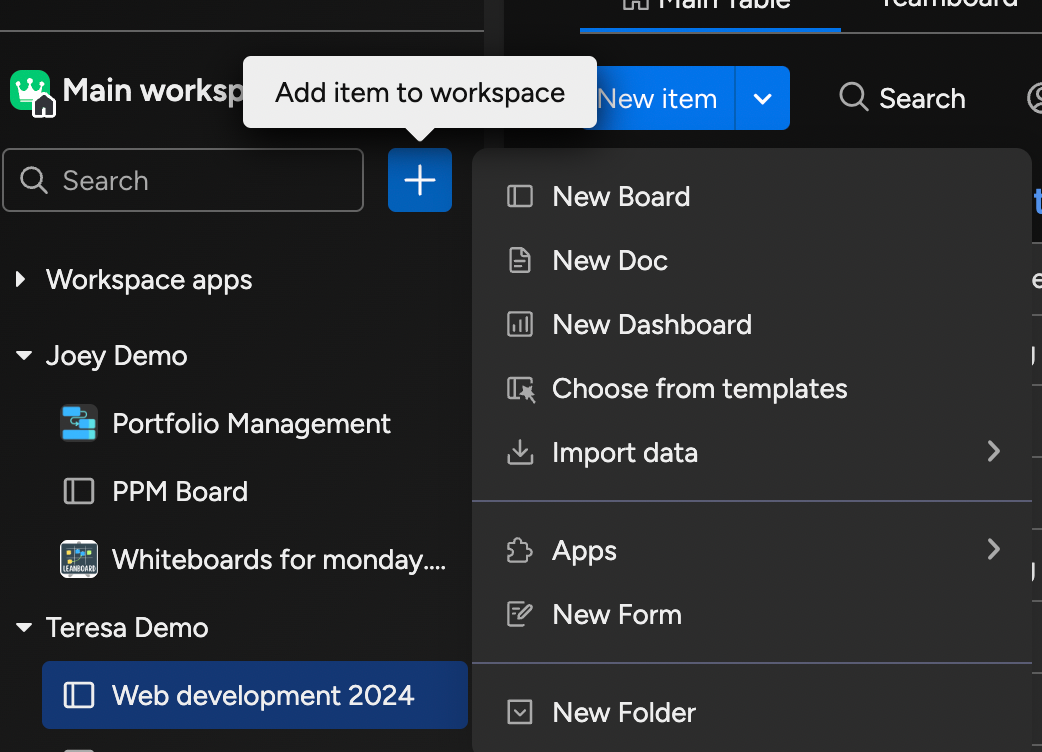
Install the TeamBoard App Directly on Monday Workspace
-
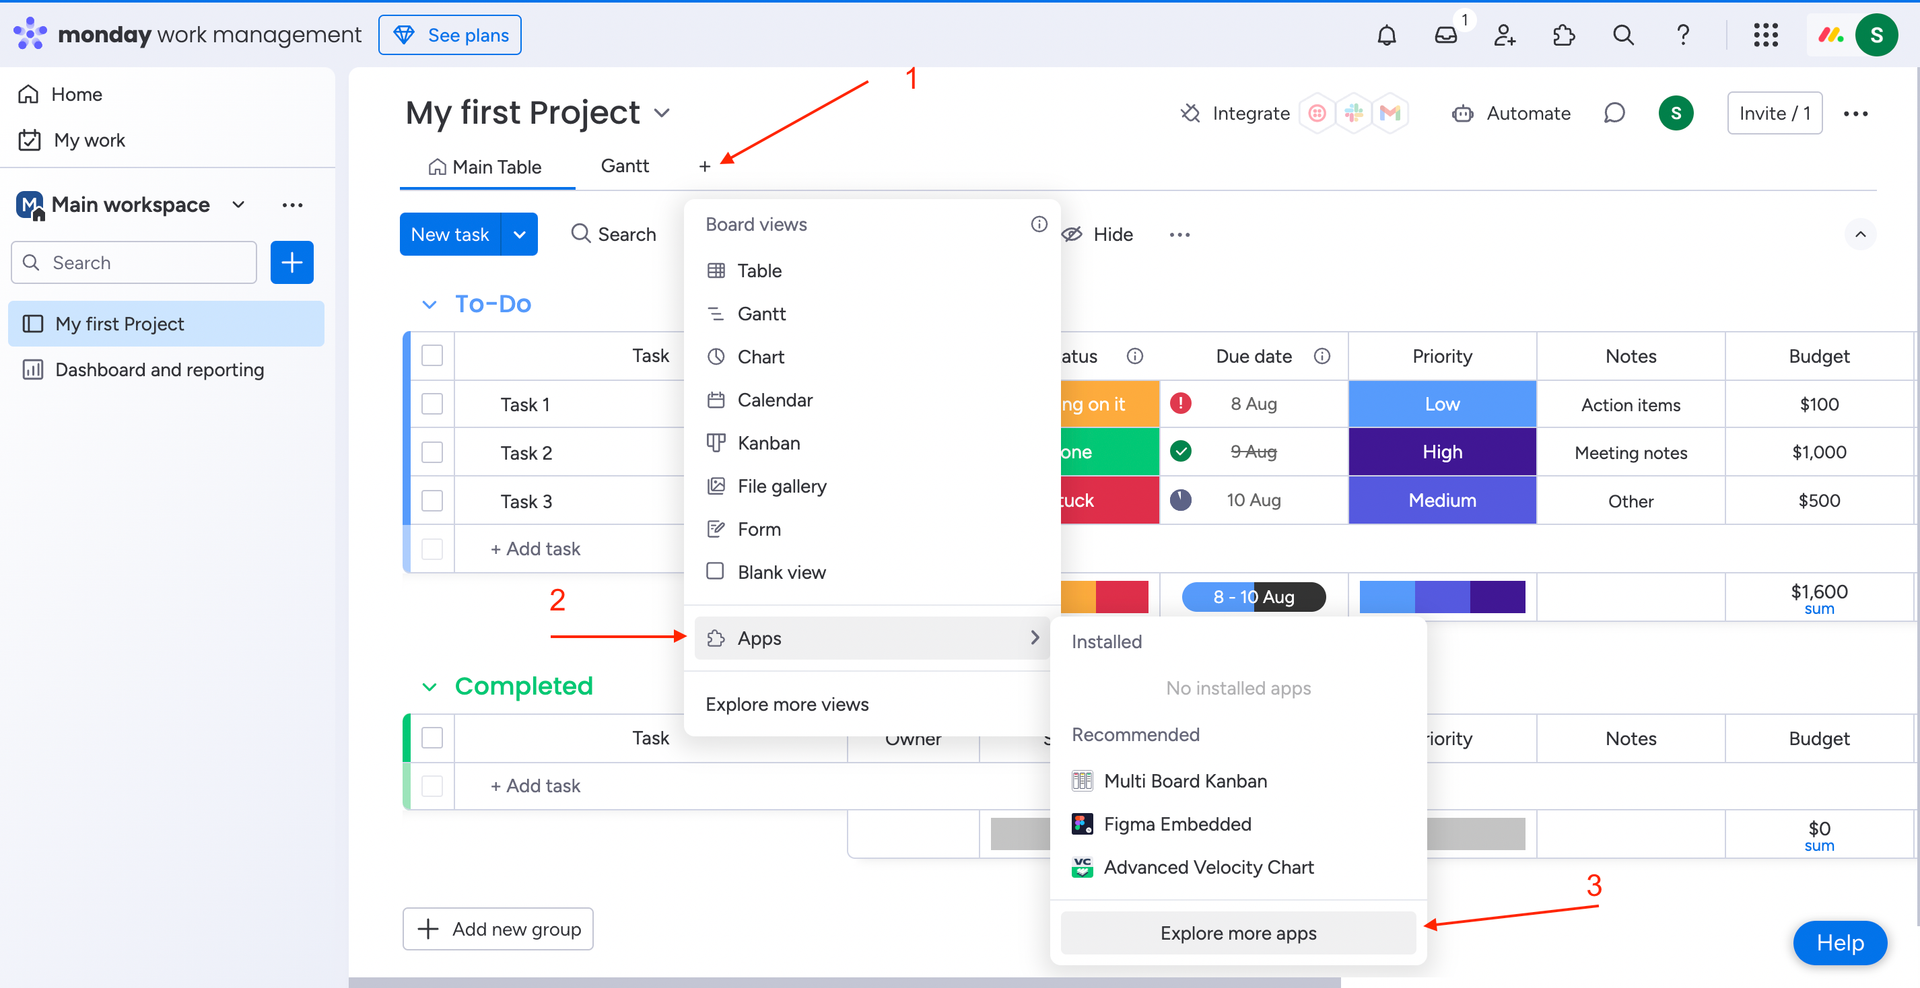
Install the TeamBoard App on the Project Board
-
Install the TeamBoard App on the Item View Center
-
Install the TeamBoard App on the Dashboard Widget
LEARN MORE
Learn more How to install the TeamBoard app?
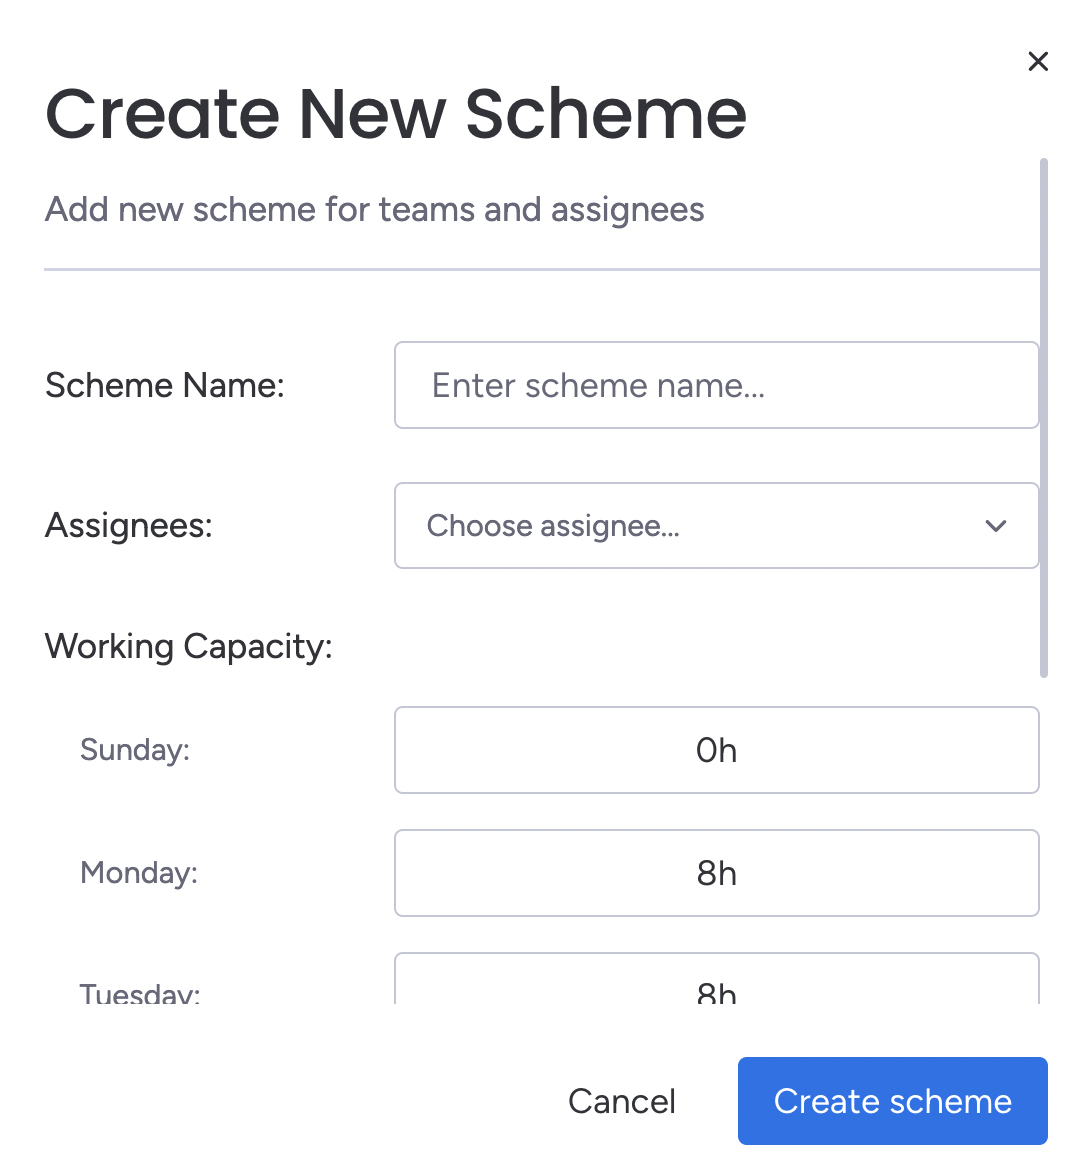
STEP 3: SET UP CAPACITY SCHEME
The Capacity Hour Scheme refers to the maximum number of hours a user can work in a single day.
-
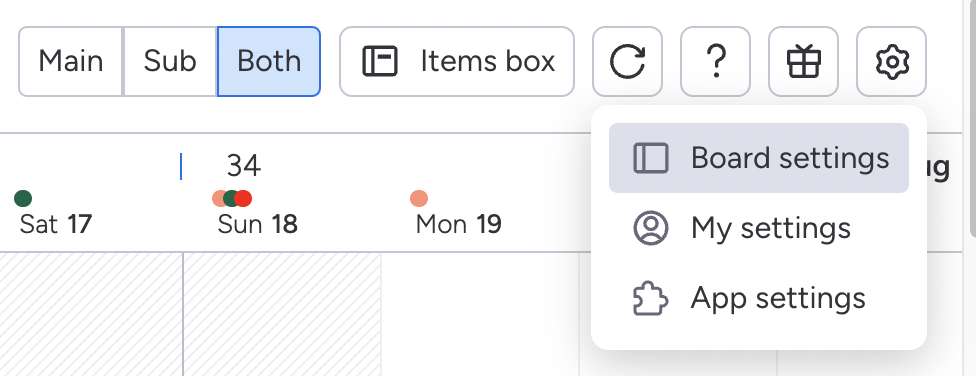
Go to App Setting

-
Create a new Scheme
-
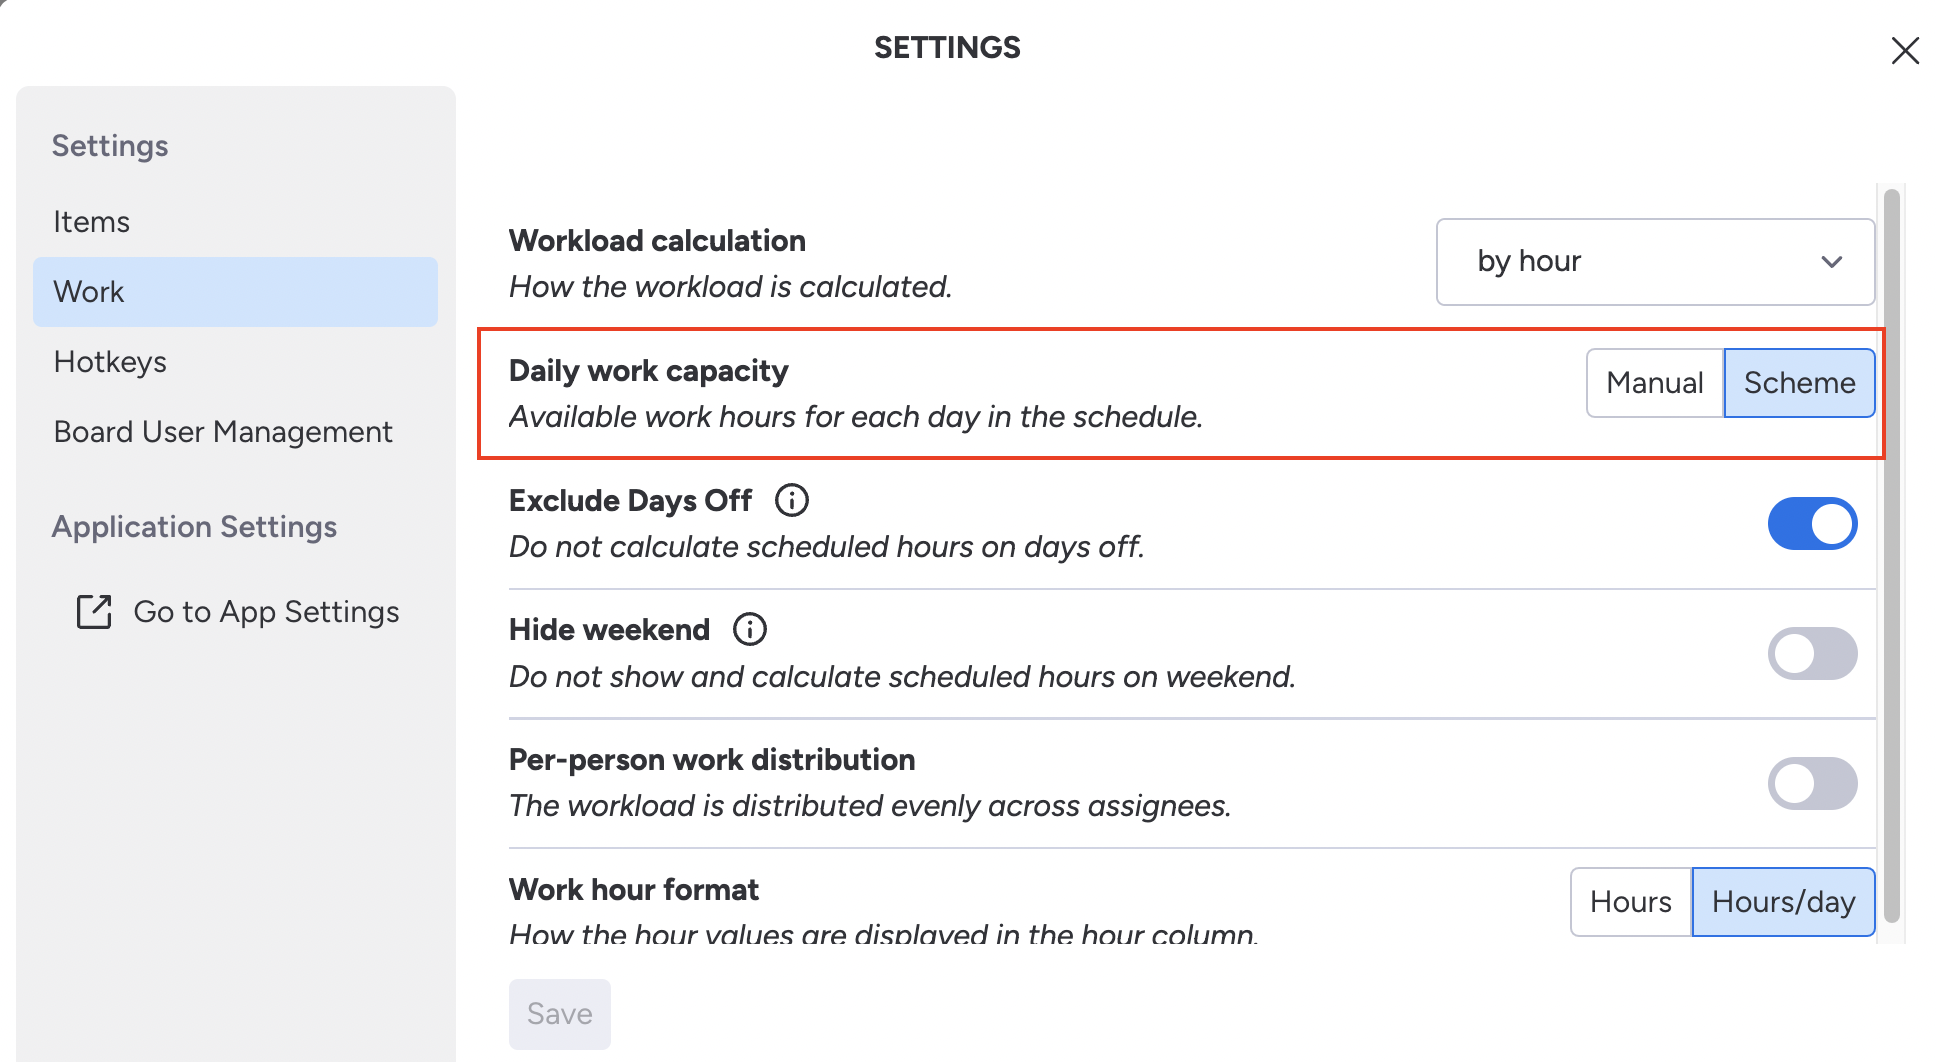
Apply the Work Capacity Scheme to Your Board
By default, Teamboard will set an 8-hour workday for all users. To apply the Work Capacity Scheme to your board, go to Board Settings and switch to Capacity Scheme.
-
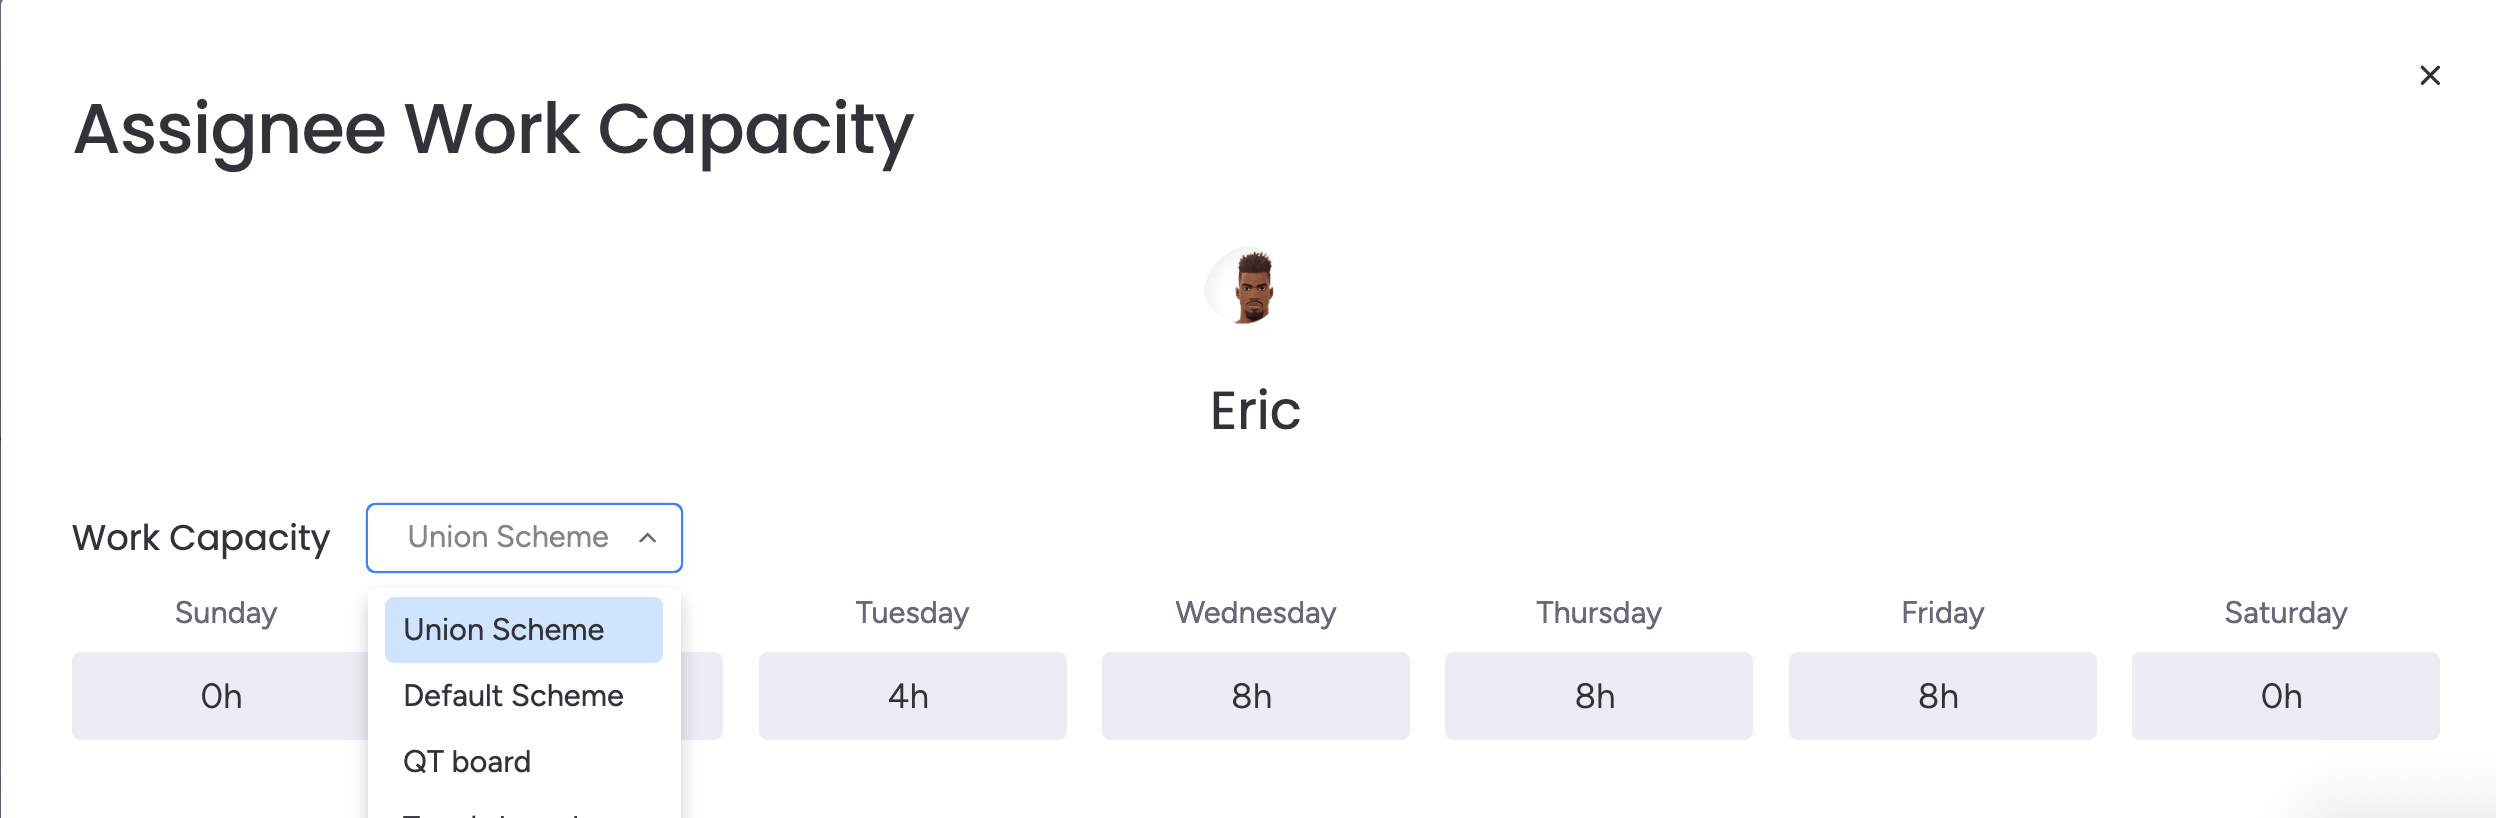
Apply each user's and team's work capacity

LEARN MORE
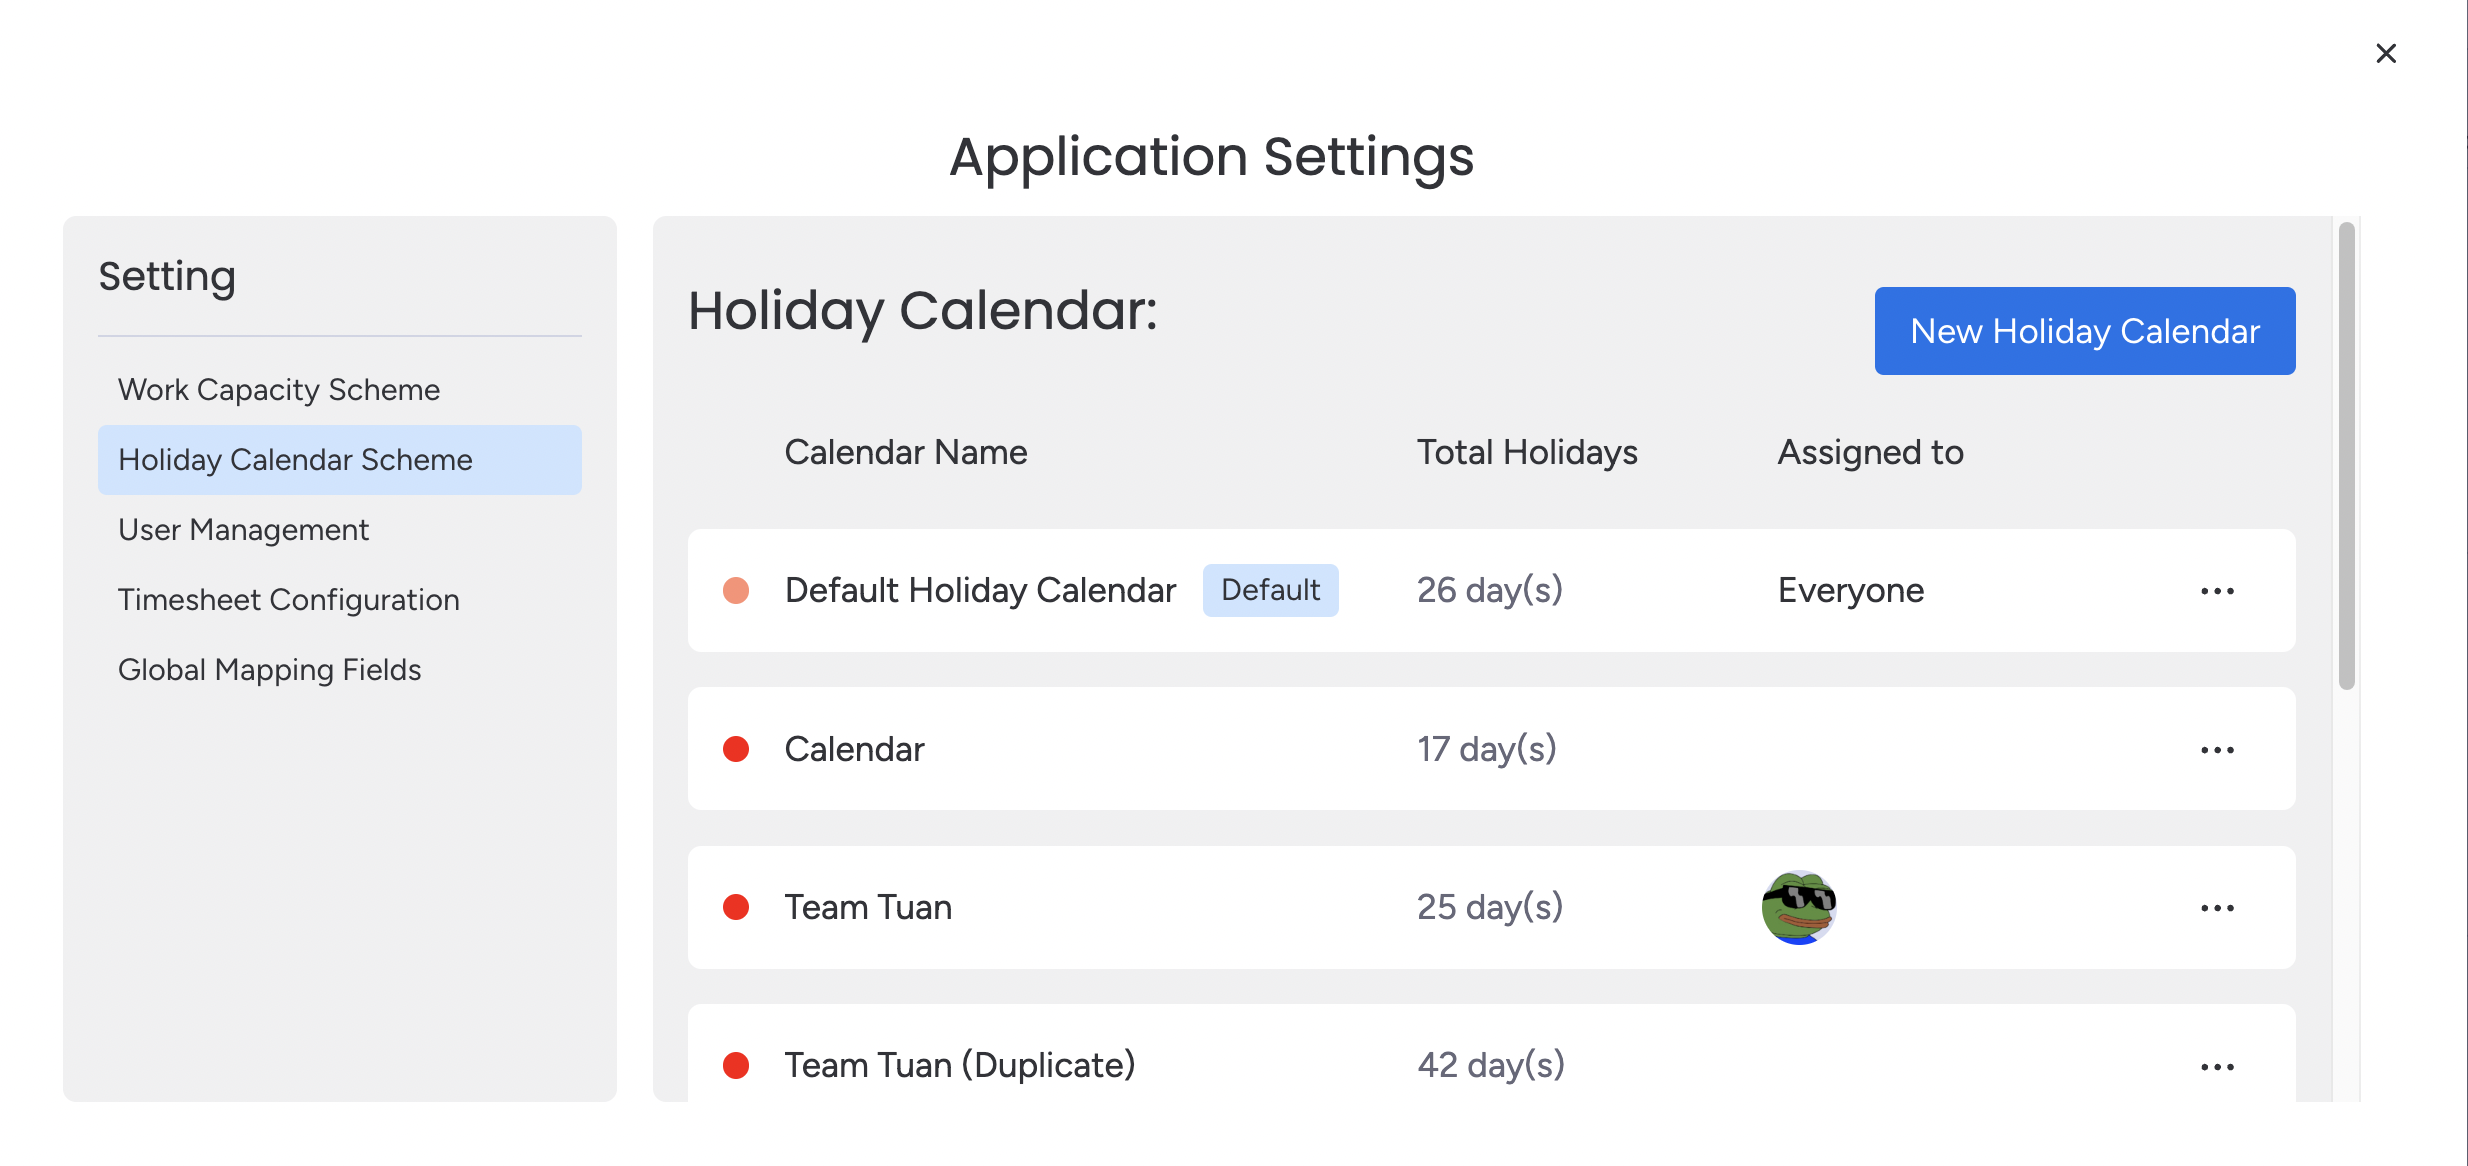
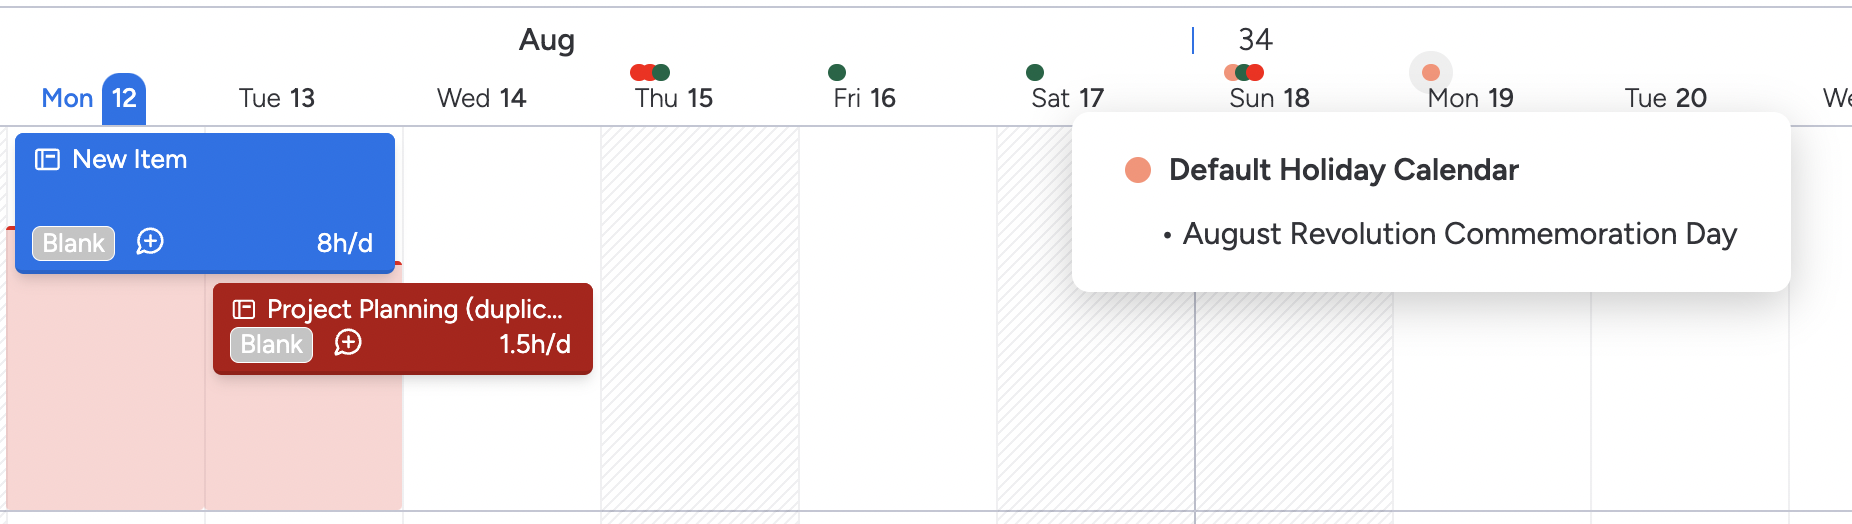
STEP 4: SET UP HOLIDAY SCHEME
Manage and track holidays for teams and members in their workspace. If a person has a holiday, their capacity for that day will be zero.
-
Go to App Setting
-
Create holiday Scheme
-
Check it on the Schedule board or in the Calendar view
LEARN MORE
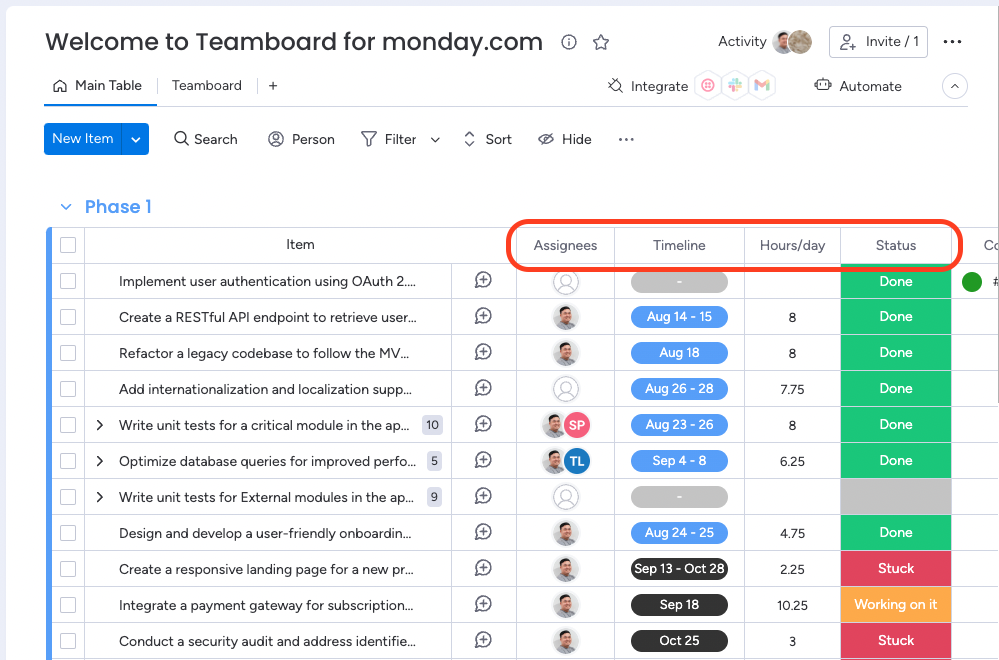
STEP 5: ASSIGN TASKS TO MEMBERS/TEAMS
You have several options for planning existing tasks on TeamBoard:
-
Input Mapped Fields:
In your monday.com table, input the fields mapped to TeamBoard, including Assignees, Timeline, and Scheduled Hours.
-
Creating a New Task
-
Click "New Item" to add a new task to your board in TeamBoard.
-
Input Task Details
.gif?cb=3f8afc65661ba879dae6e53db0284a6e)
-
Use the Item box
LEARN MORE
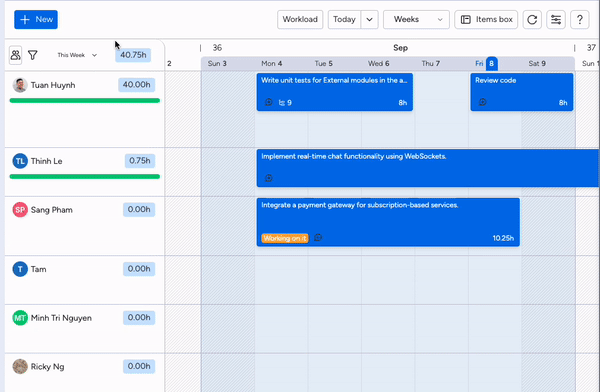
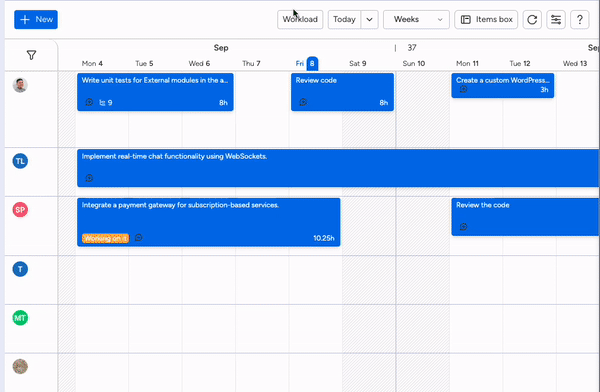
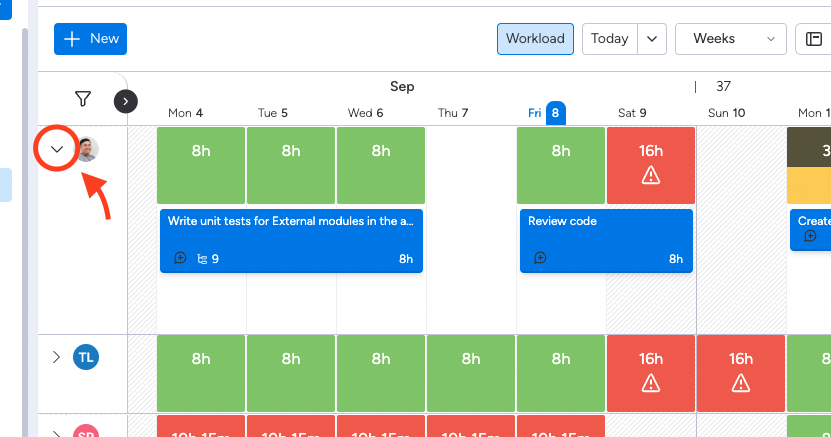
STEP 6: MANAGE USER WORKLOAD
Click the "Workload" button on the top bar to enable this mode

Tip: You can click the archor icon next to avatar each row to expand the row to see the detail plan in workload mode.

-
Green Color: Full of workload - Tasks assigned to an individual or team member have a moderate amount of work
-
Red color: Overload - Tasks assigned have a lower volume of work than the individual's or team's capacity.
-
Yellow Color: Under workload - Tasks assigned exceed the capacity of the individual or team
Select your desired time frame, and the number of scheduled hours will appear on the left side.
STEP 7: CONFIGURE WORK HOURS (IF NEEDED)
Go to Board Setting → Work
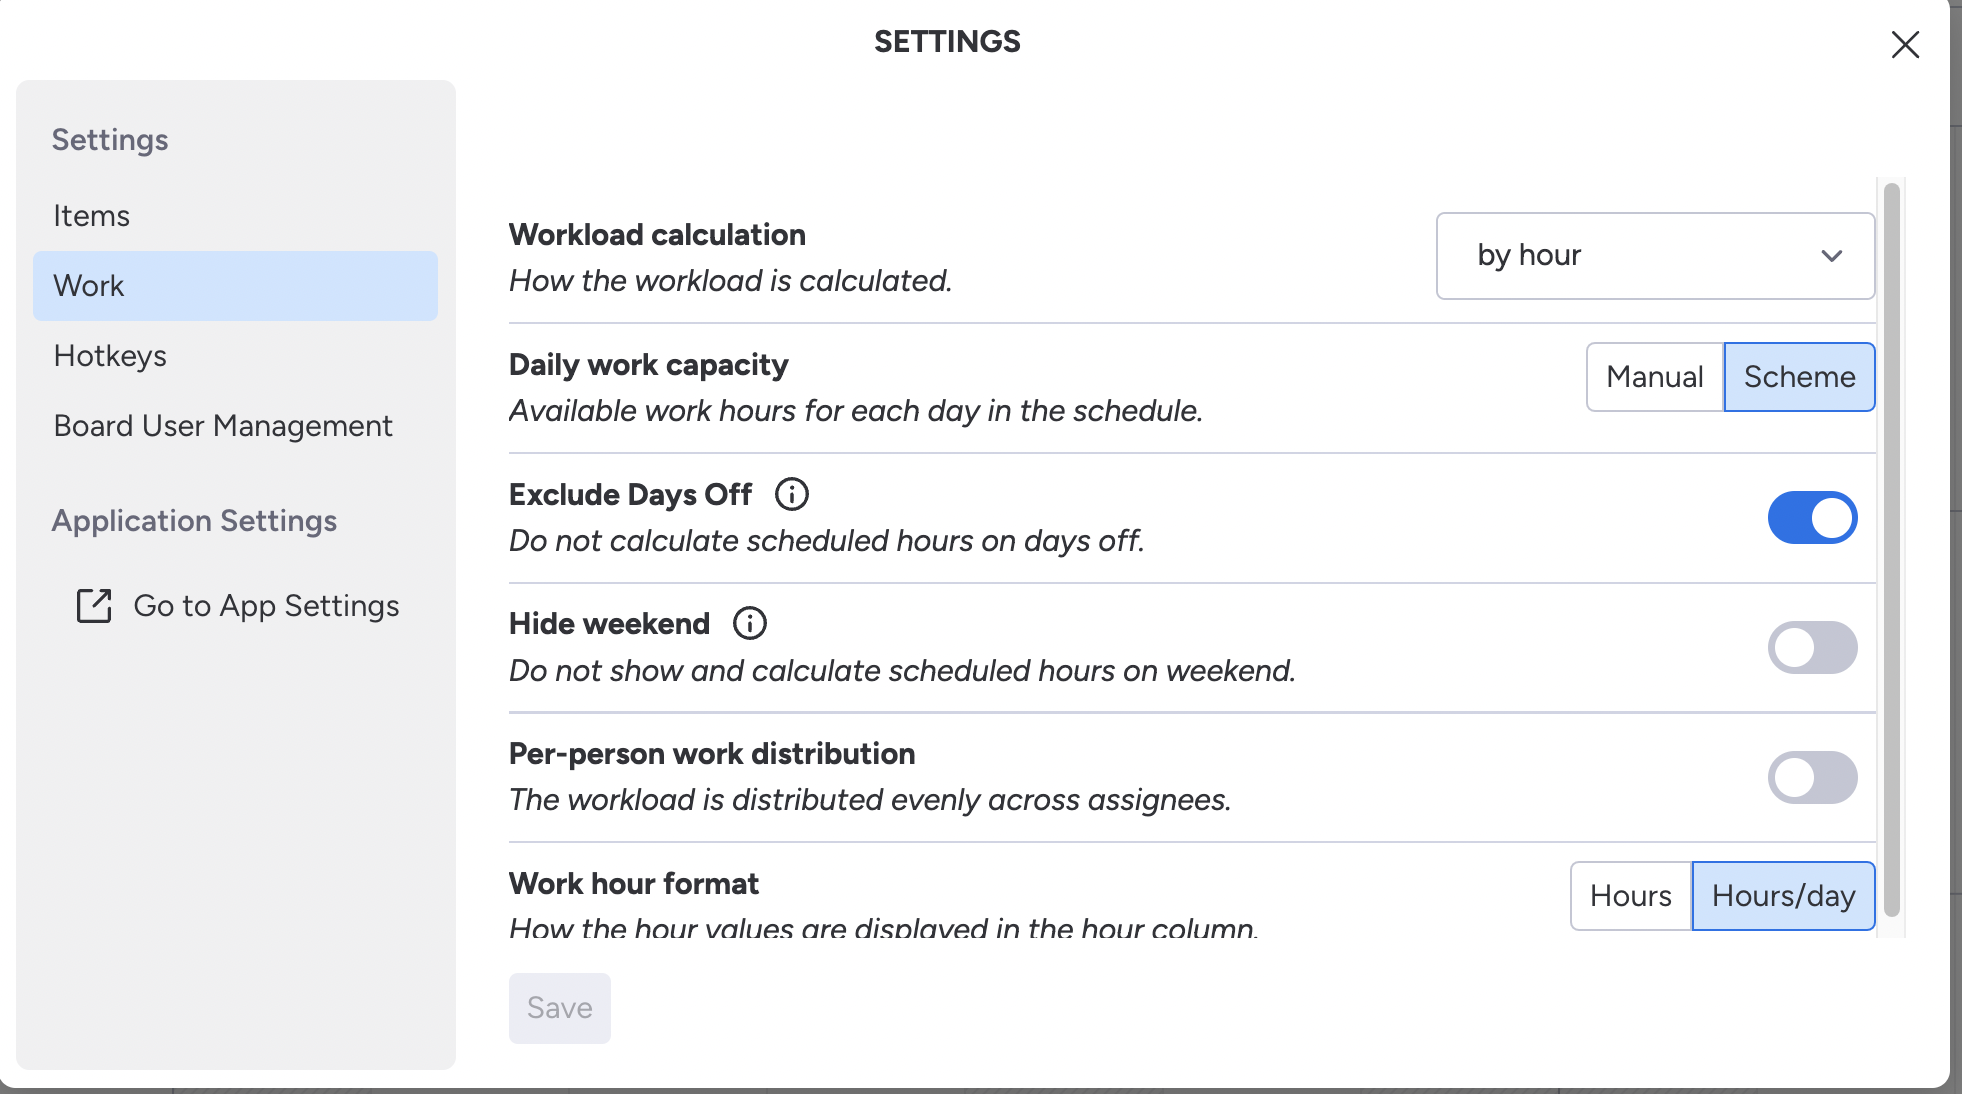
Per-person work distribution
With this setting enabled, all tasks will now have their hours divided by the total number of unique assignees and team members.
Work hour Format
By default, it will be displayed in "Hours per day" format and can be changed back and forth in the settings. However, it should be noted that hours will not automatically convert back. For example, a task with a total of 48 hours, when changed, will be seen as a task of 48 hours per day.
LEARN MORE
STEP 8: MANAGE & APPROVE TIMESHEETS
After users log their time for work and submit their timesheet.
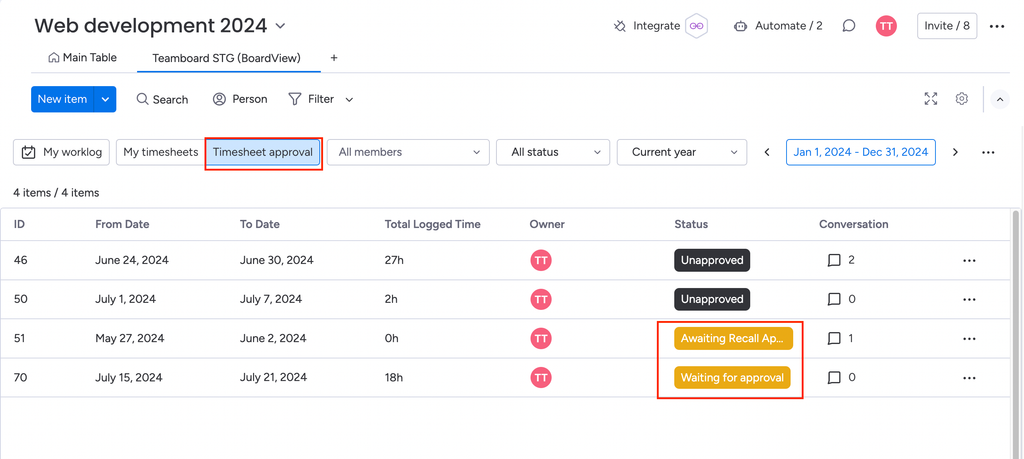
If you are an approver, go to the "Timesheet Approval" section. Here, you will see a list of submitted timesheets that need your approval or rejection
Review each timesheet and choose to approve or reject it based on the accuracy and compliance of the logged work.
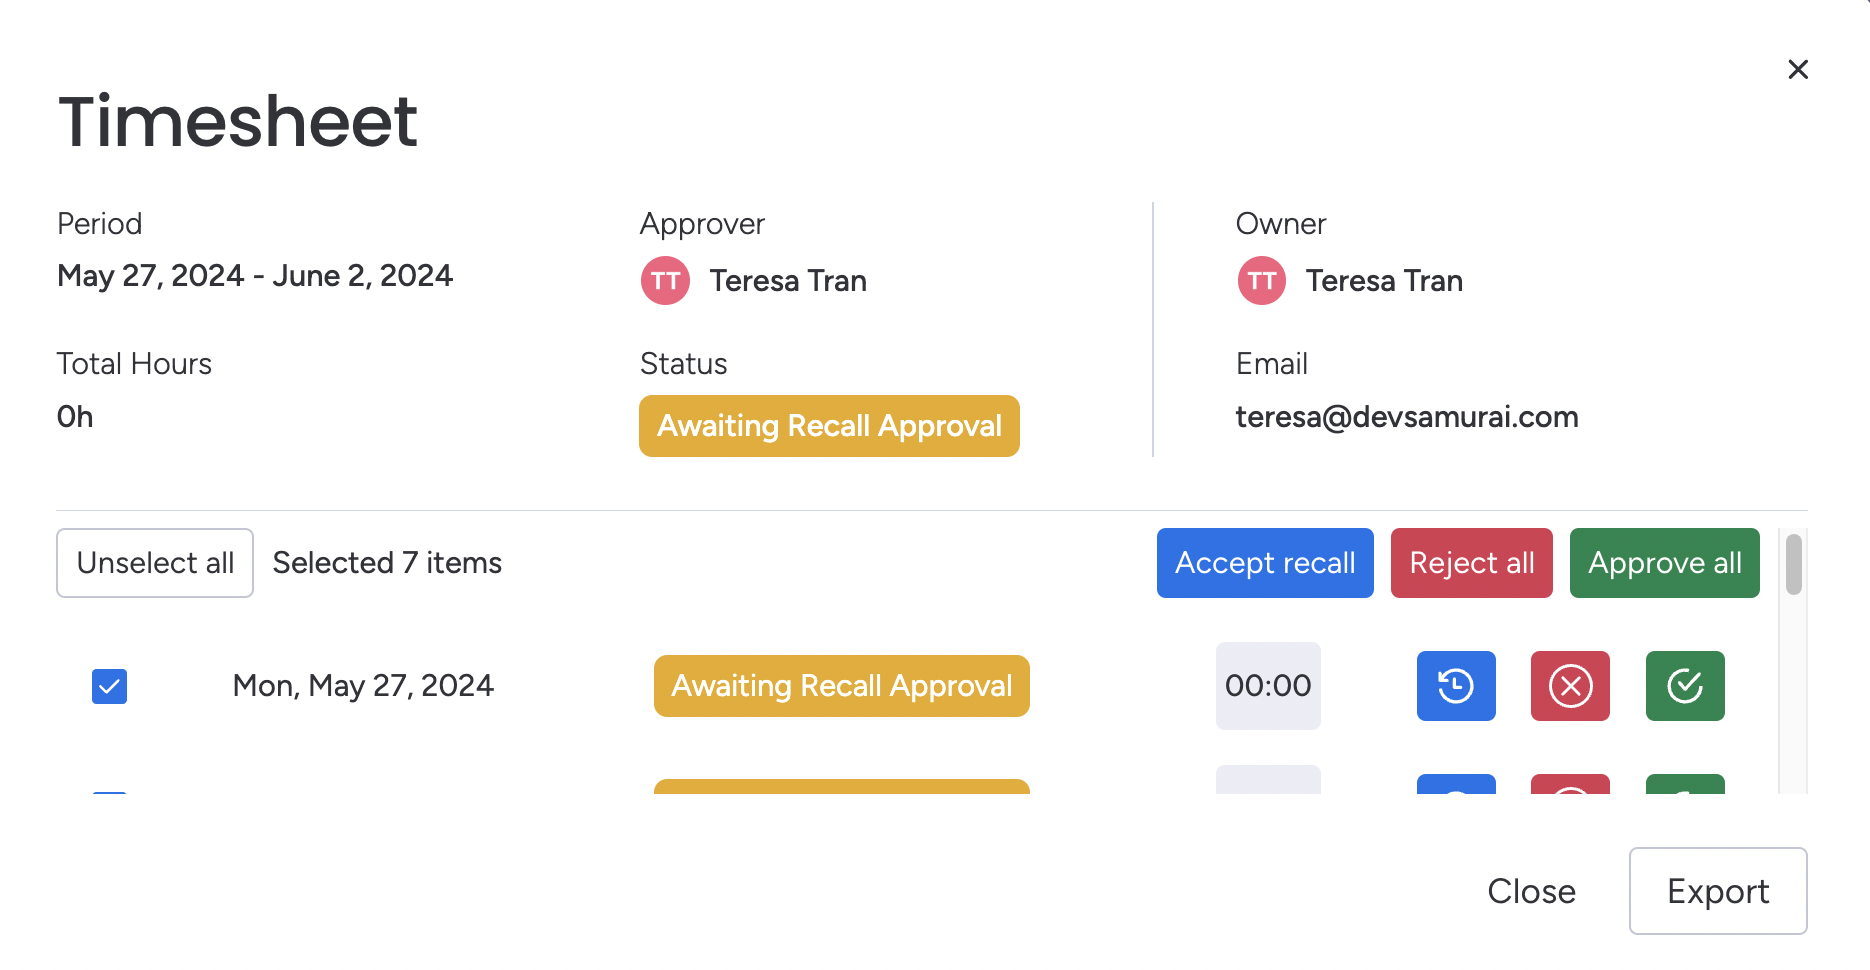
Leave a comment when you approve or reject a timesheet to provide feedback or ask for clarifications.
Approval Statuses in TeamBoard
Waiting for Approval: the timesheet has been submitted by a team member and is now awaiting the approver's review and decision.
Awaiting Recall Approval: a recall request for a timesheet has been made by the team member and is now awaiting the approver's review and decision
LEARN MORE
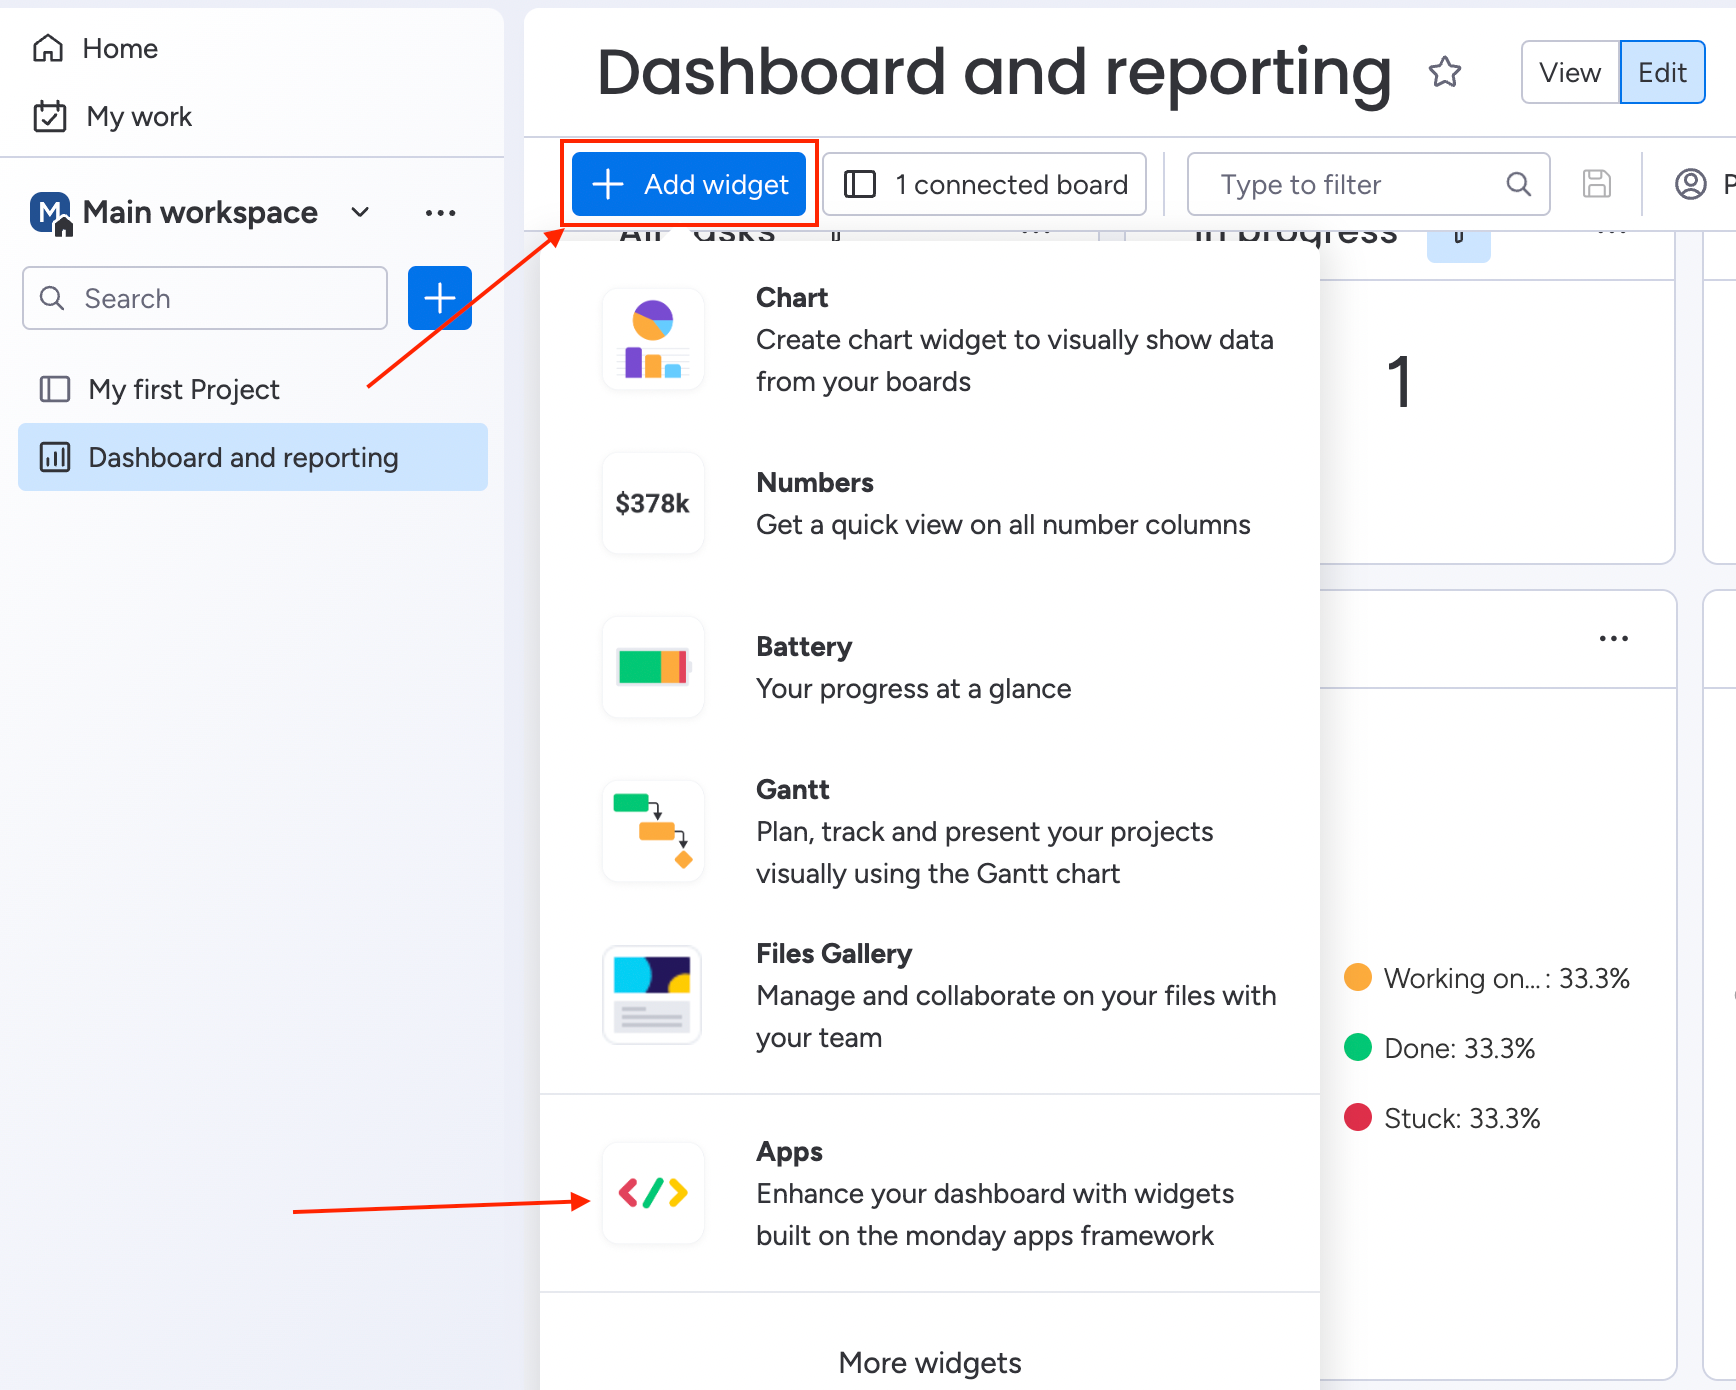
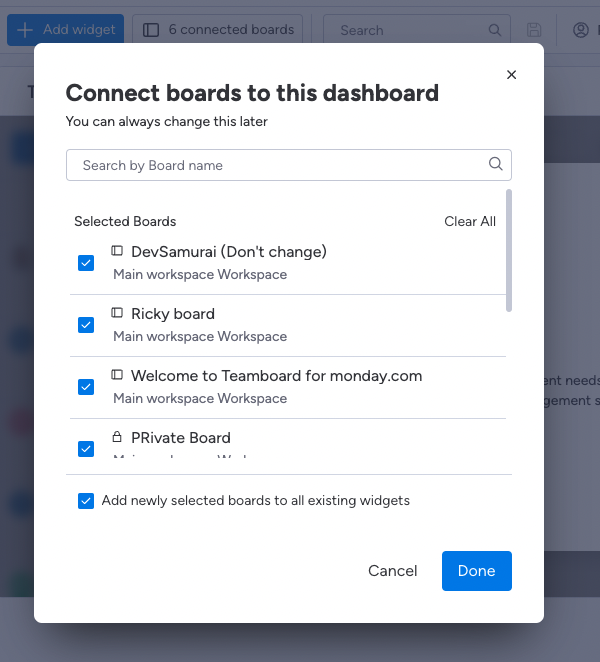
STEP 9: CREATE A DASHBOARD TO OVERSEE TASKS ACROSS MULTIPLE PROJECTS
-
In the dashboard, connect some boards which you want to get items
-
Click on "Add widget." at the top-left of the dashboard
-
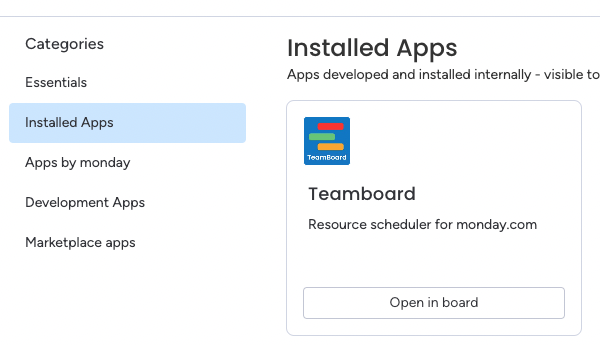
Find Teamboard among your installed apps.
-
Use it as you normally would

👏 Remenber setting the mapping fields for each boards.
Getting Started for Members
STEP 1: PLAN TASKS ON THE BOARD
You have several options for planning existing tasks on TeamBoard:
-
Input Mapped Fields:
In your http://monday.com table, input the fields mapped to TeamBoard, including Assignees, Timeline, and Scheduled Hours.
-
Creating a New Task
-
Click "New Item" to add a new task to your board in TeamBoard.
-
Input Task Details
-
Use the Item box
LEARN MORE
STEP 2: SEE YOUR ASSIGNED TASKS AND AVAILABILITY
Click the "Workload" button on the top bar to enable this mode
Tip: You can click the archor icon next to avatar each row to expand the row to see the detail plan in workload mode.
-
Green Color: Full of workload - Tasks assigned to an individual or team member have a moderate amount of work
-
Red color: Overload - Tasks assigned have a lower volume of work than the individual's or team's capacity.
-
Yellow Color: Under workload - Tasks assigned exceed the capacity of the individual or team
Select your desired time frame, and the number of scheduled hours will appear on the left side.

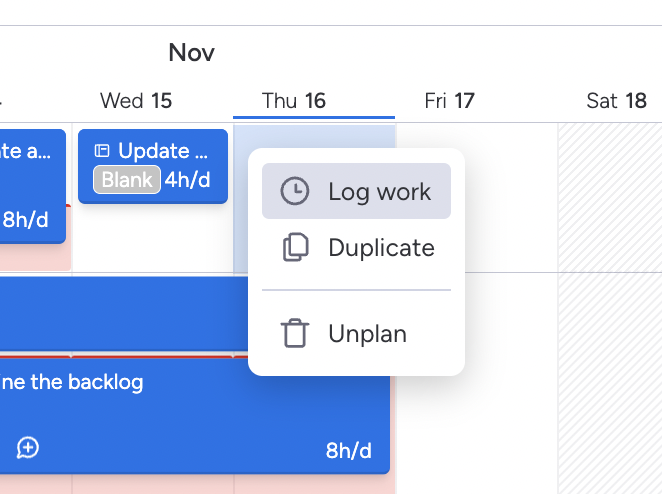
STEP 3: LOG TIME SPENT
Add a work log
You have several options to log your work.
-
Click on
Log workfrom the context menu of the planned item on the schedule board.
-
In the Time Tracking screen, Click on
+ Worklogat the top-left or Click ➕ icon on the table.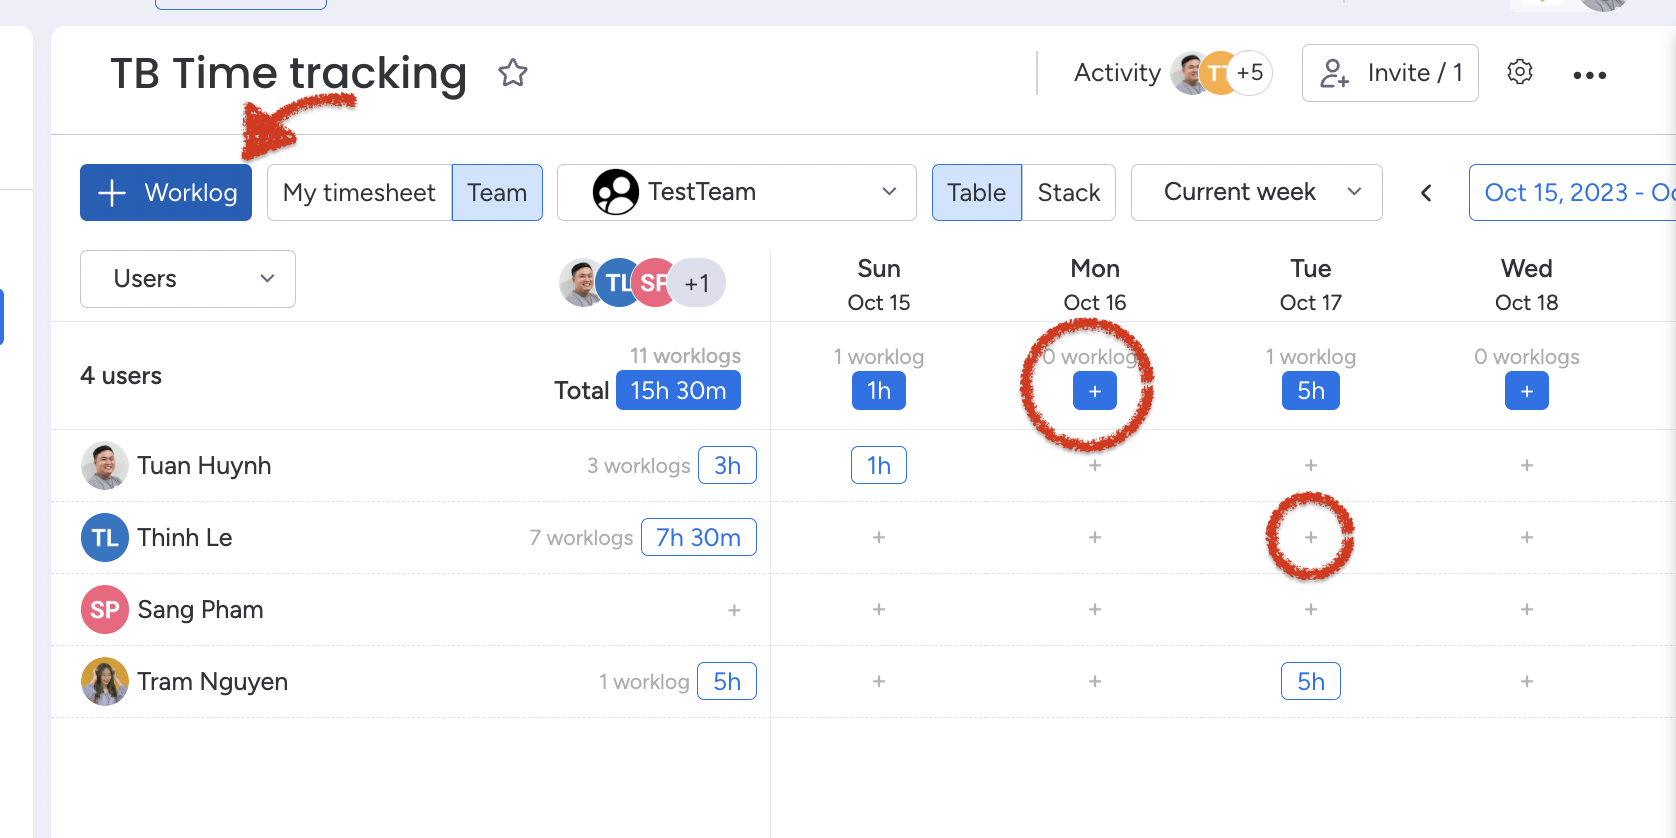
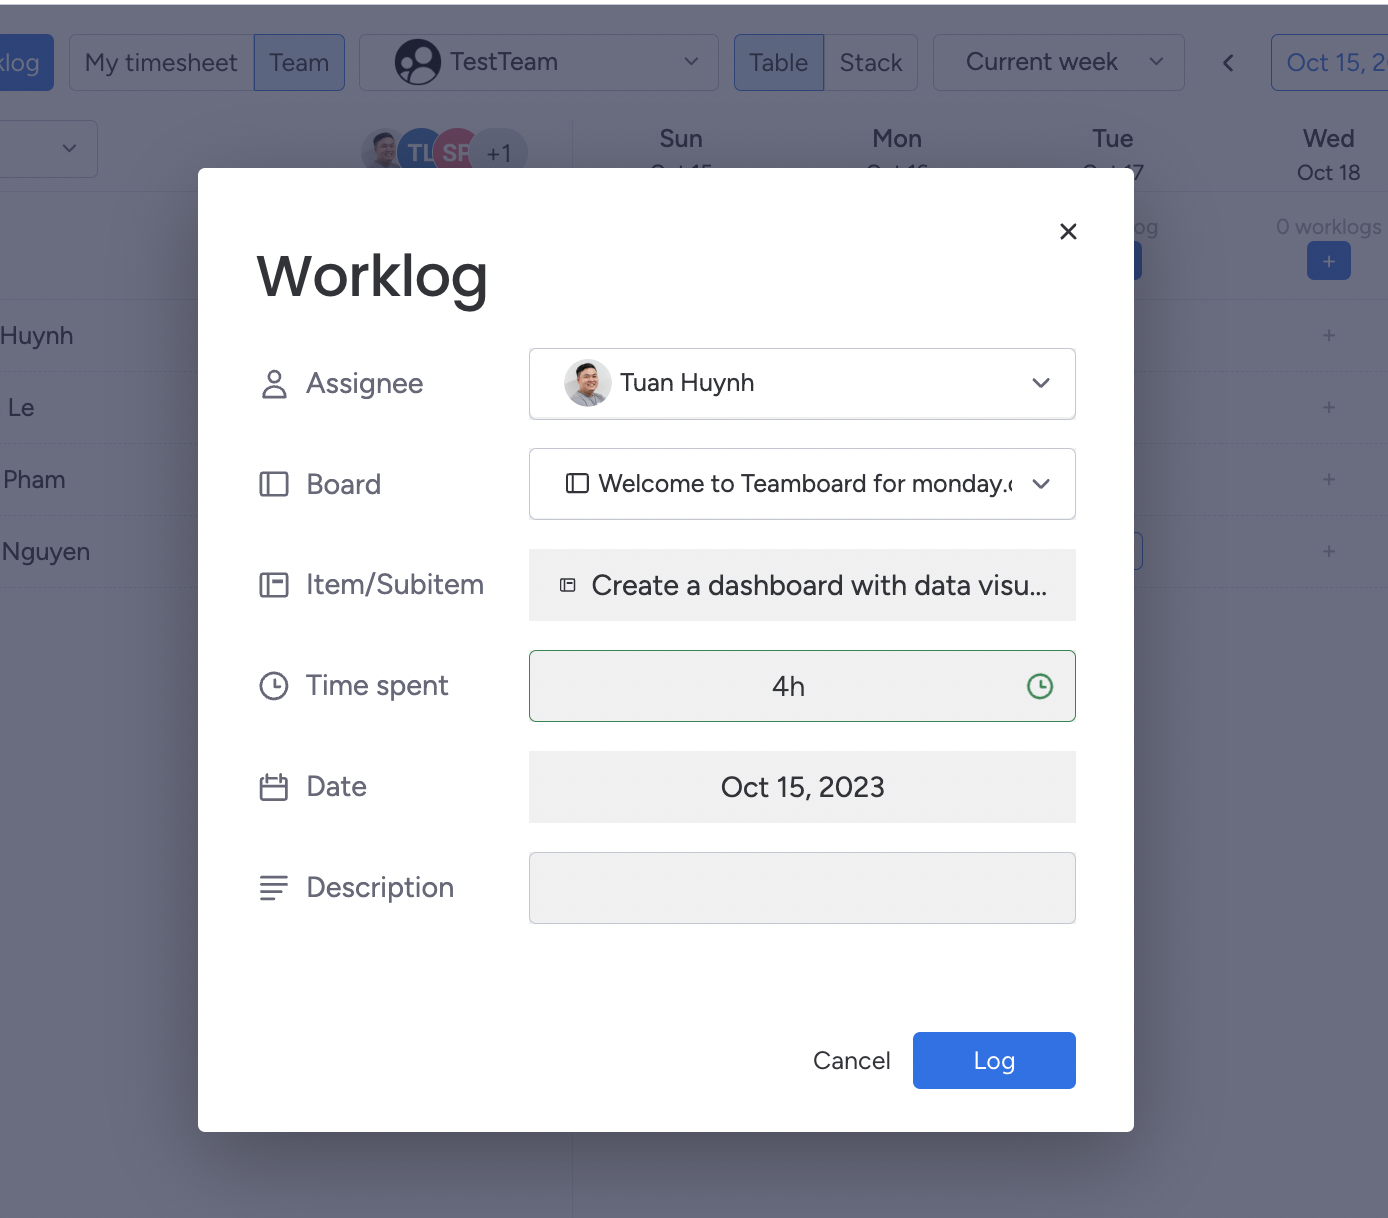
A dialog will appear where you can fill in the information for the work log.
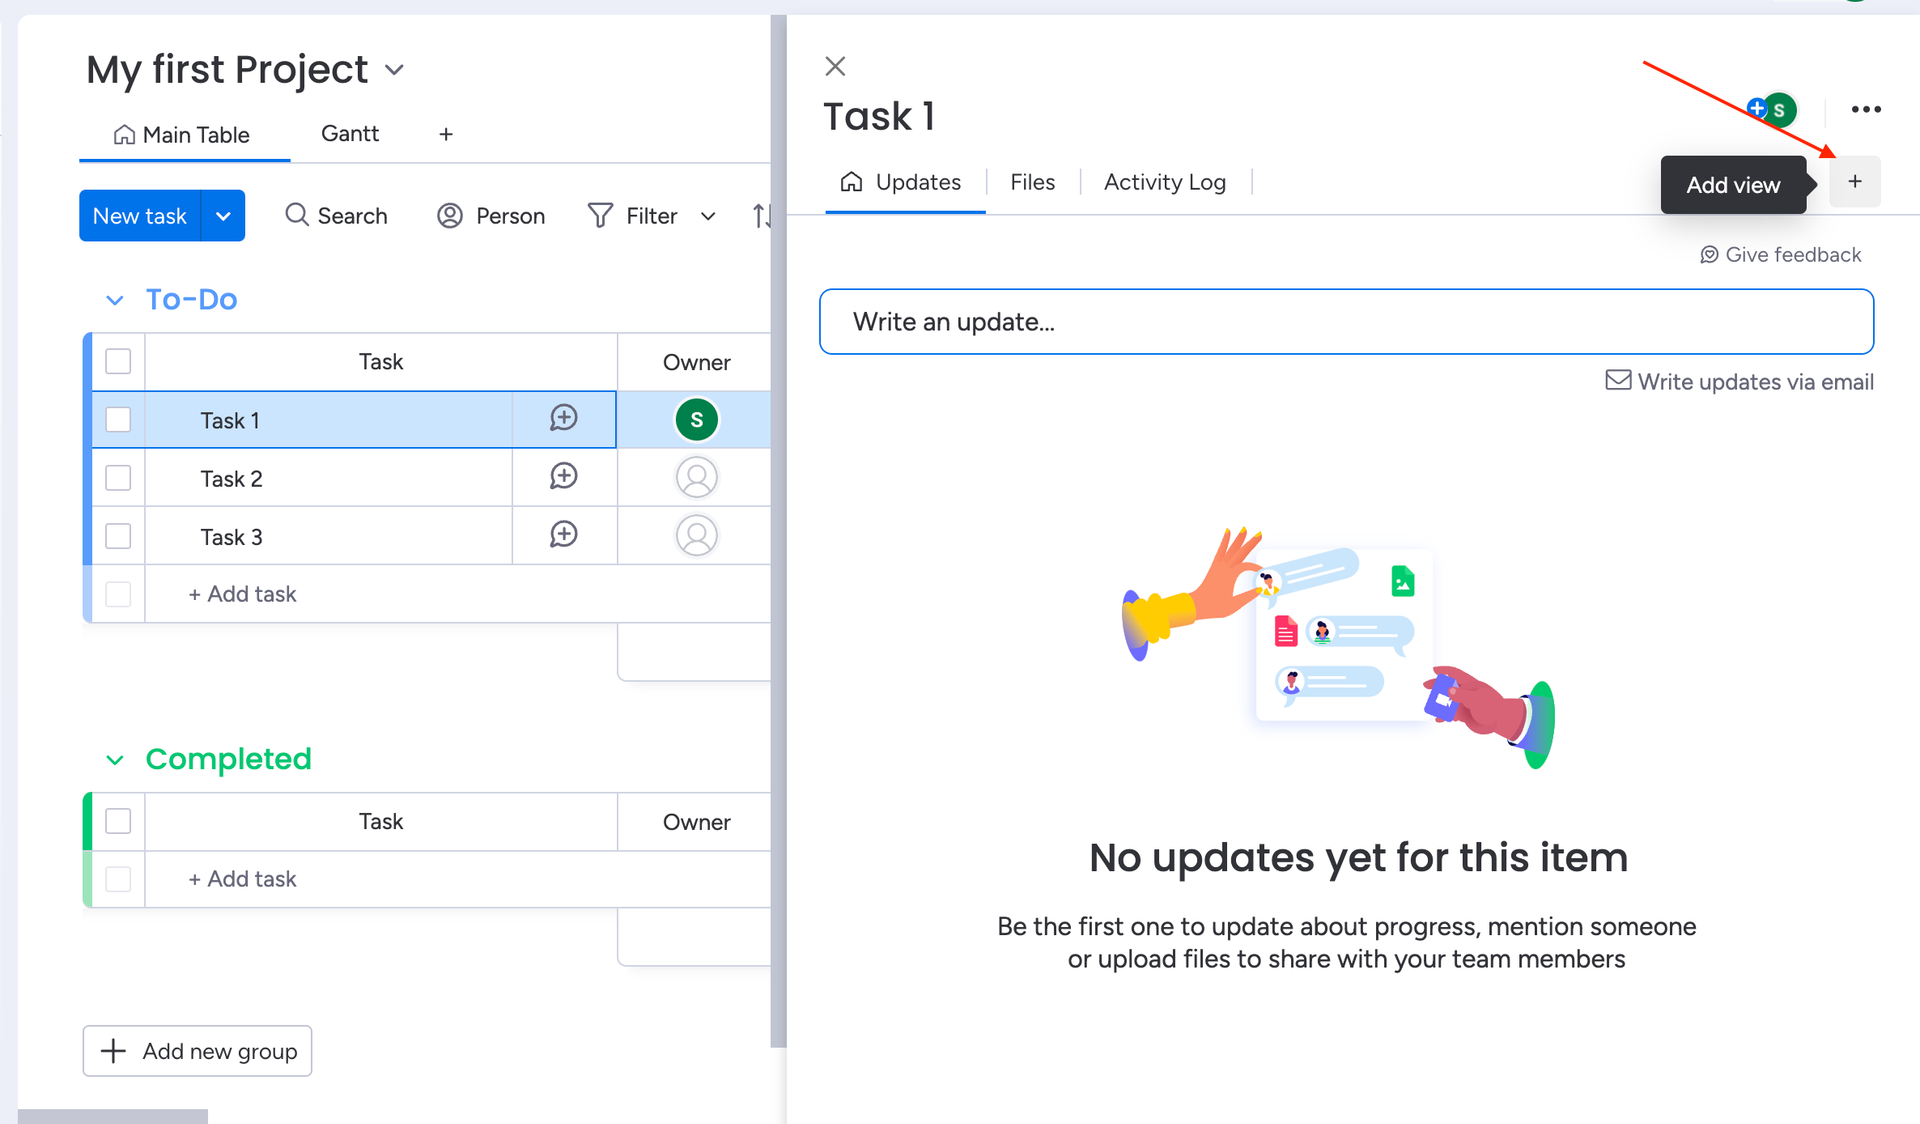
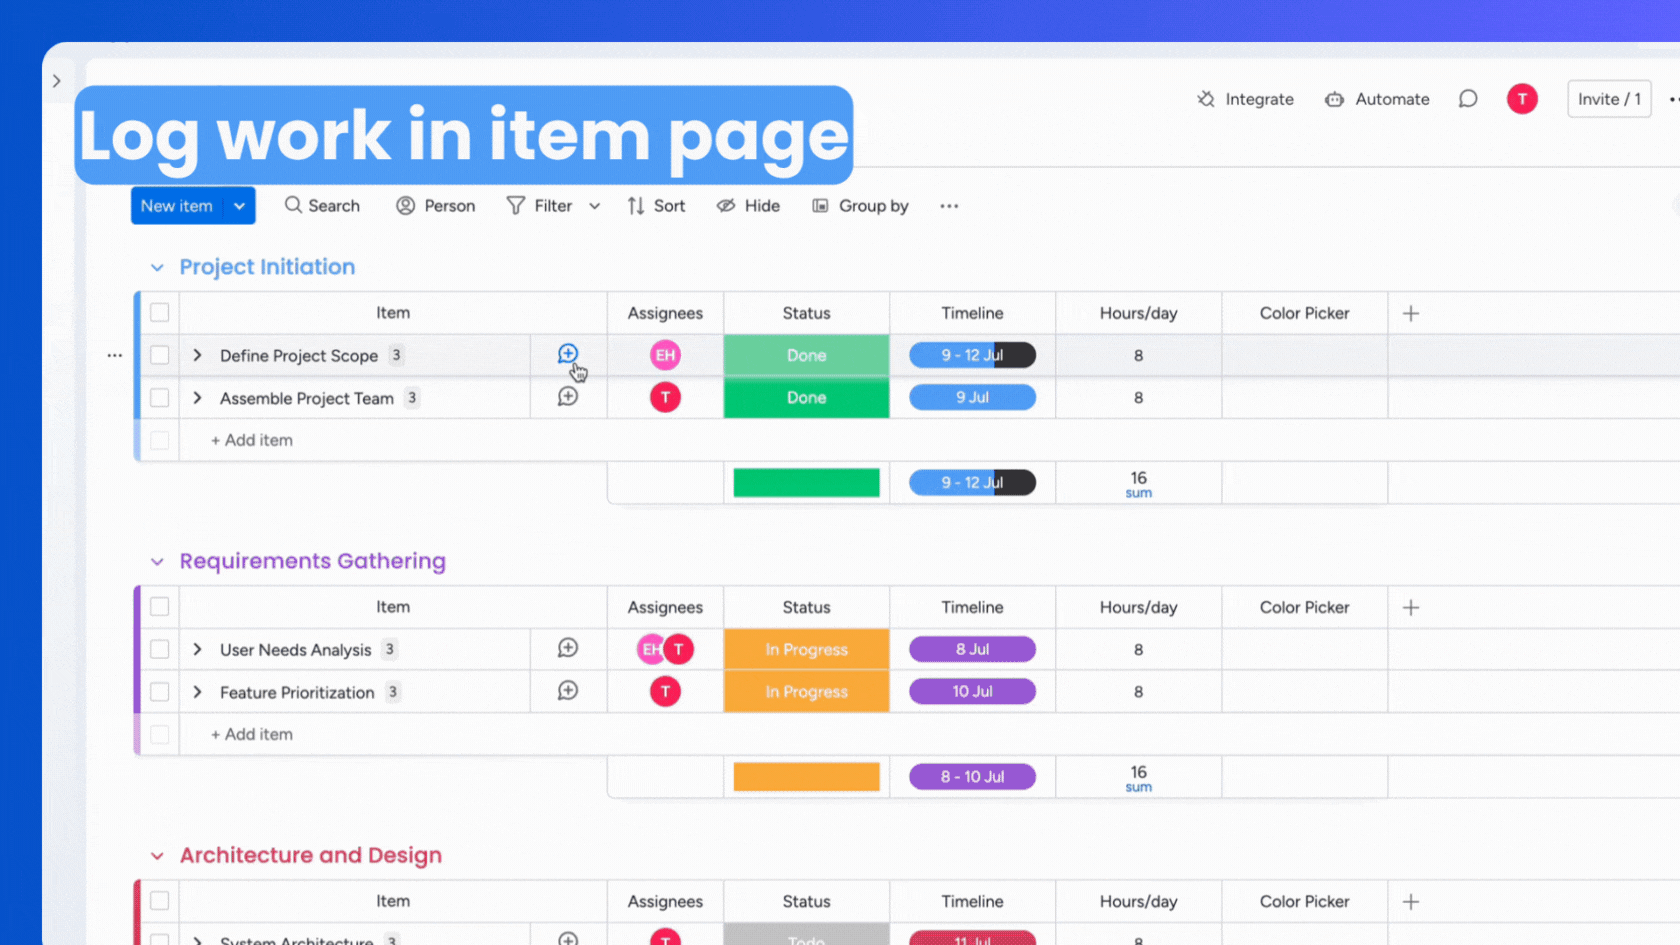
Log work in item page
You can now log your work directly on the item page by following these steps:
-
Click the plus (+) icon to add a new view.
-
Choose "TeamBoard" from the options.
-
Click to add a worklog and begin logging your work.
LEARN MORE
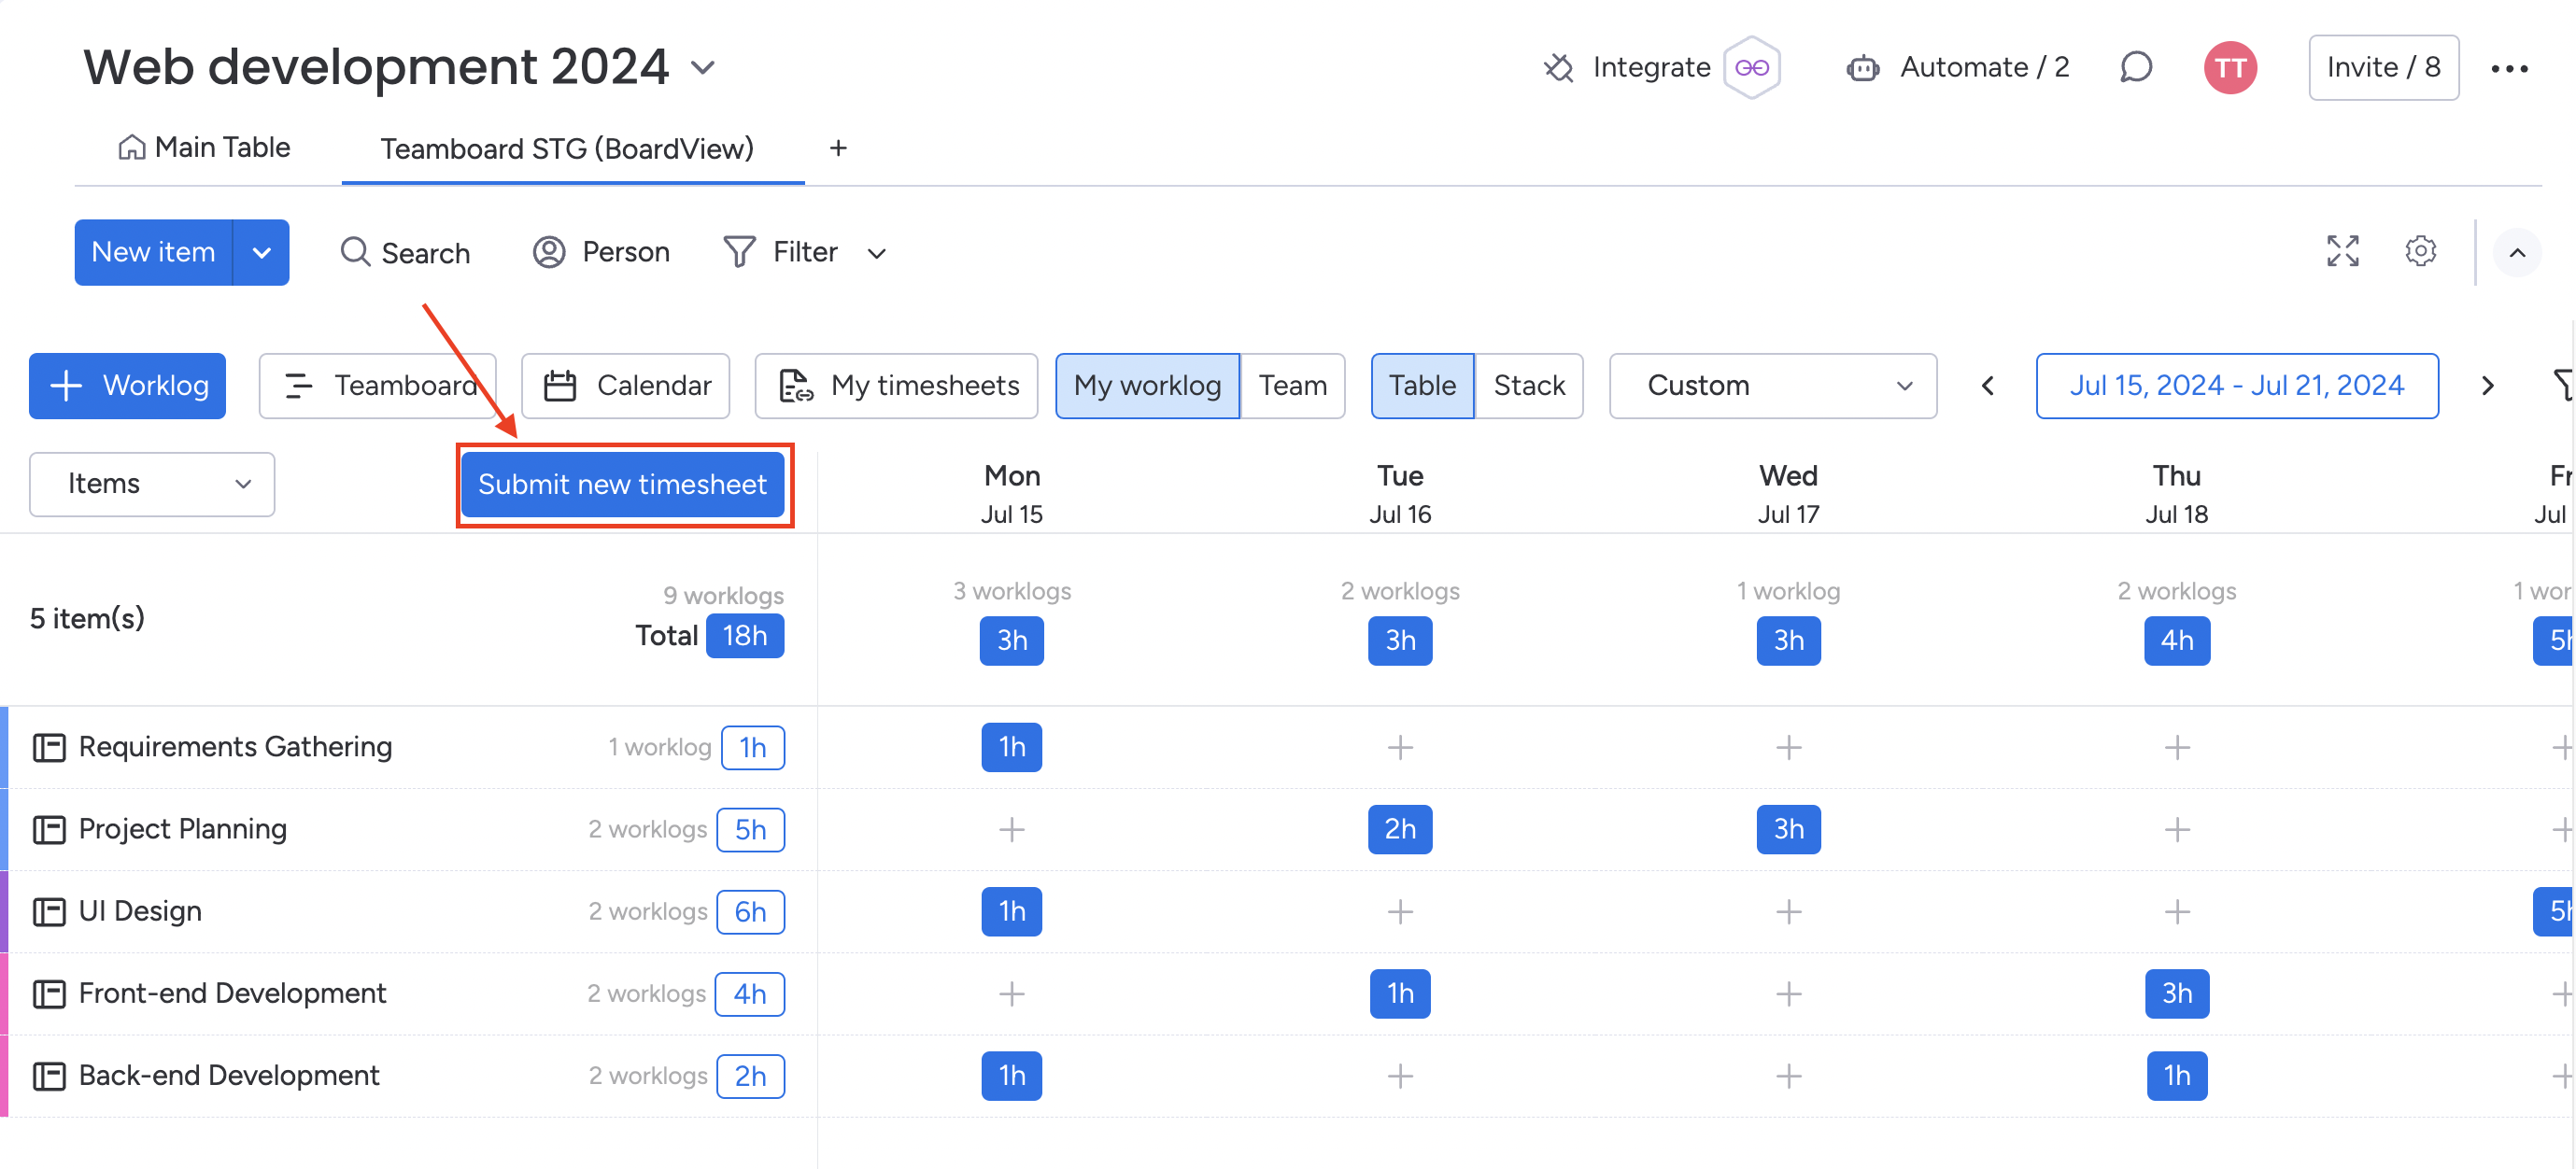
STEP 4: SUBMIT TIMESHEETS FOR APPROVAL
-
After logging your time, navigate to the "My worklog" section to view your logged hours.

Submitting Your Timesheet
-
Click the "Submit new Timesheet" button.
-
Select the date range for the timesheet you want to submit.
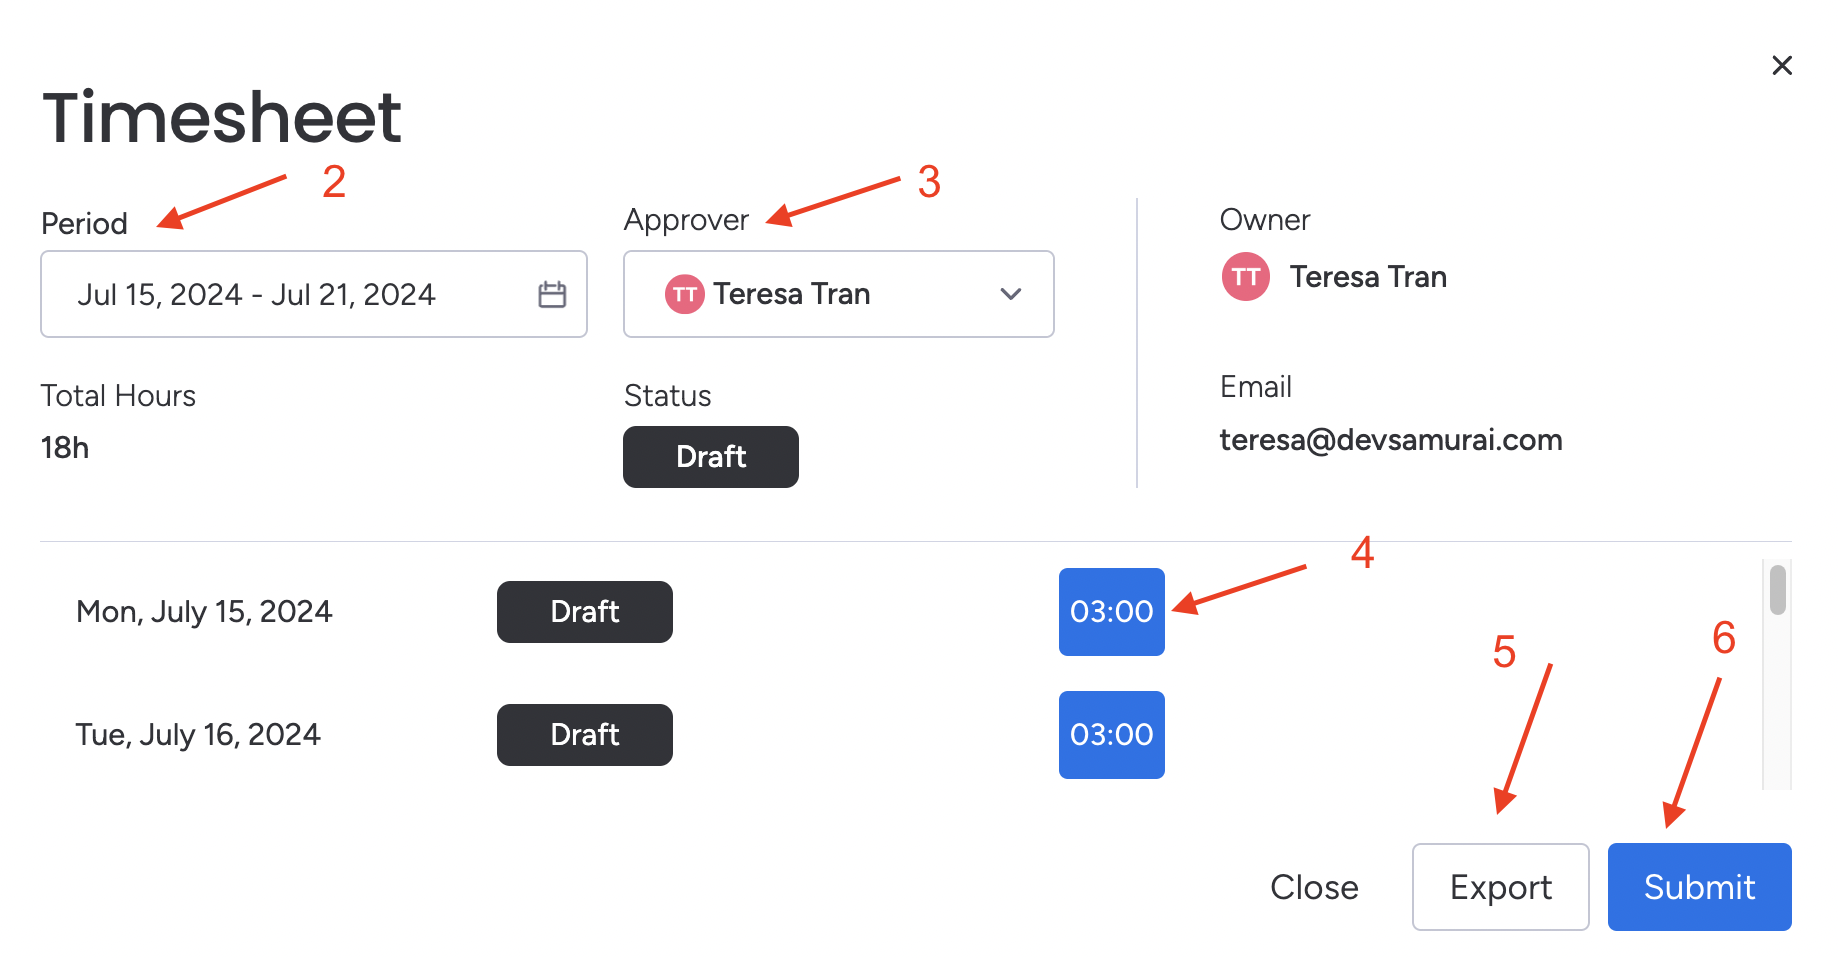
-
Choose your approver.
-
Edit or add more entries to your worklog if needed.
-
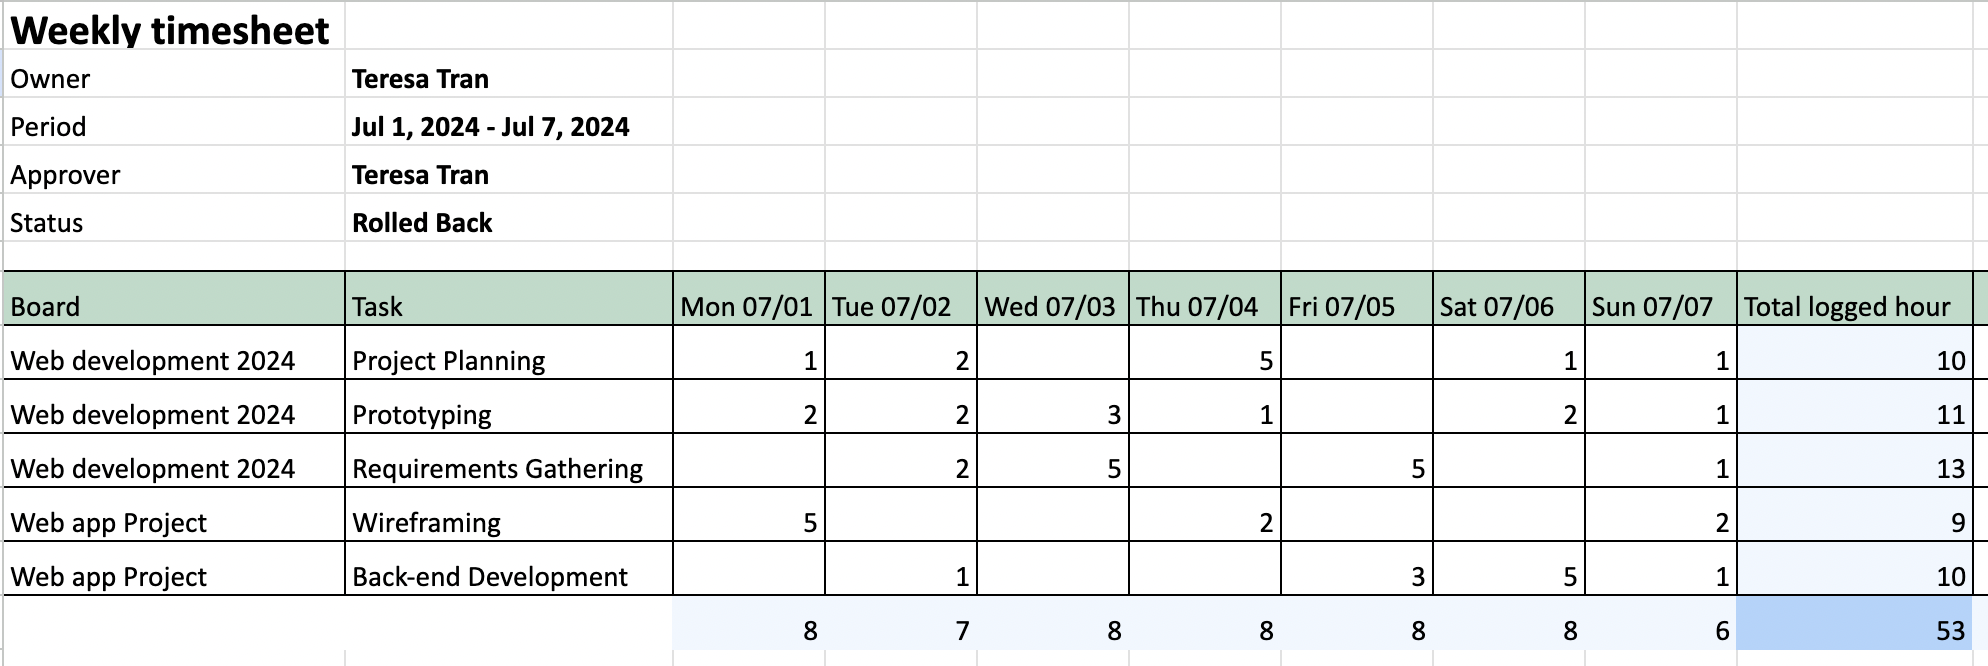
Optionally, export your timesheet to an .xlsx file for your records.
-
Finally, click to submit your timesheet. The status will show as "Waiting for Approval."
Approval Statuses in TeamBoard
For Team Members:
Draft: the timesheet has been saved but not yet submitted for approval. Team members can continue to edit and add entries as needed.
Waiting for Approval: the team member has submitted the timesheet, and it is now awaiting review by the approver.
Rejected: the approver has reviewed the timesheet and found issues that need to be addressed, resulting in rejection. The team member needs to review the rejection comments, correct the issues, and resubmit the timesheet.
Approved: the approver has reviewed and approved the timesheet. The timesheet is now finalized and recorded.
Awaiting Recall Approval: the team member recalls a submitted timesheet for corrections before it is approved, and it is now awaiting the approver's review for the recall action.
Recalled: the approver has approved the recall request, allowing the team member to make necessary changes to the timesheet.
Unapproved: the approver does not approve the recall request, meaning the timesheet remains unchanged. The team member should follow up with the approver to understand why the recall was not approved and address any issues.
LEARN MORE
Tips and Best Practices
-
Use Color Schemes: Differentiate tasks by group or status with color schemes.
-
Switch Work Hour Format: Display total task hours instead of hours/day.
-
Edit Multiple Tasks Simultaneously: Make bulk changes to tasks for consistency.
-
Timeframe: Tracking the scheduled hours and the status of tasks within that period.
-
Contact Support Anytime: Email support for assistance whenever needed.
-
Calendar view: Manage tasks, holidays, schedules, and resources in a comprehensive calendar.
-
Filtering Assignees: This feature lets you focus on specific team members by filtering out others
For more tips: learn the details in the User Guide, FAQs, and Use Cases
📖 Support and Resources
-
Help Center: Visit our Help Center for detailed documentation.
-
Contact Support: Reach out to our support team here.
-
Book a demo: Schedule a demo for personalized guidance.
-
Tutorial Videos: Watch our tutorial videos for more help.
-
Customer Portal: See Roadmap and Request a Feature.
Happy planning and organizing! ♥️