.png)
Who can manage custody verification?
Only app admins or users with Custody Verification permission can manage custody verifications in AssetIT. The list includes only assets in inventories that you have access to.
As an administrator or authorized user, you can initiate and send verification requests for assets. This is essential for ensuring physical assets within your organization are properly maintained and accounted for.
Single asset verification
-
Go to the asset list by clicking the Assets tab in the sidebar menu, and locate the asset you need to verify.
The asset must already have been checked out to a user, as this confirms who is currently responsible for it.
-
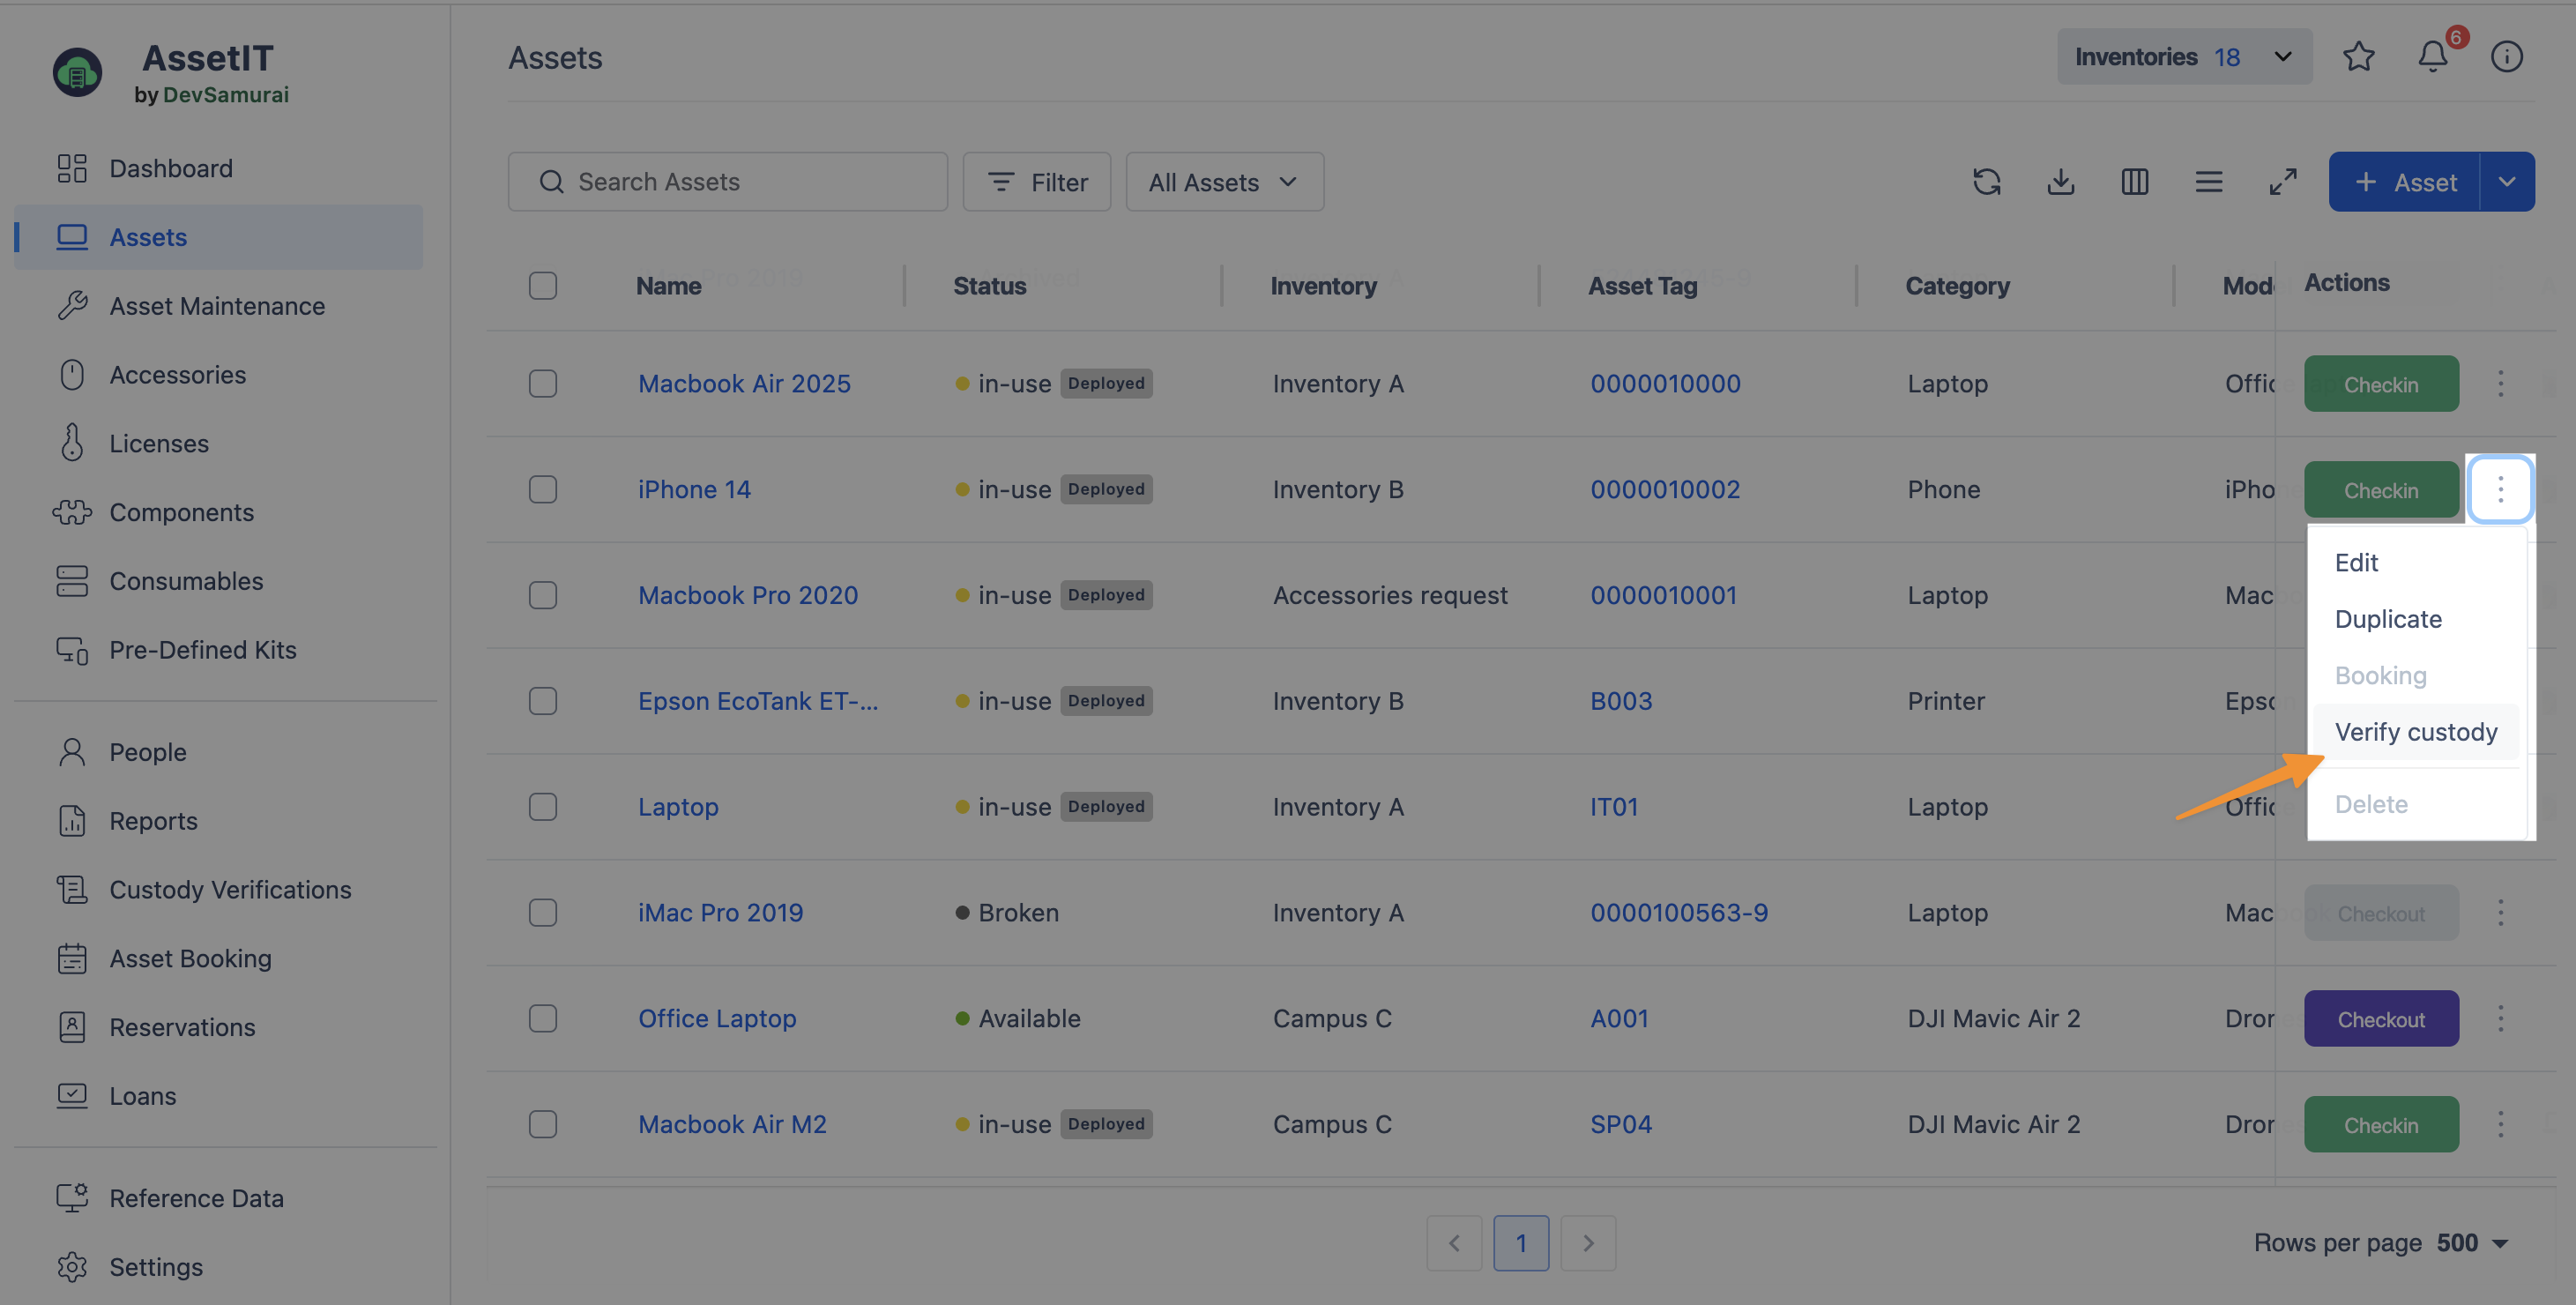
Click the More Options button on the selected asset to reveal additional actions.
-
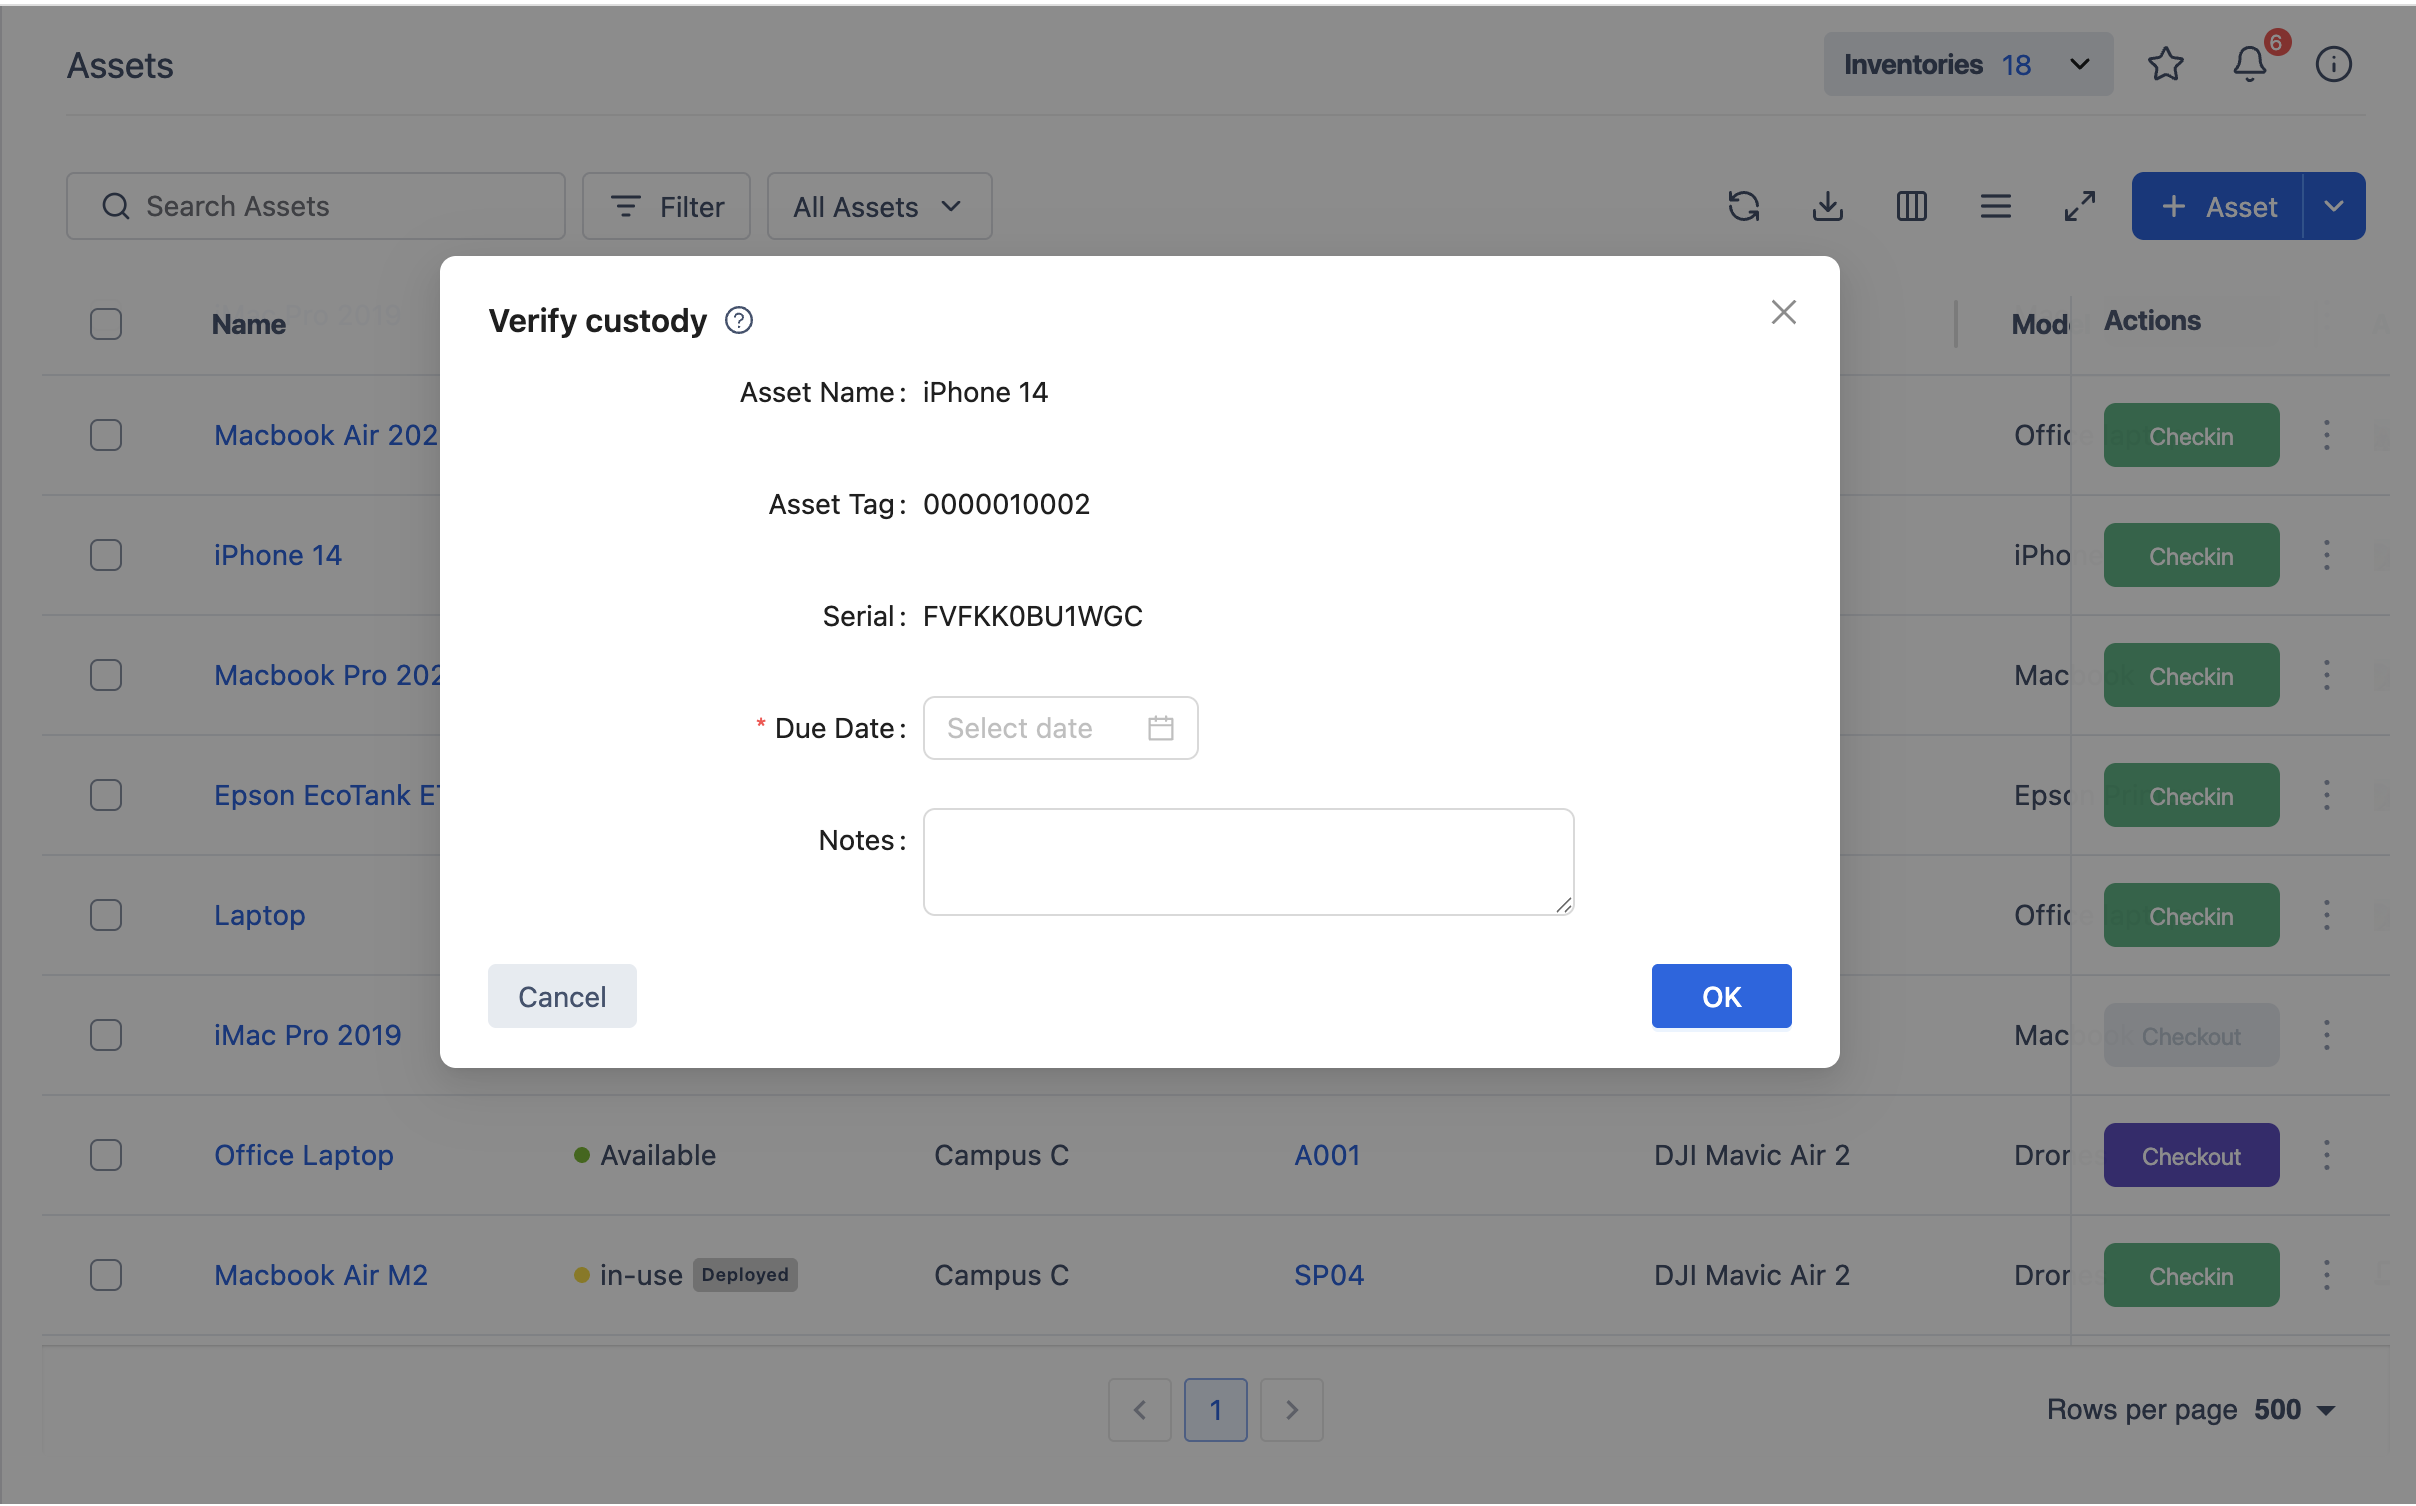
Select Verify Custody. A dialog opens where you can set the verification parameters.
-
Set the Due Date: Pick a date by which the verification needs to be completed.
-
Add notes: Write any instructions or details to accompany the verification request.
-
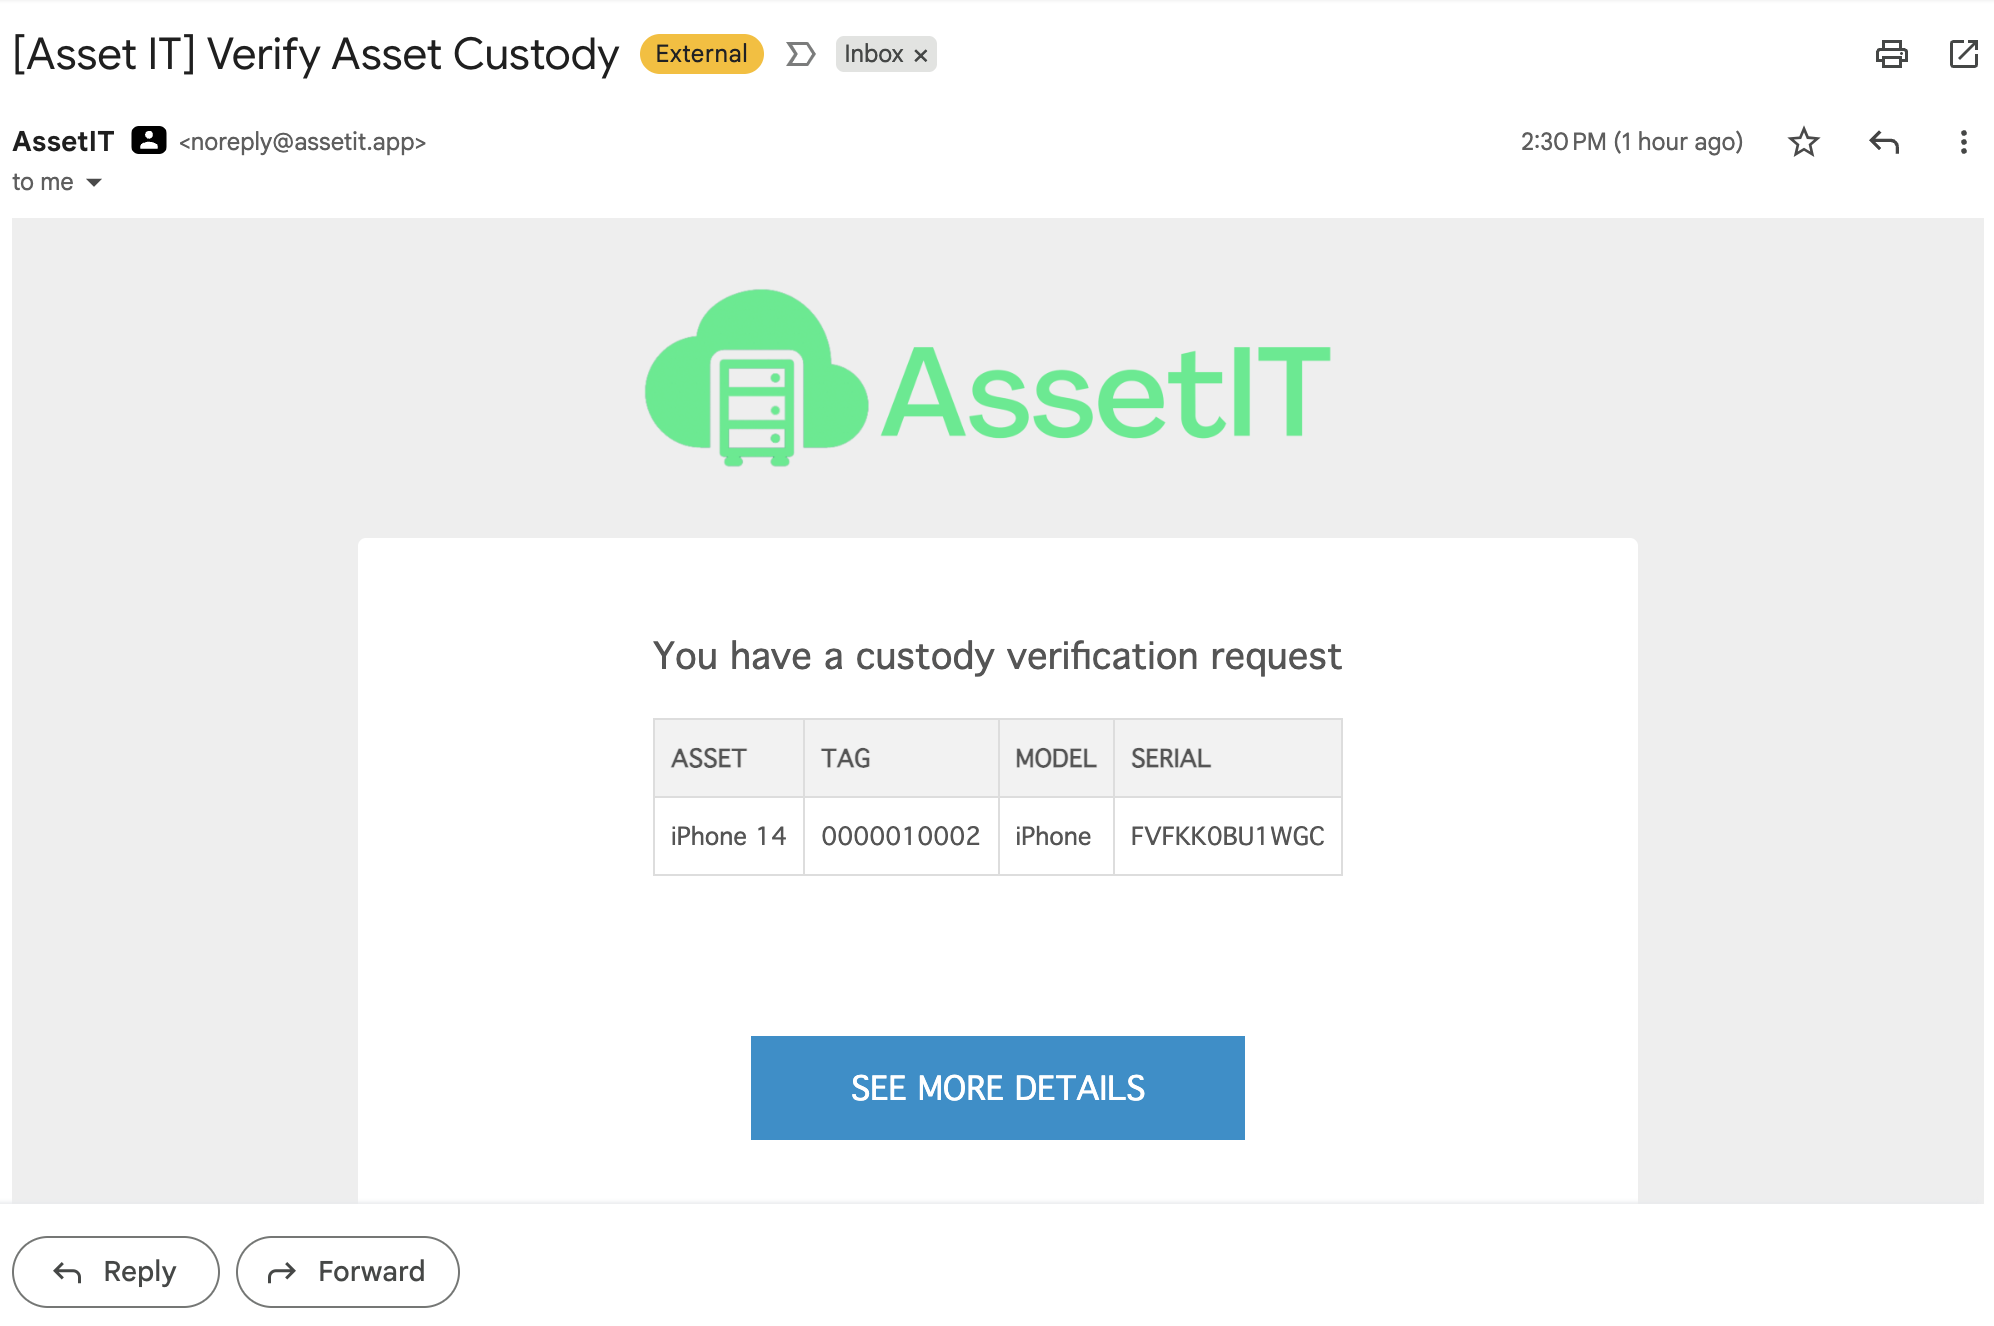
Click OK to send the verification request. The assigned user receives an email notification informing them of the verification.
To customize which fields appear in custody verification requests, navigate to Settings → General tab → Custody Verifications.
Bulk custody verification
AssetIT also supports bulk verification, allowing you to send multiple custody verification requests at once.
Step 1: Select assets
-
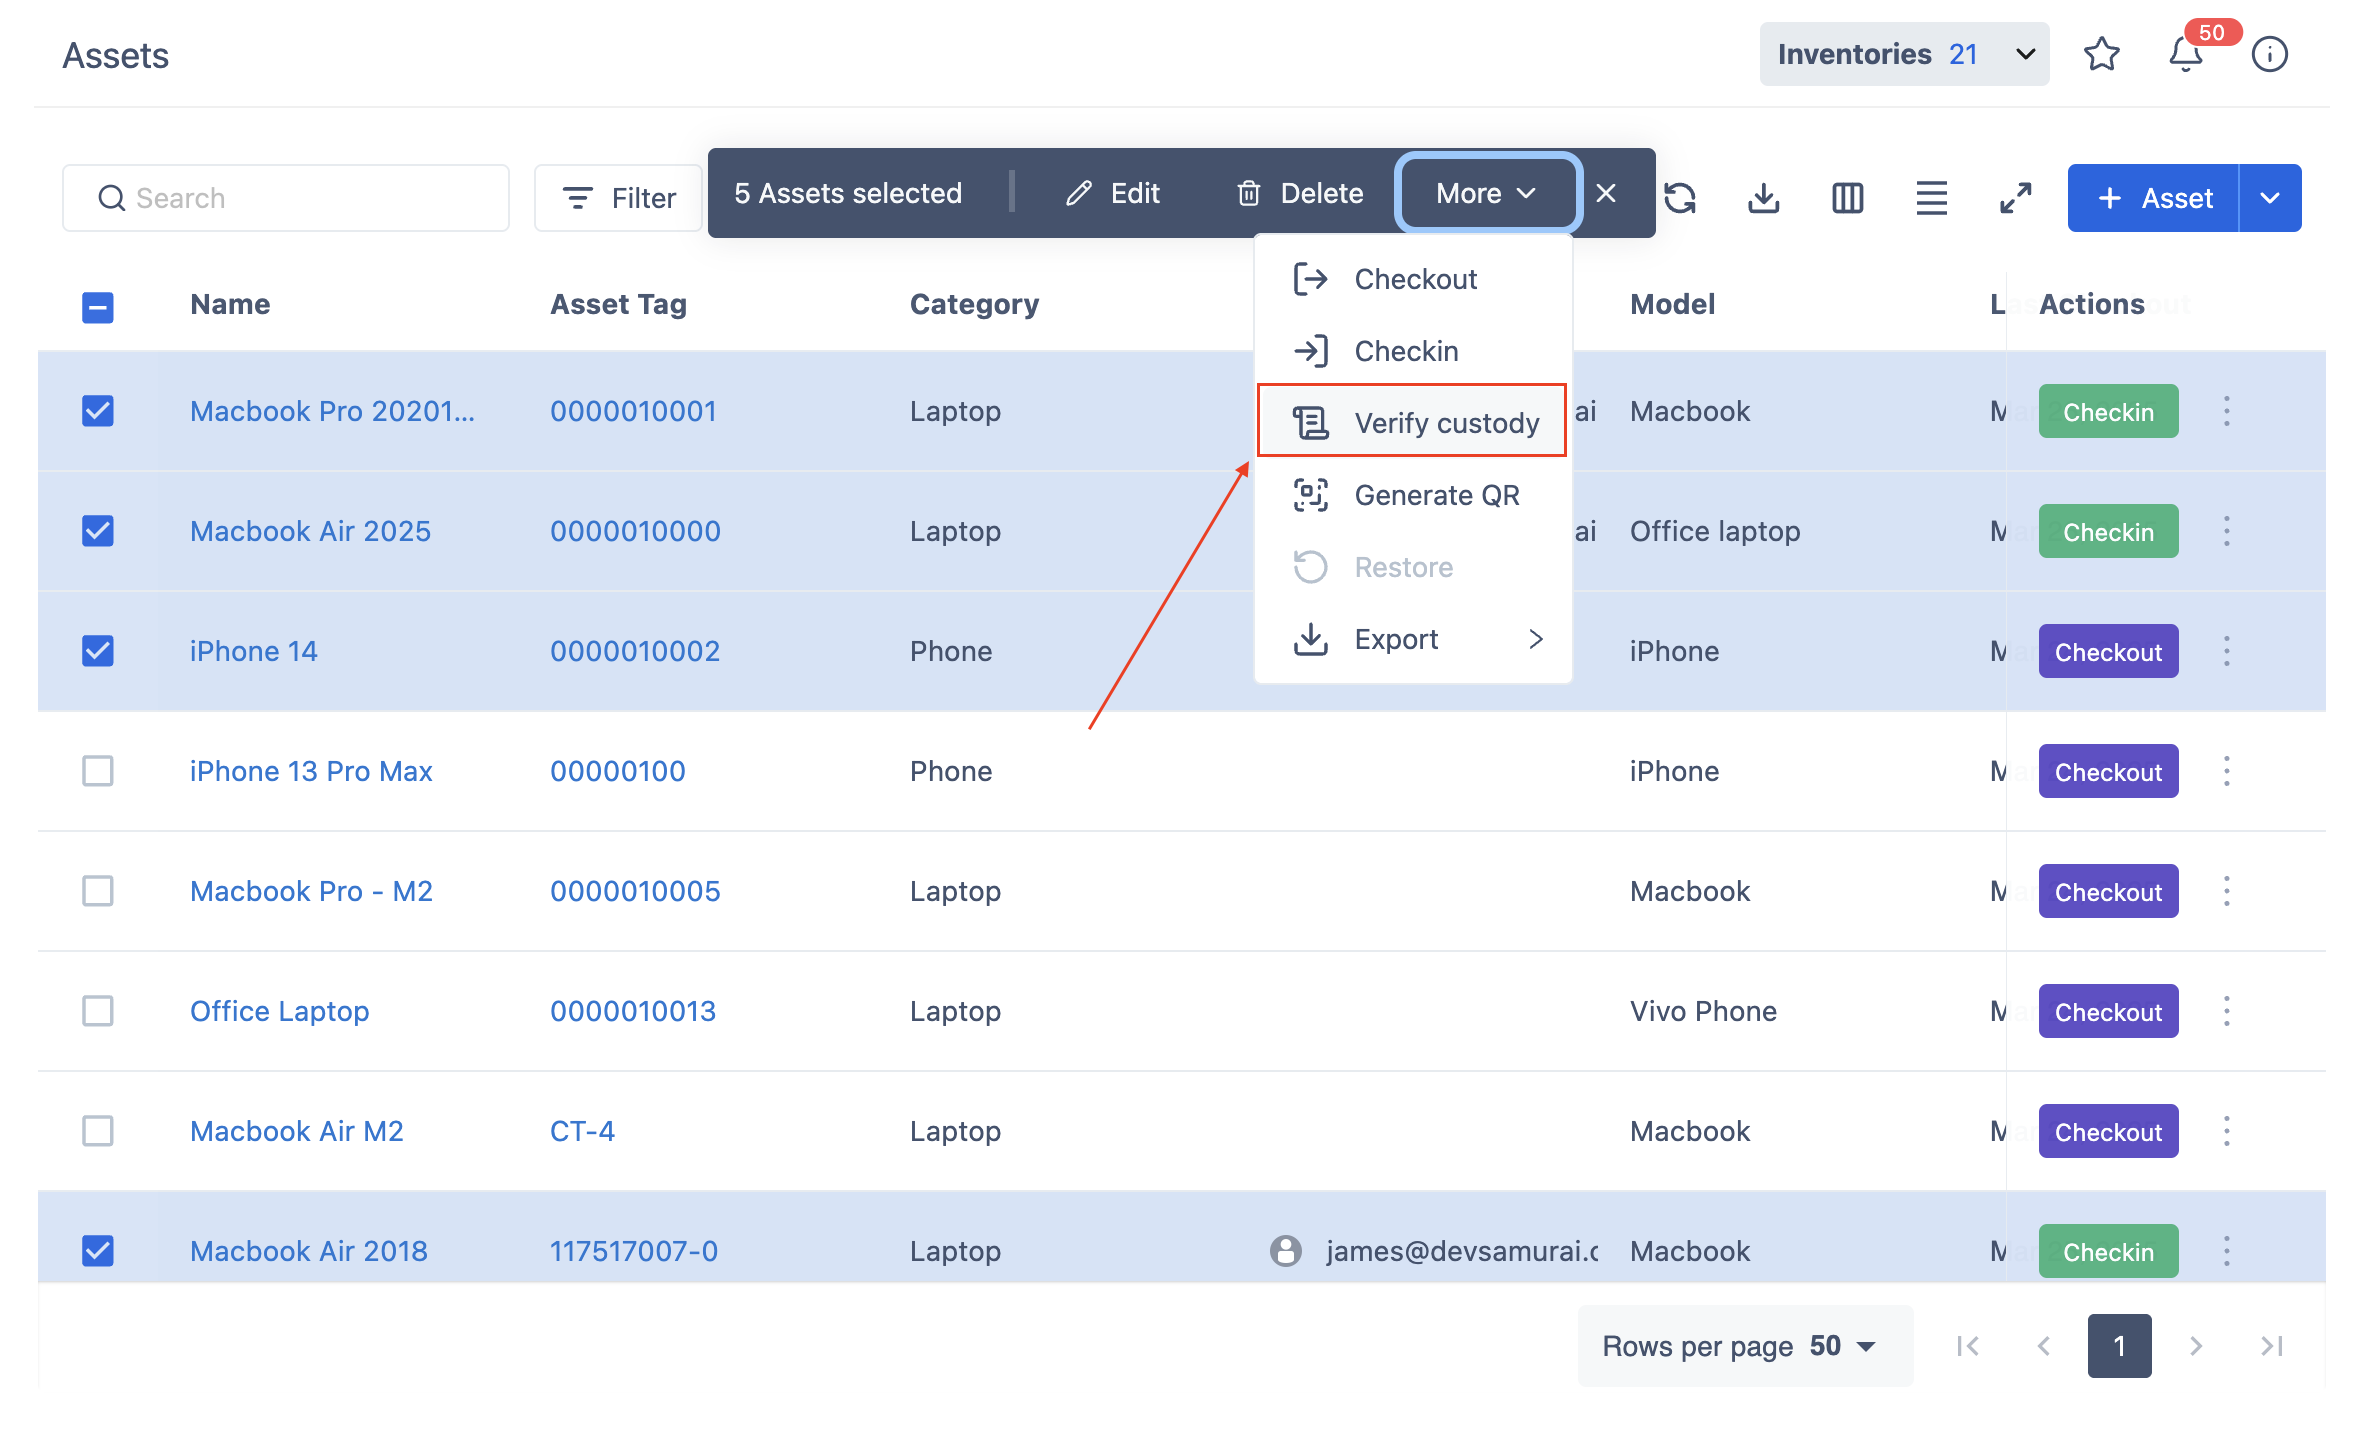
Select the assets you want to verify.
-
Click More → Verify Custody to proceed.
Step 2: Review the custody verification list
The system displays the selected assets with the following details:
|
Field |
Description |
|---|---|
|
Asset Name & Tag |
Identifies the asset. |
|
Assigned To |
The user currently assigned to the asset. |
|
Status |
The verification progress (see statuses below). |
Verification statuses:
-
Verified – Custody has been confirmed.
-
Pending – The verification request has been sent but not confirmed.
-
To be requested – No verification request has been sent yet.
You can filter assets by the above status using the dropdown menu at the top of the list.
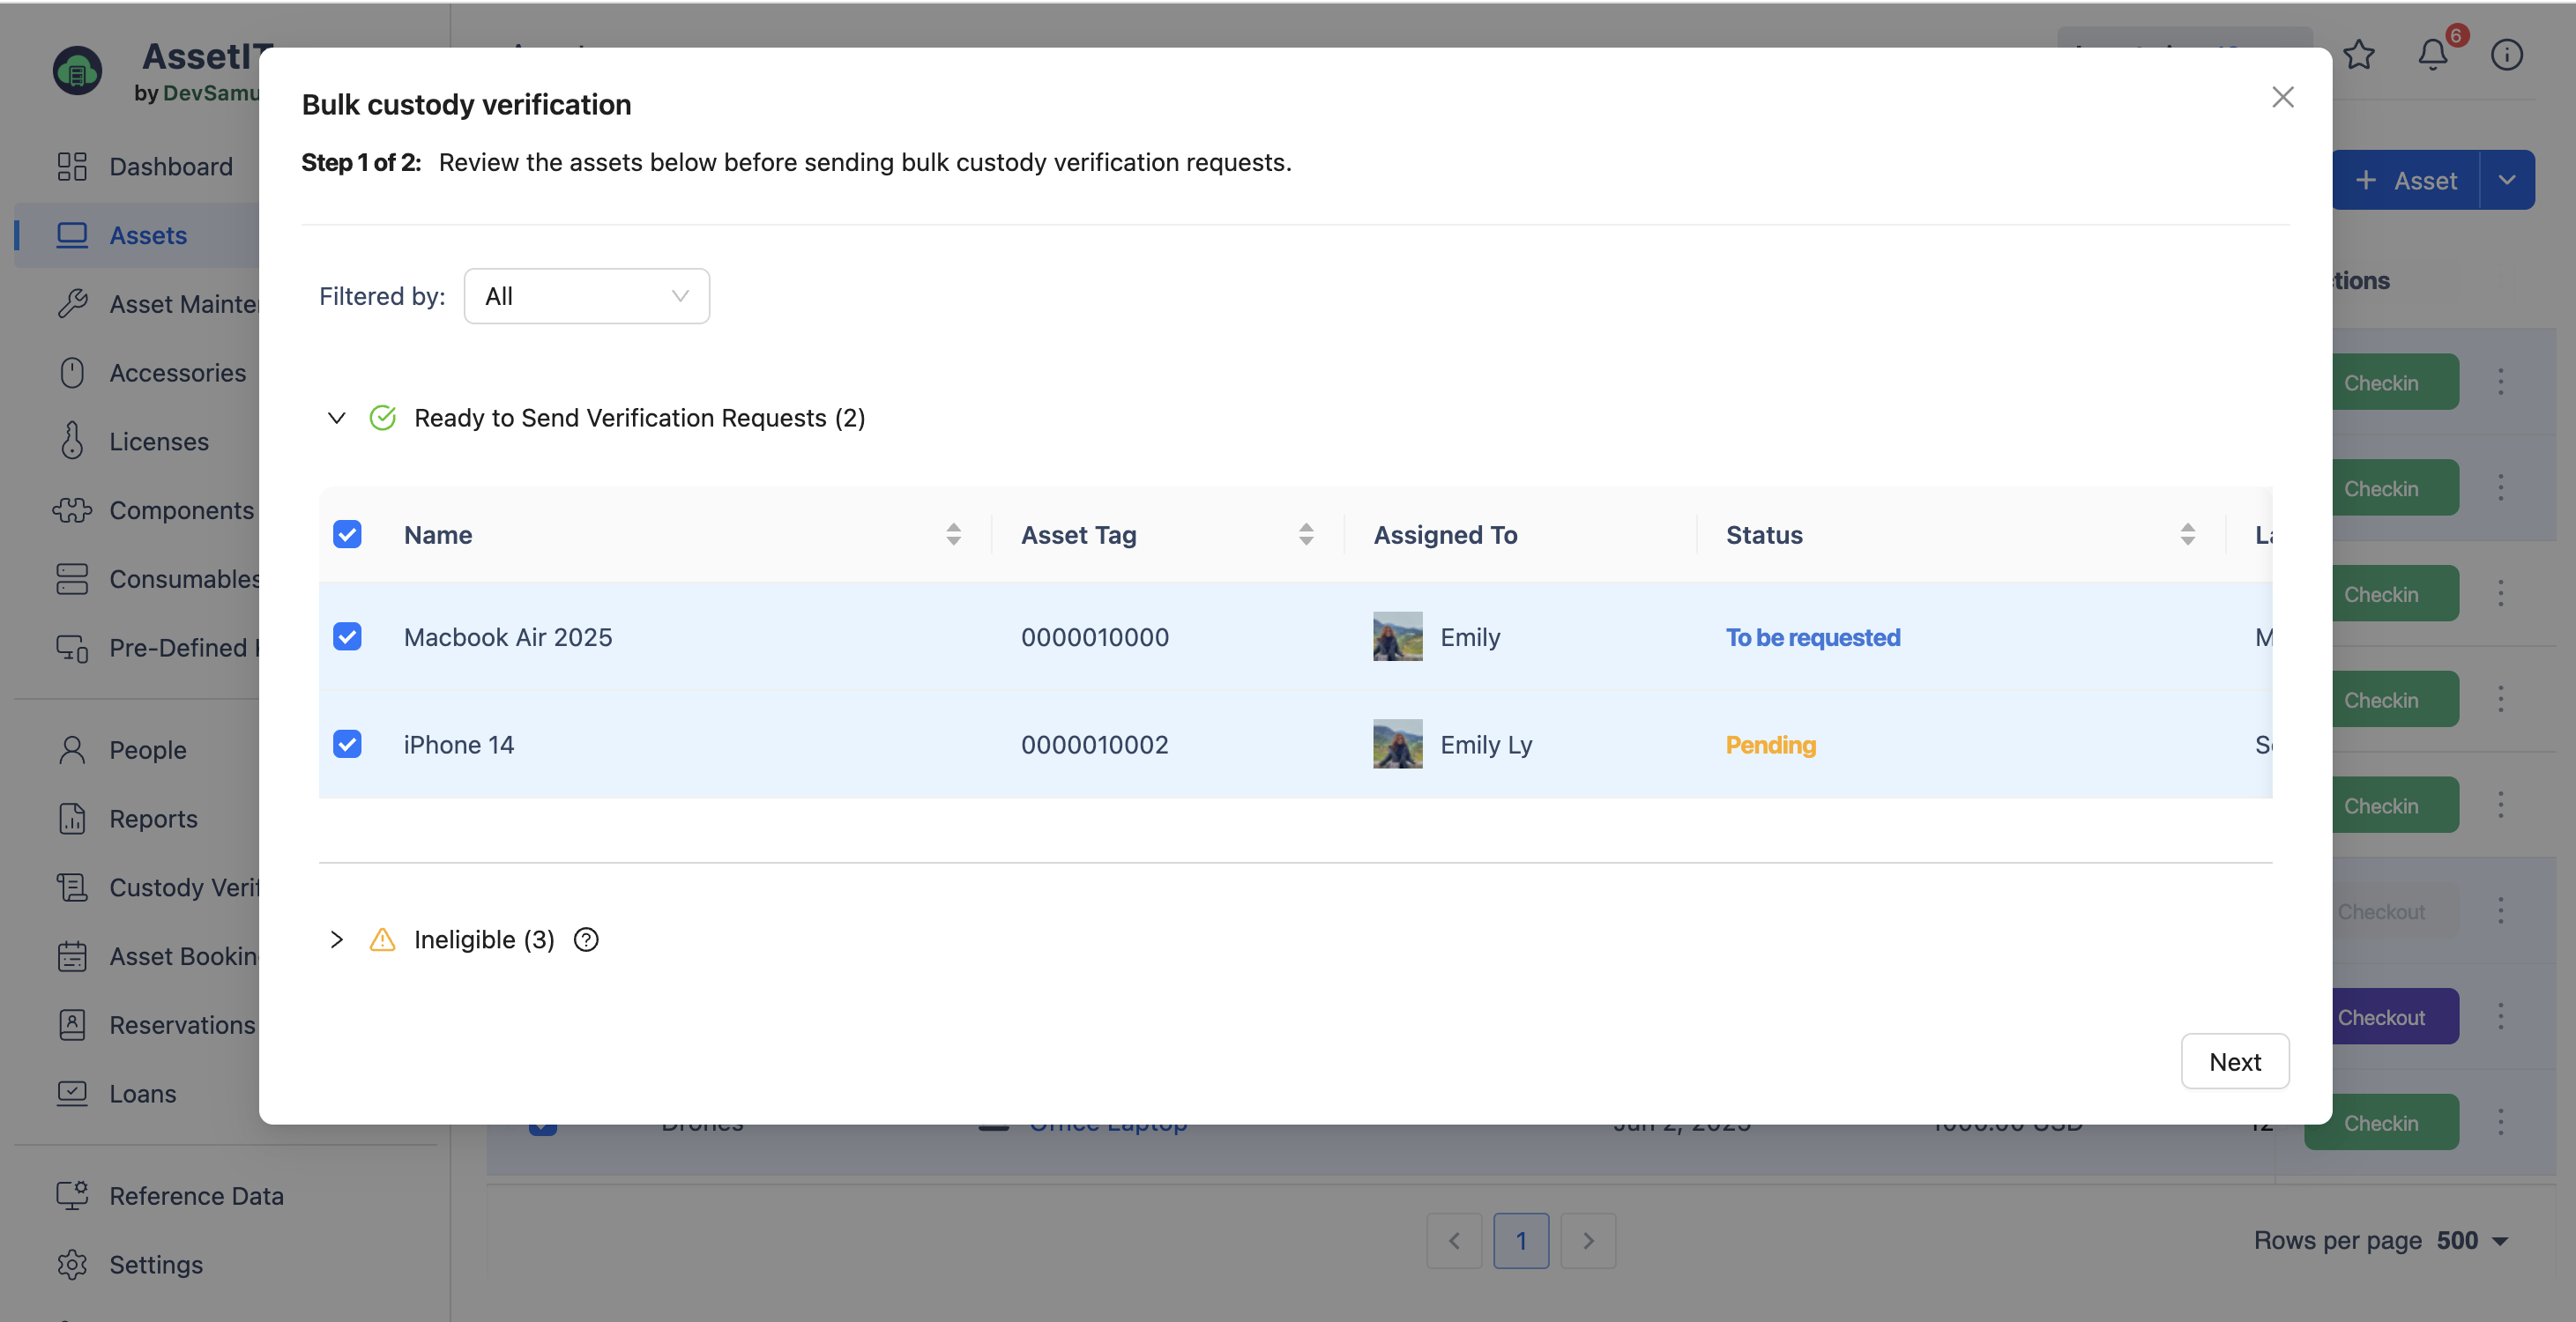
If any selected assets are not assigned to a user, a notification alerts you that they cannot be sent for verification in the Ineligible list at the bottom.
After previewing all eligible assets, click Next to proceed.
Step 3: Set due date and submit
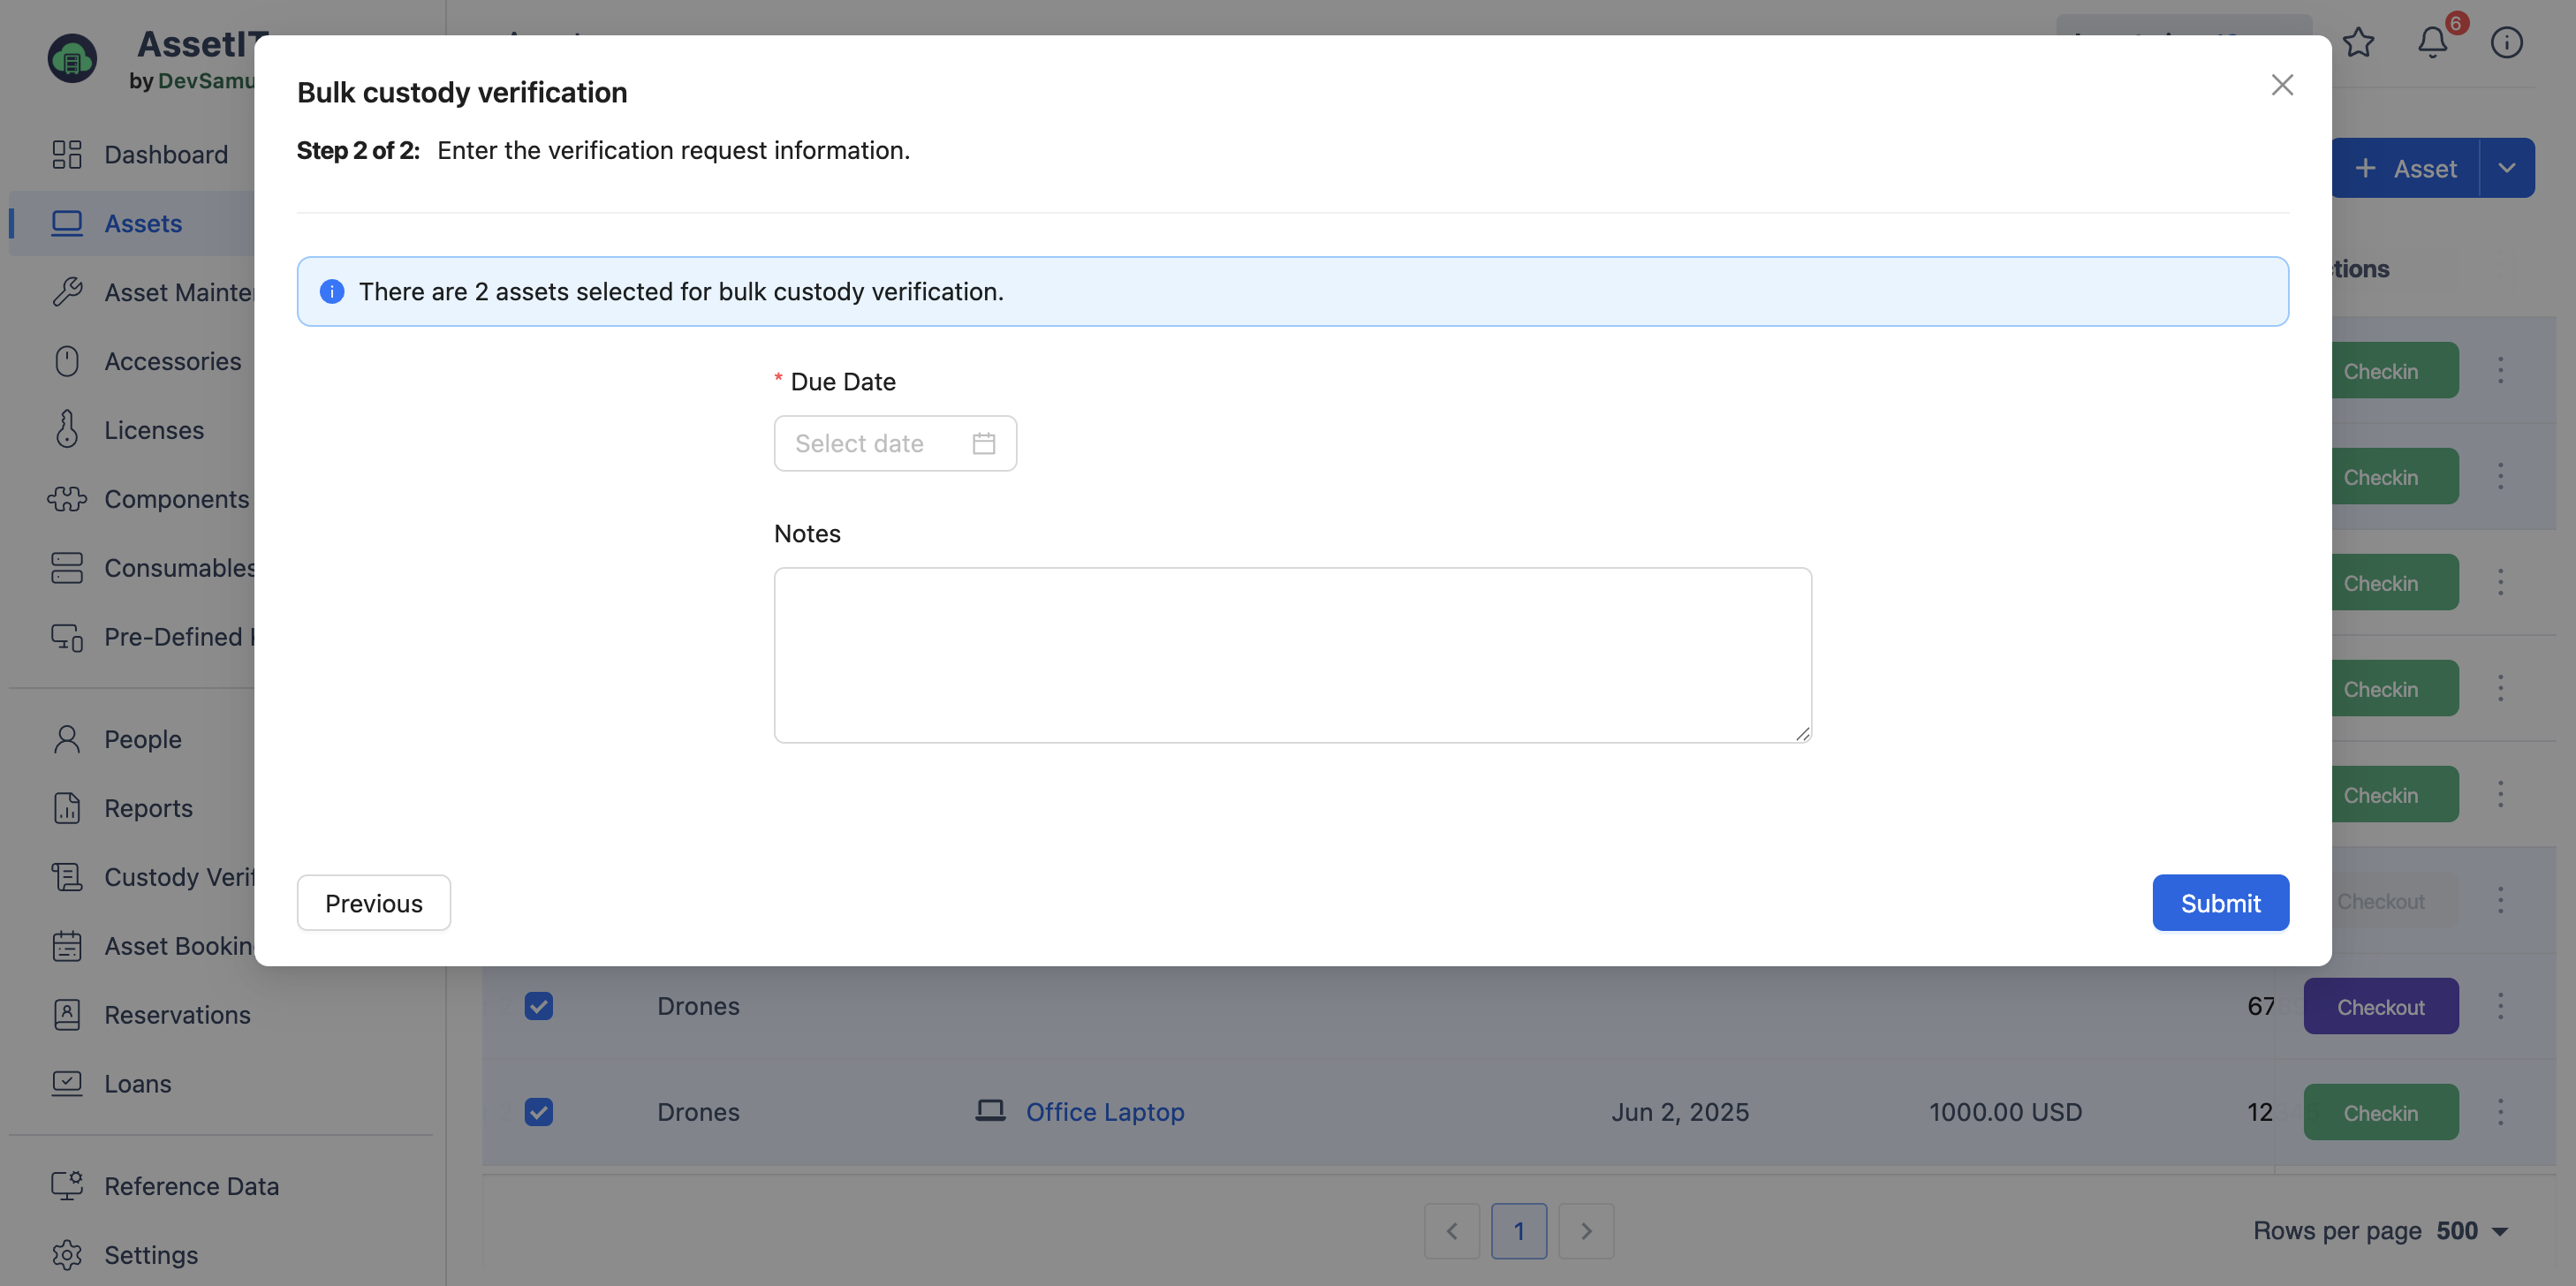
-
Enter a due date for the verification request.
-
(Optional) Add notes if needed.
-
Click Submit to finalize and send the requests.